For 1990-2009 cars only
Removal Procedure
- Remove the right instrument panel (I/P) insulator. Refer to Instrument Panel Insulator Panel Replacement - Right Side in Instrument Panel, Gages, and Console.
- Remove the I/P compartment. Refer to Instrument Panel Compartment Replacement in Instrument Panel, Gages, and Console.
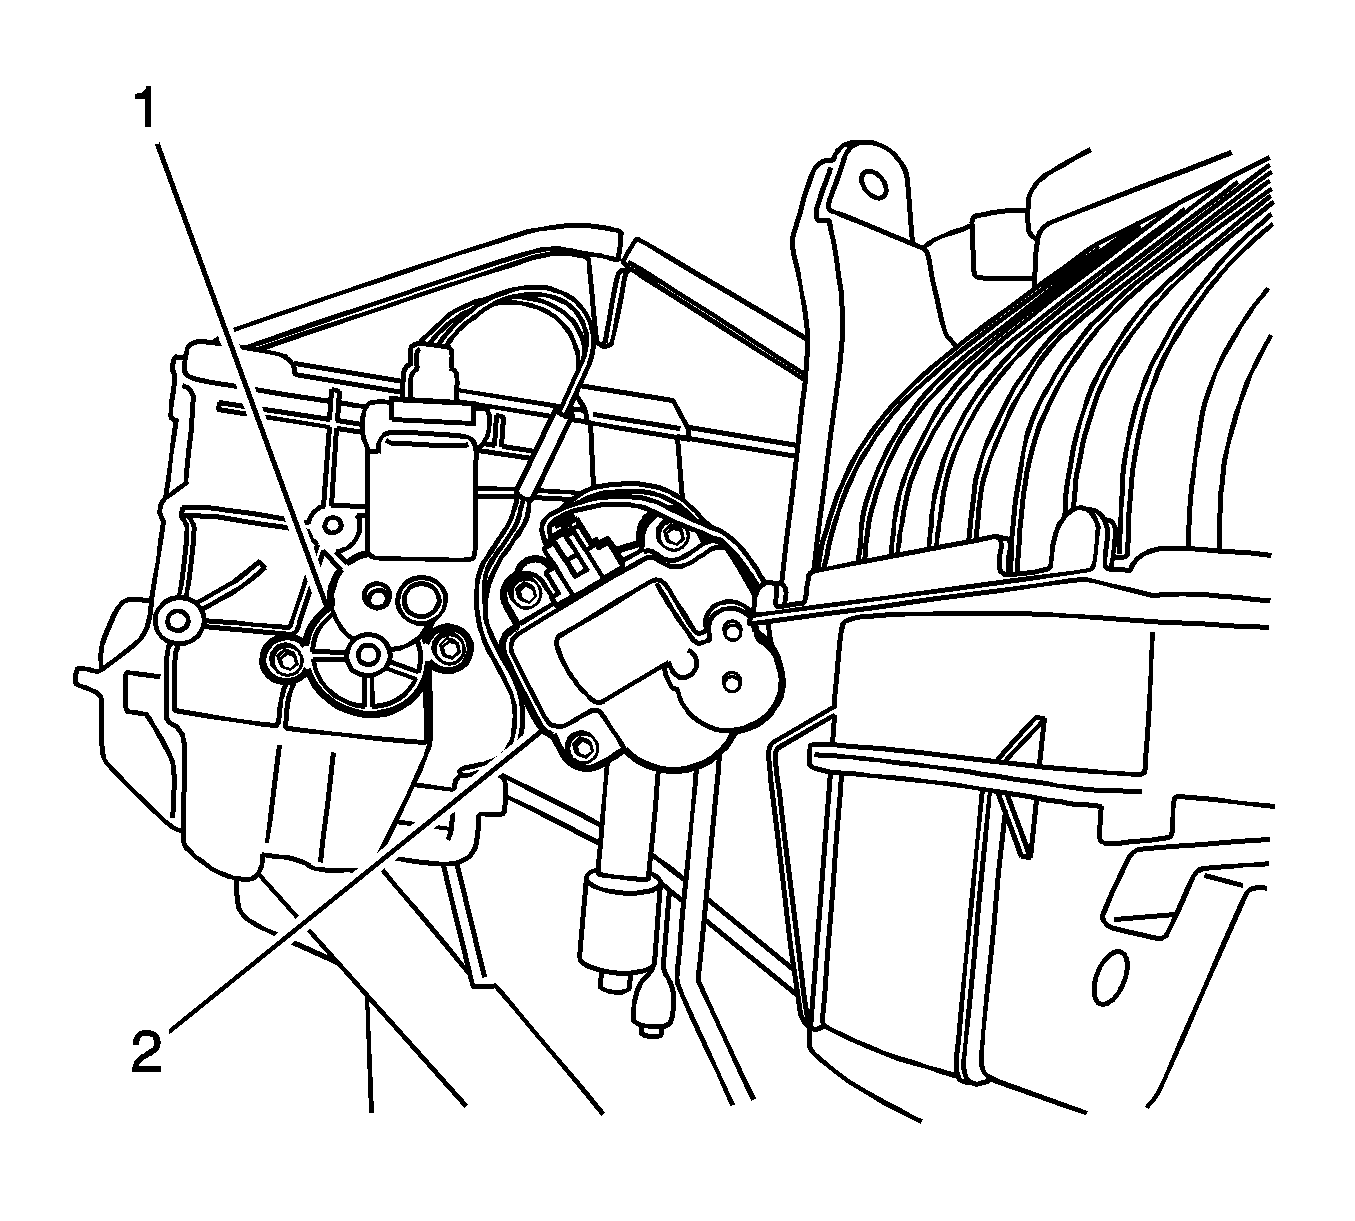
- Remove the screws that secure the mode actuator (1) to the HVAC module assembly.
- Remove the mode actuator from the HVAC module assembly.
- Disconnect the electrical connector from the mode actuator.
Installation Procedure
- Position the mode actuator, aligning the slots in the electric actuator drive to the flats on the shaft.
- Align the locating hole to the alignment pin on the HVAC module assembly.
- Slide the actuator drive completely onto the shaft, with the mounting holes flush with the mounting screw holes on the HVAC module assembly.
- Install the screws to the mode actuator (1).
- Connect the electrical connector to the mode actuator.
- Install the I/P compartment. Refer to Instrument Panel Compartment Replacement in Instrument Panel, Gages, and Console.
- Install the right I/P insulator. Refer to Instrument Panel Insulator Panel Replacement - Right Side in Instrument Panel, Gages, and Console.
- Calibrate the actuator. Refer to Actuator Recalibration .
Notice: Refer to Fastener Notice in the Preface section.
Tighten
Tighten the screws to 1.5 N·m (13 lb in).
