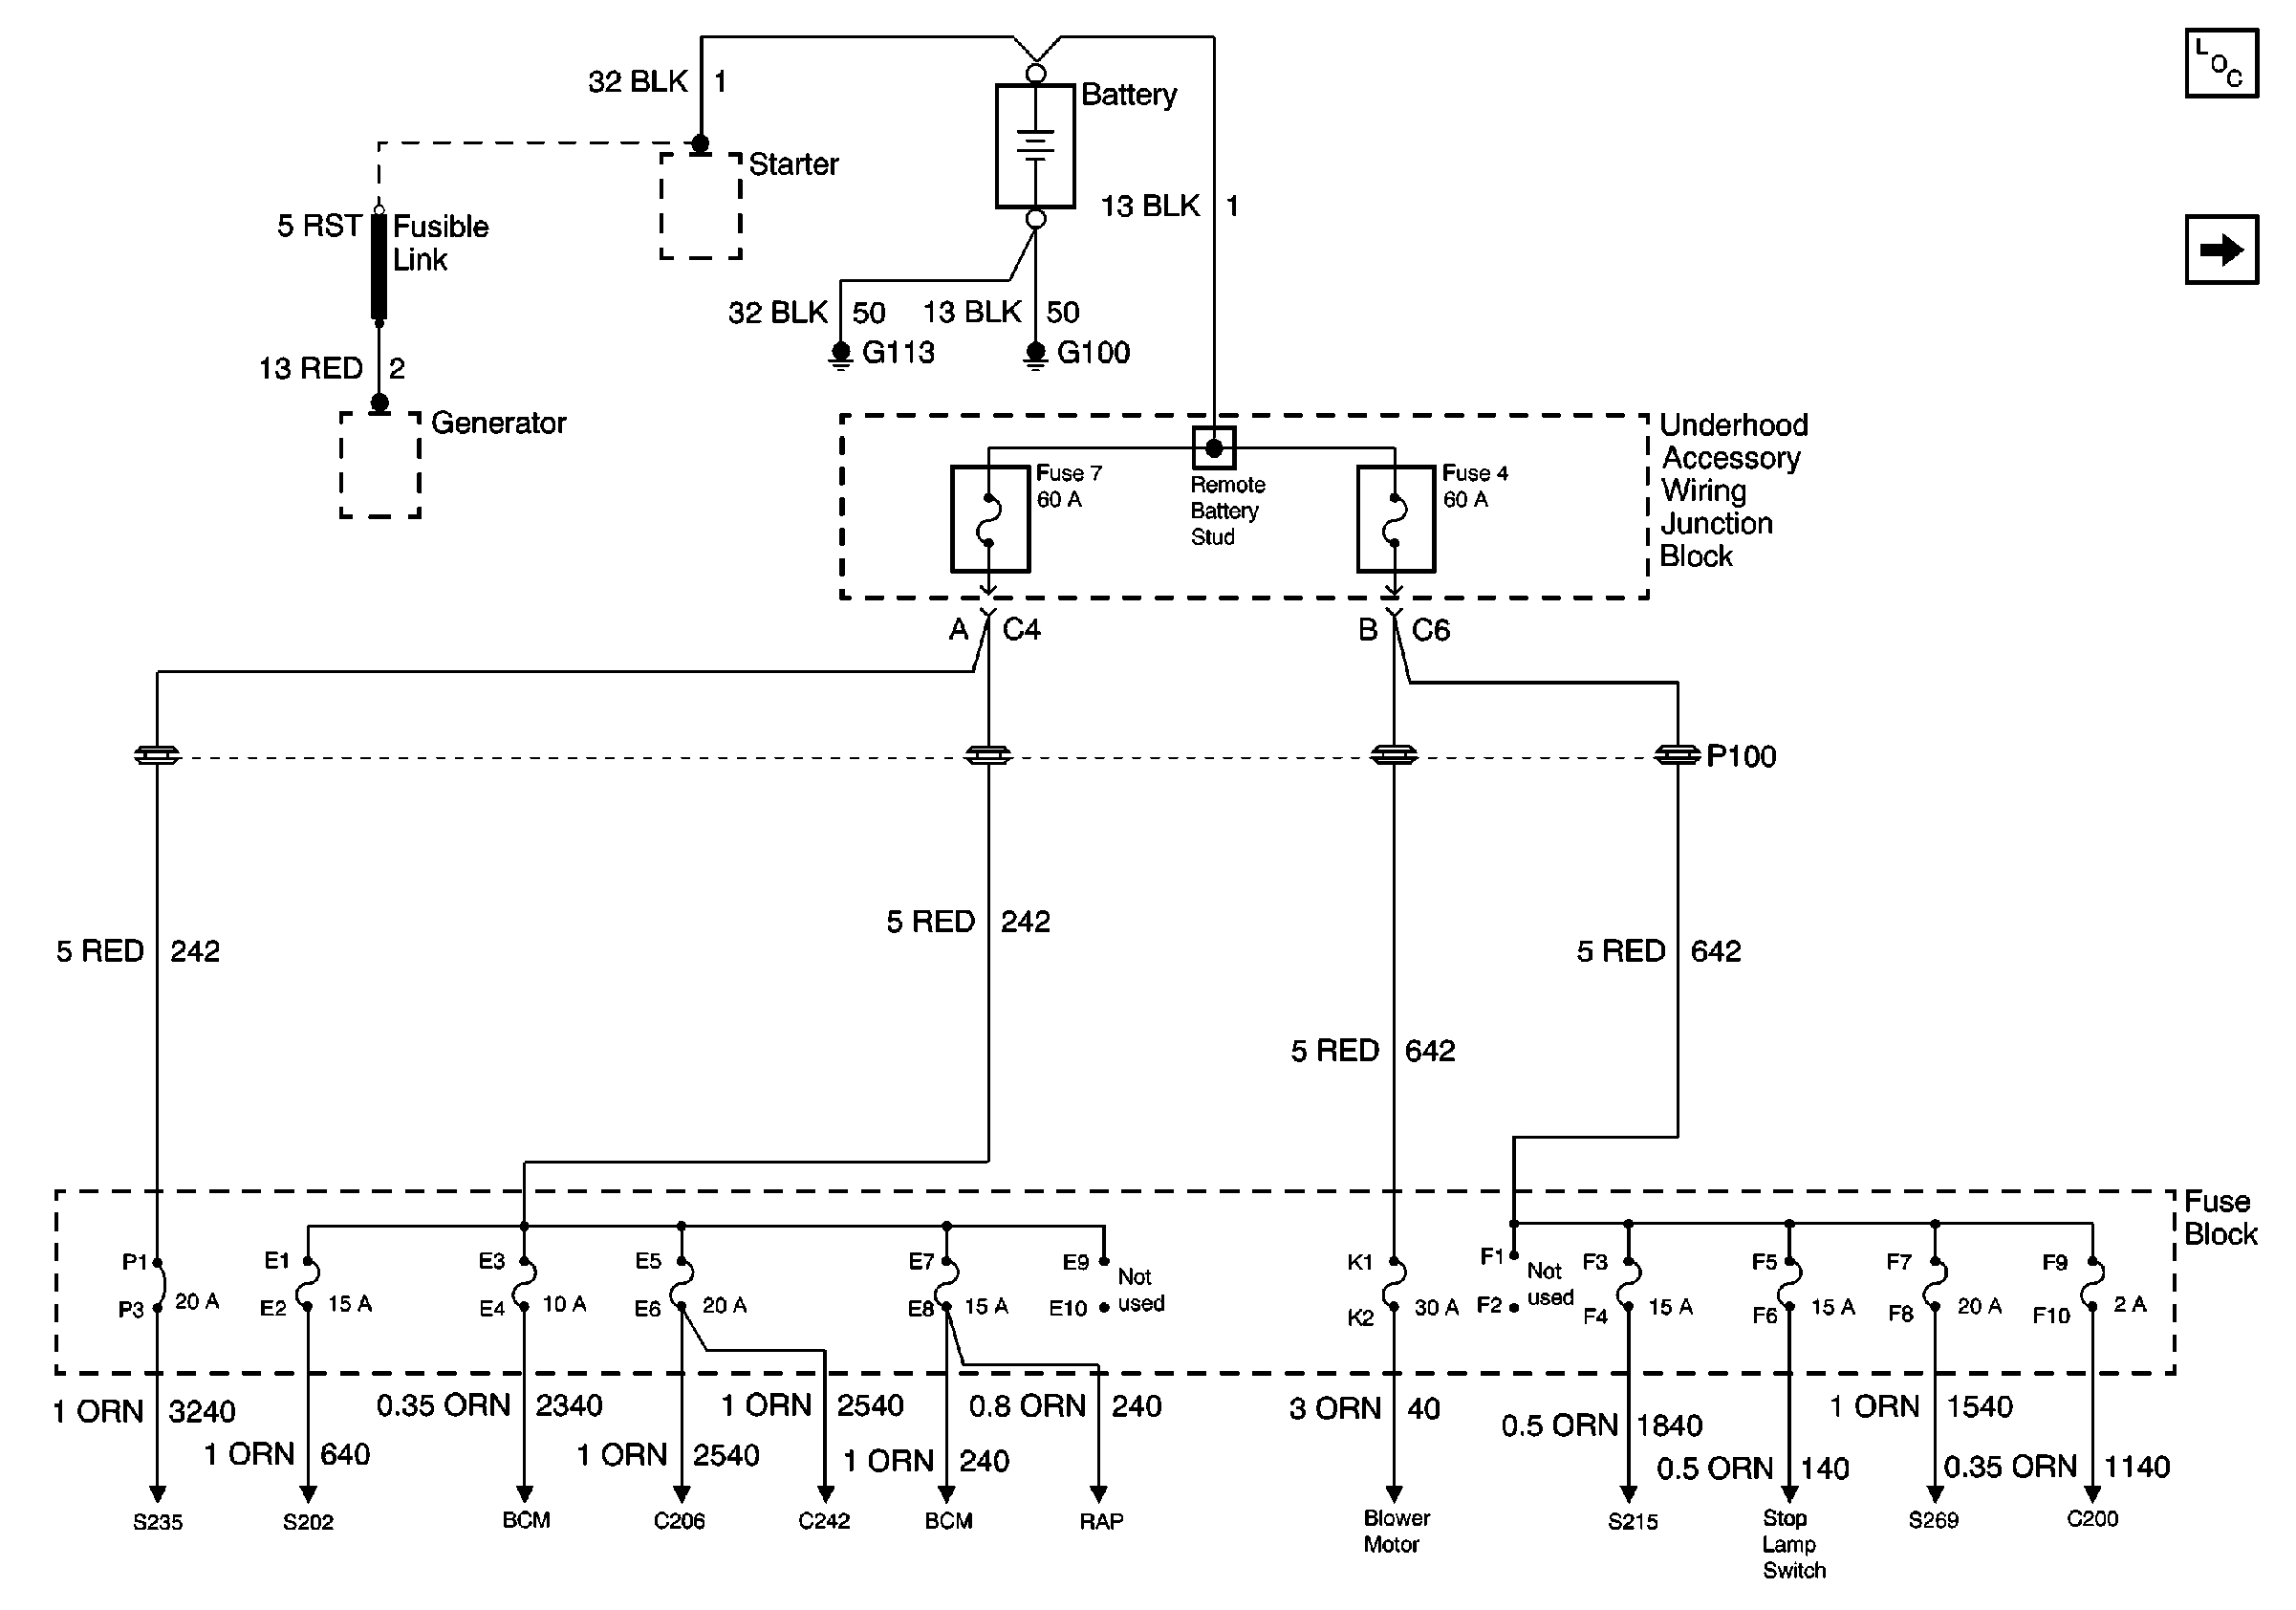
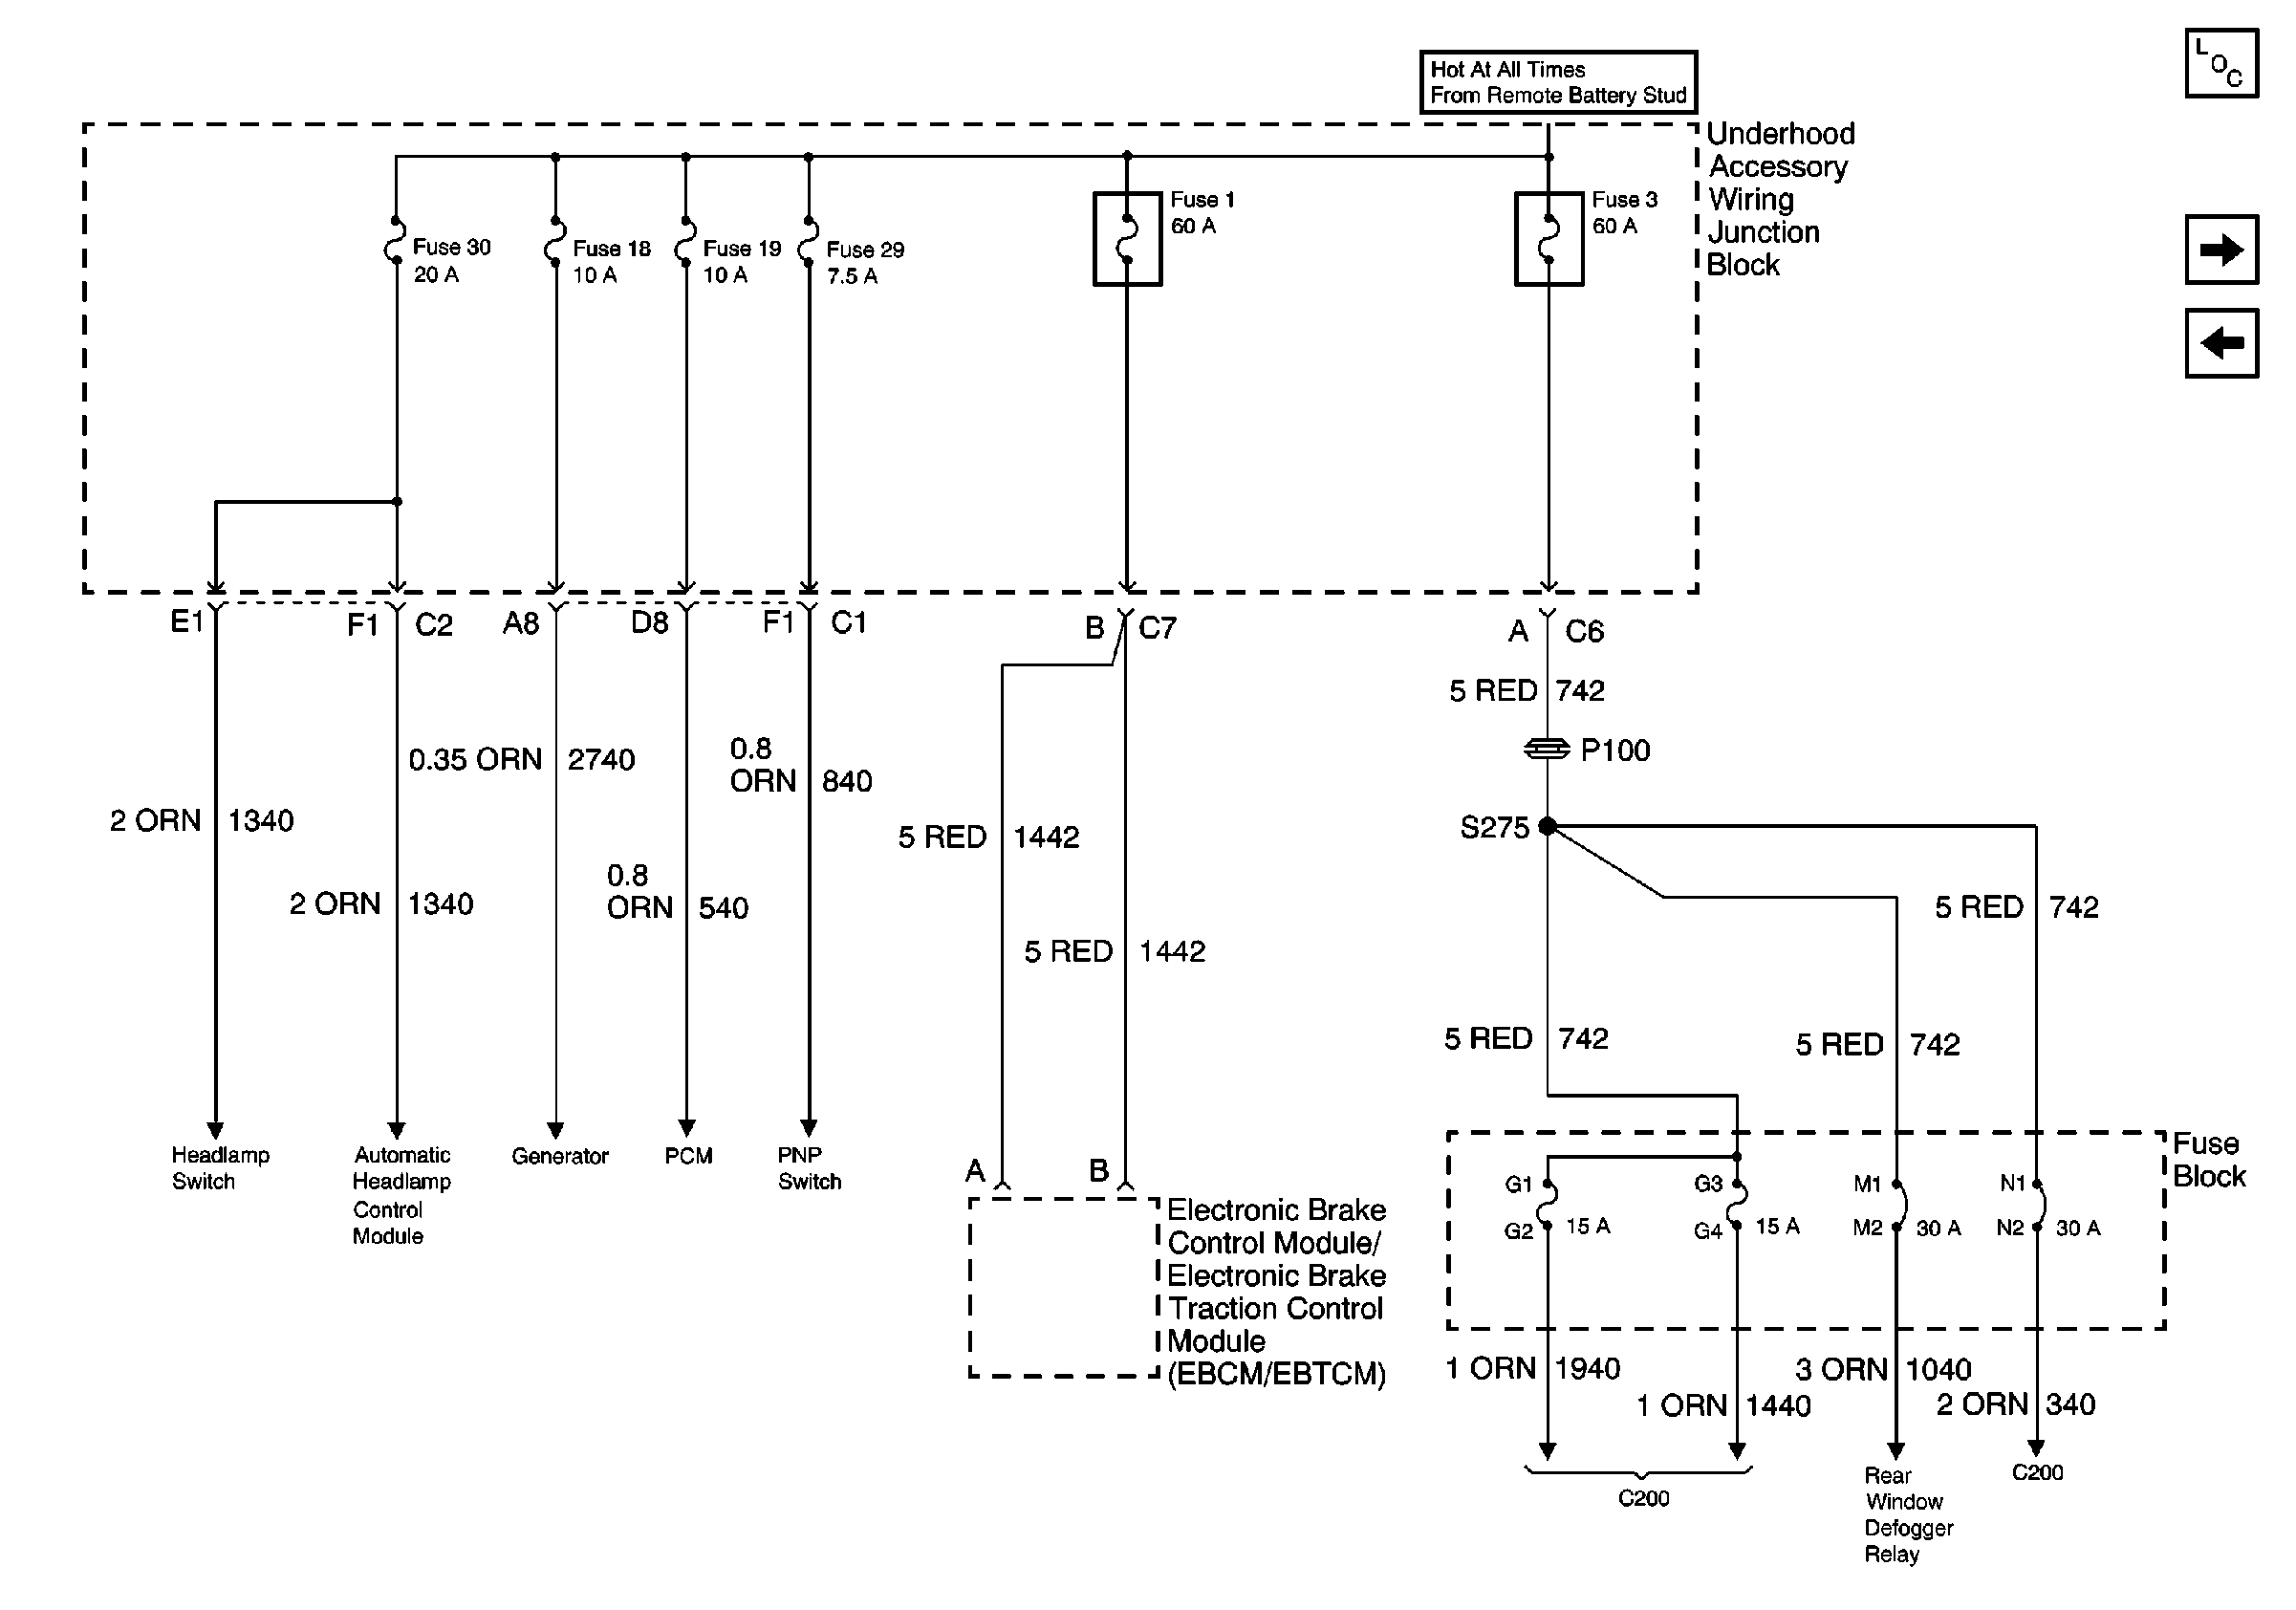
| Figure 1: |
Battery, UAWJB and Fuse Block
|
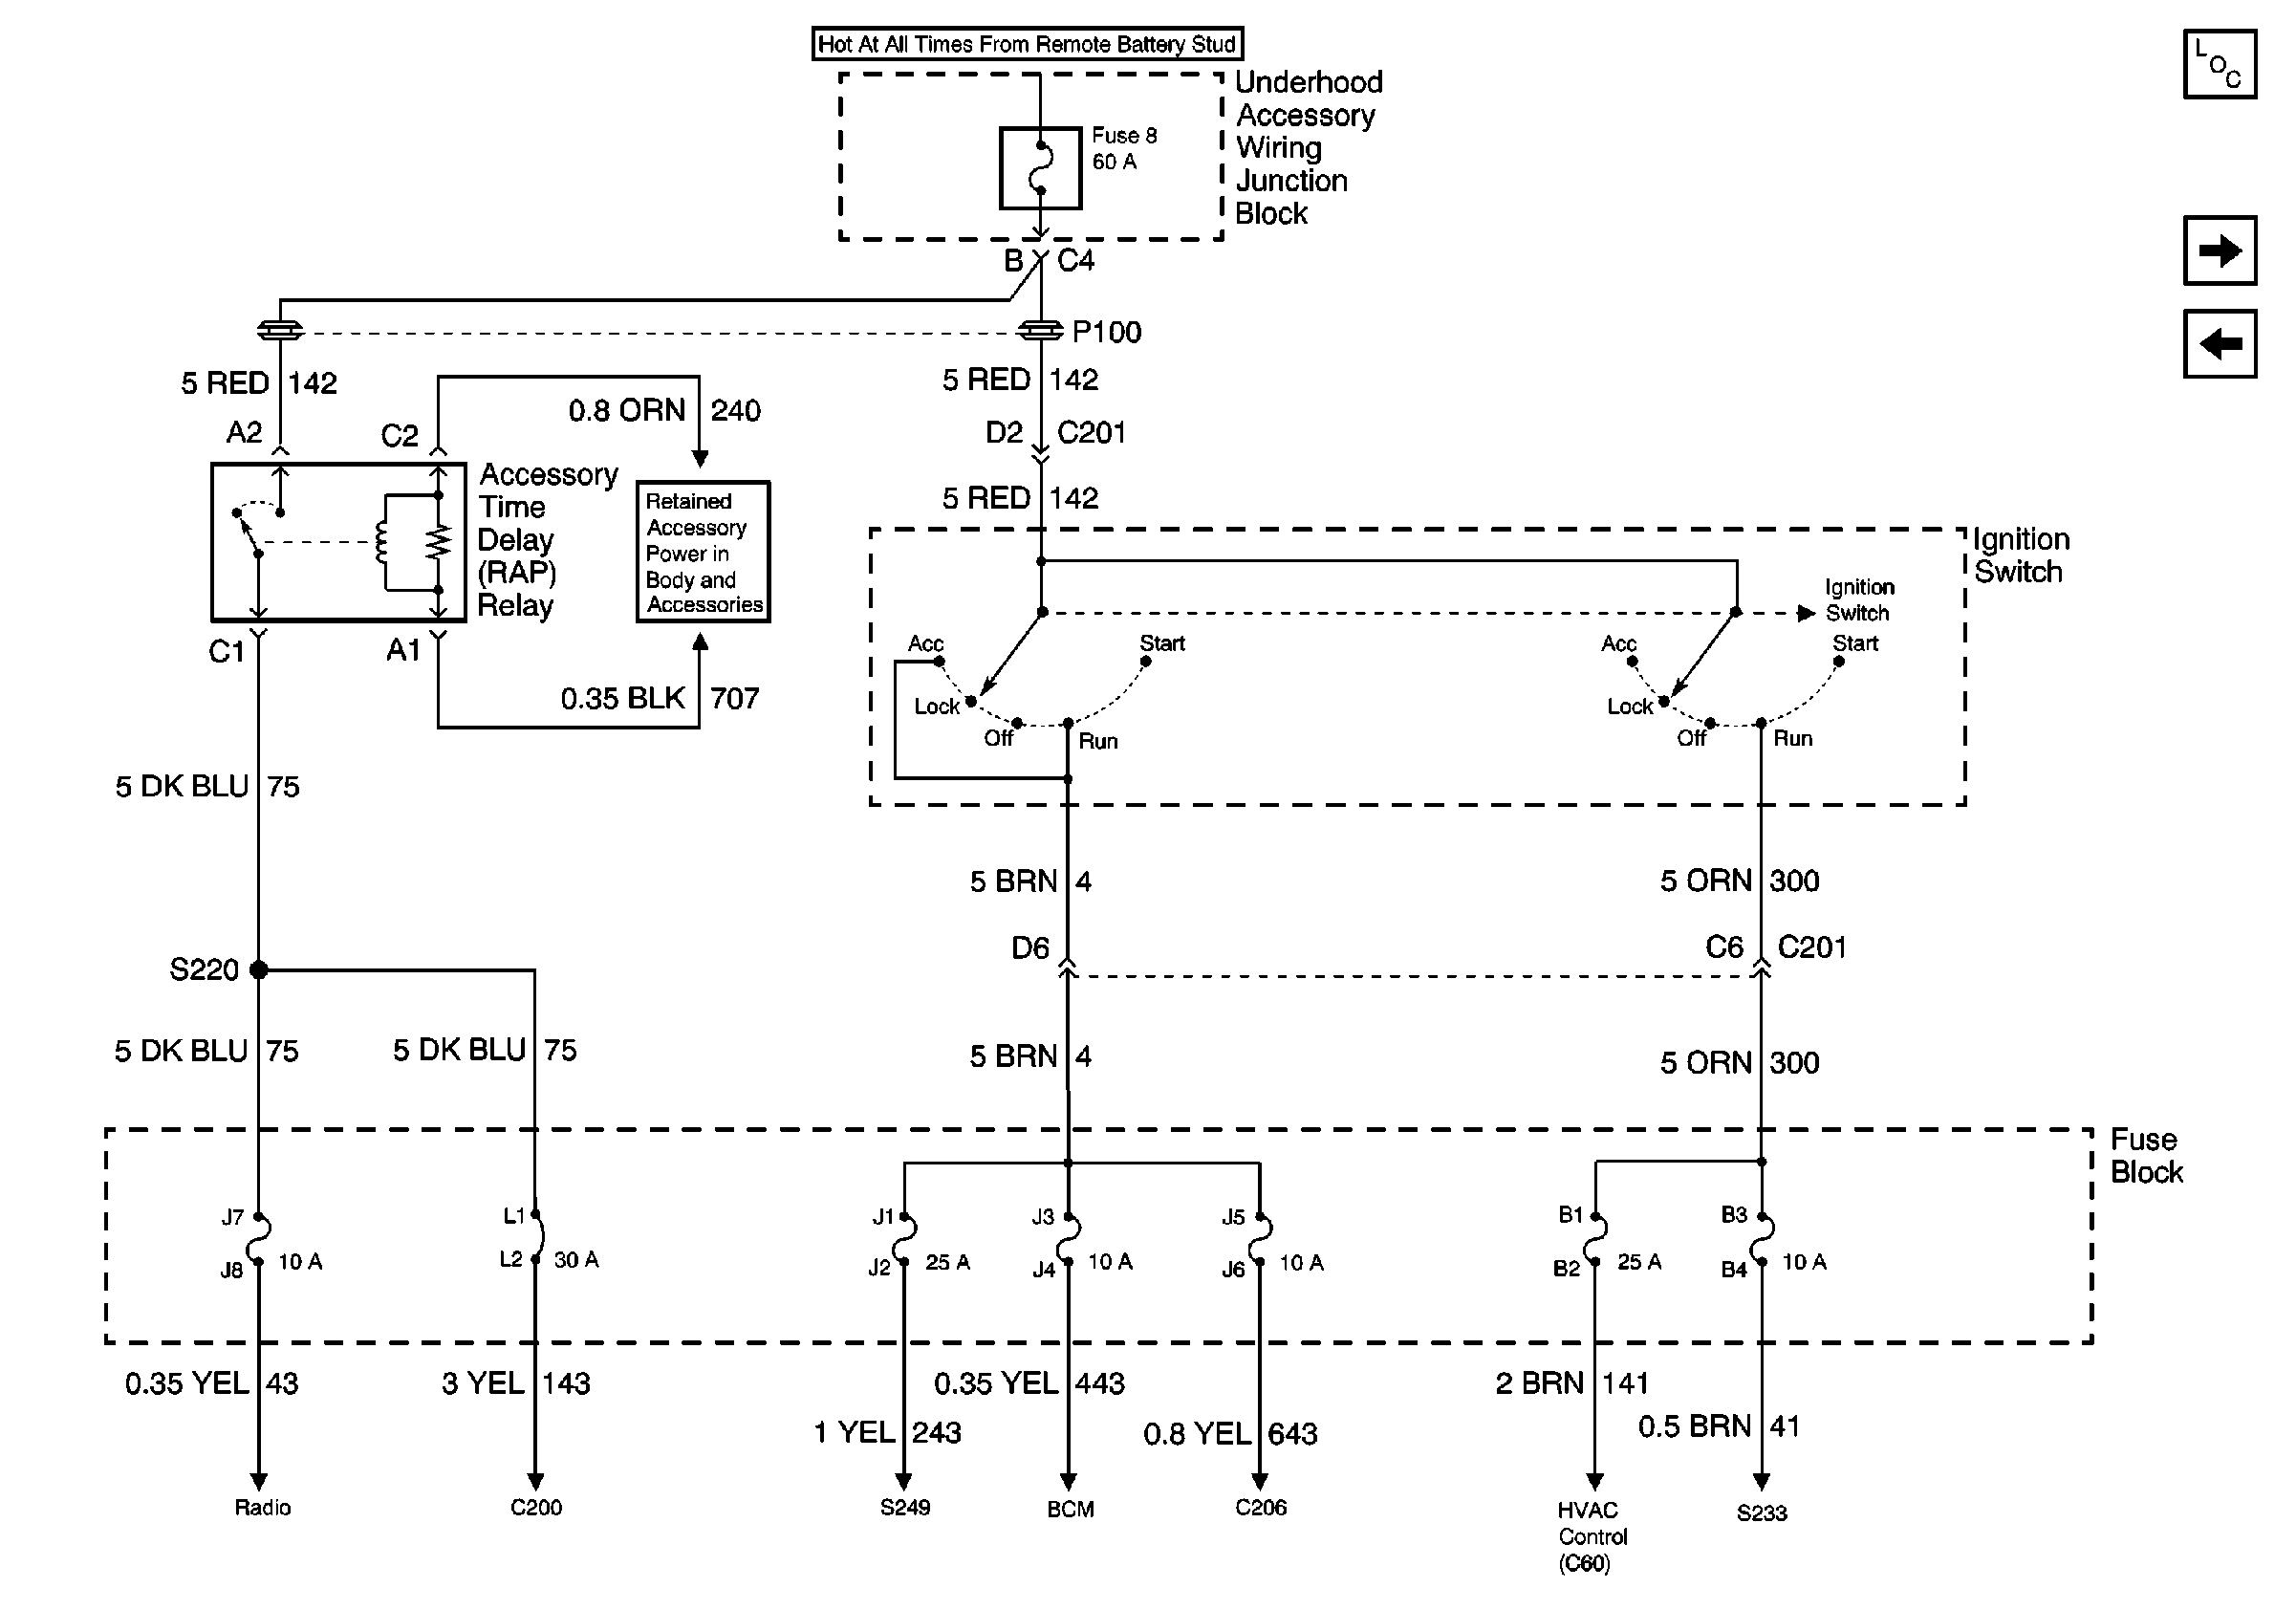
| Figure 2: |
GLX: RAP Relay, UAWJB, Ignition Switch and Fuse Block

|
| Figure 3: |
GL: RAP Relay, UAWJB, Ignition Switch and Fuse Block
|
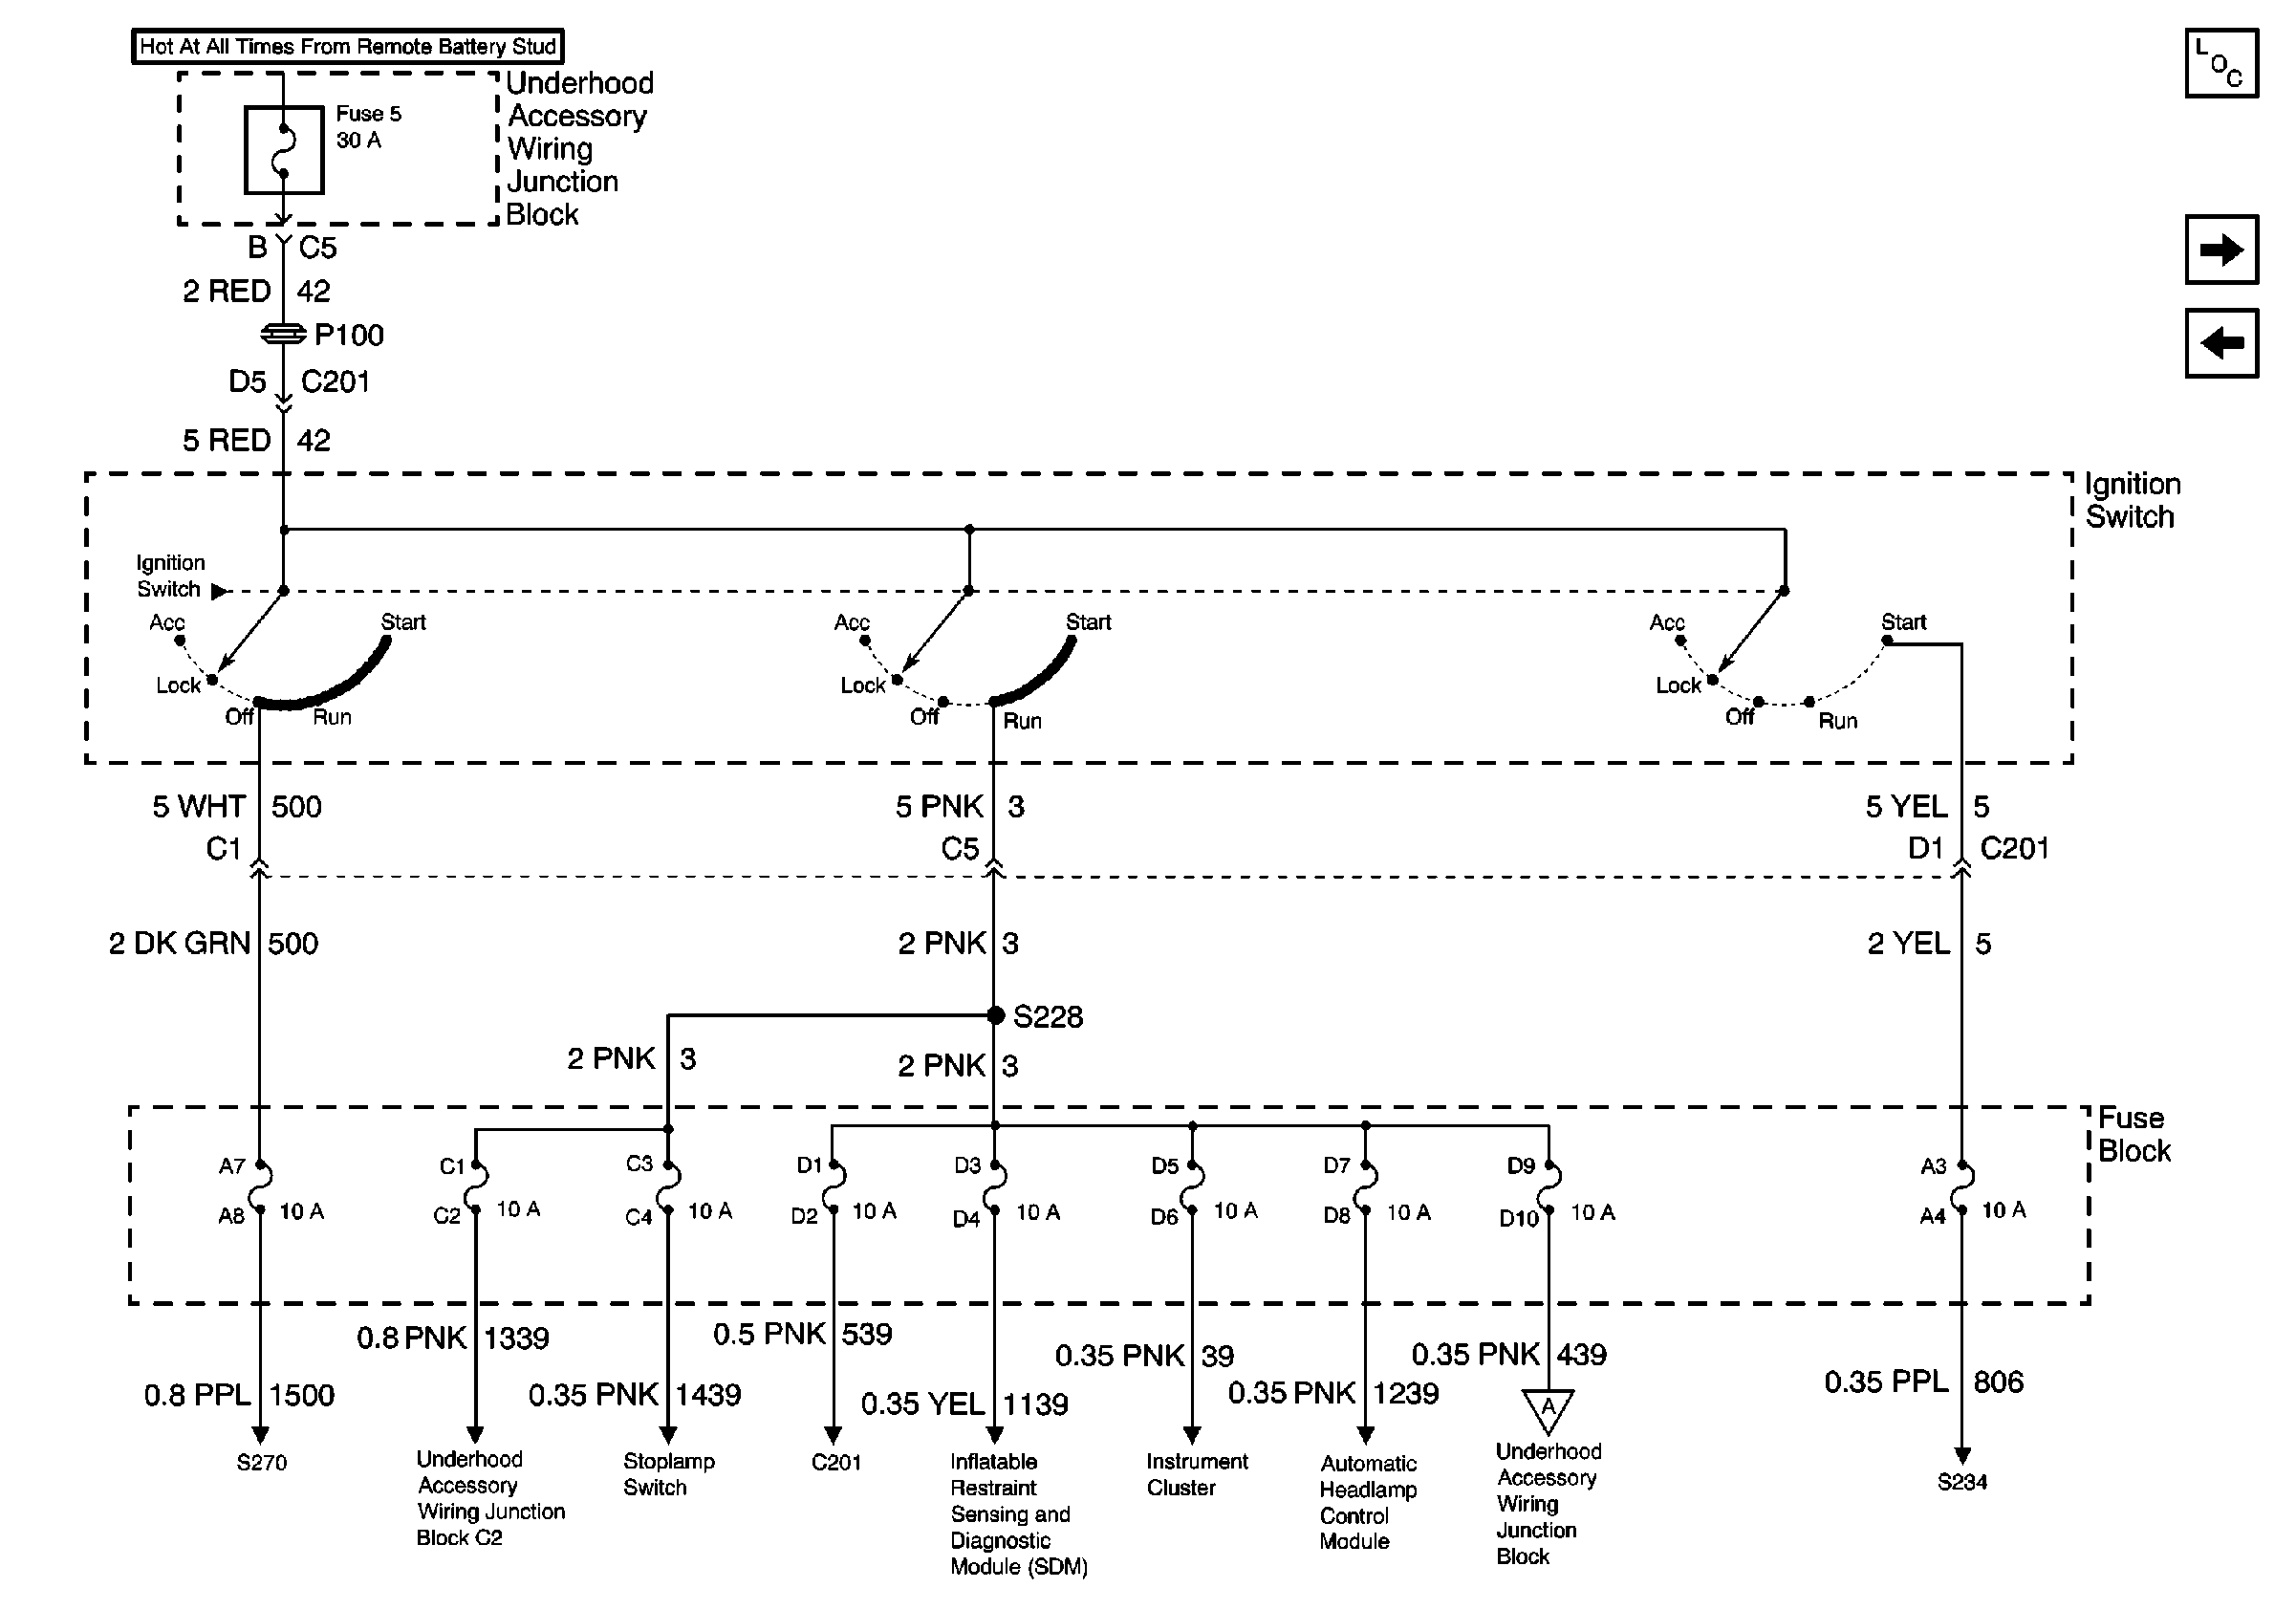
| Figure 4: |
UAWJB, Ignition Switch and Fuse Block
|
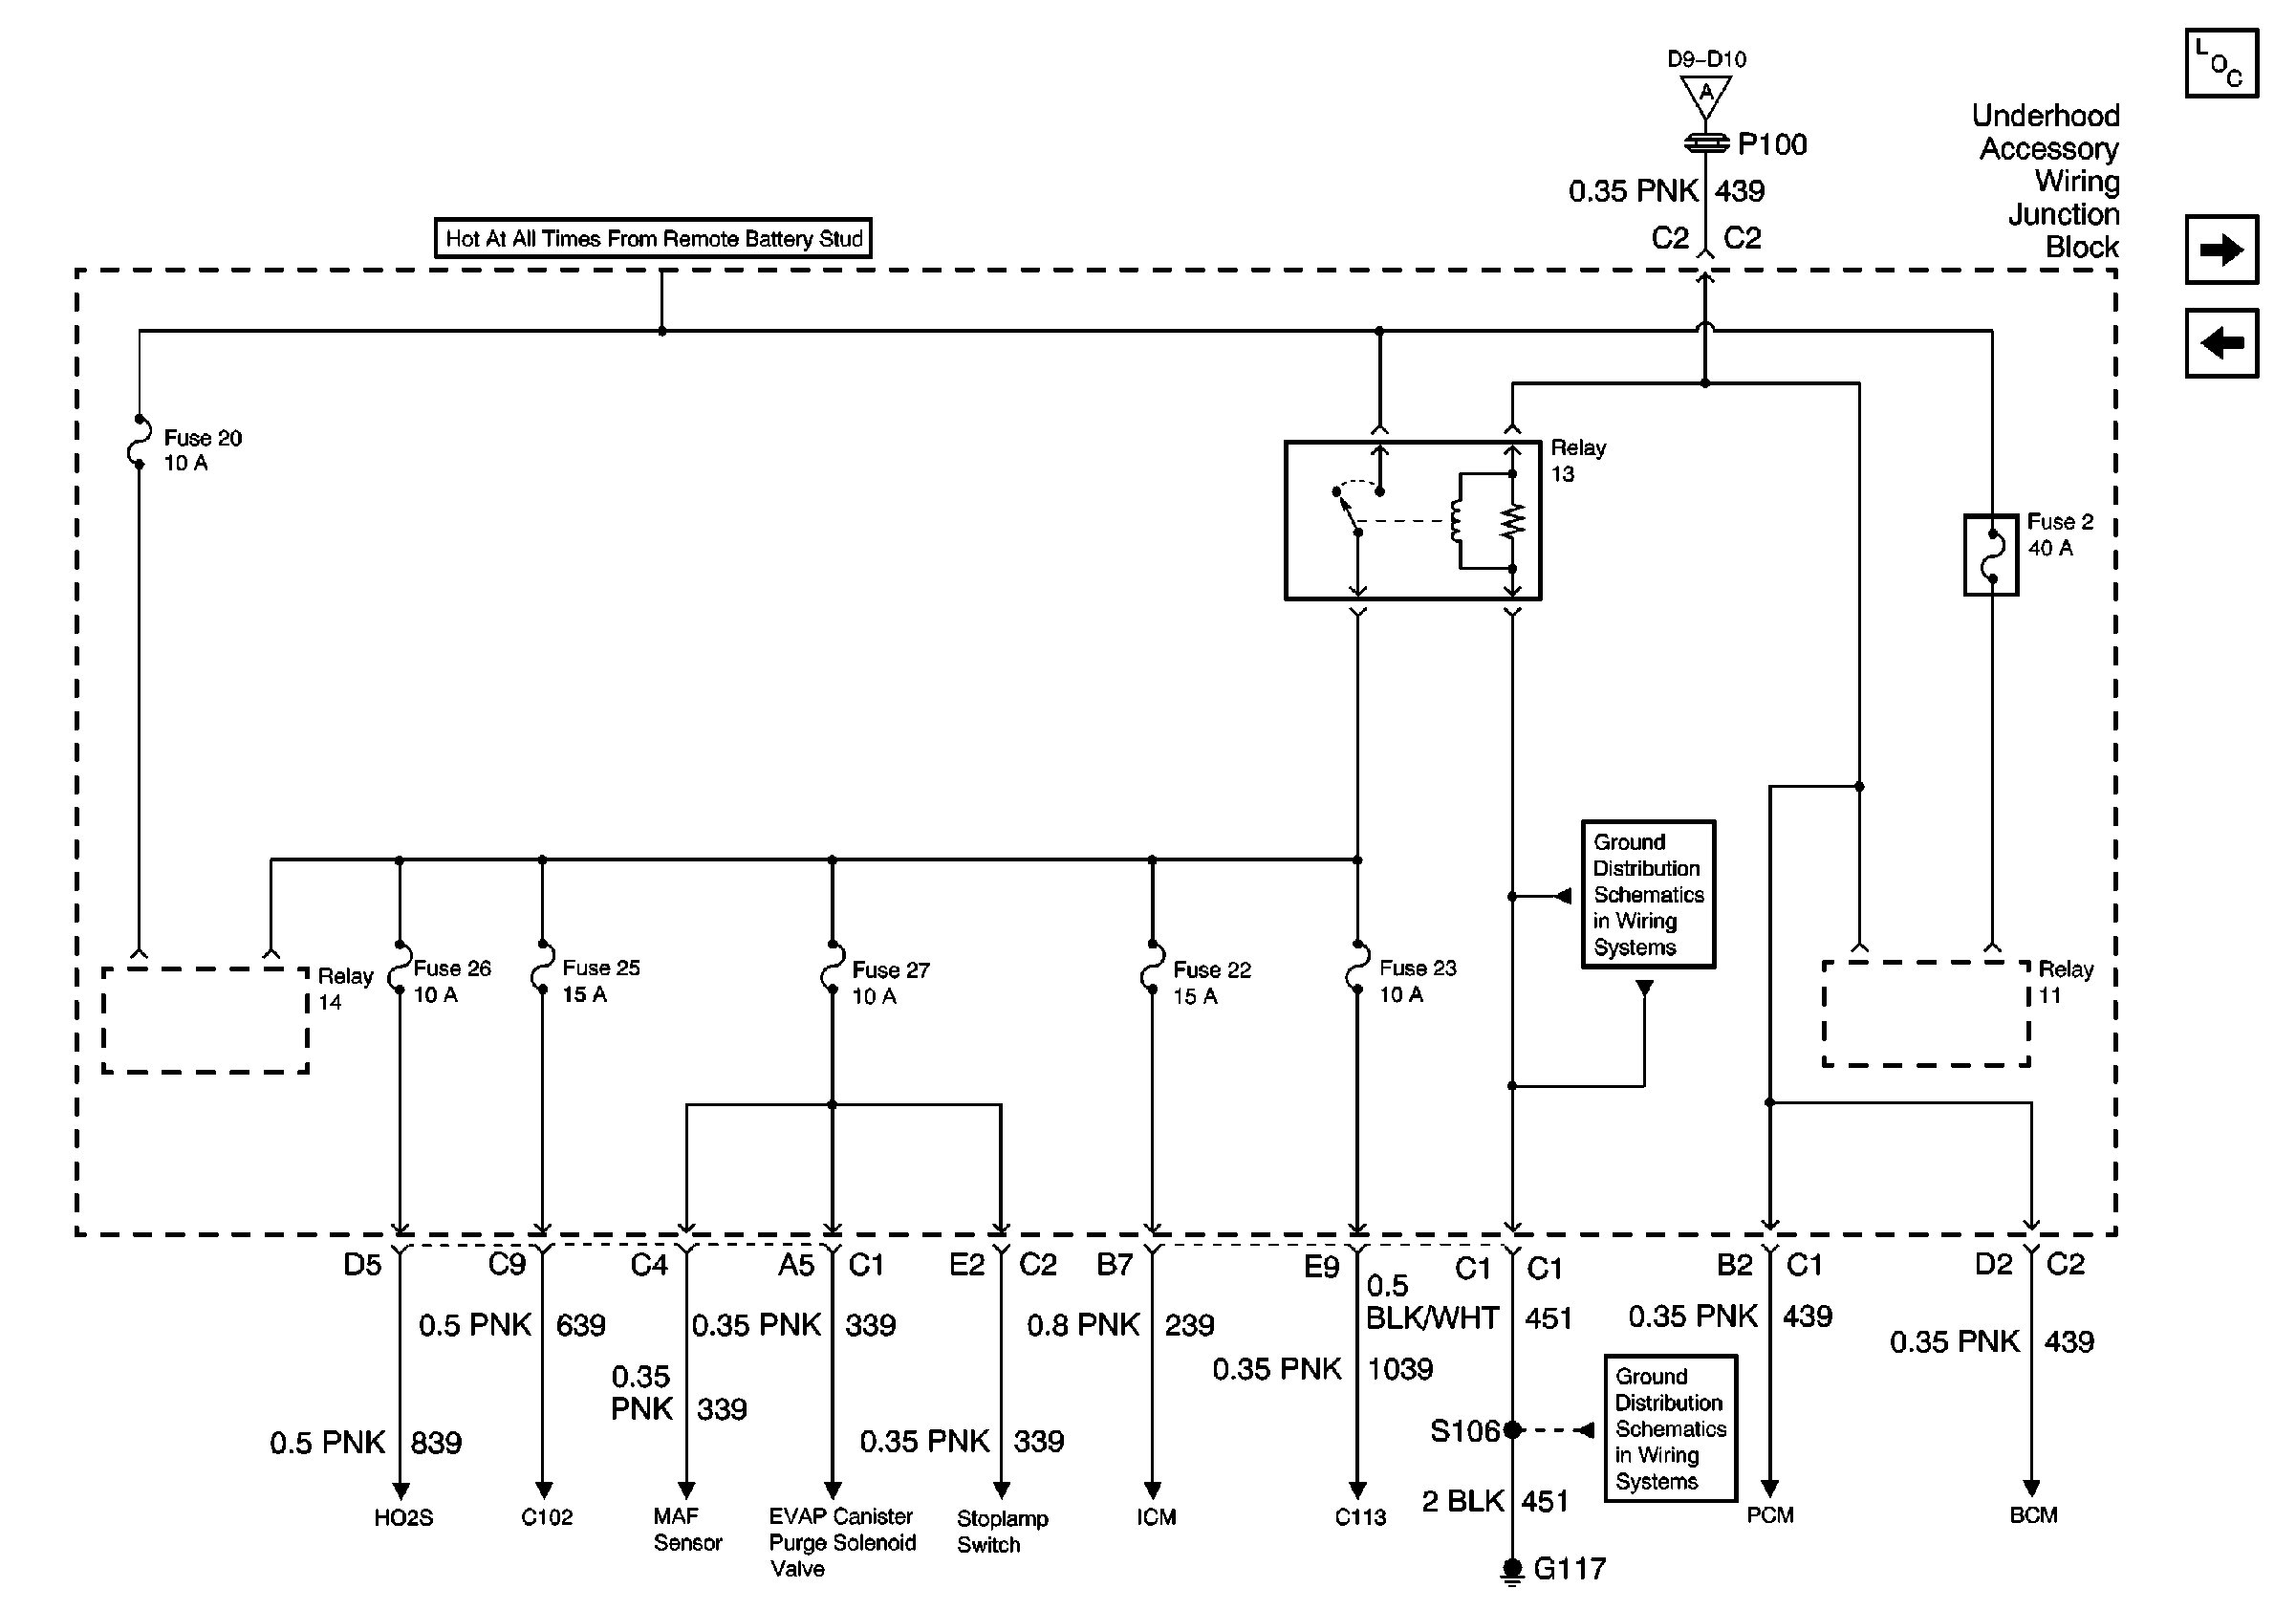
| Figure 5: |
UAWJB and G117
|
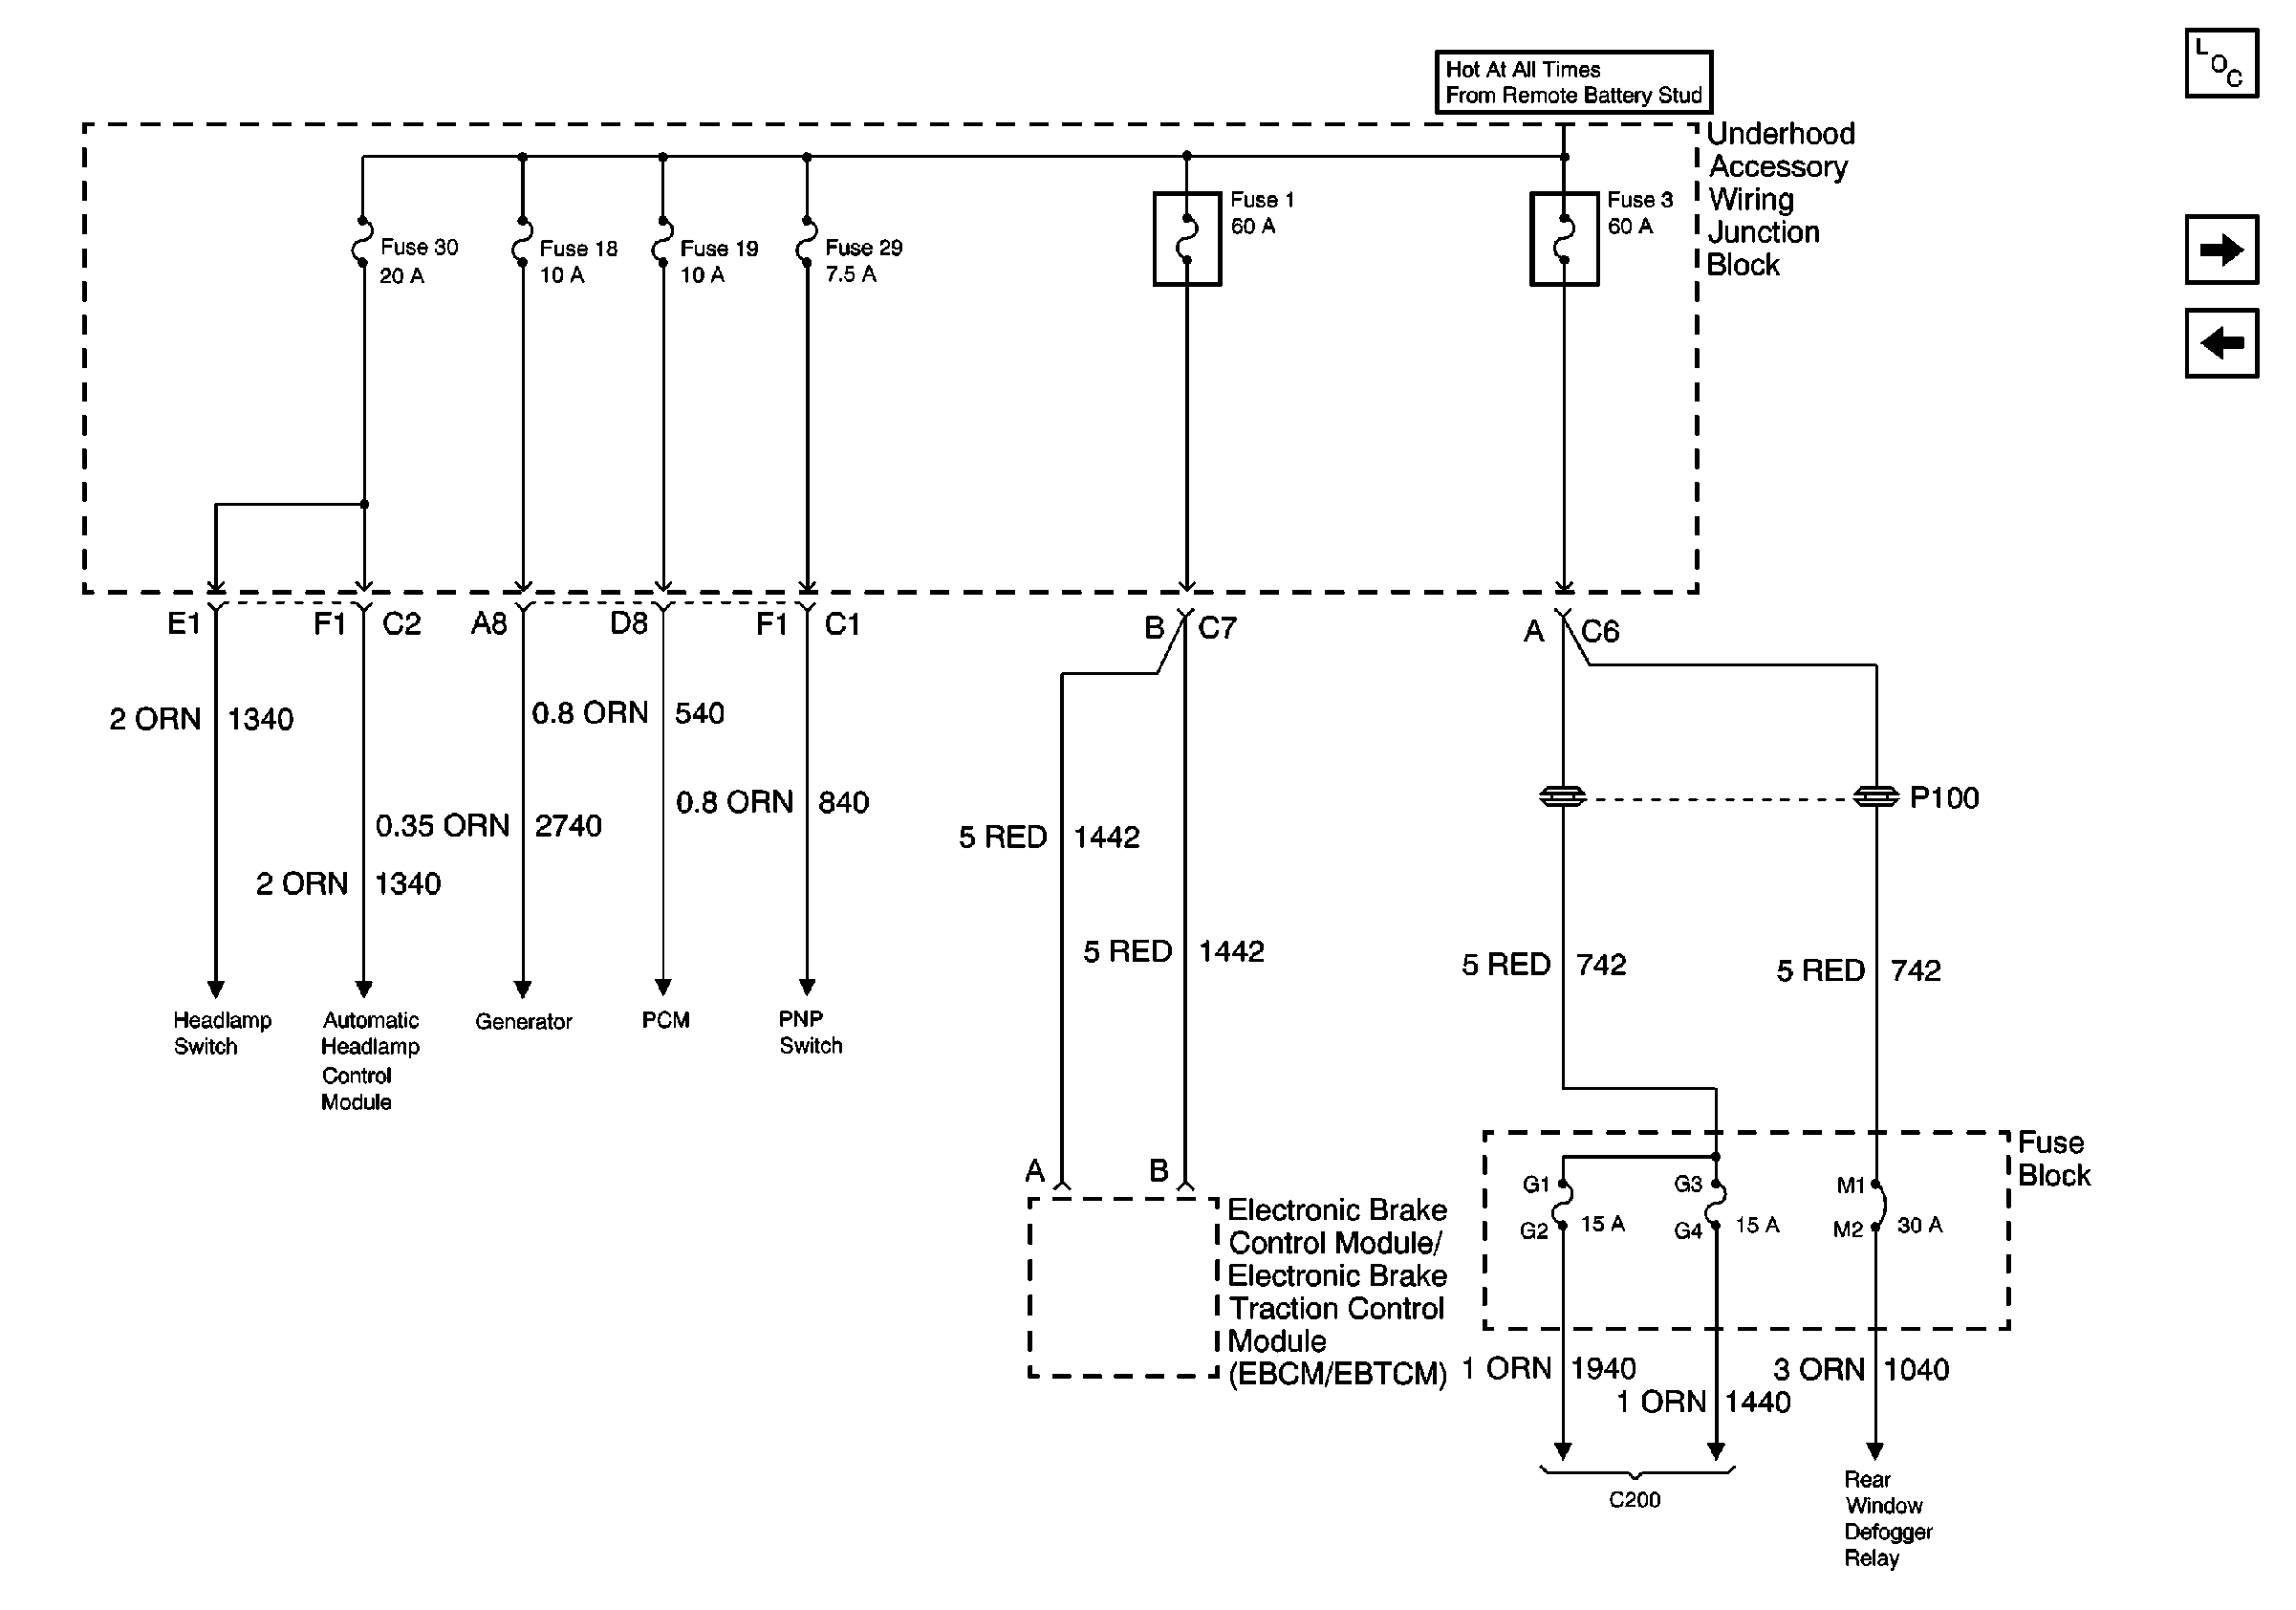
| Figure 6: |
GLX: UAWJB, EBCM/EBTCM and Fuse Block
|
| Figure 7: |
GL: UAWJB, EBCM/EBTCM and Fuse Block
|
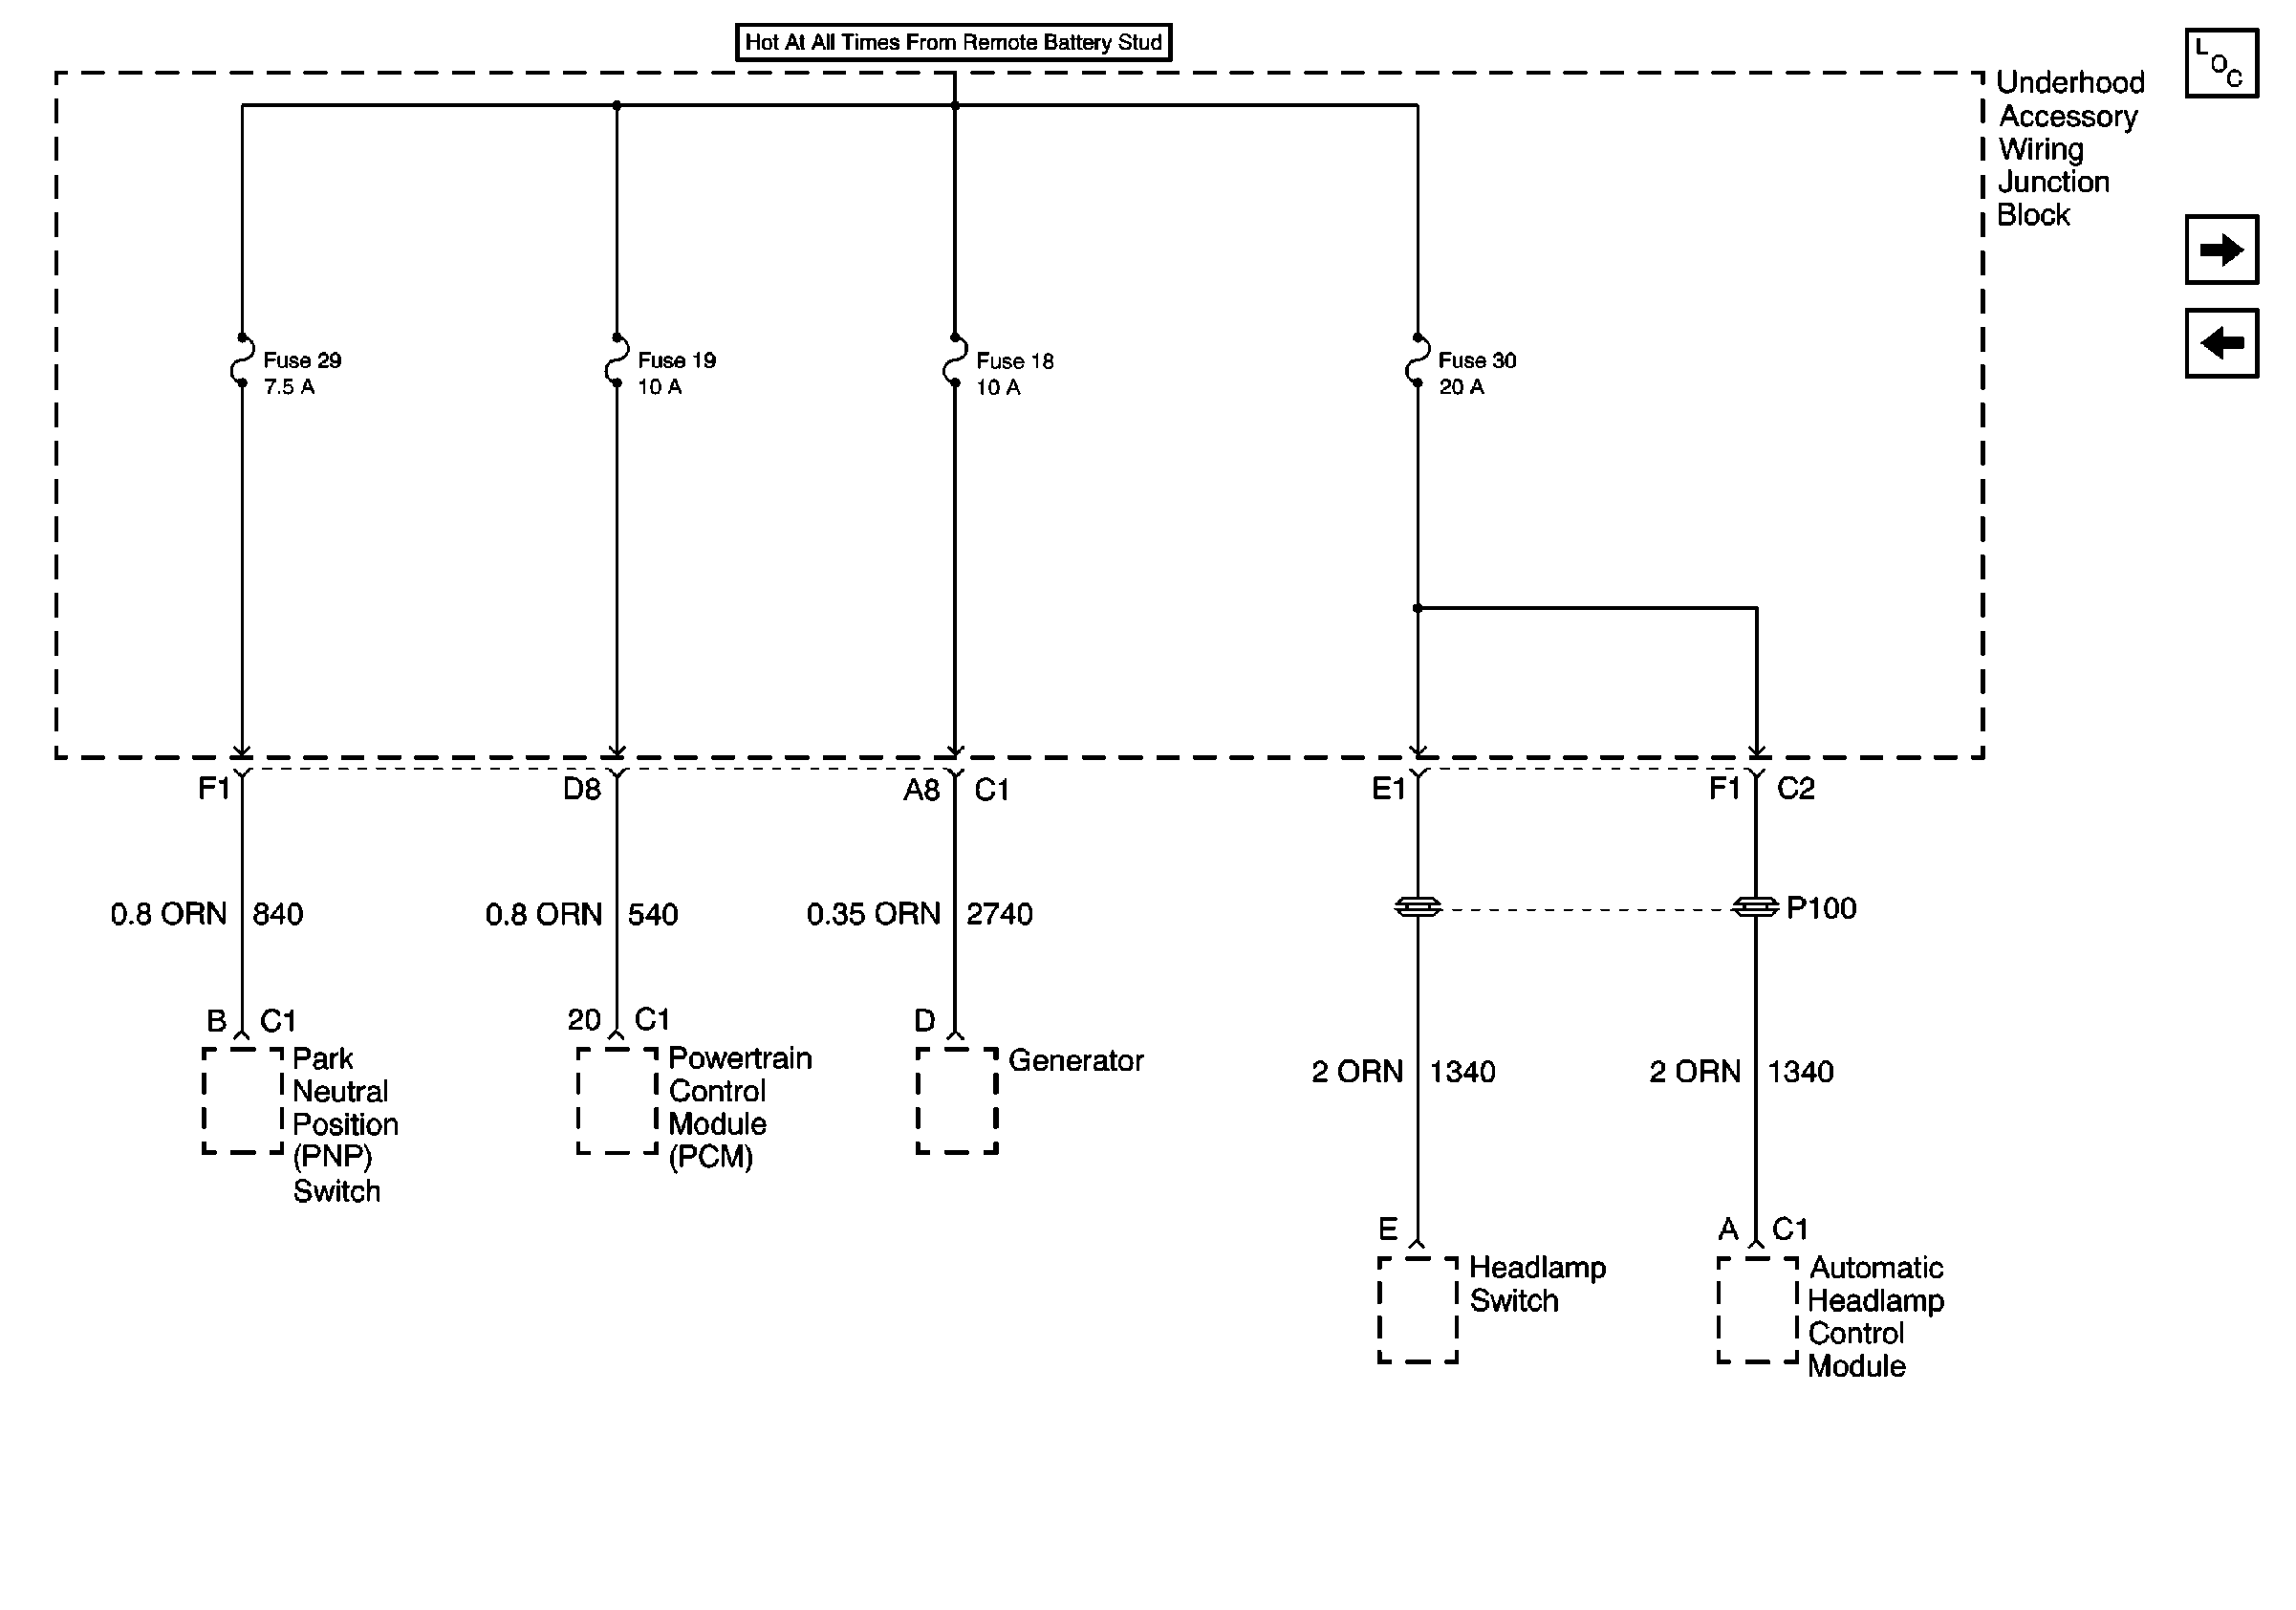
| Figure 8: |
UAWJB,PNP Switch, PCM, Generator, Headlamp Module and Switch
|
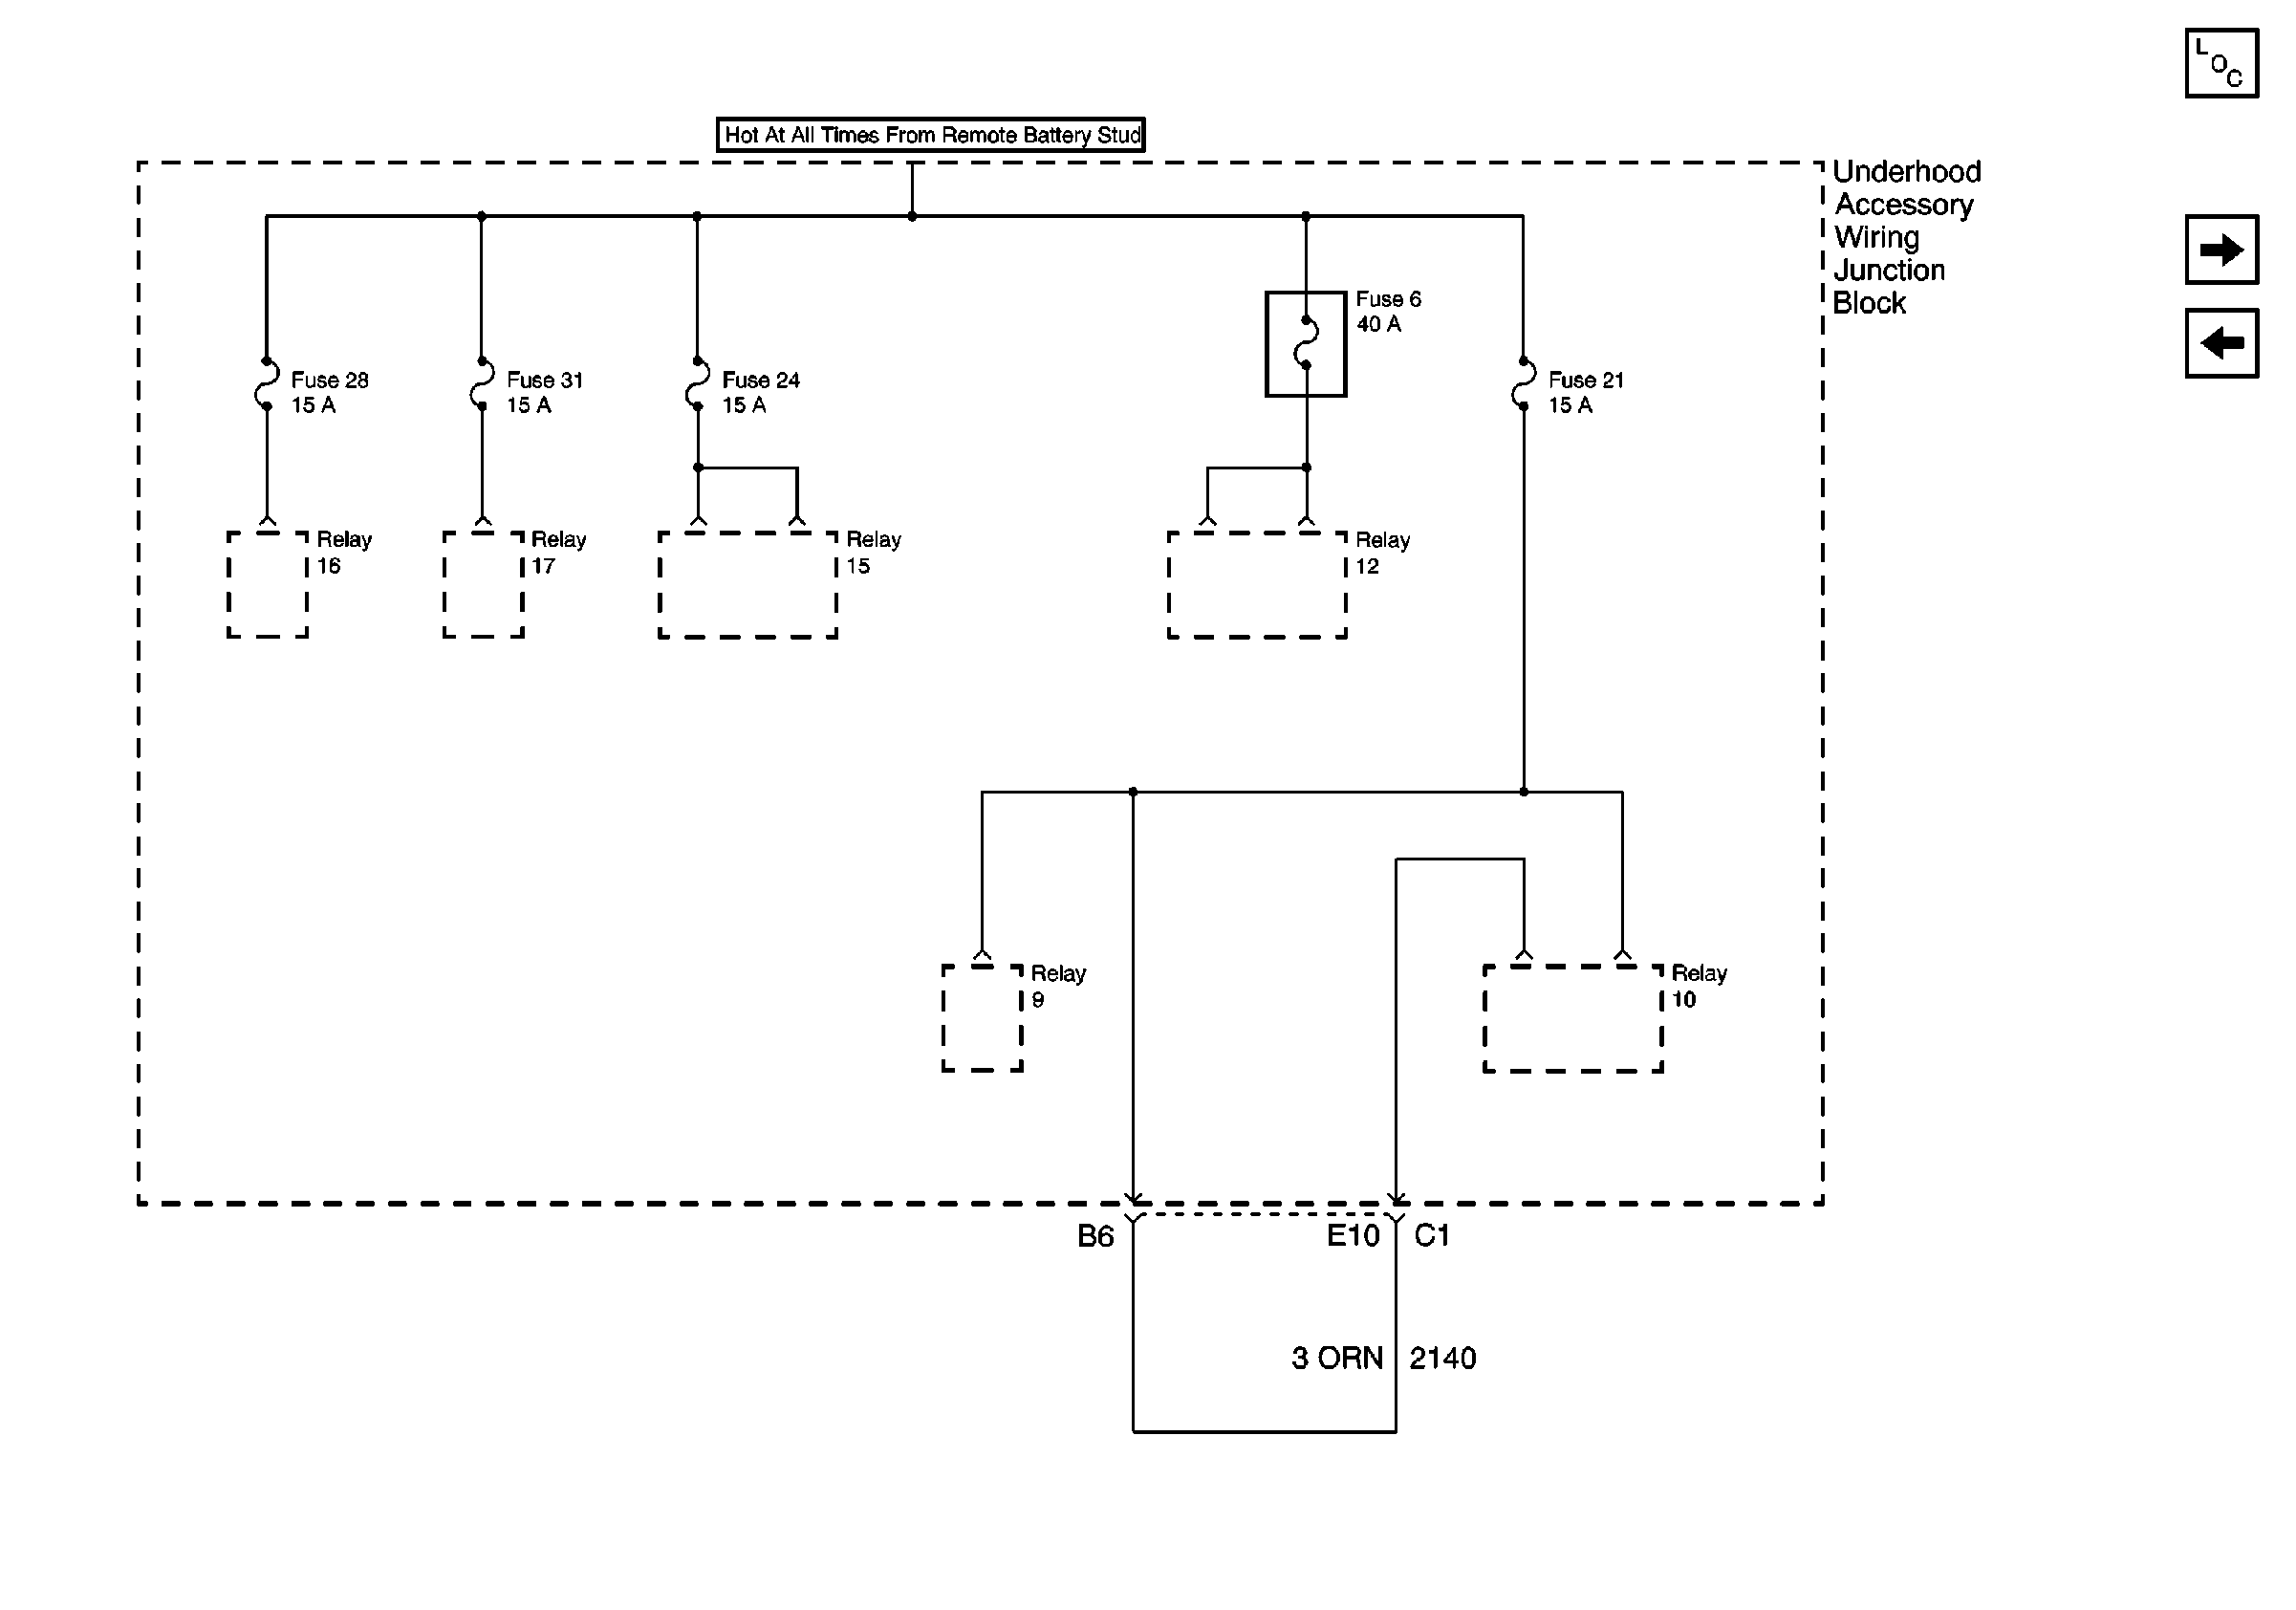
| Figure 9: |
Underhood Accessory Wiring Junction Block
|
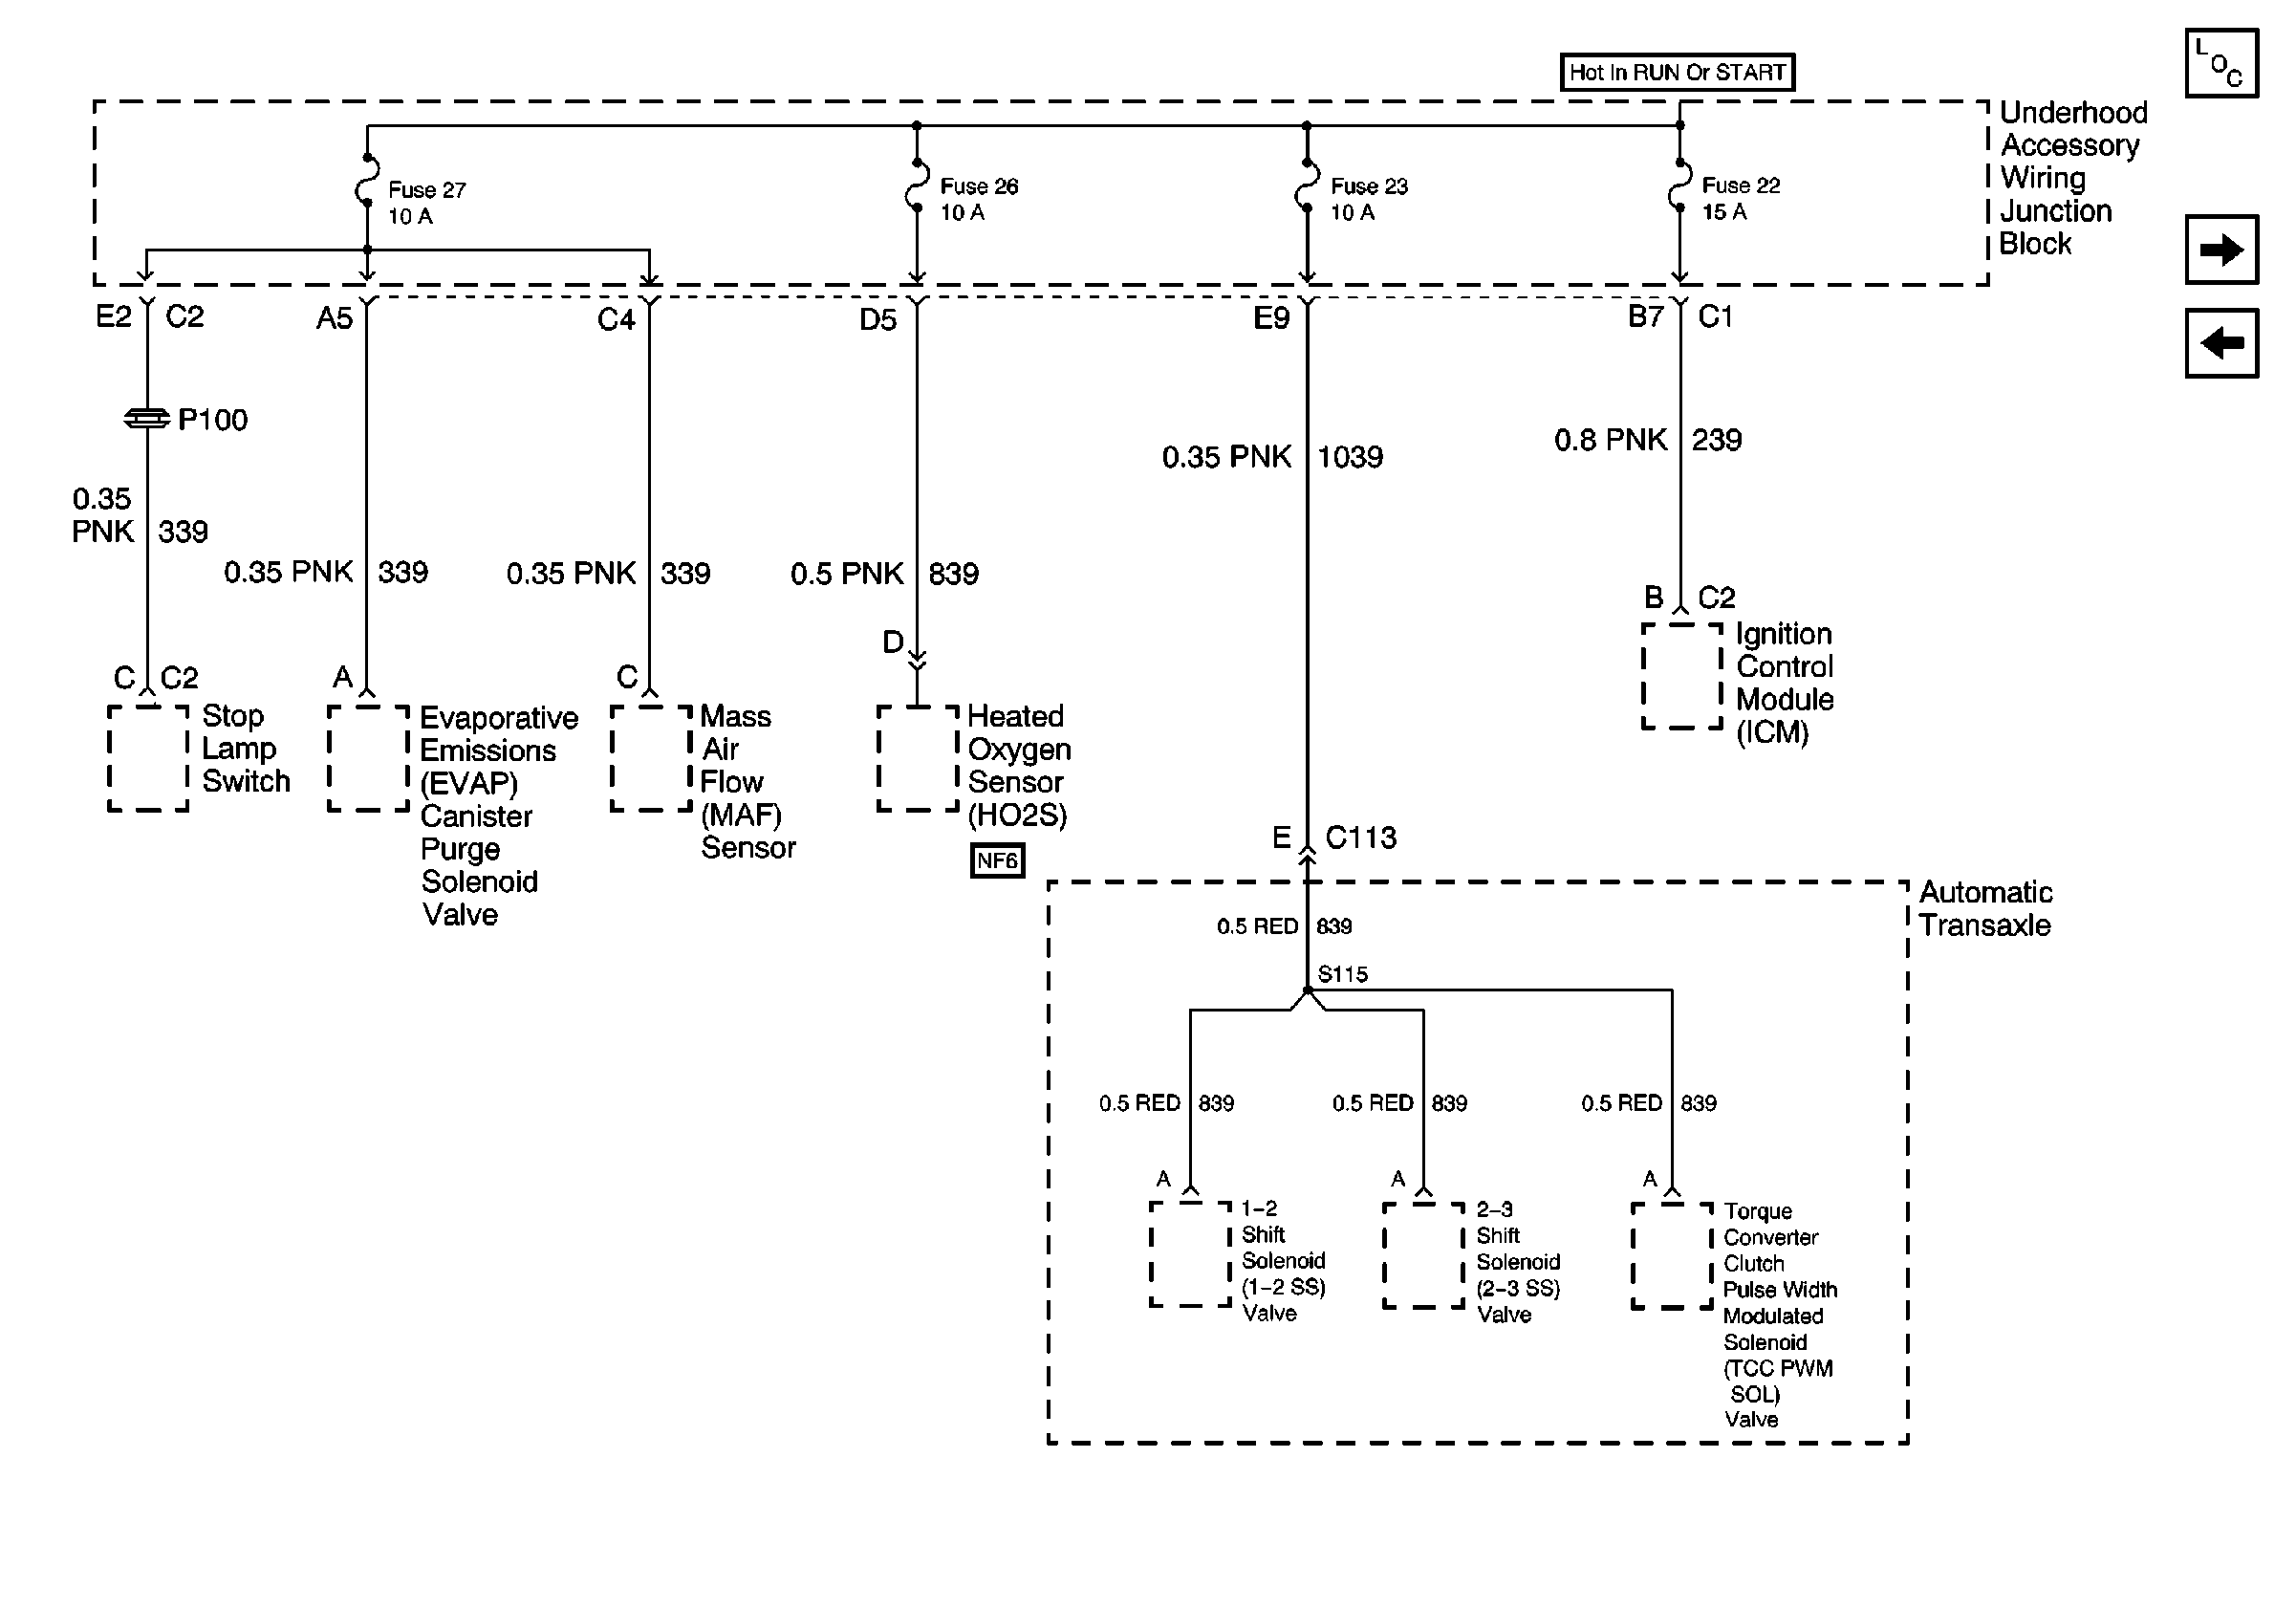
| Figure 10: |
UAWJB, Stop Lamp Switch, A/T and ICM
|
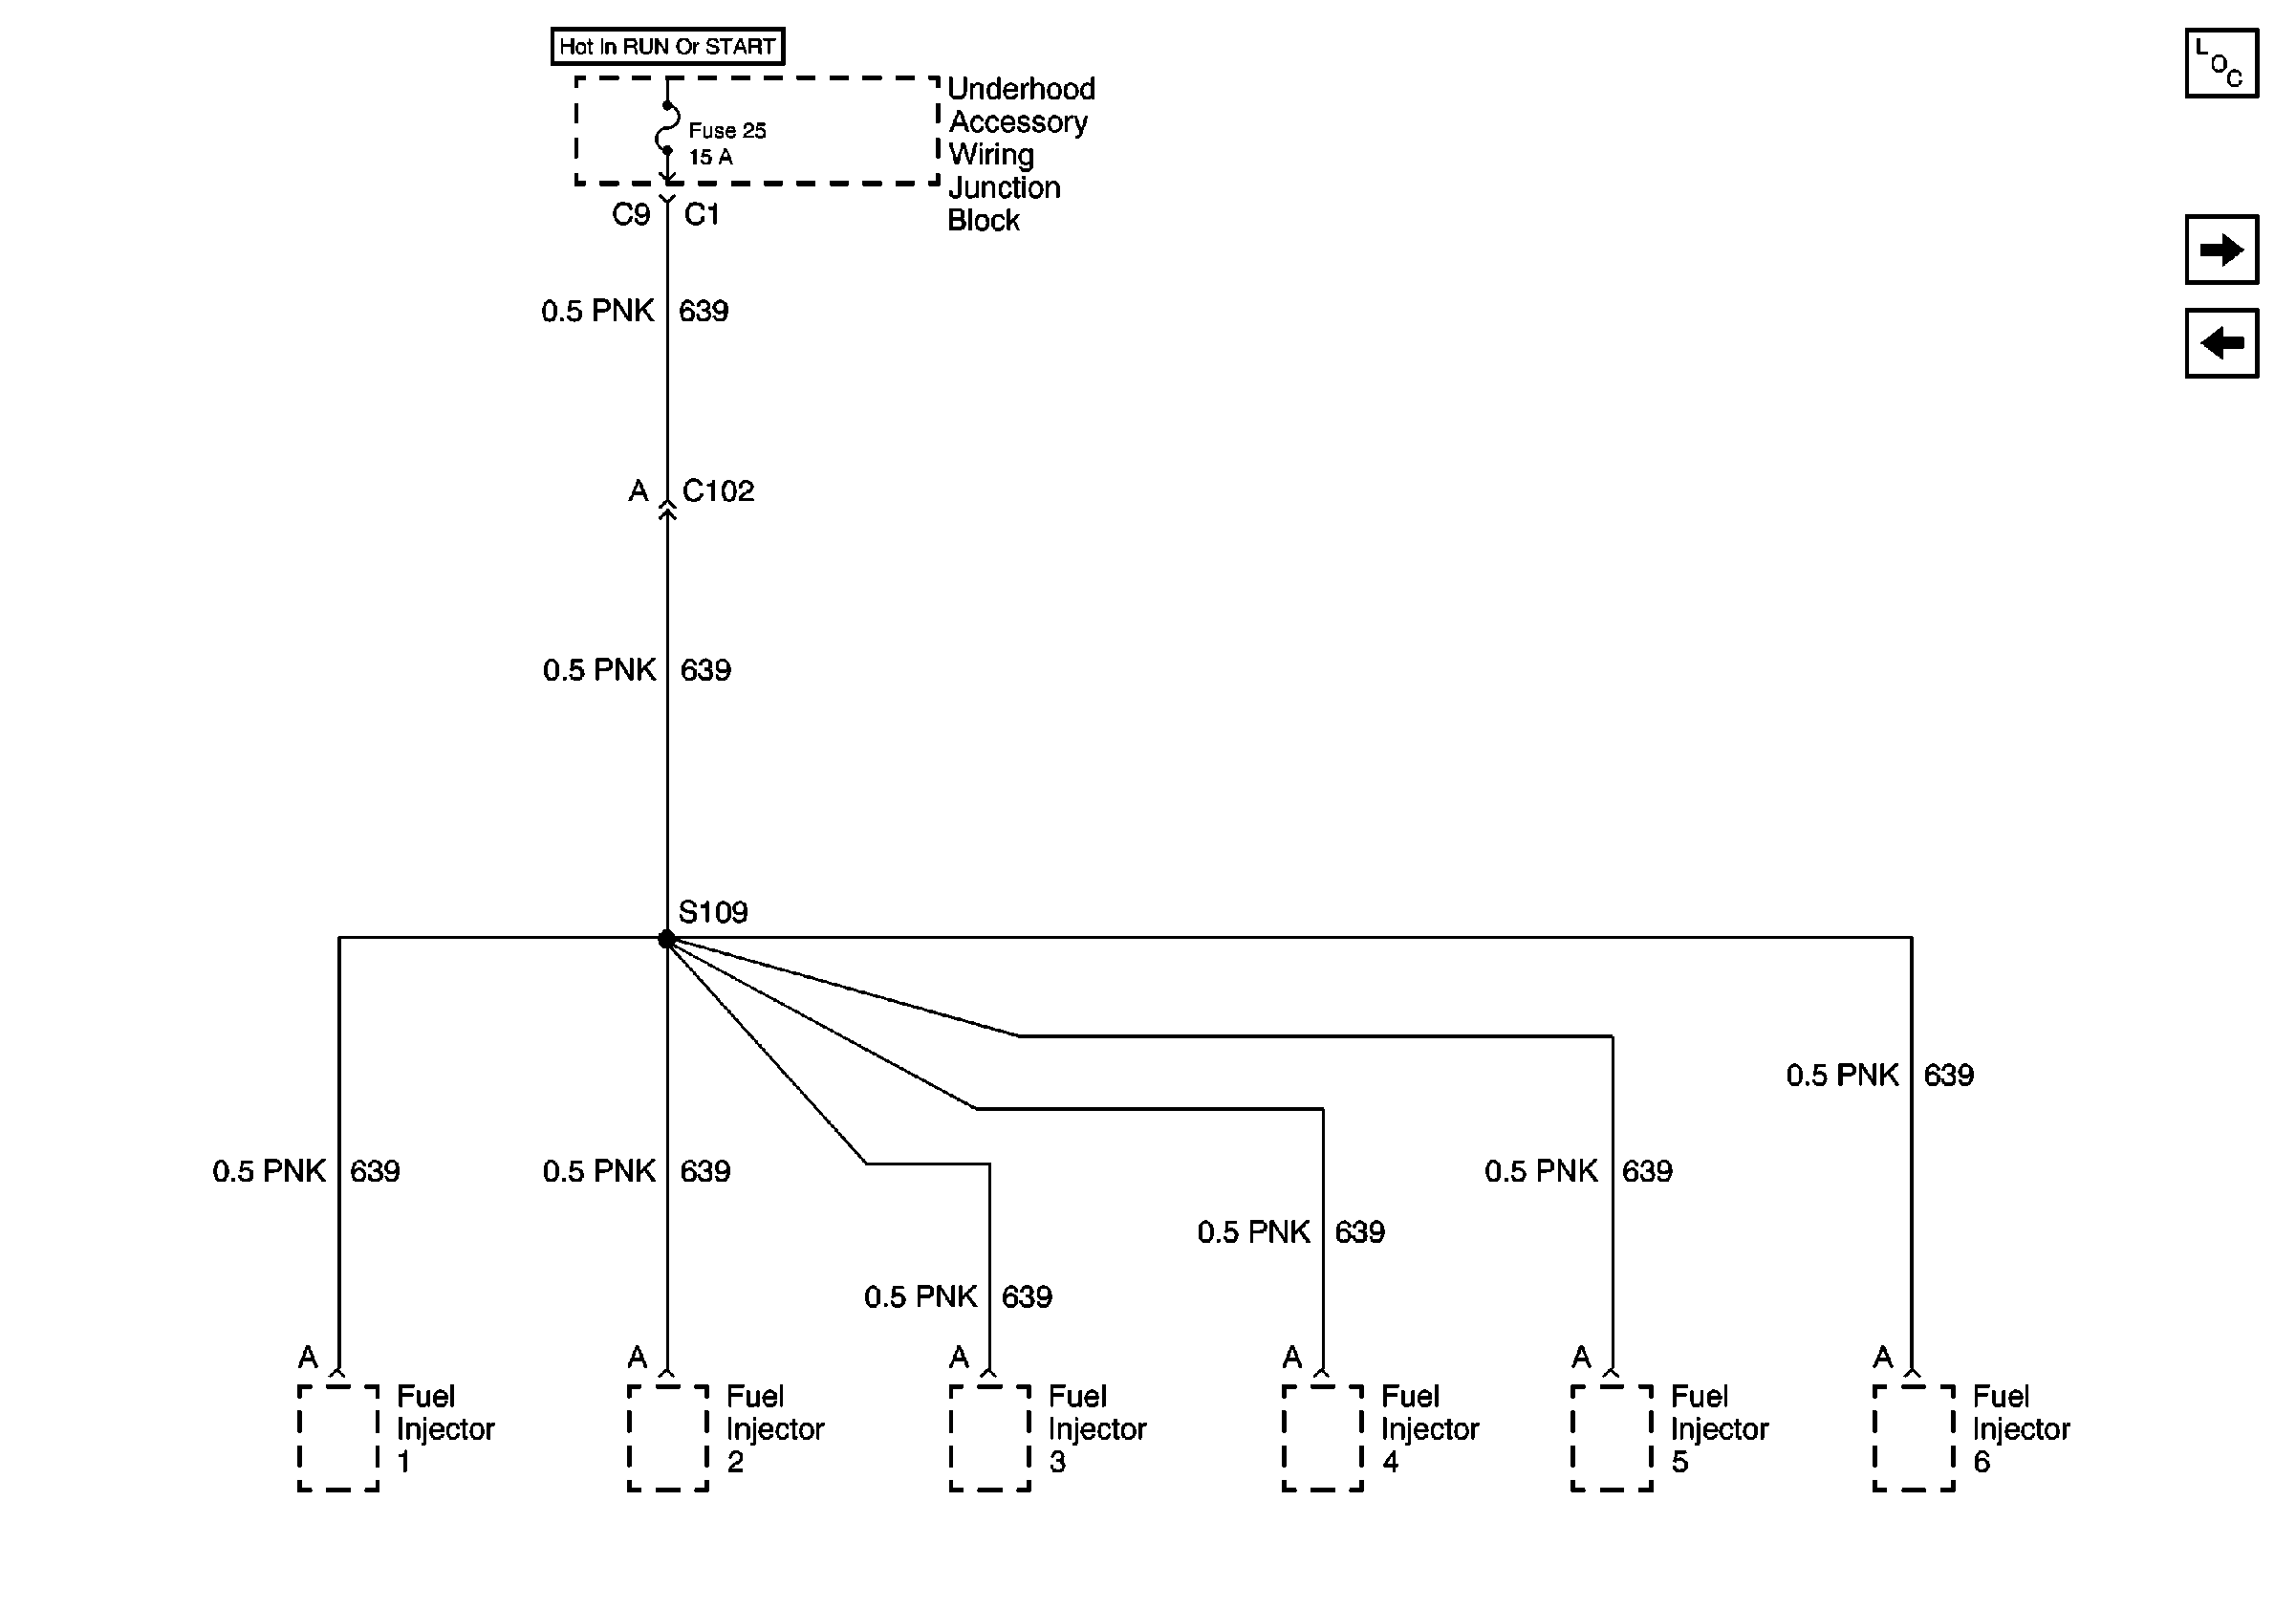
| Figure 11: |
UAWJB and Fuel Injectors
|
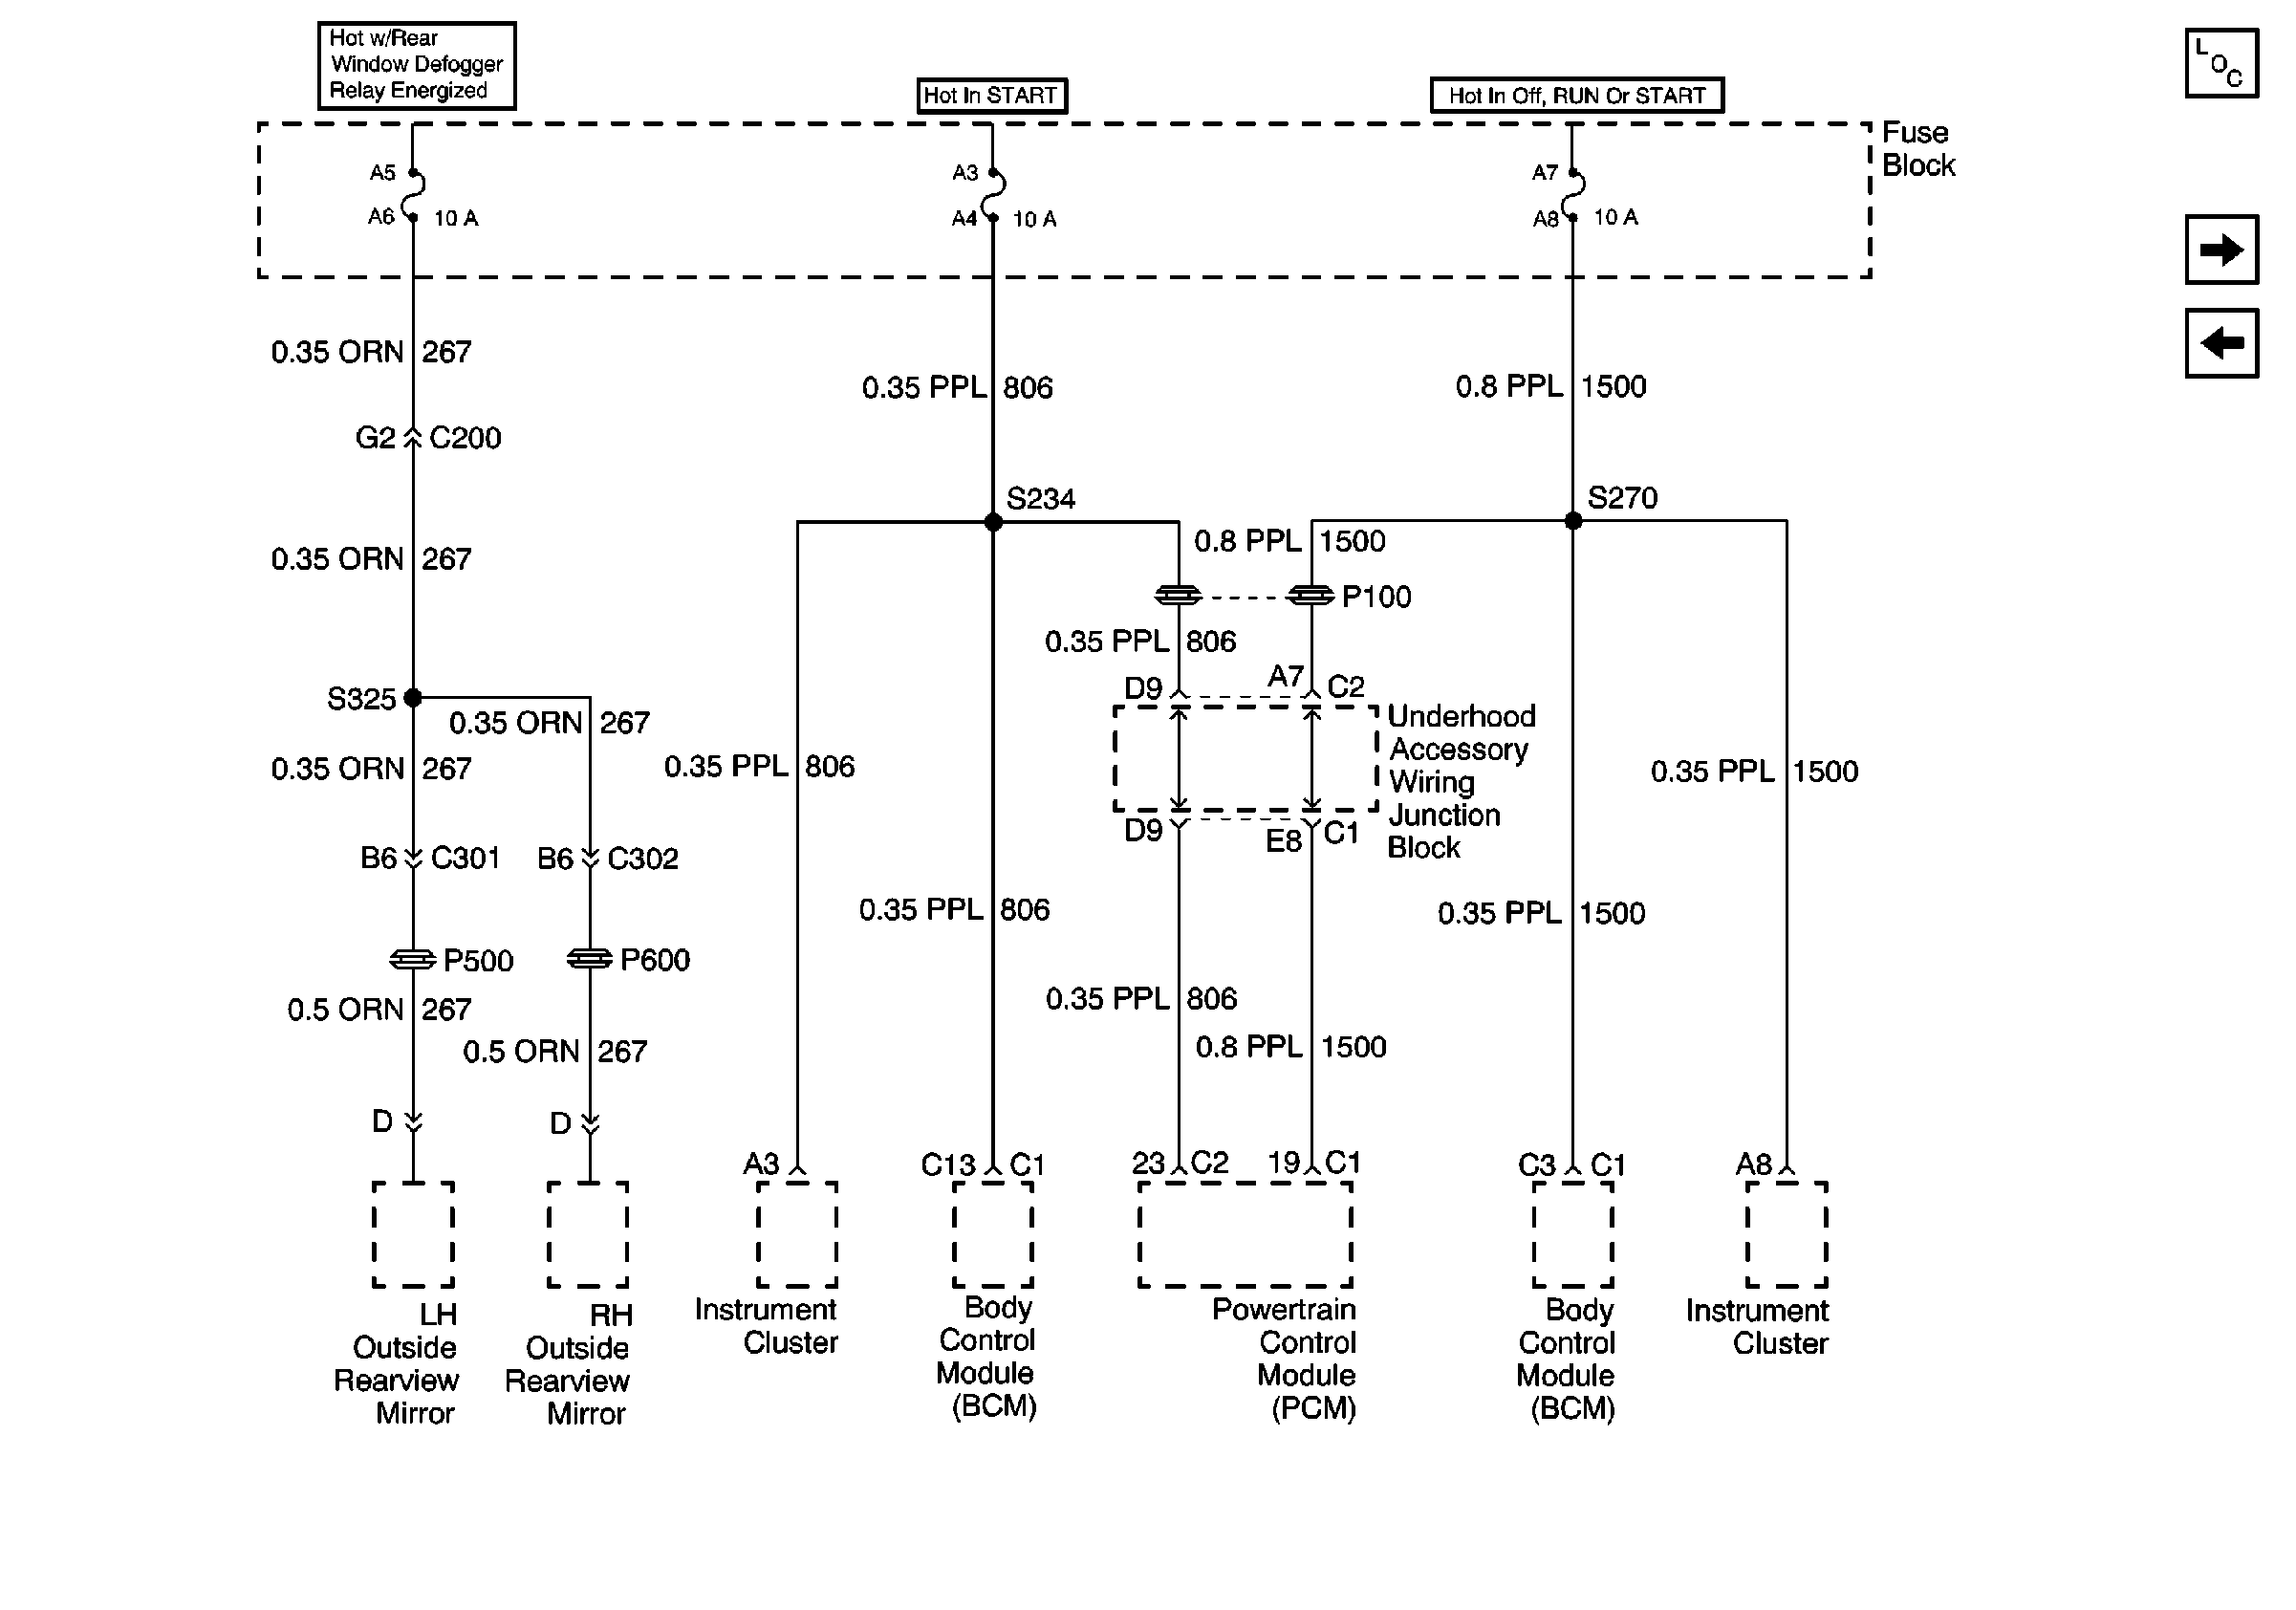
| Figure 12: |
Fuse Block, Outside Rearview Mirrors and PCM
|
| Figure 13: |
Fuse Block and HVAC Components

|
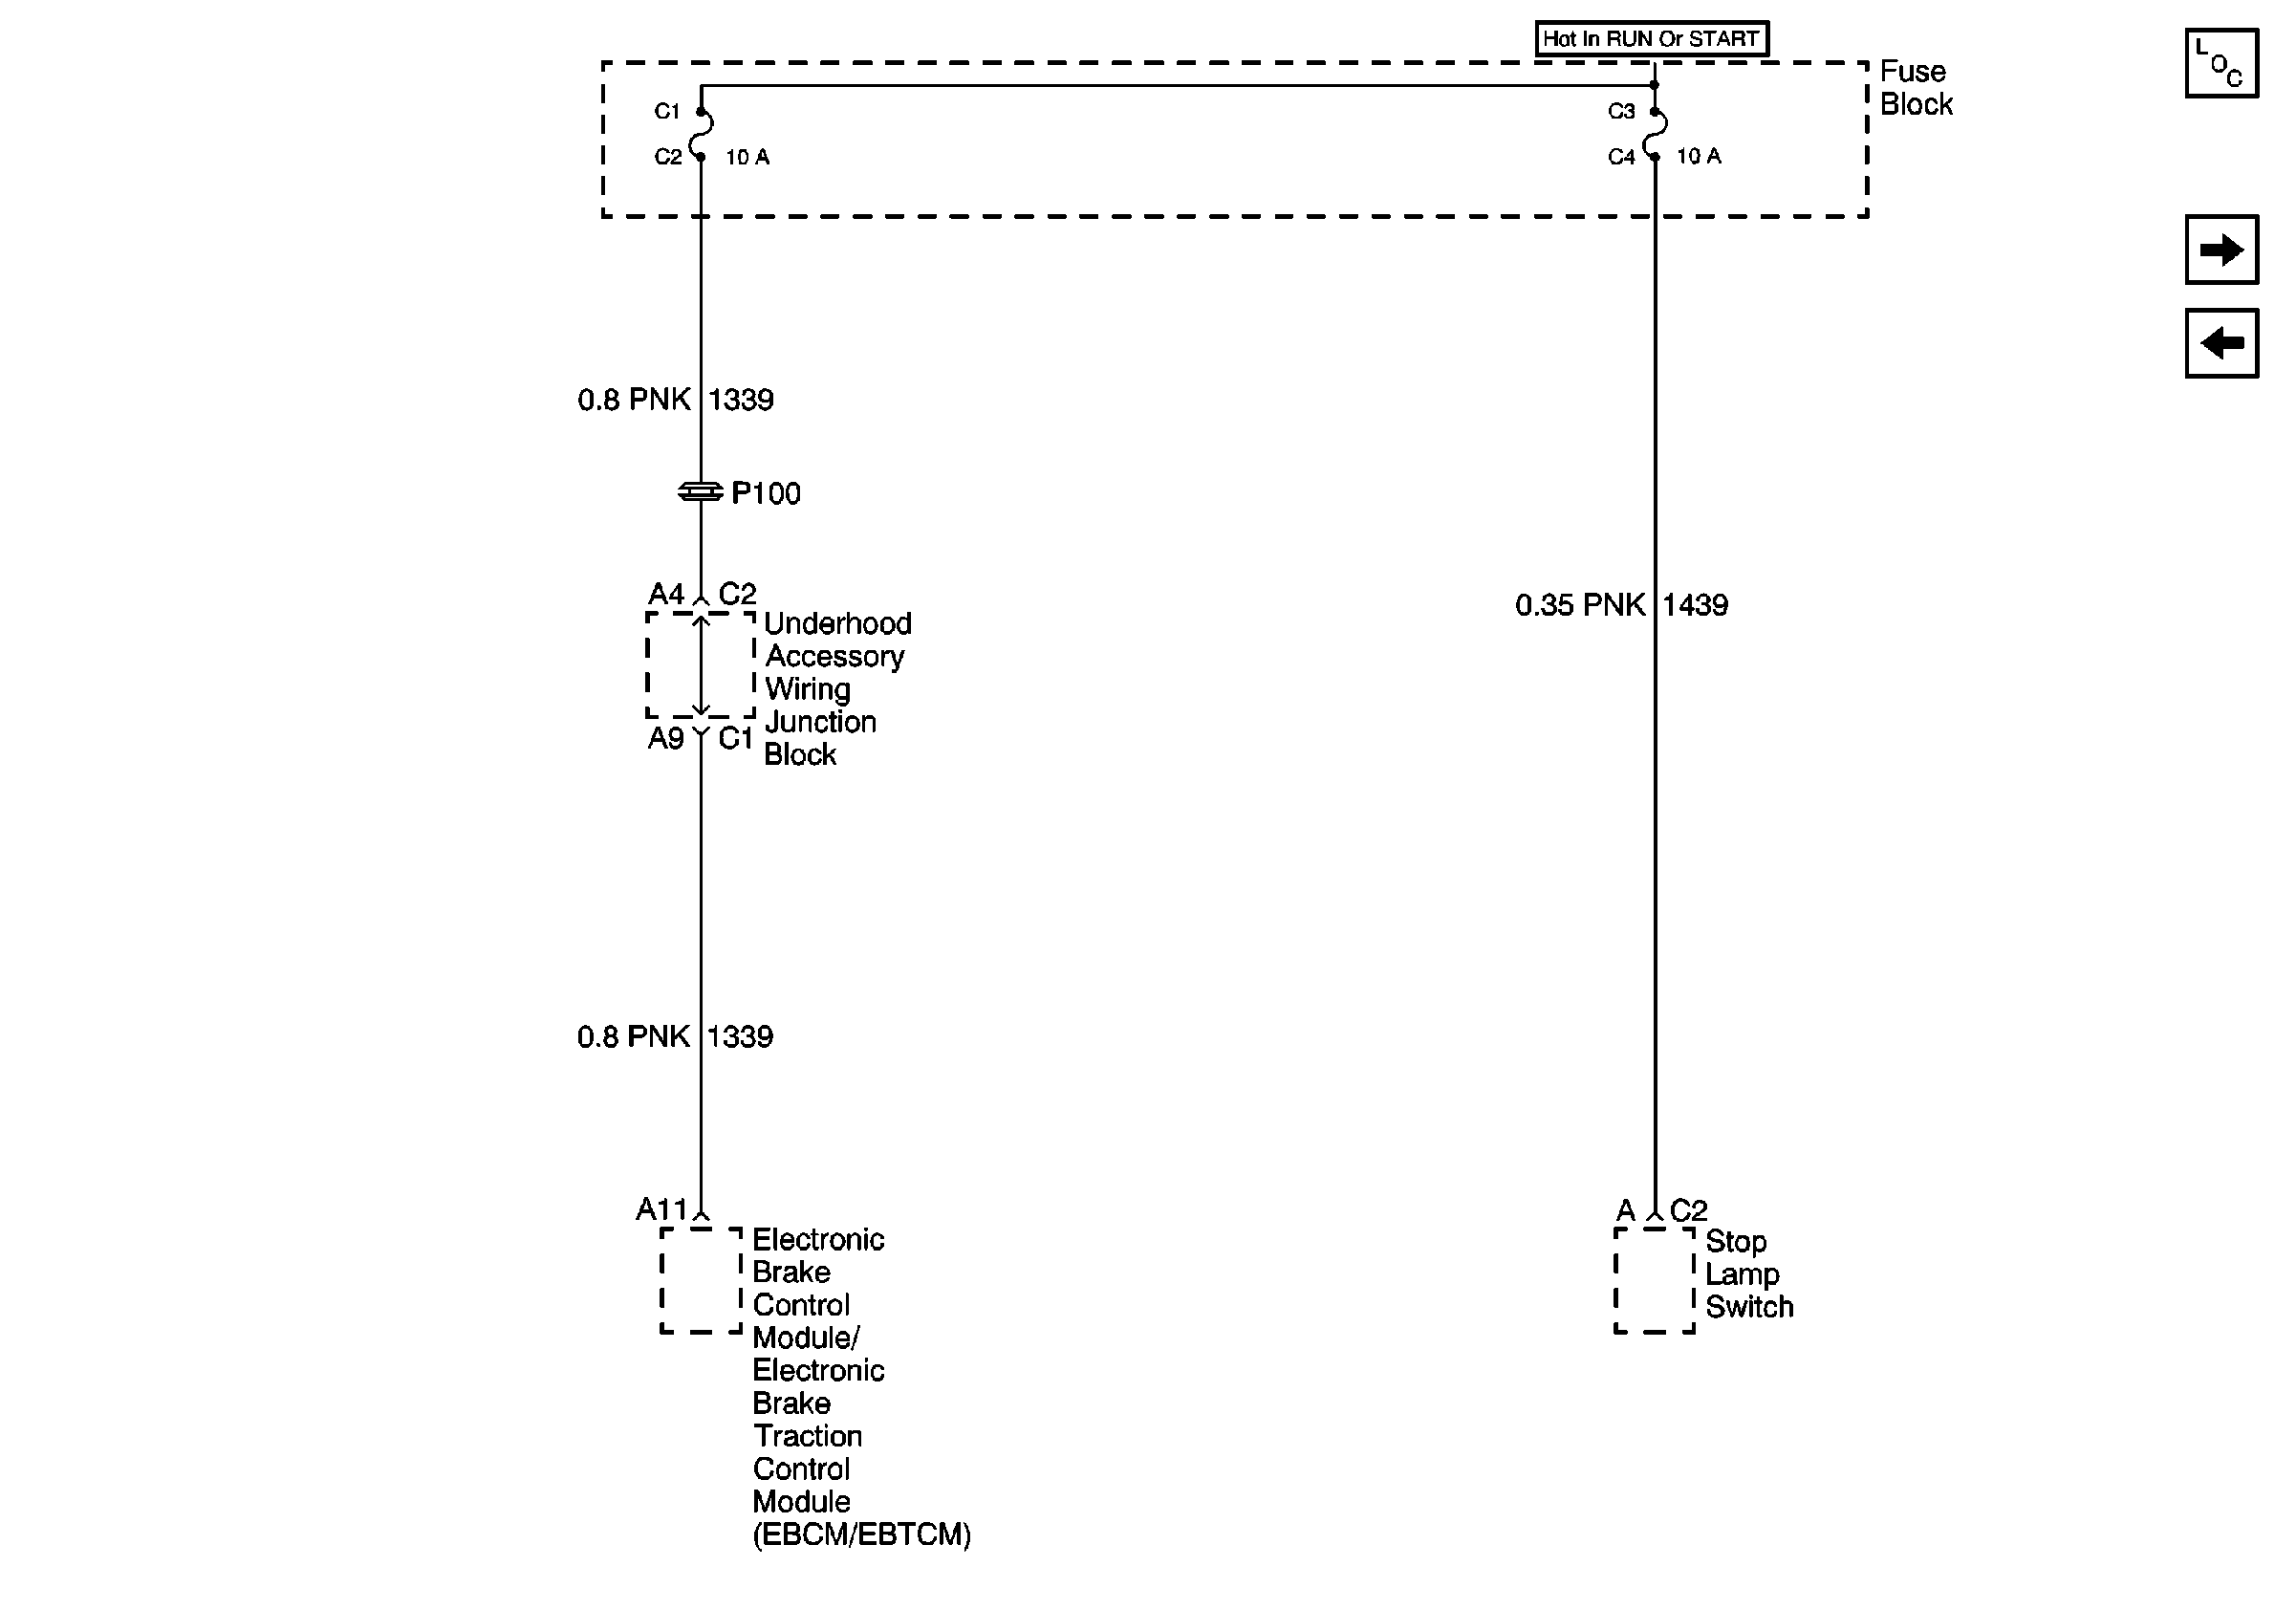
| Figure 14: |
Fuse Block and EBCM/EBTCM and Stop Lamp Switch
|
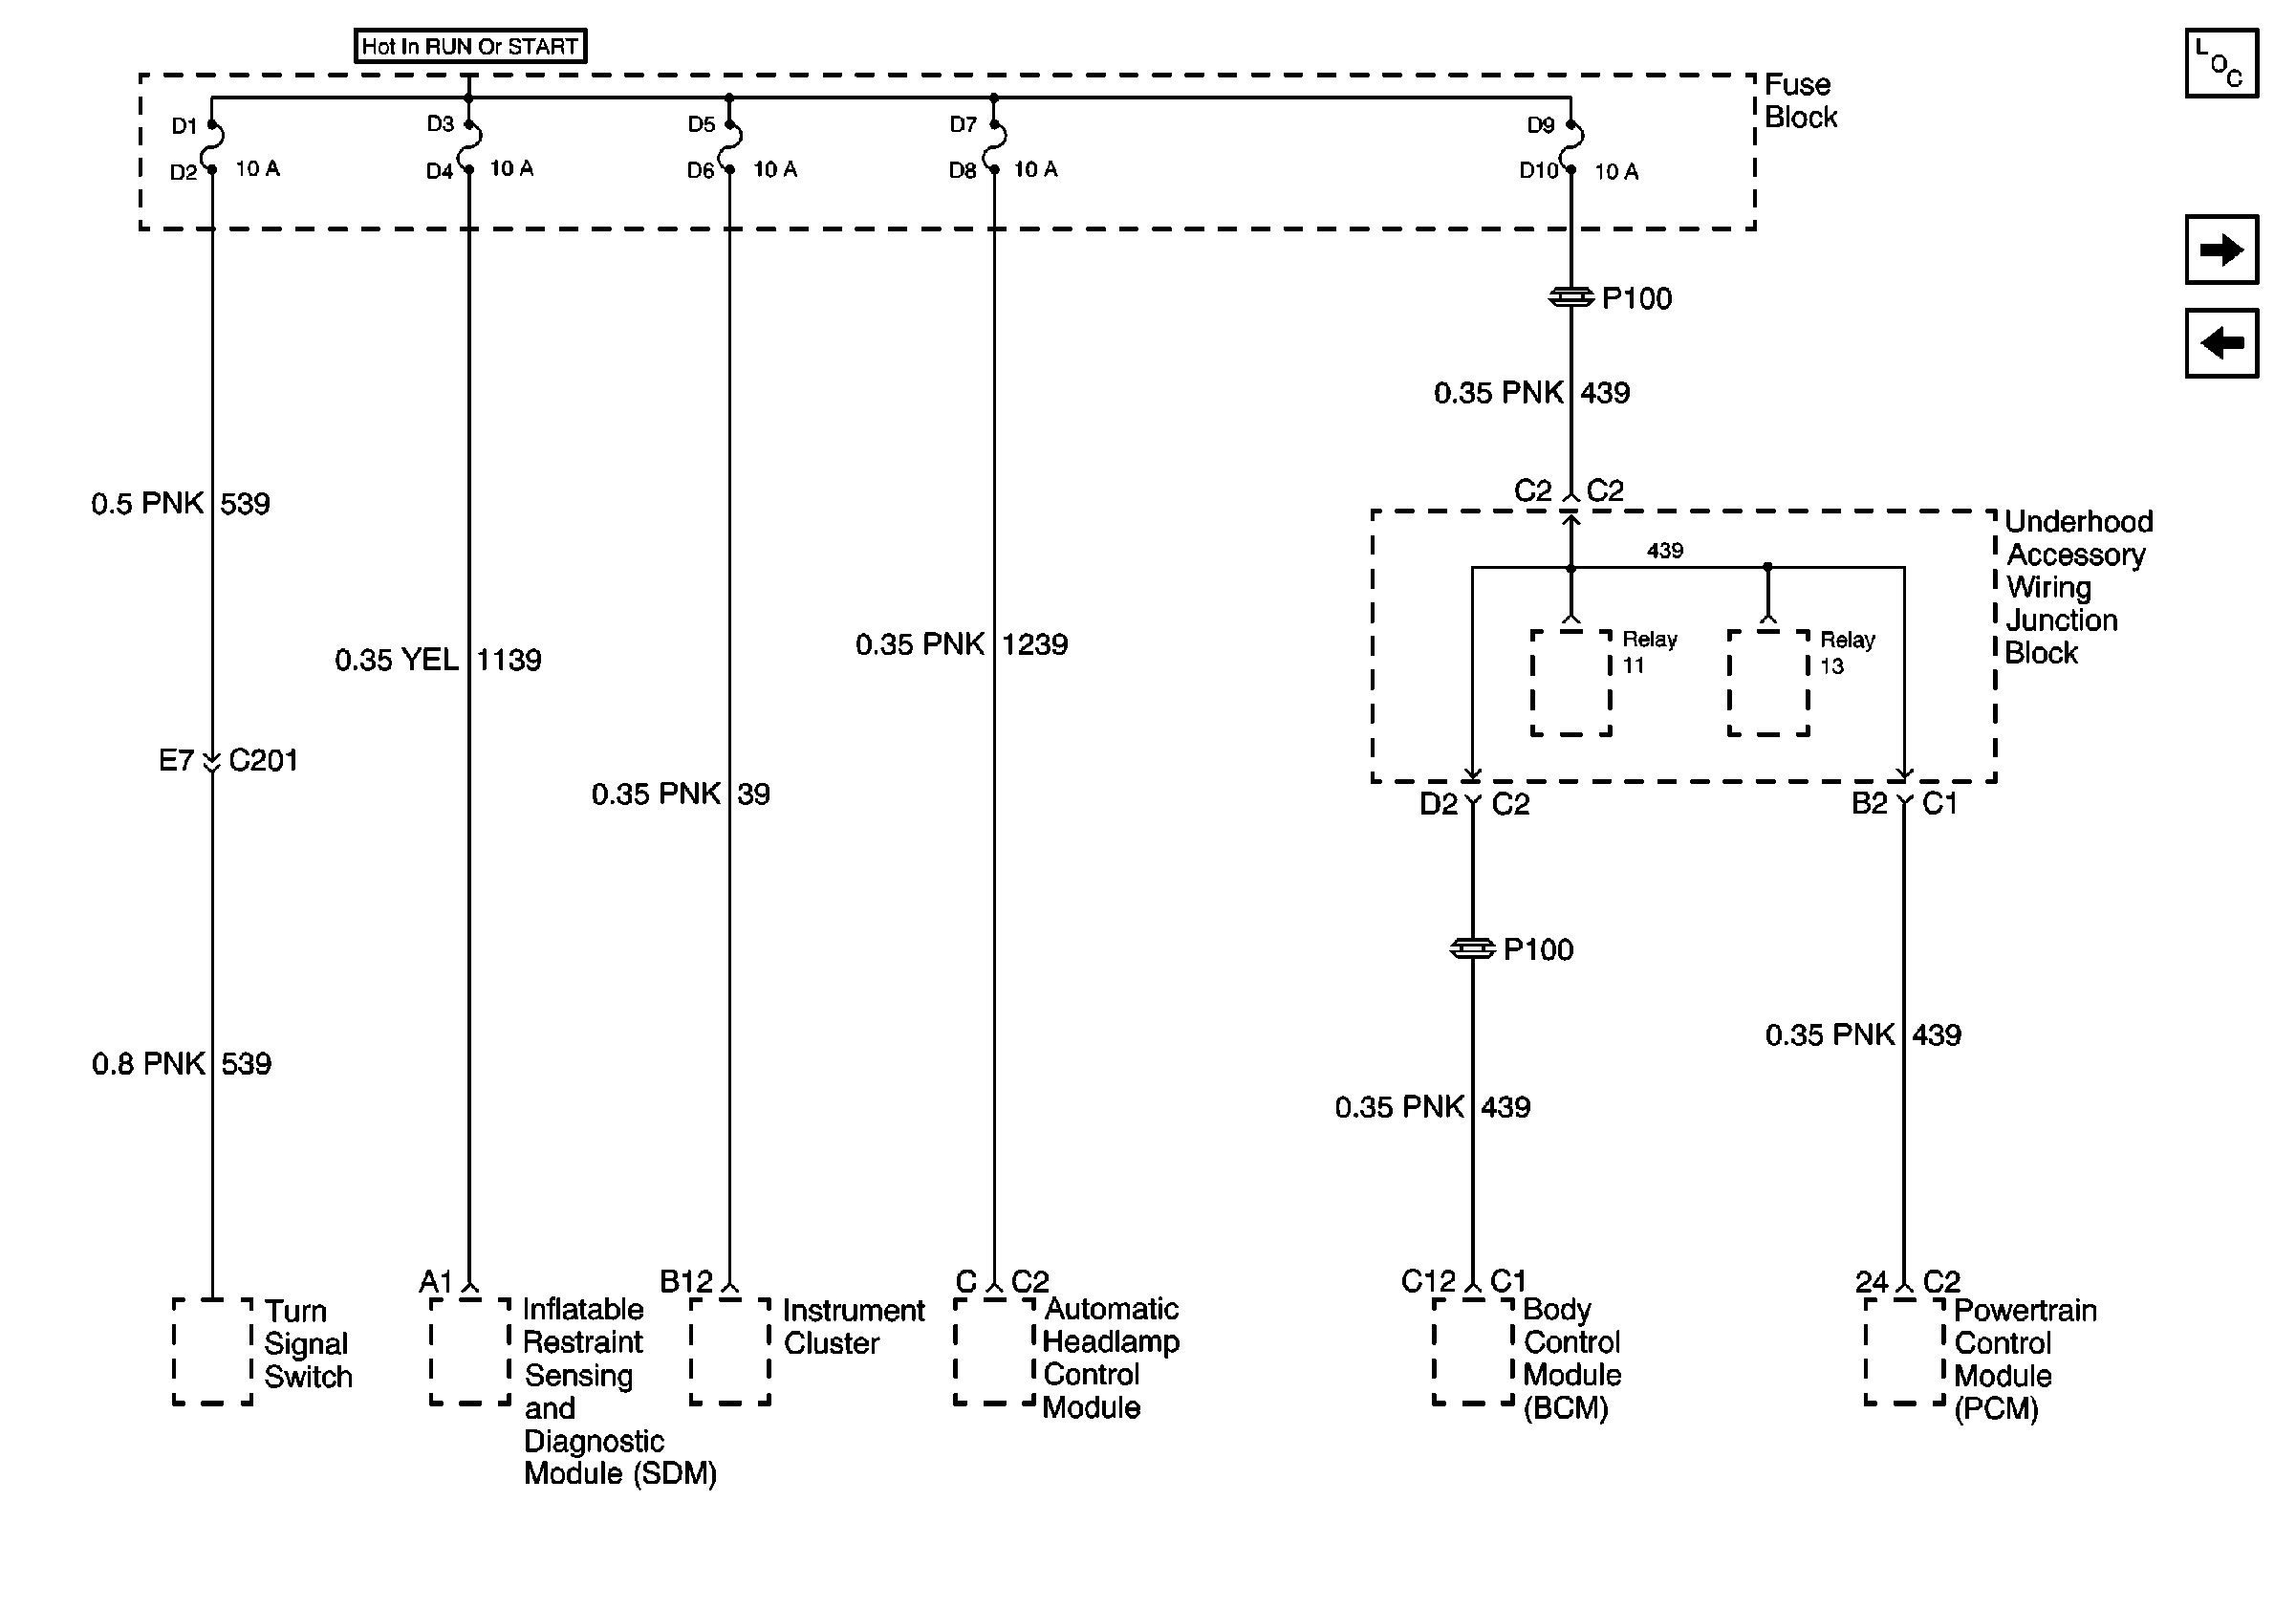
| Figure 15: |
Fuse Block, UAWJB, PCM and BCM
|
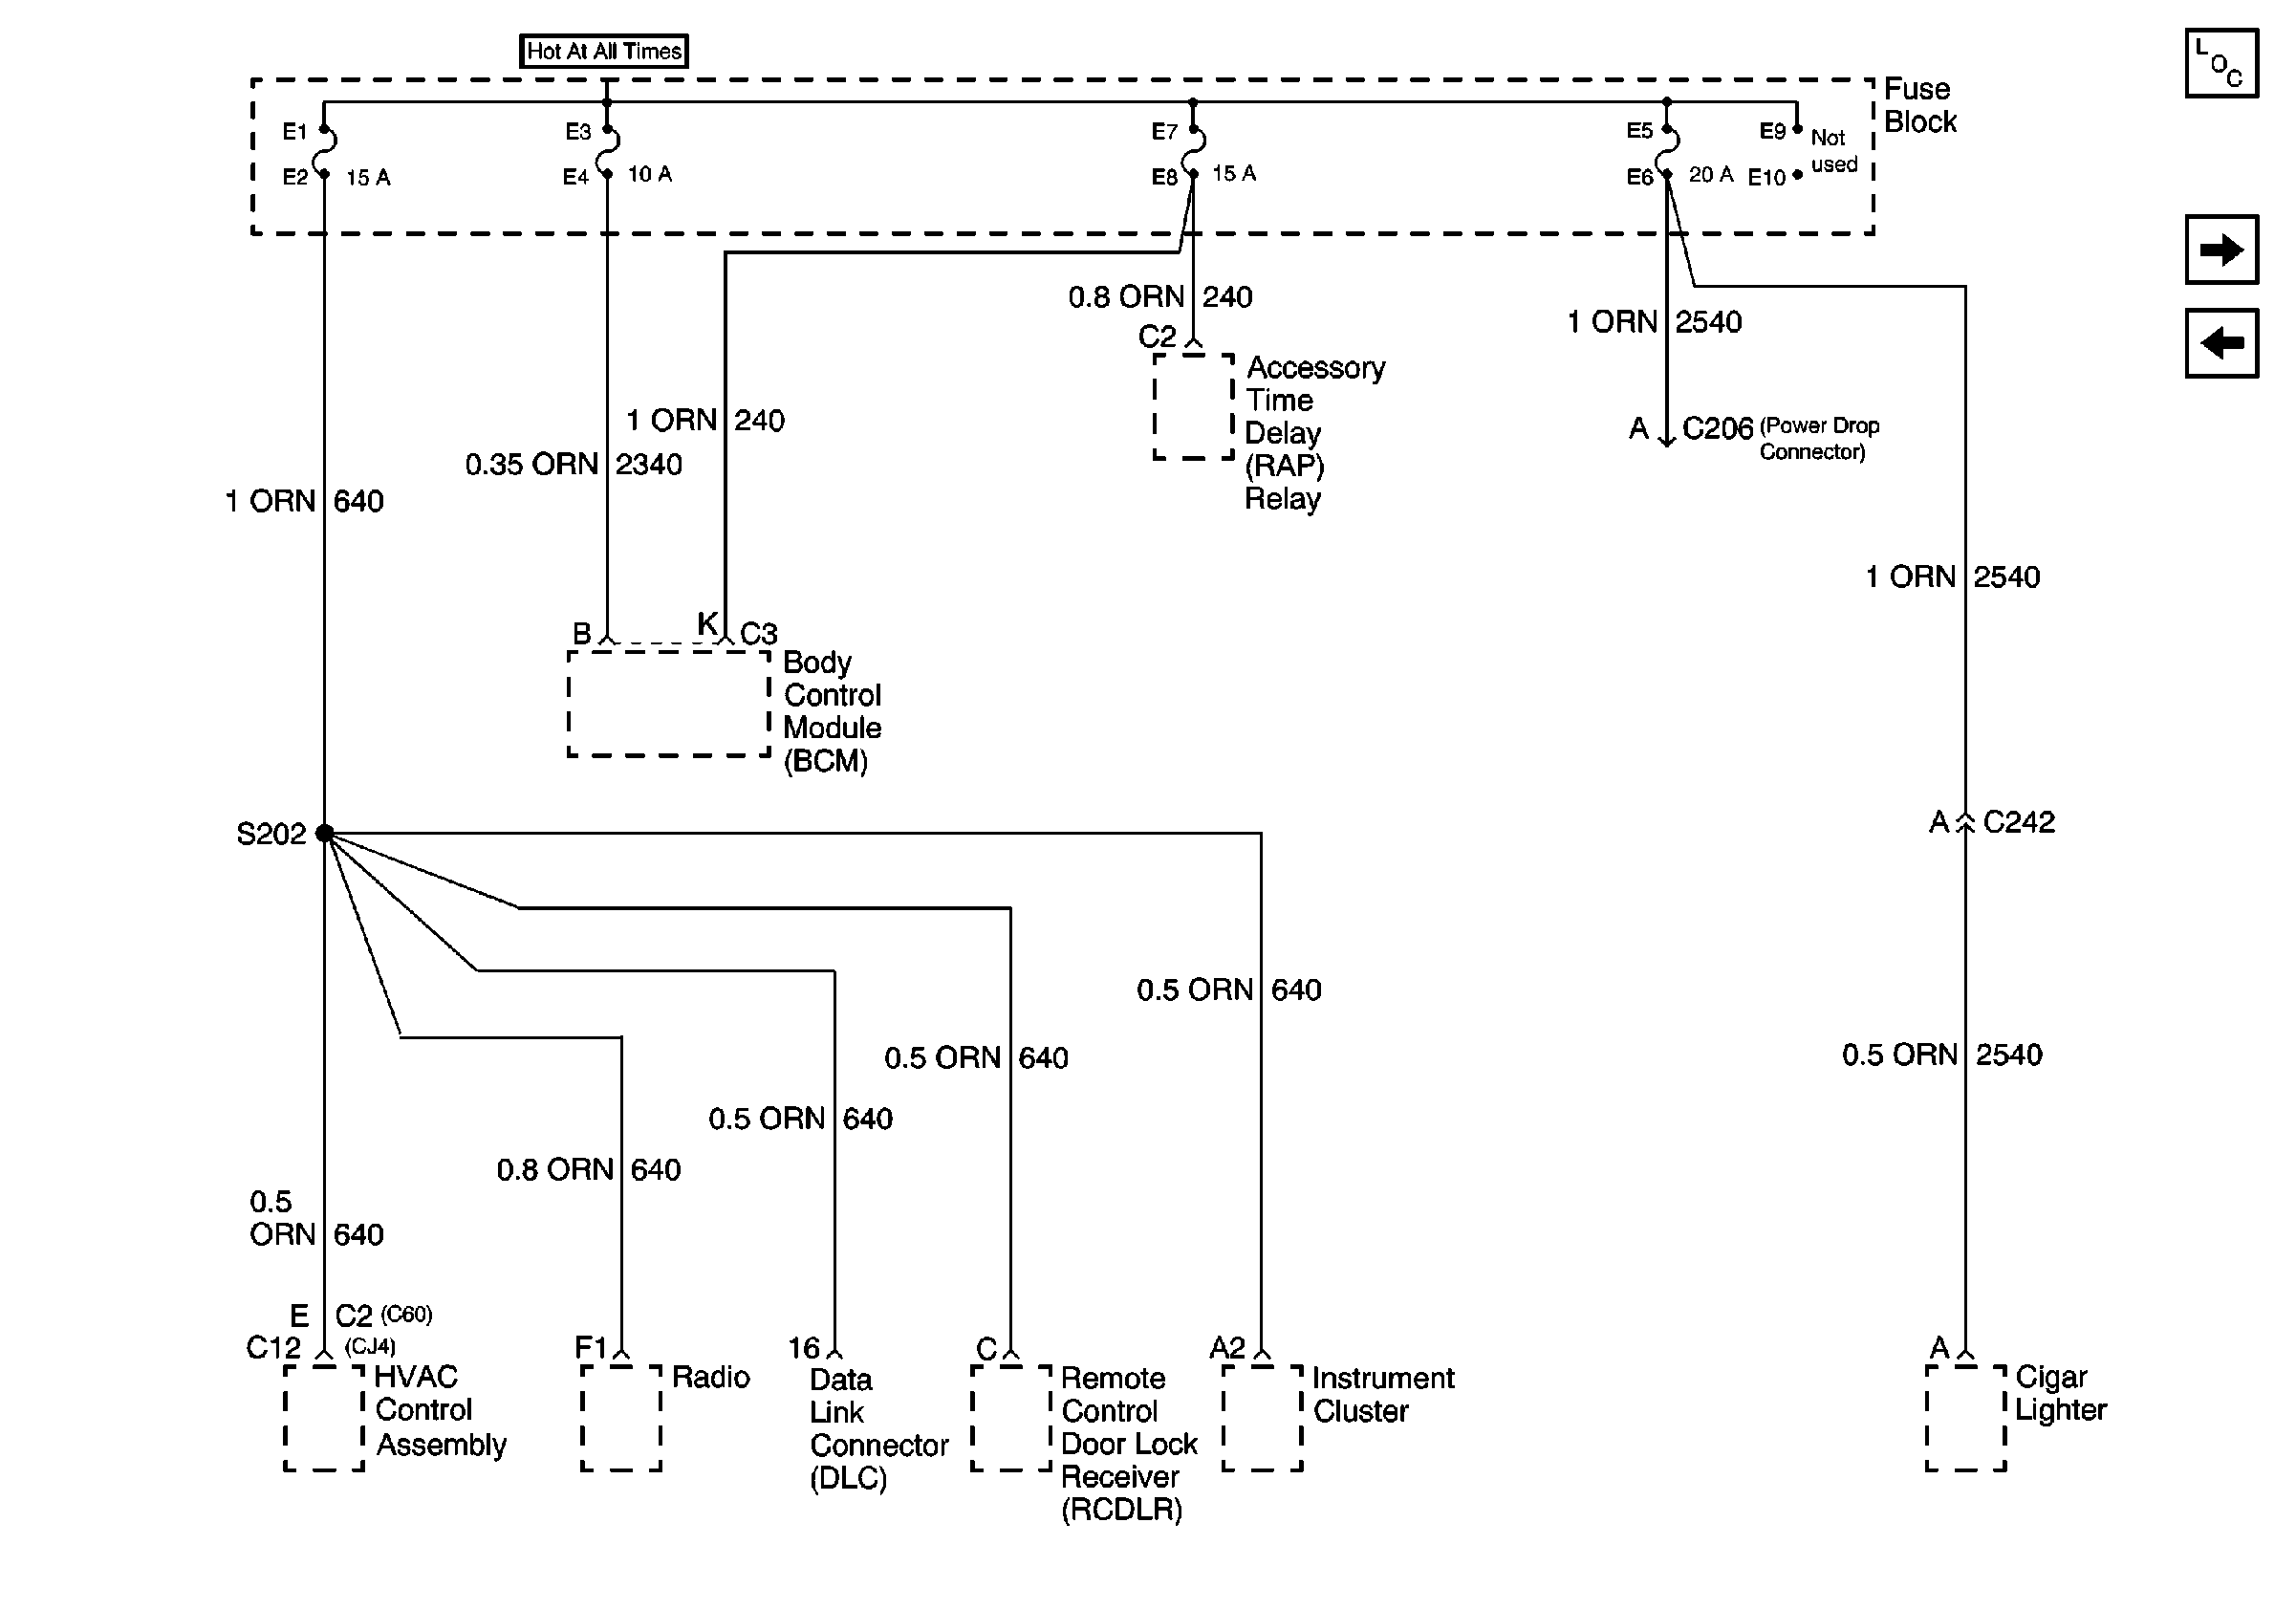
| Figure 16: |
Fuse Block, BCM, Cluster, Radio and DLC
|
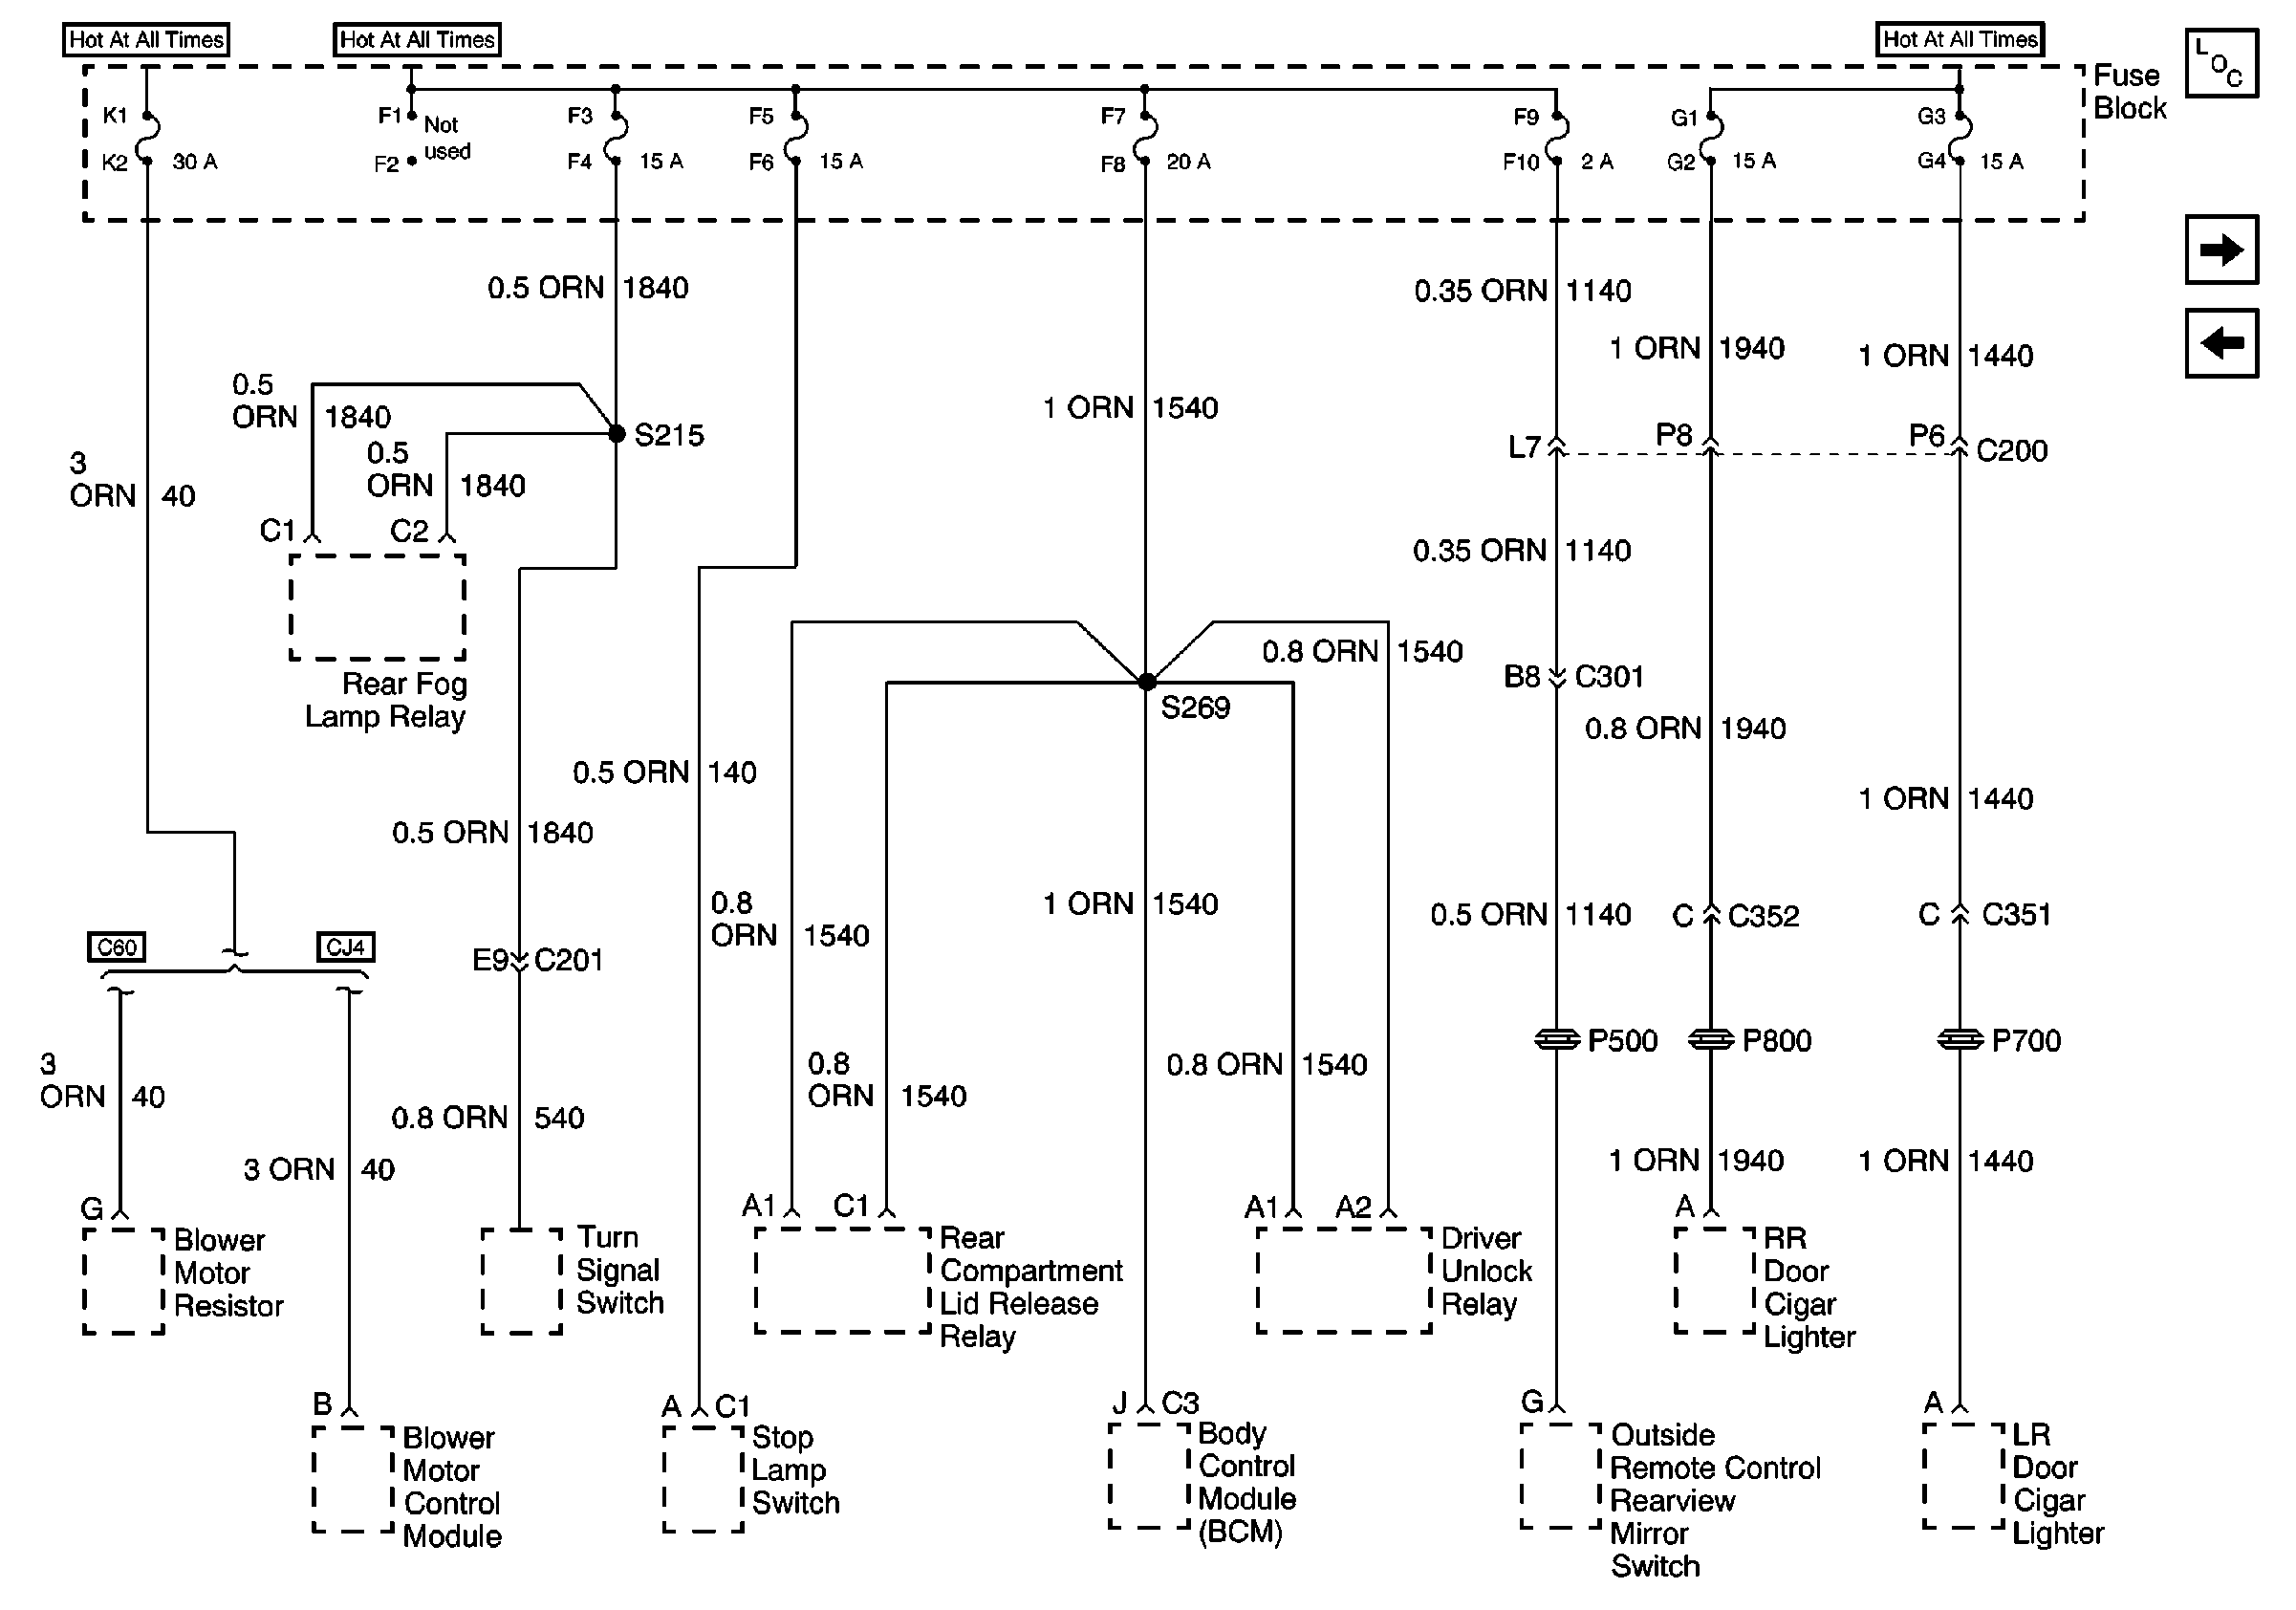
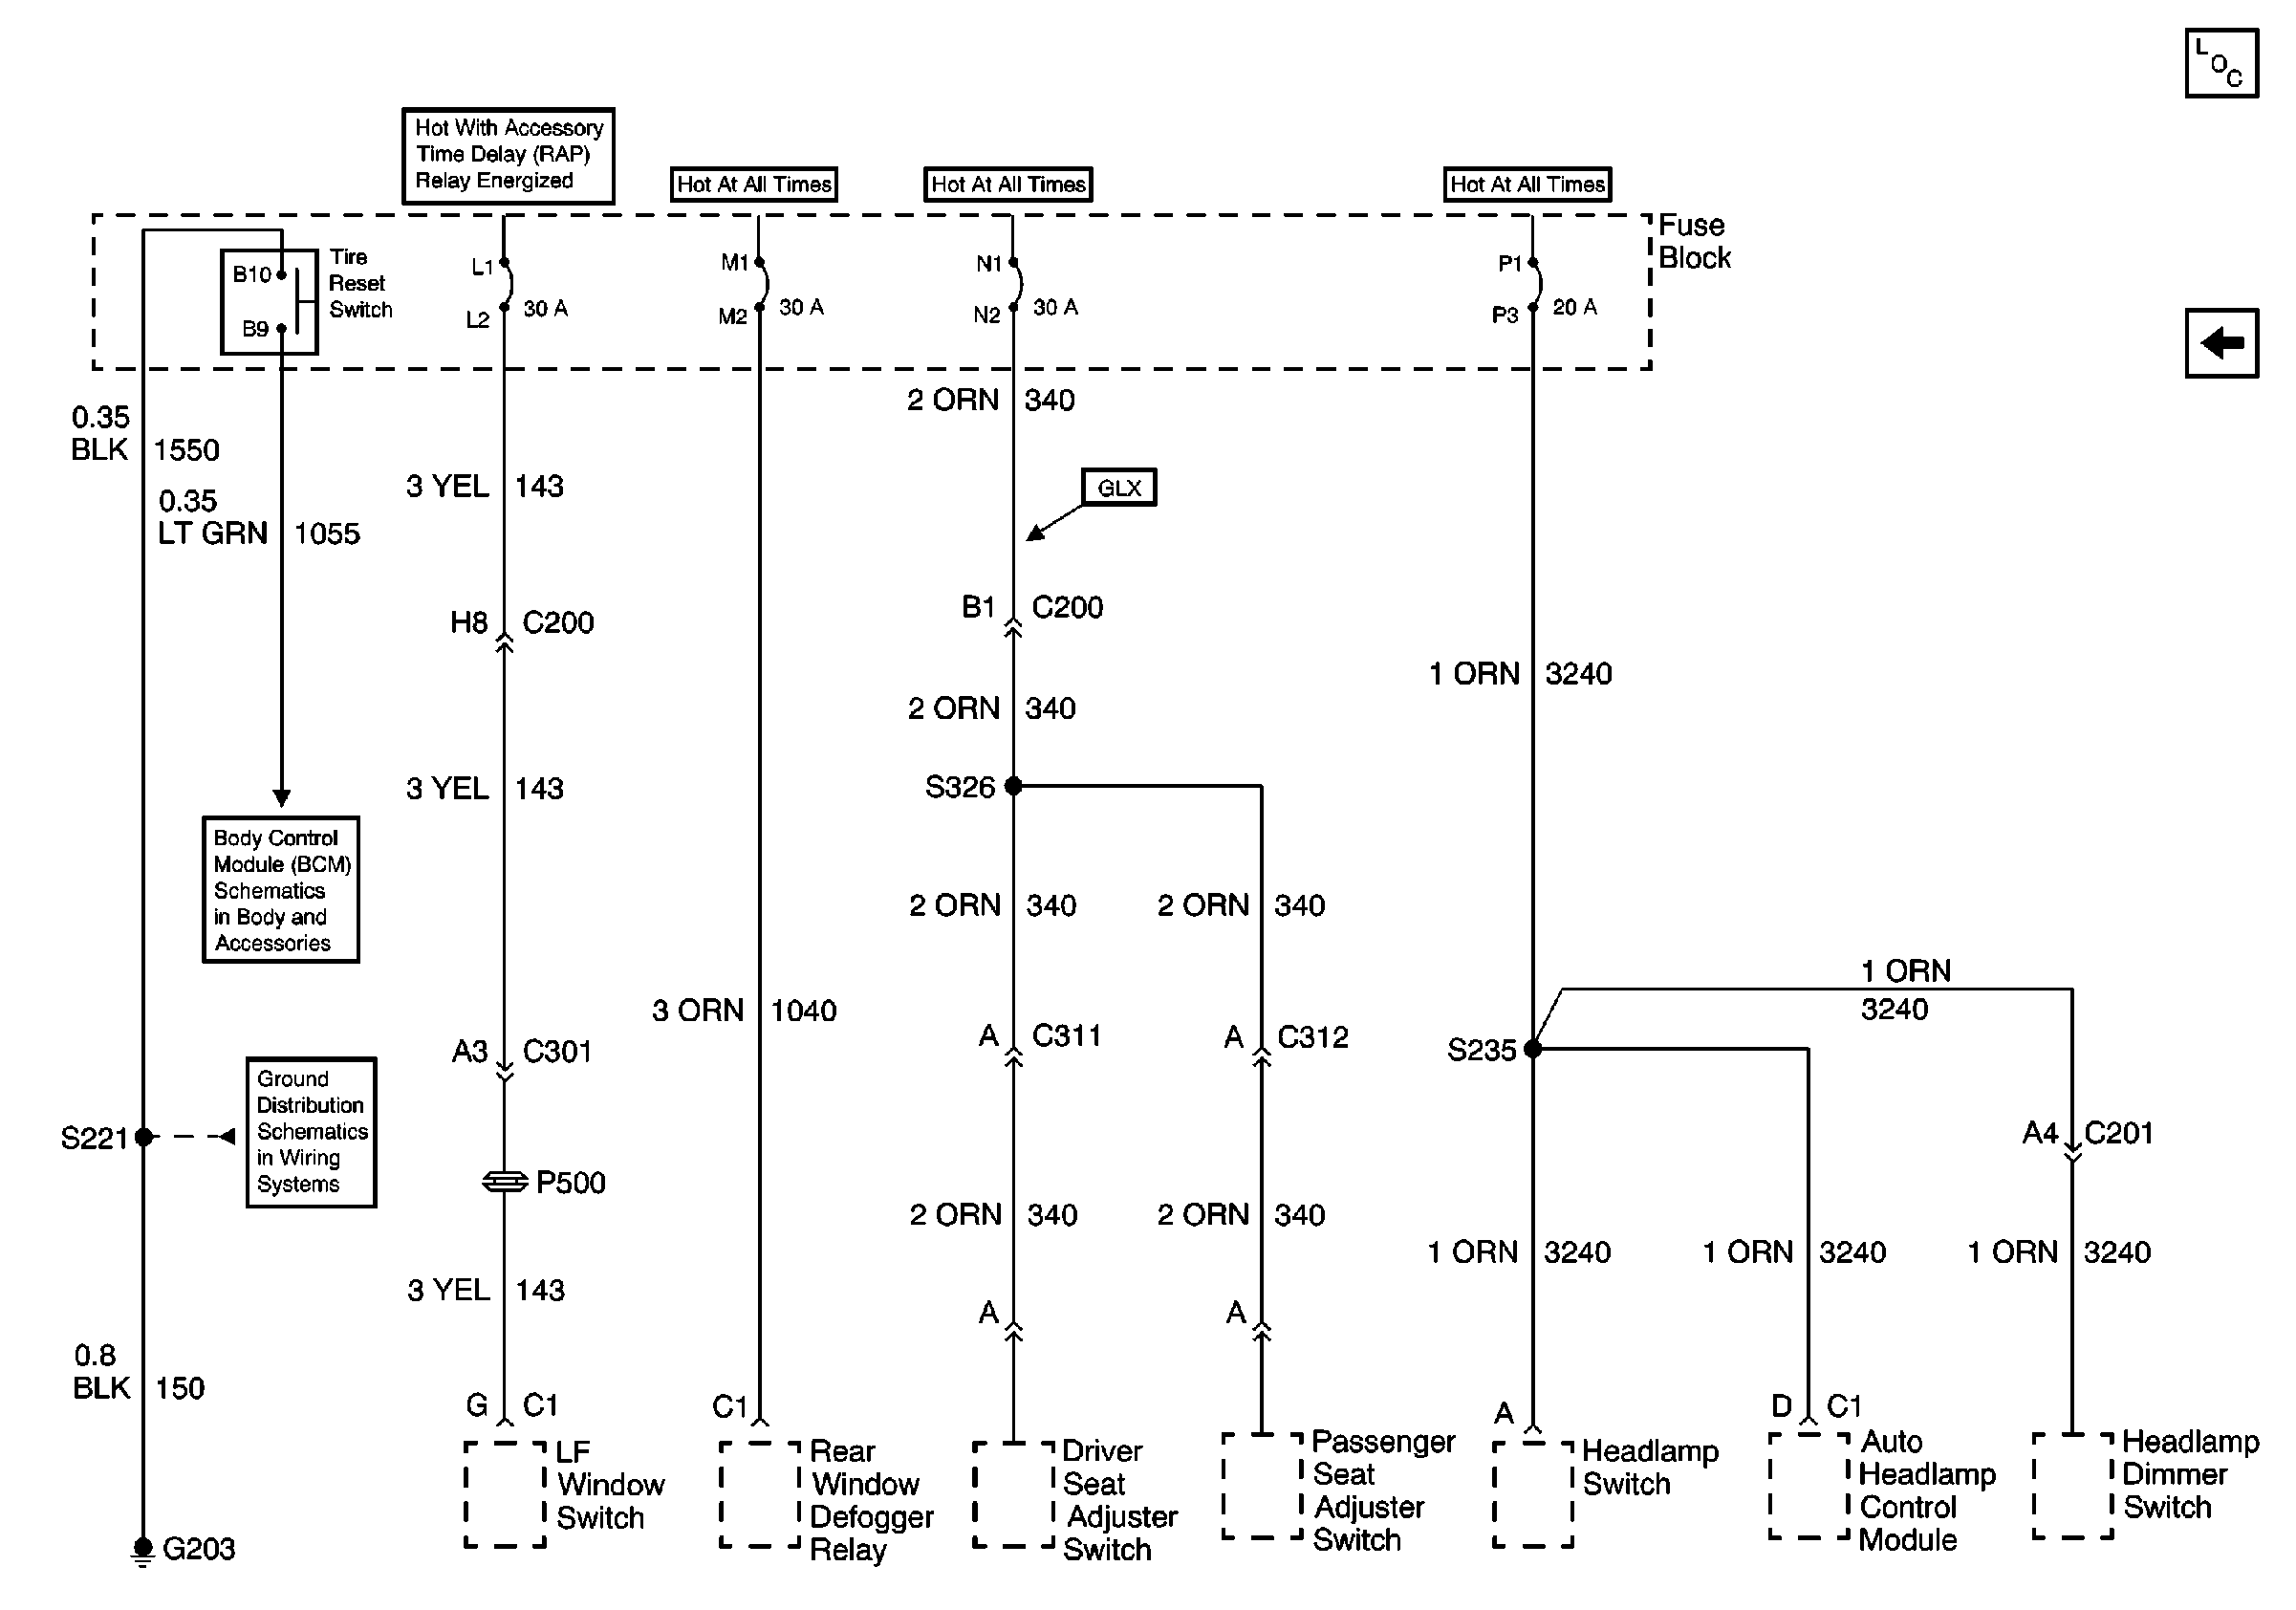
| Figure 17: |
Fuse Block Details
|
| Figure 18: |
Fuse Block, UAWJB Radio and Cluster
|
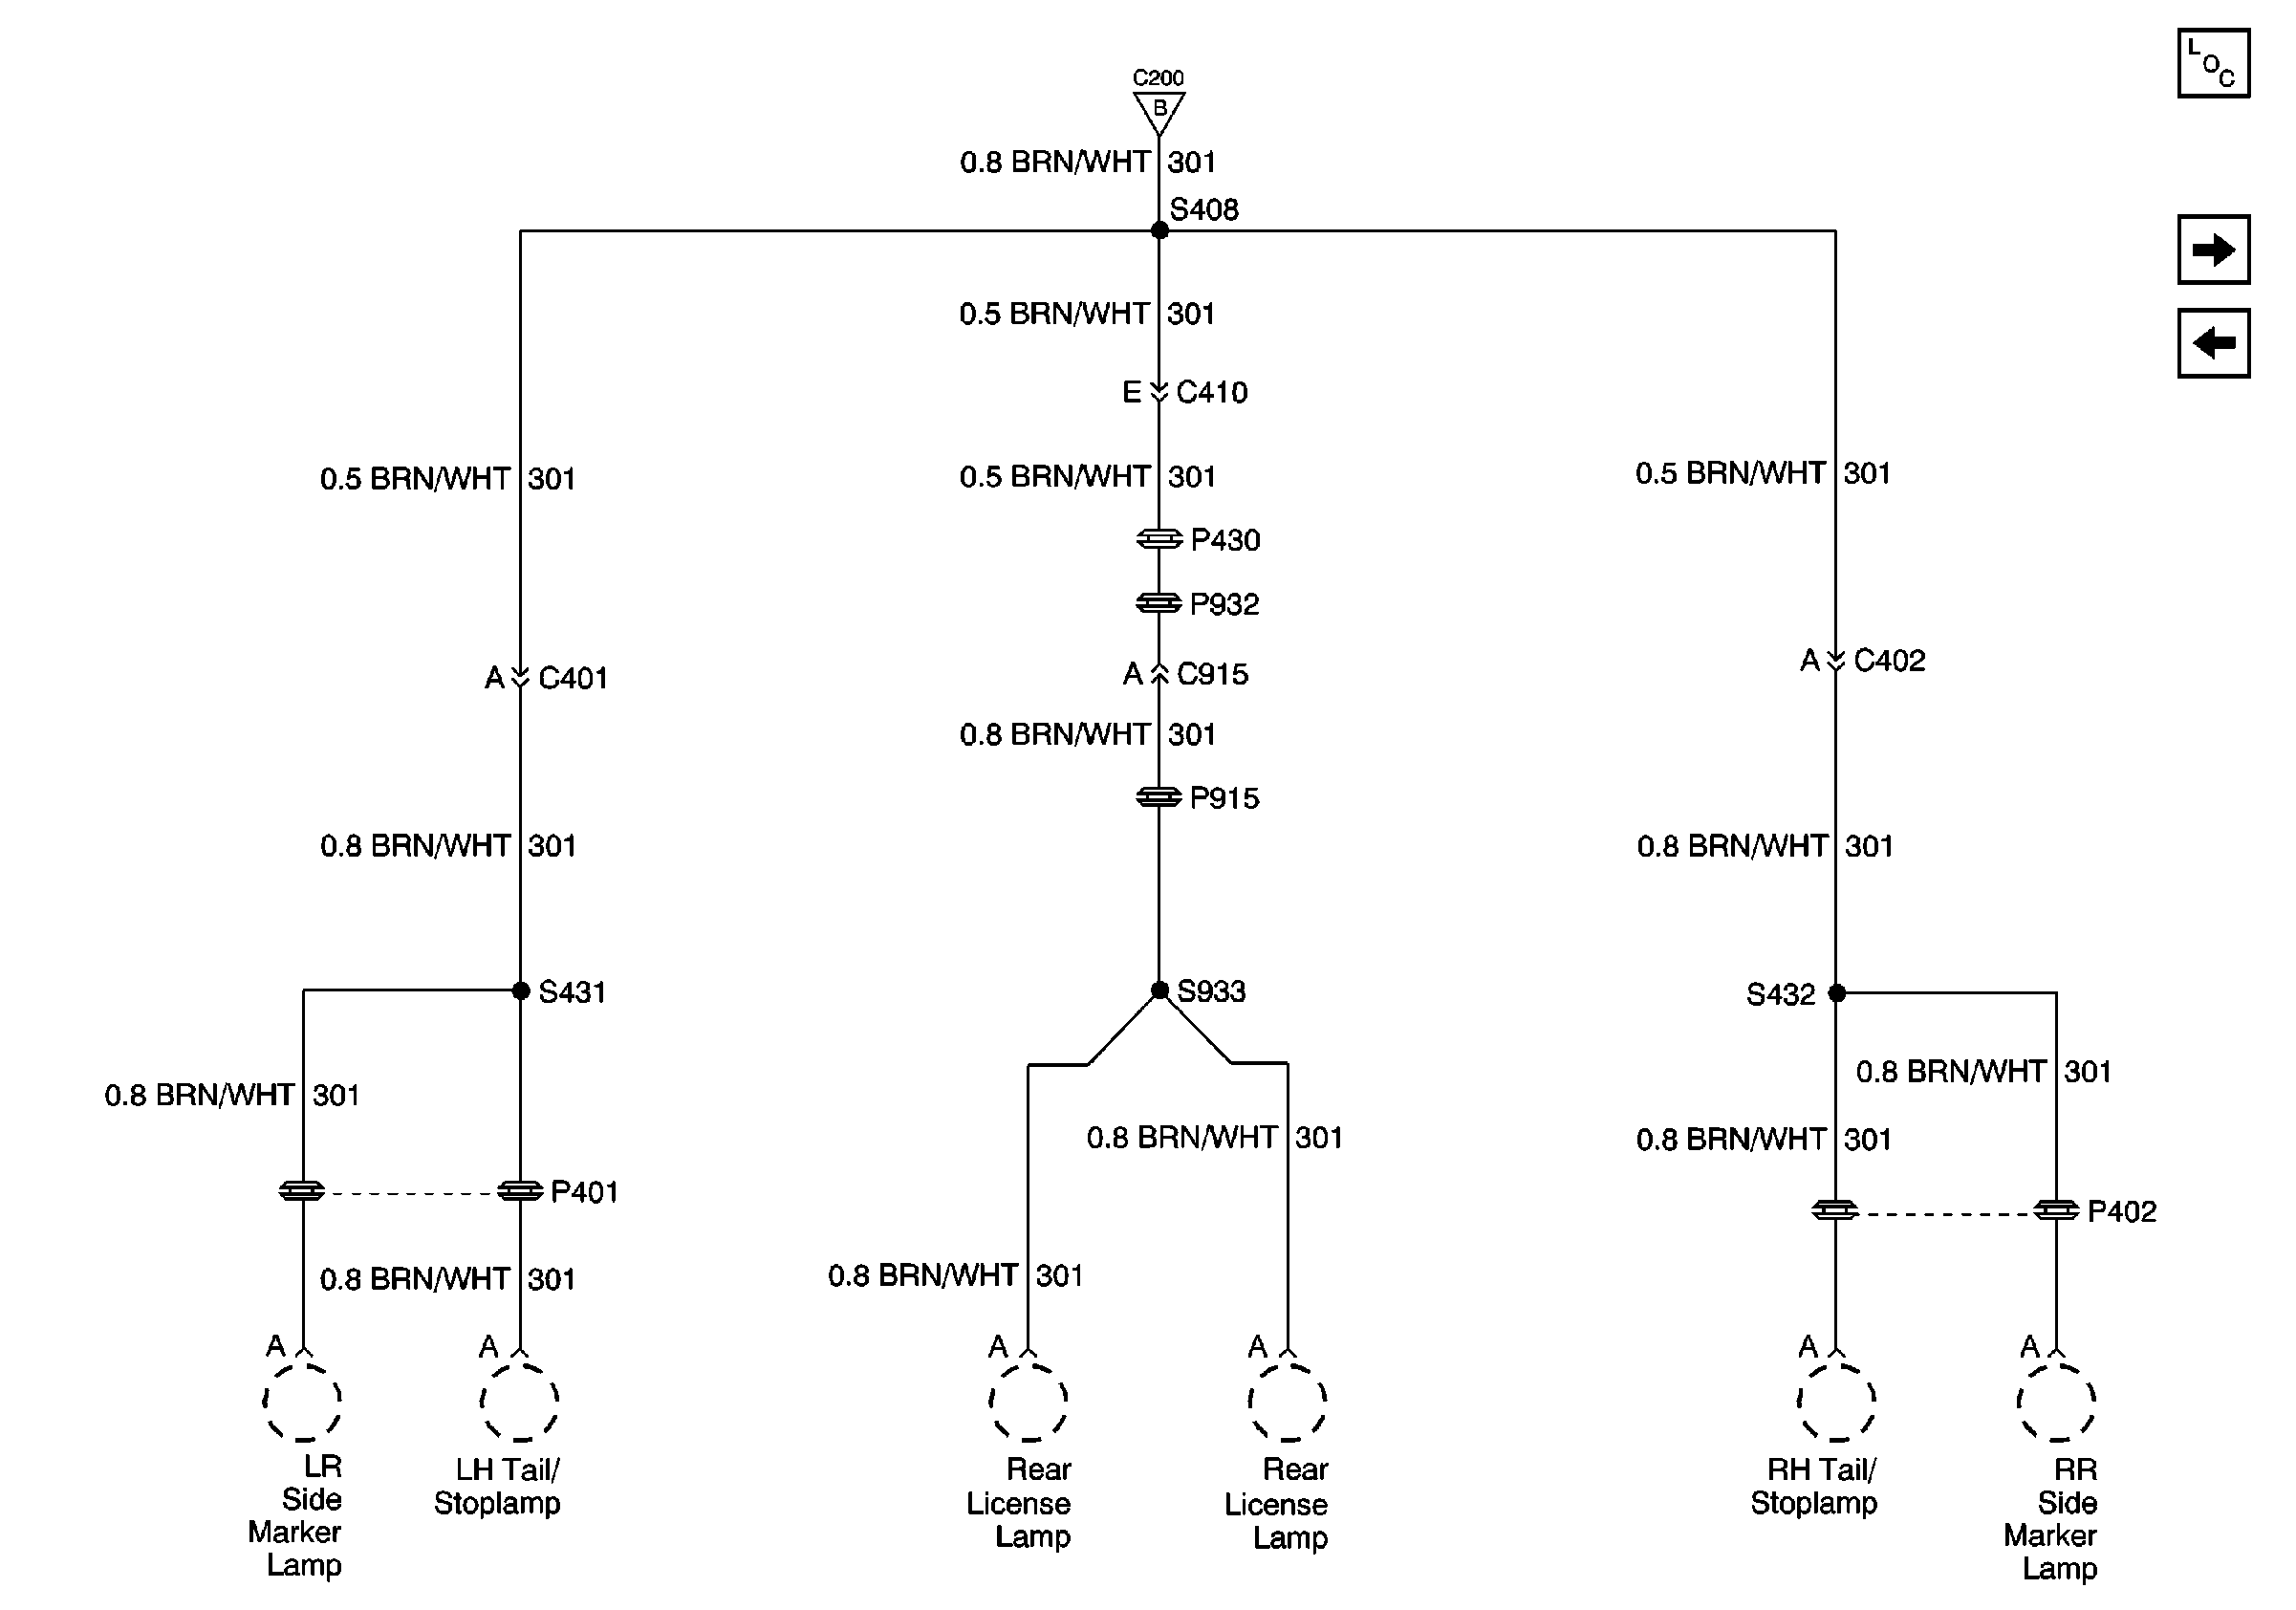
| Figure 19: |
Fuse Block and Rear Lights
|
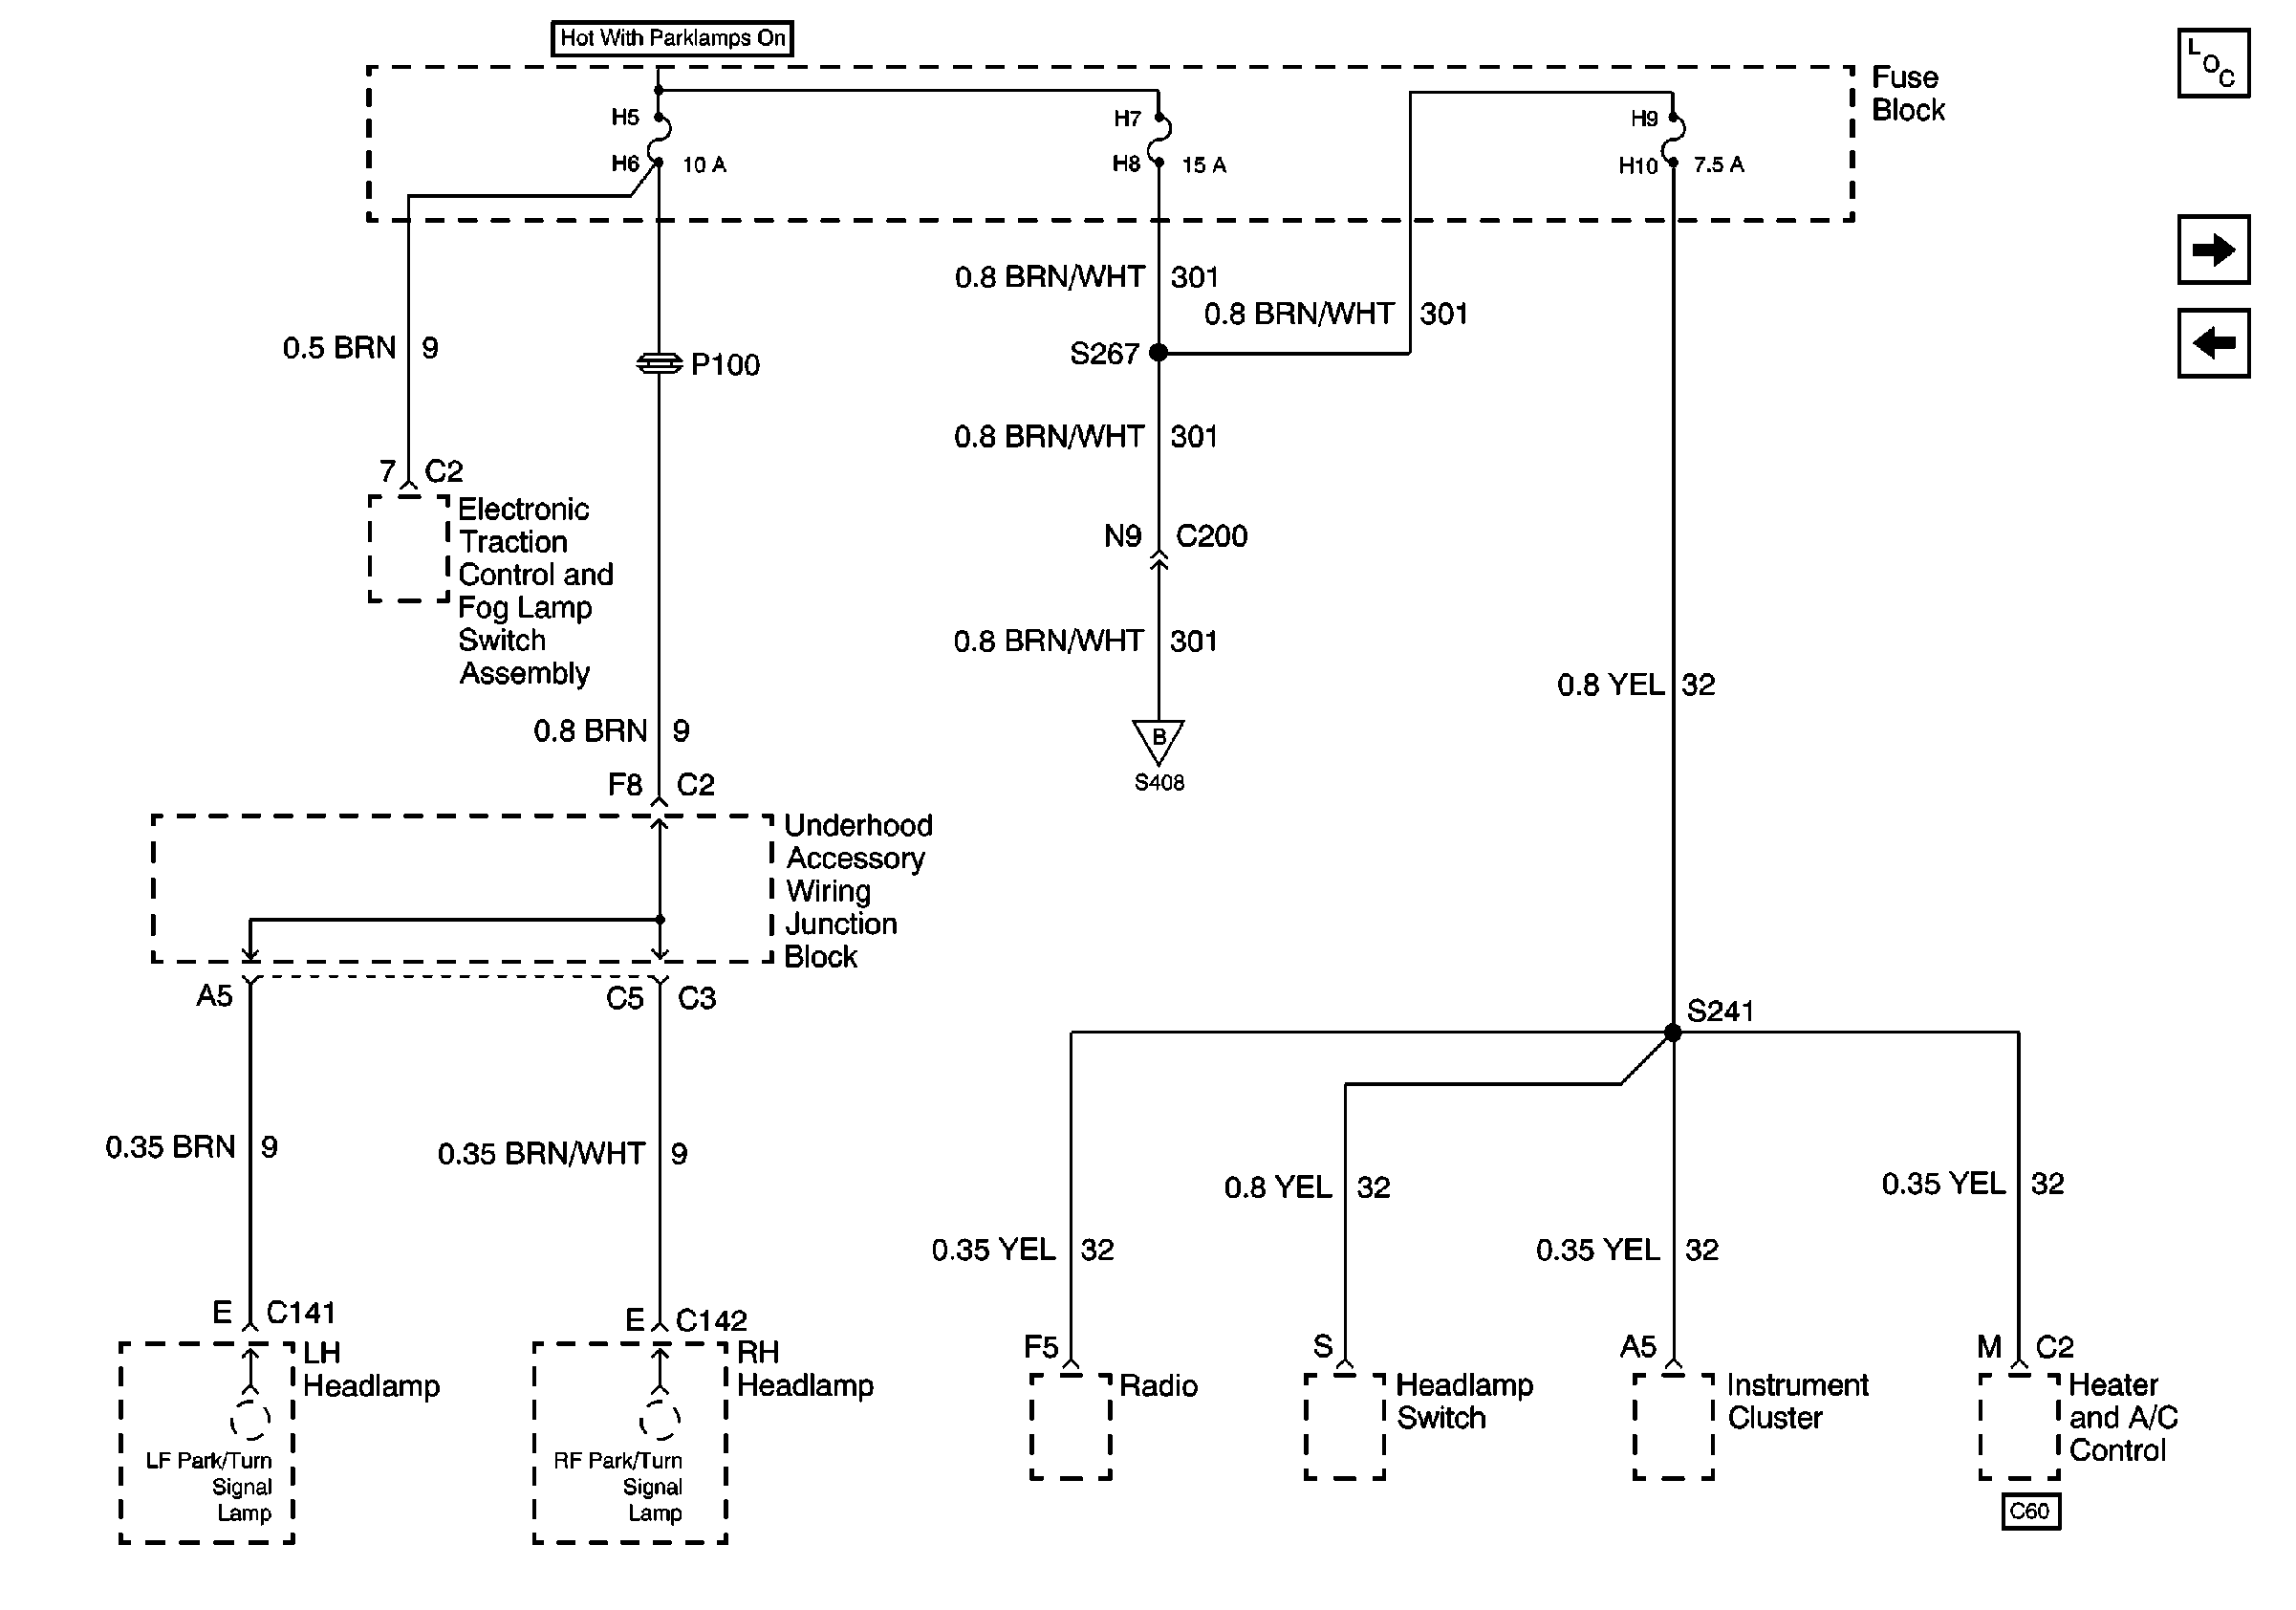
| Figure 20: |
Fuse Block, Headlamps and LF Window Switch
|
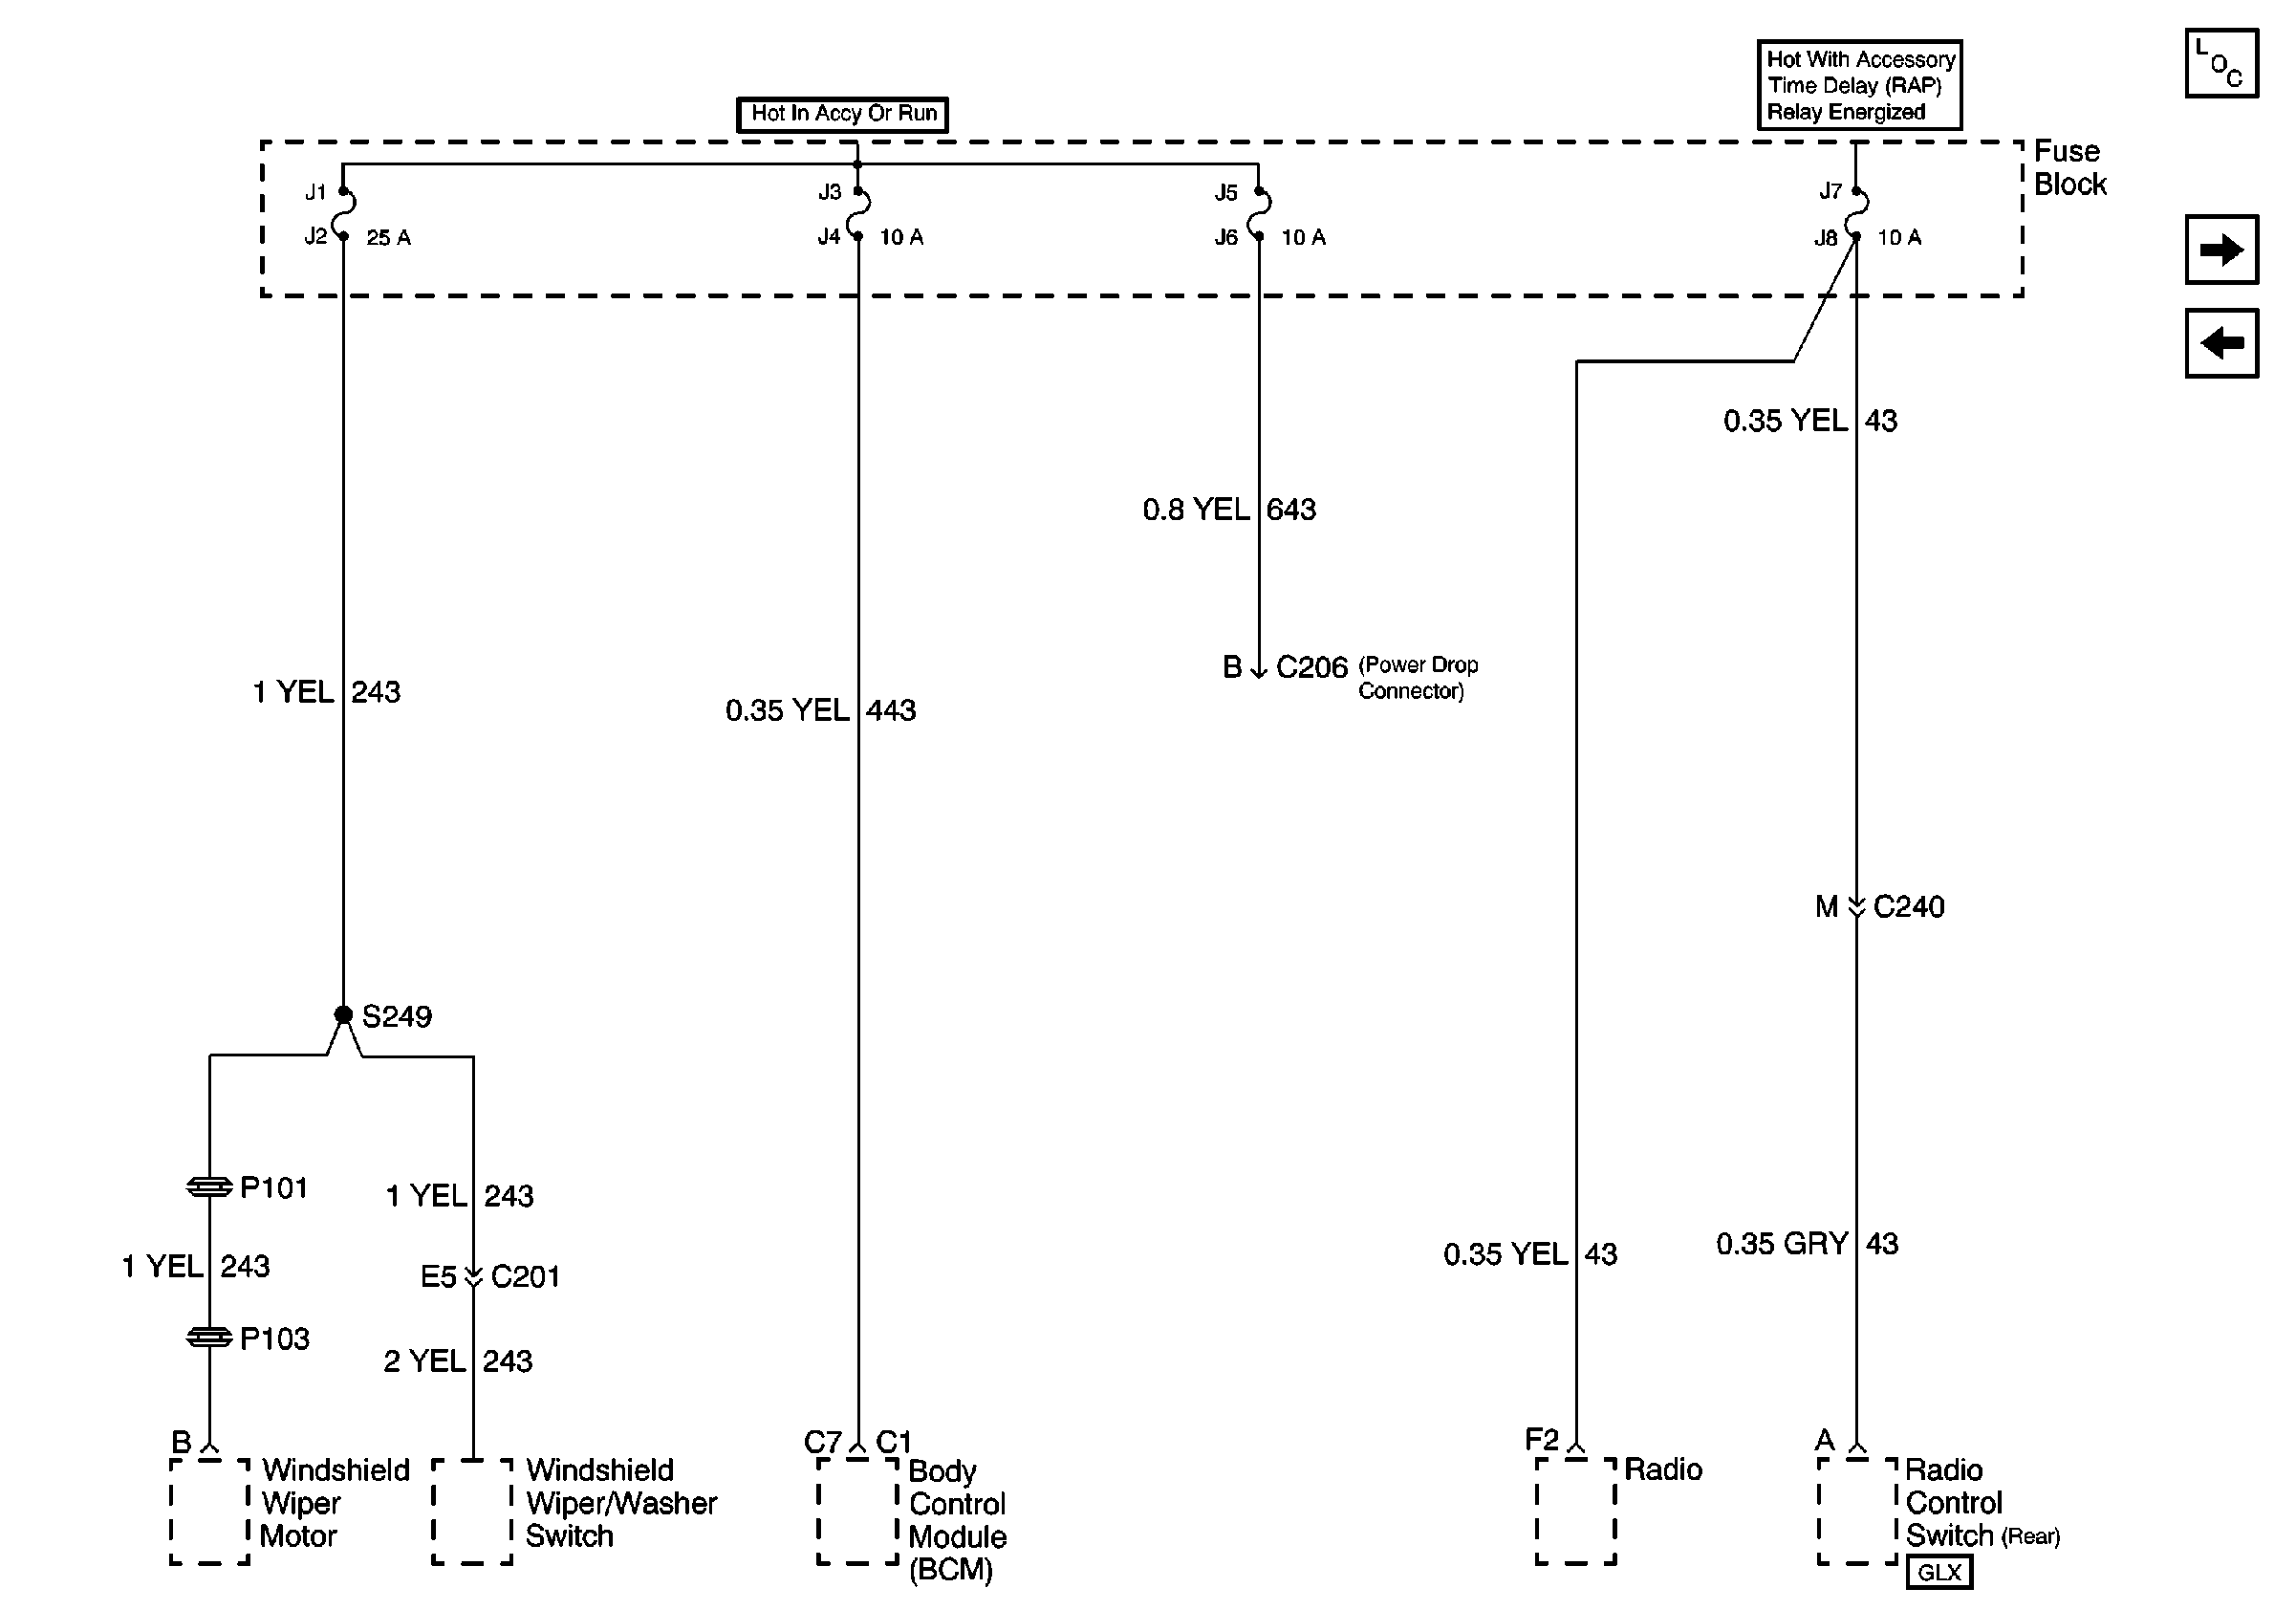
| Figure 21: |
Fuse Block, Wiper/Washer, BCM and Radio Controls
|
