Headlamp Replacement Traverse with TVP

Callout | Component Name |
|---|---|
Preliminary ProcedureRemove the front bumper fascia. Refer to Front Bumper Fascia Replacement. | |
1 | Fender Brace Bolt to Headlamp Caution: Refer to Fastener Caution in the Preface section. Tighten |
2 | Headlamp Bolt Tighten |
3 | Headlamp Horizontal and Vertical Adjusting Cam Nut Bolt (Qty: 2) Procedure
|
4 | Headlamp Assembly Warning: Refer to Halogen Bulb Warning in the Preface section. Procedure
|
Headlamp Replacement Acadia
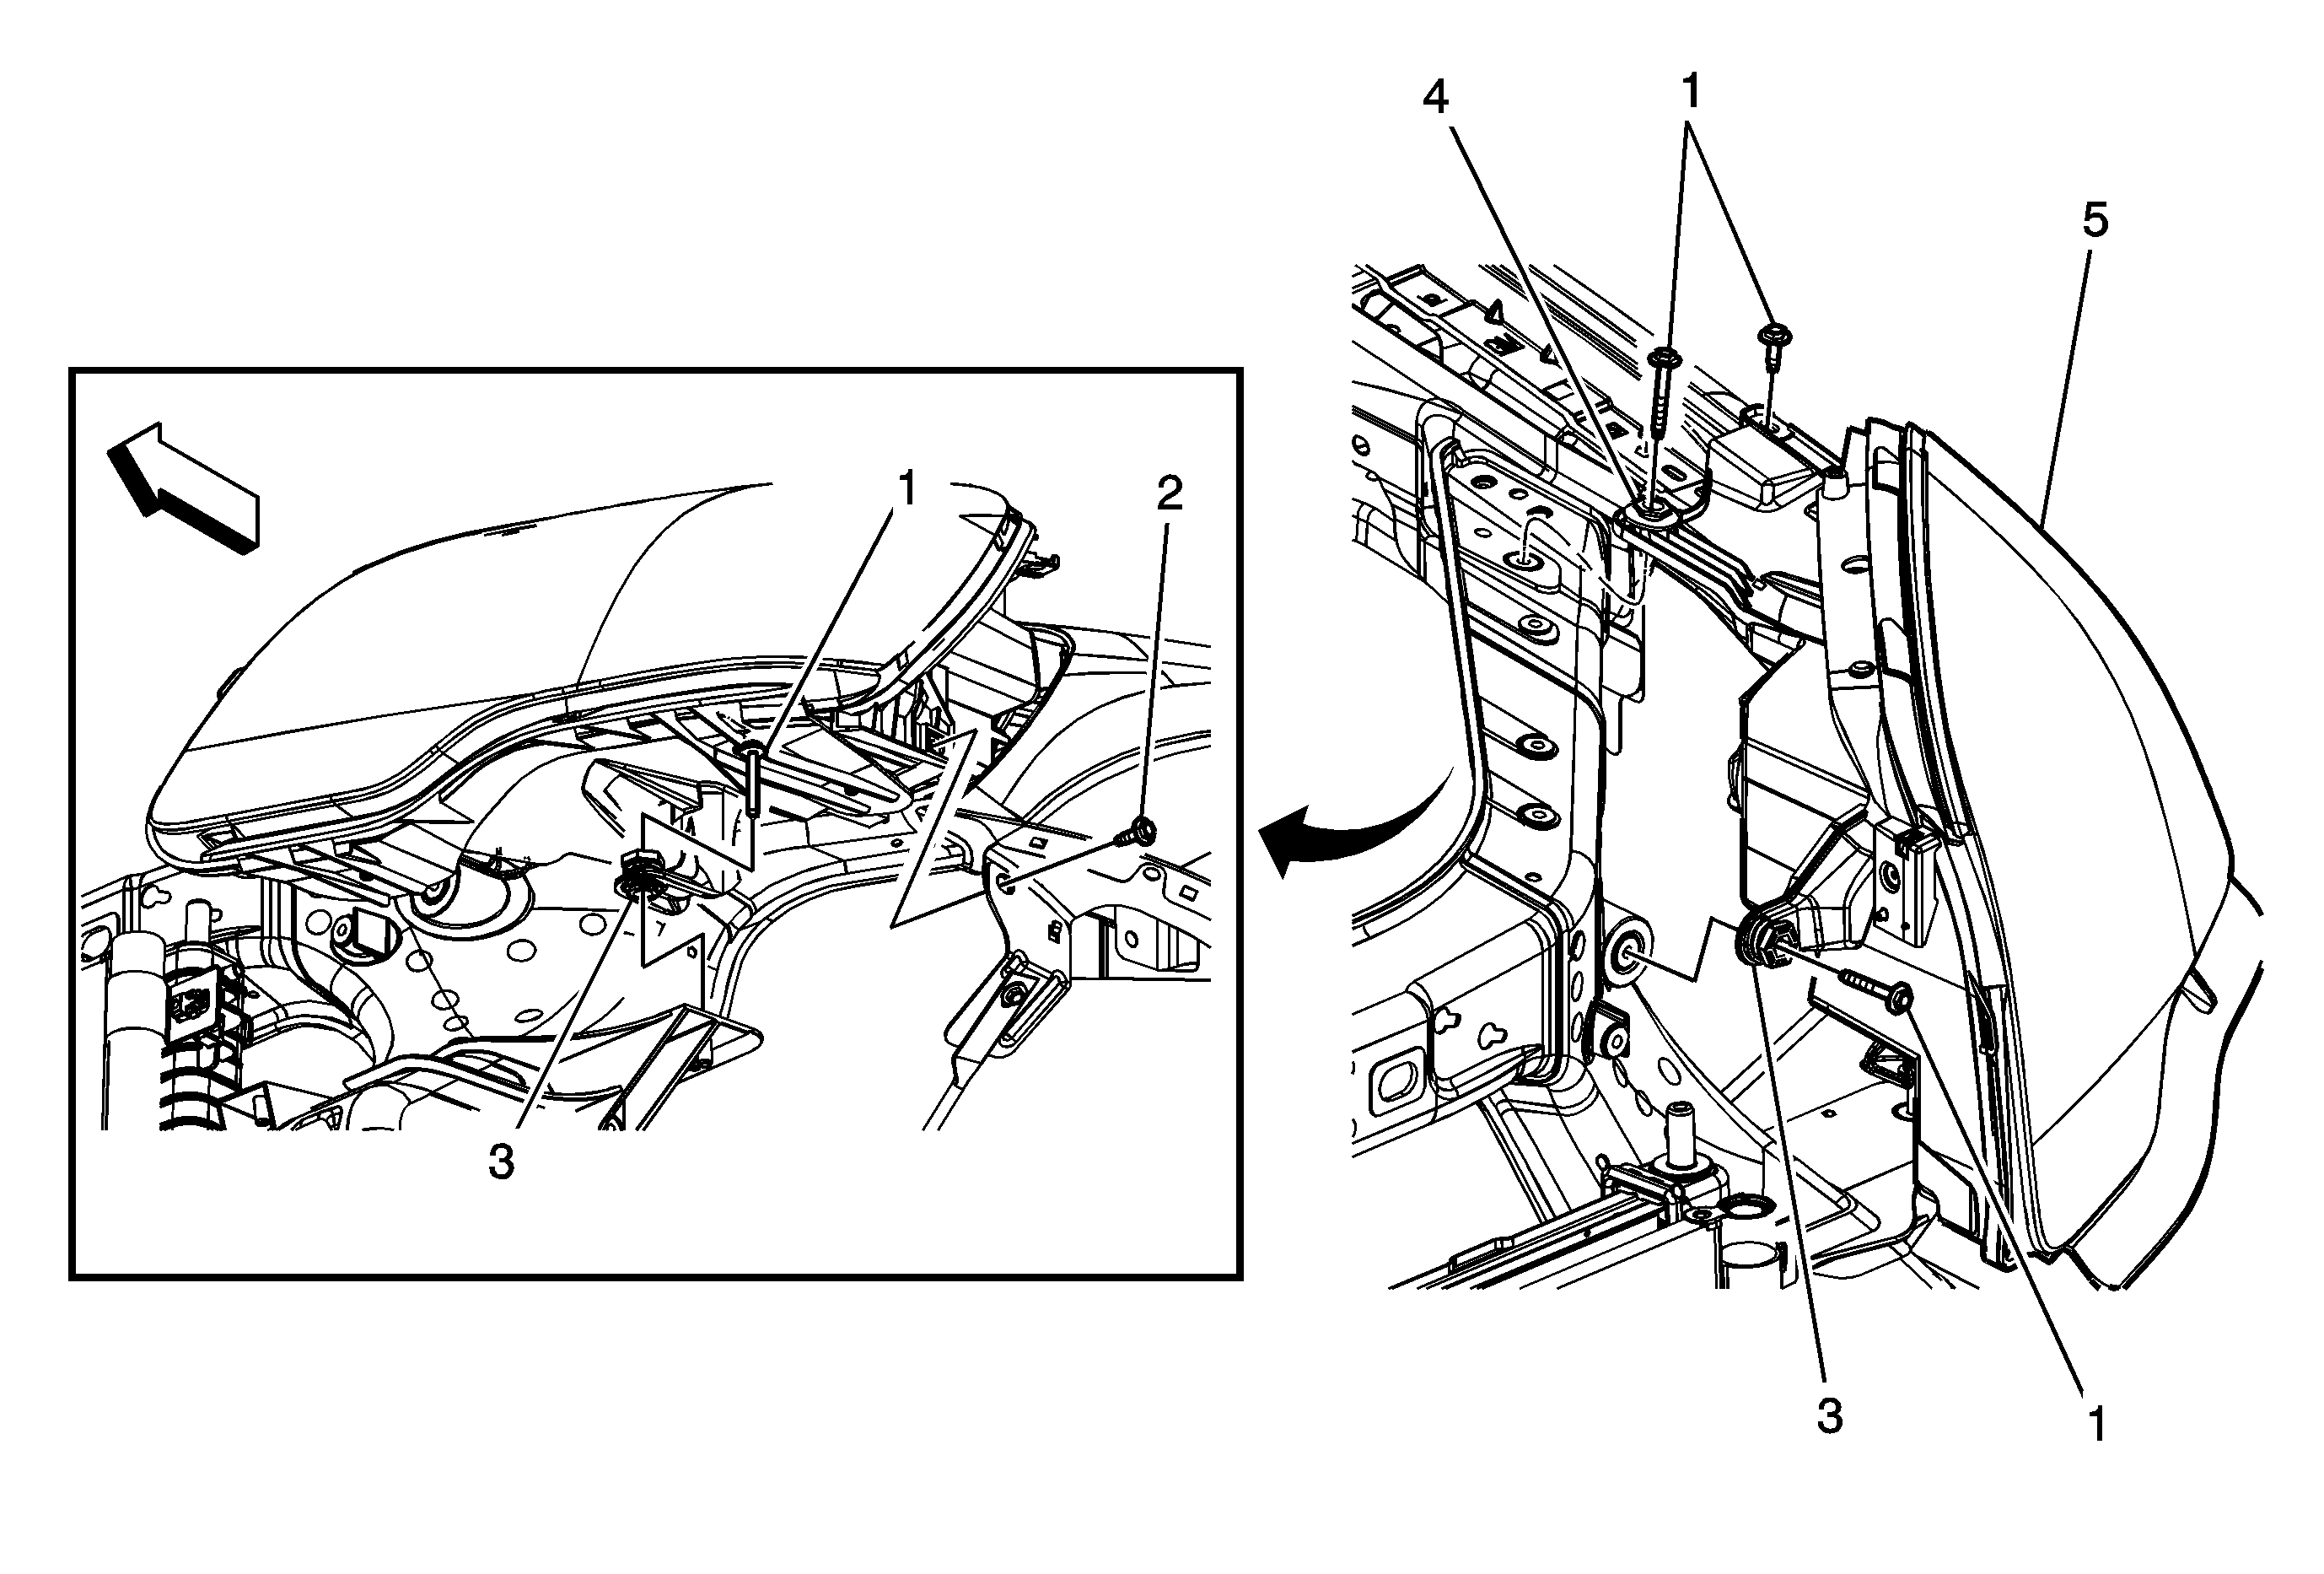
Callout | Component Name |
|---|---|
Preliminary ProcedureRemove the front bumper fascia. Refer to Front Bumper Fascia Replacement. | |
1 | Headlamp Screws (Qty: 4) Caution: Refer to Fastener Caution in the Preface section. Tighten |
2 | Fender Brace Screw to Headlamp Tighten |
3 | Headlamp Horizontal and Vertical Adjustment Nuts (Qty: 2) Procedure
|
4 | Headlamp Vertical Adjusting Bolt Bushing |
5 | Headlamp Assembly Procedure
|
Headlamp Replacement Enclave
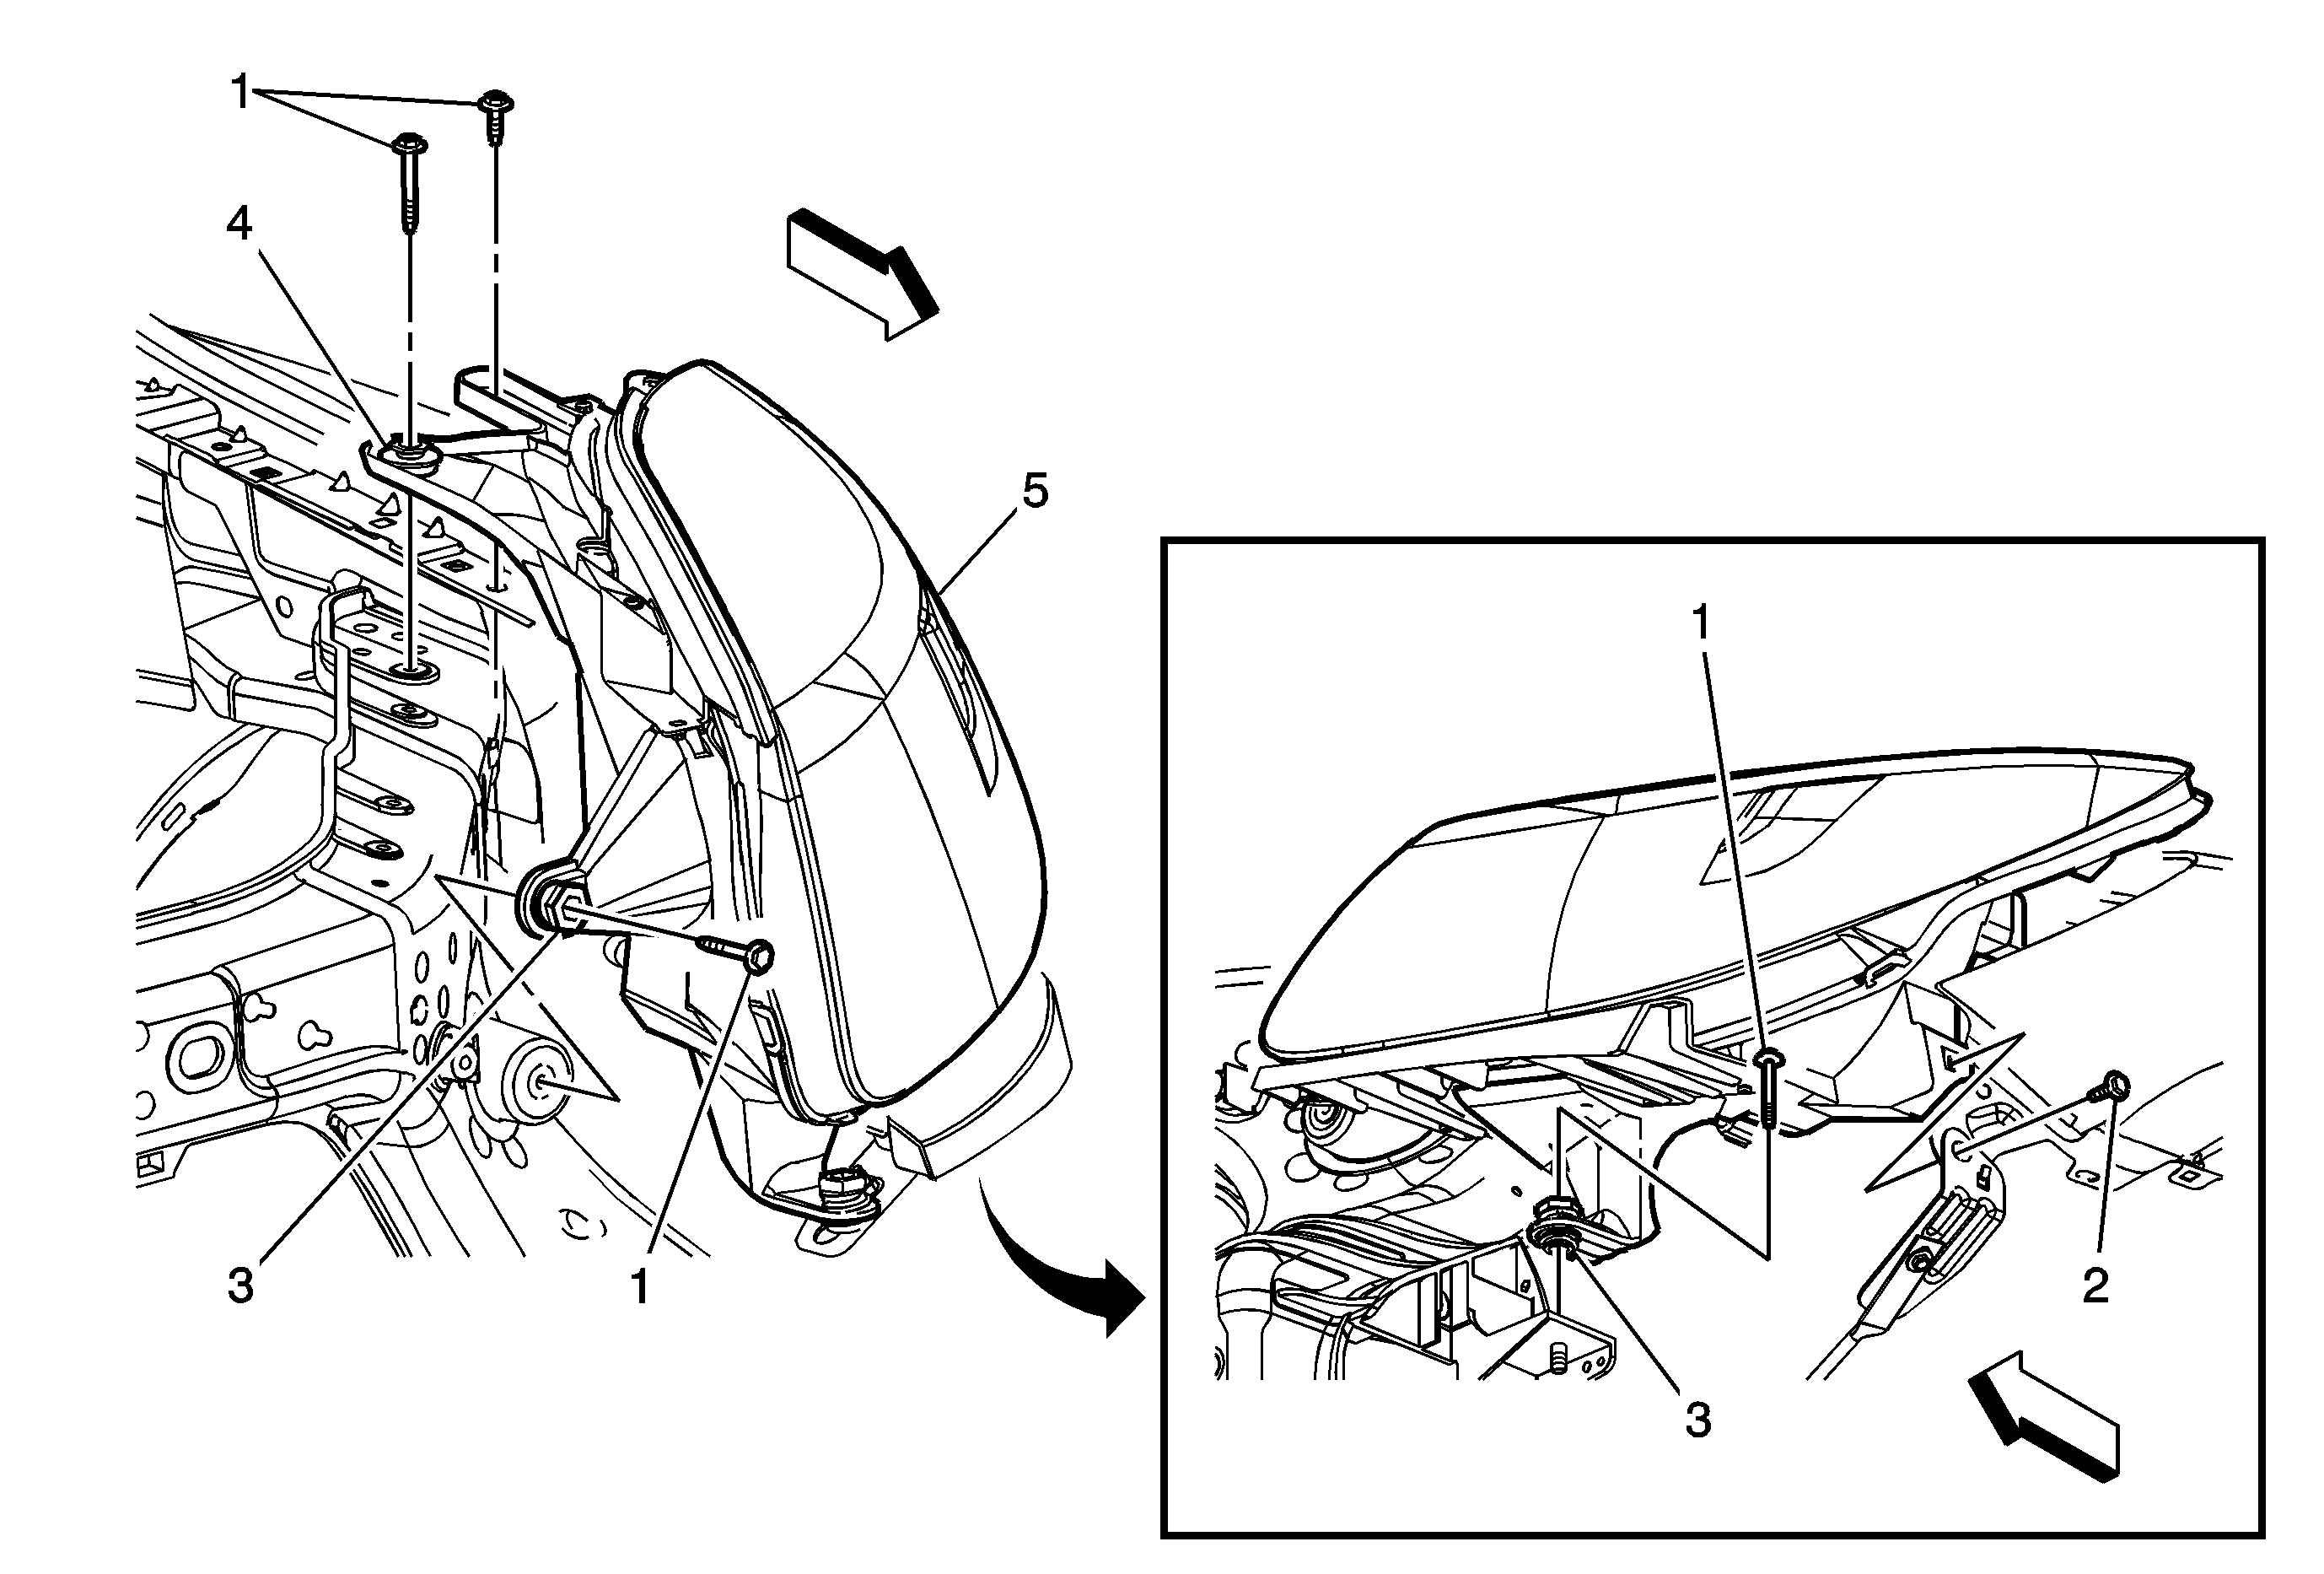
Callout | Component Name |
|---|---|
Preliminary ProcedureRemove the front bumper fascia. Refer to Front Bumper Fascia Replacement. | |
1 | Headlamp Bolt (Qty: 4) Caution: Refer to Fastener Caution in the Preface section. Tighten |
2 | Fender Brace Bolt to Headlamp Tighten |
3 | Headlamp Horizontal and Vertical Adjustment Nuts (Qty: 2) Procedure
|
4 | Headlamp Vertical Adjusting Bolt Bushing |
5 | Headlamp Assembly Procedure
|
Headlamp Replacement OUTLOOK
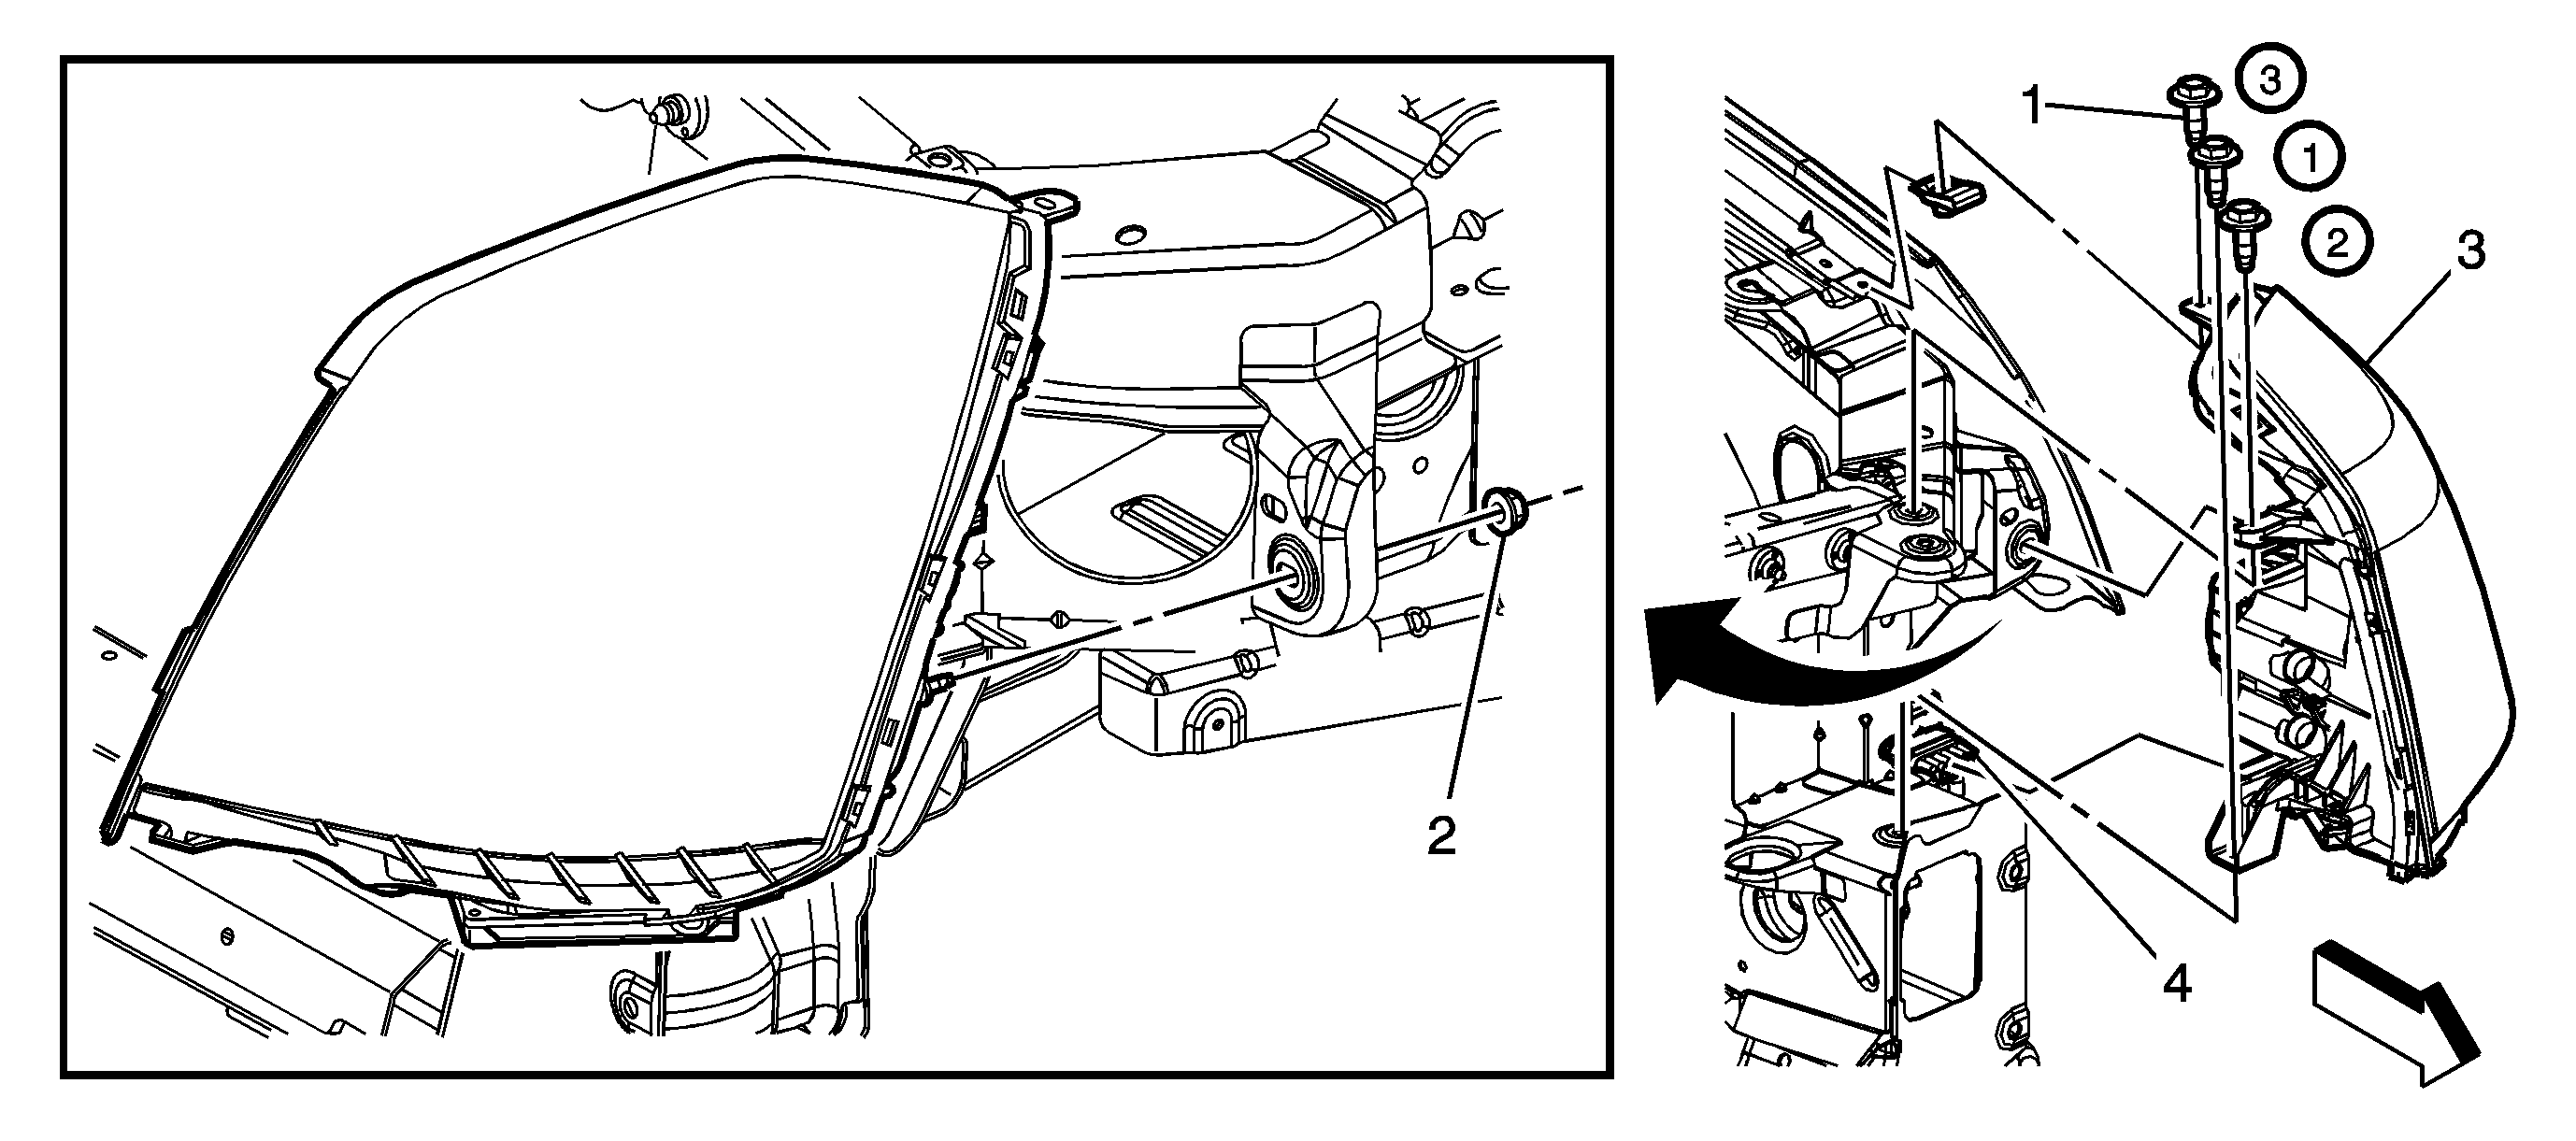
Callout | Component Name |
|---|---|
Preliminary ProcedureRemove the front bumper fascia. Refer to Front Bumper Fascia Replacement. | |
1 | Headlamp Assembly Bolt (Qty: 3) Caution: Refer to Fastener Caution in the Preface section. Tip Tighten |
2 | Headlamp Assembly Nut Tighten |
3 | Headlamp Assembly ProcedurePull outward on the housing in order to disconnect the electrical connection at the lower rear edge of the lamp. |
4 | Electrical Harness Connector ProcedureDisconnect the electrical connector from the headlamp assembly. |
