Tools Required
| • | J 39511
Countershaft Bearing Installer |
Important: Do not mix up the synchronizer components. All of the parts should be installed in their original locations.
- Remove the
87 92 103
from 1st gear and the 1st/2nd gear synchronized sleeve.
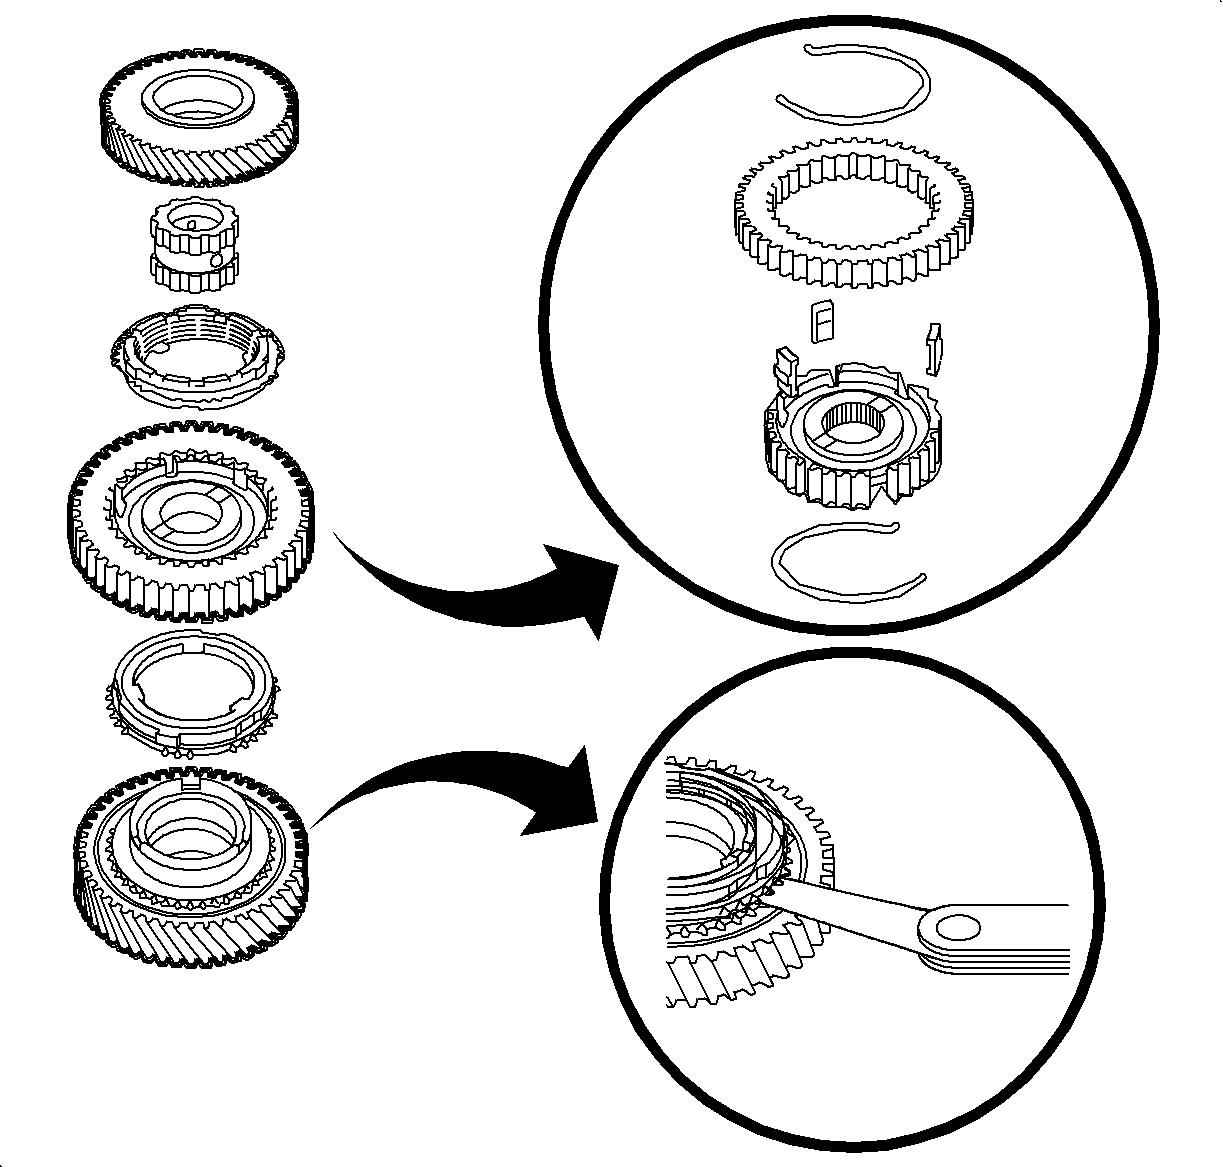
- Remove the 2nd driven gear and bushing.
- Remove the 2nd gear synchronizer assembly, blocking ring, and inner and outer cones.
Important: Mark the top of 1st/2nd gear synchronizer hub to orient the part correctly during assembly.
- After marking the top of 1st/2nd gear synchronizer hub, turn over the assembly and remove the 1st gear.
- Remove the 1st gear synchronizer assembly, blocking ring, and inner and outer cones.
- Remove the 1st gear synchronizer springs.
- Turn hub and sleeve over and remove the remaining synchronizer spring and inserts.
- Remove the hub sleeve.
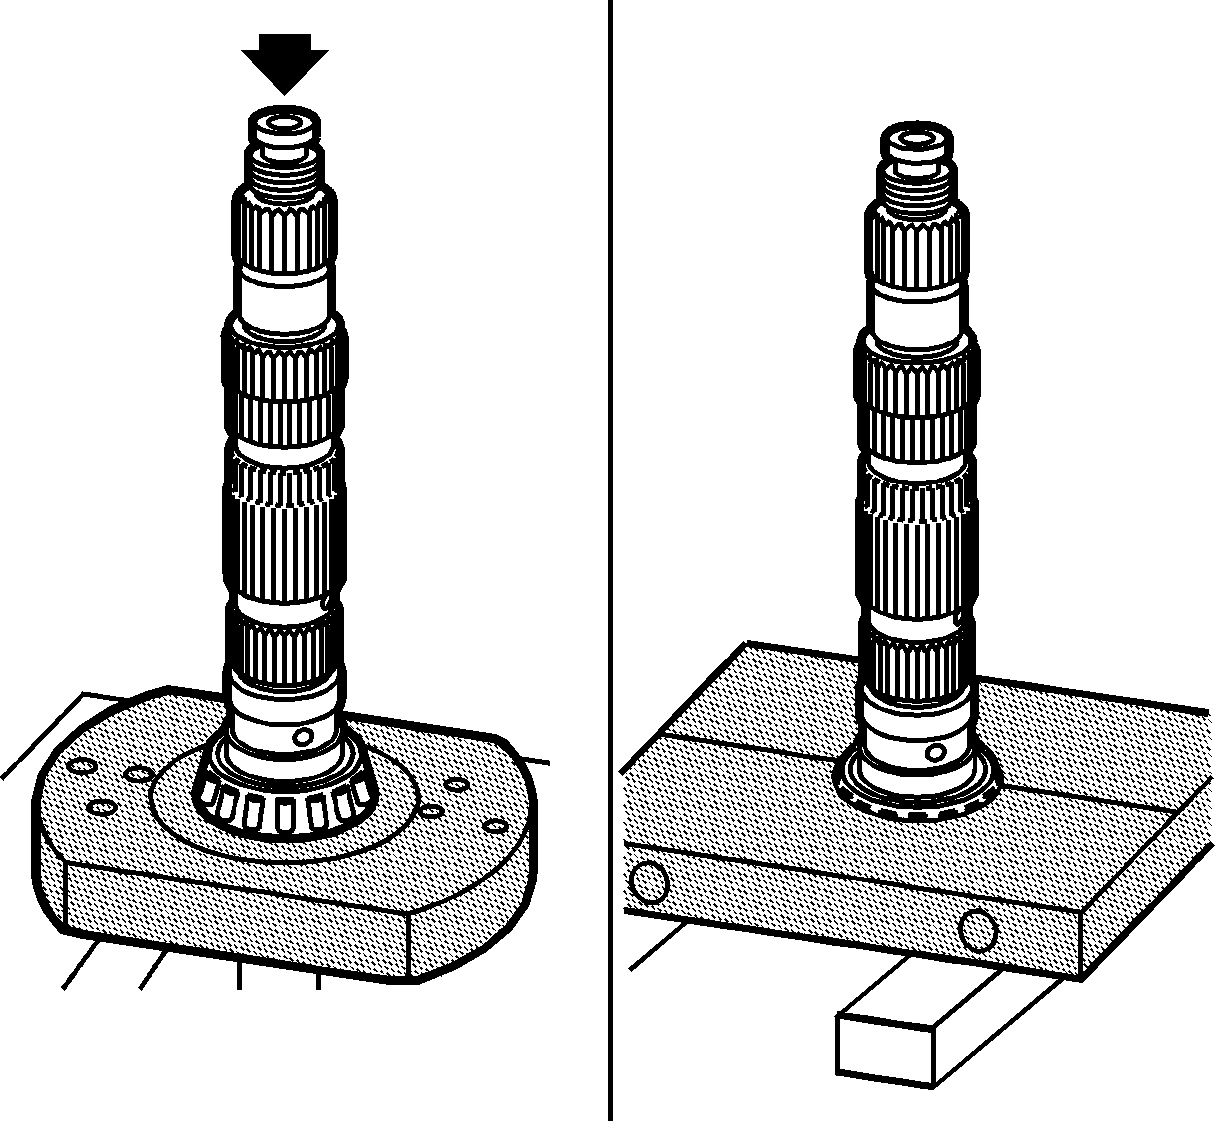
- Remove the output shaft bearing using the
J 39511
in a hydraulic press.
- Inspect the conditions of the gears and synchronizers. Refer to
Synchronizers Cleaning and Inspection
.
