For 1990-2009 cars only
Shock Absorber Replacement IRS
Removal Procedure
- Raise and support the vehicle. Refer to Lifting and Jacking the Vehicle in General Information.
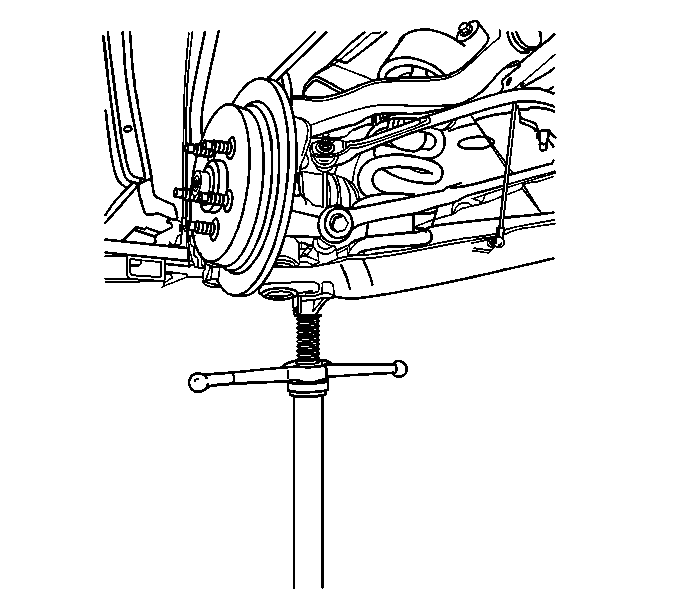
- Use a utility stand in order to slightly compress the coil spring and relieve the tension on the shock absorber.
- If the vehicle is equipped with automatic level control, disconnect the air tube connector from the shock absorber.
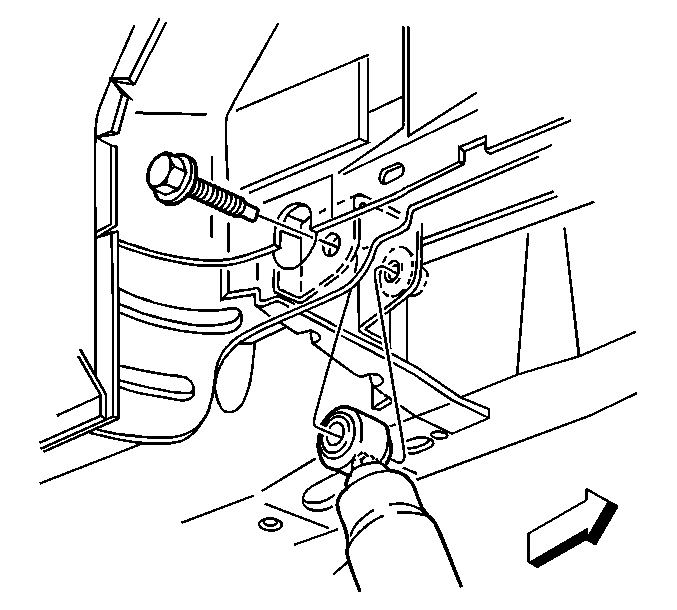
- Remove the shock absorber upper bolt and nut.
- Remove the shock absorber lower bolt and nut.
- Remove the shock absorber.

Installation Procedure
- Install the shock absorber.
- Install the shock absorber bolts and nuts.
- If the vehicle is equipped with automatic level control, install the air tube connector to the shock absorber.
- Remove the utility stand from the rear axle.
- Lower the vehicle.

Notice: Refer to Fastener Notice in the Preface section.
Tighten
Tighten the shock absorber nuts to 90 N·m (66 lb ft).
Shock Absorber Replacement All Wheel Drive
Removal Procedure
- Raise and support the vehicle. Refer to Lifting and Jacking the Vehicle in General Information.
- Use a utility stand in order to slightly compress the coil spring and relieve tension on the shock absorber.
- If the vehicle is equipped with automatic level control, disconnect the air tube connector from the shock absorber.
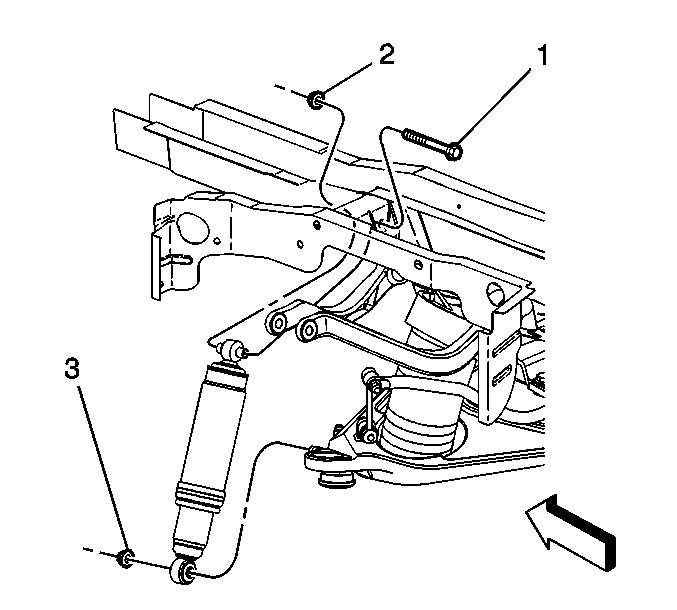
- Remove the shock absorber upper bolt (1).
- Remove the shock absorber lower nut (3).
- Remove the shock absorber.


Installation Procedure
- Install the shock absorber.
- Install the shock absorber upper bolt (1).
- Install the shock absorber lower nut.
- If the vehicle is equipped with automatic level control, install the air tube connector to the shock absorber.
- Remove the utility stand.
- Lower the vehicle.

Notice: Refer to Fastener Notice in the Preface section.
Tighten
Tighten the shock absorber bolt (2 and 3)
to 85 N·m (63 lb ft).
Tighten
Tighten the shock absorber nut to 85 N·m
(63 lb ft).
