Removal Procedure
Important: There is no service interval for in-pipe fuel filter replacement. Only
replace the in-pipe fuel filter if it is restricted.
- Relieve the fuel system pressure, refer to the
Servicing Quick Connect Fittings
4.0L,
Fuel Pressure Relief
3.8L.
- Raise the vehicle.
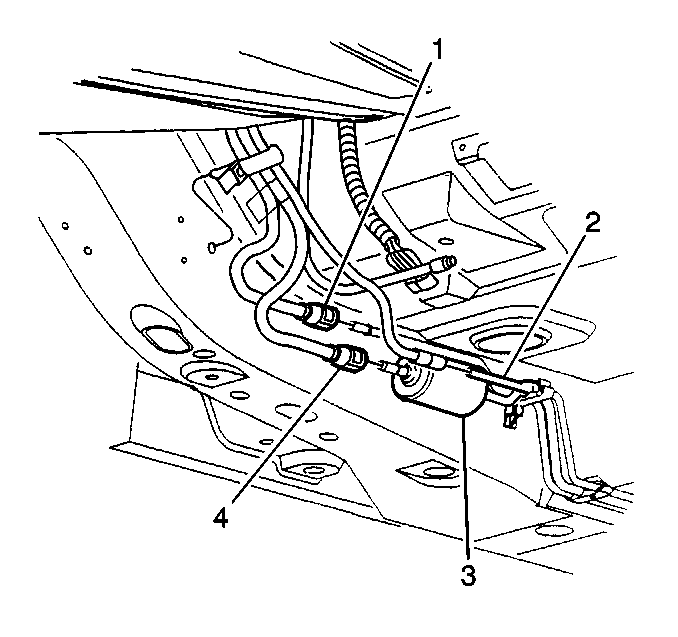
- Remove the fuel feed quick-connect fitting (4) at the inlet of
the in-pipe fuel filter (3). Refer to
Servicing Quick Connect Fittings
4.0L,
Servicing Quick Connect Fittings
3.8L.
- Remove the threaded fitting at the outlet of the in-pipe fuel
filter (3).
- Drain any remaining fuel into an approved gasoline container.
- Inspect the lines for cuts, swelling, cracks, and distortion.
Replace the lines as required.
- Inspect the fuel vent pipe (2).
- Inspect the fuel return pipe quick connect fitting (1).
Installation Procedure
- Remove the protective caps from the new in-pipe fuel filter.
- Install the new plastic connector retainer on the in-pipe fuel
filter inlet.
- Install the new plastic connector retainer in the same position
as on the old in-pipe fuel filter.
- Slide the in-pipe fuel filter into place.
- Install the quick-connect fitting at the inlet (4) of the in-pipe
fuel filter (3). Refer to
Servicing Quick Connect Fittings
4.0L,
Servicing Quick Connect Fittings
3.8L.
- Install the threaded fitting at the outlet of the in-pipe fuel
filter (3).
Tighten
| • | Use a back-up wrench in order to prevent the in-pipe fuel filter
from turning. |
| • | Reposition the fuel vent pipe. (2) |
| • | Tighten the in-pipe fuel filter outlet nut to 30 N·m
(22 lb. ft.). |
- Lower the vehicle.
- Tighten the fuel tank filler pipe cap.
- Install the negative battery cable.
- Inspect for fuel leaks.
| 10.1. | Turn the ignition switch to the On position for 2 seconds. |
| 10.2. | Turn the ignition switch to the Off for 10 seconds. |
| 10.3. | Turn the ignition switch to the On position. |
| 10.4. | Check for fuel leaks. |
