For 1990-2009 cars only
Air Conditioning Compressor Replacement LX9
Tools Required
J 39400-A Halogen Leak Detector
Removal Procedure
- Recover the refrigerant from the air conditioning (A/C) system. Refer to Refrigerant Recovery and Recharging .
- Disconnect the A/C compressor electrical connector.
- If equipped with a C60 compressor, remove the discharge line (3) to compressor nut (4).
- Remove the suction line (5) to compressor nut (4).
- Remove the discharge (3) and suction (5) lines from the compressor.
- Remove and discard the sealing washers (2).
- If equipped with a C69 compressor, remove the discharge line (5) to compressor nut (4).
- Remove the suction line (2) to compressor nut (1).
- Remove the discharge (5) and suction (5) lines from the compressor.
- Remove and discard the sealing washers (3).
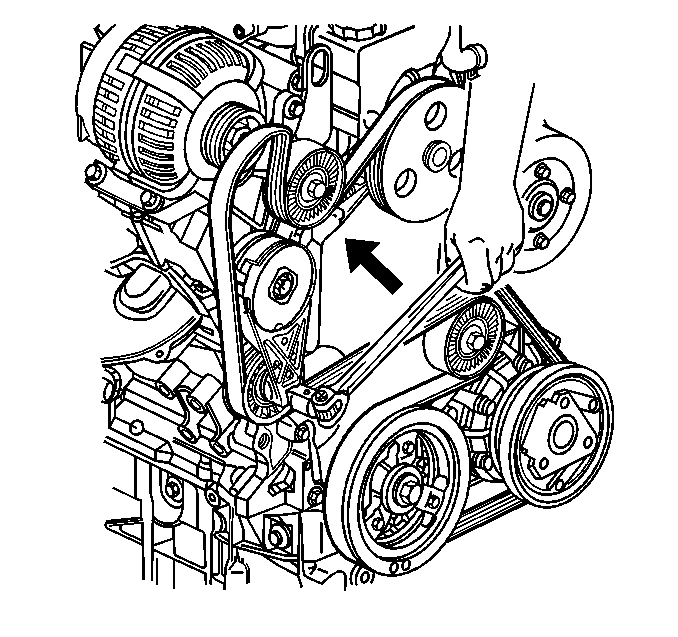
- Release the drive belt tensioner.
- Remove the drive belt from the generator pulley.
- Remove the drive belt from the A/C compressor.
- Raise and support the vehicle. Refer to Lifting and Jacking the Vehicle .
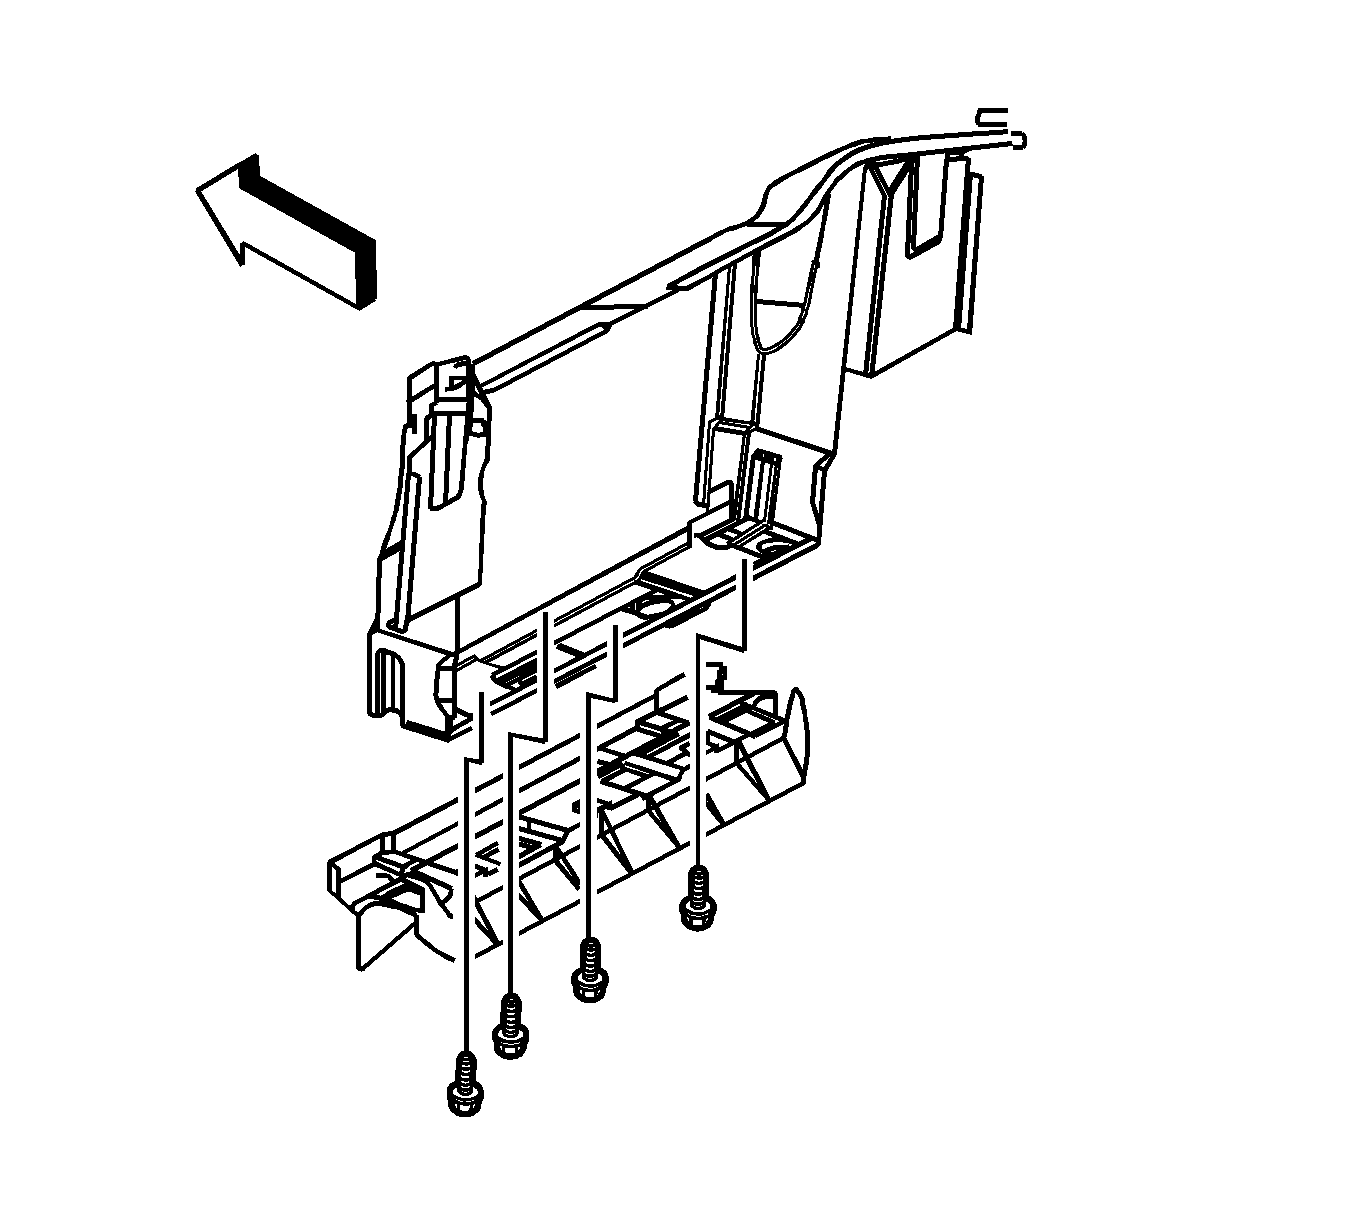
- Remove the air deflector bolts and deflector.
- Remove the passenger side engine splash shield. Refer to Engine Splash Shield Replacement .
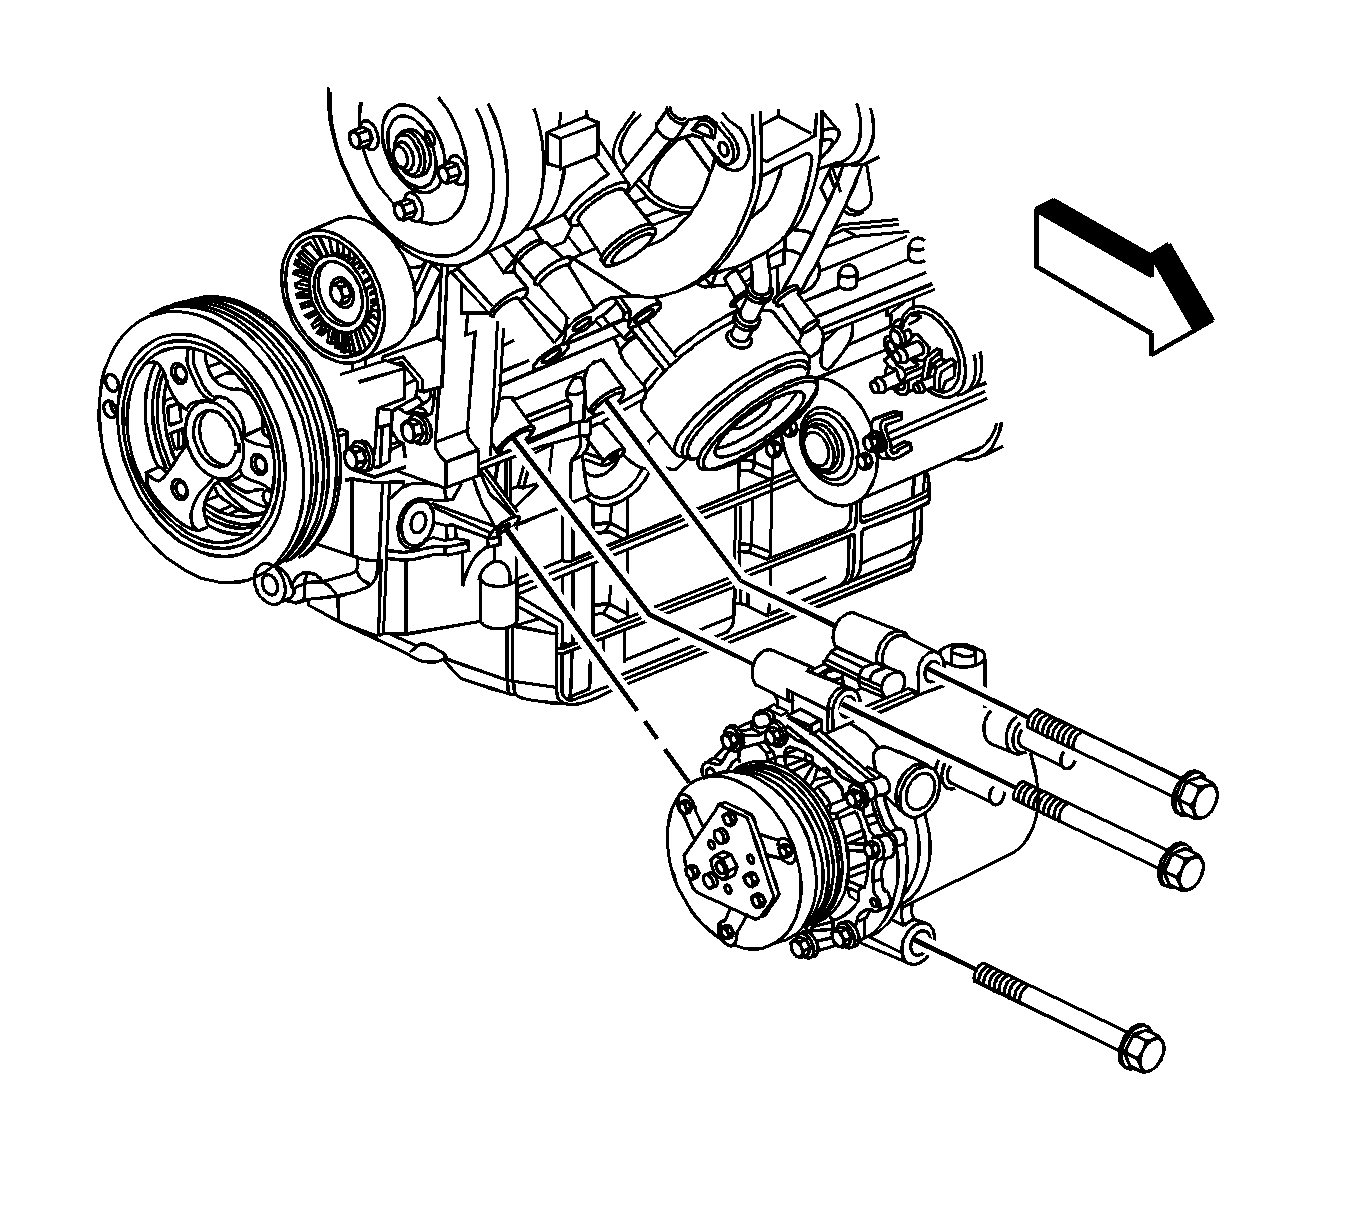
- Remove the A/C compressor bolts.
- Remove the A/C compressor.
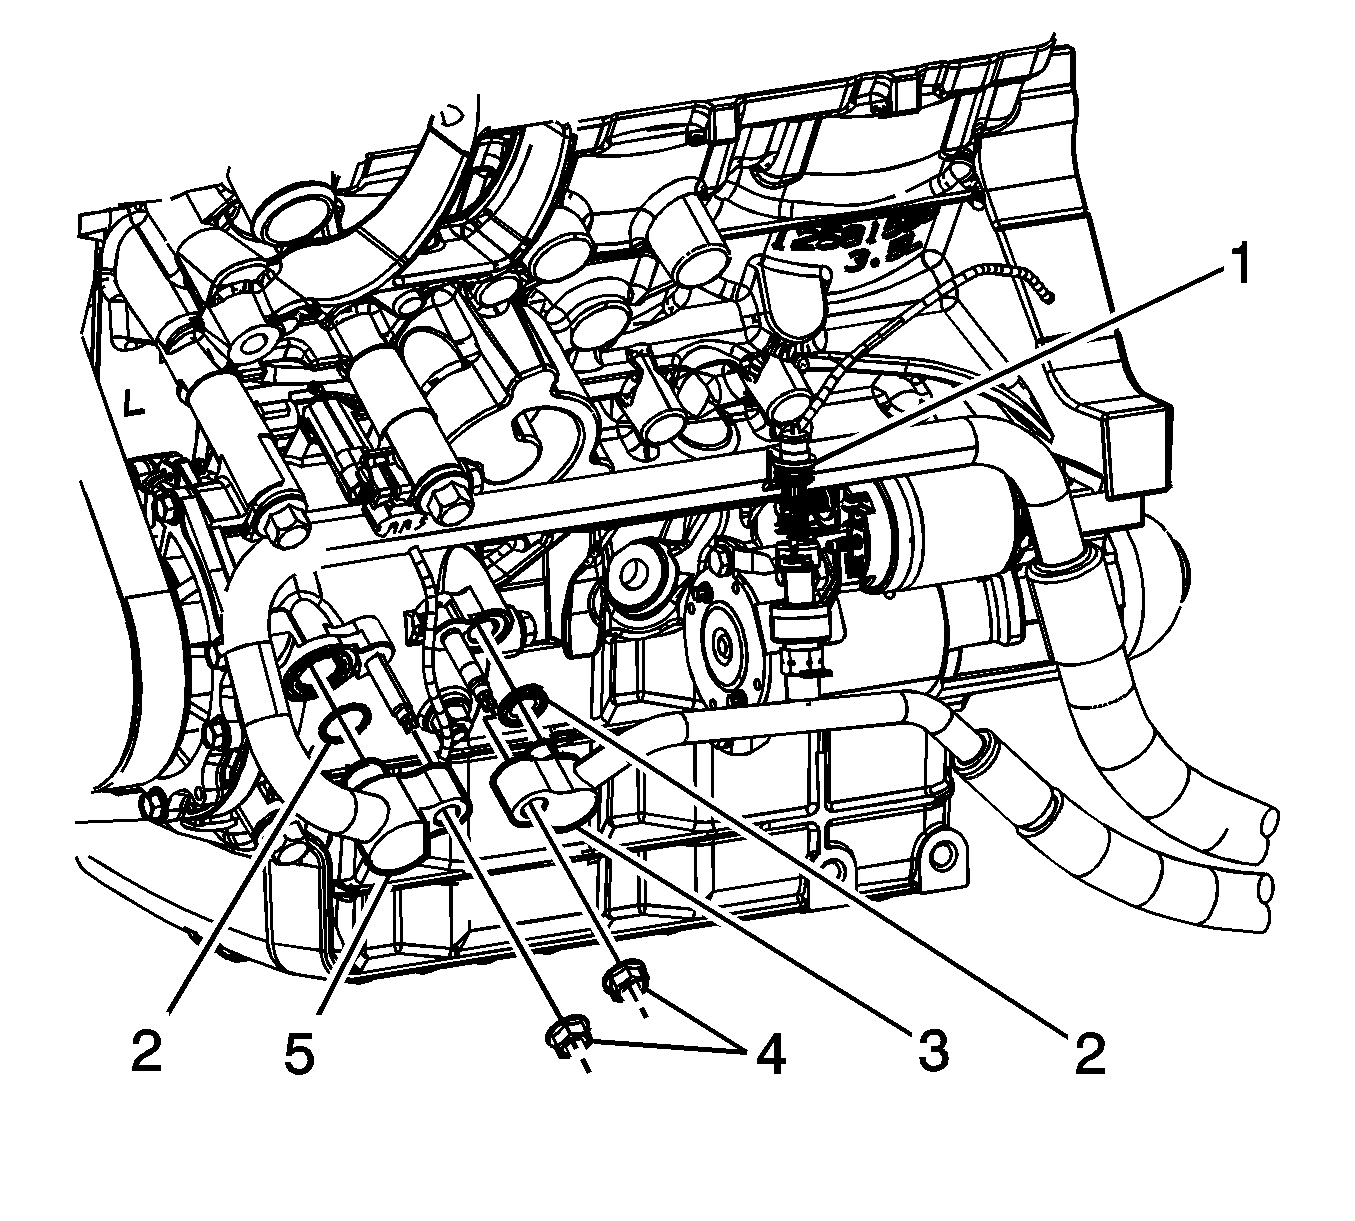
Important: Cap or tape the openings of the A/C lines immediately in order to prevent system contamination.
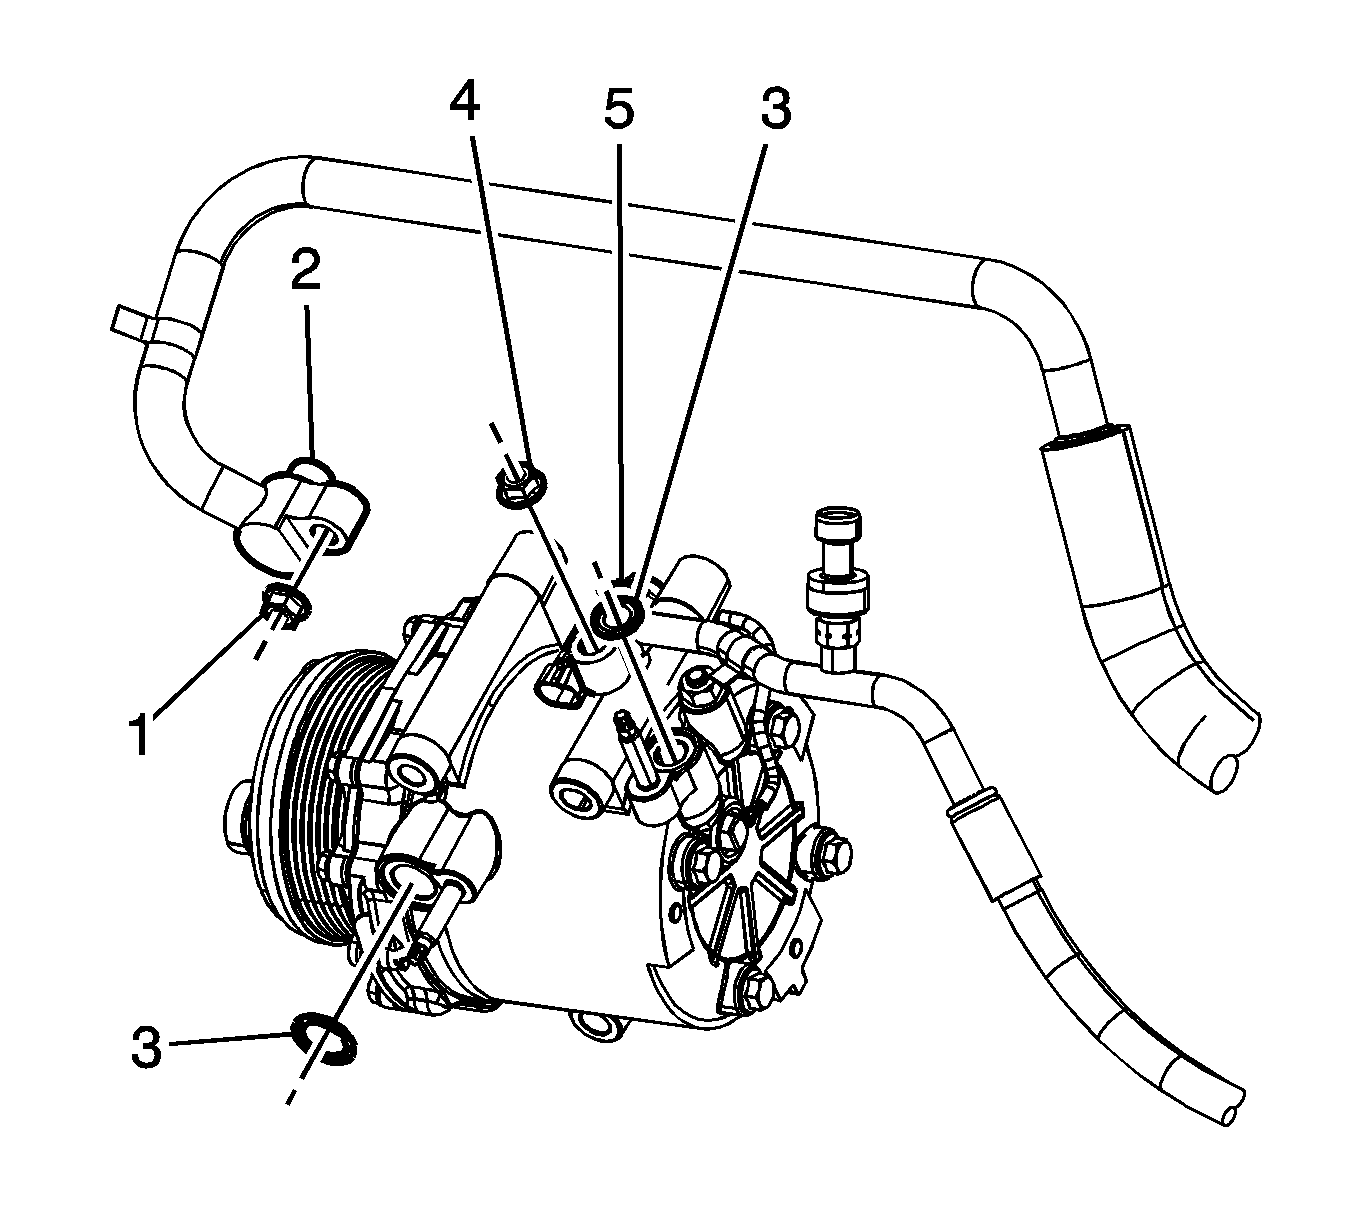
Important: Cap or tape the openings of the A/C lines immediately in order to prevent system contamination.
Installation Procedure
Important: Replacement A/C compressors are partially precharged with polyalkylene glycol (PAG) oil. Refer to Refrigerant System Capacities .
- If replacing the A/C compressor, balance the compressor oil. Refer to Air Conditioning Compressor Oil Balancing .
- Install the A/C compressor.
- Install the A/C compressor bolts.
- Install the passenger side engine splash shield. Refer to Engine Splash Shield Replacement .
- Install the air deflector and bolts.
- Lower the vehicle.
- Release the drive belt tensioner.
- Install the drive belt to the A/C compressor.
- Install the drive belt to the generator pulley.
- Remove the caps or tape from the discharge and suction line openings.
- Install NEW sealing washers (3) to the discharge and suction lines.
- If equipped with a C69 compressor, install the discharge (5) and suction (2) lines to the compressor.
- Install the discharge line (5) to compressor nut (4).
- Install the suction line (2) to compressor nut (1).
- Remove the caps or tape from the discharge and suction line openings.
- Install NEW sealing washers (2) to the discharge and suction lines.
- If equipped with a C60 compressor, install the discharge (3) and suction (5) lines to the compressor.
- Install the suction line (5) to compressor nut (4).
- Install the discharge line (3) to compressor nut (4).
- Connect the A/C compressor electrical connector.
- Evacuate and recharge the A/C system. Refer to Refrigerant Recovery and Recharging .
- Leak test the A/C fittings using the J 39400-A .

Notice: Refer to Fastener Notice in the Preface section.
Tighten
Tighten the bolts to 50 N·m (37 lb ft).

Tighten
Tighten bolts to 20 N·m (15 lb ft).


Tighten
Tighten the nut to 16 N·m (12 lb ft).
Tighten
Tighten the nut to 16 N·m (12 lb ft).

Tighten
Tighten the nut to 16 N·m (12 lb ft).
Tighten
Tighten the nut to 16 N·m (12 lb ft).
