Callout
| Component Name
|
|
Notice: Refer to Fastener Notice in the Preface section. Fastener Tightening Specifications:
Refer to
Fastener Tightening Specifications
.
|
Preliminary Procedures
- Disable the SIR. Refer to
SIR Disabling and Enabling
and
SIR Disabling and Enabling
.
- Disconnect the negative battery cable. Refer to
Battery Negative Cable Disconnection and Connection
.
- Remove the instrument panel (I/P) insulators. Refer to
Knee Bolster, Insulator, Molding Replacement - Instrument Panel
.
- Remove the I/P compartment assembly. Refer to
Instrument Panel Compartment Assembly, Door, Striker, and Latch Replacement
.
- Remove the I/P driver knee bolster assembly. Refer to
Knee Bolster, Insulator, Molding Replacement - Instrument Panel
.
- Remove the I/P accessory trim plate. Refer to
Accessory Trim Plate, Driver Information Display Switch Replacement - Instrument Panel
.
- Remove the HVAC control module. Refer to
HVAC Control Module Replacement
.
- Remove the radio. Refer to
Radio Replacement
.
- Remove the driver information center. Refer to
Accessory Trim Plate, Driver Information Display Switch Replacement - Instrument Panel
.
- Remove the I/P cluster trim plate. Refer to
Cluster, Cluster Trim Plate Replacement - Instrument Panel
.
- Remove the I/P cluster. Refer to
Cluster, Cluster Trim Plate Replacement - Instrument Panel
.
- Remove the I/P lower trim molding. Refer to
Knee Bolster, Insulator, Molding Replacement - Instrument Panel
.
- Remove the I/P steering column opening moldings. Refer to
Knee Bolster, Insulator, Molding Replacement - Instrument Panel
.
- Remove the windshield pillar garnish moldings. Refer to
Windshield Pillar Garnish Molding Replacement
.
- Remove the I/P upper trim pad. Refer to
Upper Trim Pad, Outer Trim Cover, Fuse Block Access Cover Replacement - Instrument Panel
.
- Remove the steering column assembly. Refer to
Steering Column Replacement
.
- Remove the front floor console assembly. Refer to
Compartment, Door, Latch, Panel, Mat Replacement - Front Floor Console
.
- Remove the front floor console reinforcement. Refer to
Bracket, Reinforcement, Side Trim Panel Replacement - Front Floor Console
.
- Remove the front floor console bracket. Refer to
Bracket, Reinforcement, Side Trim Panel Replacement - Front Floor Console
.
- Remove the inflatable restraint I/P module. Refer to
Inflatable Restraint Instrument Panel Module Replacement
.
- Remove the hood release handle. Refer to
Hood Primary Latch Release Cable Handle Replacement
.
- Remove the screws for the data link connector. Refer to
Data Link Connector Replacement
.
- Remove the carrier cover. Refer to
Carrier Cover, Accessory Trim Panel Lower Extension Replacement - Instrument Panel
.
- Remove the lower extension panel. Refer to
Carrier Cover, Accessory Trim Panel Lower Extension Replacement - Instrument Panel
.
|
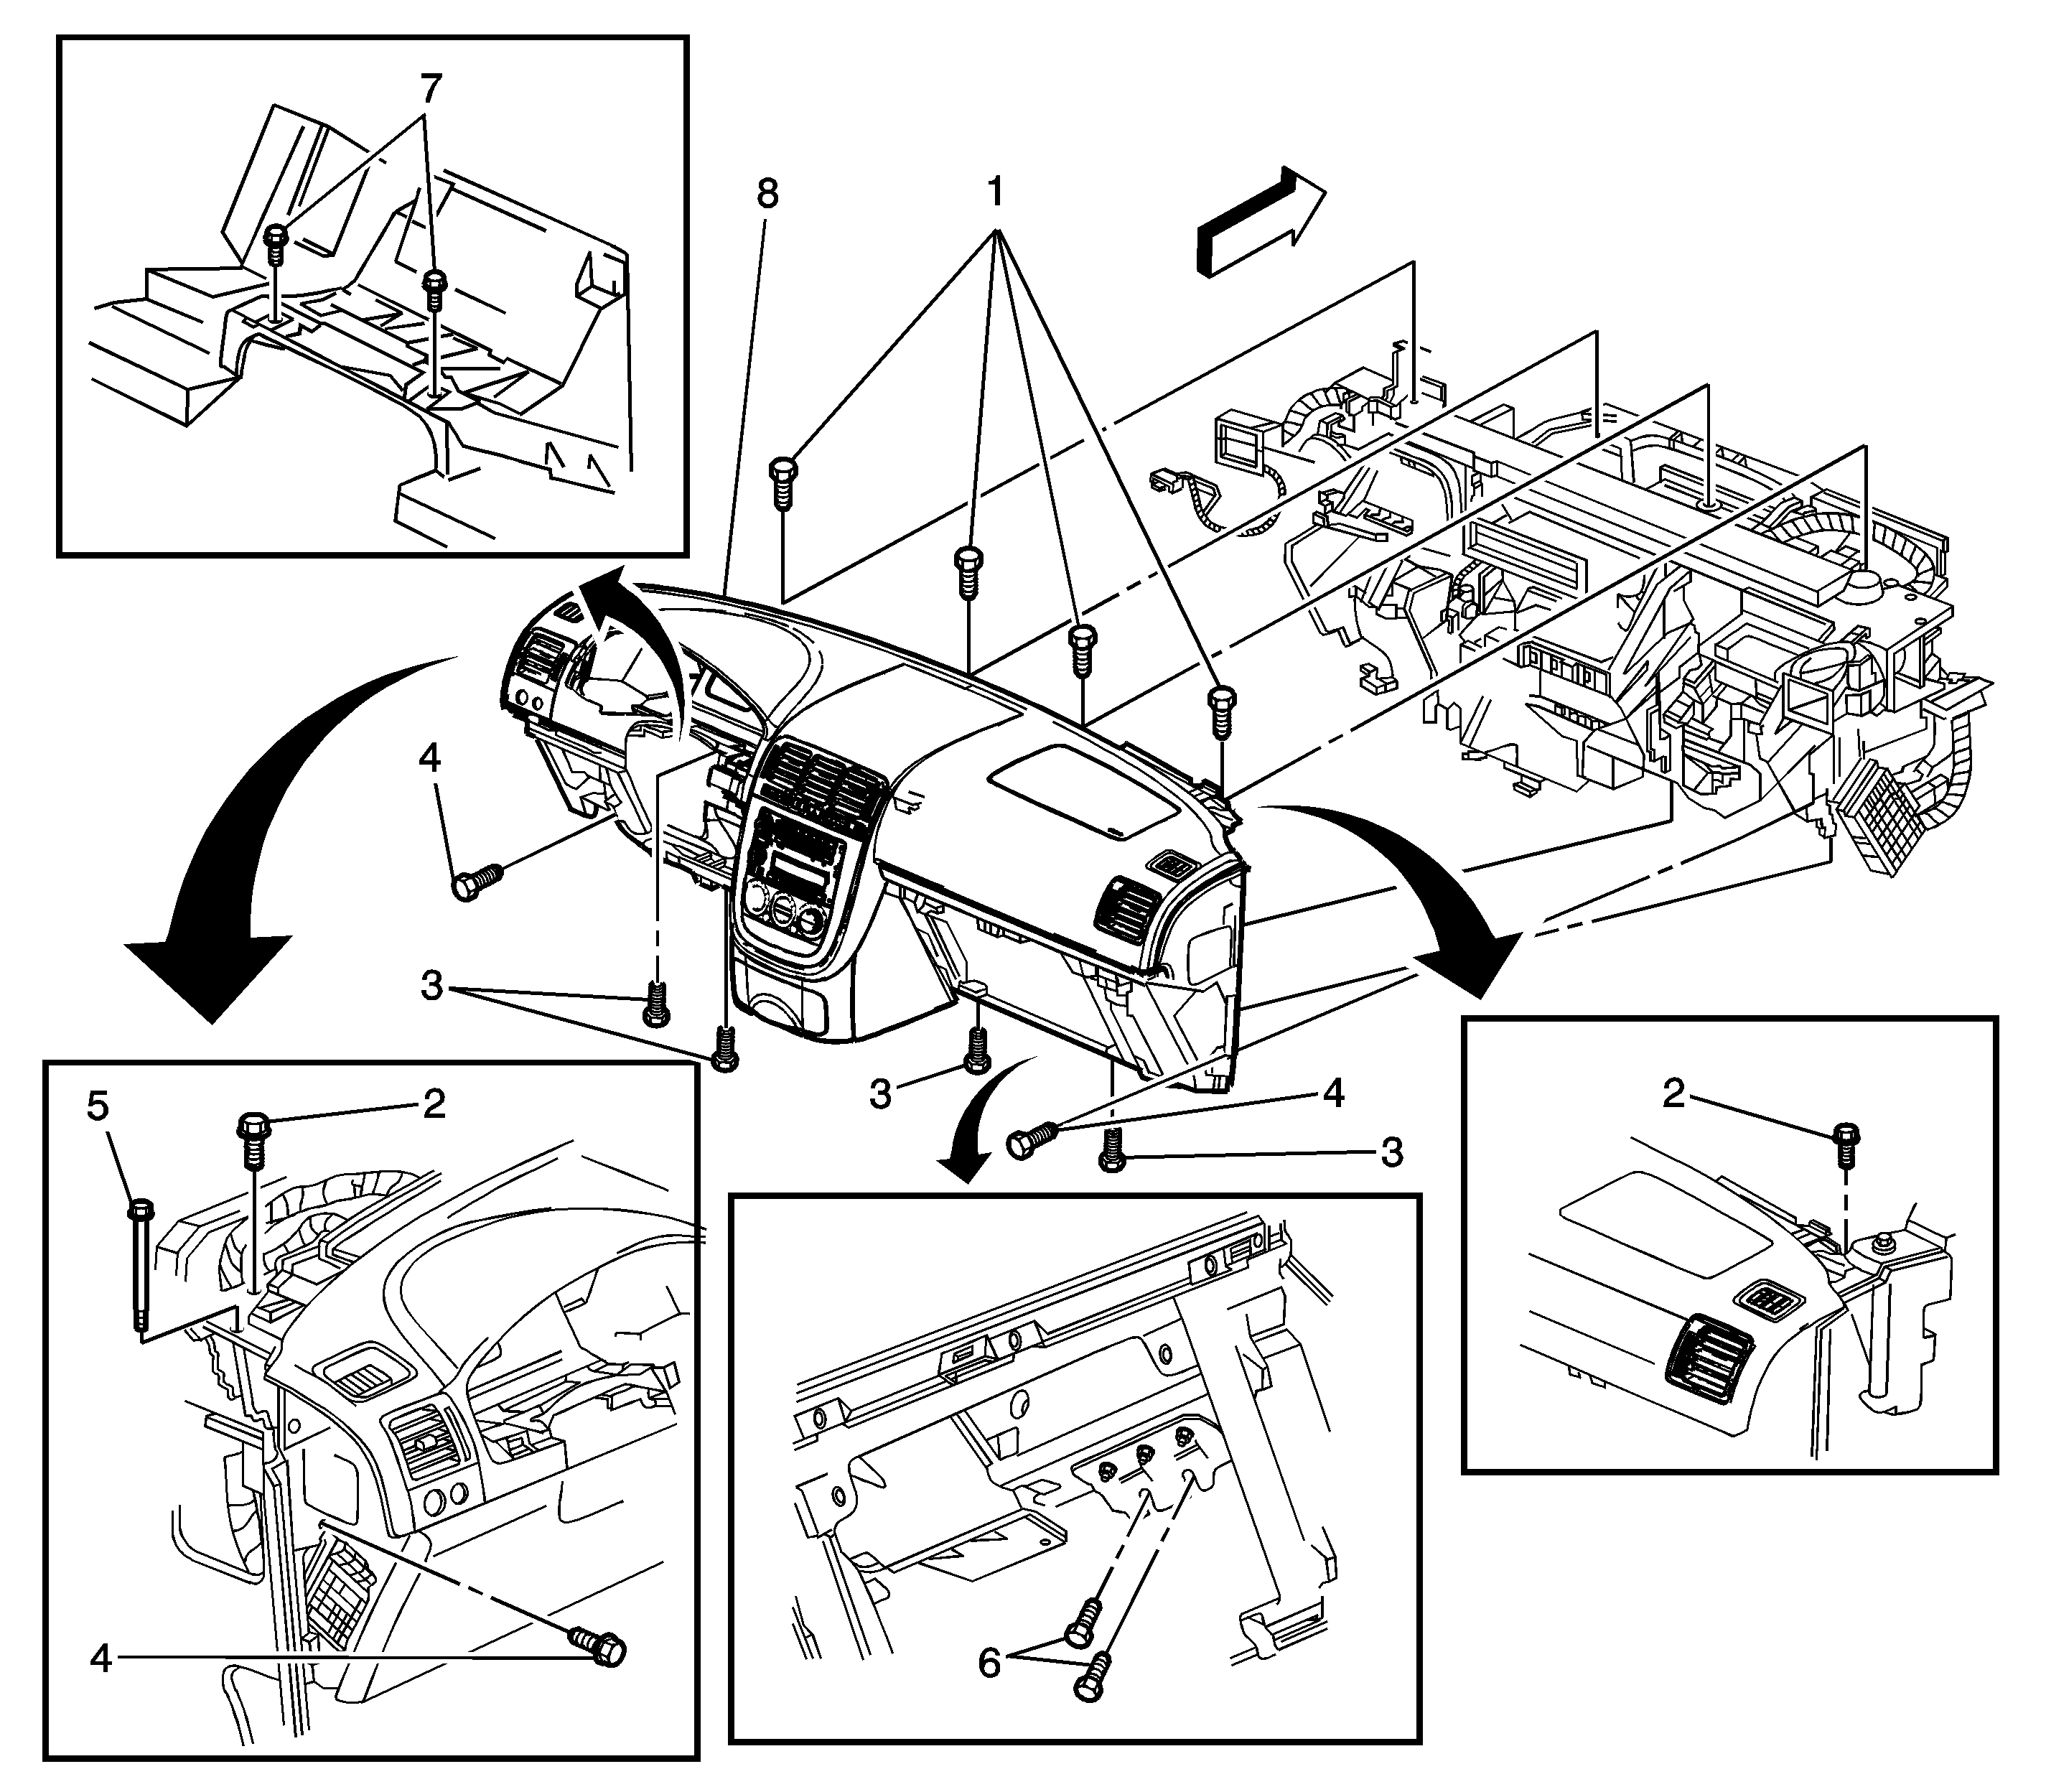
1
| Screw, I/P Carrier Trim Cover (Qty: 4)
Tighten
2 N·m (18 lb in) |
2
| Bolt, I/P Carrier (Qty: 2)
Tighten
10 N·m (89 lb in) |
3
| Screw, I/P Carrier (Qty: 4)
Tighten
4 N·m (25 lb in) |
4
| Screw, I/P Carrier (Qty: 2)
Tighten
4 N·m (25 lb in) |
5
| Bolt, I/P Carrier Pivot (Qty: 2)
Tighten
25 N·m (18 lb ft) |
6
| Screw, Passenger Air Bag Module (Qty: 2)
Tighten
4 N·m (25 lb in) |
7
| Screw, I/P Carrier (Qty: 2)
Tighten
4 N·m (25 lb in) |
8
| Panel Assembly, I/P
Tip
- Lift up from the bottom of the I/P in order to release the top retainers.
- Remove the I/P wiring harness retainers that are attached to the I/P assembly.
- Remove the I/P panel assembly from the vehicle.
|