Windshield Wiper Arm Replacement LHD
Tools Required
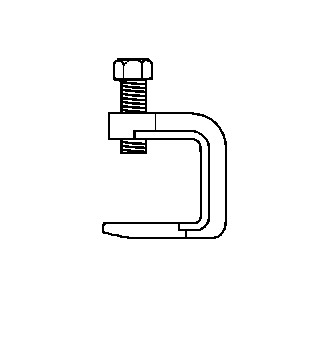
J 39637 Wiper Arm Puller
Removal Procedure
- Set the wipers in the Park position.
- Open the hood assembly.
- The driver side wiper (4) aligns with an orange line at the tip of the wiper blade located at the center lower windshield.
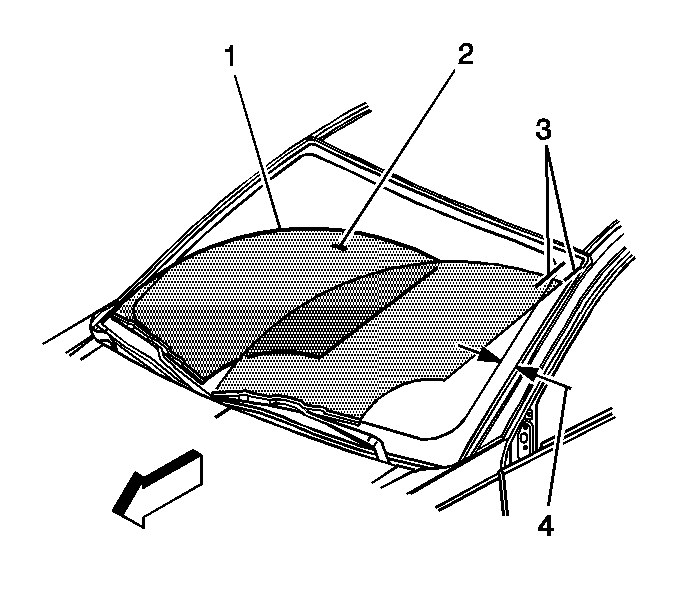
- The passenger side wiper (1) aligns with an orange dot at the tip of the wiper blade located on the right lower side of the windshield.
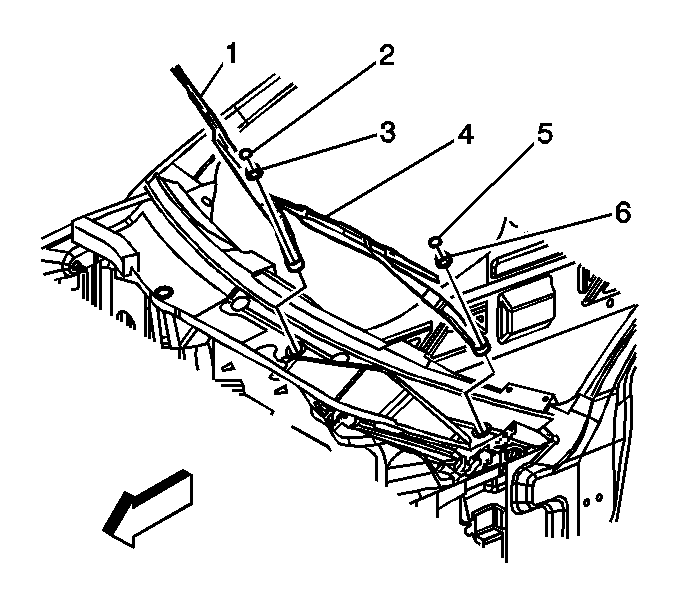
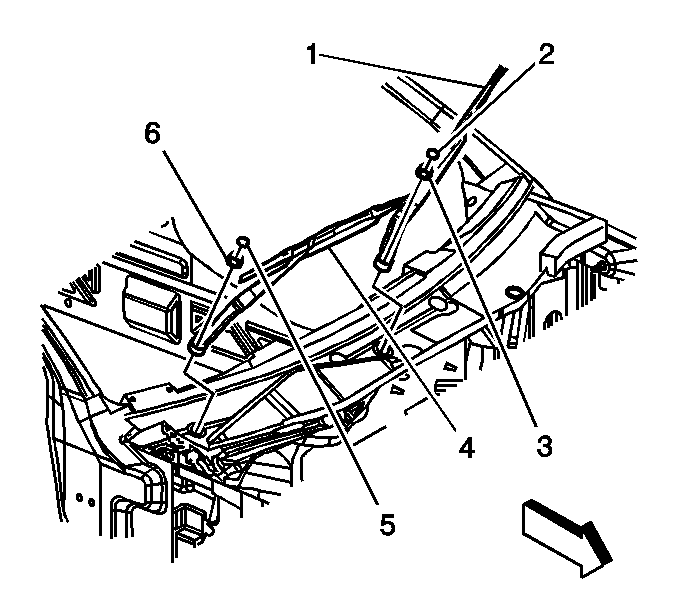
- Remove the covers (2, 5) from the wiper arm nuts (3, 6).
- Remove the nut (3, 6) from the wiper arm drive spindle.
- Remove the upper hood assist rods from the assist rod ball studs (1) if removing the driver side wiper arm.
- Tilt the hood rearward to the air inlet grille panel.
- Support the hood assembly.
- Remove the wiper arm from the wiper arm drive spindle.
- Clean the drive spindle knurls with a fine wire brush.
- Remove the wiper blade from the wiper arm. Refer to Windshield Wiper Blade Replacement .

Notice: Apply pressure only at the end of the liftgate/hood assist rod that you are removing or attaching. Do NOT apply pressure to the middle of the rod because damage or bending will result.
Important: Use the J 39637 in order to remove the wiper arm if the wiper arm fails to loosen from the wiper arm drive spindle.
Installation Procedure
- Install the wiper blade onto the wiper arm. Refer to Windshield Wiper Blade Replacement .
- Position the passenger side wiper arm so the wiper blade tip (1) aligns with the orange dot on the lower outer edge of the windshield.
- Position the driver side wiper arm so that the wiper blade tip (4) aligns with the orange line on the lower center of the windshield.
- Install the wiper arm onto the wiper arm drive spindle.
- Install the nut (3, 6) on the wiper arm.
- Secure the upper hood assist rods onto the assist rod ball studs (1) located on the hood assembly.
- Install the wiper arm nut covers.
- Close the hood assembly.
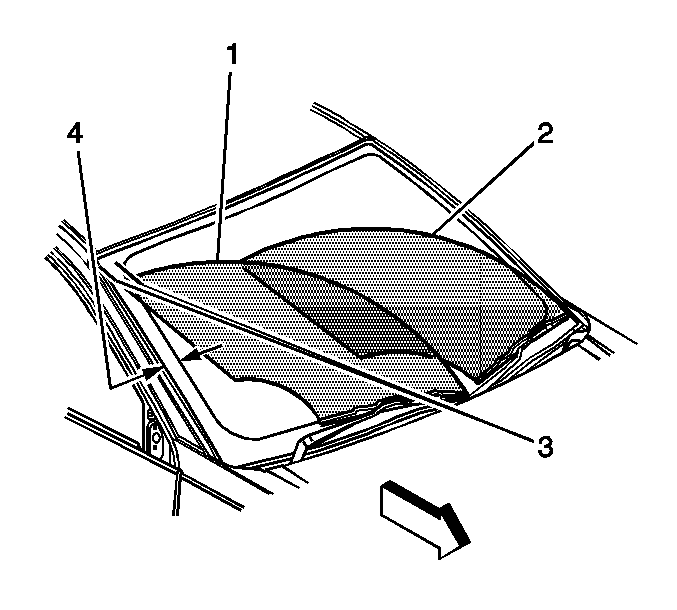
- Operate the wipers and wash pattern (2) in order to verify the operation.
- Verify the driver side wiper does not exceed the wipe area (3).
Notice: Refer to Fastener Notice in the Preface section.
Important: Hold the wiper arm into position while tightening the nut.
Tighten
Tighten the nut to 35 N·m (26 lb ft).
Windshield Wiper Arm Replacement RHD
Tools Required
J 39637 Wiper Arm Puller
Removal Procedure
- Set the wipers in the Park position.
- Open the hood assembly.
- The driver side wiper (4) aligns with an orange line at the tip of the wiper blade located at the center lower windshield.
- The passenger side wiper (1) aligns with an orange dot at the inner tip of the wiper blade located on the center lower side of the windshield.
- Remove the covers (2, 5) from the wiper arm nuts (3, 6).
- Hold the wiper arm into position and remove the nut (3, 6).
- Remove the upper hood assist rods from the assist rod ball studs (1) if removing the driver side wiper arm.
- Tilt the hood rearward to the air inlet grille panel.
- Support the hood assembly.
- Remove the wiper arm from the wiper arm drive spindle.
- Clean the drive spindle knurls with a fine wire brush.
- Remove the wiper blade from the wiper arm. Refer to Windshield Wiper Blade Replacement .
Notice: Apply pressure only at the end of the liftgate/hood assist rod that you are removing or attaching. Do NOT apply pressure to the middle of the rod because damage or bending will result.
Important: Use the J 39637 in order to remove the wiper arm if the wiper arm fails to loosen from the wiper arm drive spindle.
Installation Procedure
- Install the wiper blade onto the wiper arm. Refer to Windshield Wiper Blade Replacement .
- Position the passenger side wiper arm so the wiper blade tip (1) aligns with the orange dot on the lower outer edge of the windshield.
- Position the driver side wiper arm so that the wiper blade tip (4) aligns with the orange line on the lower center of the windshield.
- Install the wiper arm onto the drive shaft.
- Install the nut (3, 6) on the wiper arm.
- Connect the hood assist rods to the assist rod ball studs (1) on the hood assembly.
- Install the wiper nut covers.
- Close the hood.
- Operate the wipers and wash pattern (2) in order to verify the proper operation.
- Verify the driver side wiper does not exceed the drivers side wipe area (3).
Notice: Refer to Fastener Notice in the Preface section.
Important: Hold the wiper arm into position while tightening the nut.
Tighten
Tighten the nut to 35 N·m (26 lb ft).