Clunk Noise from Front of Vehicle While Driving and/or While Shifting In and Out of Gear (Replace Front Engine Mount and Install Additional Mount Heat Shield)

| Subject: | Clunk Noise From Front Of Vehicle While Driving and/or While Shifting In and Out Of Gear (Replace Front Engine Mount and Install Additional Mount Heat Shield) |
| Models: | 2000-2005 Cadillac DeVille |
This bulletin is being revised to update the part numbers. Please discard Corporate Bulletin Number 05-08-61-007 (Section 08 -- Body).
Condition
Some customers may comment on one or both of the following conditions:
| • | A clunk noise from the front of the vehicle while driving. |
| • | A clunk noise while shifting from PARK to DRIVE, from PARK to REVERSE, from DRIVE to REVERSE or from REVERSE to DRIVE. |
Cause
These conditions may be caused by degradation of the front engine mount due to high heat exposure from the exhaust manifold.
Correction
Inspection
- Inspect the front engine mount for signs of degradation:
- Replace the front engine mount and install a engine mount heat shield if any the above conditions are found using the service procedure below.
| • | The hard rubber surface is covered with heat check cracks. |
| • | The rubber is separated from the metal plate of the engine mount. |
| • | The rubber is split through the center of the engine mount. |
| • | For additional information, refer to Engine Mount Inspection (SI Document ID# 714353). |
Service Procedure
- Raise and support the vehicle. Refer to Lifting and Jacking the Vehicle in General Information (SI Document ID# 377101).
- Remove the front air deflector. Refer to Air Deflector Replacement - Front in Body Front End (SI Document ID# 477575).
- Support the powertrain with a suitable adjustable support.
- Support the front of the frame with a suitable adjustable support.
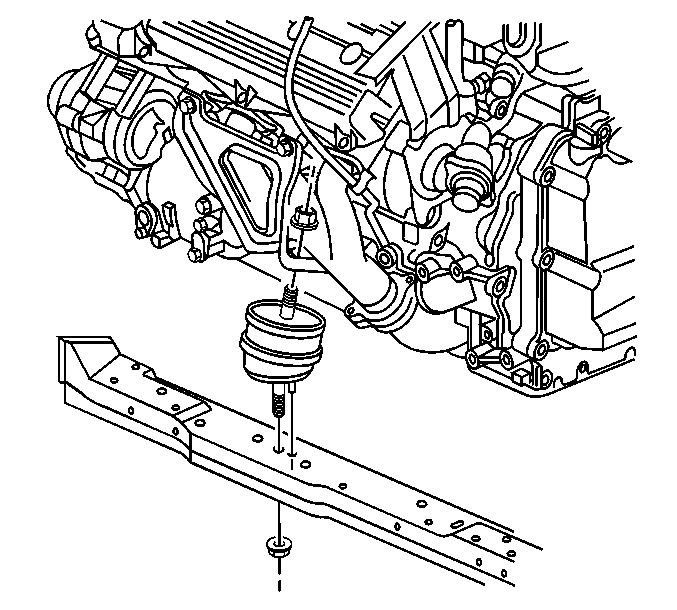
- Remove the front engine mount-to-frame nut.
- Remove the two front frame bolts.
- Lower the frame with the adjustable support.
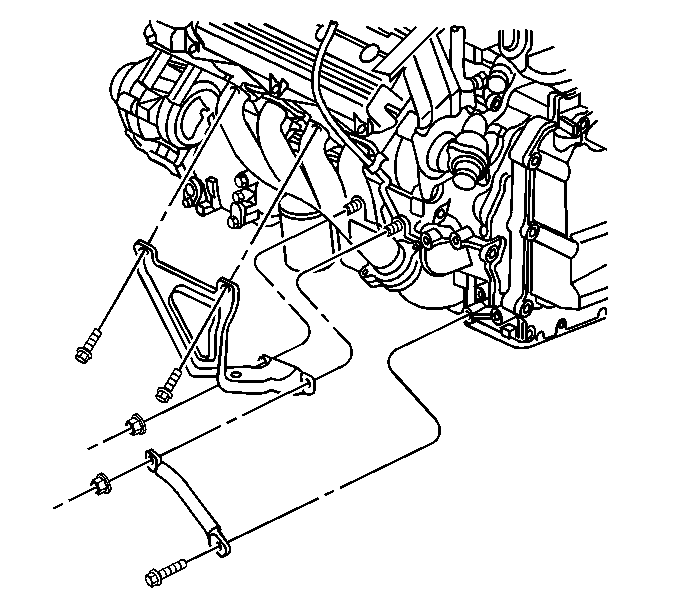
- Remove the two lower engine mount bracket nuts.
- Remove the one support bracket nut.
- Remove the support bracket.
- Remove the two upper engine mount bolts.
- Remove the front engine mount and bracket from the vehicle.
- Remove the nut retaining the mount to the bracket.
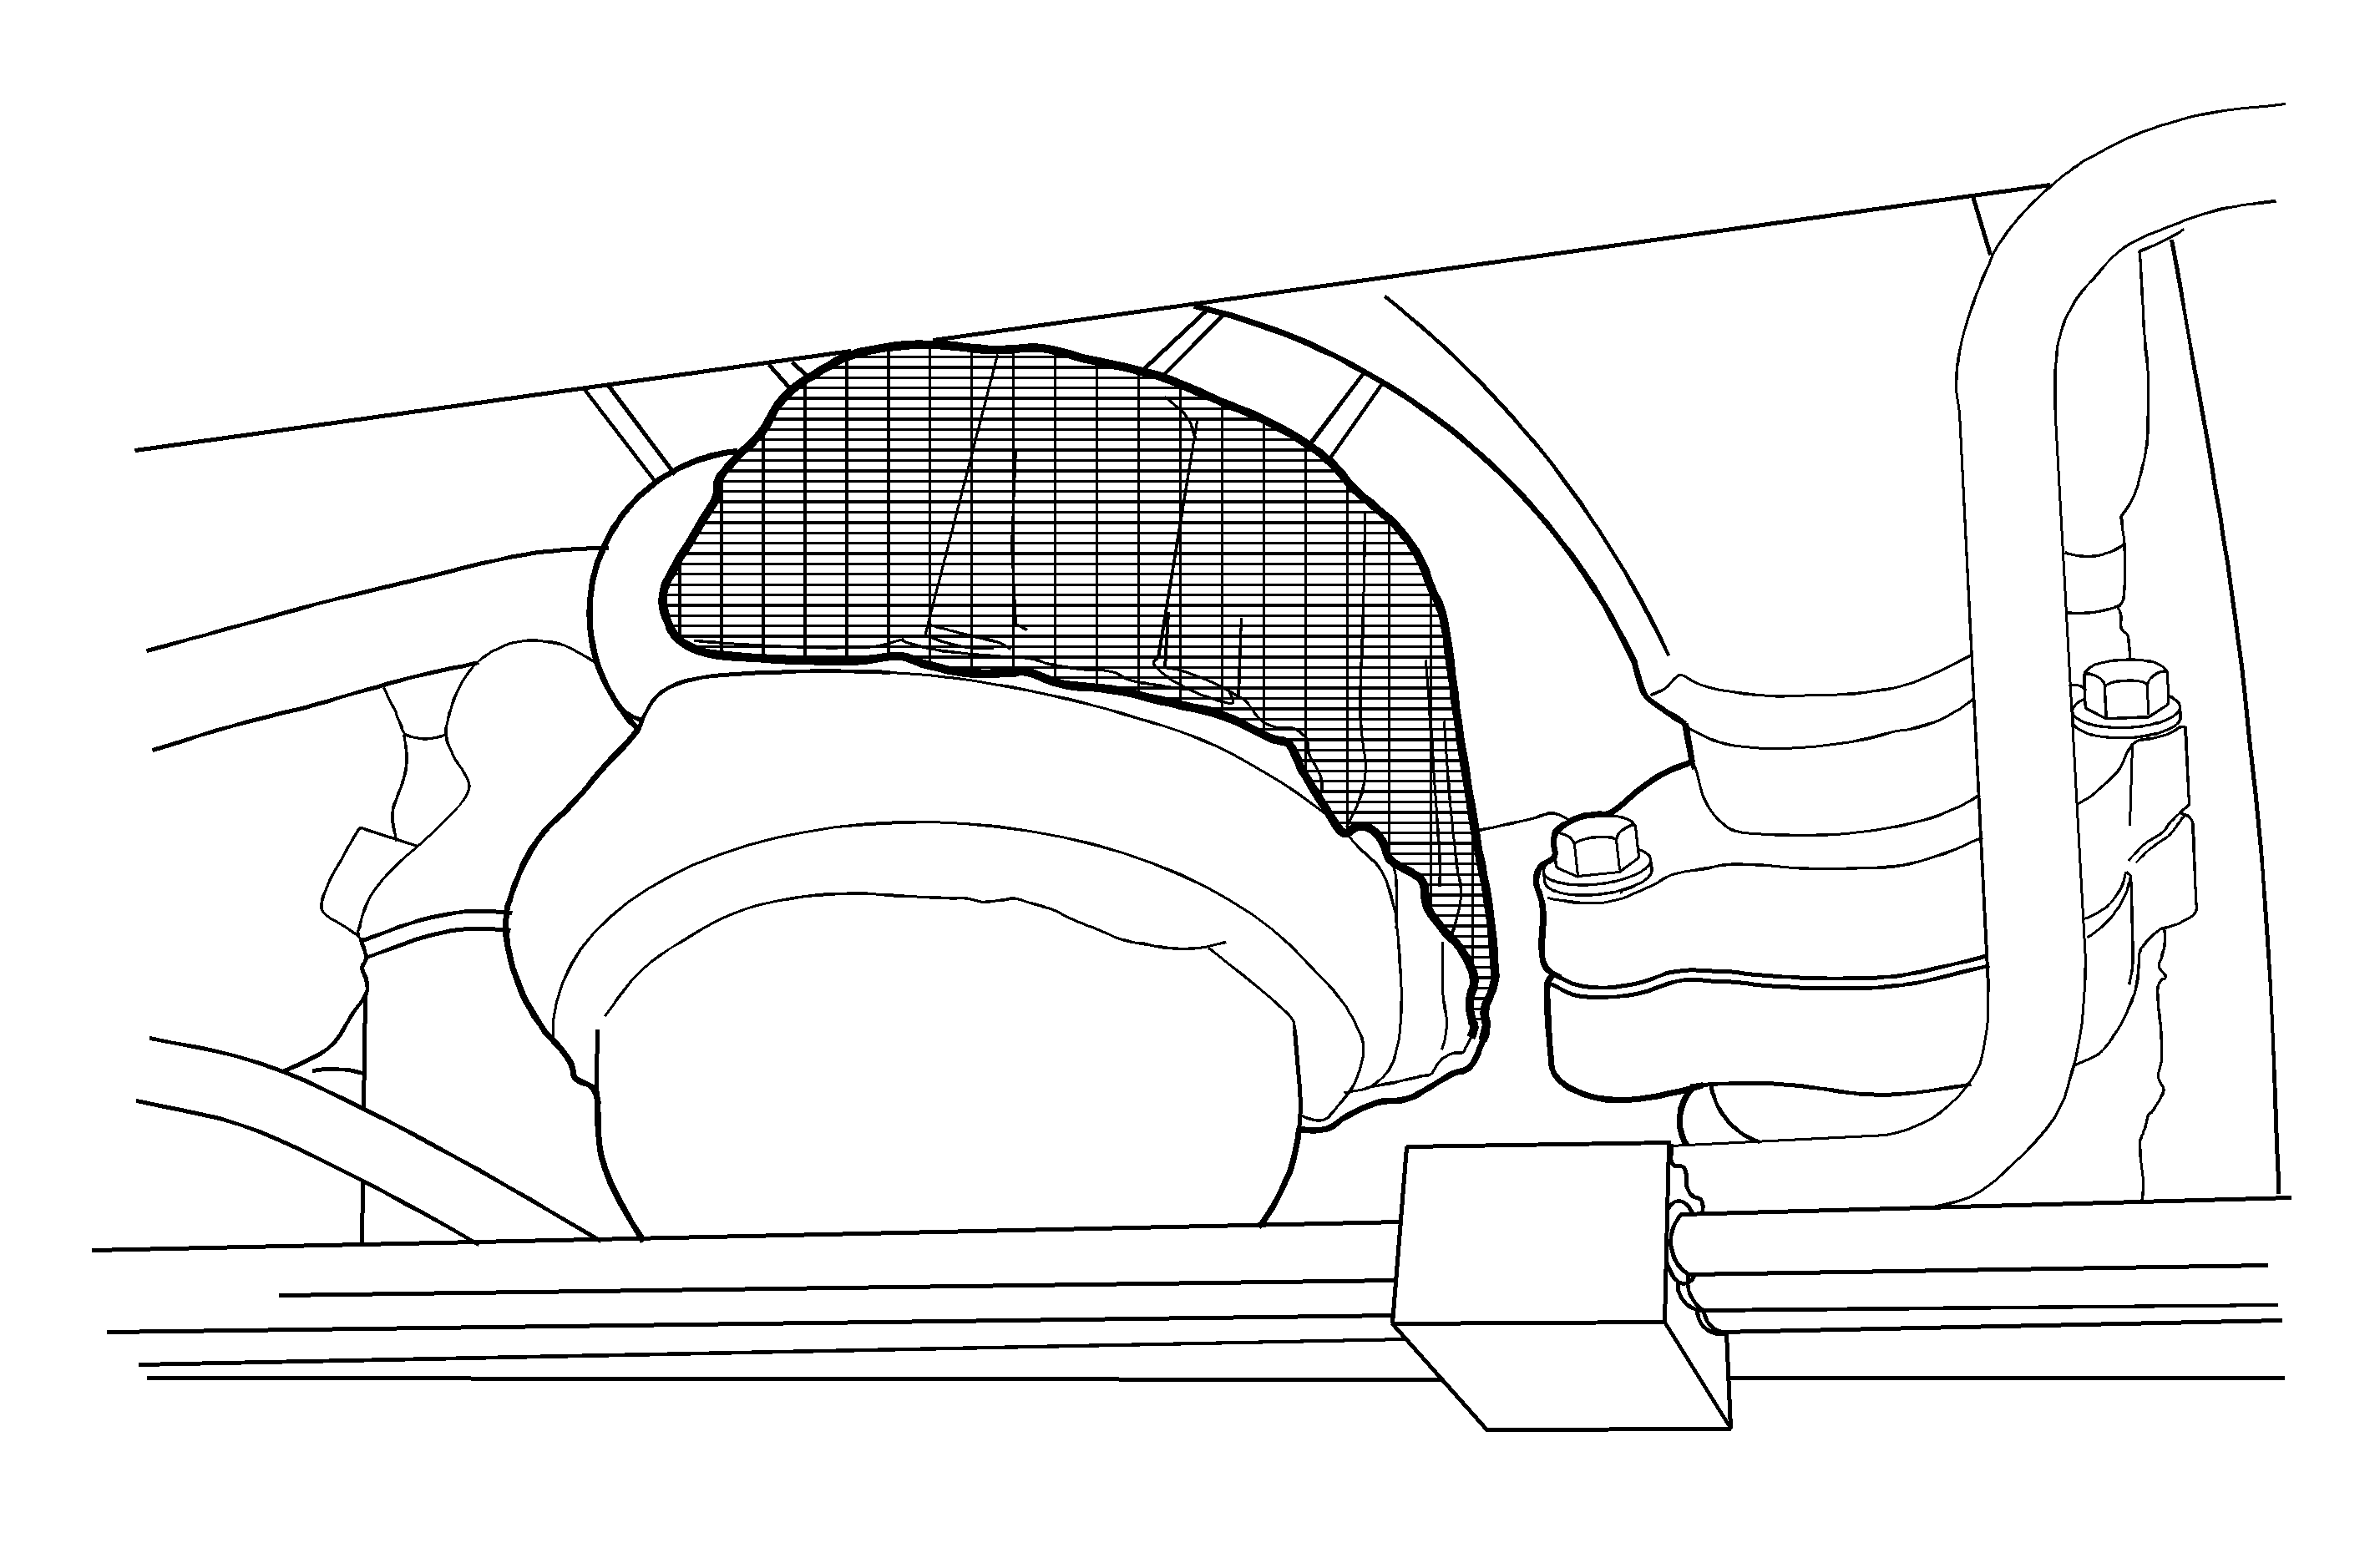
- Install a new front engine mount, P/N 25759455, and shield, P/N 15804790, to the engine mount bracket.
- Correctly position the alignment tab on the mount with the shield and bracket.
- Install and tighten the mount to bracket nut.
- Position the bracket, mount and shield onto the vehicle.
- Install the two upper bracket bolts.
- Install the support brace.
- Install the support brace bolt
- Install the two lower bracket nuts. Tighten the bolts in the following sequence
- Using the adjustable support, position the frame into place. Ensure that the front mount is correctly positioned in the frame.
- Install the two frame mount bolts.
- Install the front engine mount to frame nut.
- Remove the two adjustable supports
- Install the front air deflector. Refer to Air Deflector Replacement - Front in Body Front End (SI Document ID# 477575).
- Lower the vehicle.


Tip
Rotate the mount and bracket in a counterclockwise direction to remove from the vehicle.
Important: When installing the new shield and engine mount to the bracket, ensure that the alignment tabs is correctly positioned.
Tighten
Tighten the front engine mount to bracket nut to 114 N·m(84 lb ft).

Tighten
| • | Tighten the two lower engine mount bracket nuts to 41 N·m(30 lb ft). |
| • | Tighten the transaxle support brace bolt to 50 N·m(37 lb ft). |
| • | Tighten the two upper engine mount bracket bolts to 50 N·m(37 lb ft). |
Tighten
Tighten the retainers to 191 N·m(141 lb ft).
Tighten
Tighten the fastener to 70 N·m(52 lb ft).
Parts Information
Part Number | Description | Qty |
|---|---|---|
25759455 | Mount -- Front Engine Mount | 1 |
15804790 | Shield -- Front Engine Mount | 1 |
Warranty Information
For vehicle repaired under warranty use:
Labor Operation | Description | Labor Time |
|---|---|---|
J1502 | Mount, Engine-Front-Replace | 0.8 hr |
