For 1990-2009 cars only
| Figure 1: |
Power and Ground Circuits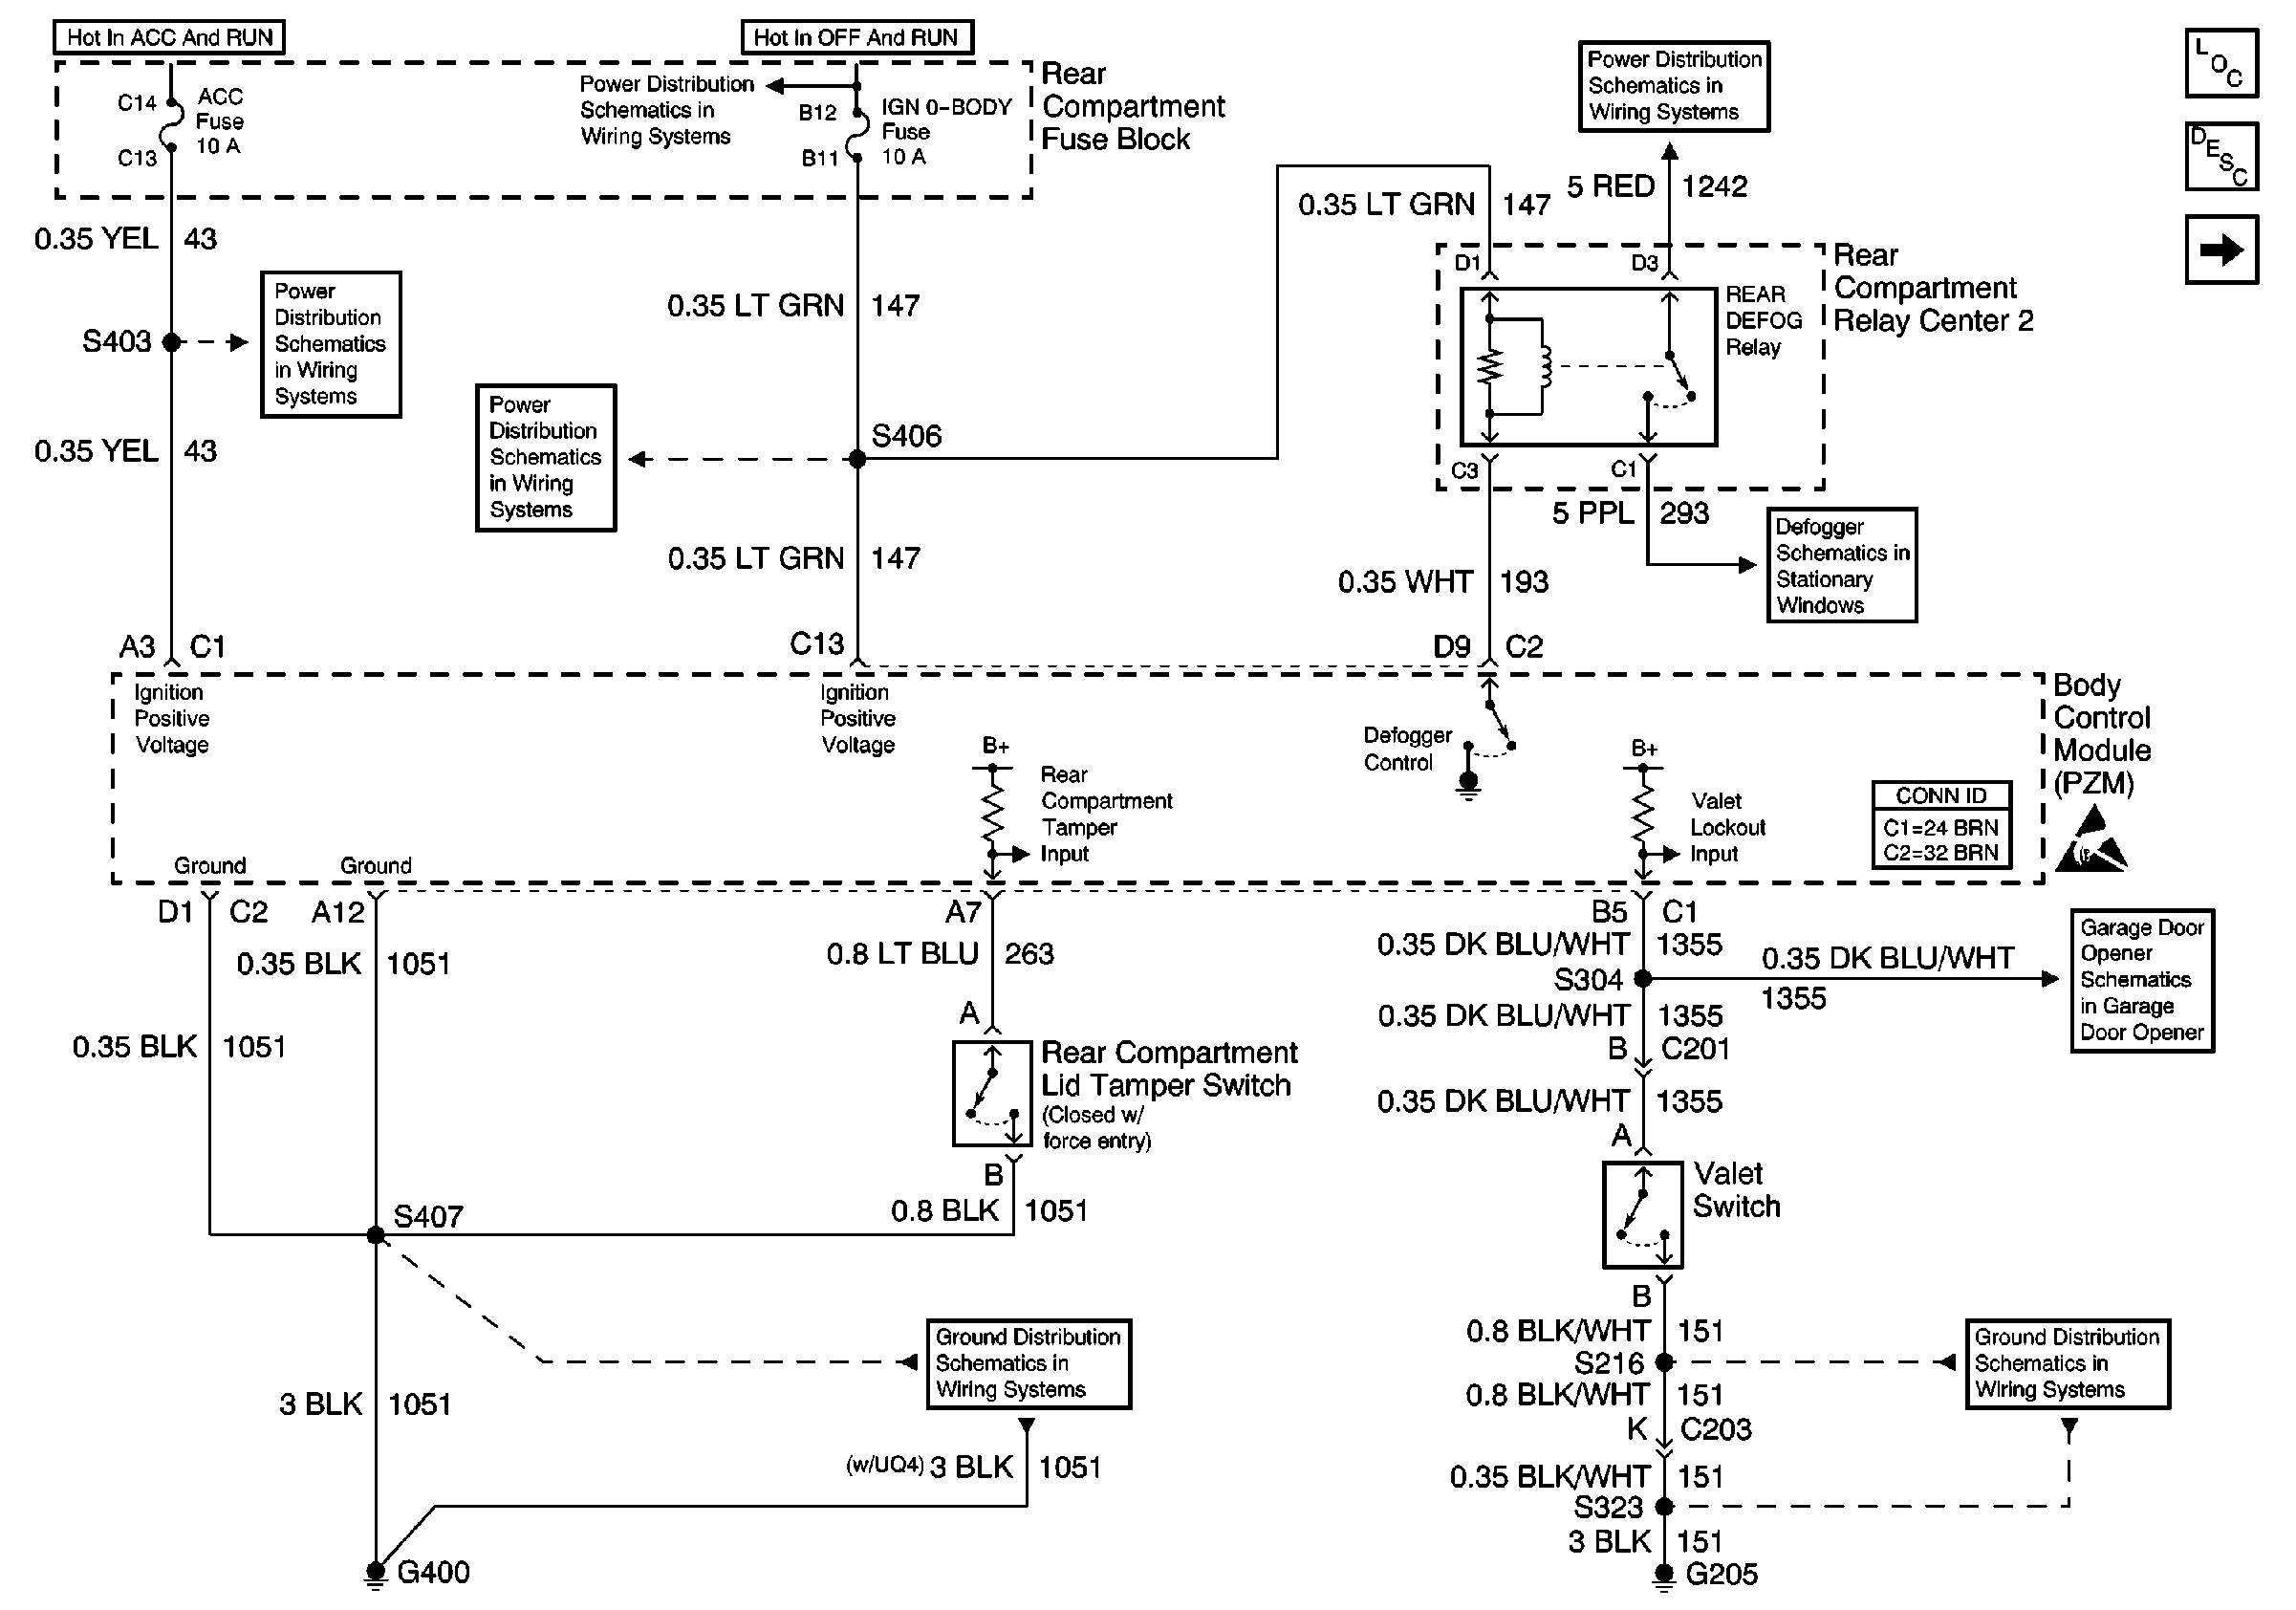
|
| Figure 2: |
Body Control Module Inputs and Outputs (1 of 4)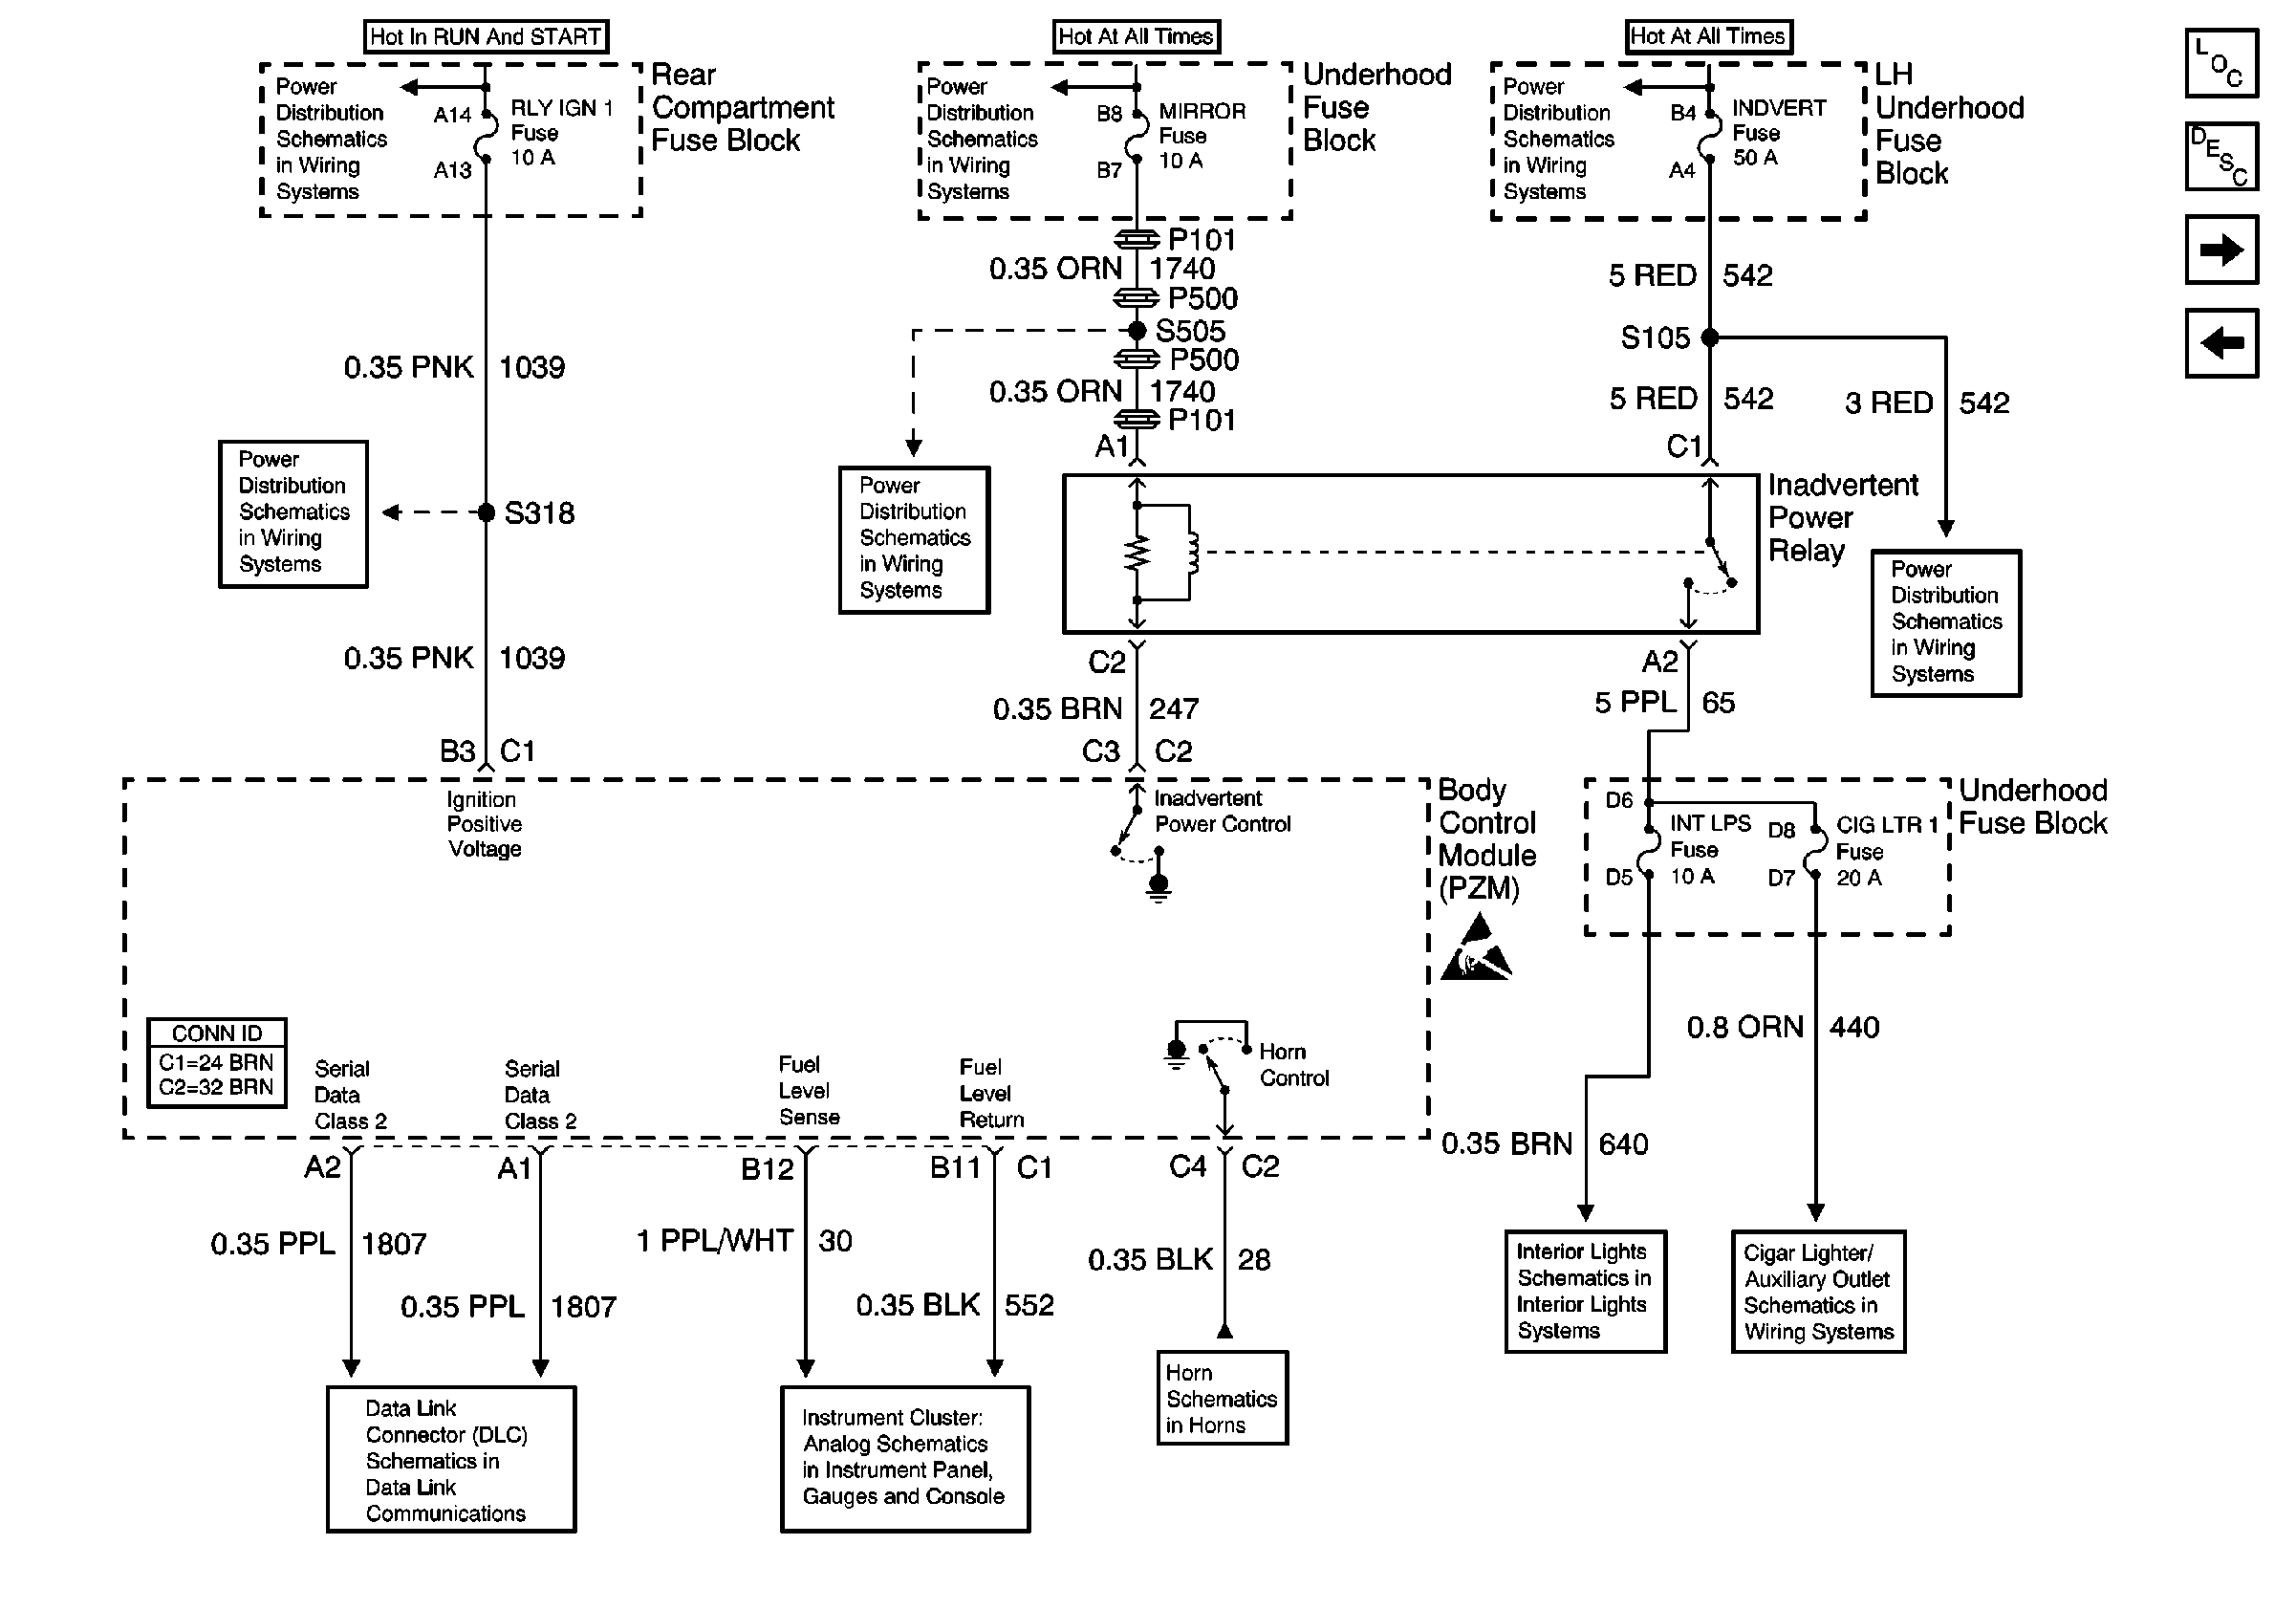
|
| Figure 3: |
Body Control Module Inputs and Outputs (2 of 4)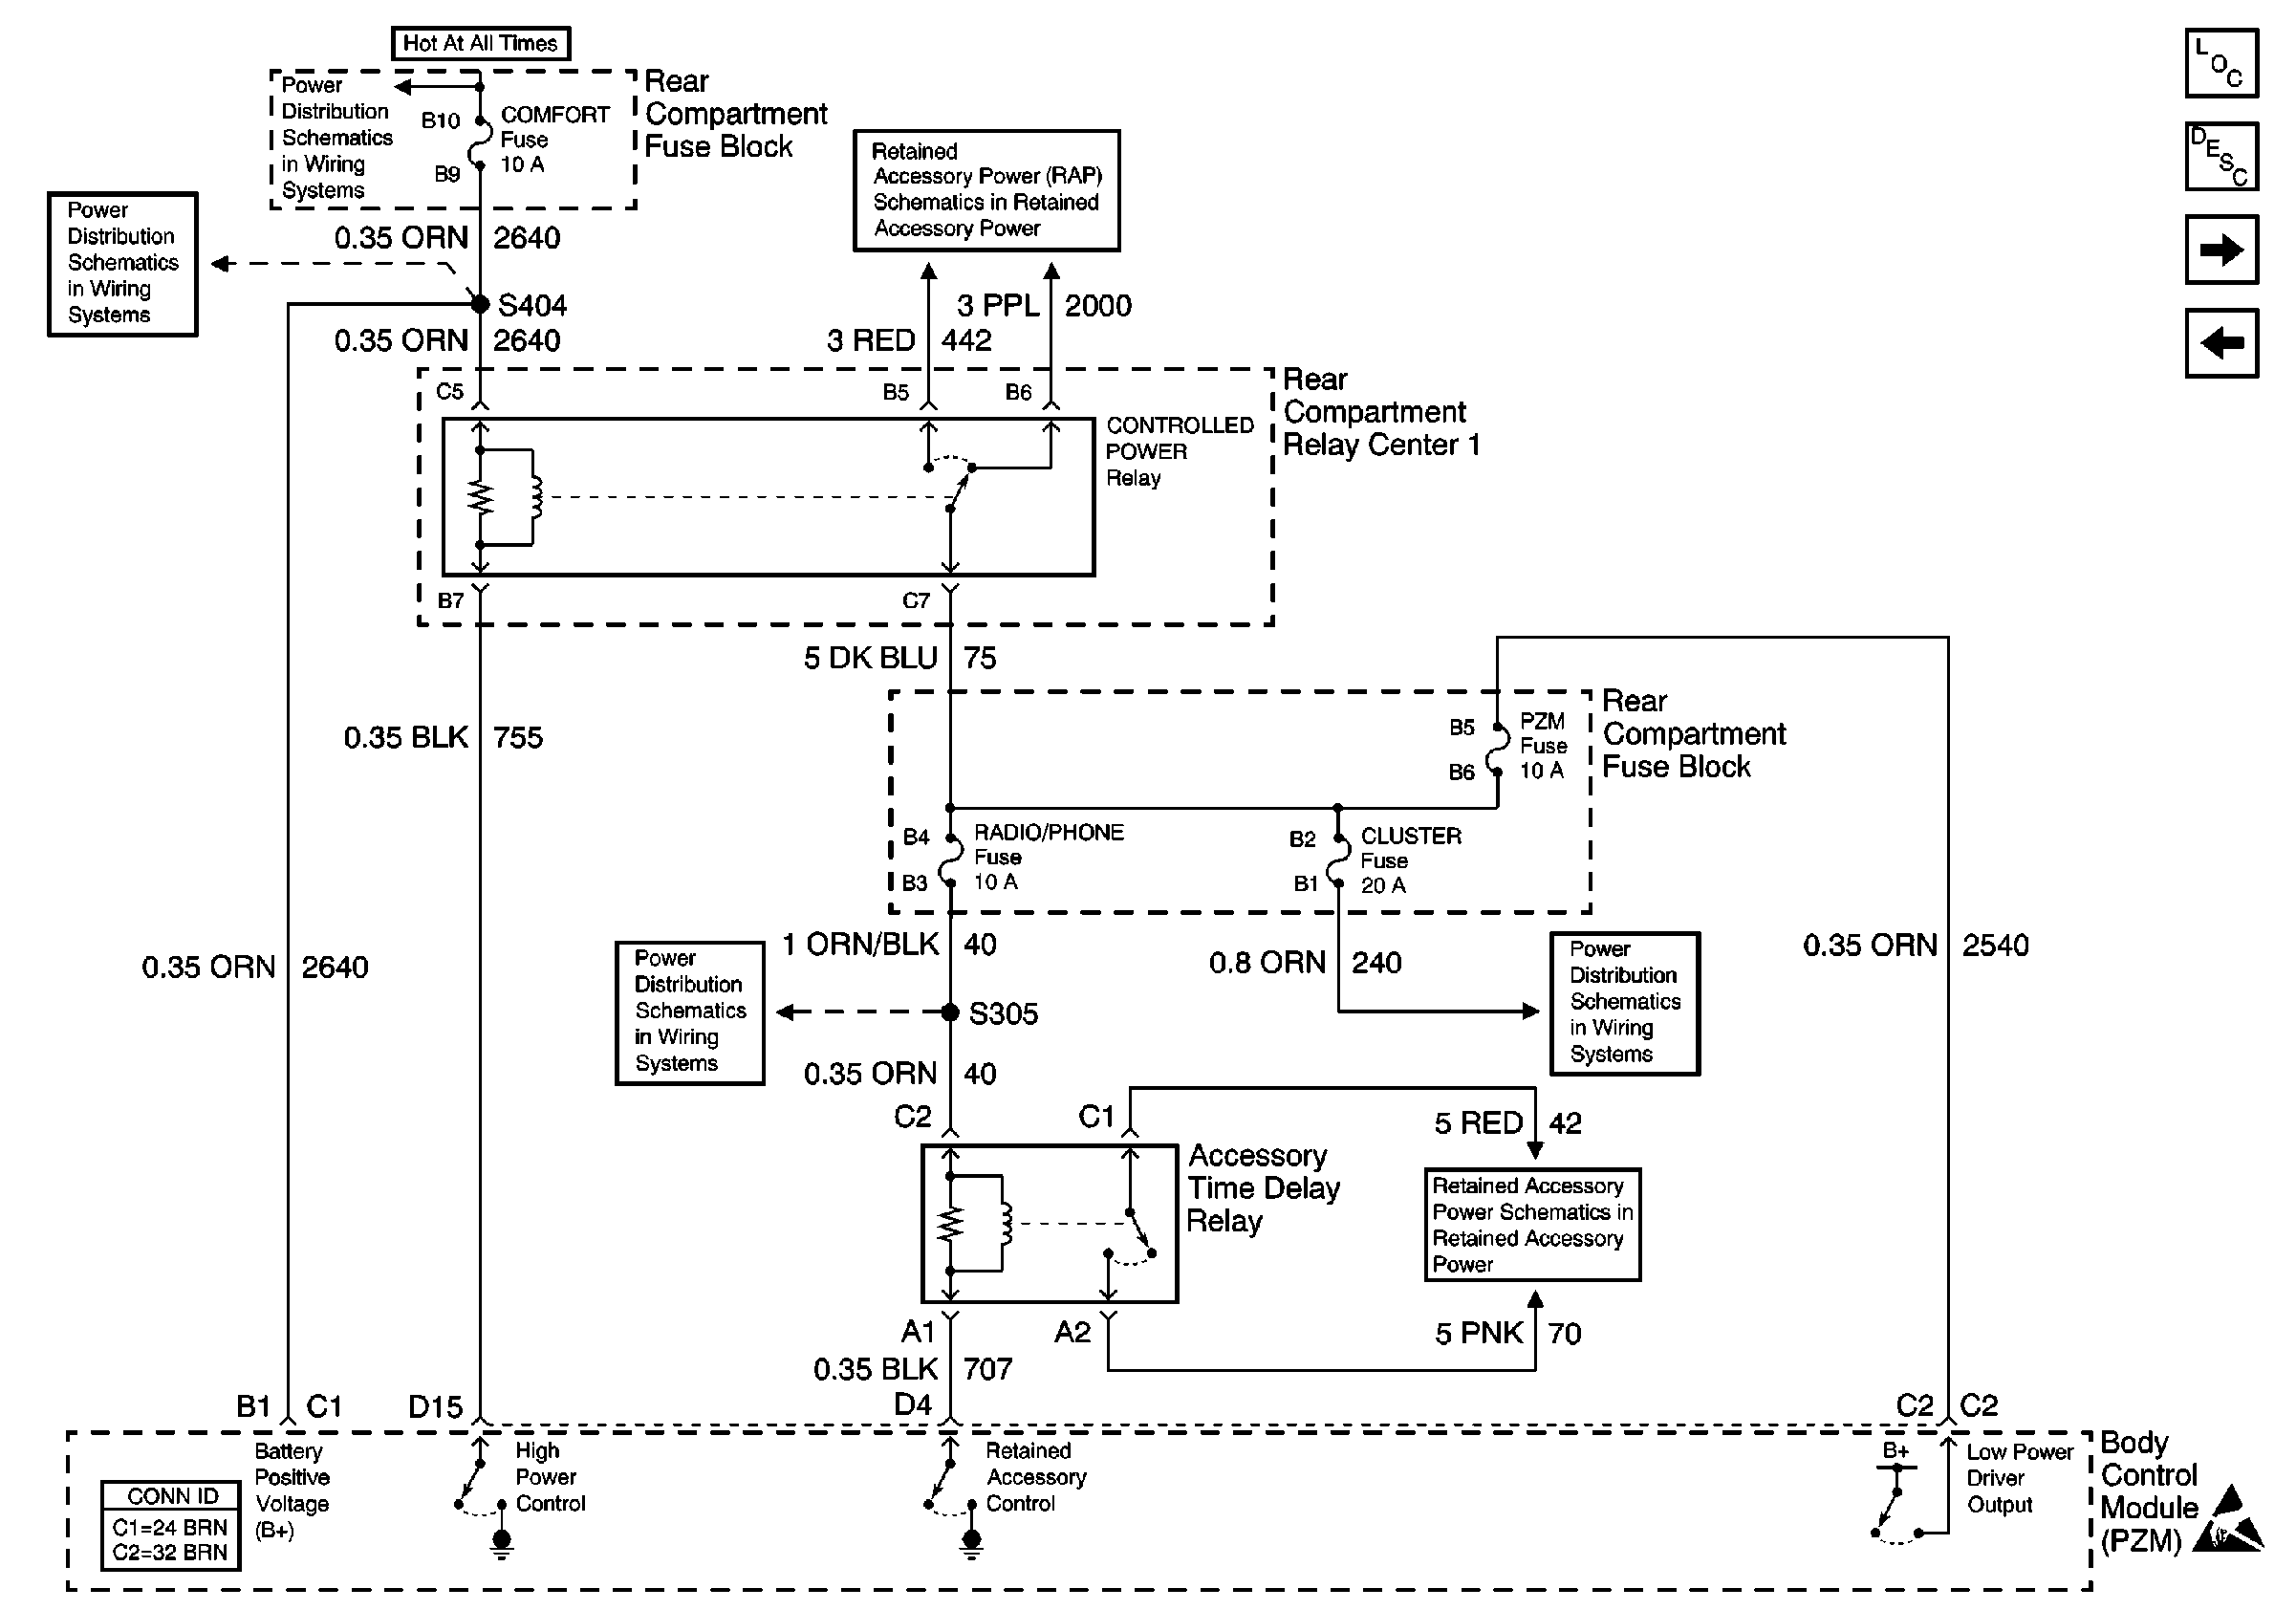
|
| Figure 4: |
Body Control Module Inputs and Outputs (3 of 4)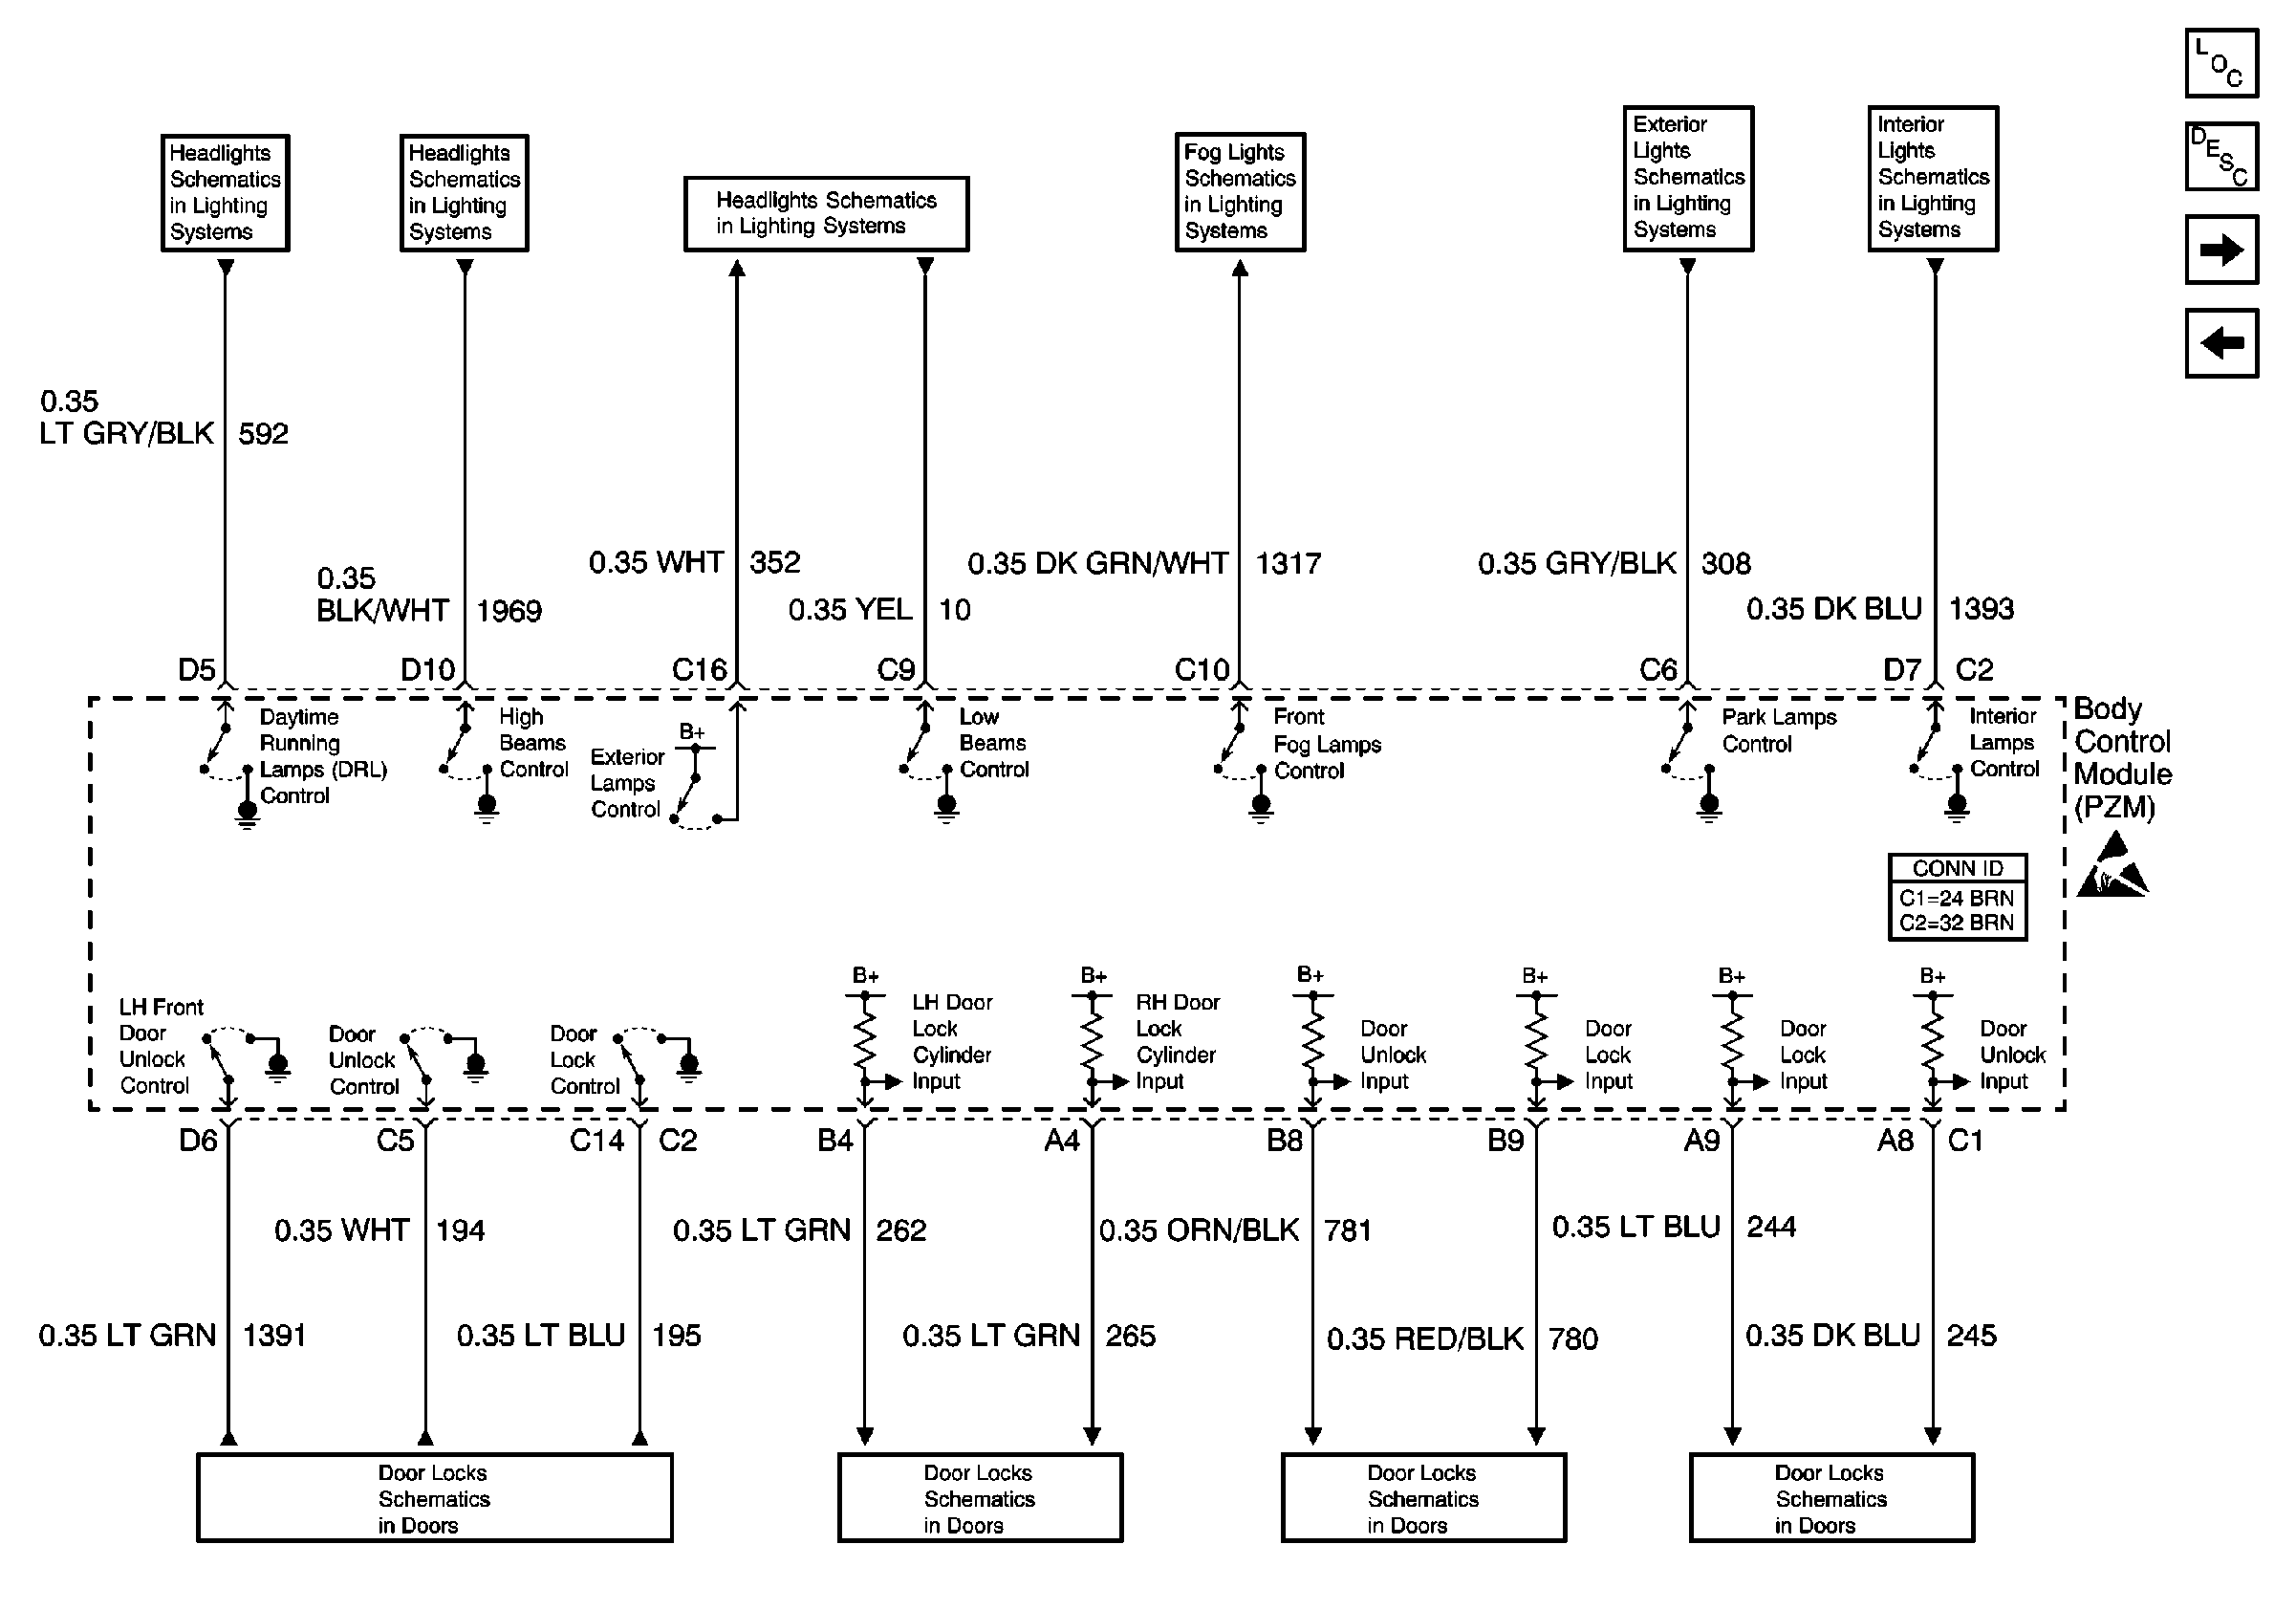
|
| Figure 5: |
Body Control Module Inputs and Outputs (4 of 4)
|
