For 1990-2009 cars only
| Figure 1: |
Park Lamps (without EXP) - (1 of 2)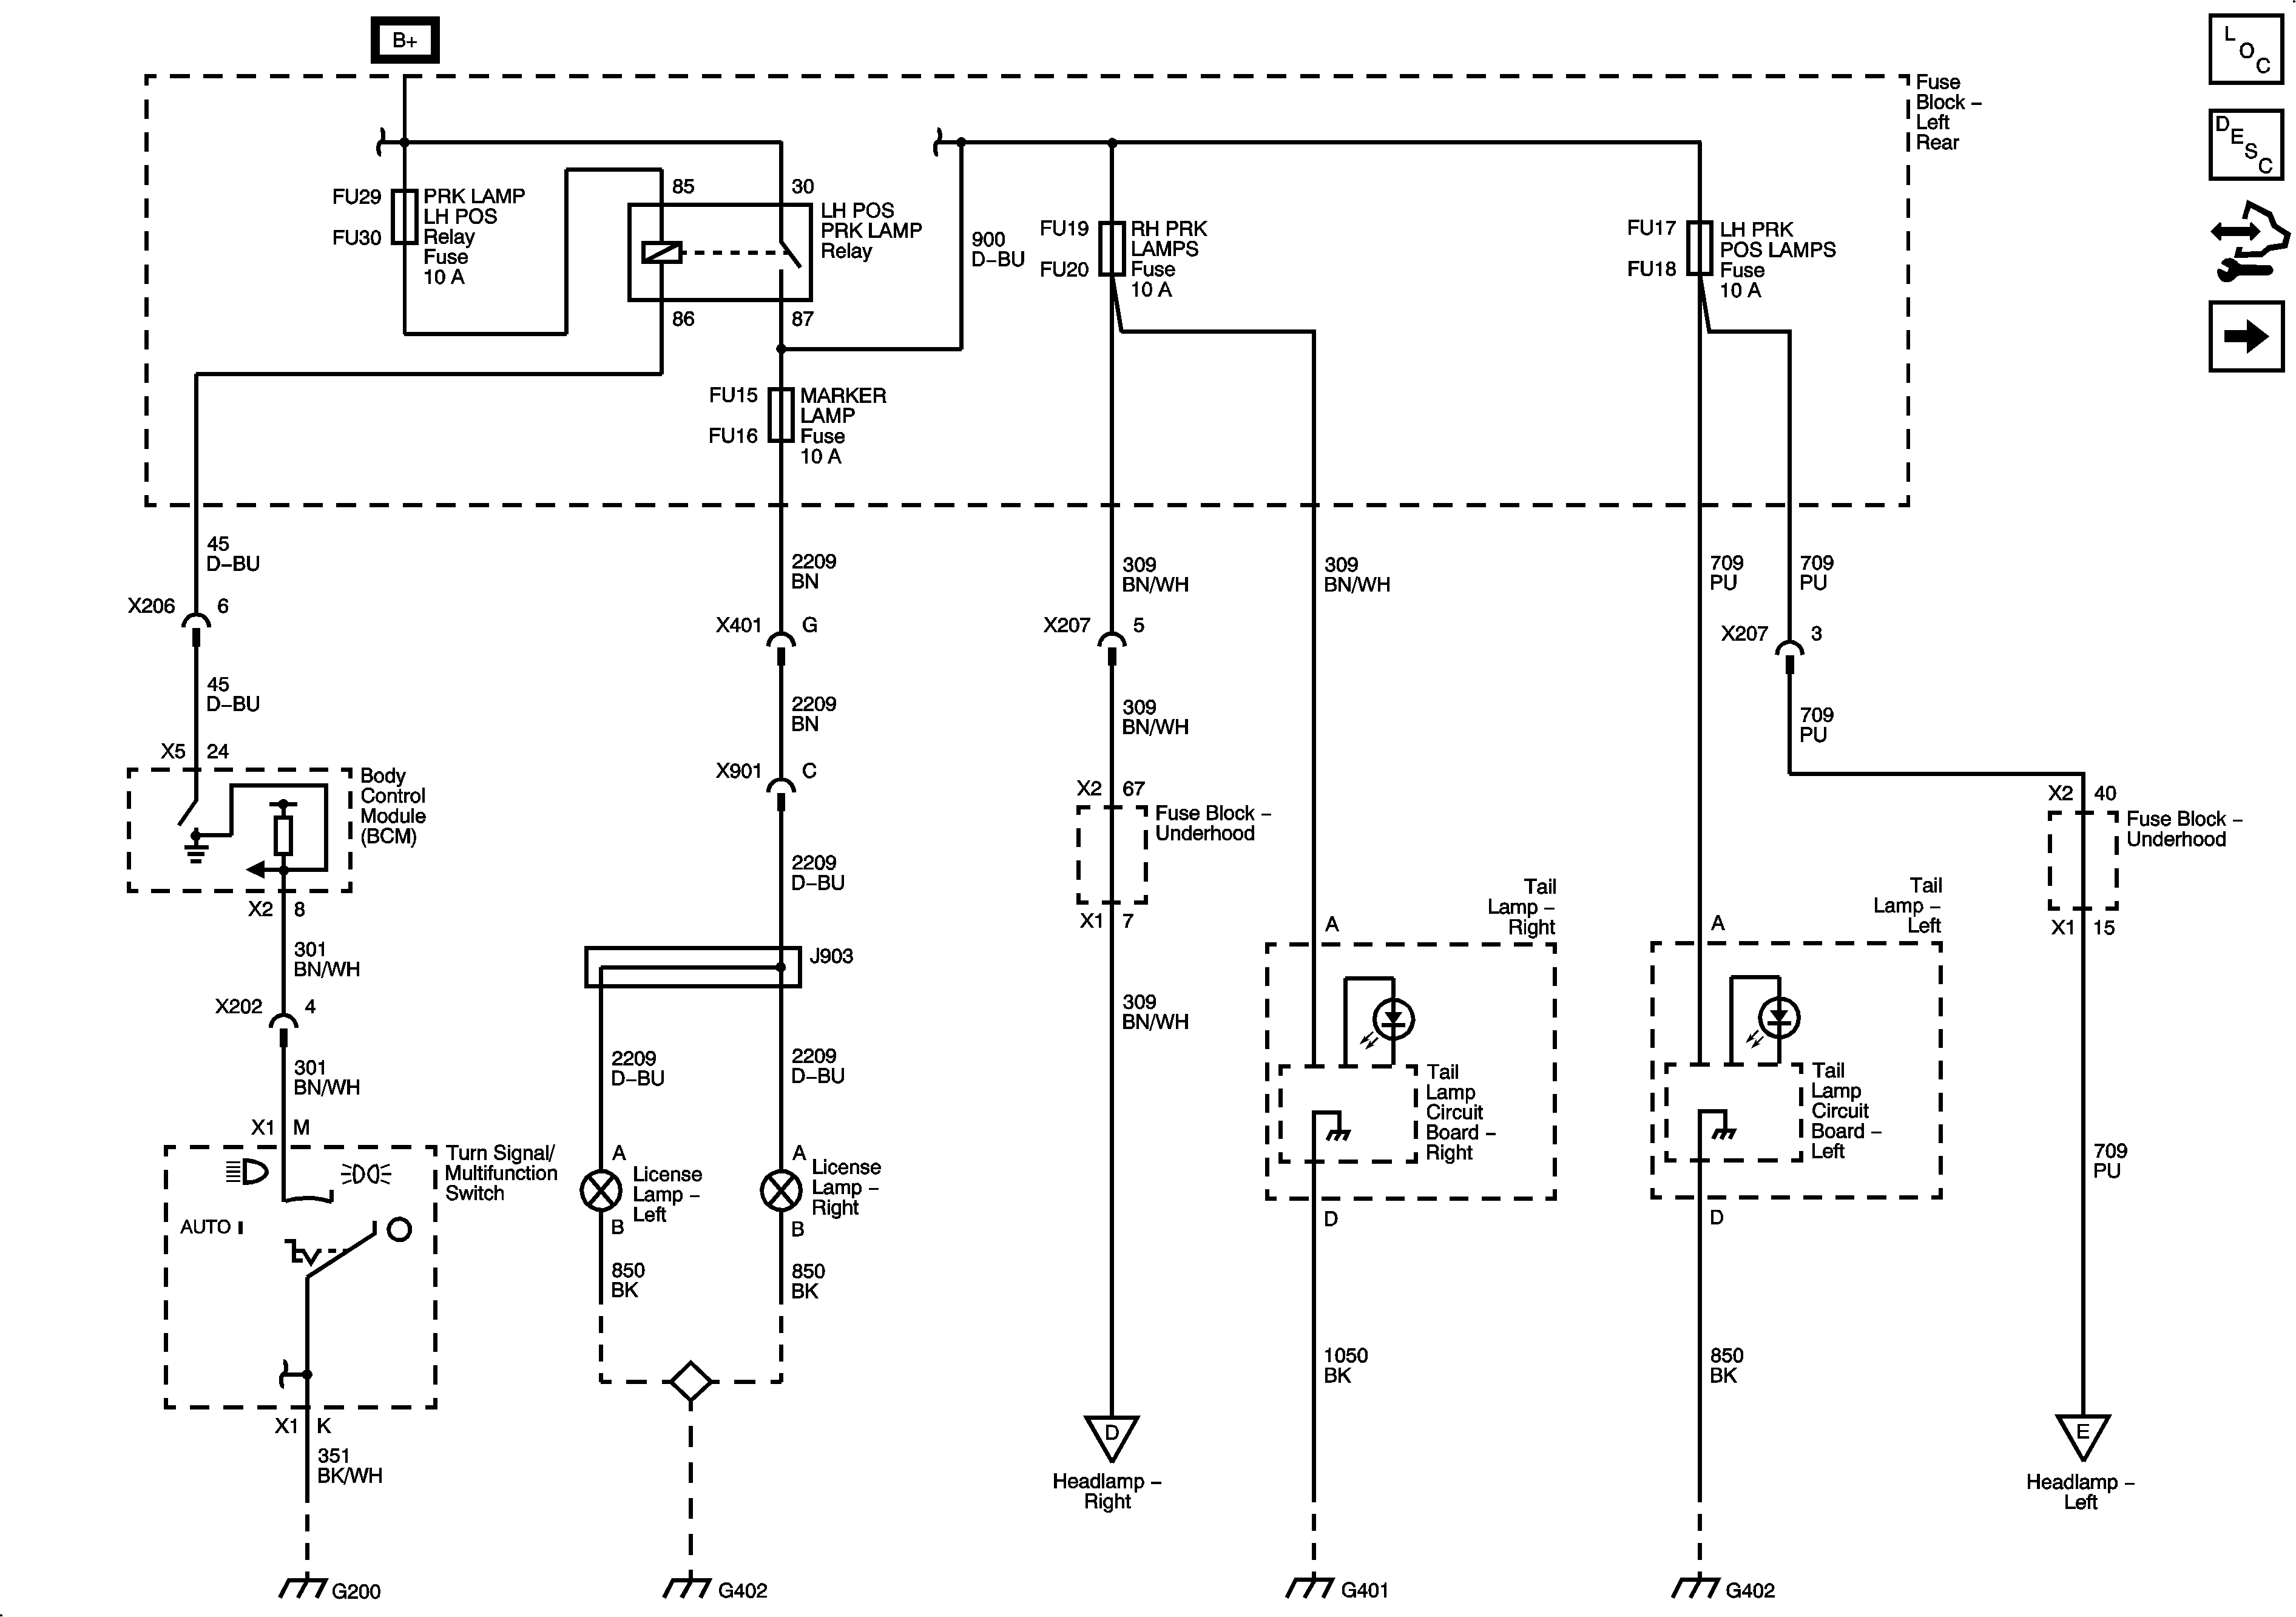
|
| Figure 2: |
Park Lamps (without EXP) - (2 of 2)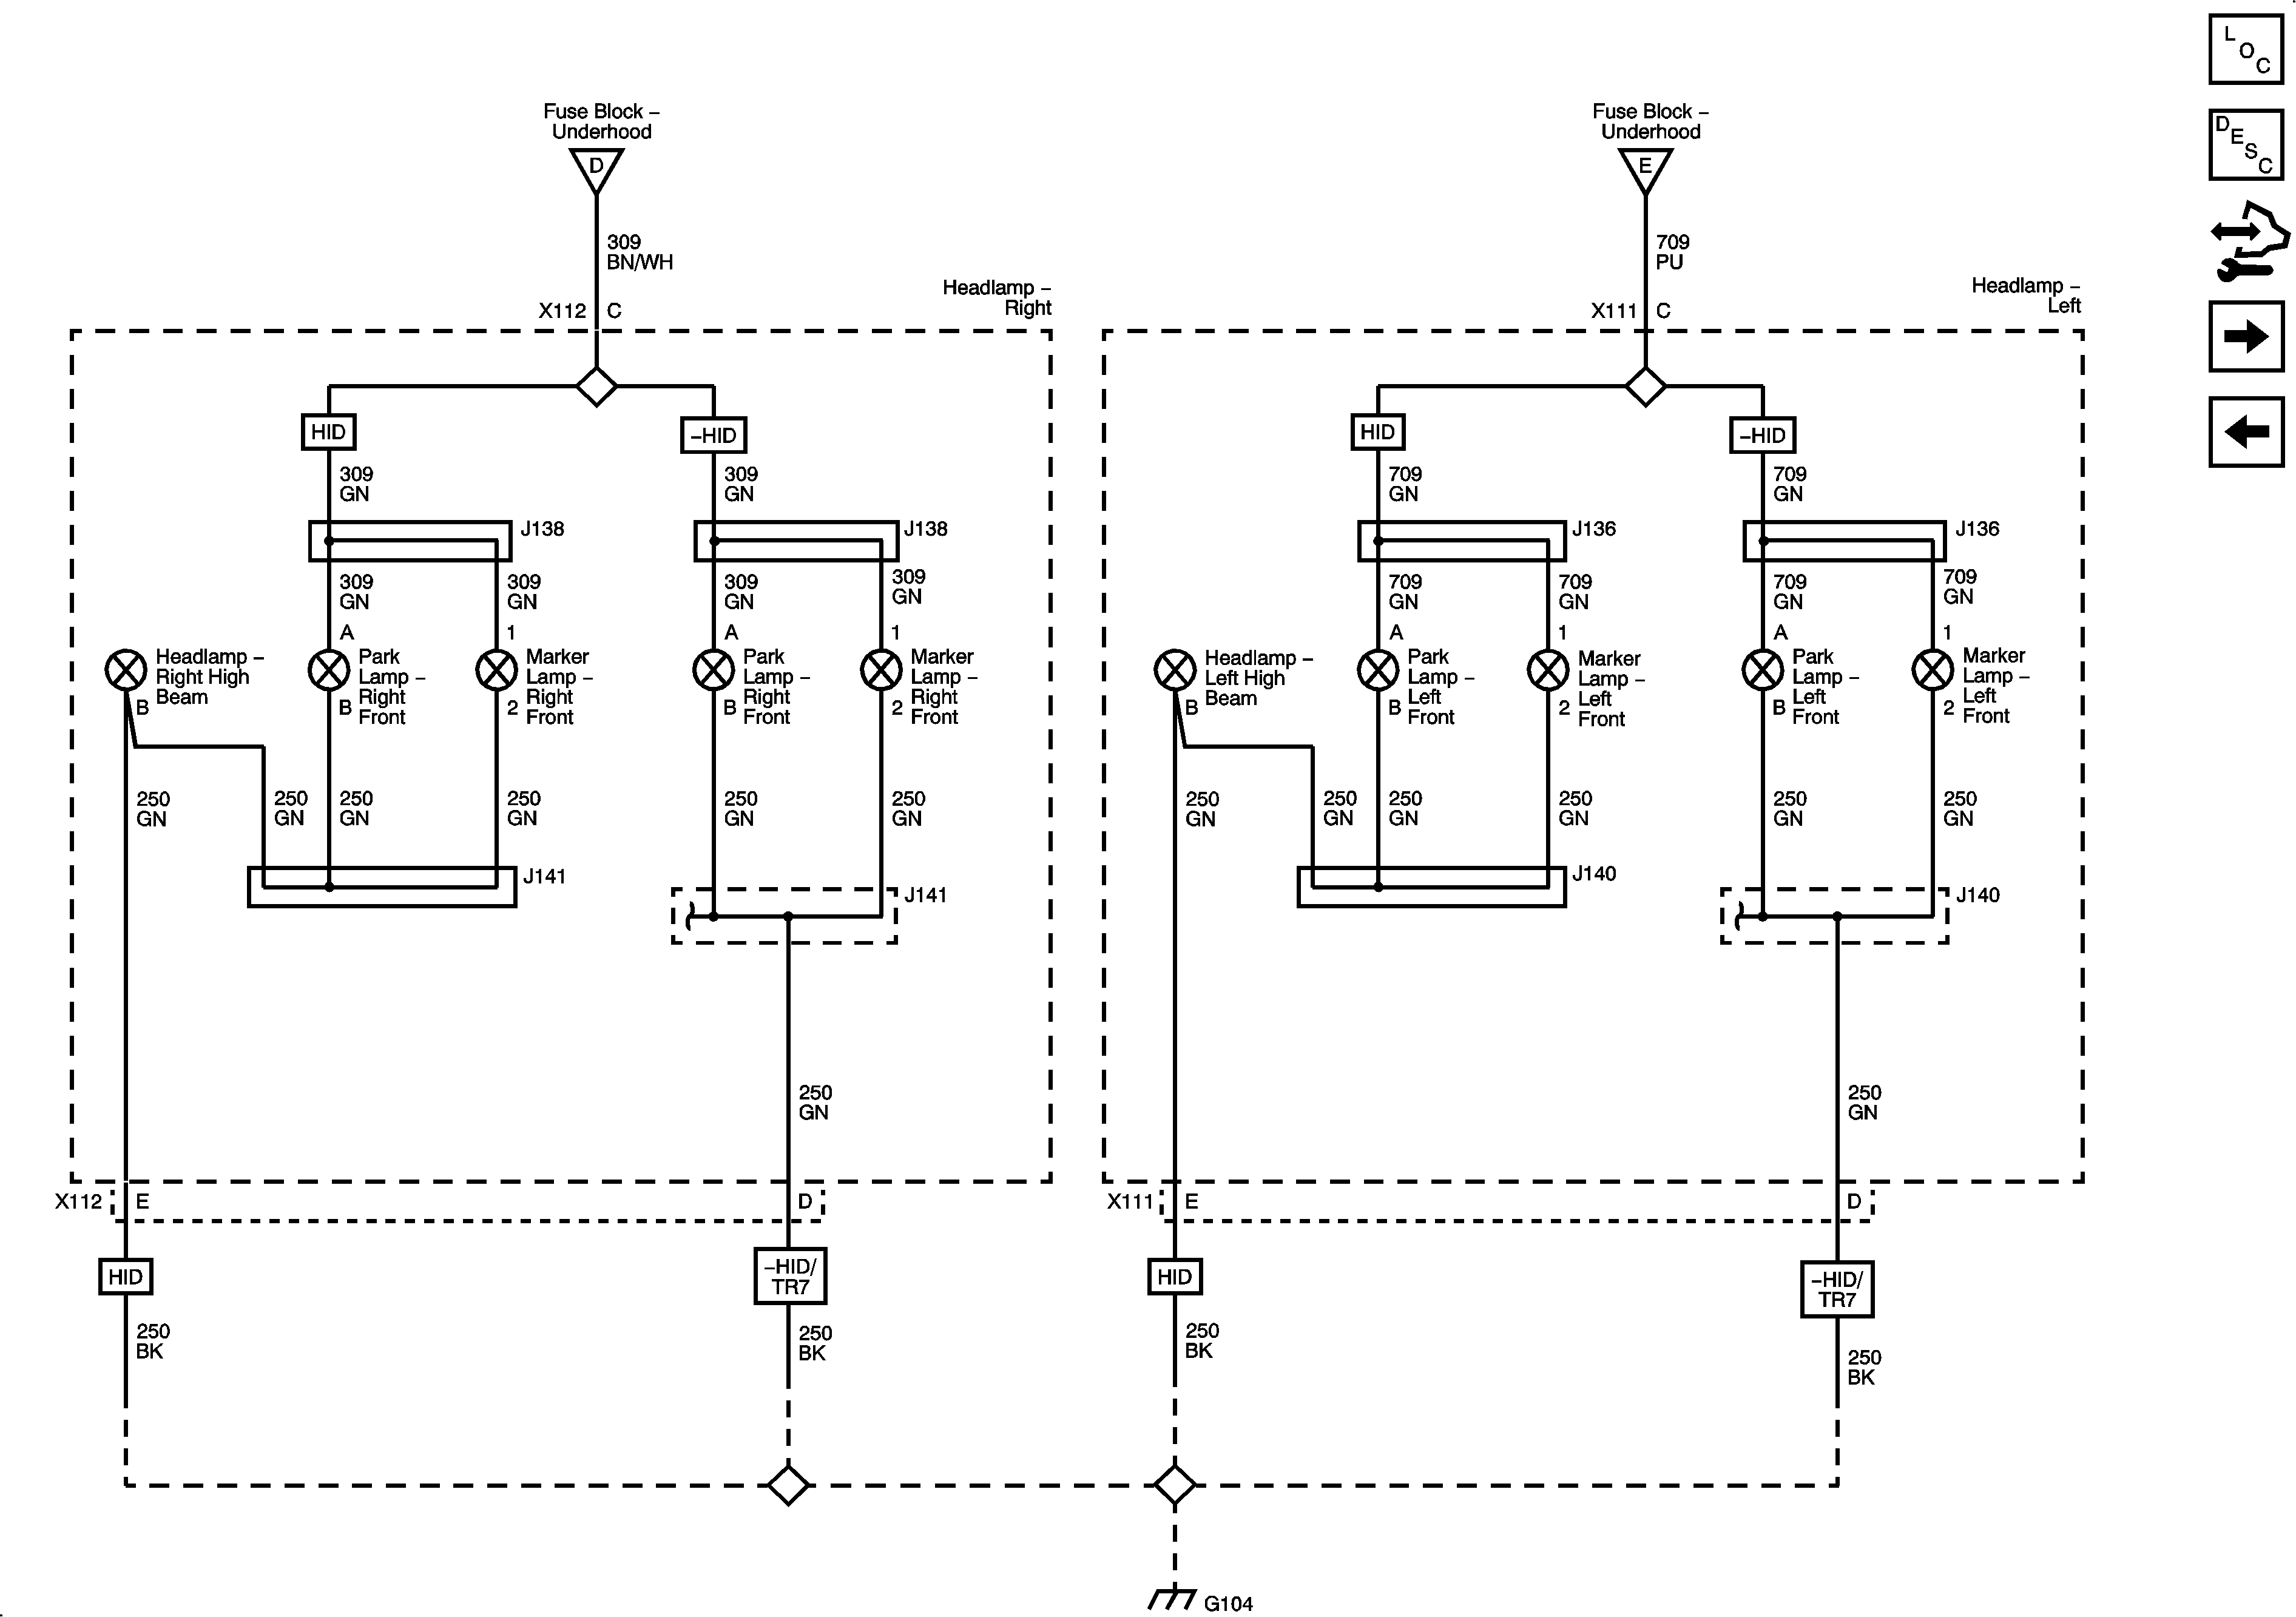
|
| Figure 3: |
Park Lamps (EXP) - (1 of 2)
|
| Figure 4: |
Park Lamps (EXP) - (2 of 2)
|
| Figure 5: |
Hazard and Turn Lamps (without EXP)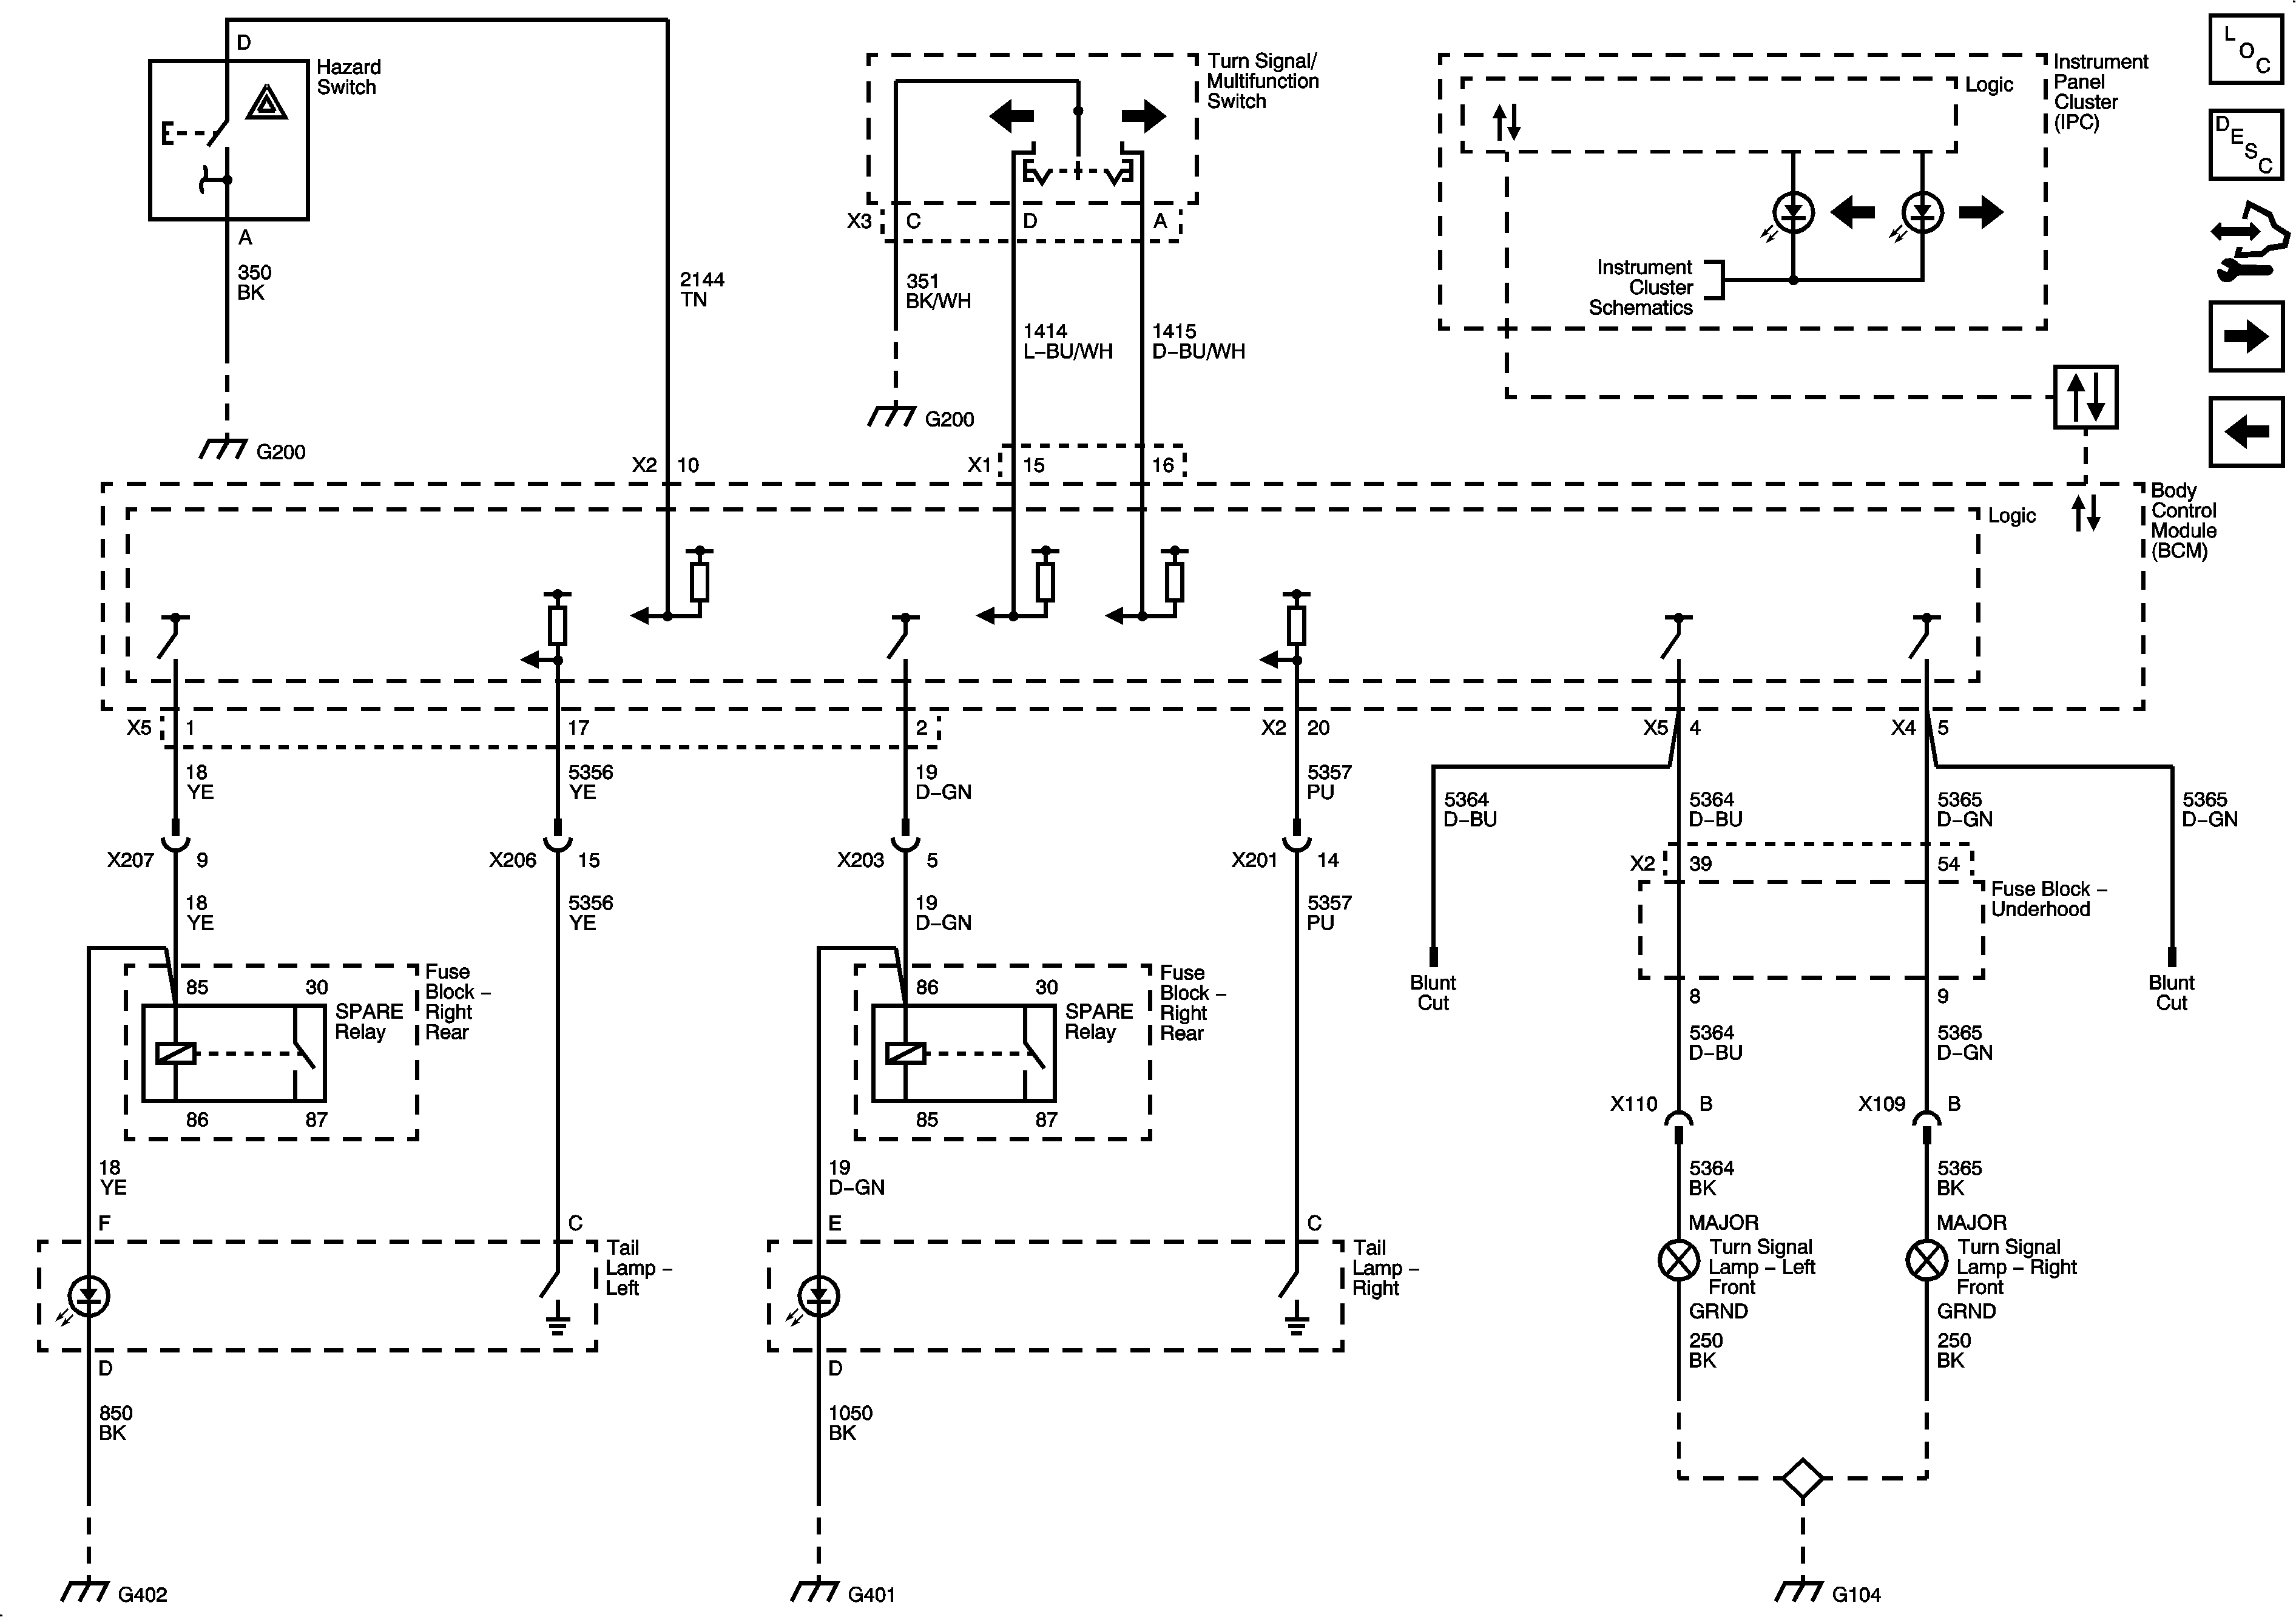
|
| Figure 6: |
Hazard and Turn Lamps (EXP)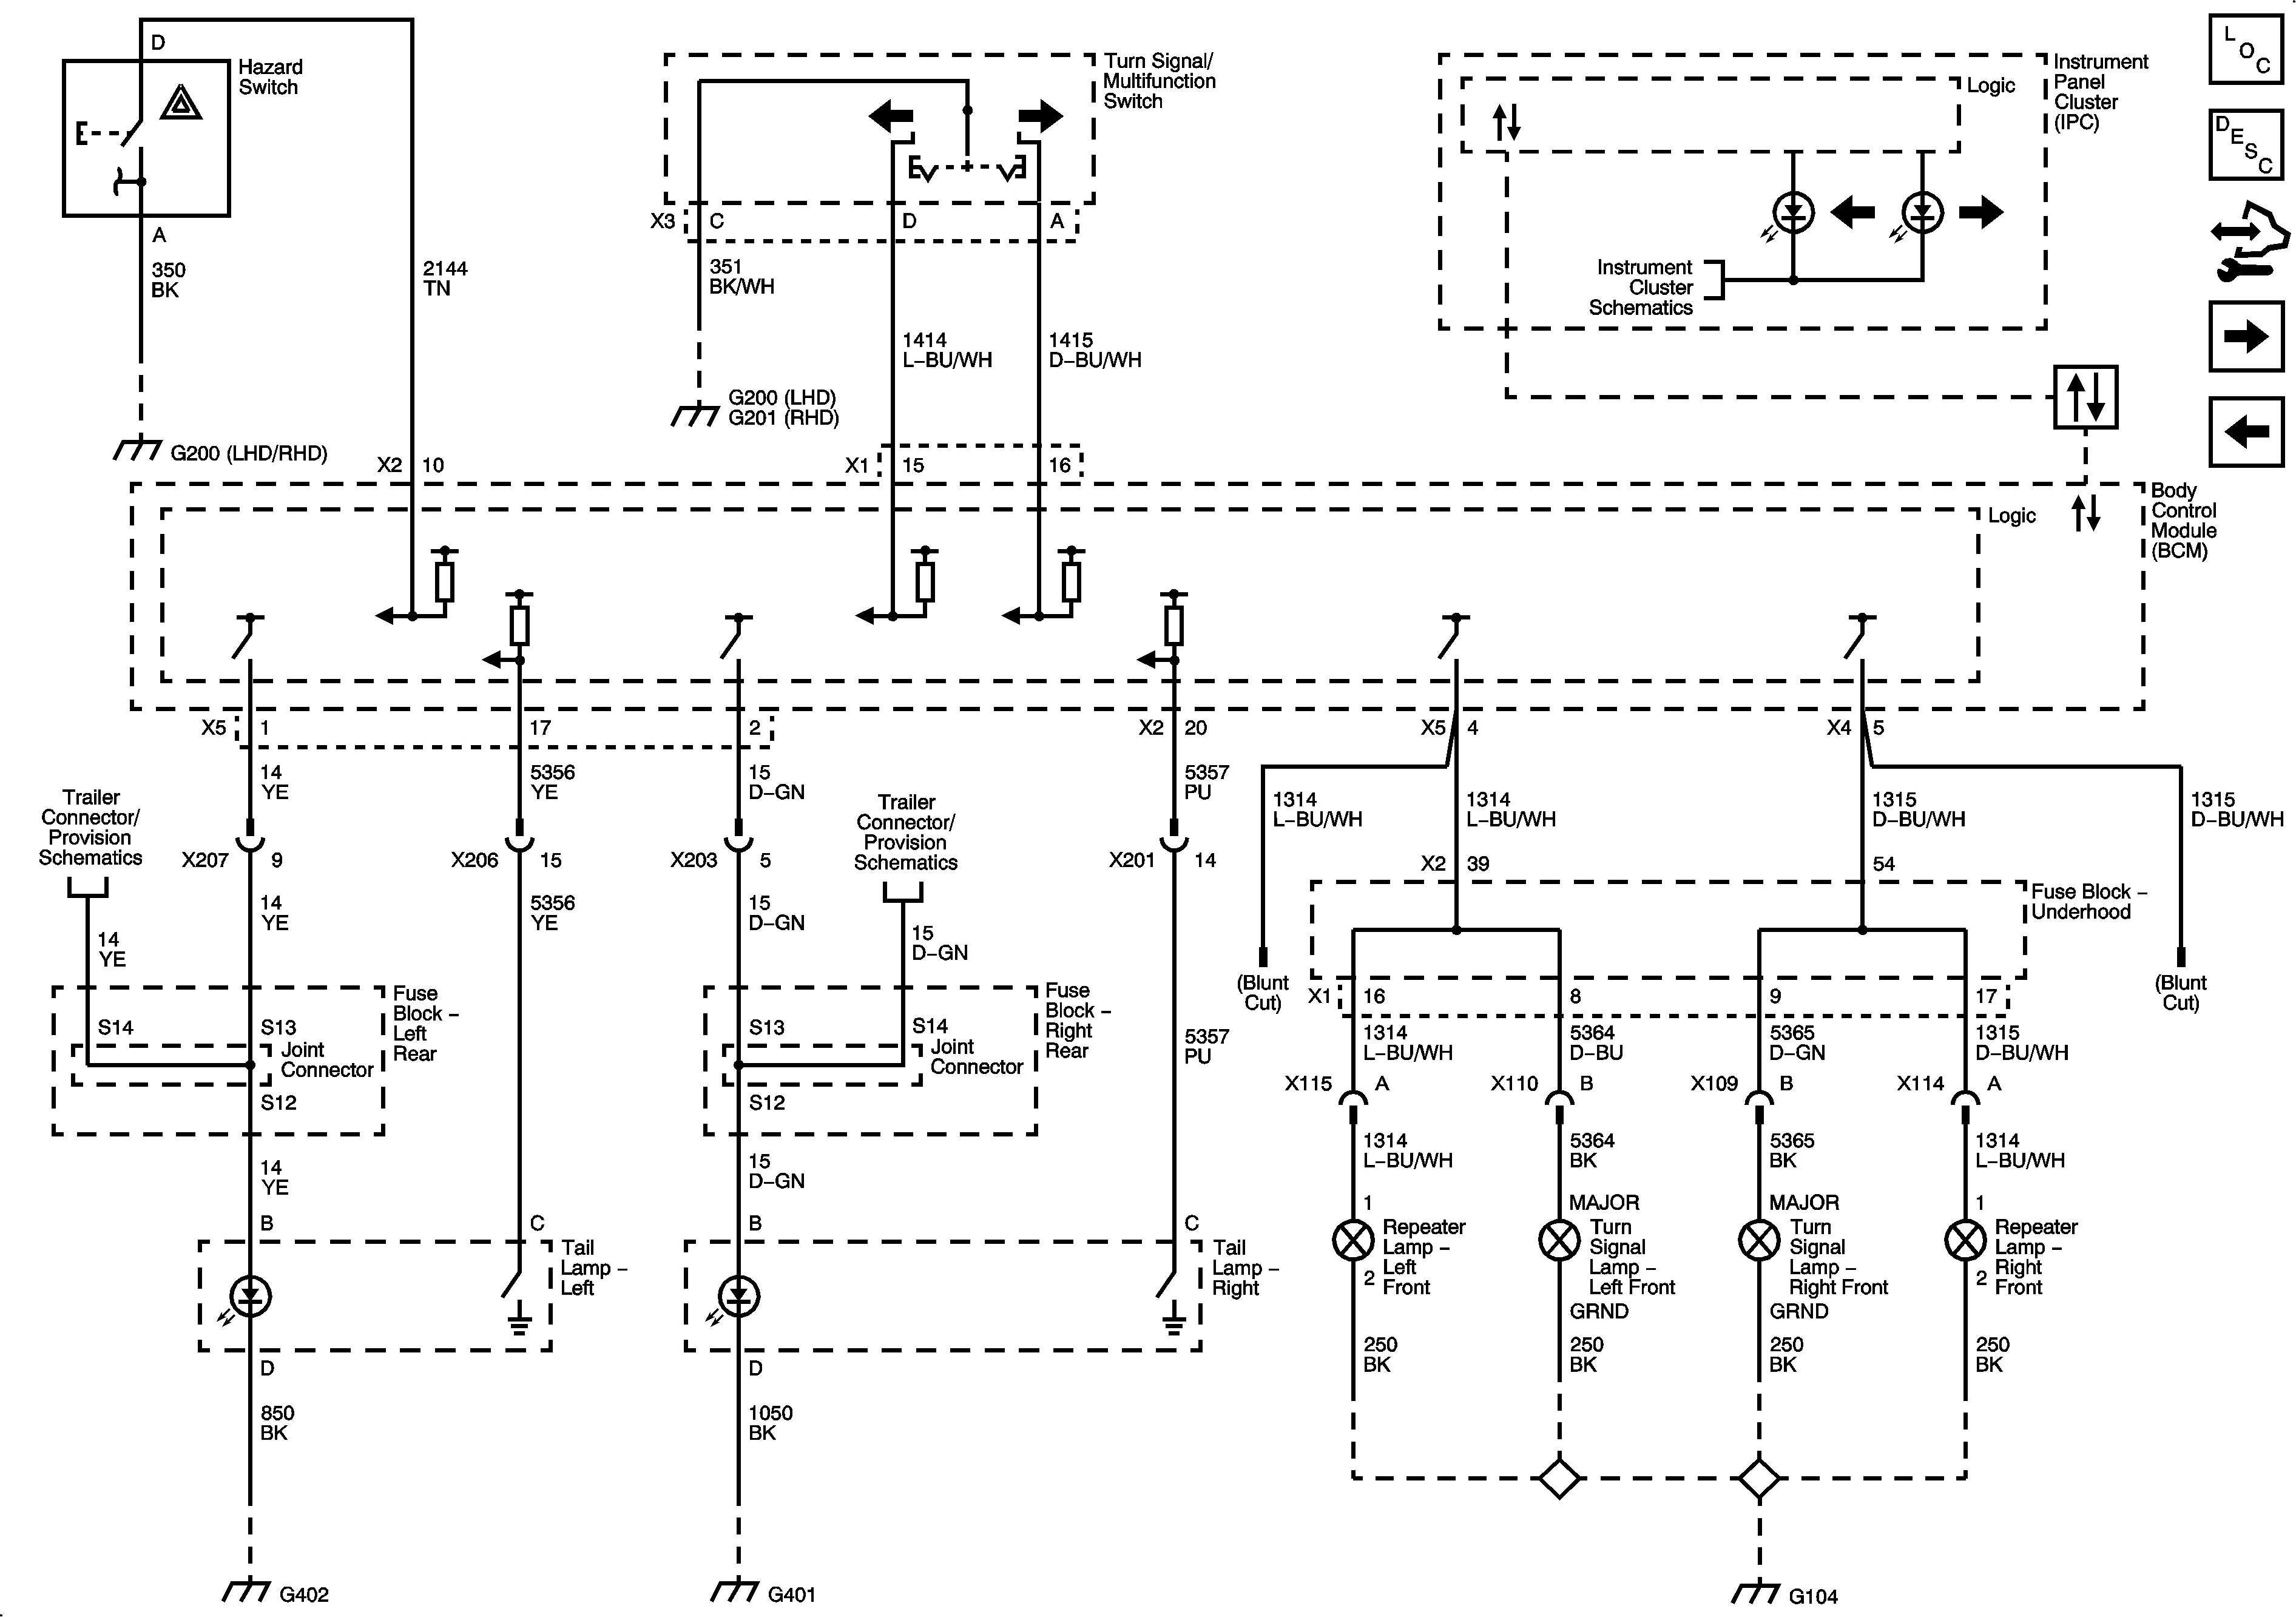
|
| Figure 7: |
Stop Lamps (without EXP)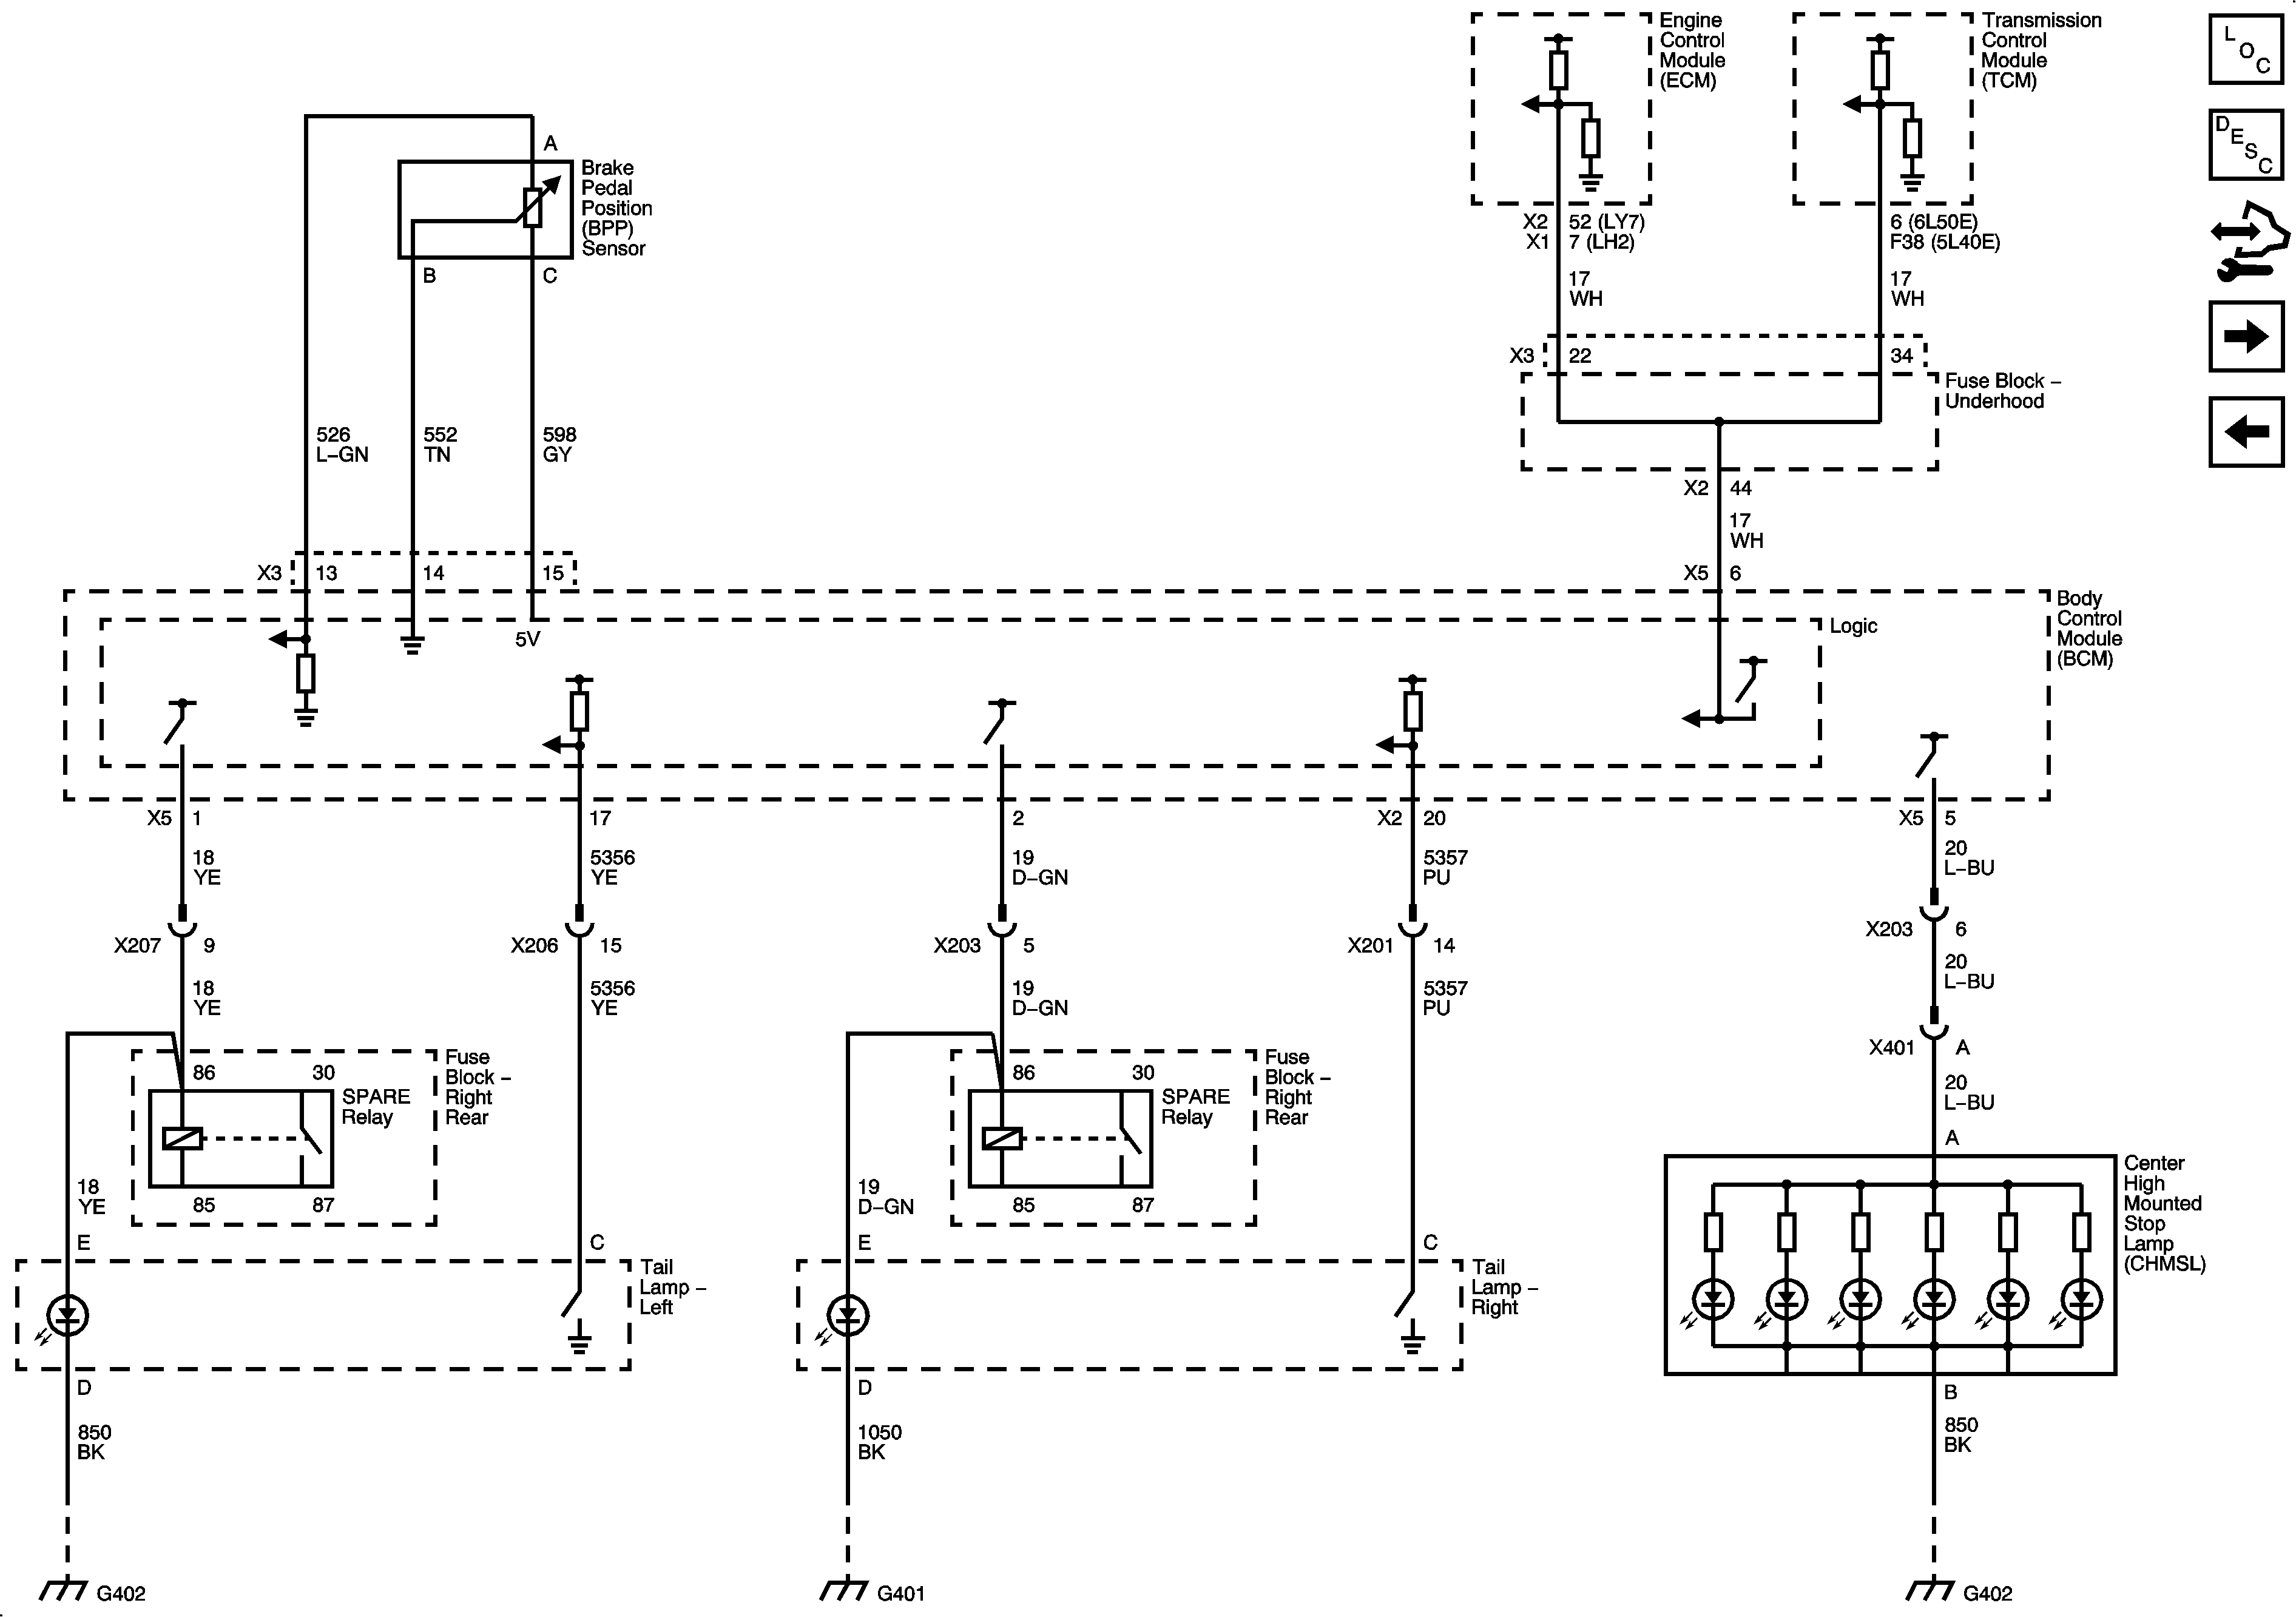
|
| Figure 8: |
Stop Lamps (EXP)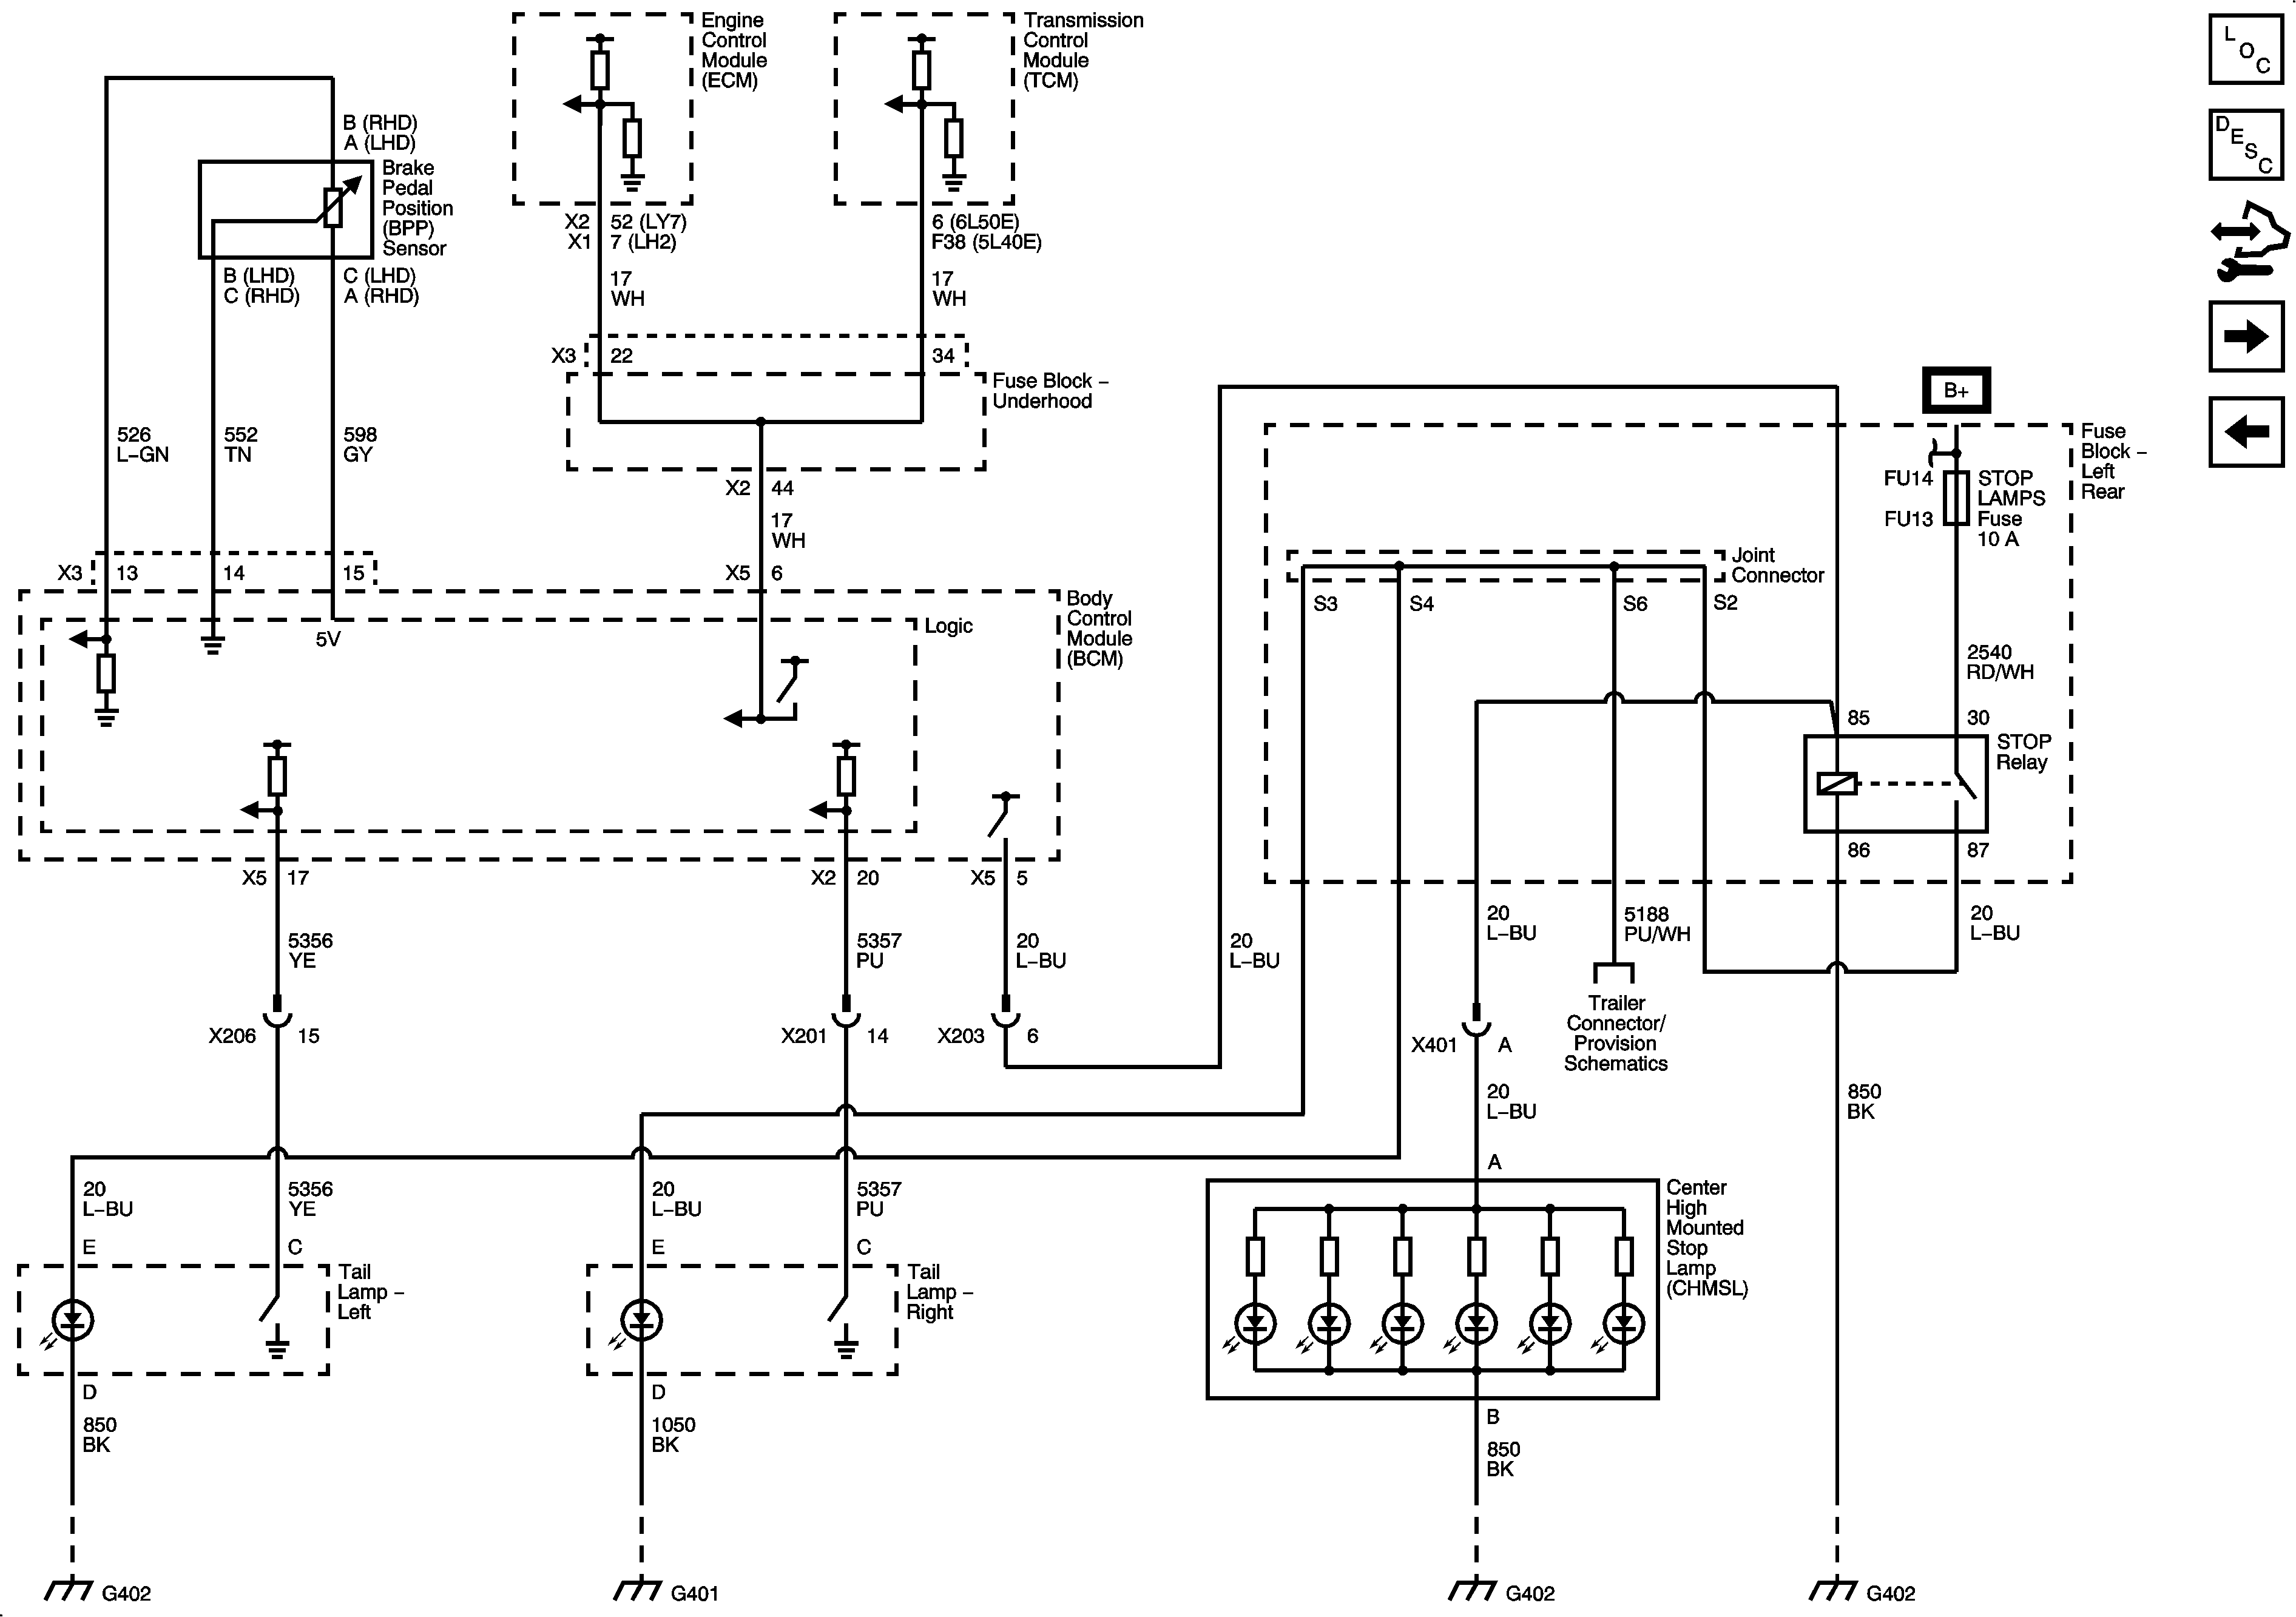
|
| Figure 9: |
Backup Lamps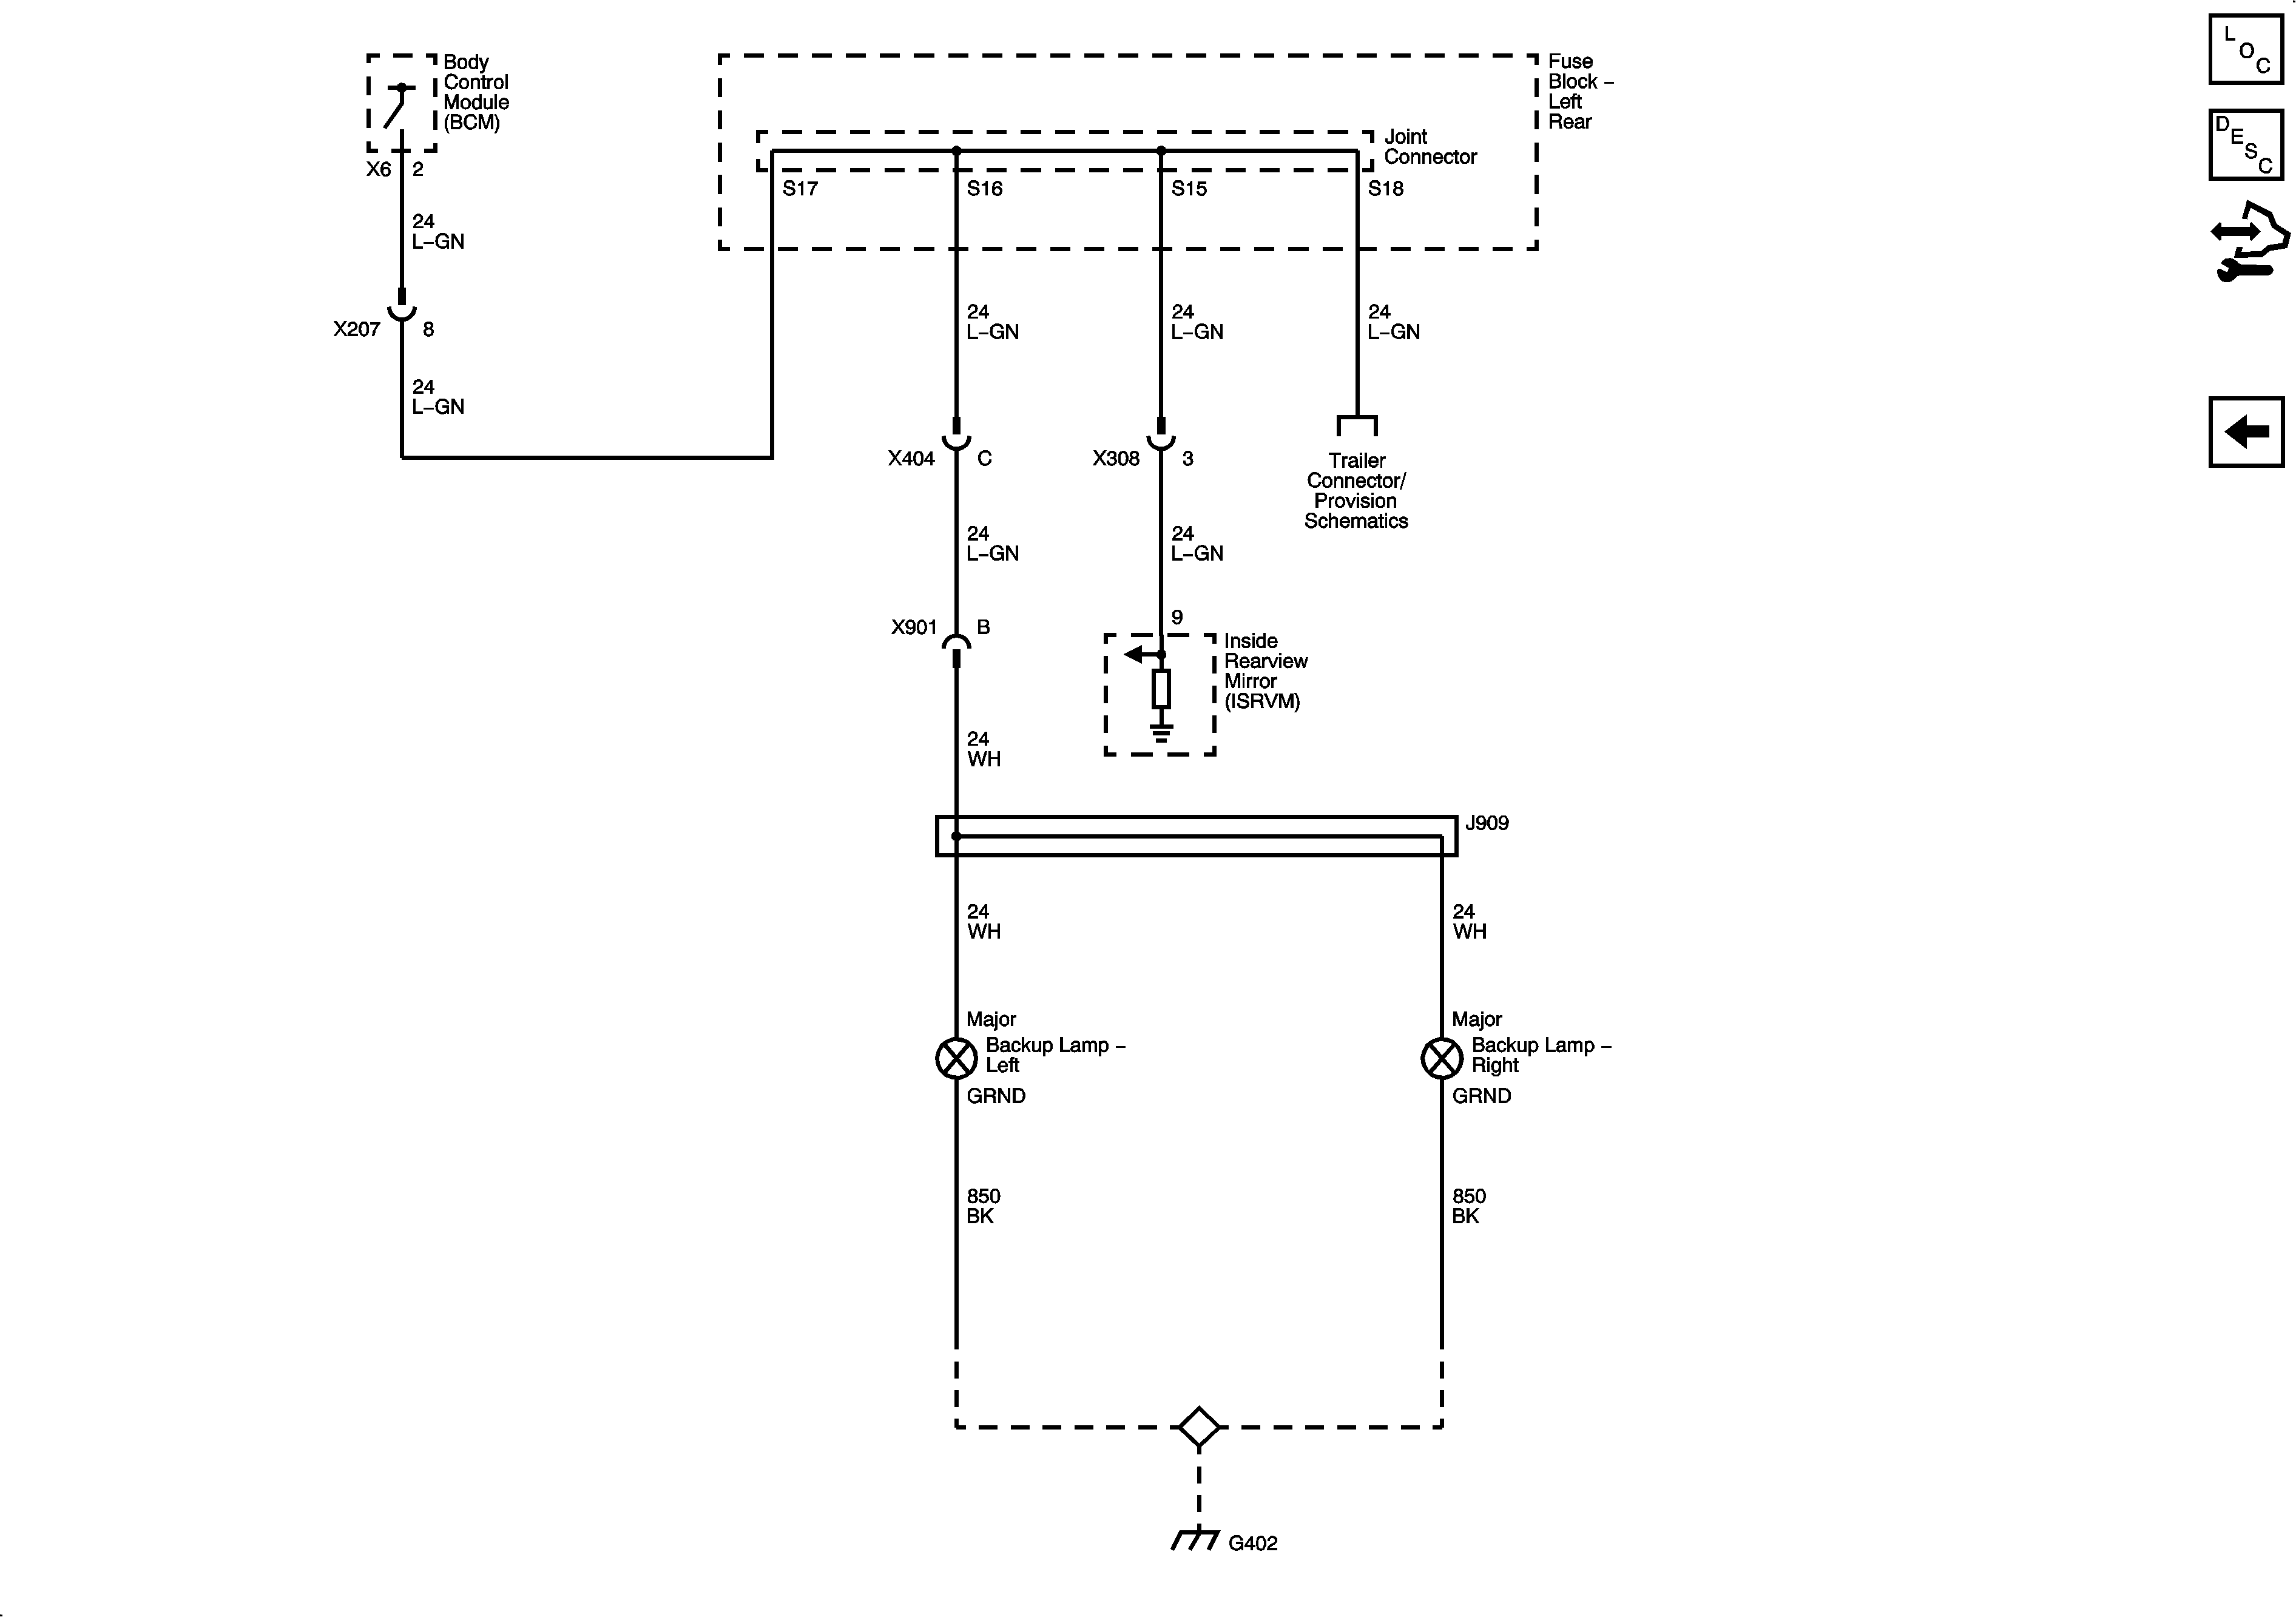
|
