For 1990-2009 cars only
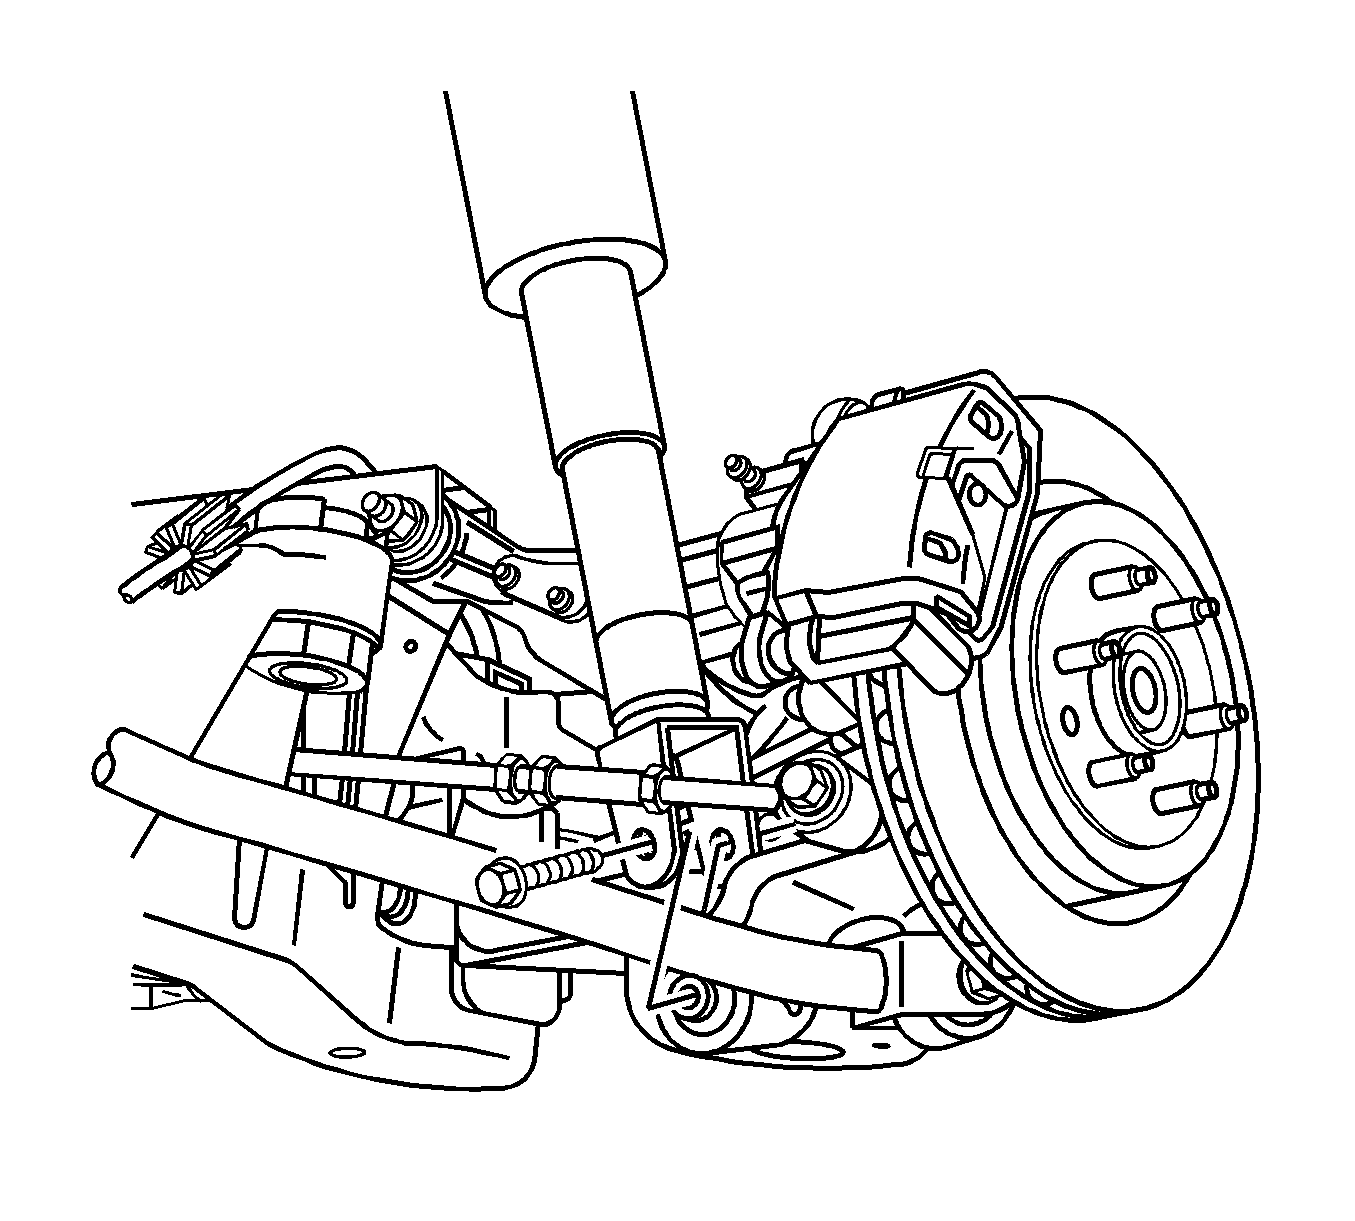
Removal Procedure
- Raise and support the vehicle. Refer to Lifting and Jacking the Vehicle .
- Remove the tire and wheel. Refer to Tire and Wheel Removal and Installation .
- Disconnect the automatic level control sensor link from the upper control arm.
- Disconnect the head lamp adjustment link from the upper control arm.
- Support and raise the lower control arm using a suitable jack.
- Remove the shock absorber lower mounting bolt.
- Lower the lower control arm and remove the support.
- Support the rear frame with a suitable jack.
- Remove the frame to body side mounting bolts and washers.
- Lower the side of the frame.
- Remove the coil spring from the vehicle.
Important: Remove the frame bolts from the side that the coil spring is being replaced on.
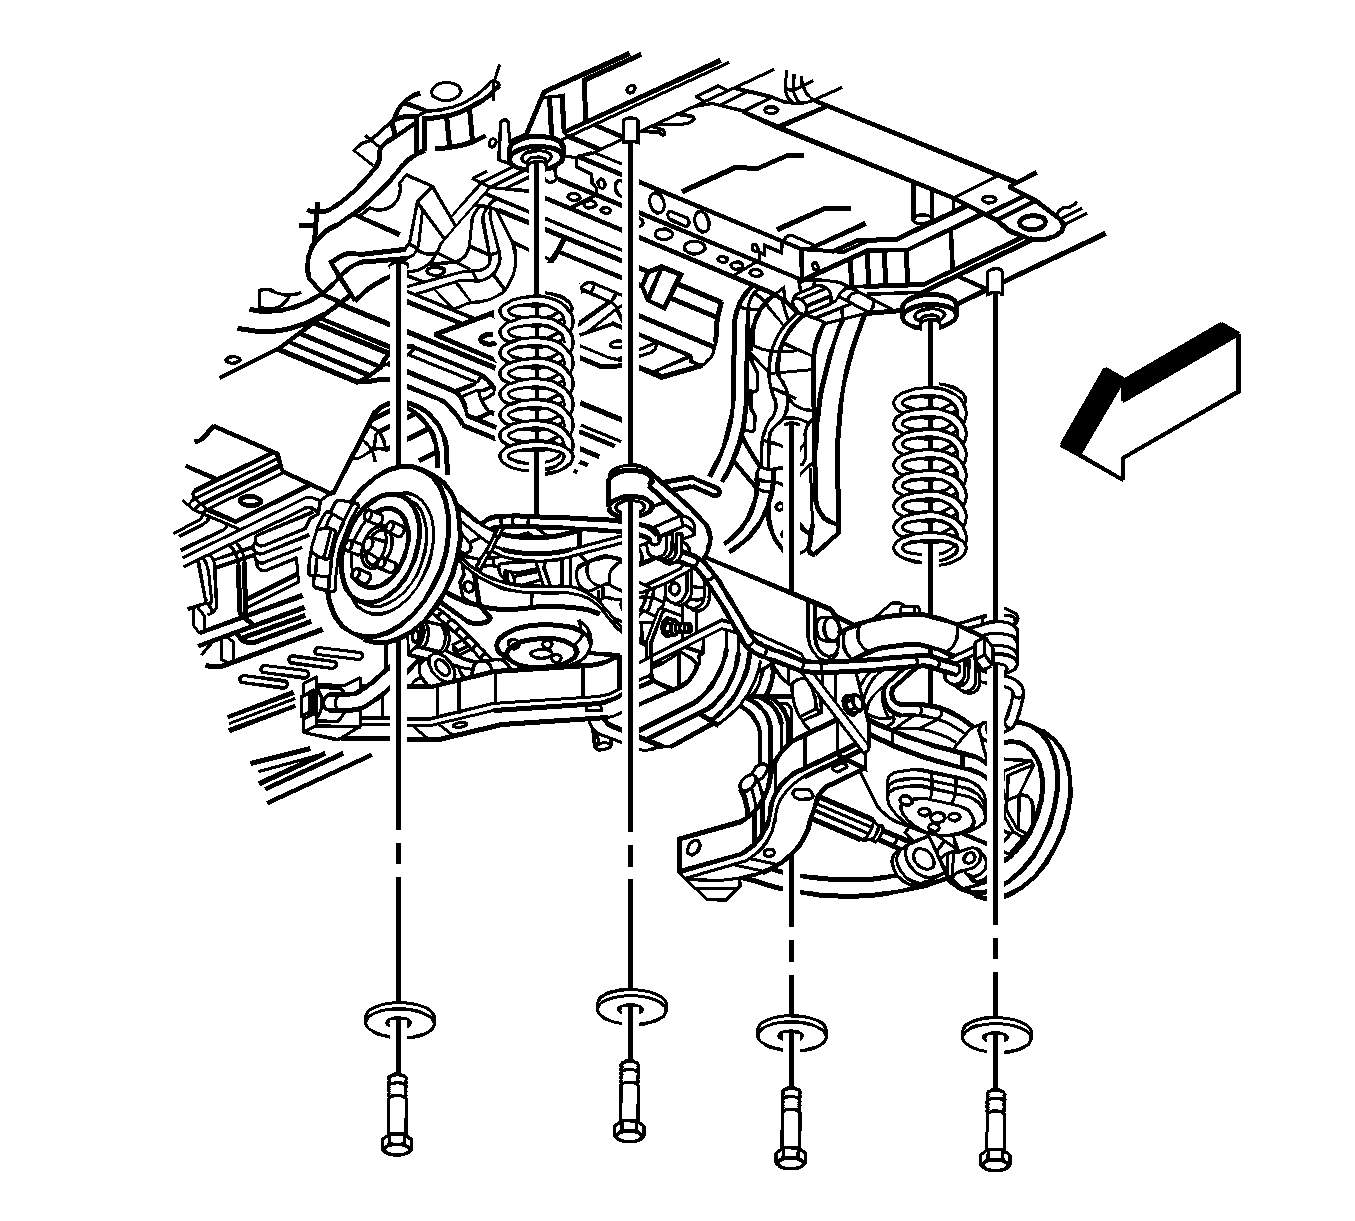
Important: Lower the frame far enough to remove the coil spring without going past the guide pins.
Installation Procedure
- Install the coil spring to the vehicle.
- Raise the frame.
- Install the frame to body mounting bolts and washers.
- Remove the jack from the vehicle.
- Install a suitable jack under the lower control arm.
- Using the jack raise the lower control arm until the shock absorber aligns with the knuckle.
- Install the shock absorber lower retaining bolt.
- Remove the jack from the vehicle.
- Connect the head lamp adjustment link to the upper control arm.
- Connect the automatic level control sensor link to the upper control arm.
- Install the tire and wheel. Refer to Tire and Wheel Removal and Installation .
- Lower the vehicle.
Notice: Refer to Fastener Notice in the Preface section.
Tighten
| • | Tighten the front bolts to 265 N·m (195 lb ft). |
| • | Tighten the rear bolts to 191 N·m (140 lb ft). |
Tighten
Tighten the bolt to 150 N·m (111 lb ft).
