For 1990-2009 cars only
Tools Required
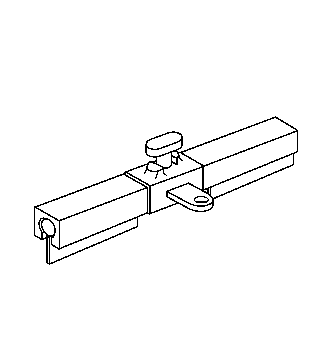
J 42058 Frame Adapter Clamp
Removal Procedure
- Disable the SIR system. Refer to SIR Disabling and Enabling .
- Disconnect the negative battery cable. Refer to Battery Negative Cable Disconnection and Connection .
- Remove all related panels and components.
- Remove or reposition the wiring to avoid damage.
- Repair as much of the damage as possible to the factory specifications. Refer to Dimensions - Body .
- Use J 42058 to secure the vehicle if pulling and straightening is required.
- Note the location and remove the sealers and anti-corrosion materials from the repair area. Refer to Anti-Corrosion Treatment and Repair .
- Apply heat and pry apart to separate the impact bar from the front panel.
- Trim the front wheelhouse and the front end panel as necessary to access the top impact bar welds.
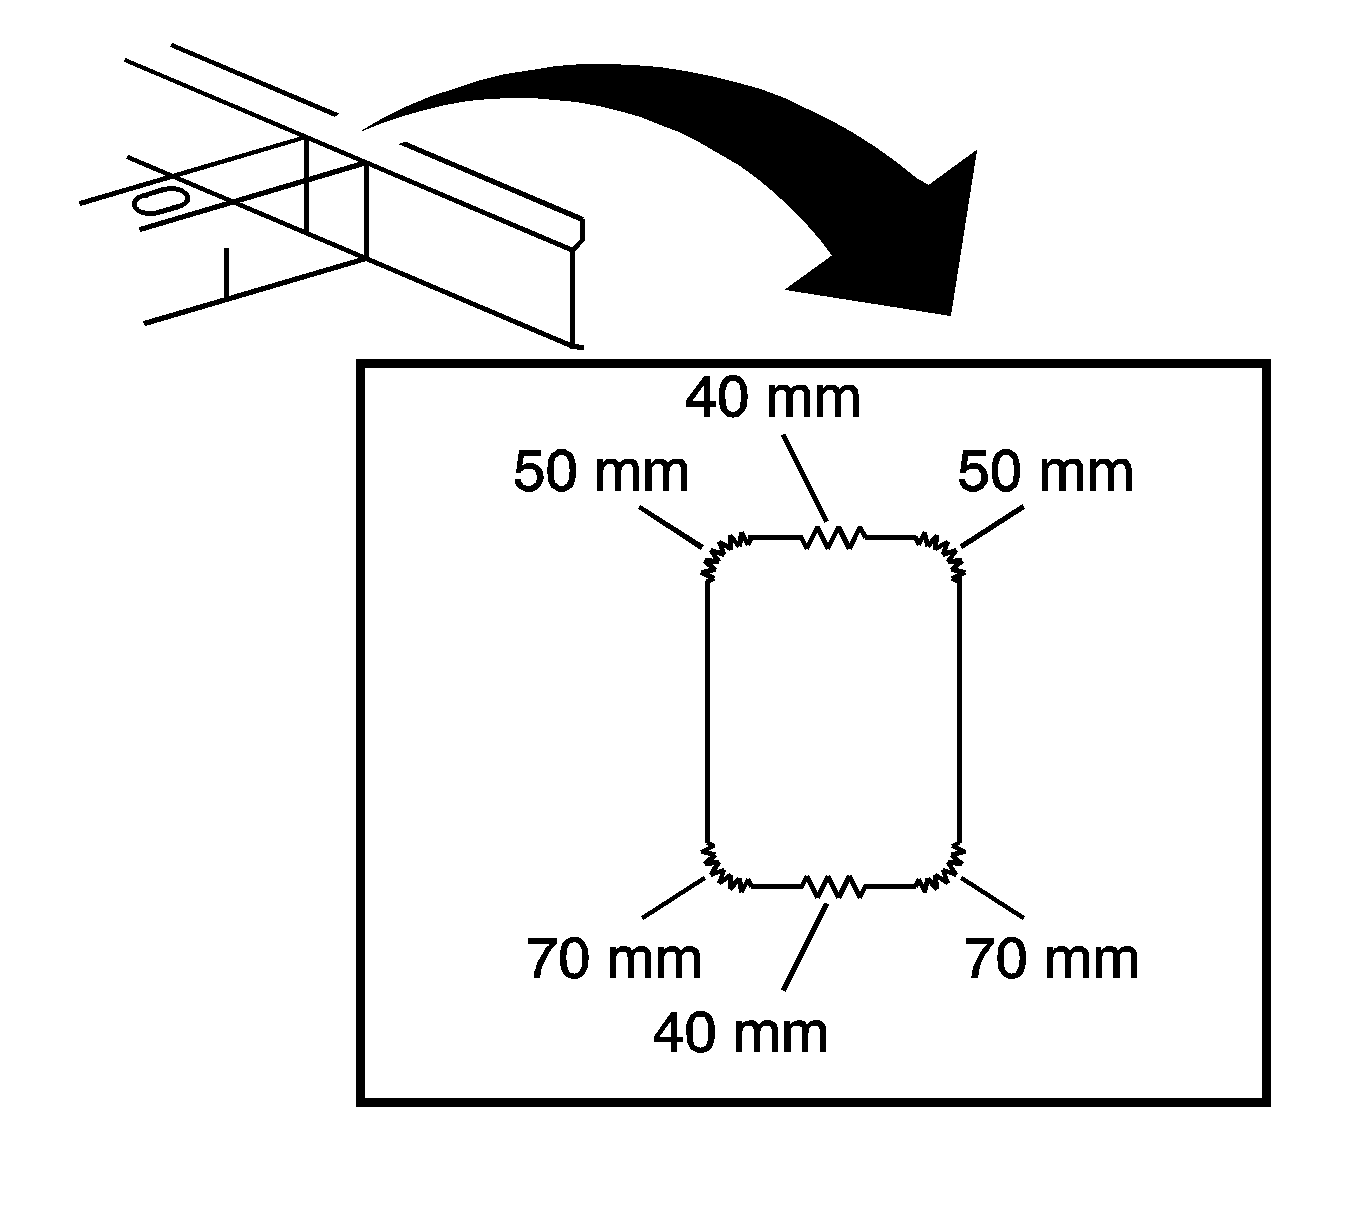
- Cut the welds around the perimeter of the frame rail ends. Cut the welds favoring the impact bar side of the joint.
- Remove the damaged impact bar.
- Extract pieces of the impact bar which are left attached to the rail ends.
- Straighten and deburr the rail ends. Keep the perimeter and shape of the rail end as original as possible.
Caution: Refer to Approved Equipment for Collision Repair Caution in the Preface section.
Important: Do not cut into the frame rails.

Installation Procedure
- Temporarily position the impact bar for proper fit and alignment.
- Clean and prepare all of the welded mating surfaces.
- Apply 3M weld-thru coating P/N 05916 or equivalent as necessary and to the inside of the rail ends.
- Clean and prepare all bonding mating surfaces according to adhesive manufacturer's recommendations.
- Apply a consistent bead of structural adhesive to the top impact bar to bond to the front panel. Refer to Sheet Molded Compound (SMC) Panel Bonding .
- Position the bumper impact bar to the vehicle using three-dimensional measuring equipment. Refer to Dimensions - Body .
- Using a metal inset gas (MIG) welder, stitch weld the front bar to the frame rail ends.
- Apply the sealers and anti-corrosion materials to the repair area. Refer to Anti-Corrosion Treatment and Repair .
- Paint the repair area. Refer to Basecoat/Clearcoat Paint Systems .
- Install all related panels and components.
- Connect the negative battery cable. Refer to Battery Negative Cable Disconnection and Connection .
- Enable the SIR system. Refer to SIR Disabling and Enabling .
Important: DO NOT top coat the bonding surface of the front bar. Use primer only on bonding surfaces. Refer to adhesive manufacturer's recommendations.
Important: If no trace of the original welds is present, follow the pattern specified for welding the side rails to the impact bar.
