For 1990-2009 cars only
Removal Procedure
- Raise the hood. Support the hood.
- Remove the battery. Refer to Battery Replacement in Engine Electrical.
- Remove the grille. Refer to Grille Replacement in Exterior Trim.
- Remove the air cleaner assembly. Refer to Air Cleaner Assembly Replacement in Engine Controls - 4.3L.
- Remove the front bumper impact bar. Refer to Front Bumper Impact Bar Replacement in Bumpers.
- Remove the headlamp assemblies. Refer to Headlamp Assembly or Headlamp Bulb and/or Cornering, Sidemarker, Park, Turn Signal Bulb Replacement in Lighting Systems.
- Raise and suitably support the vehicle. Refer to Lifting and Jacking the Vehicle in General Information.
- Remove the steering linkage shield. Refer to Steering Linkage Shield Replacement in Steering Linkage (Non-Rack & Pinion).
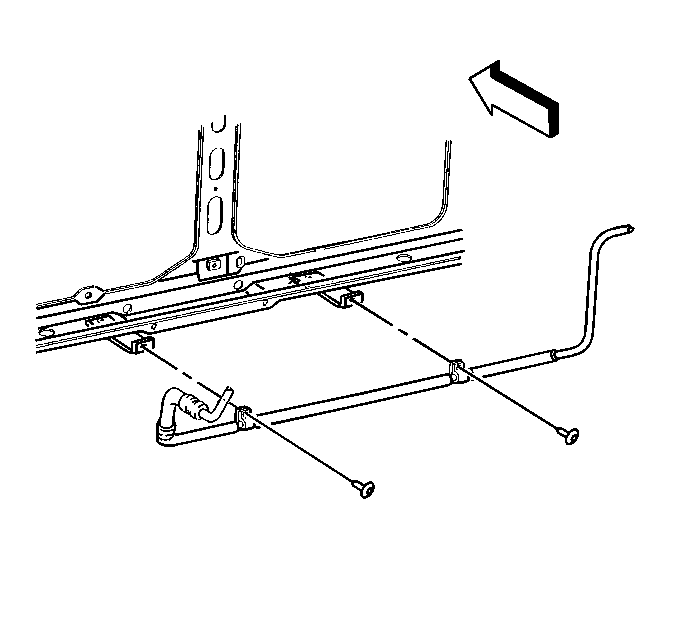
- Disconnect the A/C evaporator line from the 2 brackets located at the bottom of the radiator support. Refer to Evaporator Tube Replacement in Heating, Ventilation and Air Conditioning.
- Disconnect the electrical connector to the SIR discriminating sensors.
- Remove the SIR discriminating sensors from the radiator support, if replacing the radiator support. Refer to Inflatable Restraint Front End Discriminating Sensor Replacement in SIR.
- Lower the vehicle. Refer to Lifting and Jacking the Vehicle in General Information.
- Disconnect the power steering hoses to the power steering cooler. Refer to Power Steering Fluid Cooler Replacement in Power Steering System.
- Remove the power steering cooler from the radiator support, if replacing the radiator support. Refer to Power Steering Fluid Cooler Replacement in Power Steering System.
- Remove the hood release cable from the radiator support and the primary hood latch. Refer to Hood Primary Latch Release Cable Replacement .
- Remove the primary hood latch support. Refer to Hood Latch Support Replacement .
- Remove the air intake baffle. Refer to Air Intake Baffle Replacement - Radiator in Body Front End.
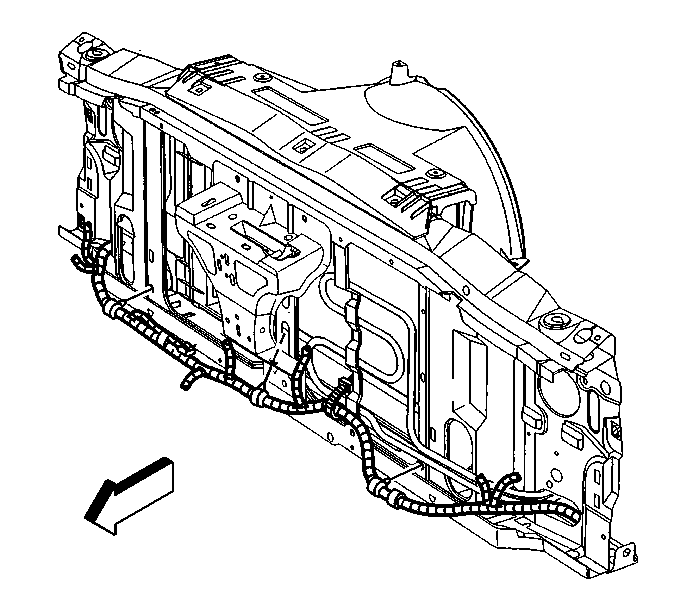
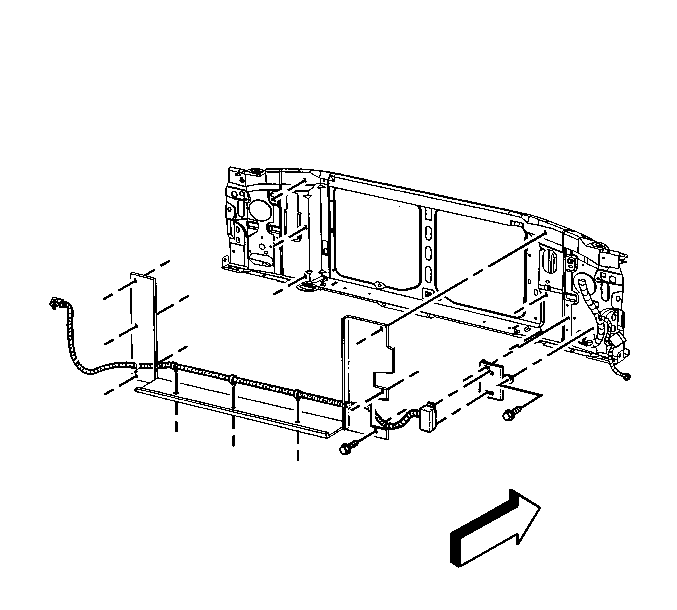
- Remove the forward lamp wiring harness from the radiator support.
- Remove the upper fan shroud from the radiator support. Refer to Fan Shroud Replacement in Engine Cooling.
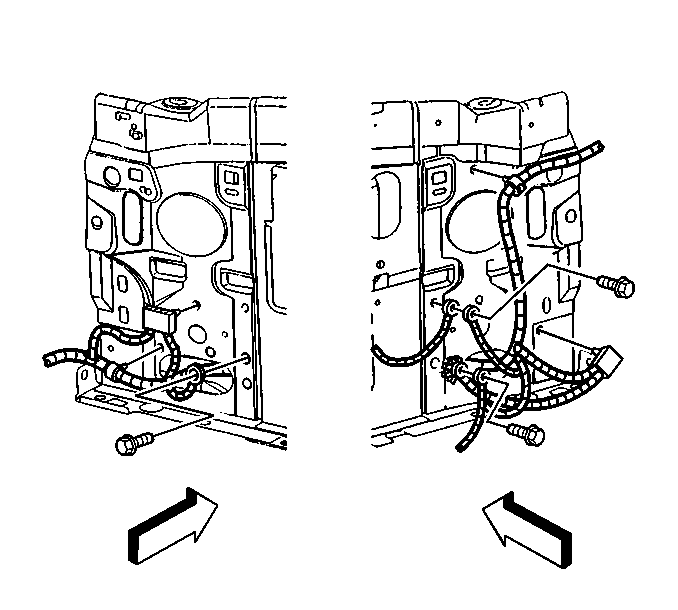
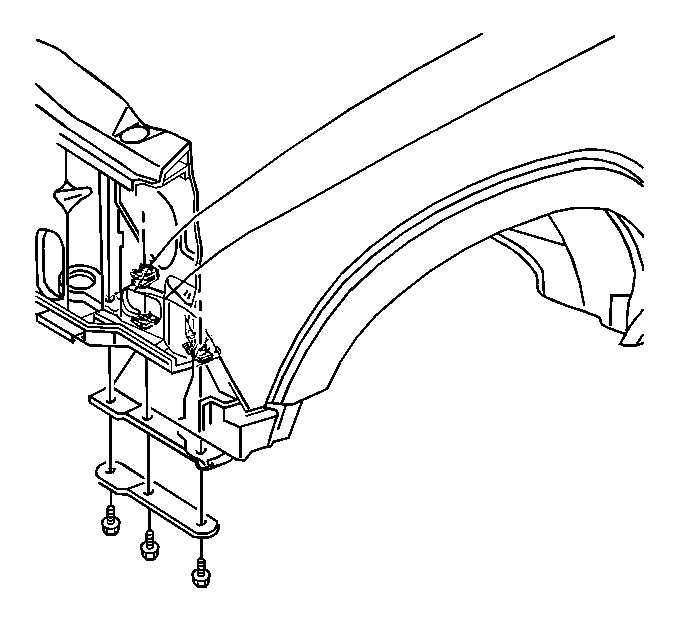
- Remove the ground screw terminals from the radiator support.
- Remove the bolts that retain the air conditioning condenser to the radiator support. Refer to Condenser Replacement in Heater, Ventilation and Air Conditioning.
- Remove the bolts that retain the battery tray to the radiator support. Refer to Battery Tray Replacement in Engine Electrical.
- Remove the radiator air intake baffle. Refer to Air Intake Baffle Replacement - Radiator .
- Remove the hood support rod. Refer to Hood Hold-Open Rod Replacement .
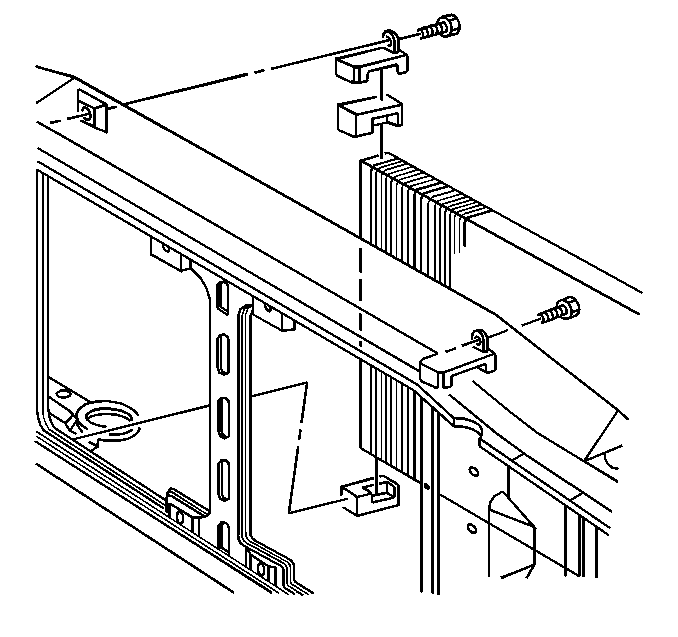
- Remove the mega fuse cable and bracket.
- Remove the bolts that retain the radiator support to the right and the left wheel house panel. Refer to Wheelhouse Panel Replacement in Exterior Trim.
- Remove the bolts that retain the left fender to the wheel house panel. Refer to Front Fender Replacement .
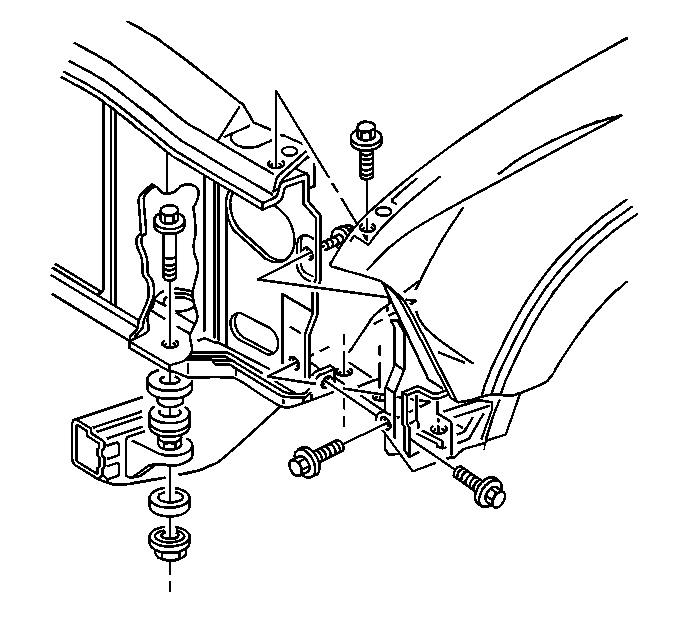
- Remove the bolts that retain the radiator support to the frame.
- Remove the bolts that retain the radiator support to the right and the left fender. Refer to Front Fender Replacement .
- Remove the radiator support frame mounts.
- Position the left fender away from the vehicle in order to allow a clearance between the fender and the radiator support.
- Slide the left side of the support away from the vehicle.
- Remove the radiator support.
Tilt the radiator toward the engine.
Installation Procedure
- Position the fender away from the vehicle in order to allow a clearance between the fender and the radiator support.
- Install the radiator support into the frame.
- Install the radiator support frame mounts.
- Install the bolts through the frame mount.
- Install the bolts that retain the left wheel house panel to the fender. Refer to Front Fender Replacement .
- Install the bolts that retain the radiator support to the right and the left fender. Refer to Front Fender Replacement .
- Install the bolts that retain the radiator support to the right and the left wheel house panel. Refer to Wheelhouse Panel Replacement in Exterior Trim.
- Install the hood hold-open rod. Refer to Hood Hold-Open Rod Replacement .
- Install the radiator air intake baffle to the vehicle. Refer to Air Intake Baffle Replacement - Radiator .
- Install the bolts that retain the battery tray to the radiator support bolts. Refer to Battery Tray Replacement in Engine Electrical.
- Install the mega fuse cable and bracket to the radiator support.
- Install the air conditioning condenser, if equipped. Refer to Condenser Replacement in HVAC Systems-Manual.
- Install the fan shroud to the radiator support. Refer to Fan Shroud Replacement in Engine Cooling.
- Install the forward lamp wiring harness to the radiator support.
- Install the ground screw terminals to the radiator support.
- Install the primary hood latch support. Refer to Hood Latch Support Replacement .
- Install the power steering cooler to the radiator support (if removed). Refer to Power Steering Fluid Cooler Replacement in Power Steering System.
- Connect the power steering hoses to the power steering cooler. Refer to Power Steering Fluid Cooler Replacement in Power Steering System.
- Raise the vehicle. Refer to Lifting and Jacking the Vehicle in General Information.
- Install the SIR discriminating sensors to the radiator support, if removed. Refer to Inflatable Restraint Front End Discriminating Sensor Replacement in SIR.
- Connect the electrical connector to the SIR discriminating sensors.
- Connect the A/C evaporator line to the 2 brackets located at the bottom of the radiator support. Refer to Evaporator Tube Replacement in Heating, Ventilation and Air Conditioning.
- Lower the vehicle. Refer to Lifting and Jacking the Vehicle in General Information.
- Install the hood release cable to the radiator support and the primary hood latch. Refer to Hood Primary Latch Release Cable Replacement .
- Install the steering linkage shield. Refer to Steering Linkage Shield Replacement in Steering Linkage (Non-Rack & Pinion).
- Install the headlamp assemblies. Refer to Headlamp Assembly or Headlamp Bulb and/or Cornering, Sidemarker, Park, Turn Signal Bulb Replacement in Lighting Systems.
- Install the bumper. Refer to Front Bumper Impact Bar Replacement in Bumpers.
- Install the air cleaner assembly. Refer to Air Cleaner Assembly Replacement in Engine Controls - 4.3L.
- Install the grille. Refer to Grille Replacement in Exterior Trim.
- Install the battery. Refer to Battery Replacement in Engine Electrical.
- Lower the hood.
- Inspect the latch. Adjust if necessary.
Slide the right side of the support onto the frame. Pivot the left side of the support into place.
Notice: Refer to Fastener Notice in the Preface section.
Tighten
Tighten the radiator support frame mount bolts to 70 N·m (52 lb ft).
