Compressor Shaft Seal Removal HT6/HD6/HU6
Tools Required
| • | J 34992 Compressor
Holding Fixture |
- Place the compressor in the J 34992
.
- Remove the clutch plate and hub assembly from the compressor.
Refer to Compressor Clutch Plate and Hub Assembly Removal
(HT6/HD6)
.
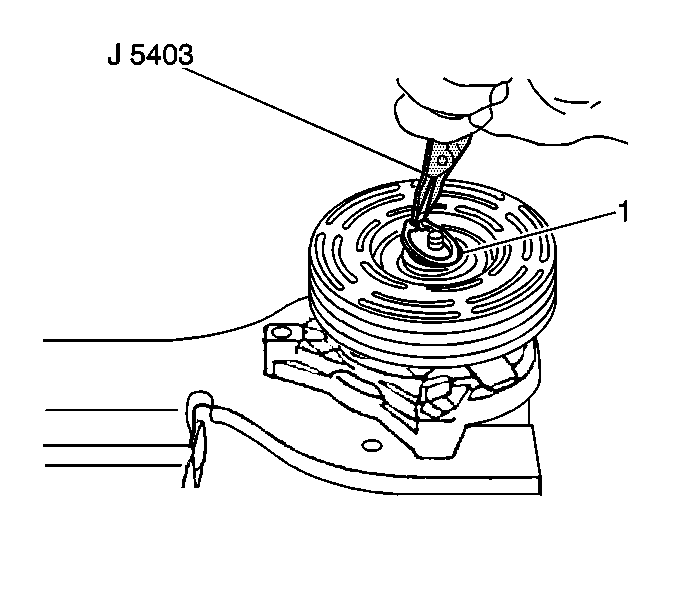
- Remove the shaft seal retainer ring (1) using the J 5403
.
- Any dirt or foreign material in the compressor may cause damage.
Thoroughly clean the following components:
| • | The inside of the compressor neck area surrounding the shaft |
| • | The exposed portion of the seal |
| • | The retainer ring groove |
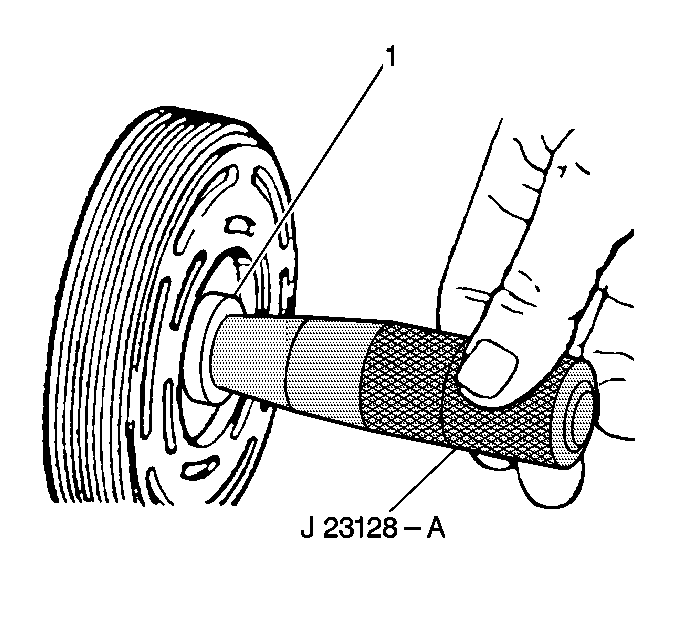
- Fully engage the knurled tangs of the J 23128-A
into the recessed portion of the seal (1) by turning
the handle clockwise.
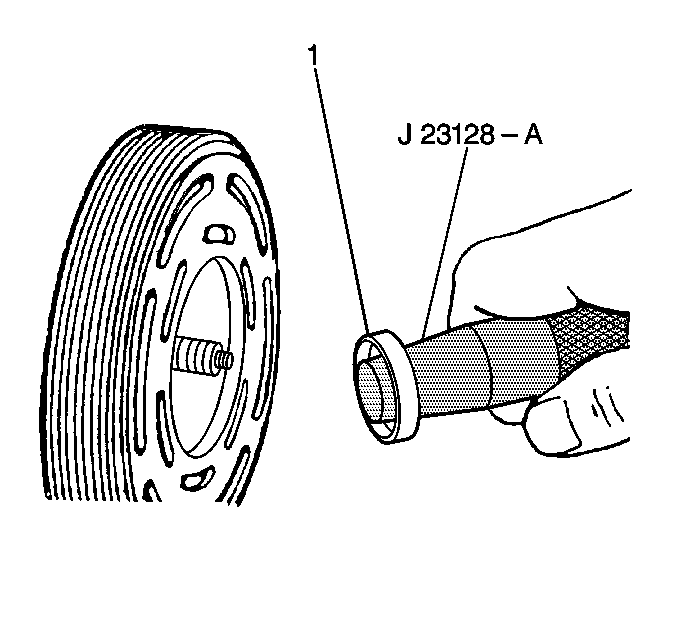
- Remove the seal (1)
from the compressor using a rotary-pulling motion. Discard the seal.
- Securely hand-tighten the handle. Do not use a wrench or pliers.
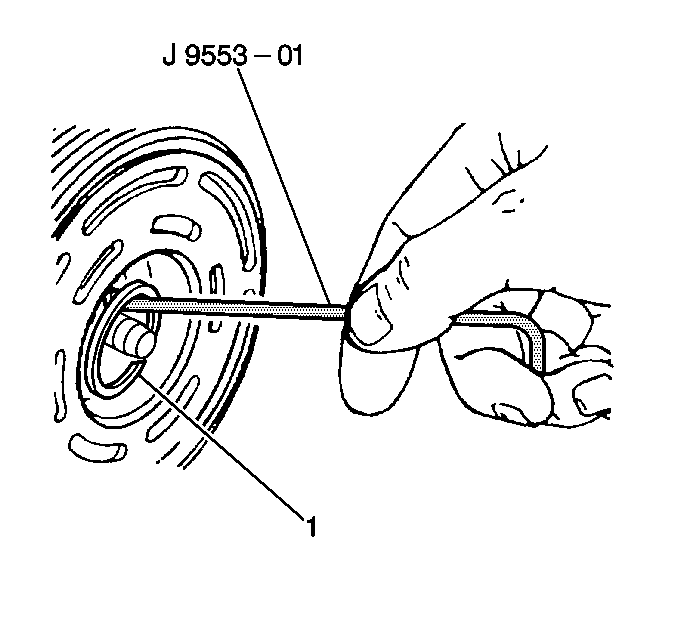
- Remove and discard the
seal seat O-ring (1) from the compressor neck using the J 9553-01
.
- Inspect the shaft and the inside of the compressor neck for dirt
or foreign material. Ensure that the shaft and the inside of the compressor
neck are perfectly clean before installing the new parts.
- Thoroughly clean the O-ring seal groove in the front head.
Compressor Shaft Seal Removal V7 - Direct Mount
Tools Required
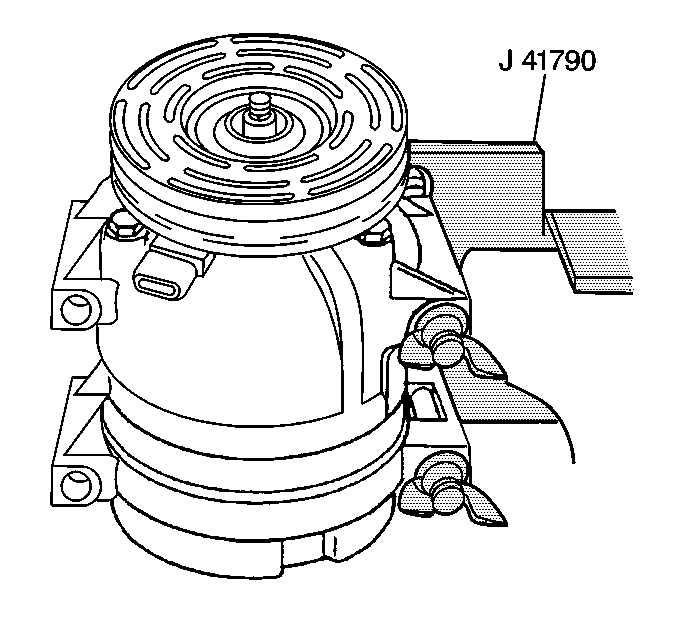
- Remove the A/C compressor
from the vehicle.
- Clamp the A/C compressor holding fixture, J 41790-A
in a vise and attach the A/C compressor
to the J 41790-A
.
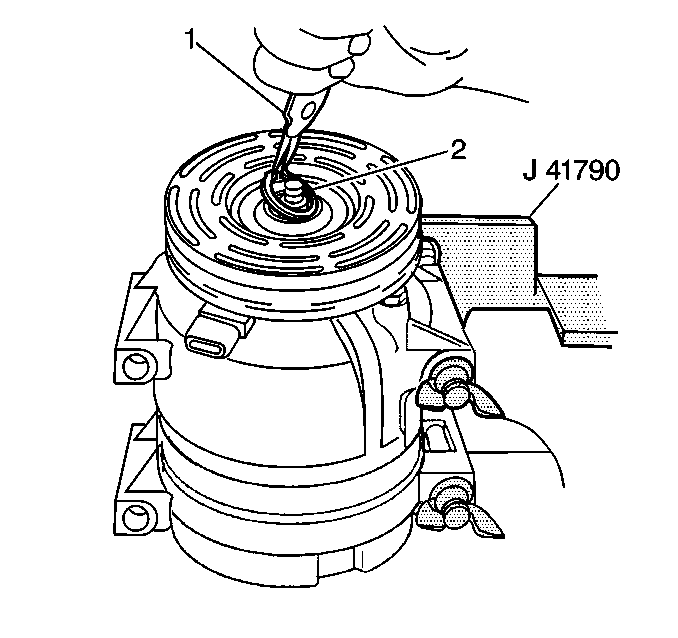
- Remove the A/C compressor
clutch plate and hub assembly. Refer to A/C compressor
Clutch Plate and Hub Assembly Removal (V7 - Direct Mount)
.
- Using internal snap ring pliers (1), remove the A/C compressor
shaft seal retainer ring (2).
- To keep any dirt or foreign material from getting into the A/C
compressor, thoroughly clean the following components:
| • | The inside of the A/C compressor neck area surrounding the shaft |
| • | The exposed portion of the A/C compressor shaft seal |
| • | The A/C compressor shaft |
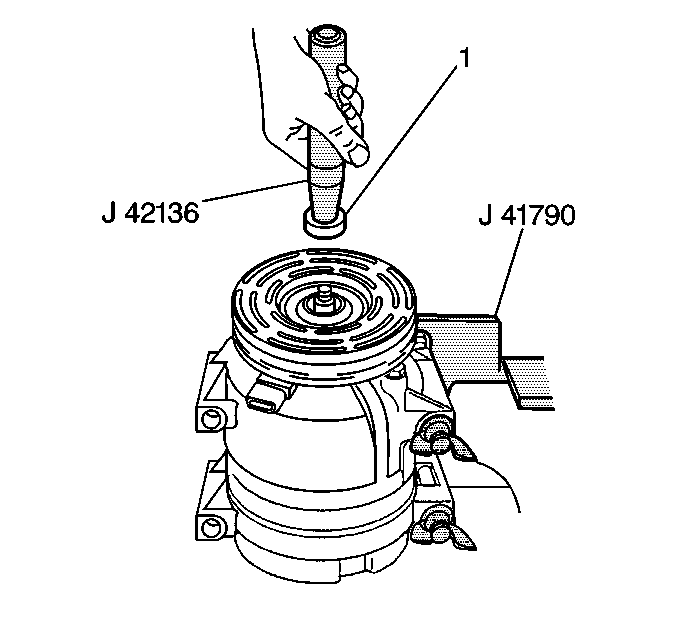
- Fully engage the lip of
the J 42136
into the recessed
portion of the seal (1) by turning the handle clockwise.
- Remove the A/C compressor shaft seal from the A/C compressor with
a rotary pulling motion.
- Recheck the shaft and inside of the A/C compressor neck for dirt
or foreign material and make sure these areas are perfectly clean before installing
the new A/C compressor shaft seal.


