Tools Required
J 36857 Engine Lift Brackets
Removal Procedure
- Open the hood.
- Place fender covers over both fenders.
- Raise the hood to the service position, perform the following:
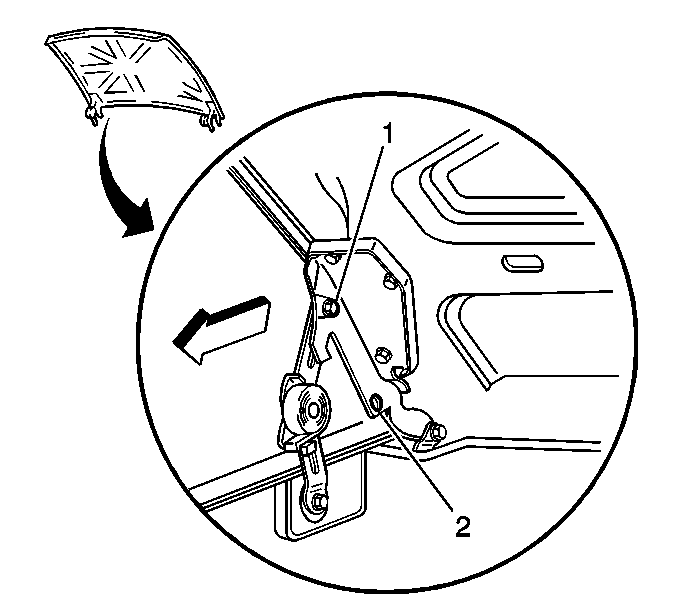
| 3.1. | Remove the hood hinge bolts (1). |
| 3.2. | Raise the hood until vertical. |
| 3.3. | Install the hood hinge bolts until snug in the service position (2). |
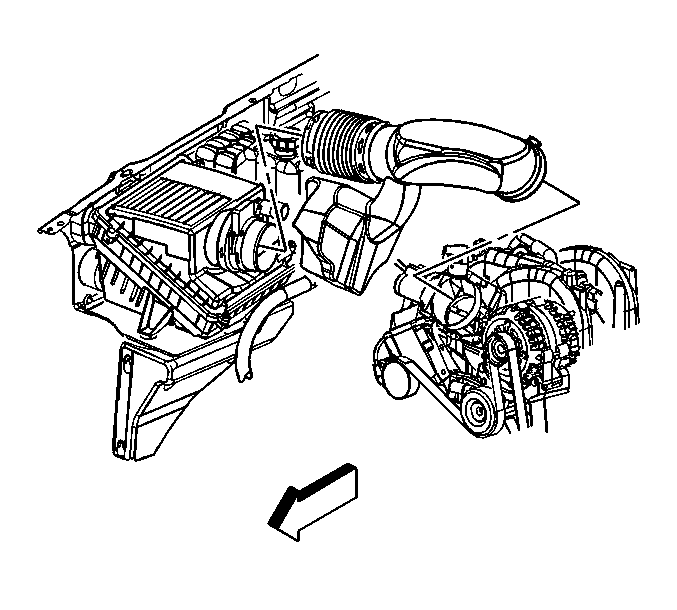
- Loosen the clamps at the throttle body
and air cleaner.
- Remove the air cleaner outlet duct.
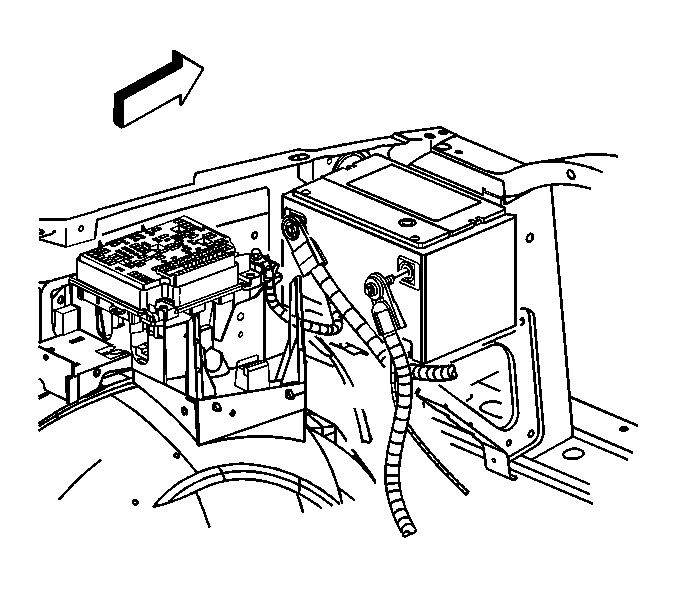
- Disconnect the battery negative cable.
Refer to
Battery Negative Cable Disconnection and Connection
in Engine Electrical.
- Disconnect the positive battery cable.
- Remove the ignition coils. Refer to
Ignition Coil Replacement
in Engine Controls - 8.1 L.
- Relieve the fuel system pressure. Refer
to
Fuel Pressure Relief
in Engine
Controls - 8.1 L.
- Disconnect the fuel feed pipe (1) from the fuel rail. Refer to
Metal Collar Quick Connect Fitting Service
in Engine
Controls - 8.1 L.
- Remove the air conditioning (A/C) compressor. Refer to
Air Conditioning Compressor Replacement
in Heating, Ventilation and Air Conditioning.
- Remove the radiator. Refer to
Radiator Replacement
in Engine Cooling.

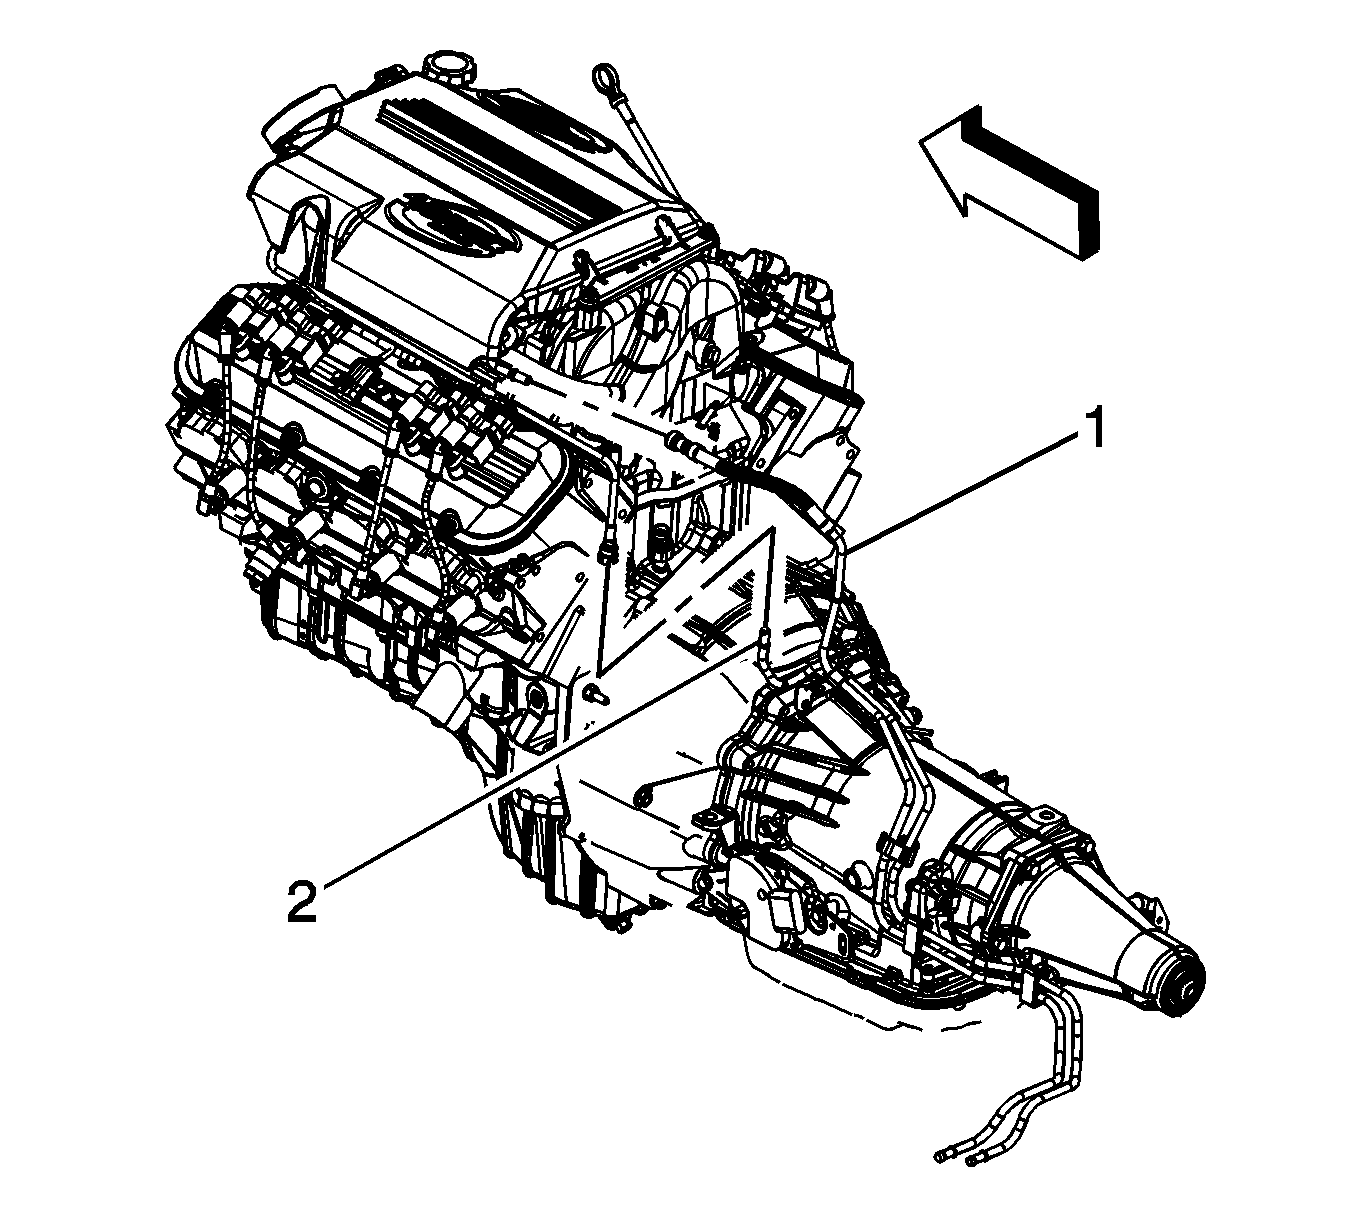
- Disconnect the throttle actuator control
(TAC) module electrical connector (1).
- Remove the vacuum lines from the engine, as required.
- Remove the ground cable bolt at the engine
block.
- Remove the generator. Refer to
Generator Replacement
in Engine Electrical.
- Remove the engine electrical harness and tie out of the way.
- Raise and suitably support the vehicle safety stands. Refer to
Lifting and Jacking the Vehicle
in General Information.
- Remove the starter motor. Refer to
Starter Motor Replacement
in Engine Electrical.
- Remove the hoses from the power steering pump. Refer to
Power Steering Cooler Pipe/Hose Replacement
in Power Steering System.
- Remove the exhaust manifold pipe. Refer to
Exhaust Manifold Pipe Replacement
in Engine Exhaust.
- Remove the catalytic converter. Refer to
Catalytic Converter Replacement
in Engine Exhaust.
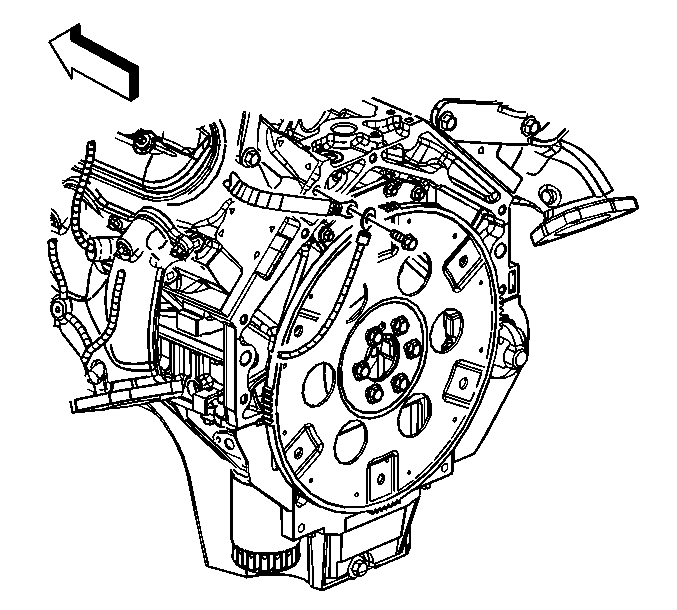
- Remove the torque converter bolts, if equipped.
- Remove the clutch pressure plate bolts, if equipped.
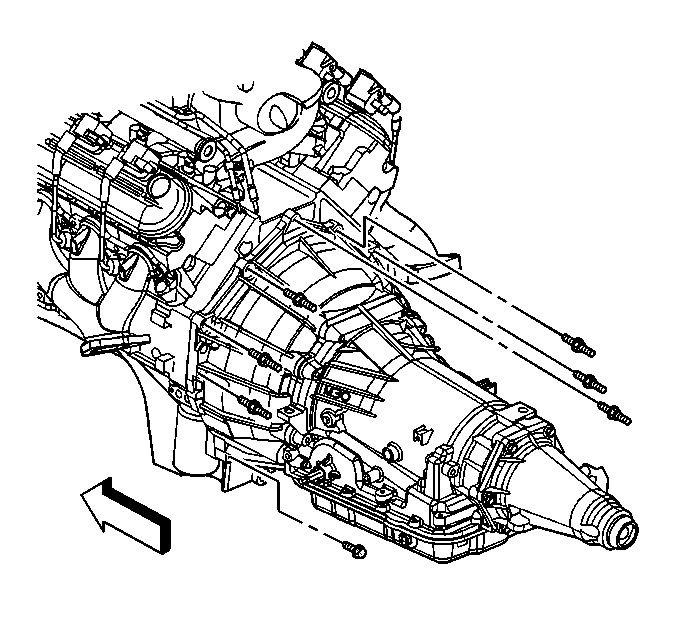
- Remove the bolts from the transmission to the engine.
- Remove the engine oil cooler lines from the engine block. Refer to
Engine Oil Cooler Hose/Pipe Replacement
in Engine Cooling.
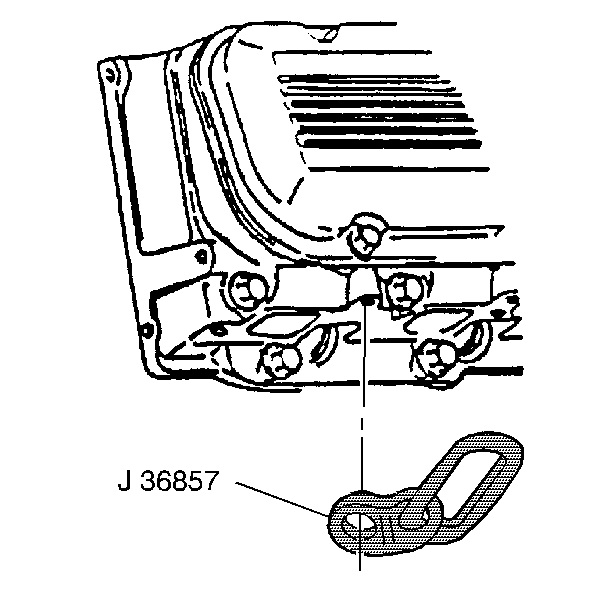
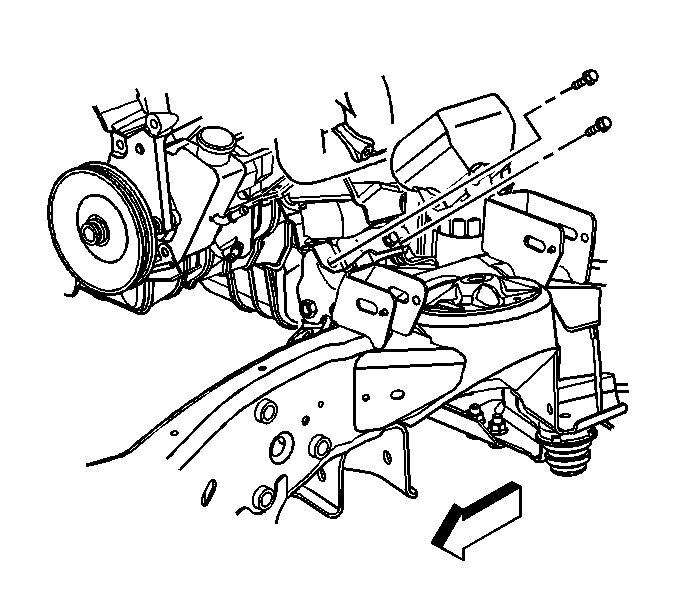
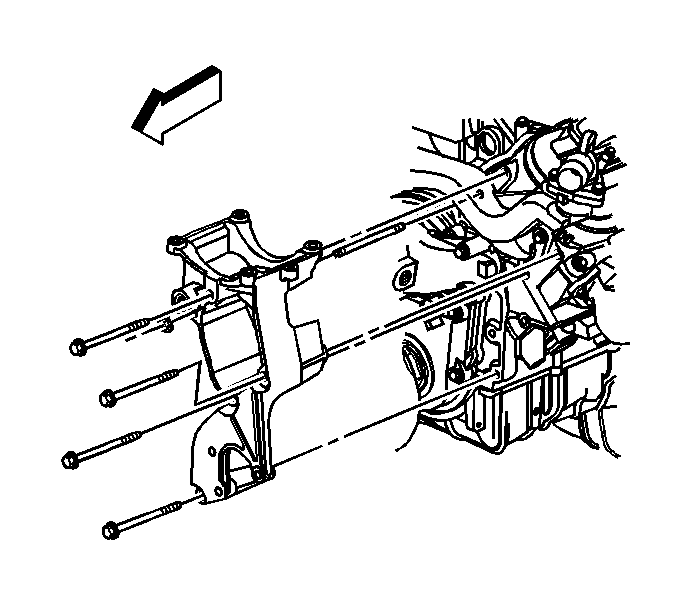
- Attach J 36857
to the rear of the right cylinder
head and to the front of the left cylinder head.
Notice: Use the correct fastener in the correct location. Replacement fasteners
must be the correct part number for that application. Fasteners requiring
replacement or fasteners requiring the use of thread locking compound or sealant
are identified in the service procedure. Do not use paints, lubricants, or
corrosion inhibitors on fasteners or fastener joint surfaces unless specified.
These coatings affect fastener torque and joint clamping force and may damage
the fastener. Use the correct tightening sequence and specifications when
installing fasteners in order to avoid damage to parts and systems.
- Install the attaching bolt and washer. Use GM P/N 9428217
with GM P/N 15650963.
Tighten
Tighten the lift bracket bolts to 40 N·m
(30 lb ft).
- Remove the engine mount heat shield bolts
and shields.
- Remove the engine mount to engine mount
bracket bolts.
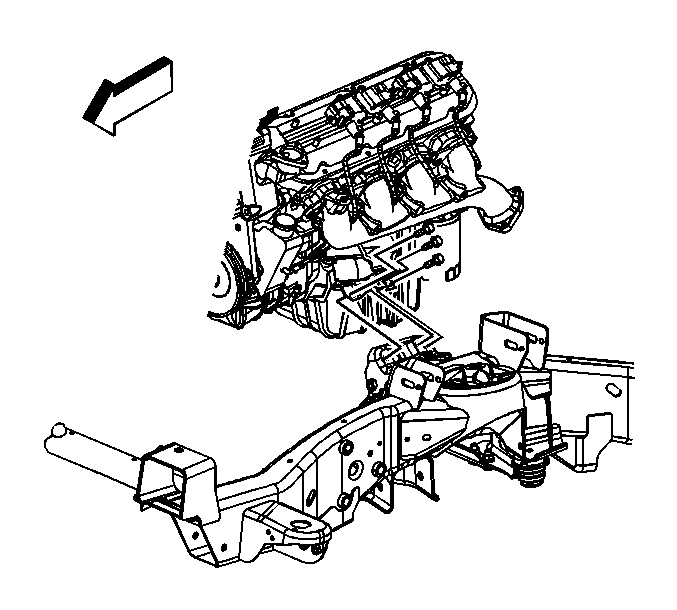
- Remove the engine using a suitable lifting devise.
- Install the engine onto a suitable engine stand.
- Remove the generator mounting bracket. Refer to
Generator Bracket Replacement
in Engine Electrical.
- Remove the A/C compressor/power steering
pump bracket from the cylinder head.
- Remove the lift brackets from the cylinder head.
Installation Procedure
- Attach J 36857
to the rear of the right cylinder
head and to the front of the left cylinder head.
Notice: Use the correct fastener in the correct location. Replacement fasteners
must be the correct part number for that application. Fasteners requiring
replacement or fasteners requiring the use of thread locking compound or sealant
are identified in the service procedure. Do not use paints, lubricants, or
corrosion inhibitors on fasteners or fastener joint surfaces unless specified.
These coatings affect fastener torque and joint clamping force and may damage
the fastener. Use the correct tightening sequence and specifications when
installing fasteners in order to avoid damage to parts and systems.
- Install the attaching bolt and washer. Use GM P/N 9428217
with GM P/N 15650963.
Tighten
Tighten the lift bracket bolts to 40 N·m
(30 lb ft).
- Install the air compressor/power steering
mounting bracket to the engine block.
Tighten
Tighten the power steering pump bracket bolts and
nut to 50 N·m (37 lb ft).
- Install the generator bracket. Refer to
Generator Bracket Replacement
in Engine Electrical.
- Remove the engine using a suitable lifting devise.
- Install the engine into the vehicle.
- Install the engine mount to engine mount
bracket bolts.
- Install the engine mount heat shield and
bolts.
- Remove the engine lift hooks from the cylinder heads.
- Raise the vehicle and support with safety stands.
- Install the engine oil cooler lines to the engine block. Refer to
Engine Oil Cooler Hose/Pipe Replacement
in Engine Cooling.
- Install the bolts from the transmission
to the engine.
- Install the clutch pressure plate bolts, if equipped.
- Install the torque converter bolts, if equipped.
- Install the catalytic converter. Refer to
Catalytic Converter Replacement
in Engine Exhaust.
- Install the exhaust manifold pipe. Refer to
Exhaust Manifold Pipe Replacement
in Engine Exhaust.
- Install the hoses to the power steering pump. Refer to
Power Steering Cooler Pipe/Hose Replacement
in Power Steering System.
- Install the starter motor. Refer to
Starter Motor Replacement
in Engine Electrical.
- Lower the vehicle.
- Route the engine electrical harness.
- Install the generator. Refer to
Generator Replacement
in Engine Electrical.
- Install the ground cable bolt at the engine
block.
Tighten
Tighten the engine wiring harness bolt to 16 N·m
(12 lb ft).
- Install the vacuum lines to the engine.
- Connect the TAC module electrical connector
(1).
- Install the radiator. Refer to
Radiator Replacement
in Engine Cooling.
- Install the A/C compressor. Refer to
Air Conditioning Compressor Replacement
in Heating, Ventilation and Air Conditioning.
- Connect the fuel feed pipe (1) to the fuel
rail.
- Install the ignition coils. Refer to
Ignition Coil Replacement
in Engine Controls - 8.1 L.
- Connect the positive battery cable.
- Connect the battery negative cable. Refer to
Battery Negative Cable Disconnection and Connection
in Engine Electrical.
- Install the air cleaner outlet duct.
- Tighten the clamps at the throttle body and air cleaner.
Tighten
Tighten the clamps to 4 N·m (35 lb in).
- Remove fender covers from both fenders.
- Remove the hood hinge bolts from the service position (2).
- Lower the hood to the normal position.
- Install the hood hinge bolts.
Tighten
Tighten the hood hinge bolts to 25 N·m
(18 lb ft).
- Before starting a new engine or one that has been repaired, complete
the following procedure.
| 37.2. | Remove the fuel pump fuse and disconnect the coil harness connectors,
then crank the engine until oil pressure is present. |
| 37.3. | Crank the engine several times. Listen for any unusual noises or evidence
that any of the parts are binding. |
| 37.4. | Install the fuel pump fuse and connect the coil harness connectors and
start the engine and listen for unusual noises. |
| 37.5. | Check the vehicle oil pressure gauge or light and confirm that the engine
has acceptable oil pressure. If necessary install an oil pressure gauge and measure
the oil pressure. |
| 37.6. | Run the engine at about 1000 RPM until the engine has reached normal
operating temperature. |
| 37.7. | Inspect for oil and or coolant leaks while the engine is running. |
| 37.8. | Stop the engine and perform a final inspection for the proper engine
oil and coolant levels. |
