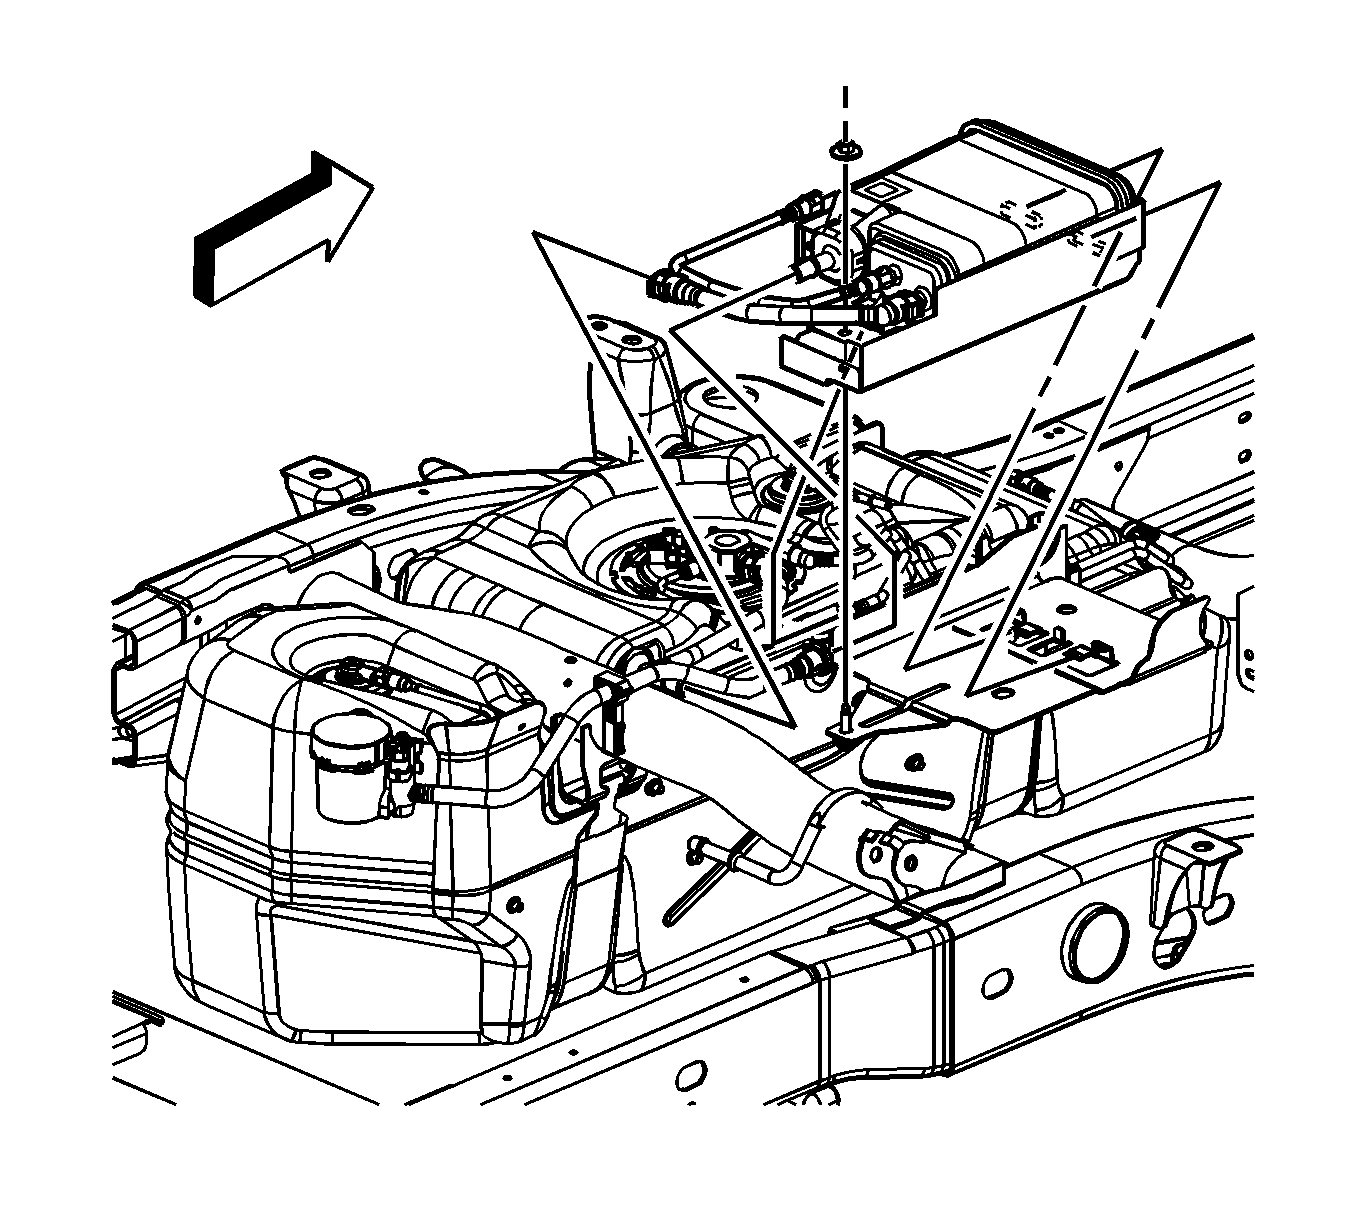
Evaporative Emission Canister Replacement Pickup
Removal Procedure
Important: Clean all evaporative emission (EVAP) connections and surrounding areas prior to disconnecting the lines in order to avoid possible system contamination.
- Raise and suitably support the vehicle. Refer to Lifting and Jacking the Vehicle in General Information.
- Disconnect the EVAP canister vent solenoid (CVS) line from the EVAP canister.
- Disconnect the fuel tank EVAP line from the canister.
- Disconnect the canister EVAP line from the fuel bundle line.
- Remove the EVAP canister nut.
- Remove the EVAP canister with shield from the bracket.
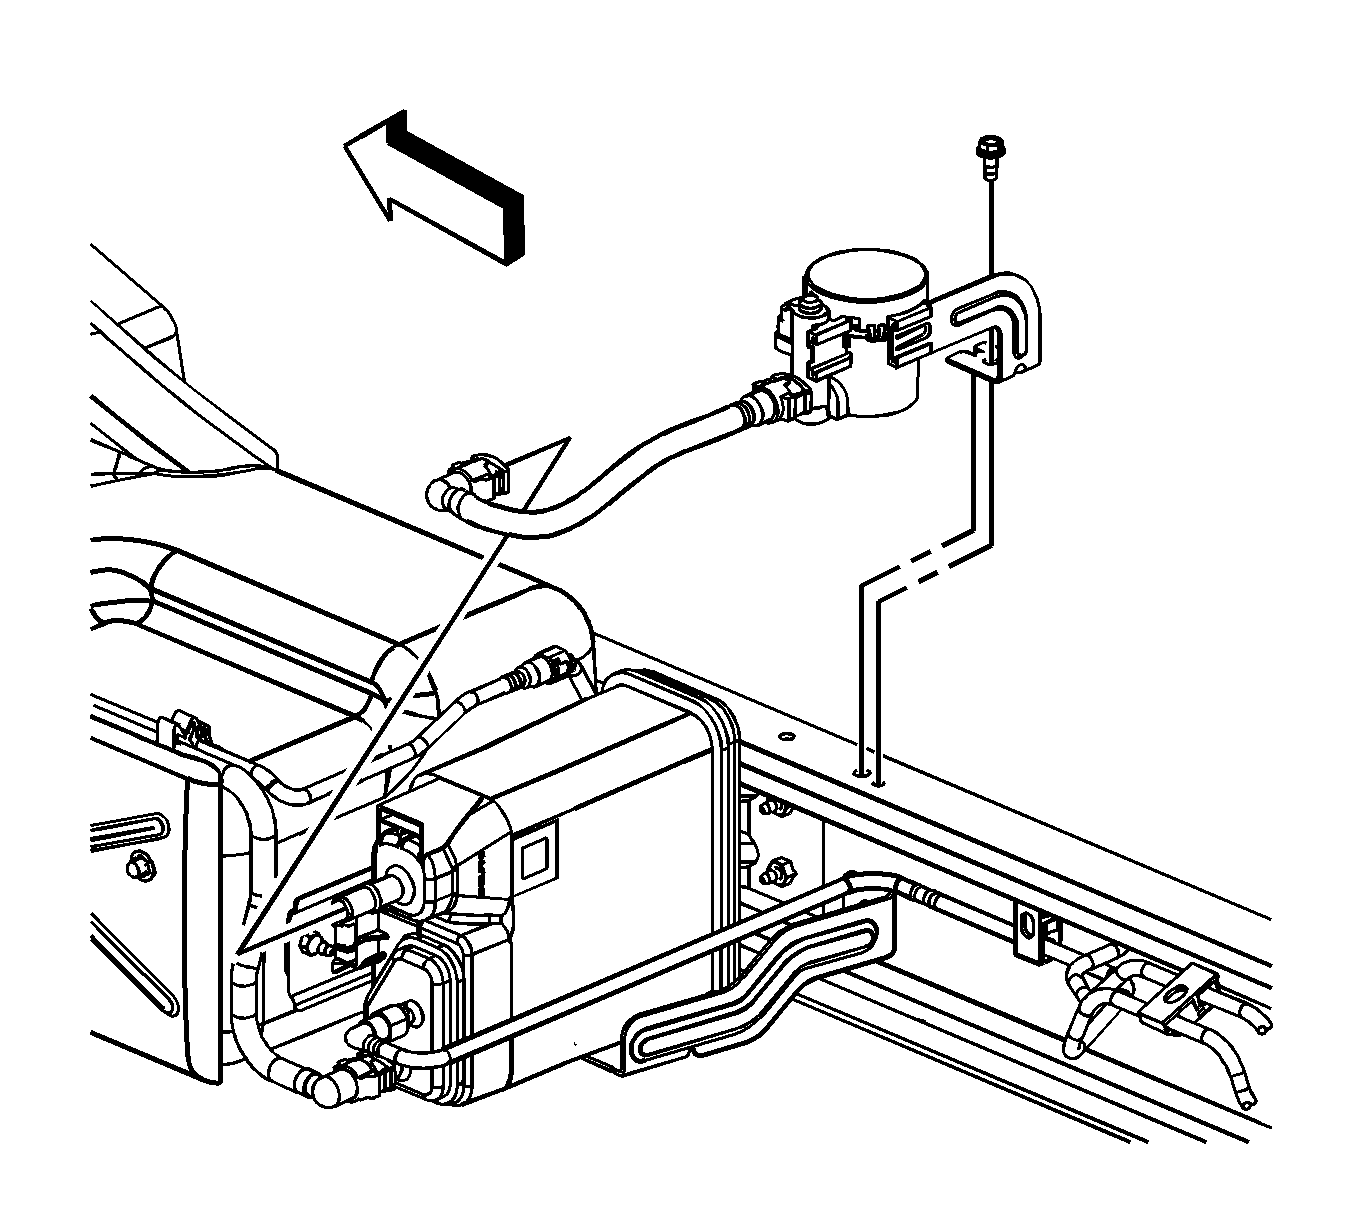
- If necessary, remove the EVAP canister from the shield, perform the following:
- If necessary, disconnect the EVAP lines from the canister.
| 7.1. | Lift up the retaining clip on the bottom of the canister. |
| 7.2. | Remove the canister from the shield. |
Installation Procedure
- If necessary, connect the EVAP lines to the canister.
- If necessary, install the EVAP canister to the shield, perform the following:
- Install the EVAP canister with shield to the bracket.
- Install the EVAP canister nut.
- Connect the canister EVAP line to the fuel bundle line.
- Connect the fuel tank EVAP line to the canister.
- Connect the EVAP CVS line to the canister.
- Lower the vehicle.
| 2.1. | Install the canister to the shield. |
| 2.2. | Ensure the retaining clip engages on the bottom of the canister. |
Notice: Refer to Fastener Notice in the Preface section.
Tighten
Tighten the nut to 25 N·m
(18 lb ft).
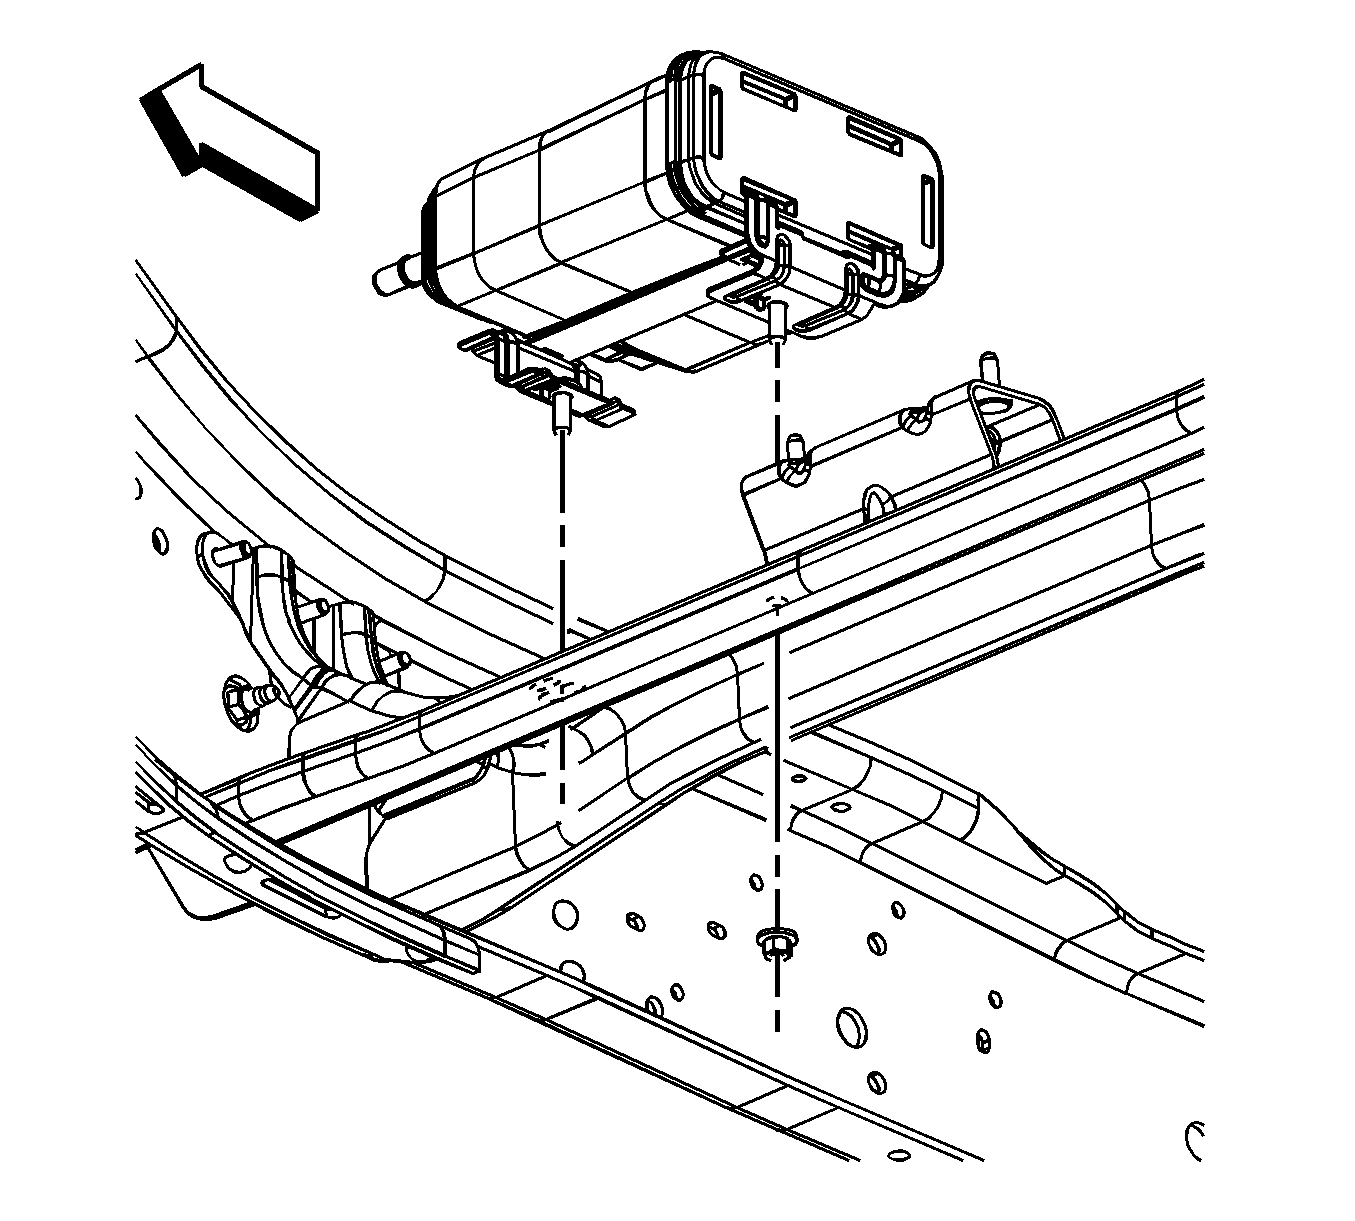
Evaporative Emission Canister Replacement Cab/Chassis
Removal Procedure
Important: Clean all evaporative emission (EVAP) connections and surrounding areas prior to disconnecting the lines in order to avoid possible system contamination.
- Raise and suitably support the vehicle. Refer to Lifting and Jacking the Vehicle .
- Disconnect the EVAP canister vent solenoid (CVS) line from the canister.
- Disconnect the fuel tank EVAP line from the canister.
- Disconnect the canister EVAP line from the fuel bundle line.
- Remove the EVAP canister nuts.
- Remove the EVAP canister.
Installation Procedure
- Install the EVAP canister.
- Install the EVAP canister nuts.
- Connect the canister EVAP line to the fuel bundle line.
- Connect the fuel tank EVAP line to the canister.
- Connect the EVAP CVS line to the canister.
- Lower the vehicle.
Notice: Refer to Fastener Notice in the Preface section.
Tighten
Tighten the nuts to 25 N·m (18 lb ft).
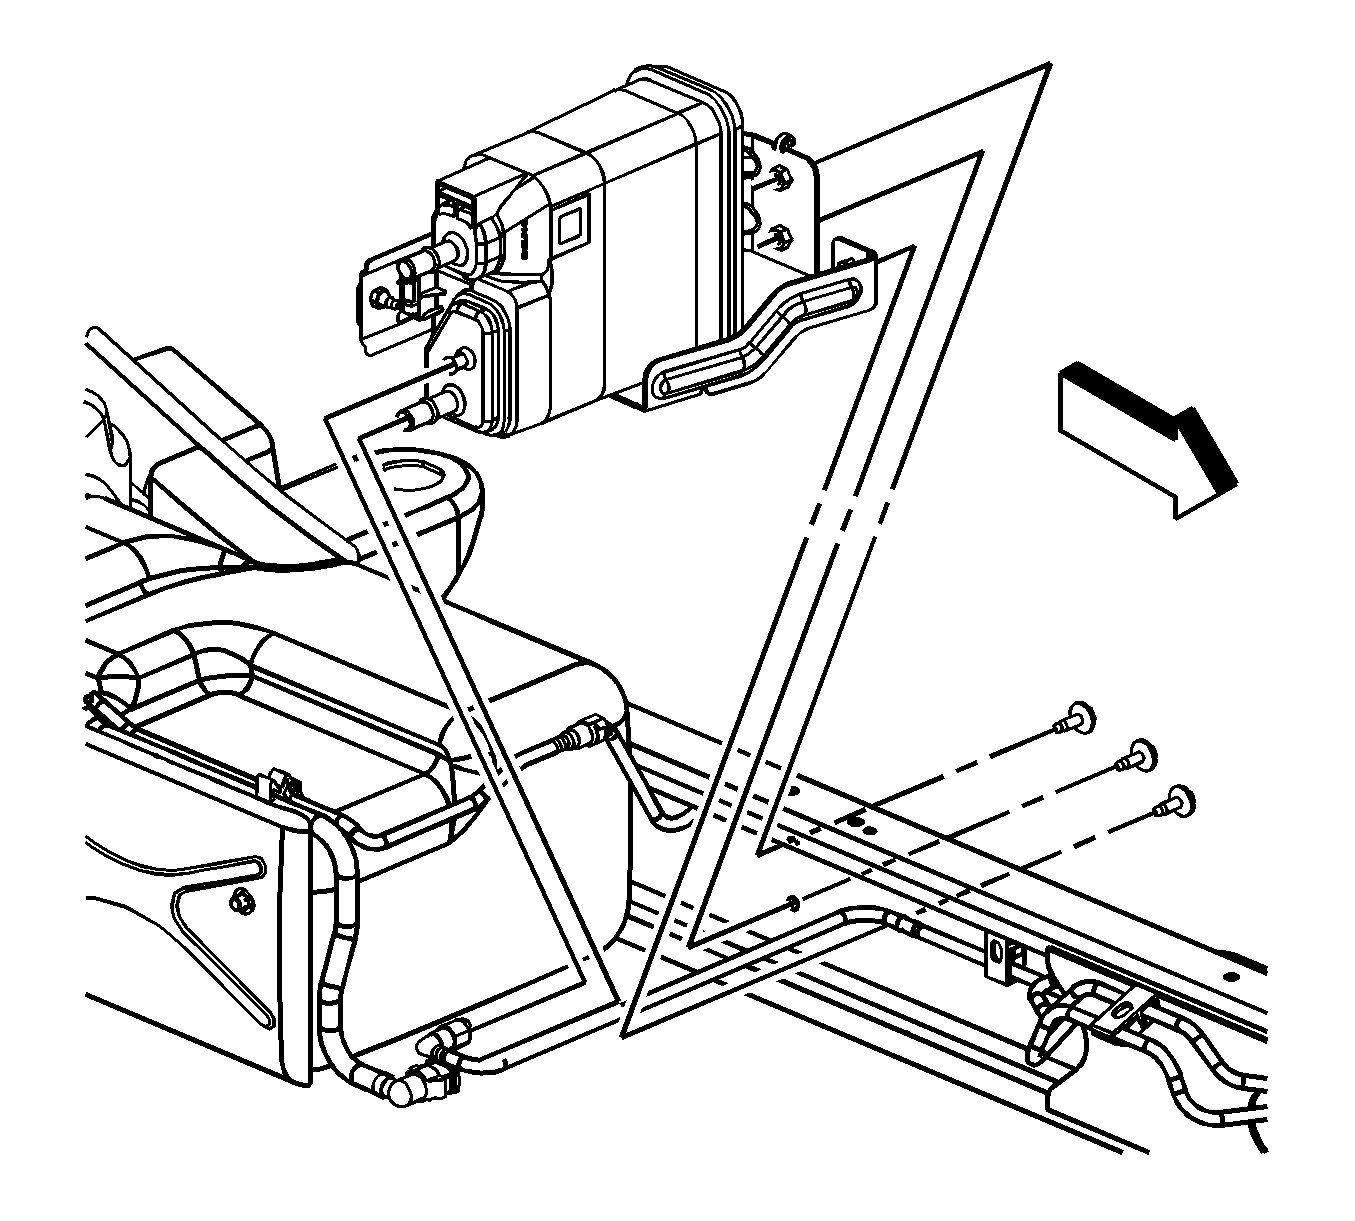
Evaporative Emission Canister Replacement 1500 Crew Cab
Removal Procedure
Important: Clean all evaporative emission (EVAP) connections and surrounding areas prior to disconnecting the lines in order to avoid possible system contamination.
- Raise and suitably support the vehicle. Refer to Lifting and Jacking the Vehicle .
- Disconnect the canister vent solenoid (CVS) line from the EVAP canister. Refer to Plastic Collar Quick Connect Fitting Service .
- Disconnect the fuel/EVAP bundle line from the EVAP canister. Refer to Plastic Collar Quick Connect Fitting Service .
- Disconnect the fuel tank line from the EVAP canister. Refer to Plastic Collar Quick Connect Fitting Service .
- Remove the EVAP canister bracket bolts.
- Remove the EVAP canister from the bracket, if necessary.
Installation Procedure
- Install the EVAP canister to the bracket, if necessary.
- Install the EVAP canister bracket bolts.
- Connect the fuel tank line to the EVAP canister. Refer to Plastic Collar Quick Connect Fitting Service .
- Connect the fuel/EVAP bundle line to the EVAP canister. Refer to Plastic Collar Quick Connect Fitting Service .
- Connect the CVS line to the EVAP canister. Refer to Plastic Collar Quick Connect Fitting Service .
- Lower the vehicle.
Notice: Refer to Fastener Notice in the Preface section.
Tighten
Tighten the bolts to 18 N·m (13 lb ft).
