Removal Procedure
Notice: If the engine is damaged internally and a new engine assembly is installed in the vehicle, ensure that all foreign material is flushed out of the cooling system. You must also flush out the oil cooler system. Failure to rid the oil cooler system of debris can result in engine damage.
Tools Required
- Disconnect the battery negative cable from the battery. Refer to Battery Cable Replacement .
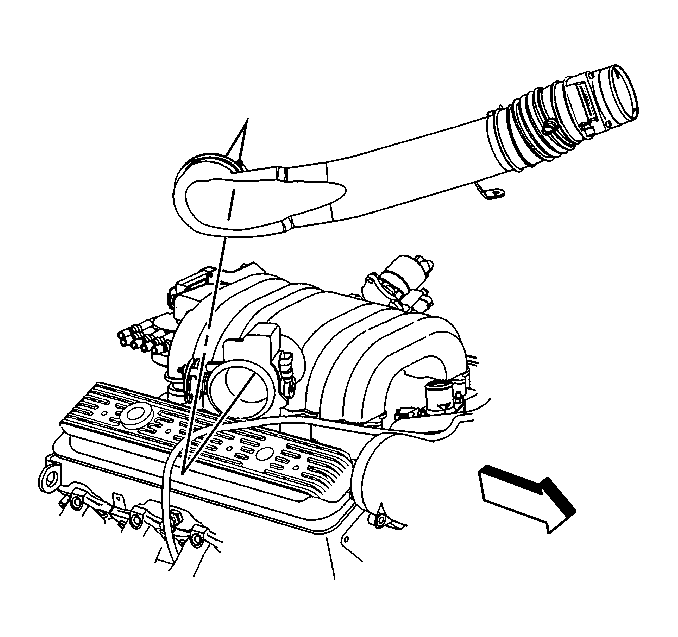
- Remove the air cleaner outlet duct from the throttle body. Refer to Air Cleaner Outlet Duct Replacement .
- Remove the electrical connector from the ignition coil. Refer to Ignition Coil and Ignition Coil Module Replacement .
- Remove the electrical connector at the distributor.
- Remove the fuel supply lines from the fuel rail. Refer to Fuel Injection Fuel Rail Assembly Replacement in Engine Controls.
- Drain the cooling system. Refer to Cooling System Draining and Filling .
- Remove the air conditioning compressor from the engine block. Refer to Air Conditioning Compressor Replacement in HVAC.
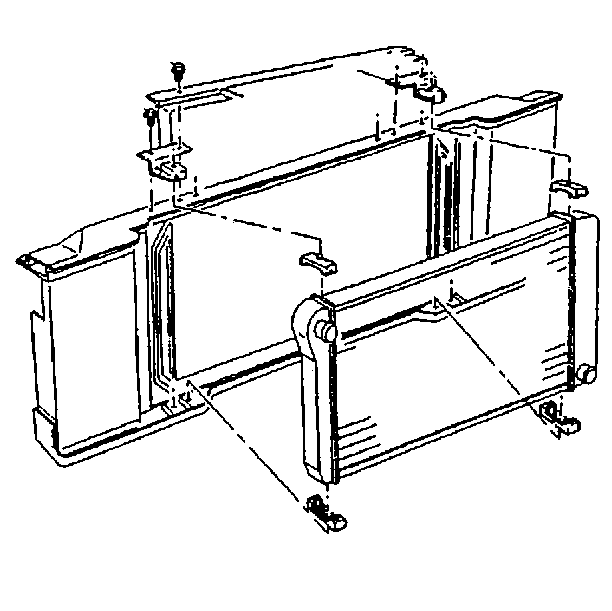
- Remove the radiator from the vehicle. Refer to Radiator Replacement .
- Disconnect the electrical connectors on the throttle body.
- Remove the accelerator control cable from the throttle body. Refer to Accelerator Control Cable Replacement in Engine Controls.
- Remove the vacuum lines from the engine.
- Remove the electrical connector from the EGR valve.
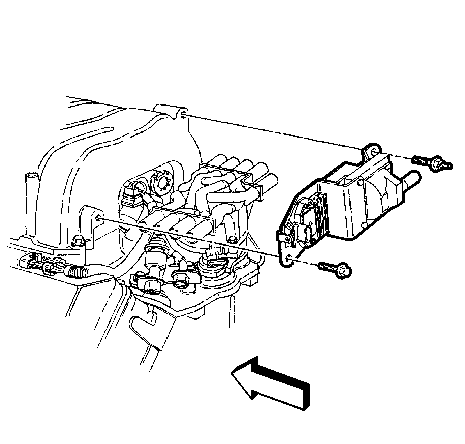
- Remove the generator from the generator mounting bracket. Refer to Generator Replacement .
- Remove the engine electrical harness and tie out of the way.
- Raise the vehicle and support with safety stands. Refer to Lifting and Jacking the Vehicle in General Information.
- Remove the hoses from the power steering pump.
- Remove the ground wires from the engine block.
- Remove the starter motor from the engine block. Refer to Starter Motor Replacement .
- Remove the flywheel inspection cover from the transmission if equipped.
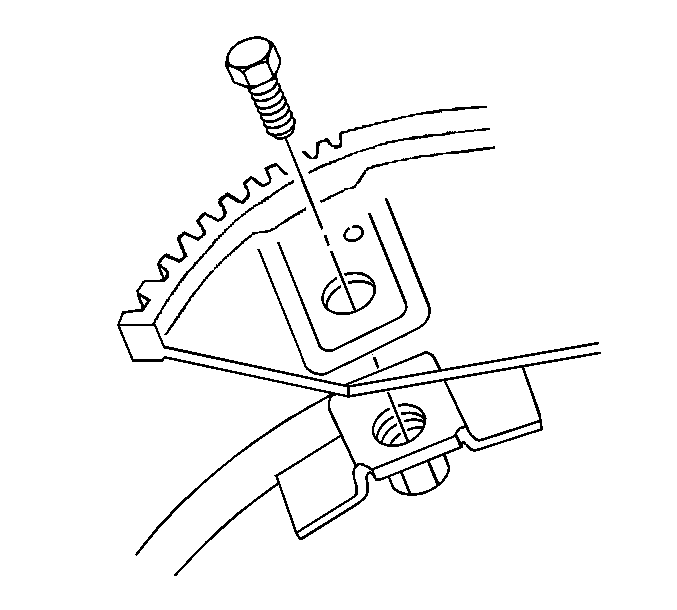
- Remove the bolts from the torque converter to the flywheel if equipped.
- Remove the exhaust pipes from the exhaust manifolds.
- Remove the bolts from the transmission to the engine block.
- Remove the engine auxiliary oil cooler lines from the engine block.
- Remove the support stands and lower the vehicle. Refer to Lifting and Jacking the Vehicle in General Information.
- Support the transmission with a suitable jack.
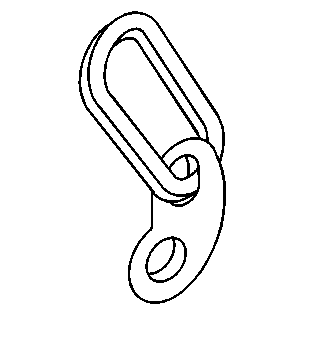
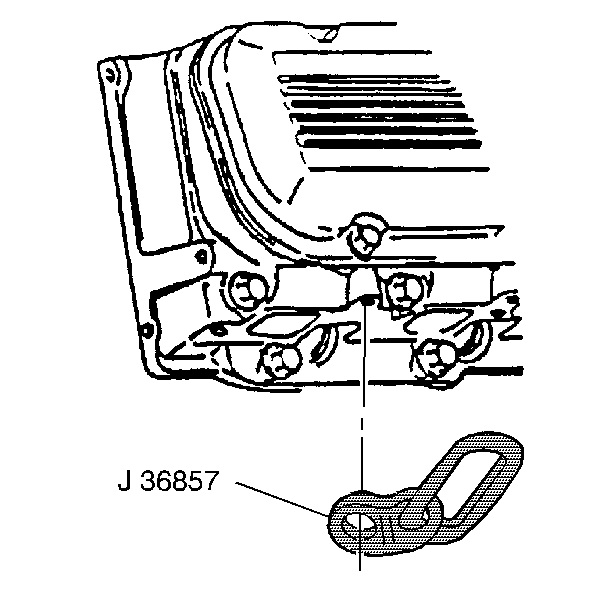
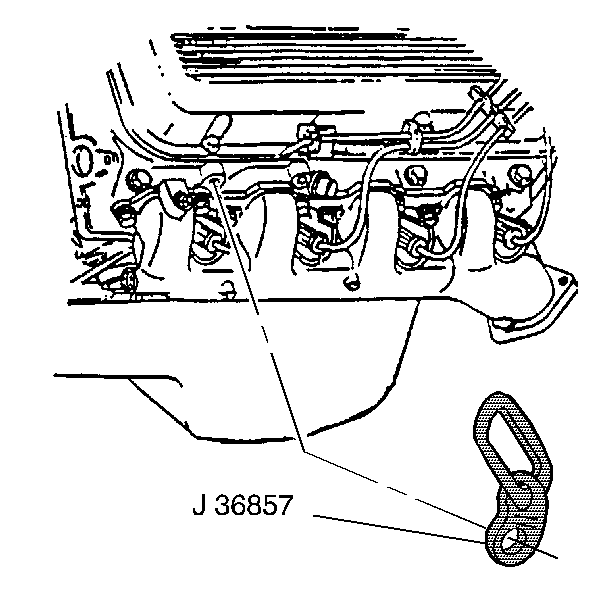
- Attach J 36857 to the cylinder head.
- Install the attaching bolt and washer. Use GM P/N 9428217 with GM P/N 15650963.
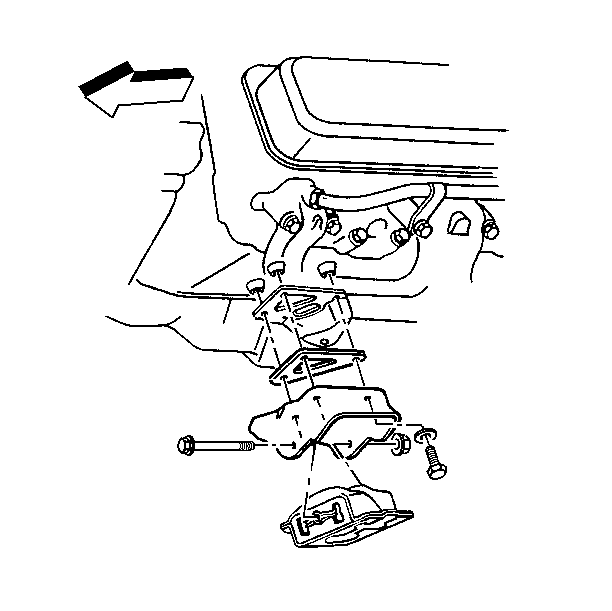
- Remove the front engine mount through bolts. Refer to Engine Mount Replacement .
- Remove the engine with a suitable lifting device.
- Remove the generator mounting bracket from the cylinder head.
- Remove the air conditioning compressor mounting bracket from the cylinder head.
- Remove the lift brackets from the cylinder head.
Caution: Before servicing any electrical component, the ignition and start switch must be in the OFF or LOCK position and all electrical loads must be OFF, unless instructed otherwise in these procedures. If a tool or equipment could easily come in contact with a live exposed electrical terminal, also disconnect the negative battery cable. Failure to follow these precautions may cause personal injury and/or damage to the vehicle or its components.
Disconnect the cruise control cable. Refer to Cruise Control Cable Replacement in Cruise Control.
Caution: In order to avoid possible injury or vehicle damage, always replace the accelerator control cable with a NEW cable whenever you remove the engine from the vehicle.
In order to avoid cruise control cable damage, position the cable out of the way while you remove or install the engine. Do not pry or lean against the cruise control cable and do not kink the cable. You must replace a damaged cable.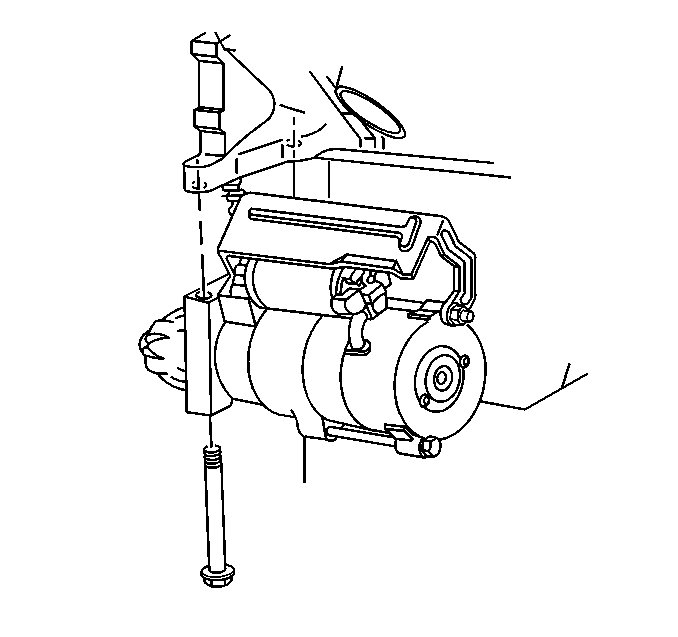
| • | For the 4L80-E automatic transmission refer to Transmission Replacement |
| • | For the manual transmission refer to Transmission Replacement |
Notice: Use the correct fastener in the correct location. Replacement fasteners must be the correct part number for that application. Fasteners requiring replacement or fasteners requiring the use of thread locking compound or sealant are identified in the service procedure. Do not use paints, lubricants, or corrosion inhibitors on fasteners or fastener joint surfaces unless specified. These coatings affect fastener torque and joint clamping force and may damage the fastener. Use the correct tightening sequence and specifications when installing fasteners in order to avoid damage to parts and systems.
Tighten
Tighten the lift bracket bolts to 40 N·m (30 lb ft).
Installation Procedure
Notice: If the engine is damaged internally and a new engine assembly is installed in the vehicle, ensure that all foreign material is flushed out of the cooling system. You must also flush out the oil cooler system. Failure to rid the oil cooler system of debris can result in engine damage.
- Attach J 36857 to the cylinder head.
- Install the attaching bolt and washer. Use GM P/N 9428217 with GM P/N 15650963.
- AttachJ 36857
- Install the attaching bolt and washer. Use GM P/N 9428217 with GM P/N 15650963.
- Install the engine into the vehicle.
- Install the engine mount through bolts. Refer to Engine Mount Replacement .
- Remove the engine lift hooks from the cylinder head.
- Install the air conditioning compressor mounting bracket to the cylinder head.
- Install the generator mounting bracket.
- Raise the vehicle and support with safety stands. Refer to Lifting and Jacking the Vehicle in General Information.
- Install the transmission to engine block bolts.
- Install the ground straps to the engine block.
- Install the hoses to the power steering pump.
- Install the torque converter bolts.
- Install the flywheel inspection cover to the transmission.
- Install the starter to the engine block. Refer to Starter Motor Replacement .
- Install the oil cooler lines to the engine block.
- Install the exhaust pipes to the exhaust manifold.
- Lower the vehicle.
- Install the fuel lines to the fuel rail. Refer to Fuel Injection Fuel Rail Assembly Replacement in Engine Controls.
- Install the electrical connector to the ignition coil.
- Install the electrical connector to the distributor.
- Install the electrical connector to the EGR valve.
- Install the electrical connectors to the throttle body. Refer to Throttle Body Assembly Replacement in Engine Controls.
- Install the accelerator cable to the throttle Body. Refer to Accelerator Control Cable Replacement .
- Connect the cruise control cable. Refer to Cruise Control Cable Replacement in Cruise Control.
- Install the vacuum lines to the engine.
- Install the generator to the generator mounting bracket. Refer to Generator Replacement .
- Install the air conditioning compressor to the air conditioning mounting bracket. Refer to Air Conditioning Compressor Replacement in HVAC.
- Install the engine electrical wiring harness to the engine.
- Install the radiator to the vehicle. Refer to Radiator Replacement .
- Install the air cleaner outlet duct to the throttle body. Refer to Air Cleaner Outlet Duct Replacement . in Engine Controls.
- Fill the radiator with coolant. Refer to Cooling System Draining and Filling .
- Recharge the air conditioning system. Refer to Air Conditioning Compressor Replacement in HVAC.
- Connect the battery negative cable to the battery. Refer to Battery Cable Replacement .
Notice: Use the correct fastener in the correct location. Replacement fasteners must be the correct part number for that application. Fasteners requiring replacement or fasteners requiring the use of thread locking compound or sealant are identified in the service procedure. Do not use paints, lubricants, or corrosion inhibitors on fasteners or fastener joint surfaces unless specified. These coatings affect fastener torque and joint clamping force and may damage the fastener. Use the correct tightening sequence and specifications when installing fasteners in order to avoid damage to parts and systems.
Tighten
Tighten the lift bracket bolts to 40 N·m (30 lb ft).
Tighten
Tighten the lift bracket bolts to 40 N·m (30 lb ft).
| • | For the 4L80-E automatic transmission, refer to Transmission Replacement |
| • | For the manual transmission, refer to Transmission Replacement |
Caution: In order to avoid possible injury or vehicle damage, always replace the accelerator control cable with a NEW cable whenever you remove the engine from the vehicle.
In order to avoid cruise control cable damage, position the cable out of the way while you remove or install the engine. Do not pry or lean against the cruise control cable and do not kink the cable. You must replace a damaged cable.
