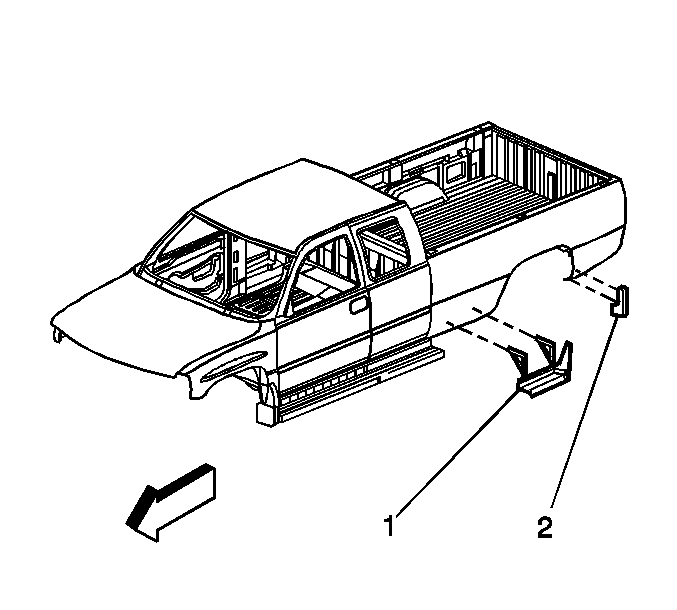
Assist Step Replacement Body Mount
Removal Procedure
- Remove the following components from the vehicle:
| 1.1. | The center body mount bolt (1) |
- Remove the center lower body-cushion assemblies (4).
- Remove the following components from the assist step:
- Remove the assist step center bracket (5).
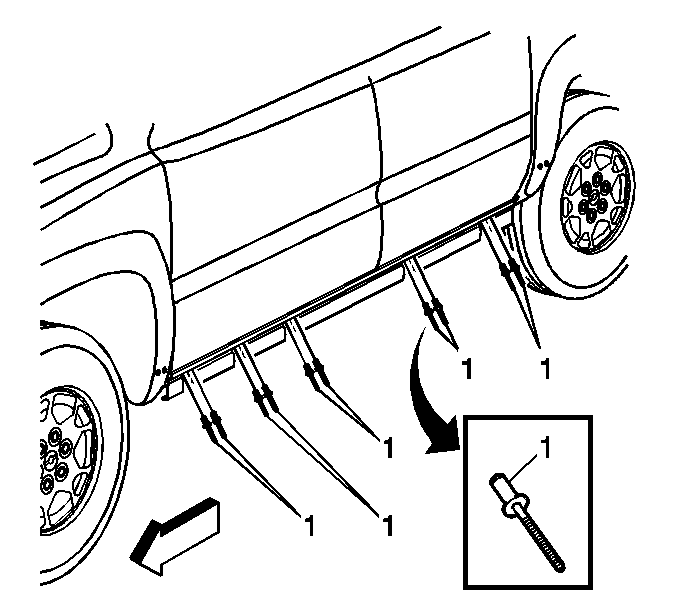
- With an assistant, remove the following front components, and rear components:
| 5.1. | The body mount bolts (1) |
| 5.2. | The lock washers (2) |
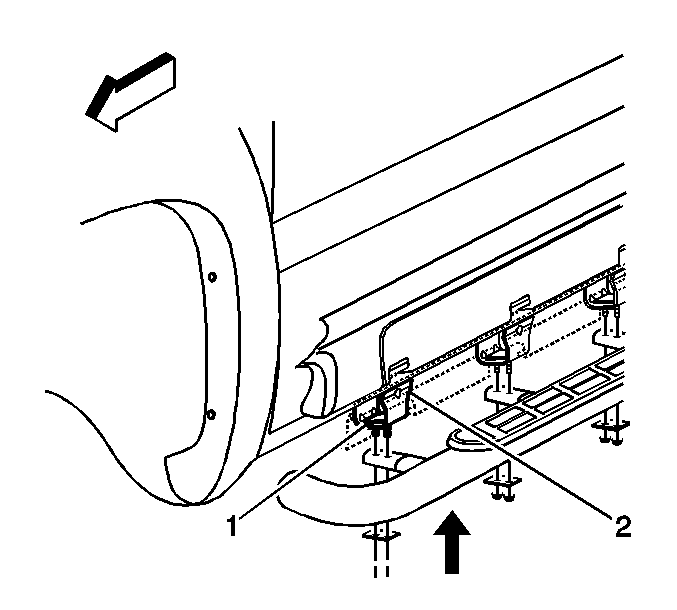
- With an assistant, remove the assist step assembly from the vehicle.
- Remove the lower body-mount cushion assemblies (4), front and rear, from the vehicle.
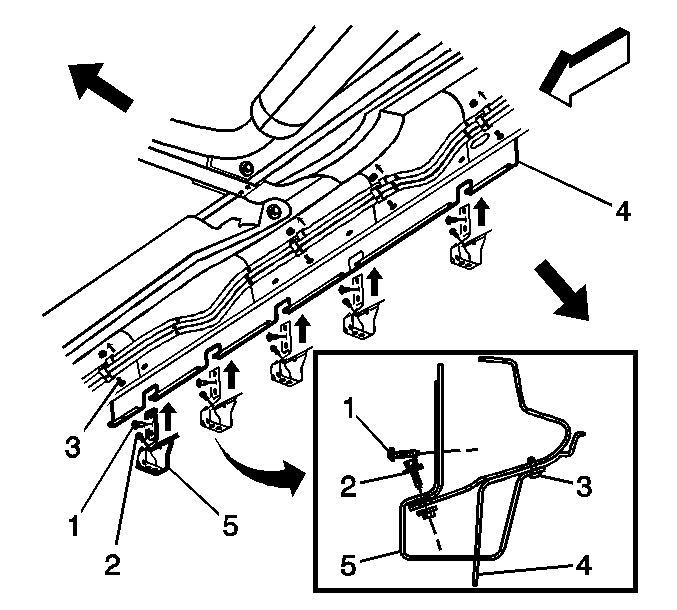
- Remove the following components from the front assist step brackets, and from the rear assist step brackets:
| 8.2. | The lock washers (2) |
- Remove the front brackets, and the rear brackets (4) from the assist step.
- Remove the front gaskets, and the rear gaskets (5) from the assist step.
Installation Procedure
Important: Apply thread locker GM P/N 12345382 to all bolt threads prior to assembly.
- Install the front gaskets, and the rear gaskets (5) to the assist step.
- Install the front brackets, and the rear brackets (4) to the assist step.
Notice: Use the correct fastener in the correct location. Replacement fasteners
must be the correct part number for that application. Fasteners requiring
replacement or fasteners requiring the use of thread locking compound or sealant
are identified in the service procedure. Do not use paints, lubricants, or
corrosion inhibitors on fasteners or fastener joint surfaces unless specified.
These coatings affect fastener torque and joint clamping force and may damage
the fastener. Use the correct tightening sequence and specifications when
installing fasteners in order to avoid damage to parts and systems.
- Install the following components to the front assist step bracket, and the rear assist step bracket:
| 3.2. | The lock washers (2) |
Tighten
Torque the bolts to 90 N·m (66 lb ft).
- Install the lower body-mount cushion assemblies (4), front and rear, to the vehicle.
- With an assistant, raise the assist step to the vehicle.
- With an assistant, install the following front components, and rear components:
| 6.2. | The lock washers (2) |
| 6.3. | The body mount bolts (1) |
Tighten
Torque the bolts to 90 N·m (66 lb ft).
- Install (5) the assist step center bracket.
- Install (2) the following components to the assist step:
Tighten
Torque to 45 N·m (33 lb ft).
- Install (1) the following components to the assist step:
| 9.3. | The center body mount bolt |
Tighten
Torque to 90 N·m (66 lb ft).
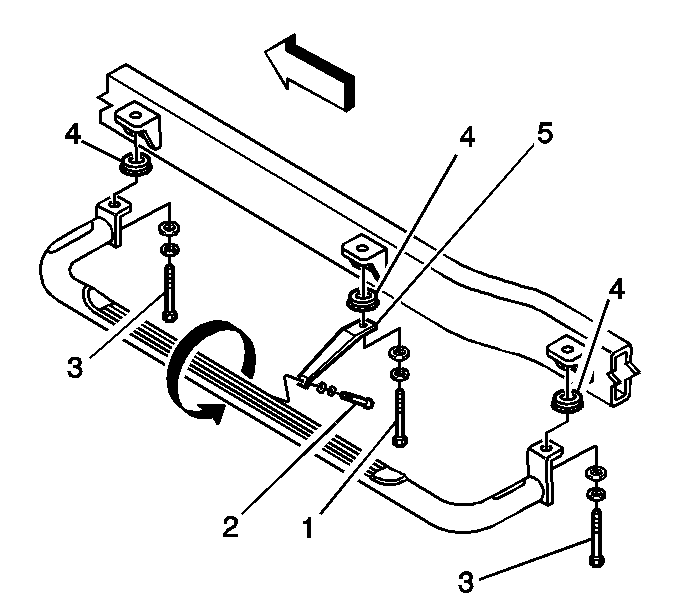
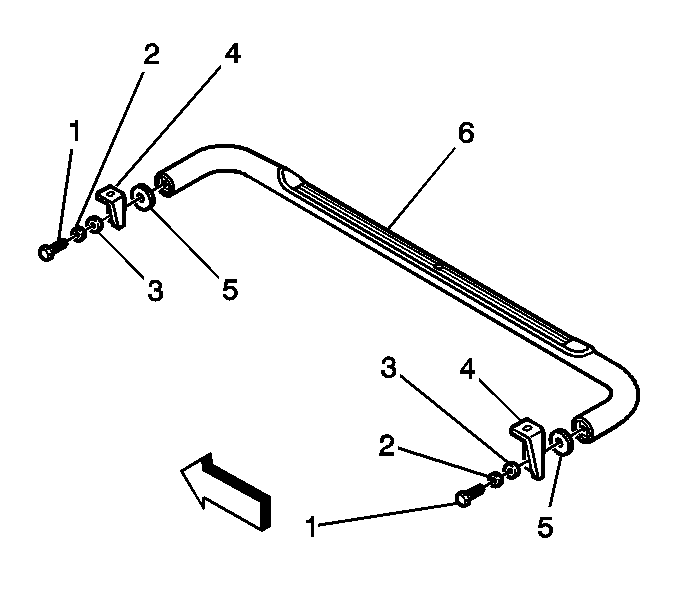
Assist Step Replacement Frame Mount
Removal Procedure
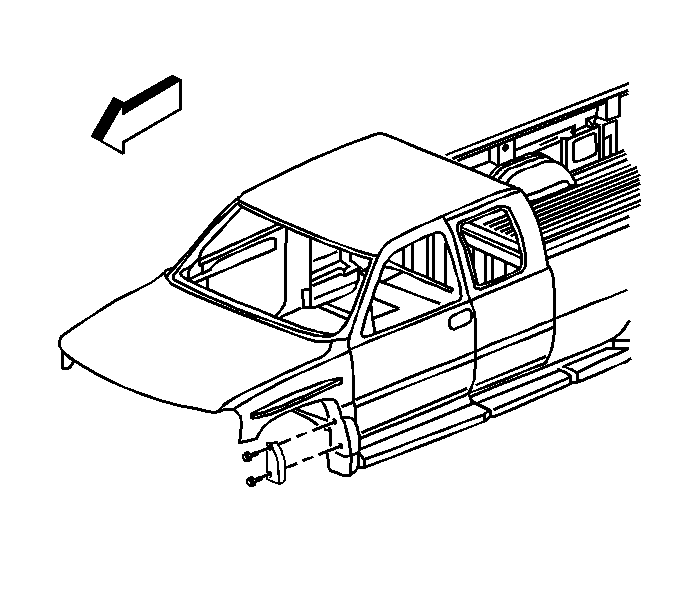
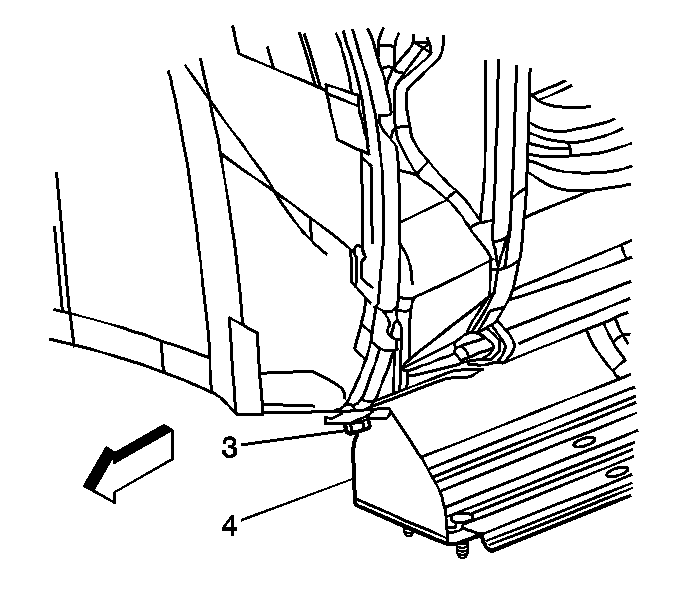
- With an assistant, remove the front retaining bolt (3) from the assist step.
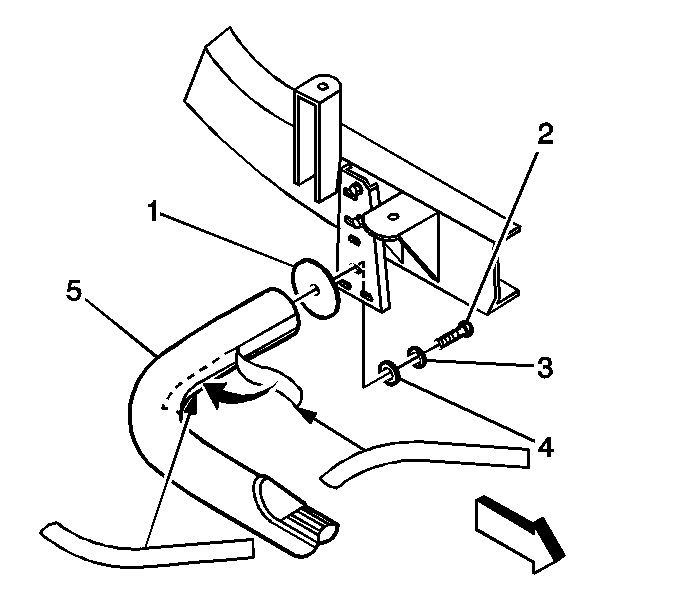
- With an assistant, remove the rear retaining bolt (2) from the assist step.
- Remove the assist step from the vehicle.
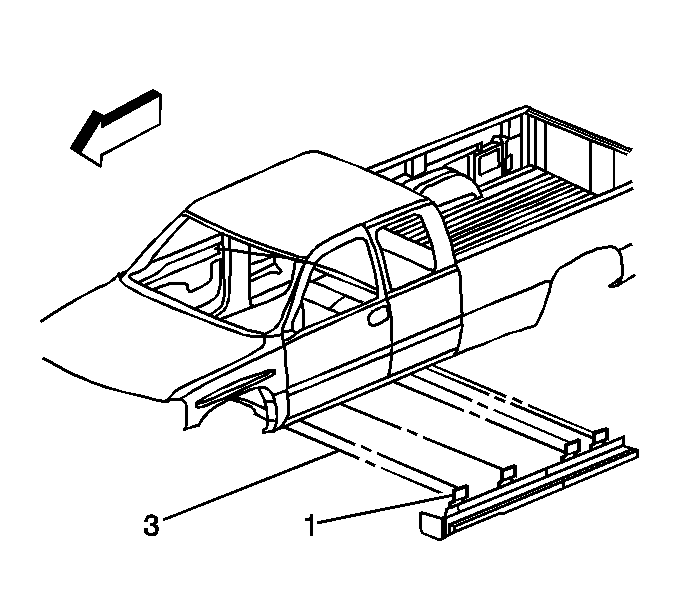
- Remove the front bracket retainers (1), and remove the bracket (4) from the vehicle.
- Remove the rear bracket retainers (1), and remove the bracket (8) from the vehicle.
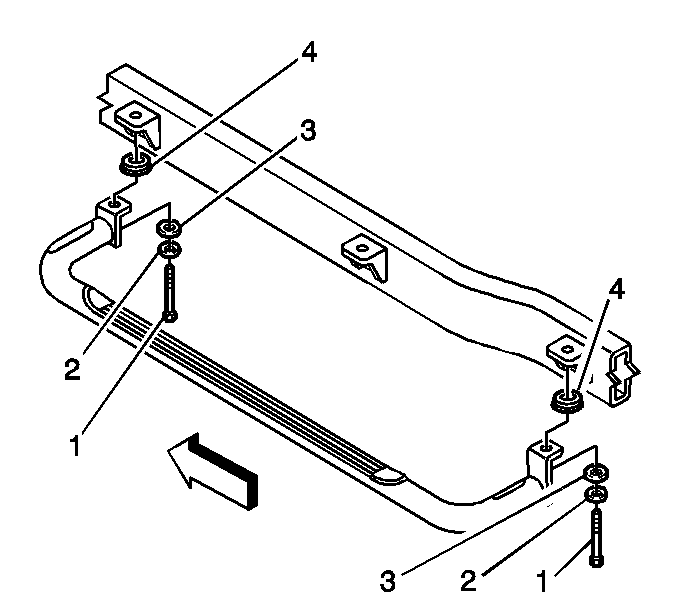
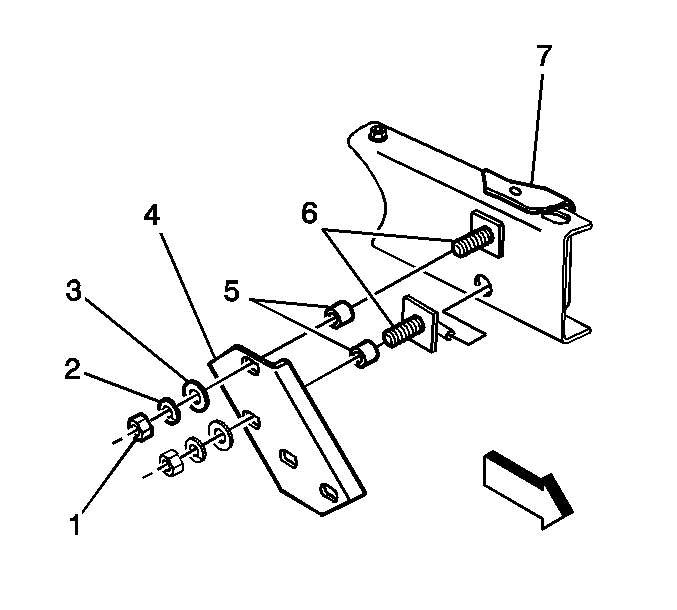
Installation Procedure
Important: Prior to installing all bolts apply thread locker GM P/N 12345382.
Important: The left side may use a nut plate in place of the washers, and in place of the nuts.
- Install the rear bracket (8) with the following components:
| 1.5. | The nuts--Leave the fasteners hand-tightened at this time. |
- Install the front bracket hook bolts (6) with poly liners to the frame.
- Install the spacers (5) to the hook bolts.
- Install the front bracket with the following components:
| 4.2. | The lock washers (2) |
| 4.3. | The nuts (1)--Leave the fasteners hand-tightened at this time. |
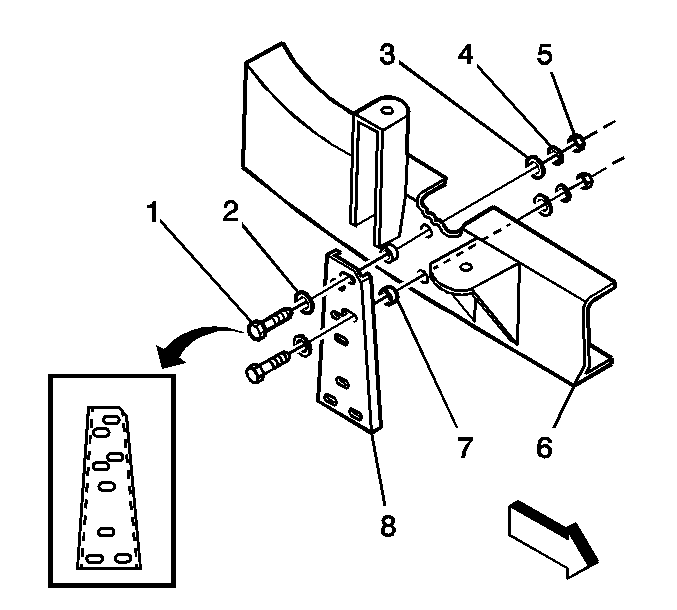
- With an assistant, install the step to the vehicle.
- With an assistant, install the following components to the rear assist step bracket:
| 6.4. | The bolt (2)--Leave the fasteners hand-tightened at this time. |
- With an assistant, install the following components to the assist step:
Notice: Use the correct fastener in the correct location. Replacement fasteners
must be the correct part number for that application. Fasteners requiring
replacement or fasteners requiring the use of thread locking compound or sealant
are identified in the service procedure. Do not use paints, lubricants, or
corrosion inhibitors on fasteners or fastener joint surfaces unless specified.
These coatings affect fastener torque and joint clamping force and may damage
the fastener. Use the correct tightening sequence and specifications when
installing fasteners in order to avoid damage to parts and systems.
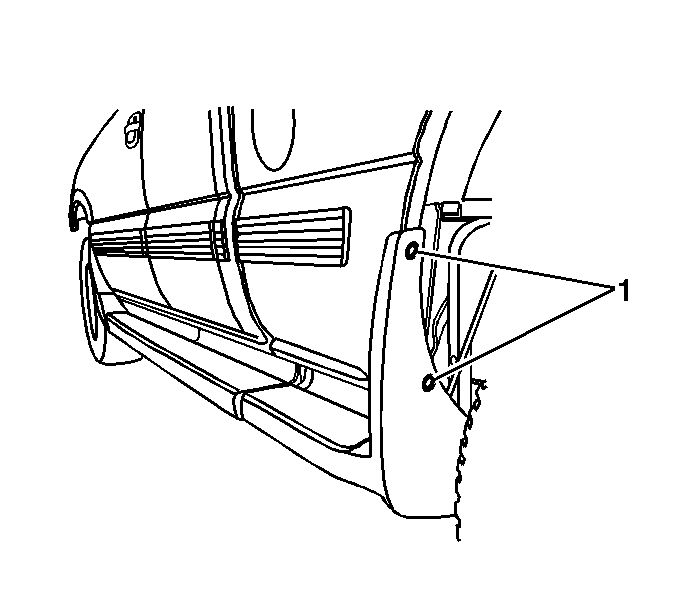
- Align step with rocker panel, and tighten the bolts.
Tighten
Torque all fasteners to 81 N·m (60 lb ft).
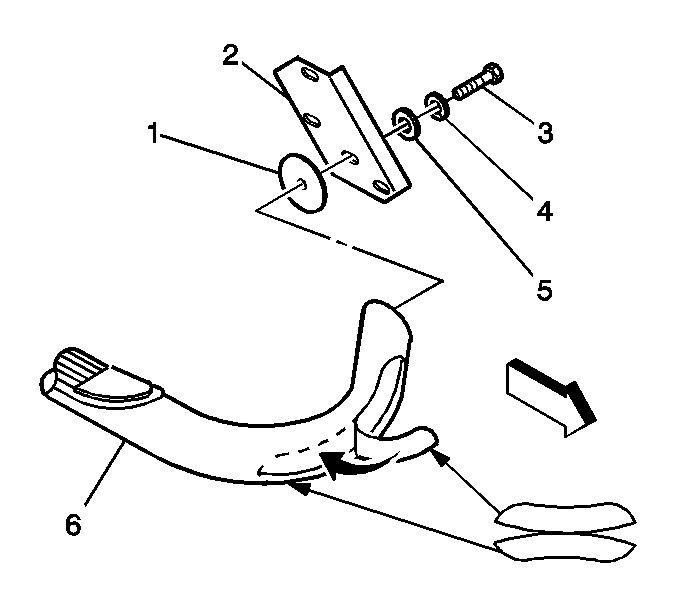
Assist Step Replacement Z-71
Removal Procedure
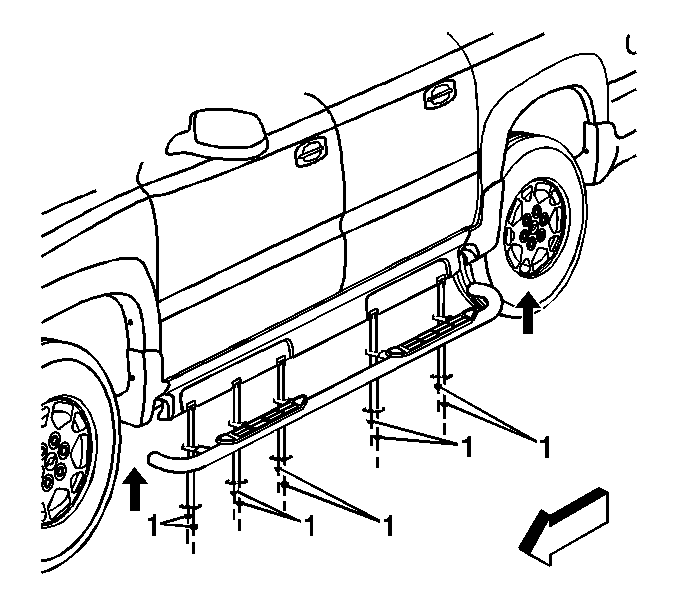
- With the aid of a helper,
remove the retaining nuts and the spacers (1) from the bottom side
of the assist step, and remove the assist step from the vehicle.
- Remove the rocker panel molding. Refer to
Rocker Panel Molding Replacement
in Exterior Trim.
- Drill out the rivets (1)
from the assist step brackets.
- Remove the 5 stud plates (1)
from the 5 assist step brackets (2).
- Remove the 5 retaining
bolts (1) from the inner side of the rocker panel.
- Remove the 5 retaining bolts (2) from the inner side of
the rocker panel.
- Remove the assist step brackets (5) from the vehicle.
- Drill out the rivets (3) for the rocker panel molding bracket (4).
- Remove the bracket (4) from the vehicle.
Installation Procedure
- Install the rocker panel
molding bracket (4) to the vehicle.
- Install the rivets (3) that secure the rocker panel molding
bracket (4) to the vehicle.
- Install the assist step brackets (5) to the vehicle.
Notice: Use the correct fastener in the correct location. Replacement fasteners
must be the correct part number for that application. Fasteners requiring
replacement or fasteners requiring the use of thread locking compound or sealant
are identified in the service procedure. Do not use paints, lubricants, or
corrosion inhibitors on fasteners or fastener joint surfaces unless specified.
These coatings affect fastener torque and joint clamping force and may damage
the fastener. Use the correct tightening sequence and specifications when
installing fasteners in order to avoid damage to parts and systems.
- Install the 5 retaining bolts (1) to the inner side of the
rocker panel.
Tighten
Tighten the bolts (1) to 29 N·m (21 lb ft).
- Install the 5 retaining bolts (2) to the inner side of
the rocker panel.
Tighten
Tighten the bolts (1) to 10 N·m (89 lb in).
- Install the 5 stud plates (1)
to the 5 assist step brackets (2).
- Install the rivets (1)
that secure the assist step brackets to the rocker panel.
- Install the rocker panel molding. Refer to
Rocker Panel Molding Replacement
in Exterior Trim.
- With the aid of an assistant,
install the assist step to the vehicle.
- Install the spacers and the nuts (1) .
Tighten
Tighten the bolts (1) to 29 N·m (21 lb ft).
Assist Step Replacement Sierra Denali-RPO BVP
Removal Procedure
- Remove the retainers from
the splash guard.
- Remove the splash guard from the Front Lower Fender.
- Remove the retainer (3)
attaching the assist step bracket (4) to the lower front fender.
- With an assistant remove
the retainers (3) from where the vertical mounting brackets (1) attached
to the inner rocker panel.
- Remove the front assist step from the vehicle.
- Remove the retainers (1)
from the rear assist step splash guard.
- Loosen the retainers (4)
at the cross sills (5) attachments.
- With an assistant remove the bolts (3) and the threaded plates
(1) from the cross rails (5).
Important: Care must be taken not to scratch or dent pickup box when removing or
installing assist step assembly.
- Remove the Rear Assist
Step Assembly (1) from the vehicle.
- Remove the retainers from the rear splash guard (2).
- Remove the rear splash guard from the vehicle.
- Ensure all areas are free from dirt or adhesive prior to installation.
Installation Procedure
Important: Install in an environment that is free from dust or dirt. Dust or dirt
could come into contact with the adhesive surface and prevent proper adhesion.
The surface should be 21°C or 70°F for proper adhesion.
Important: Assist Steps must be installed front to rear due to alignment issues.
- Install the splash guard
to the Front Lower Fender.
- Install the retainers to the splash guard.
- Align splash guard with wheel well.
- Remove the protective backing from the adhesive tape while pressing
to ensure contact with fender.
- With an assistant install
the front assist step assembly to the vehicle.
- With an assistant install
the retainer (3) attaching the assist step bracket (4) to the lower front
fender.
- With an assistant install
the retainers (3) from where the vertical mounting brackets (1).
- Adjust the clearance between the rocker panel and the assist step
to 6 -- 10 mm. Check clearance only after the last vertical mounting
bracket area.
- Tighten the assist step fasteners to 20 N·m.
- Install the threaded plates
(1) into the open end of the cross rails (5) ensuring that the holes in the
cross sills align to the threaded plates.
- With an assistant install the rear assist step assembly to the
vehicle.
- Install the retainers (3) and make adjustments by adding shims.
- Tighten the threaded plate retainers (3) to 20 N·m.
- Tighten the retaining bolt (4) to the cross sill to 9 N·m.
- Ensure proper alignment of front rear assist steps after tightening
all retainers.
- Install retainers (1)
to splash guard.
- Remove protective film to attach assist step splash guard to rear
wheel well.
- Install the rear splash
guard.
- Install the retainers.
- Align the splash guard to the wheel well.
- Remove the protective film and press firmly to secure to the wheel
well surface.
