Important:
| • | The block gasket surfaces must be clean. |
| • | Do not use a sealer on the head gasket. The head gasket is manufactured
with the proper amount of sealant "printed" on its surface. Additional
sealer may cause leakage or malfunction. In addition, some sealers may attack the
sealant already on the head gasket. |
Important: The cylinder head gasket material is soft.
Handle the cylinder head gasket with care and make sure that the sealing surfaces
are not damaged.

- Install
the head gasket to the block over the dowel pins.
Connect the rear cylinder
head bolt to the cylinder head (left cylinder head). Due to the clearances, the bolt
must be installed at this time.
- Install the cylinder head. Make sure the gasket surfaces are clean. Guide
the head carefully in place over the dowel pins.
- Install
the cylinder head bolts.
| • | Check the cylinder head bolts for stretching. |
| • | Make sure the bolt threads are clean. |
| • | Apply sealant GM P/N 12346004 or equivalent to the bolt threads
and under the bolt heads. |
- Tighten the cylinder heads in the following 3 passes:
Tighten
| • | Tighten the bolts to 25 N·m (20 lb ft). |
| • | Tighten the bolts to 75 N·m (55 lb ft). |
| • | In sequence, tighten all the bolts an additional 90-100 degrees
(1/4 + turn). |
Notice: Use the correct fastener in the correct location. Replacement fasteners
must be the correct part number for that application. Fasteners requiring
replacement or fasteners requiring the use of thread locking compound or sealant
are identified in the service procedure. Do not use paints, lubricants, or
corrosion inhibitors on fasteners or fastener joint surfaces unless specified.
These coatings affect fastener torque and joint clamping force and may damage
the fastener. Use the correct tightening sequence and specifications when
installing fasteners in order to avoid damage to parts and systems.
- Install the exhaust manifold to the cylinder head.
Tighten
- Tighten the exhaust manifold bolts to 35 N·m (26 lb ft).
- Tighten the exhaust manifold nuts and mounting studs to 35 N·m
(26 lb ft).
- Install the coolant crossover pipe/thermostat assembly. Use new gaskets.
Tighten
Tighten bolts to 42 N·m (31 lb ft).
- Install the water pump bypass and heater hoses.
- Install the pushrods and the valve rocker arm assemblies, in their original
locations.

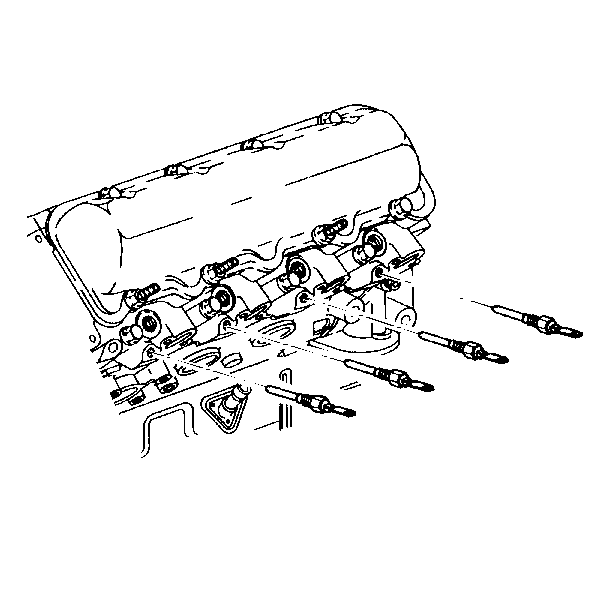
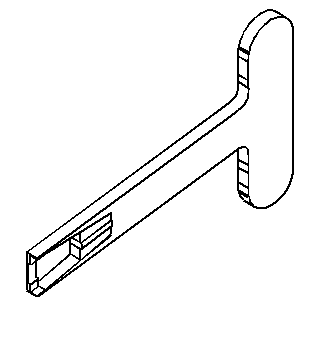
- Install
the glow plug wires. Use the J 39083
in order to connect the glow plug connectors to the glow plugs.
- Connect the wire to the coolant sensor at the cylinder head.
- Install the components as follows for the right cylinder head:
| • | The turbocharger assembly |
| • | The generator and rear bracket |
| • | The vacuum pump and bracket |
| • | The wiring harness at the clips and move aside |
- Install the components as follows for the left cylinder head:
| • | The air conditioning compressor and bracket |
| • | The power steering pump with bracket |
| • | The oil level indicator tube |
| • | The upper radiator hose |
- Raise the vehicle.
- Support the vehicle with safety stands.
- Install the exhaust pipe to the exhaust manifold. Refer to Exhaust Systems.
- Lower the vehicle.
- Install the valve rocker arm covers.
- Install the fuel injection lines.
- Install the intake manifold.
- Fill the cooling system with the proper quantity and grade of coolant.
- Change the engine oil and the filter. Refer to Maintenance and Lubrication.