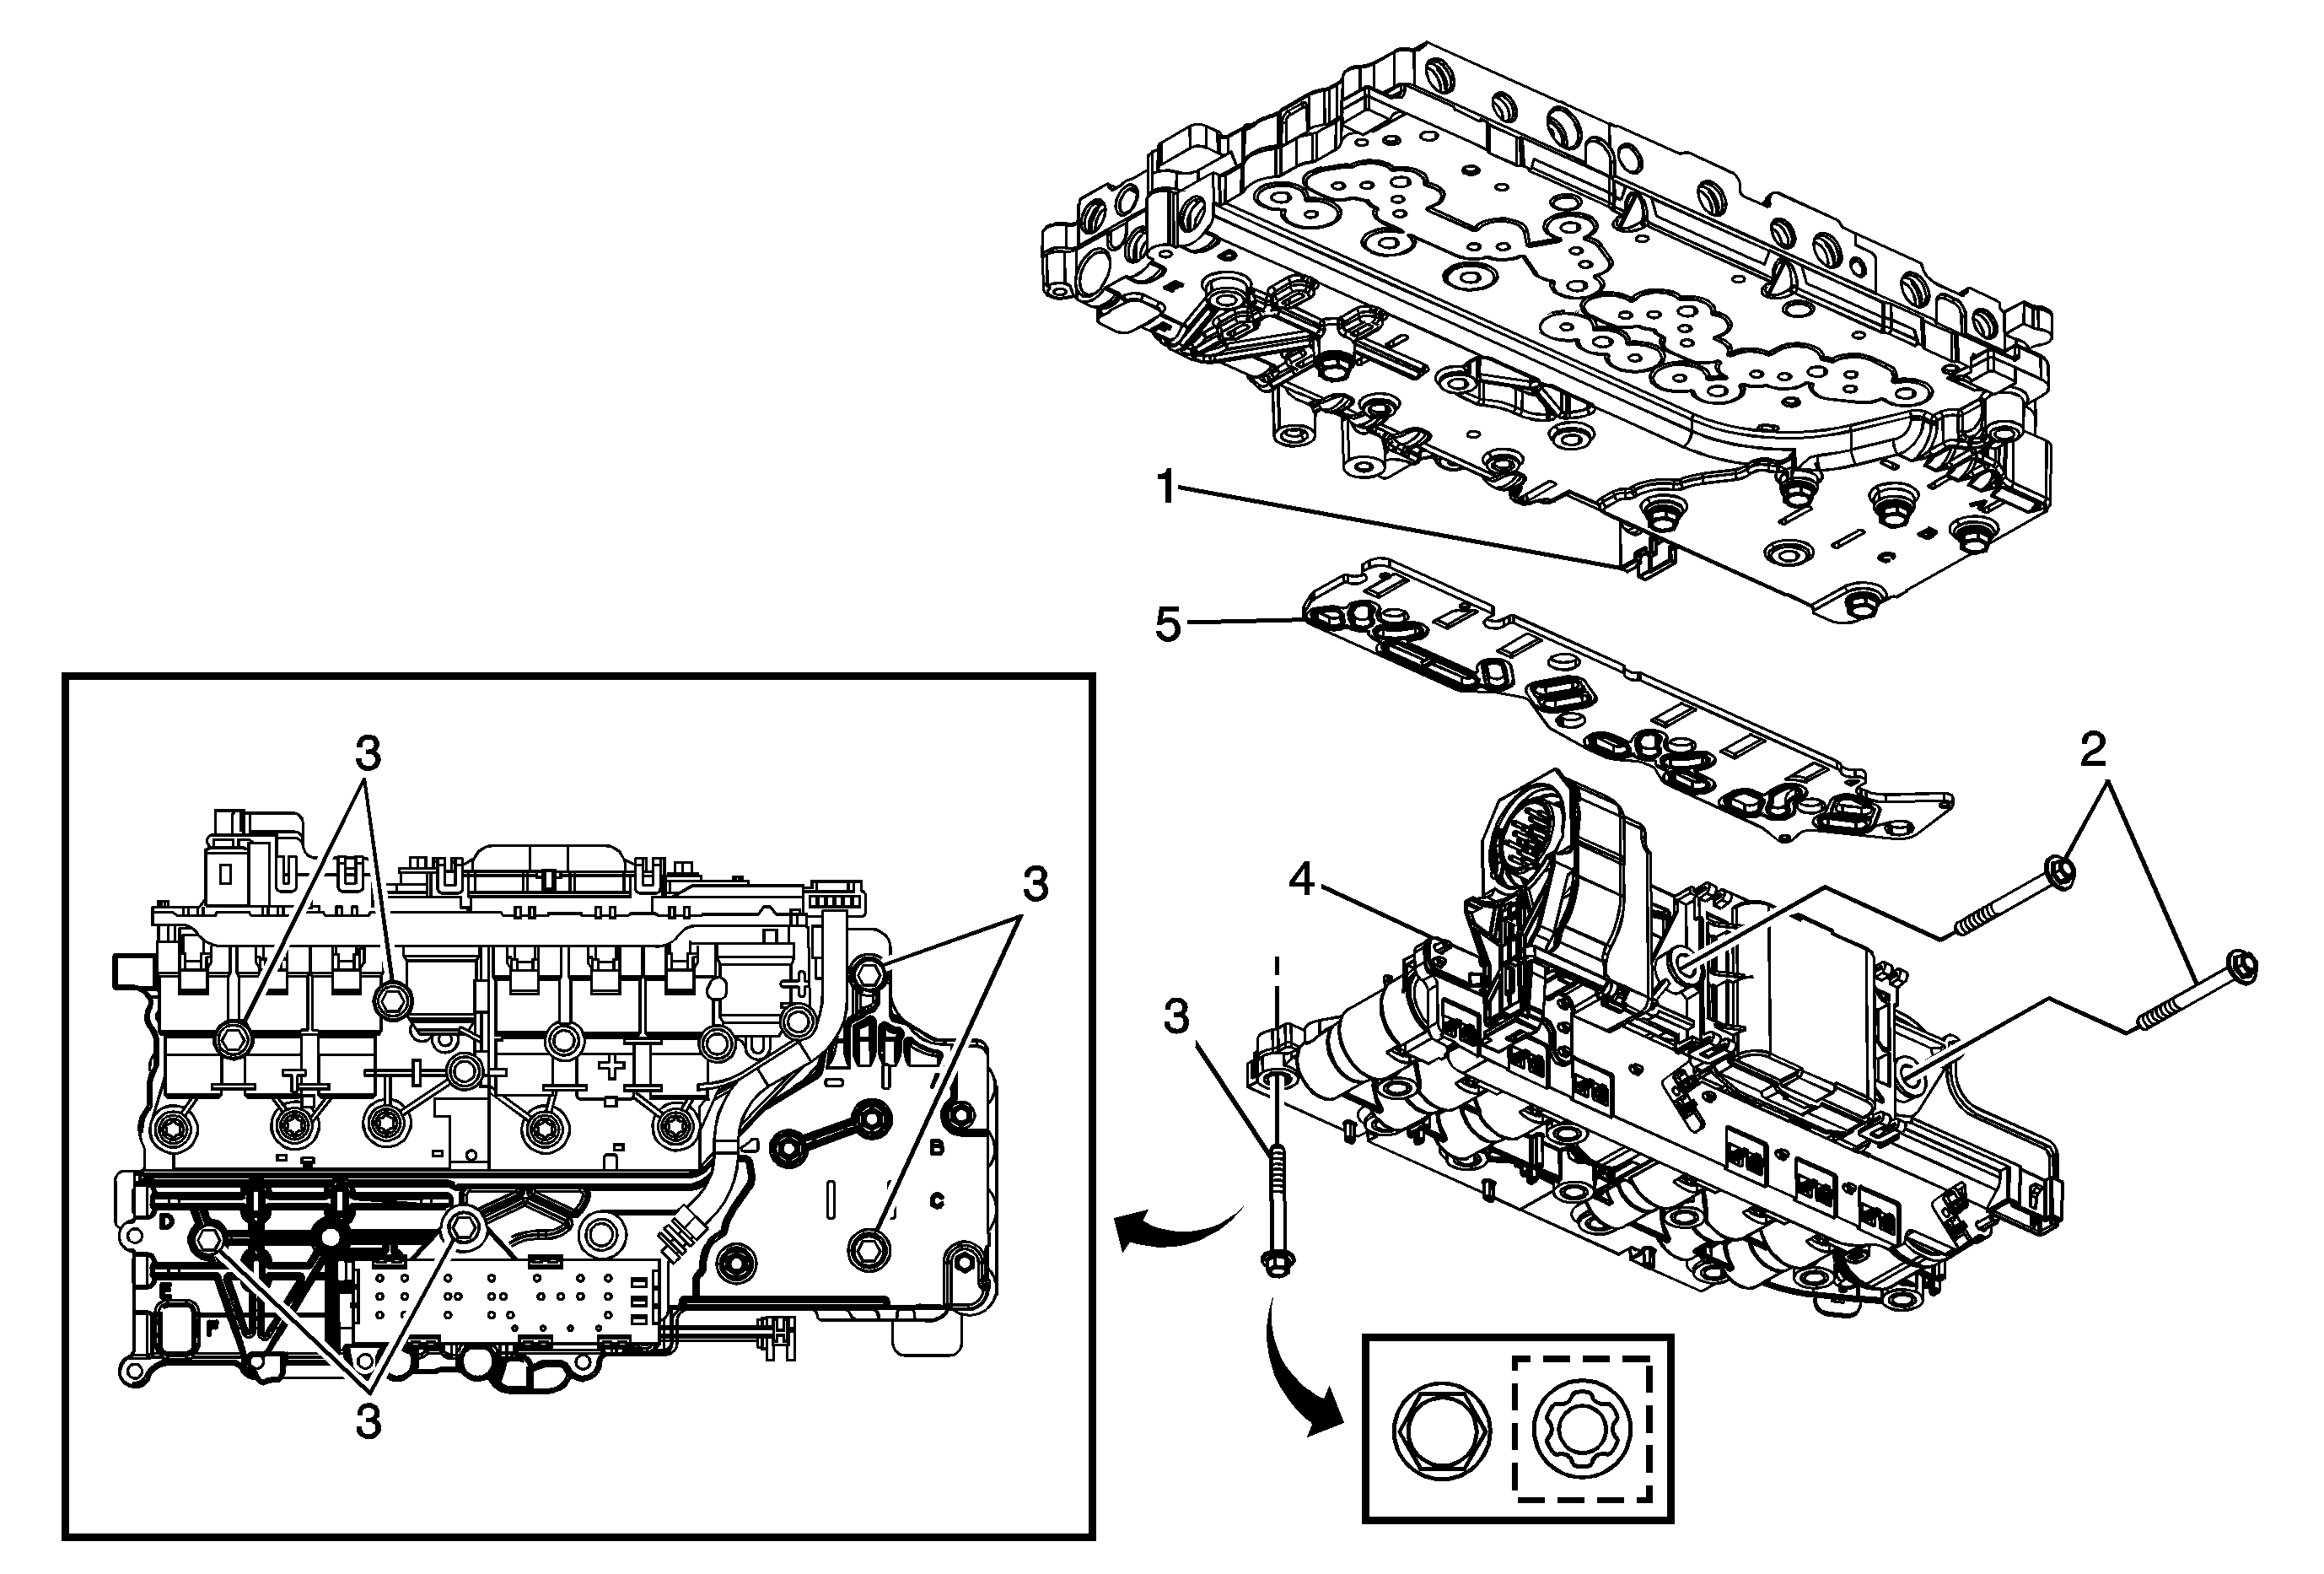
Callout
| Component Name
|
Preliminary ProceduresRemove the control valve body assembly. Refer to
Control Valve Lower Body and Upper Body Replacement.
|
1
| Manual Shift Shaft Position Switch Assembly Electrical Connector
Tip
Release the connector lock before disconnecting. Engage the connector lock after connecting. |
2
| Control Module Assembly Heat Sink Bolt (Qty: 2)
Notice: Refer to Fastener Notice in the Preface section.
Tip
Tighten in specified sequence.
Tighten
8 N·m (71 lb in) |
3
| Control Solenoid Valve Assembly Bolt (Qty: 6)
Tip
Tighten in specified sequence.
Tighten
8 N·m (71 lb in) |
4
| Control Solenoid Valve and Module Assembly
Procedure
- Inspect the 4 filter plate retaining tabs. A broken tab may not adequately secure the filter plate to the control solenoid valve assembly.
- Align the control solenoid valve assembly with the lower valve body locator pin when assembling.
- If a replacement transmission control module is installed, program the module. Refer to
Control Module References.
- Reset the transmission adaptive pressure (TAP) values. Refer to
Service Fast Learn Adapts.
|
5
| Filter Plate
Tip
Discard filter plate and replace with new. |