For 1990-2009 cars only
Removal Procedure
Notice: To prevent equipment damage, never connect or disconnect the wiring harness connection from the EBCM with the ignition switch in the ON position.
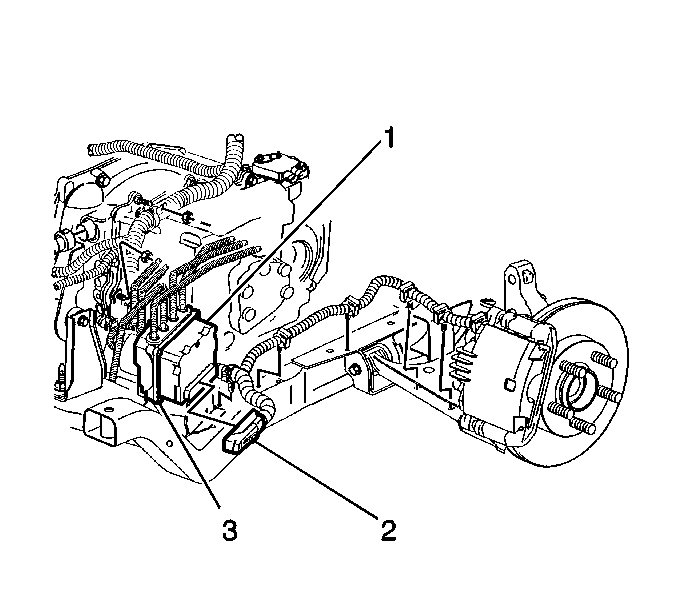
- Raise and support the vehicle on a suitable hoist. Refer to Lifting and Jacking the Vehicle .
- Remove the left engine splash shield.
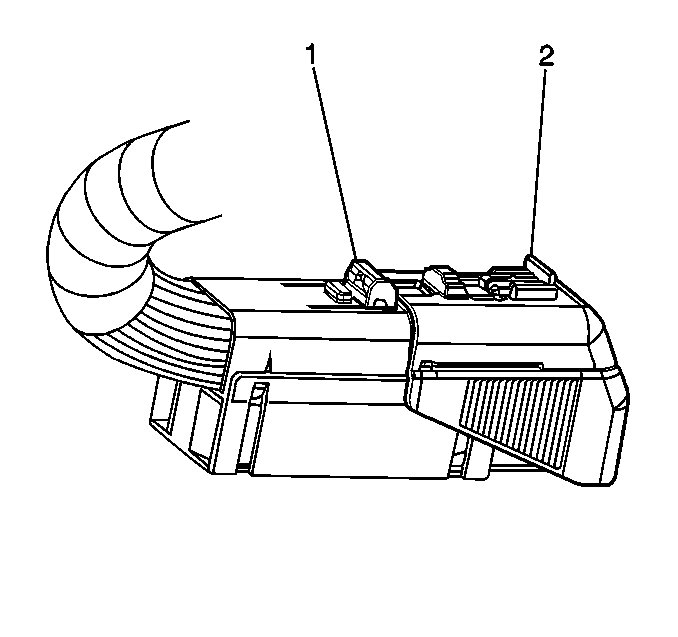
- Remove the connector position assurance (CPA) (2) from the connector lock tab (1).
- Push the lock tab (1) down and then move the sliding connector cover to the open position.
- Disconnect the EBCM harness connector (2) from the EBCM (1).
- Brush off any dirt or debris that has accumulated on the EBCM/BPMV assembly.
- Remove the 4 EBCM to BPMV screws.
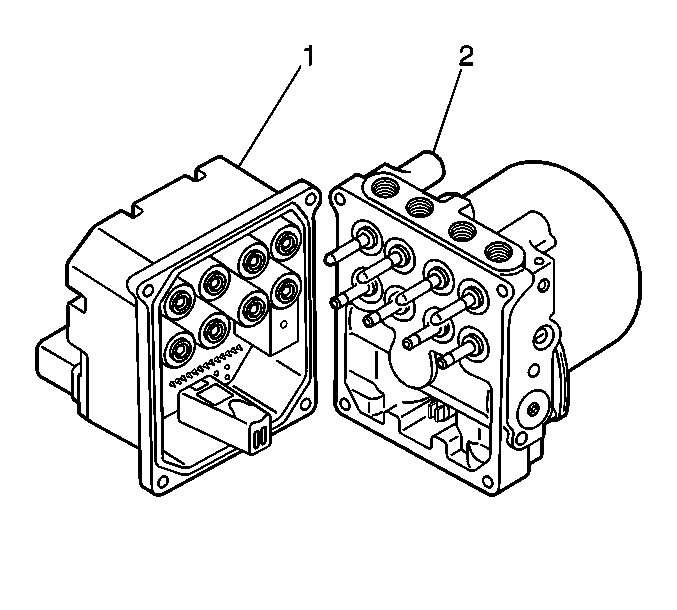
- Remove the EBCM (1) from the BPMV (2) by gently pulling apart until separated.
Important:
• Do not pry apart using a tool. Be careful not to damage the BPMV surface. • Care must be taken not to damage the solenoid valves when the EBCM is removed from the BPMV.
Installation Procedure
- Clean the EBCM gasket and the BPMV surface with alcohol using a clean rag.
- Install the EBCM (1) to the BPMV (2).
- Install the 4 screws that attach the EBCM (1) to the BPMV (2).
- Connect the EBCM harness connector (2) to the EBCM (1).
- Push down the harness connector lock tab (1) and then move the sliding connector cover back in the home position to lock.
- Push the CPA (2) back into place.
- Install the left engine splash shield.
- Lower the vehicle. Refer to Lifting and Jacking the Vehicle .
- Perform the Diagnostic System Check - Vehicle .
- Refer to Control Module References for programming and setup information.
Notice: Refer to Fastener Notice in the Preface section.
Tighten
Tighten the screws to 5 N·m (44 lb in).
