For 1990-2009 cars only
Revised HVAC Module Assembly Replacement (W/Air Conditioning)

| Subject: | Revised HVAC Module Assembly Replacement (W/Air Conditioning) |
| Models: | 2004-2005 Chevrolet Colorado Crew Cab Models |
| 2004-2005 GMC Canyon Crew Cab Models |
| With Air Conditioning |
This bulletin is being issued to revise the HVAC Module Assembly Replacement (W/Air Conditioning) procedure in the Heating, Ventilation and Air Conditioning sub-section of the Service Manual. Please replace the current information in the Service Manual with the following information.
The following information has been updated within SI. If you are using a paper version of this Service Manual, please make a reference to this bulletin on the affected page.
HVAC Module Assembly Replacement (W/Air Conditioning)
Tools Required
| • | J 43181 Heater Line Quick Connect Release Tool |
| • | J 39400-A Halogen Leak Detector |
Removal Procedure
- Drain the engine coolant. Refer to Draining and Filling Cooling System in Engine Cooling.
- Recover the refrigerant. Refer to Refrigerant Recovery and Recharging.
- Remove the instrument panel (I/P) carrier. Refer to Instrument Panel (I/P) Carrier Replacement in Instrument Panel, Gages, and Console.
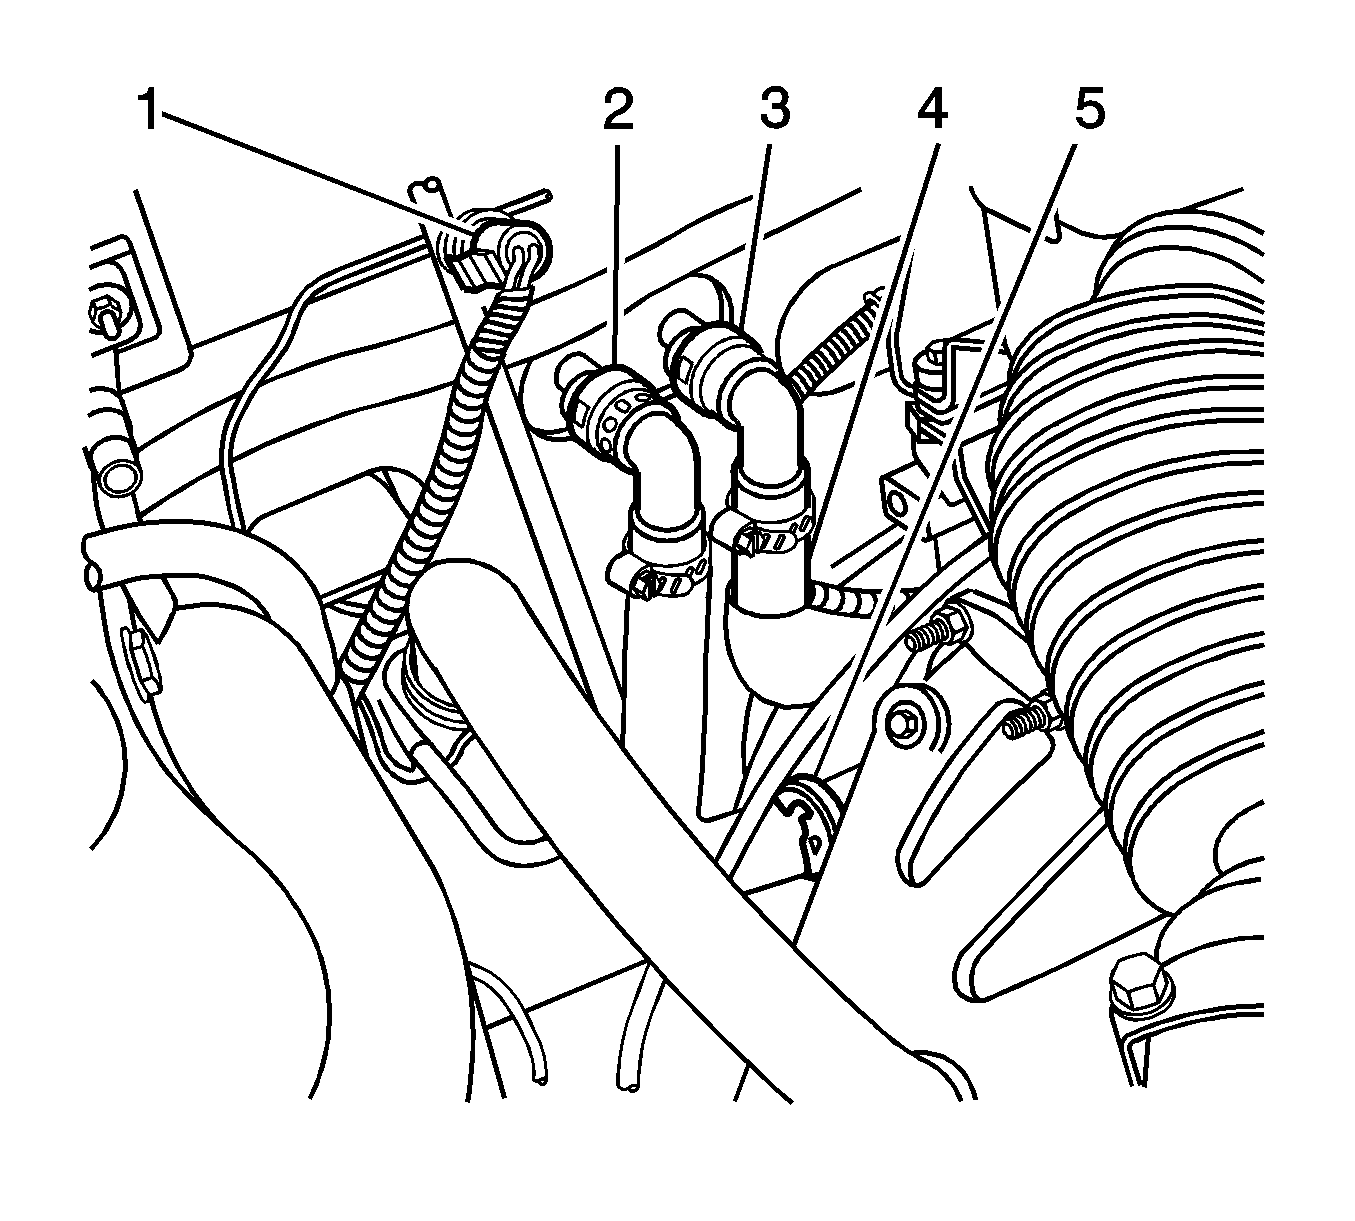
- Release the heater hose clamps using J 43181.
- Disconnect the heater hose quick connects (2) and (3) from the heater core.
- Remove the retaining nut from the TXV stud.
- Remove the evaporator tube and suction hose from the TXV.
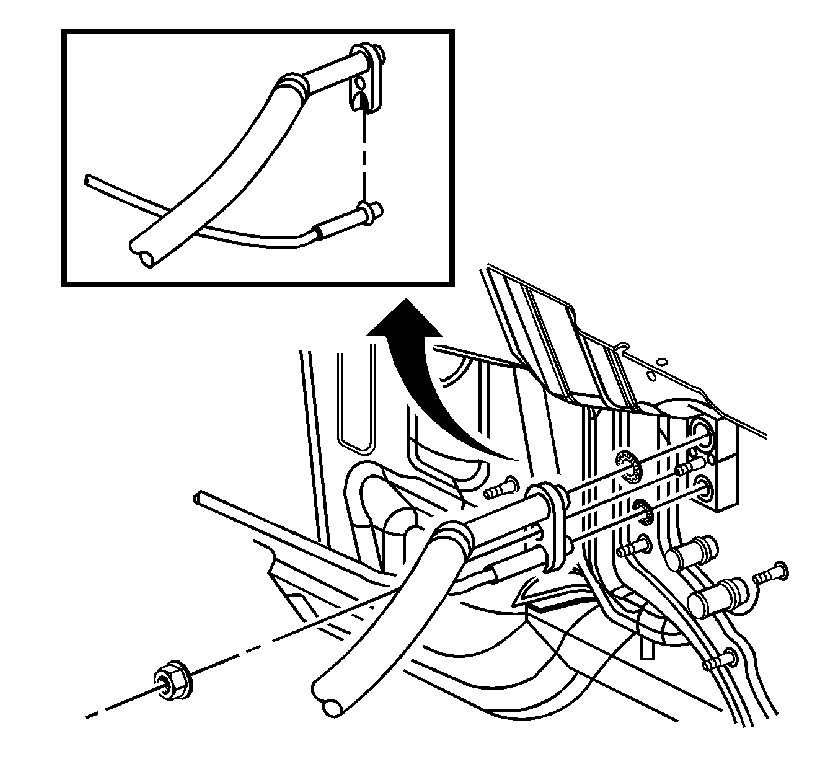
- Remove the radio antenna from the HVAC module.
- Reposition the carpet.
- Remove rear floor duct. Refer to Air Outlet Replacement - Rear Floor.
- Remove the HVAC module retaining nuts from the cowl.
- Remove the HVAC module assembly.
Installation Procedure
- Install the HVAC module assembly.
- Install the HVAC module retaining nuts from the cowl.
- Tighten the HVAC module retaining nuts.
- If replacing the HVAC module assembly (8), transfer the components from the old HVAC module assembly as necessary.
- Install the HVAC module assembly (8).
- Install rear floor duct. Refer to Air Outlet Replacement - Rear Floor.
- Reposition the carpet.
- Install the radio antenna to the HVAC module.
- Connect the heater hose quick connects (2) and (3) to the heater core.
- Install the evaporator tube and suction hose to the TXV.
- Install the retaining nut to the TXV stud.
- Tighten the retaining nut.
- Install the I/P carrier. Refer to Instrument Panel (I/P) Carrier Replacement in Instrument Panel, Gages and Console.
- Evacuate and recharge the A/C system. Refer to Refrigerant Recovery and Recharging.
- Leak test the fittings of the components using the J 39400-A .
- Refill the engine coolant. Refer to Draining and Filling Cooling System in Engine Cooling.
Notice: Refer to Fastener Notice .
Tighten
Tighten the nut to 4.5 N·m (40 lb in).
Tighten
Tighten the nut to 4.5 N·m (40 lb in).
