Special Tools
| • | EN-47610
(DW-110-130-01) Crankshaft Pulley Holder |
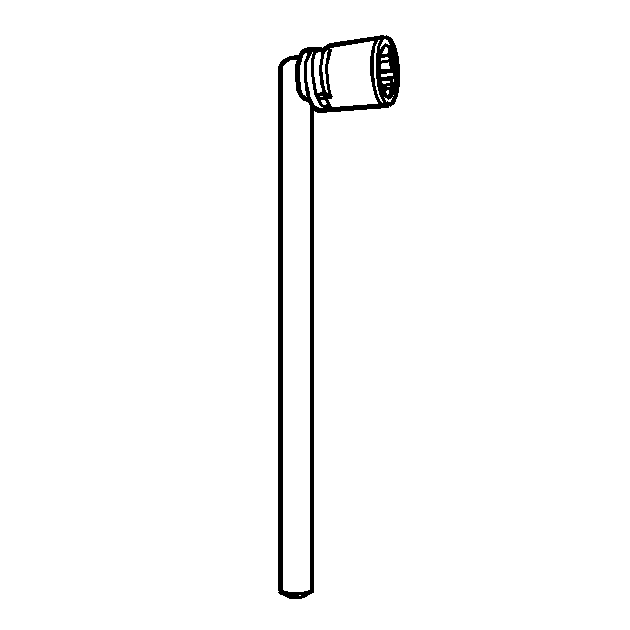
| • | EN-47611
(DW-110-130-02) Crankshaft Pulley Installer/Remover |
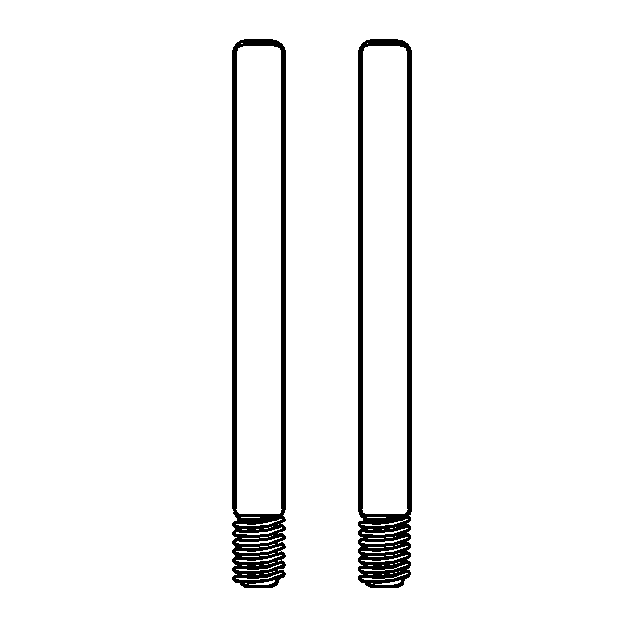
| • | EN-47612
(DW-110-140) Timing Chain Cover Install Guide Pin |
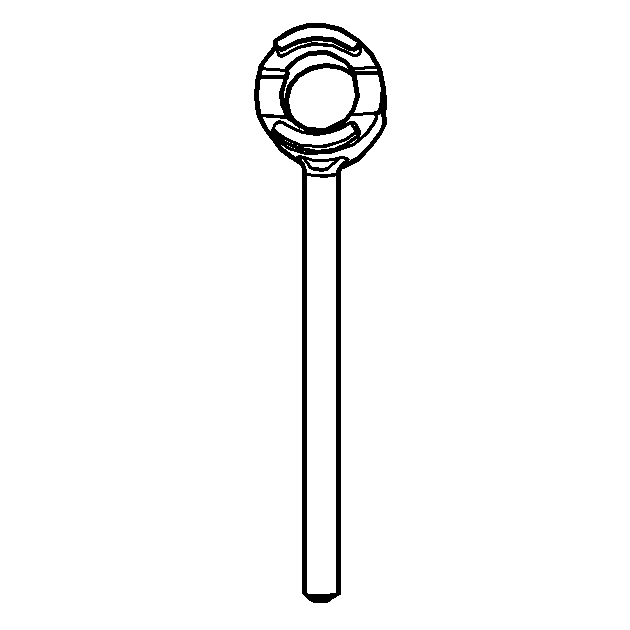
| • | EN-47613
(DW-110-150) Camshaft Sprocket Holder |
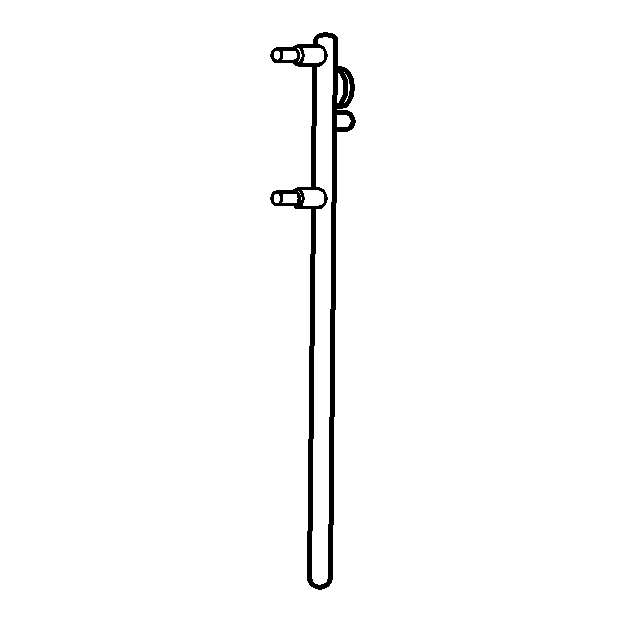
| • | EN-47614
(DW-110-160) Rocker Arm Shaft Installer/Remover |
Removal Procedure
Note: Place the parts on a clean surface. Store the components in order so they can be reassembled in the same location and with the same mating surfaces as when removed.
- Remove the engine assembly. Refer to
Engine Replacement.
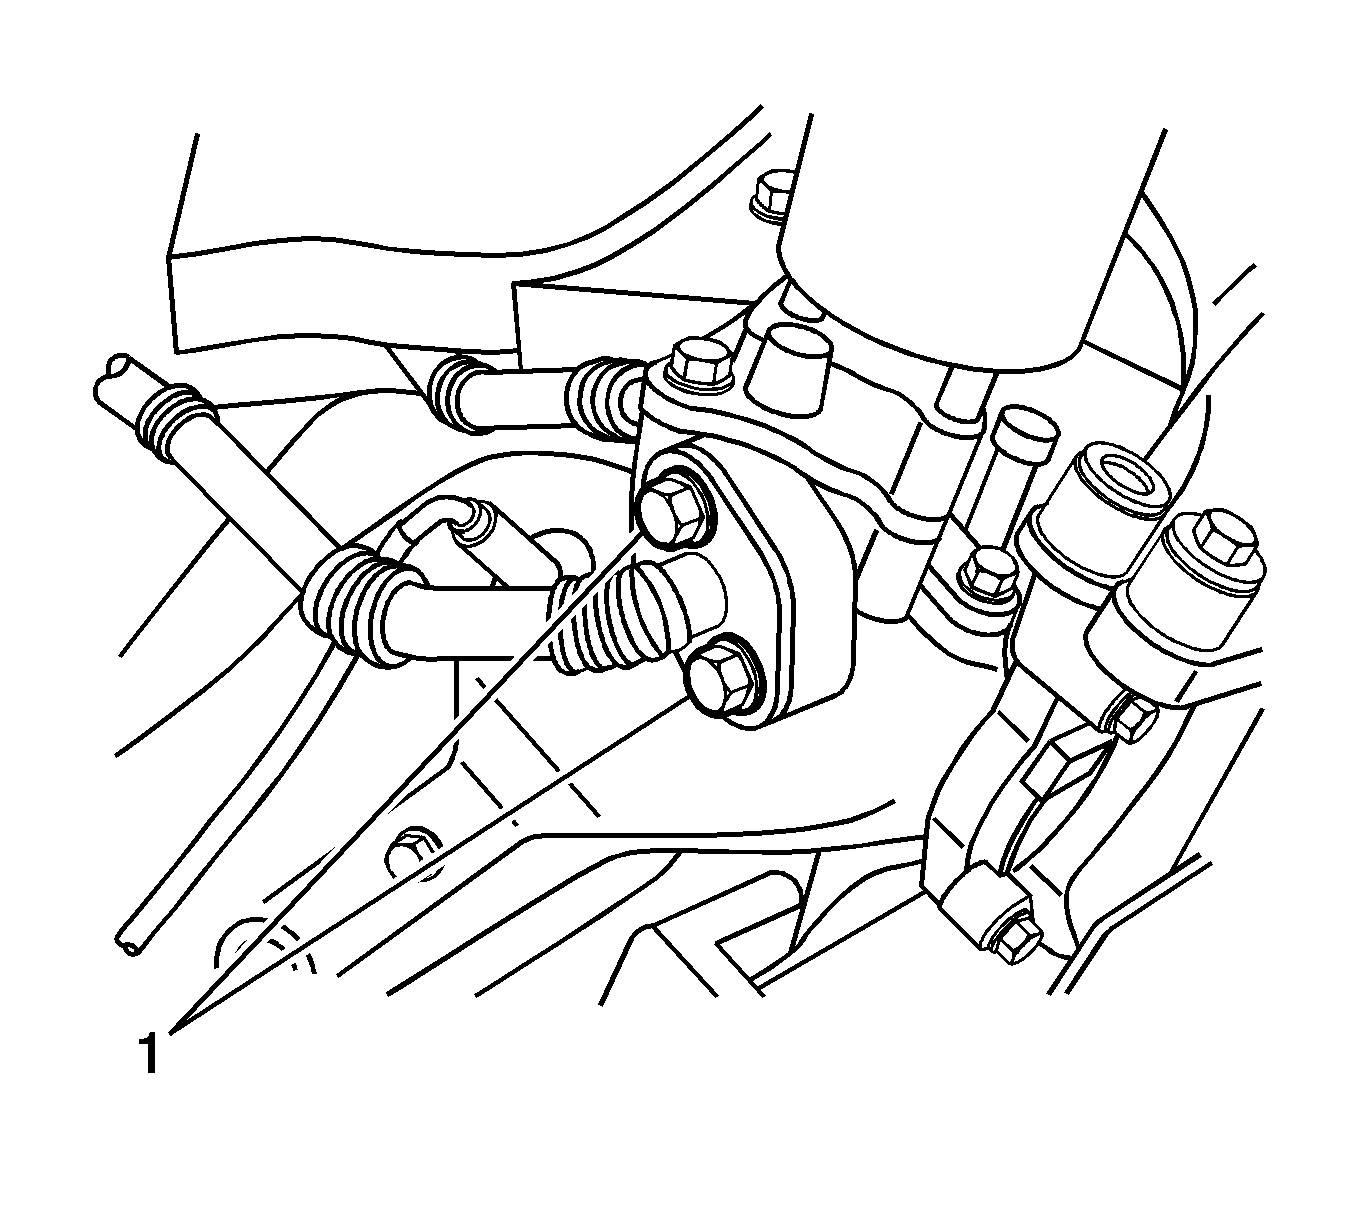
- Remove the exhaust gas recirculation (EGR) pipe mounting bolts (1) and gasket from the EGR valve adapter.
- Disconnect the positive crankcase ventilation (PCV) hose.
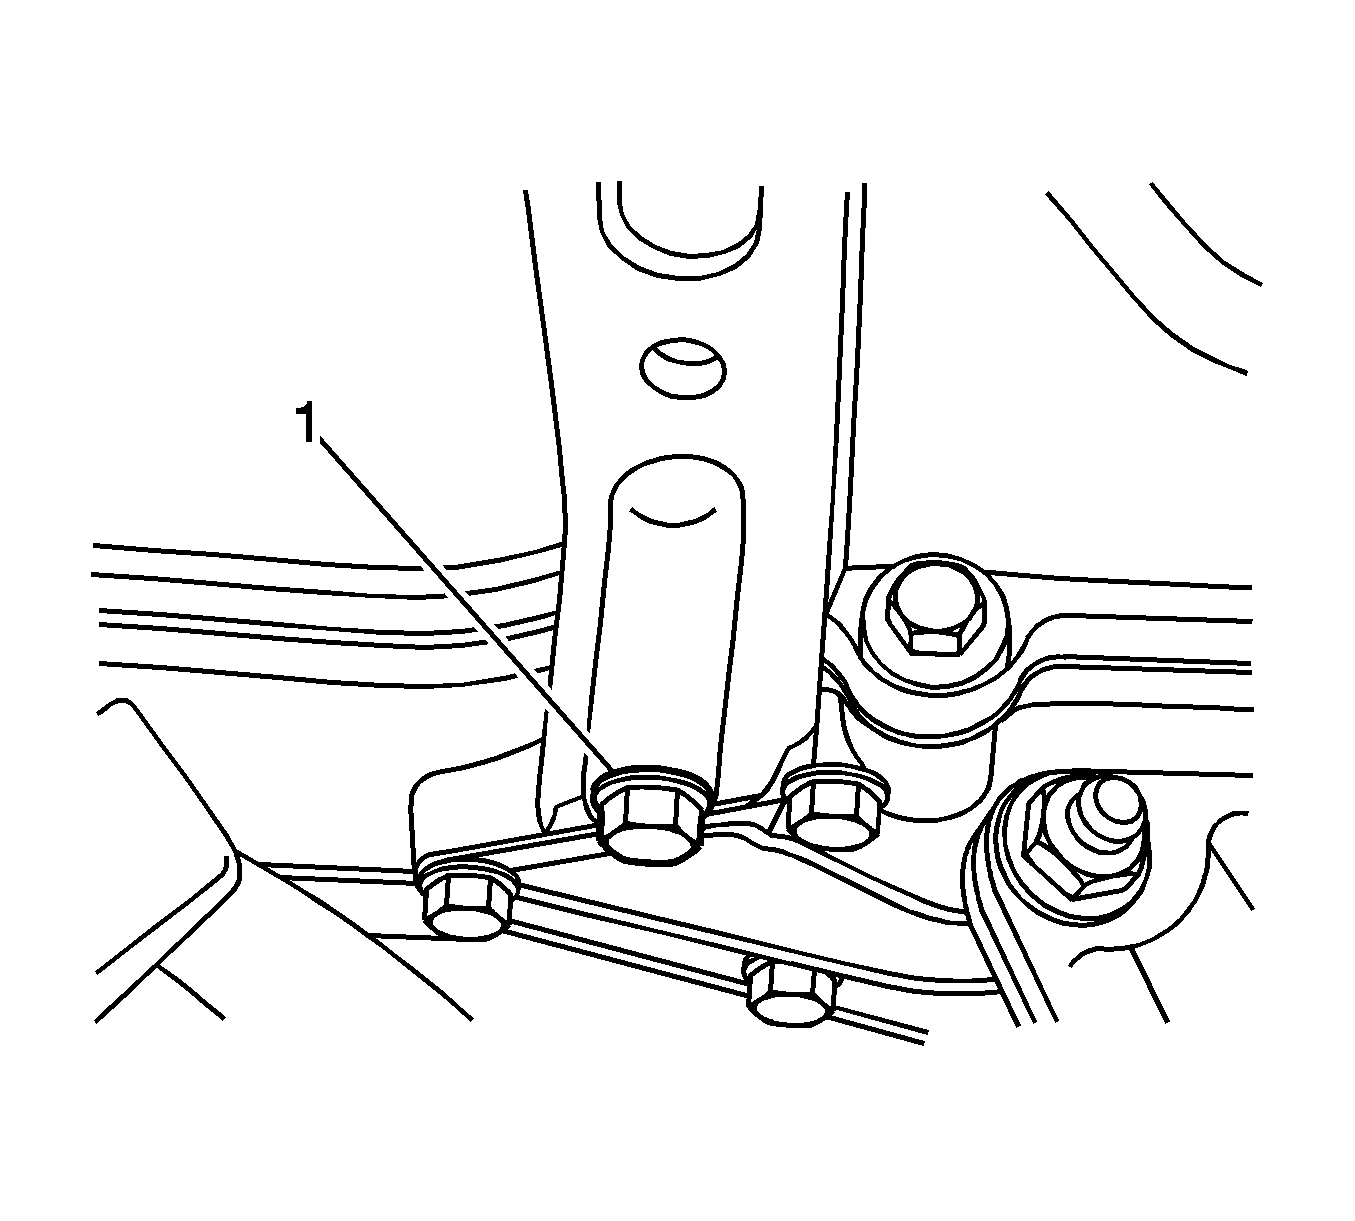
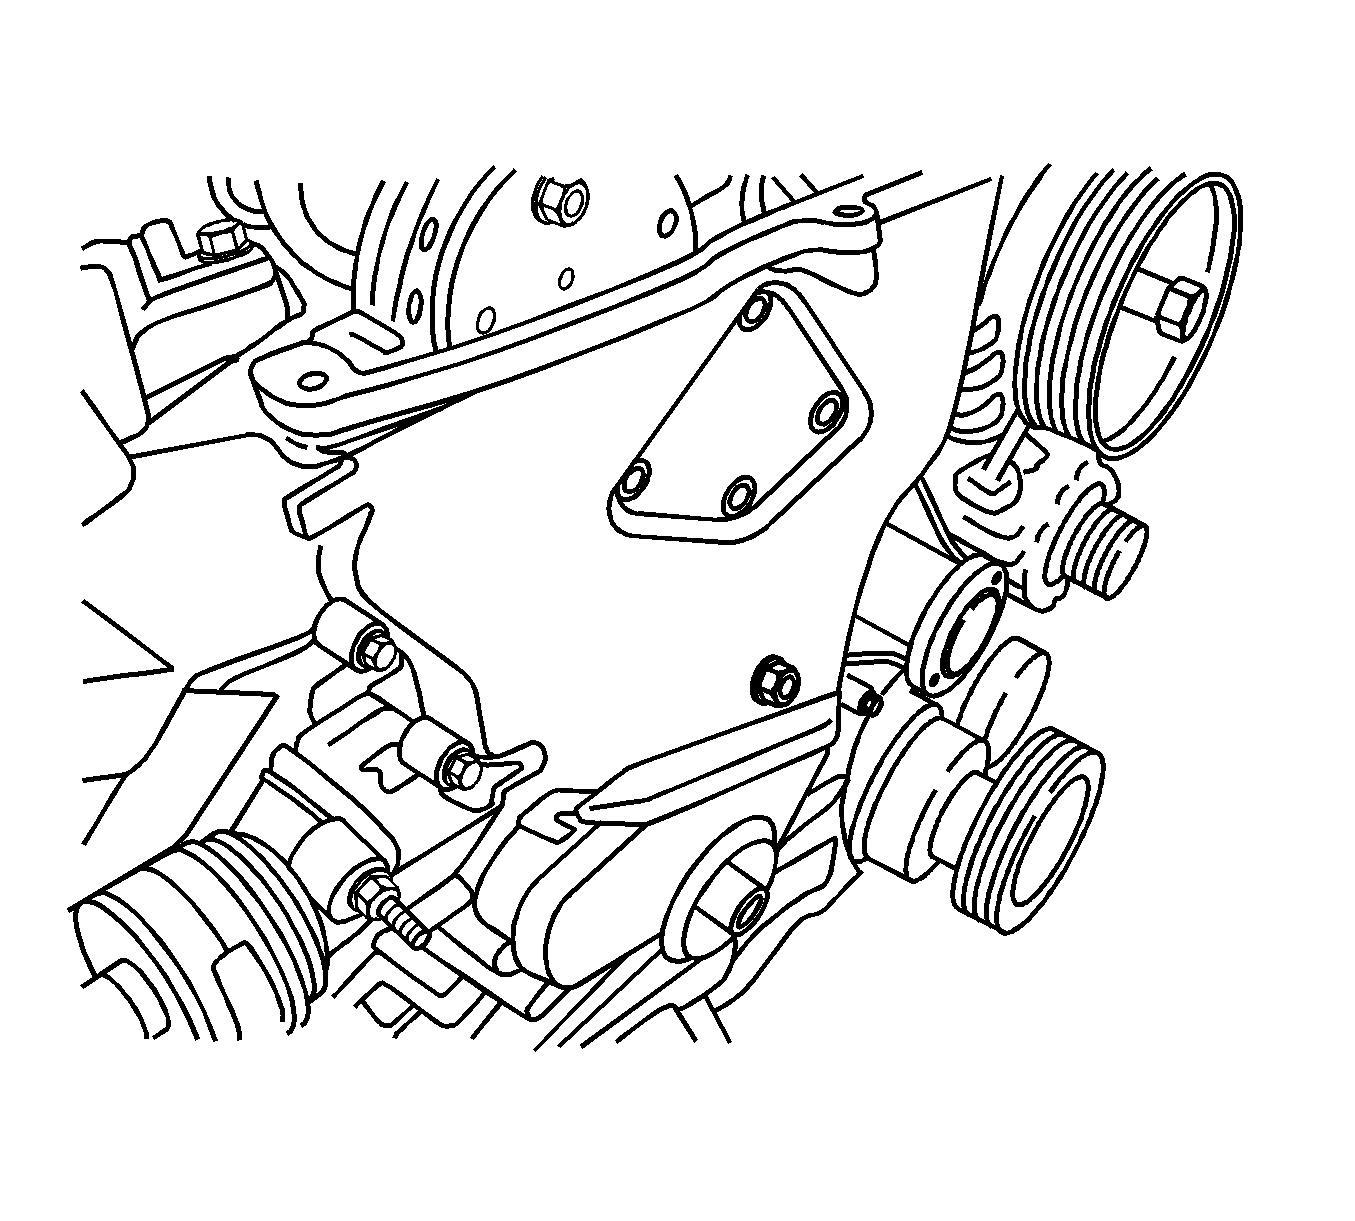
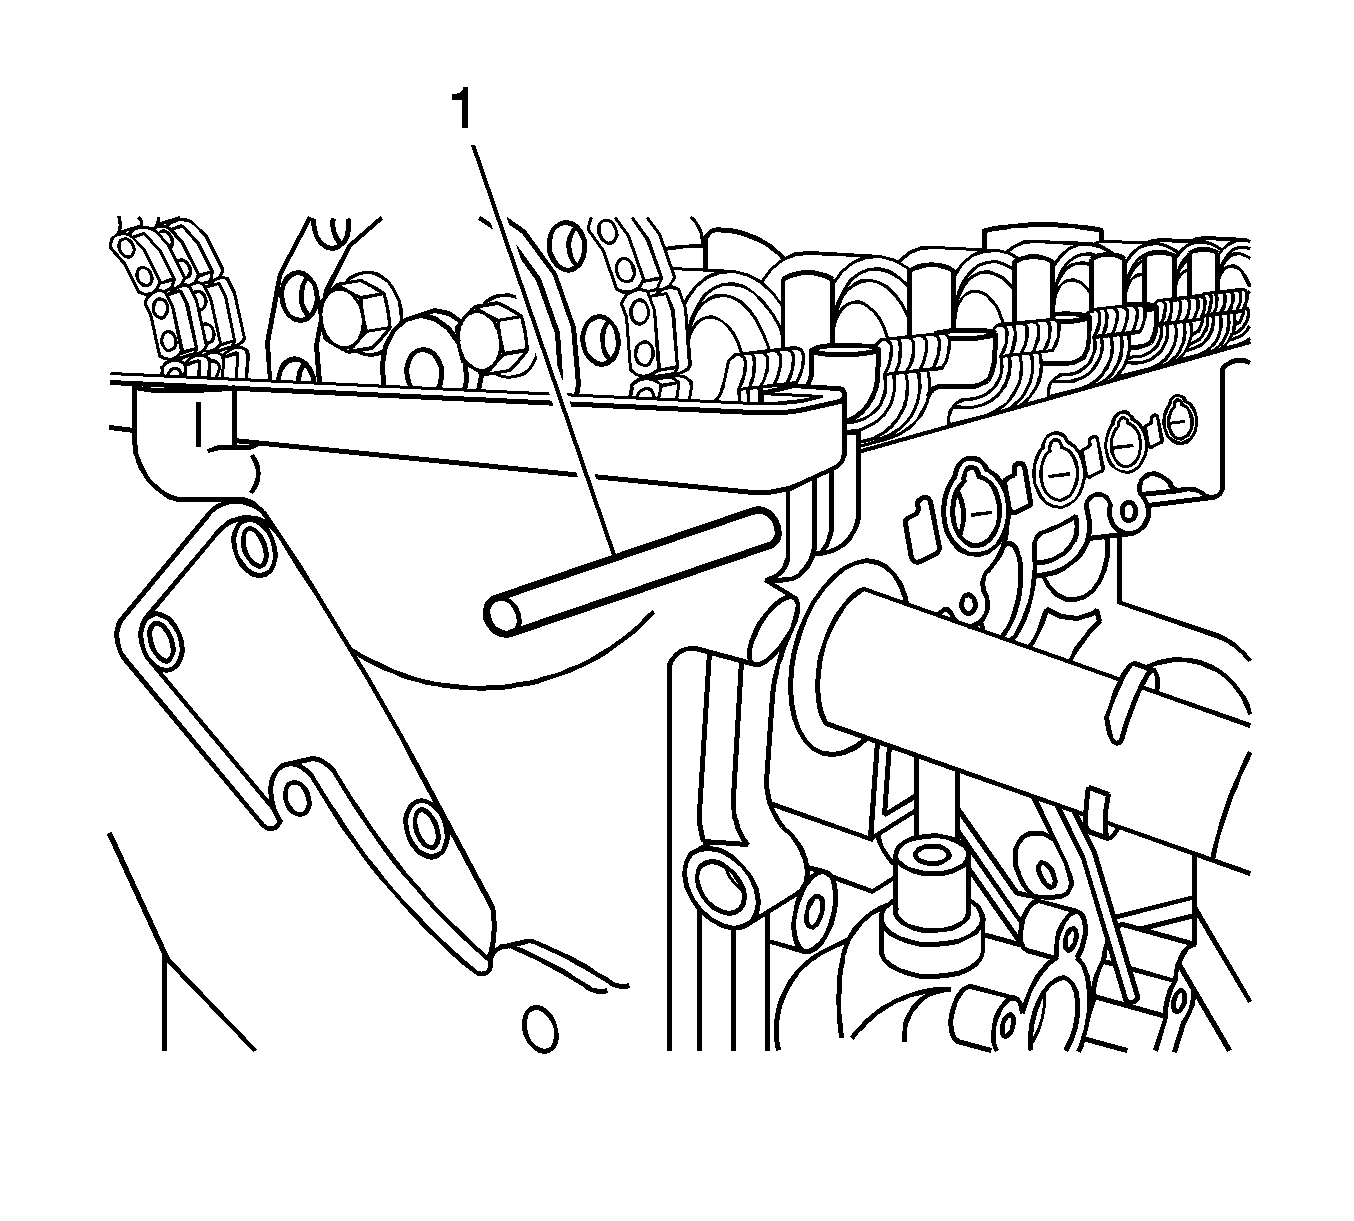
- Remove the front support bracket retaining bolt (1) and the front support bracket.
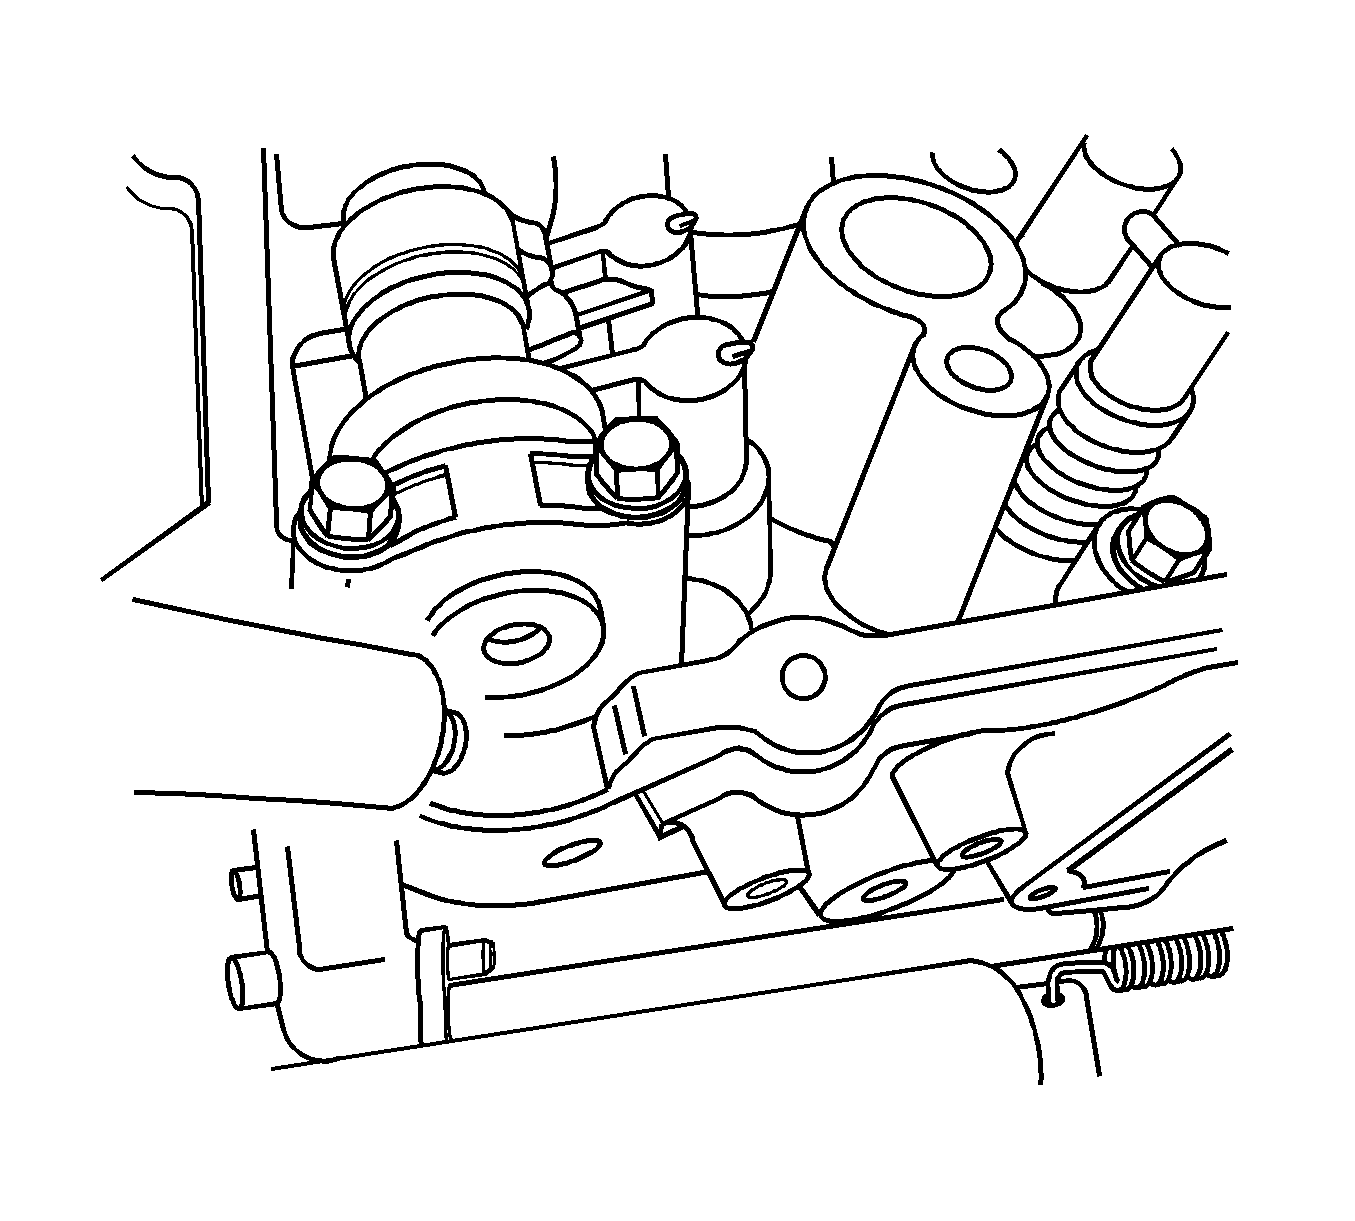
- Remove the rear support bracket mounting bolts and the rear support bracket (1).
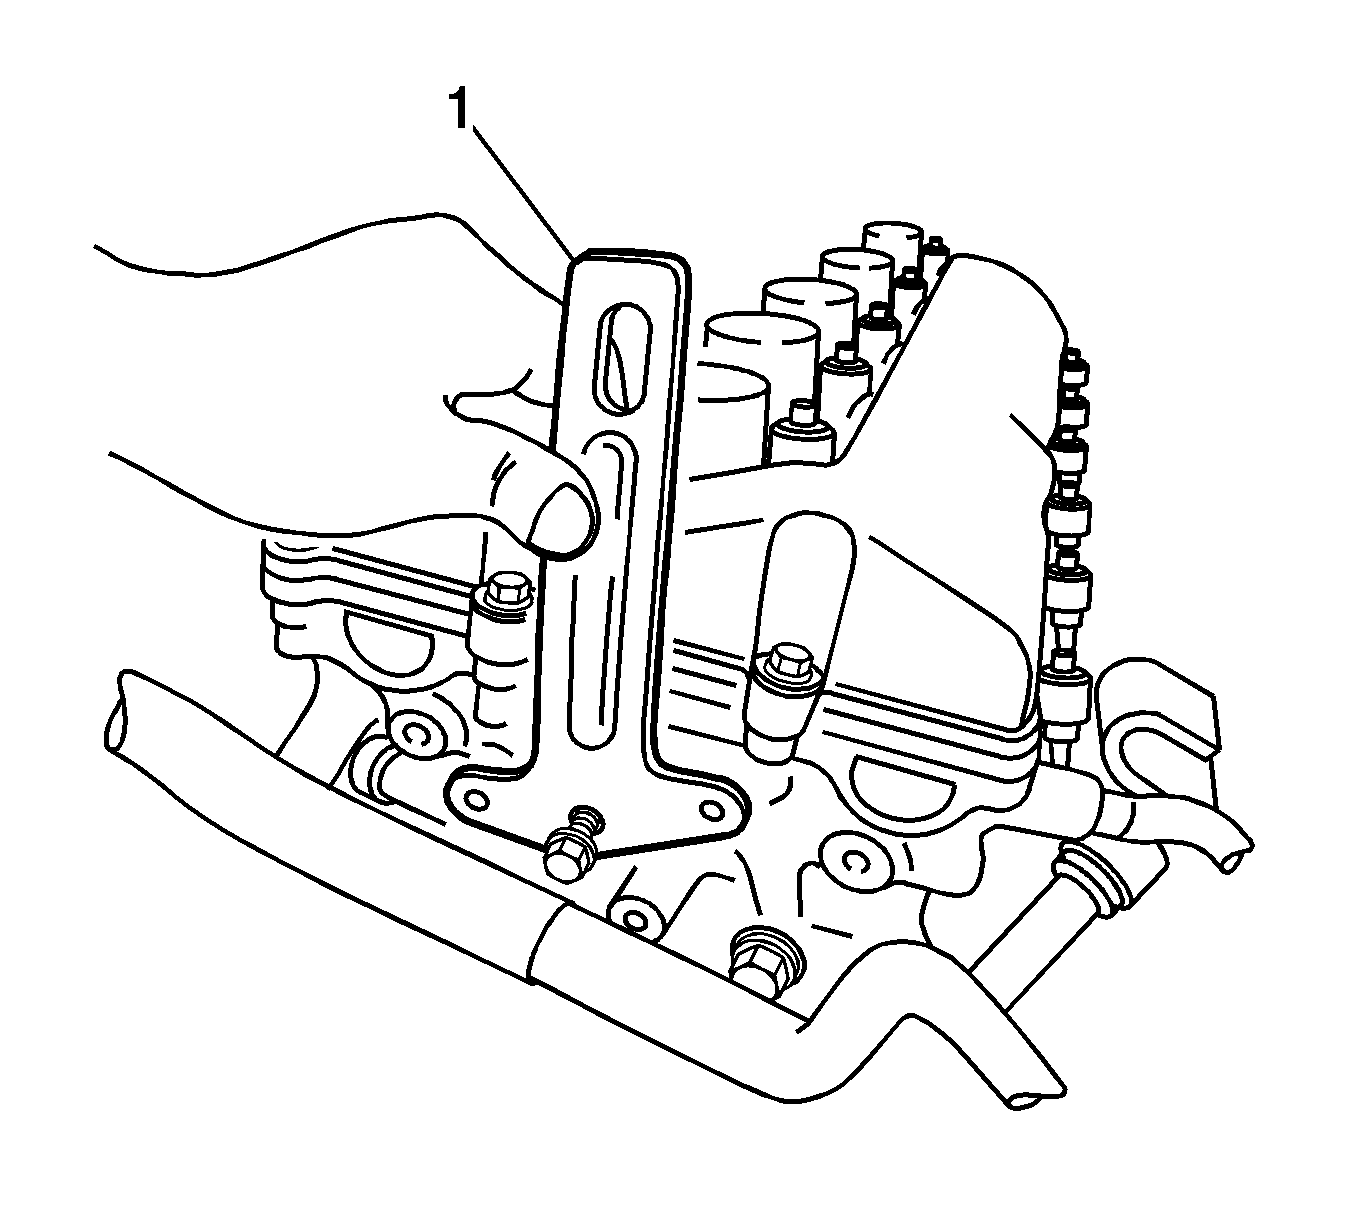
- Remove the mounting bolts and the VIS vacuum tank (1).
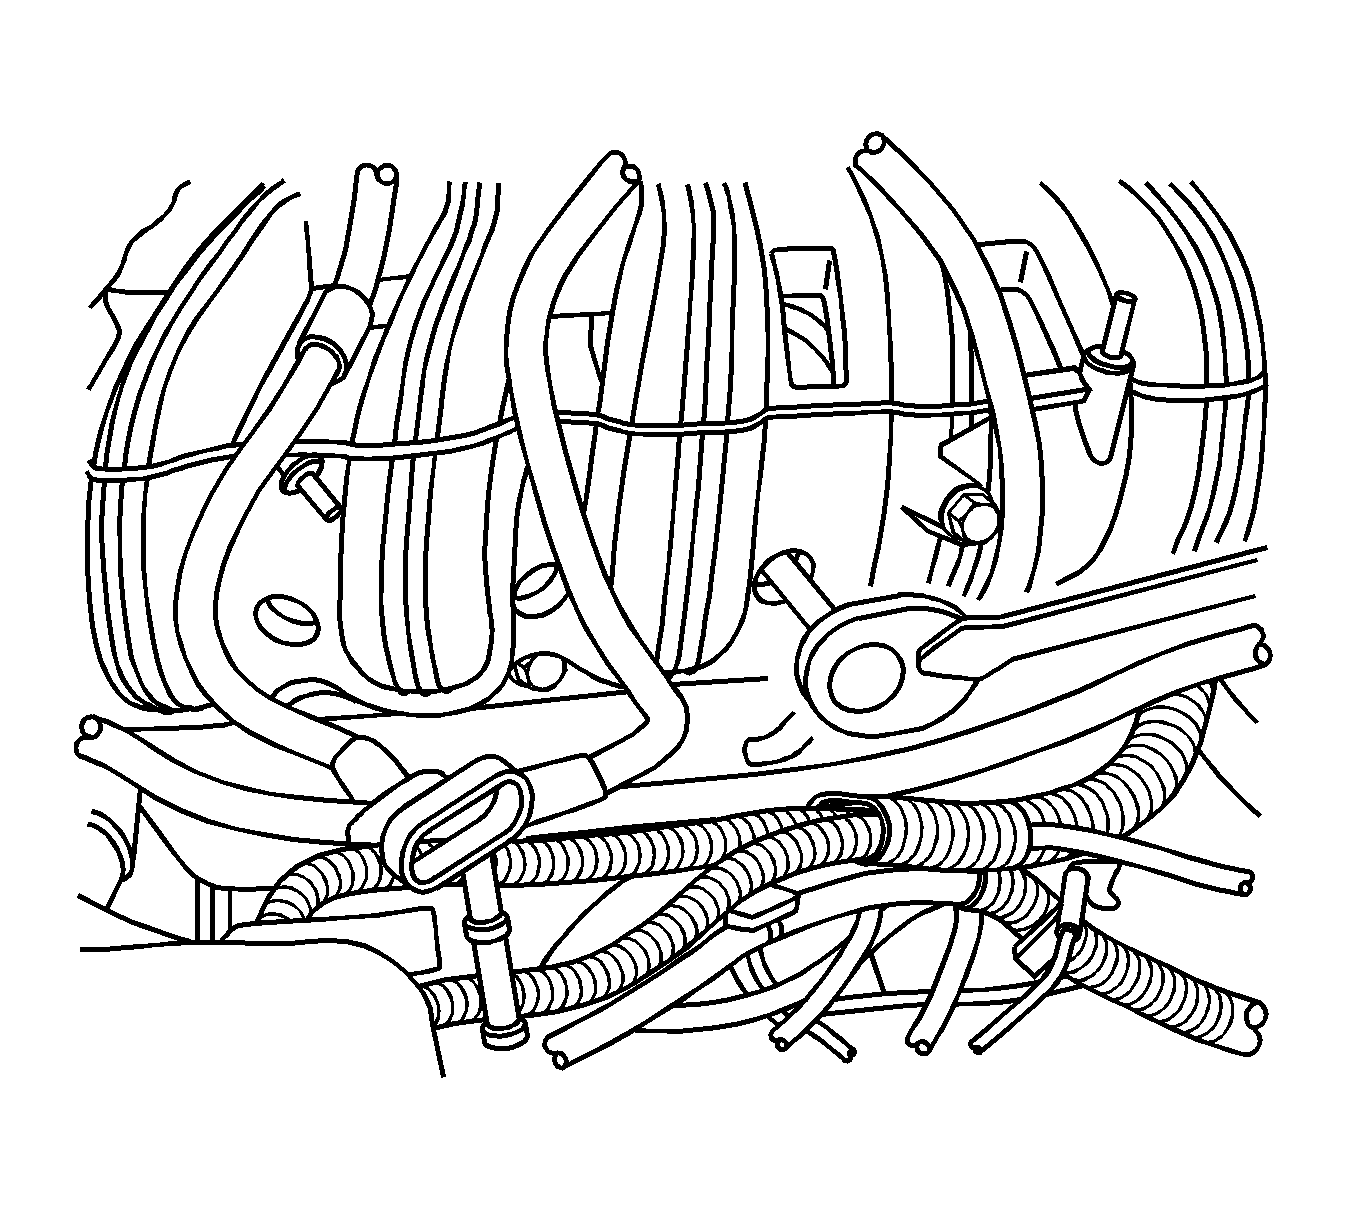
- Remove the intake manifold retaining nuts and bolts.

- Separate the intake manifold from the engine assembly.
- Disconnect the fuel injector connectors (1).
- Remove the intake manifold.
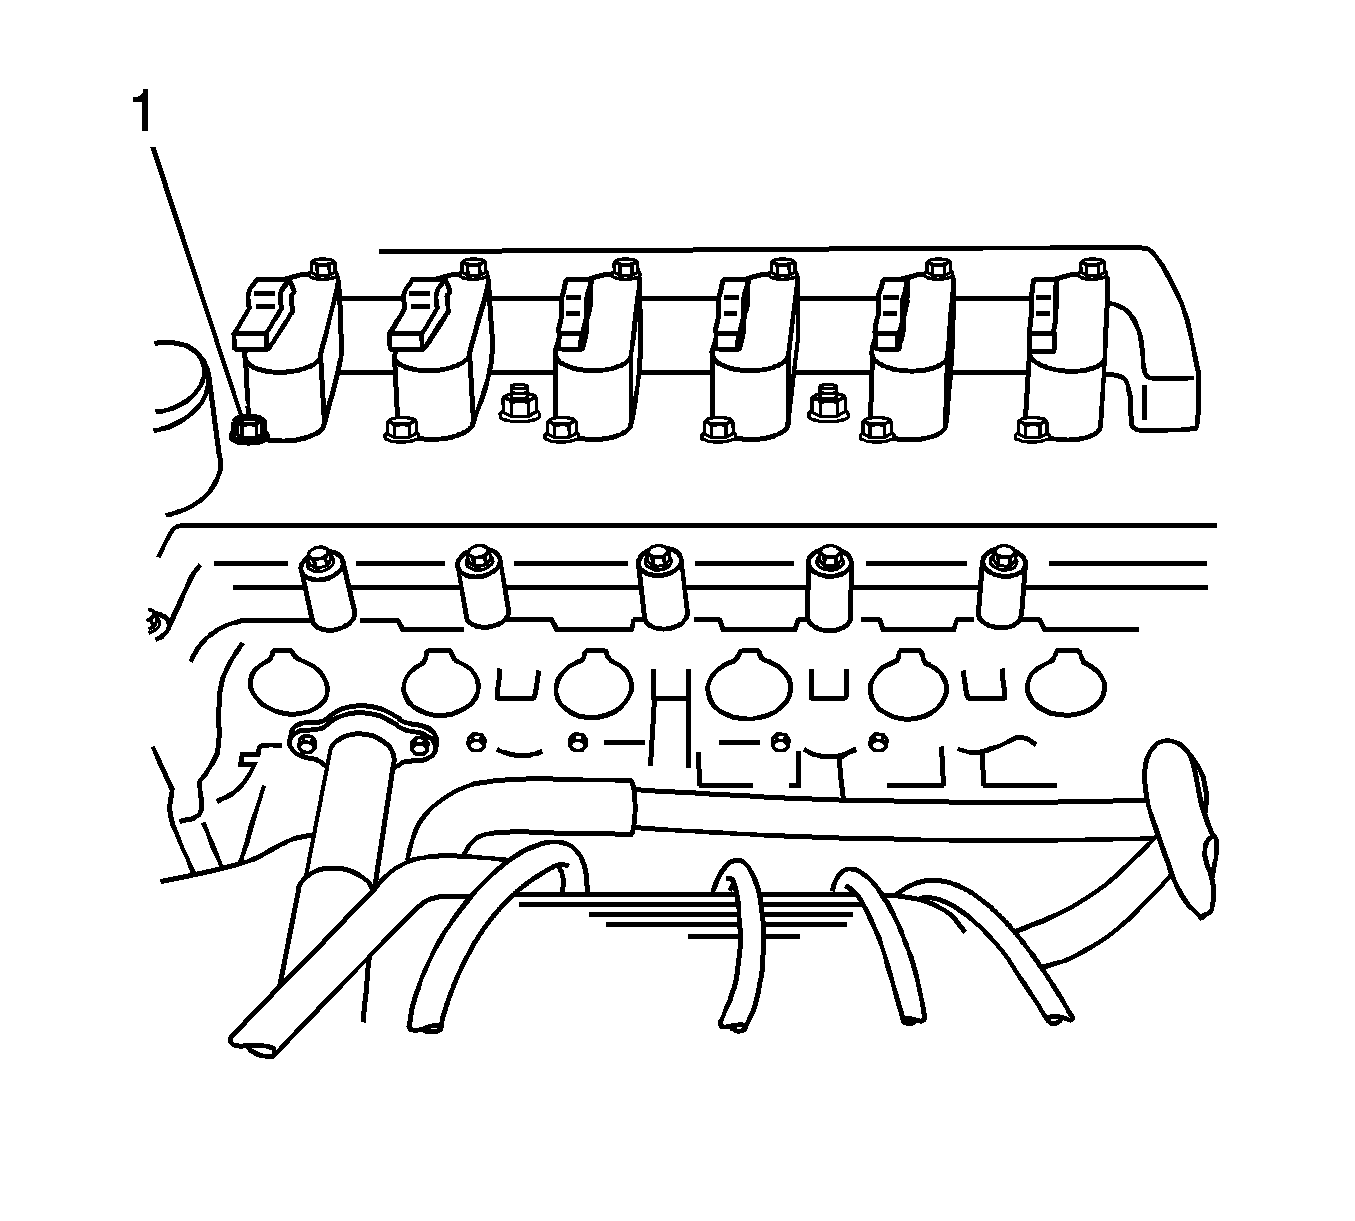
- Remove the ignition coil retaining bolts (1), and the coils.
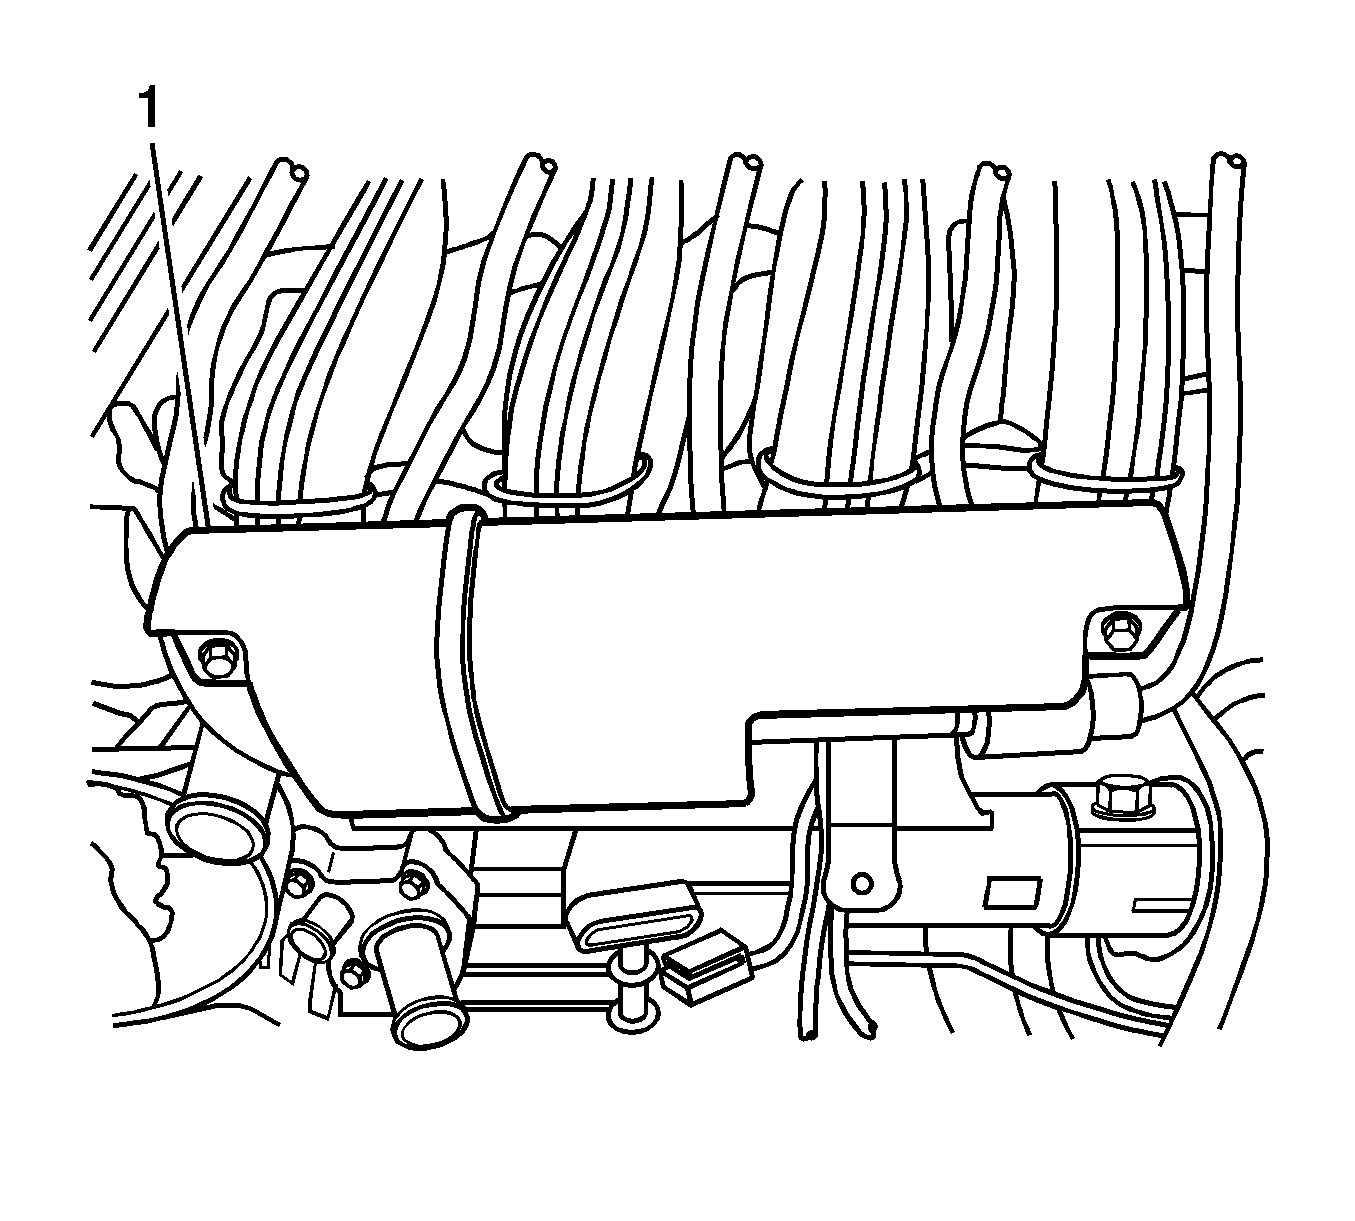
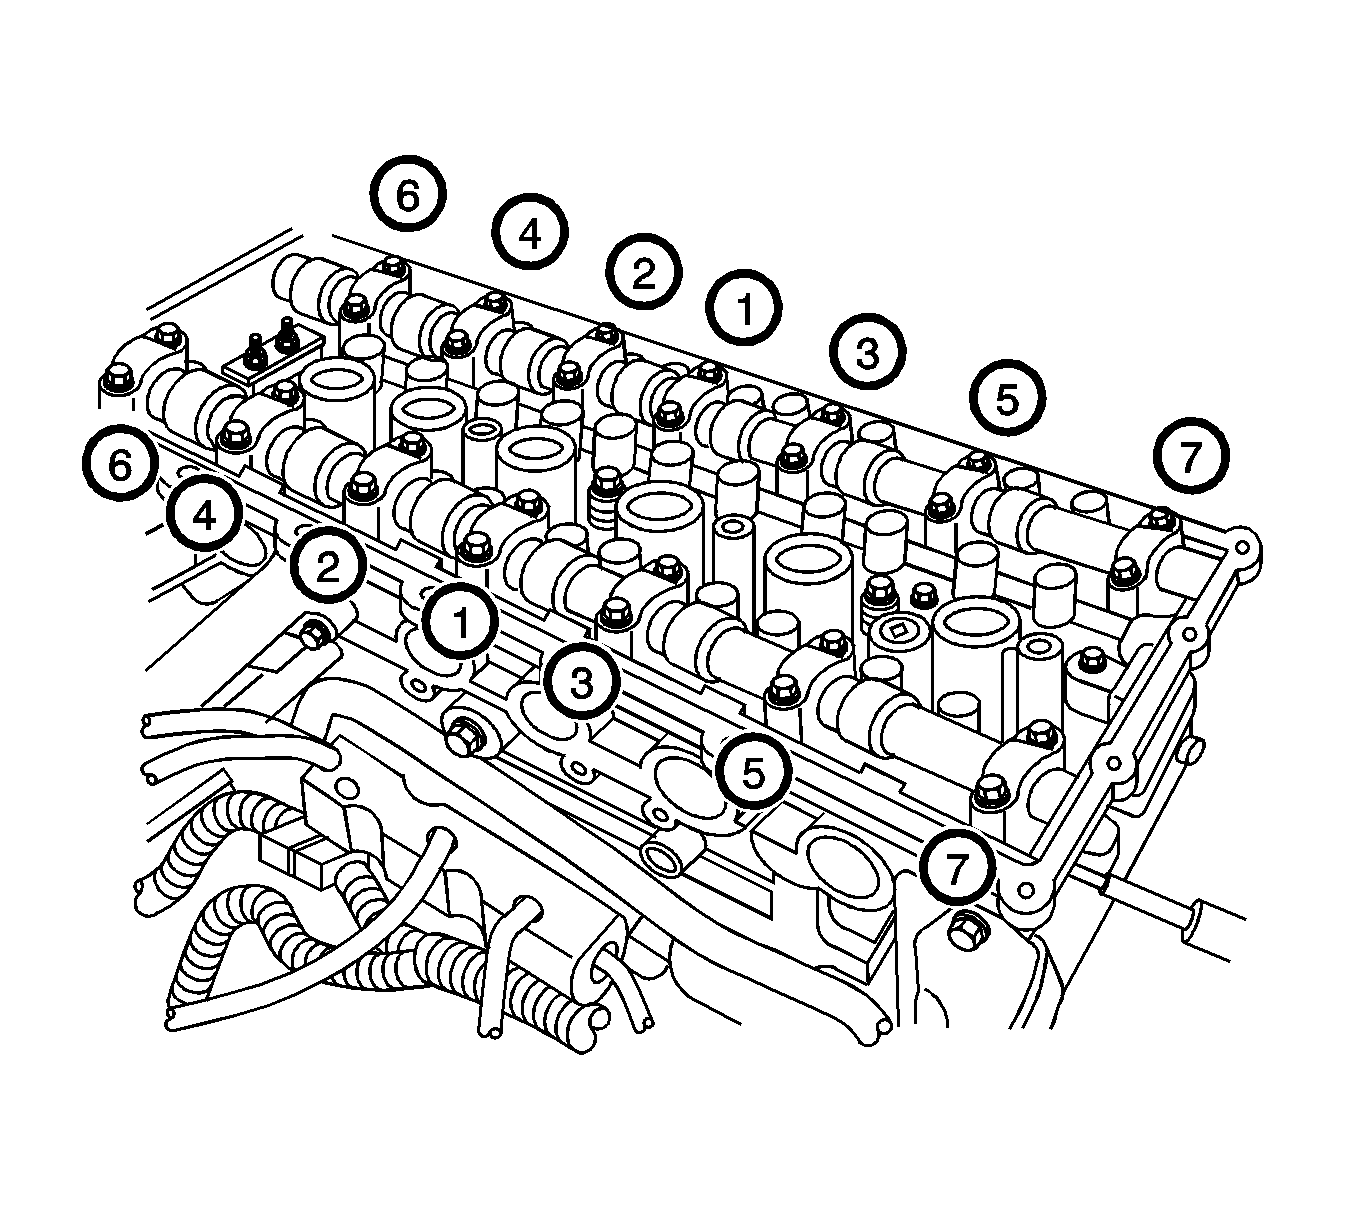
- Remove the cylinder head cover mounting bolts, then remove the cover.
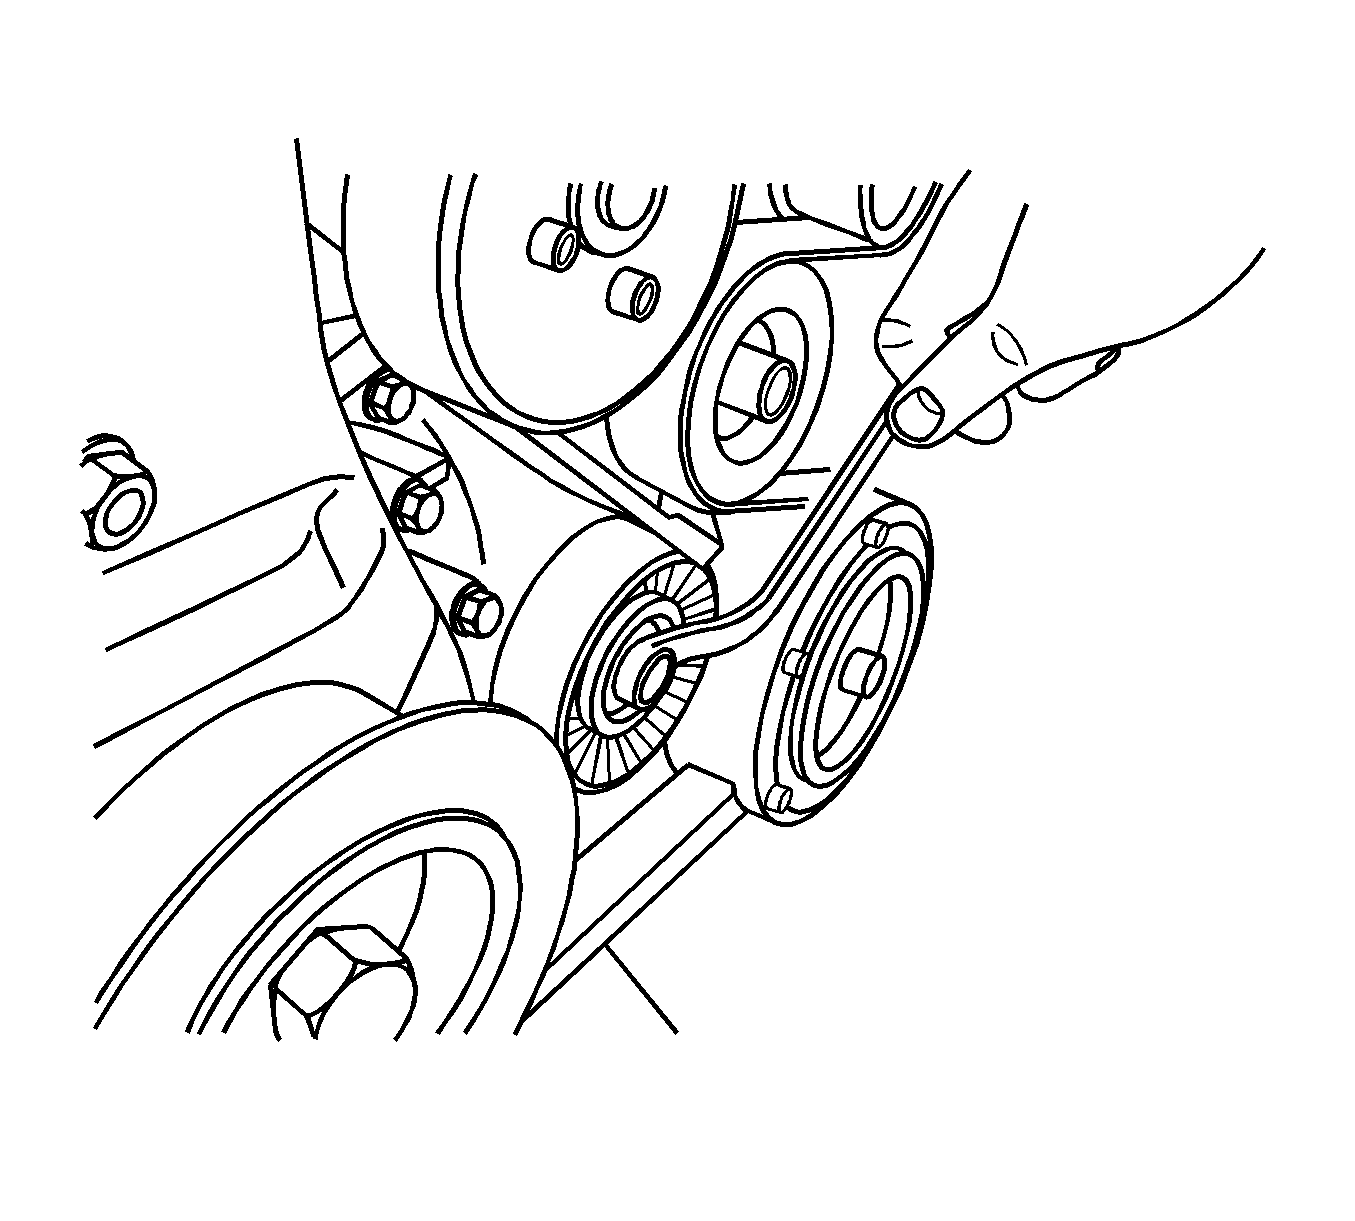
- Remove the drive belt.
- Install the
EN-47610
(1), to the crankshaft pulley bolt.
- Remove the crankshaft pulley bolt using
EN-47611
(2).
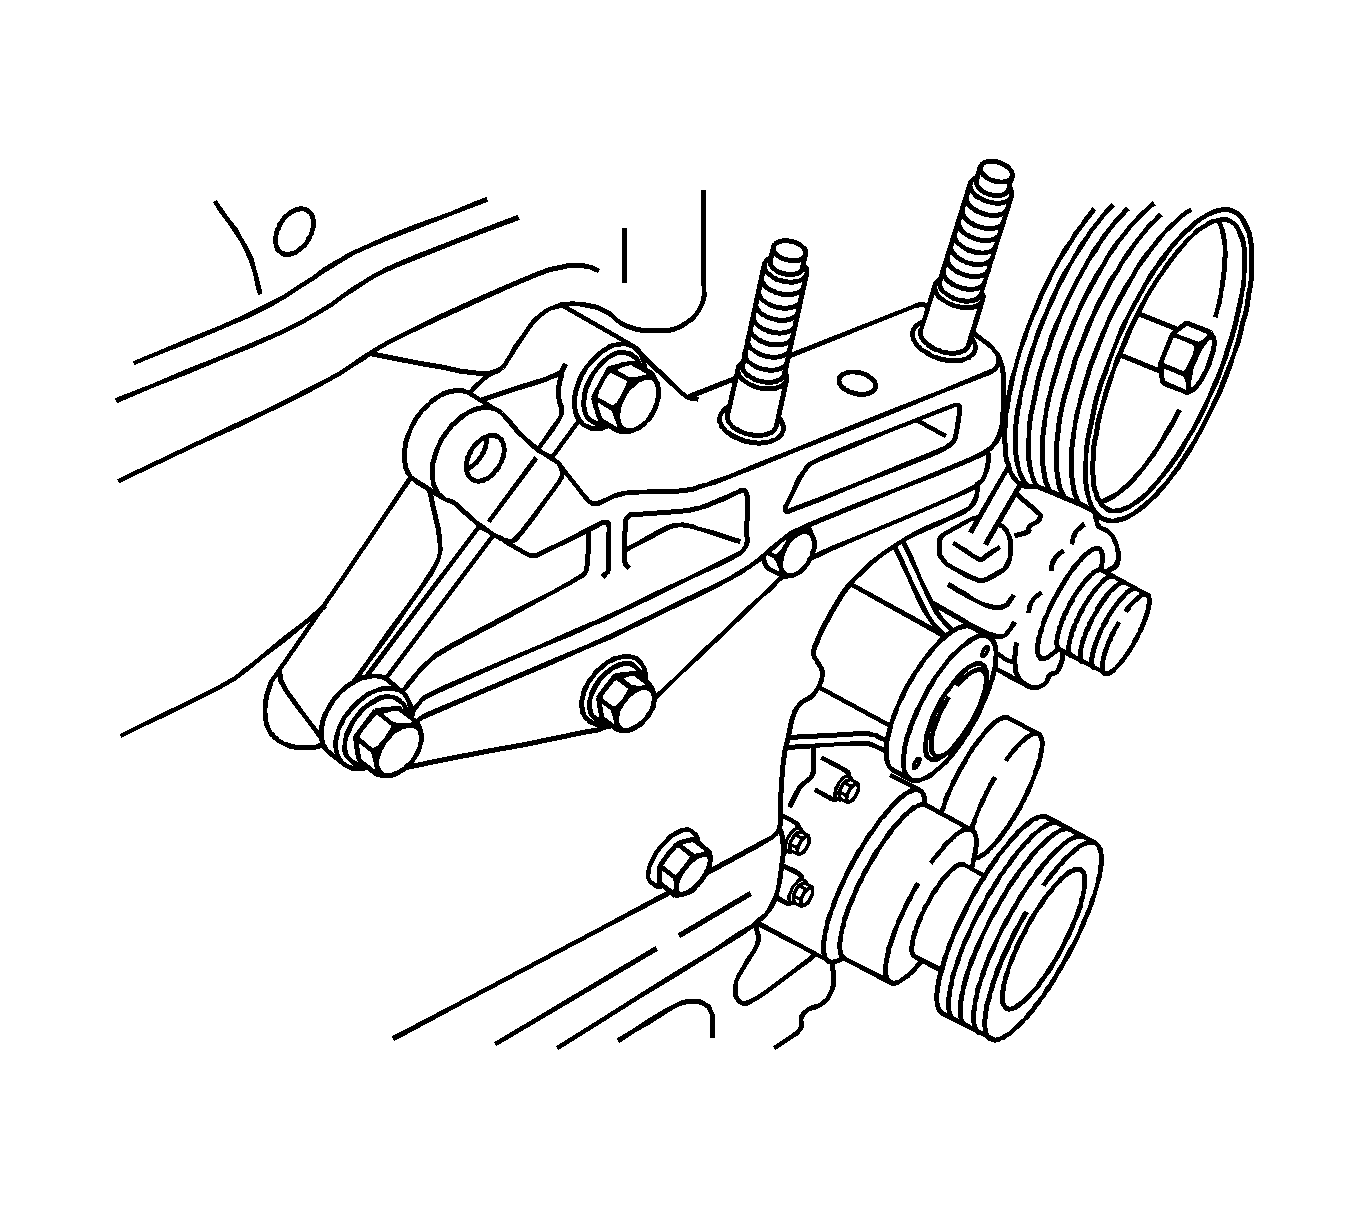
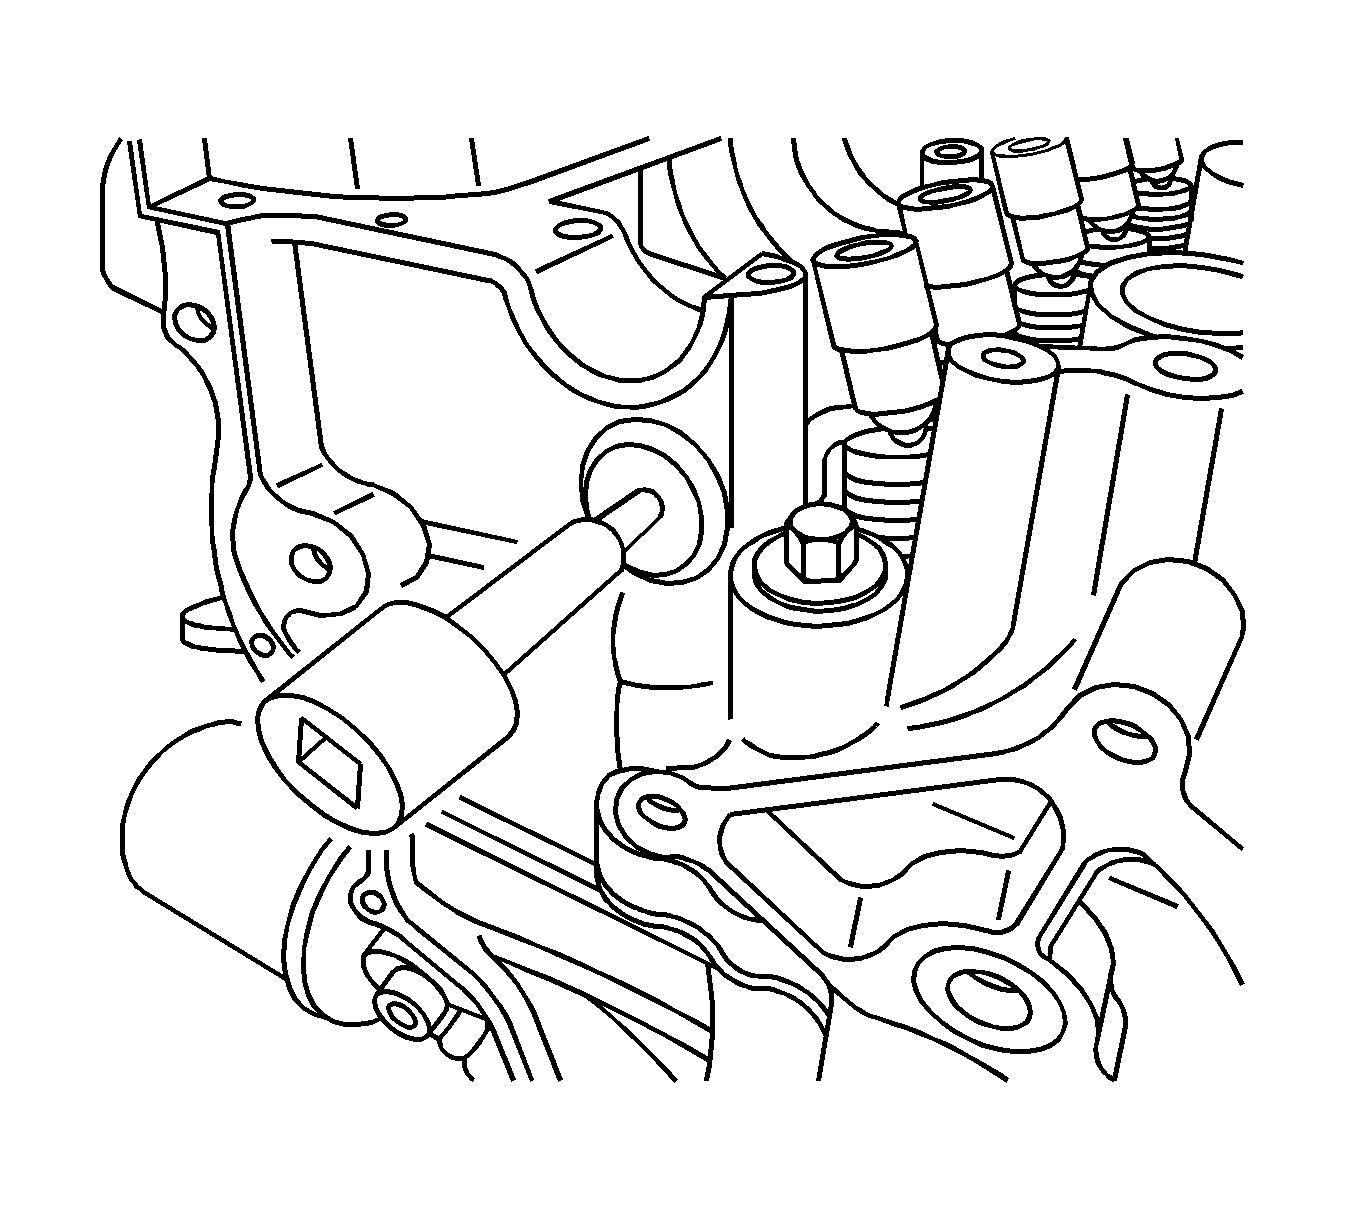
- Remove the mounting bolts and the engine mount bracket support.
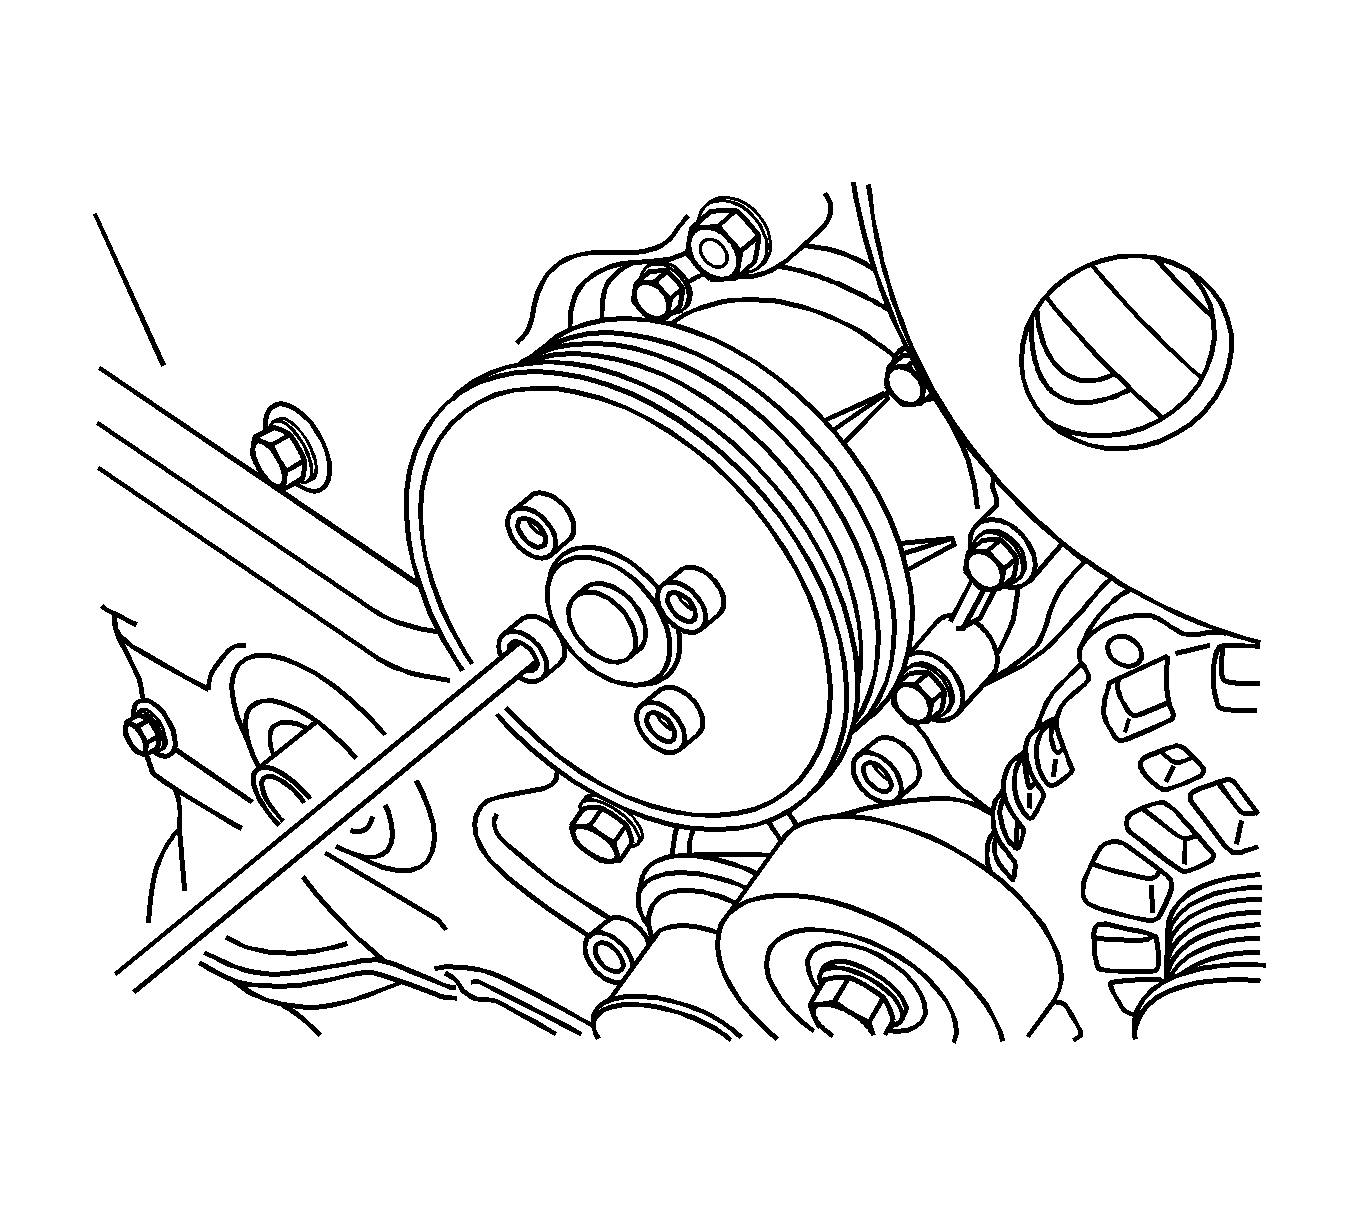
- Remove the mounting bolts and the water pump pulley.
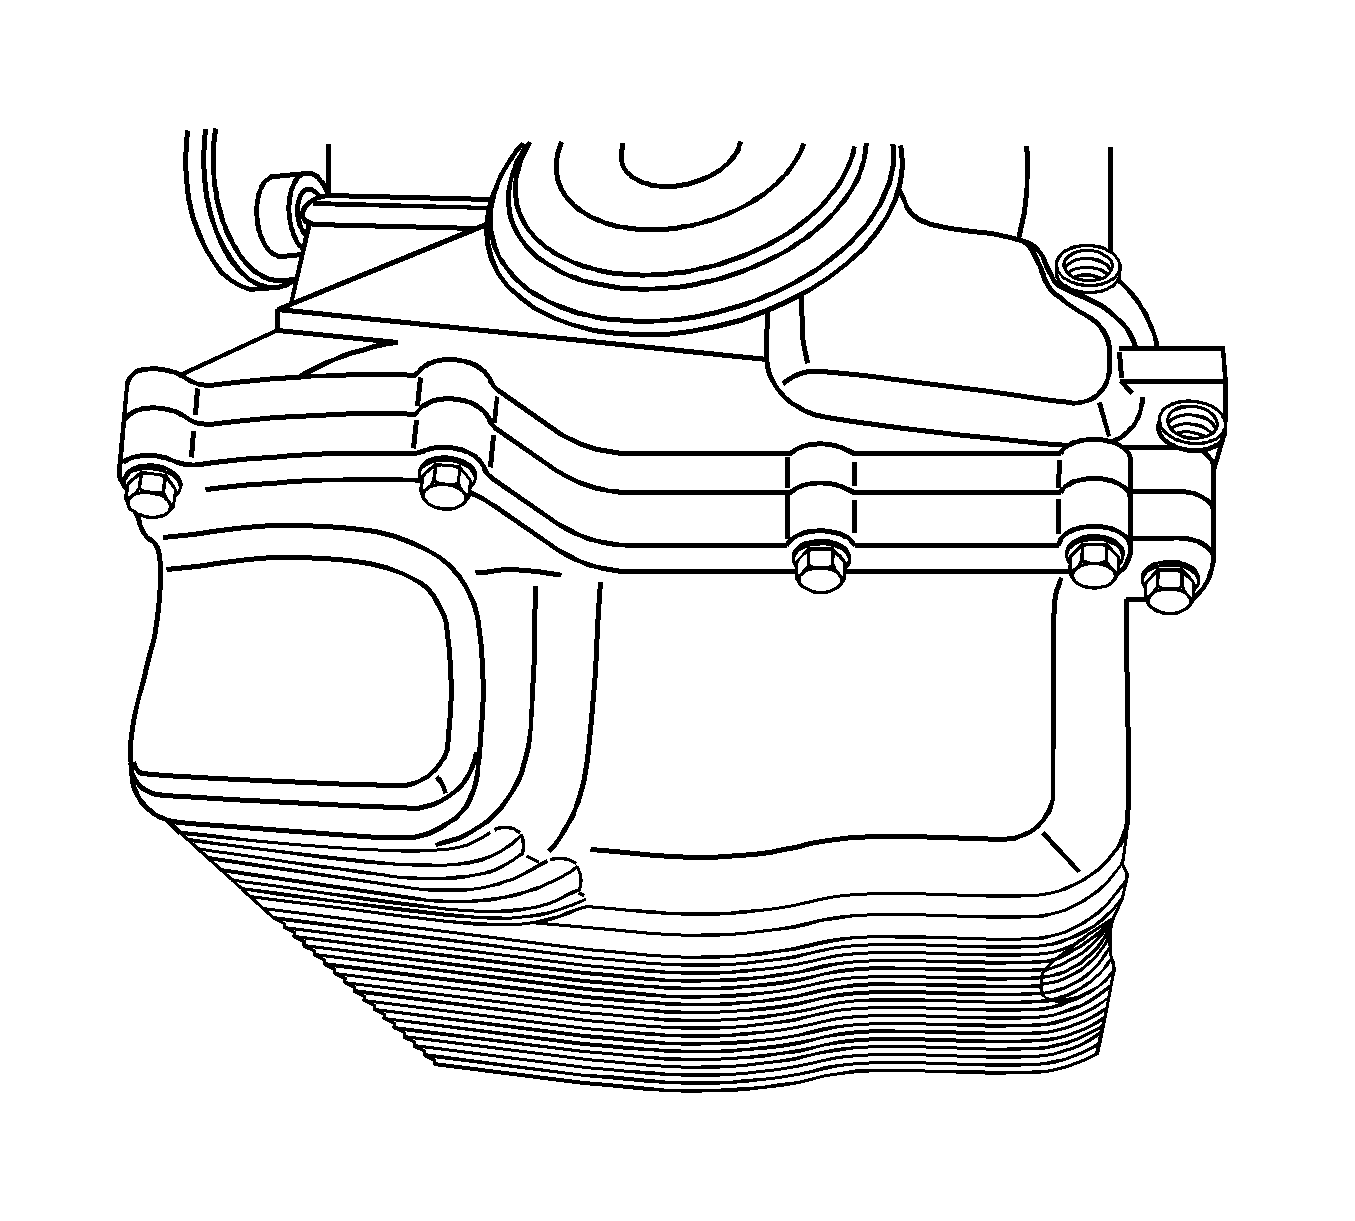
- Remove the timing chain cover mounting bolts.
- Remove the timing chain cover dowel rings.
- Remove the oil pan mounting bolts.
Note: Before removing the tensioner, insert a pin into the tensioner access hole to keep the tensioner's position.
- Remove the timing chain tensioner.
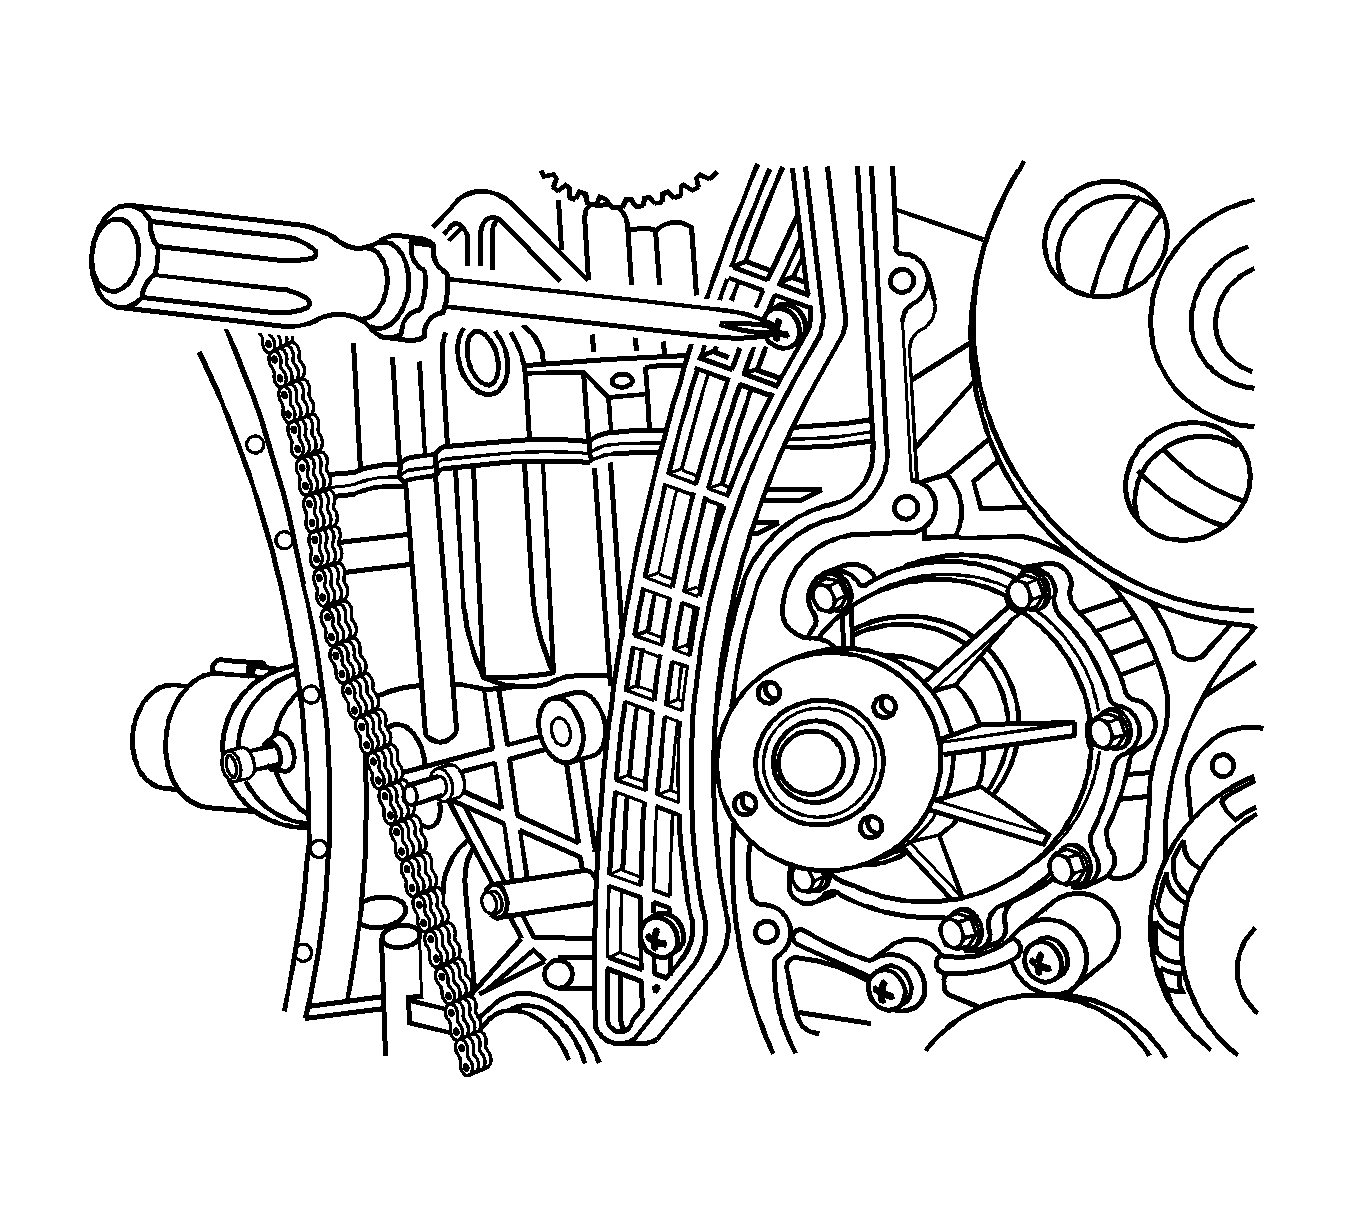
- Remove the timing chain guide.
- Remove the timing chain lever.
- Remove the top timing chain guide.
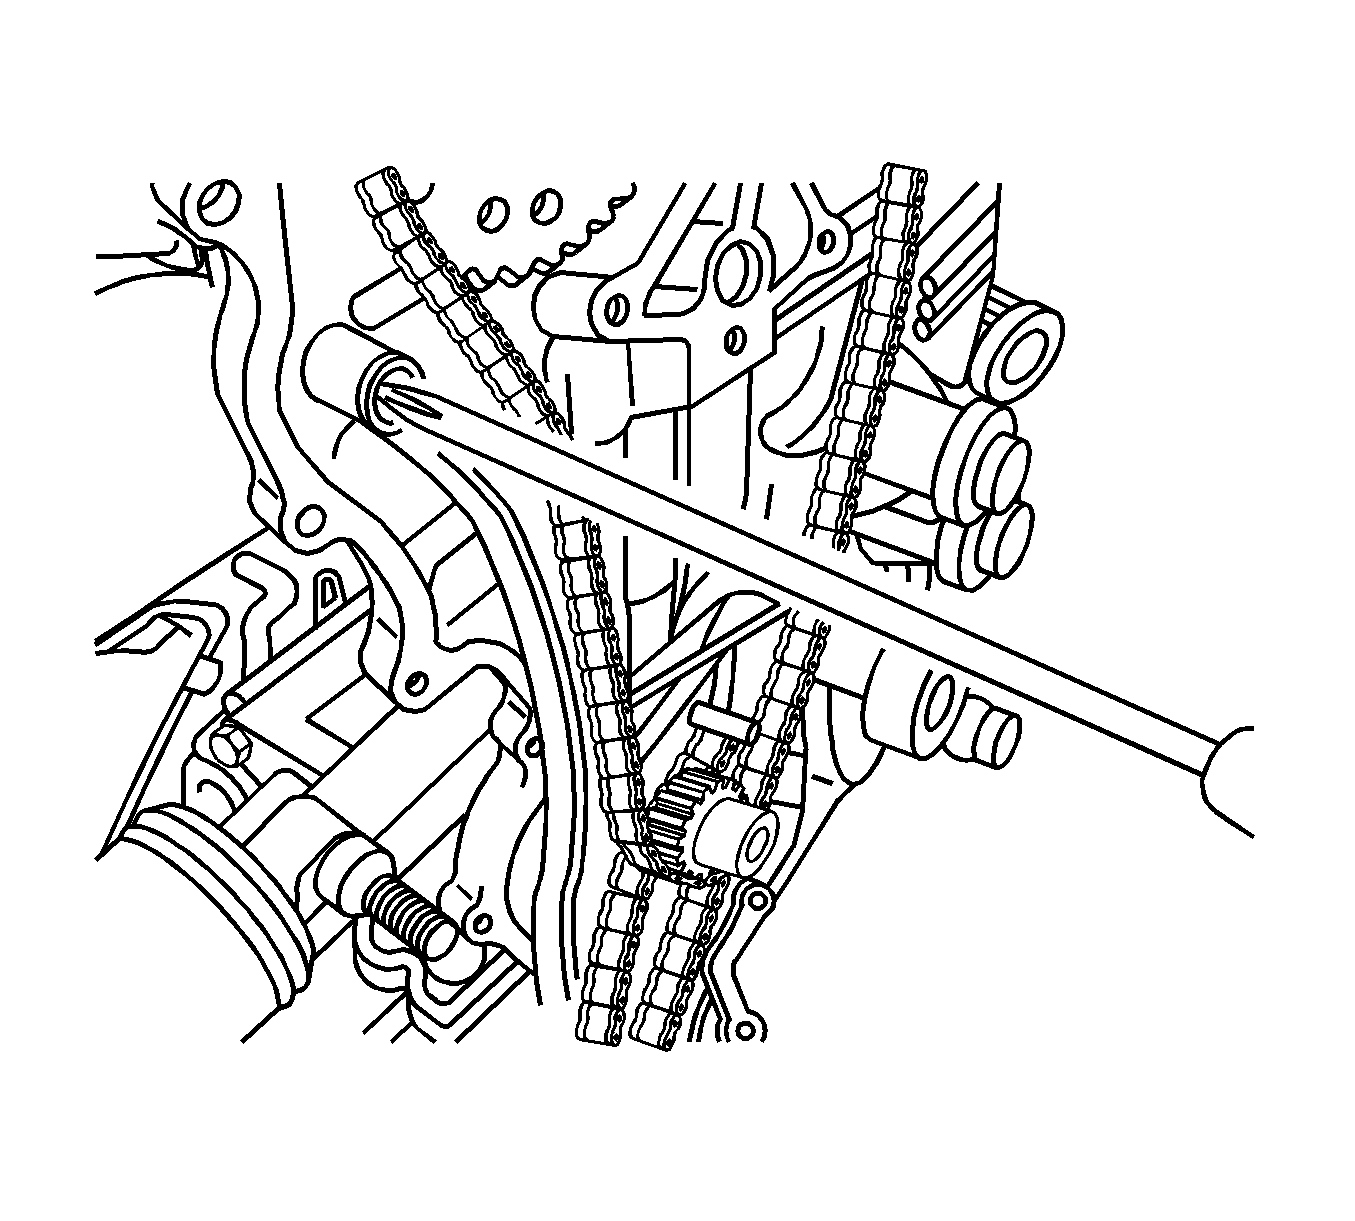
- Remove the timing chain
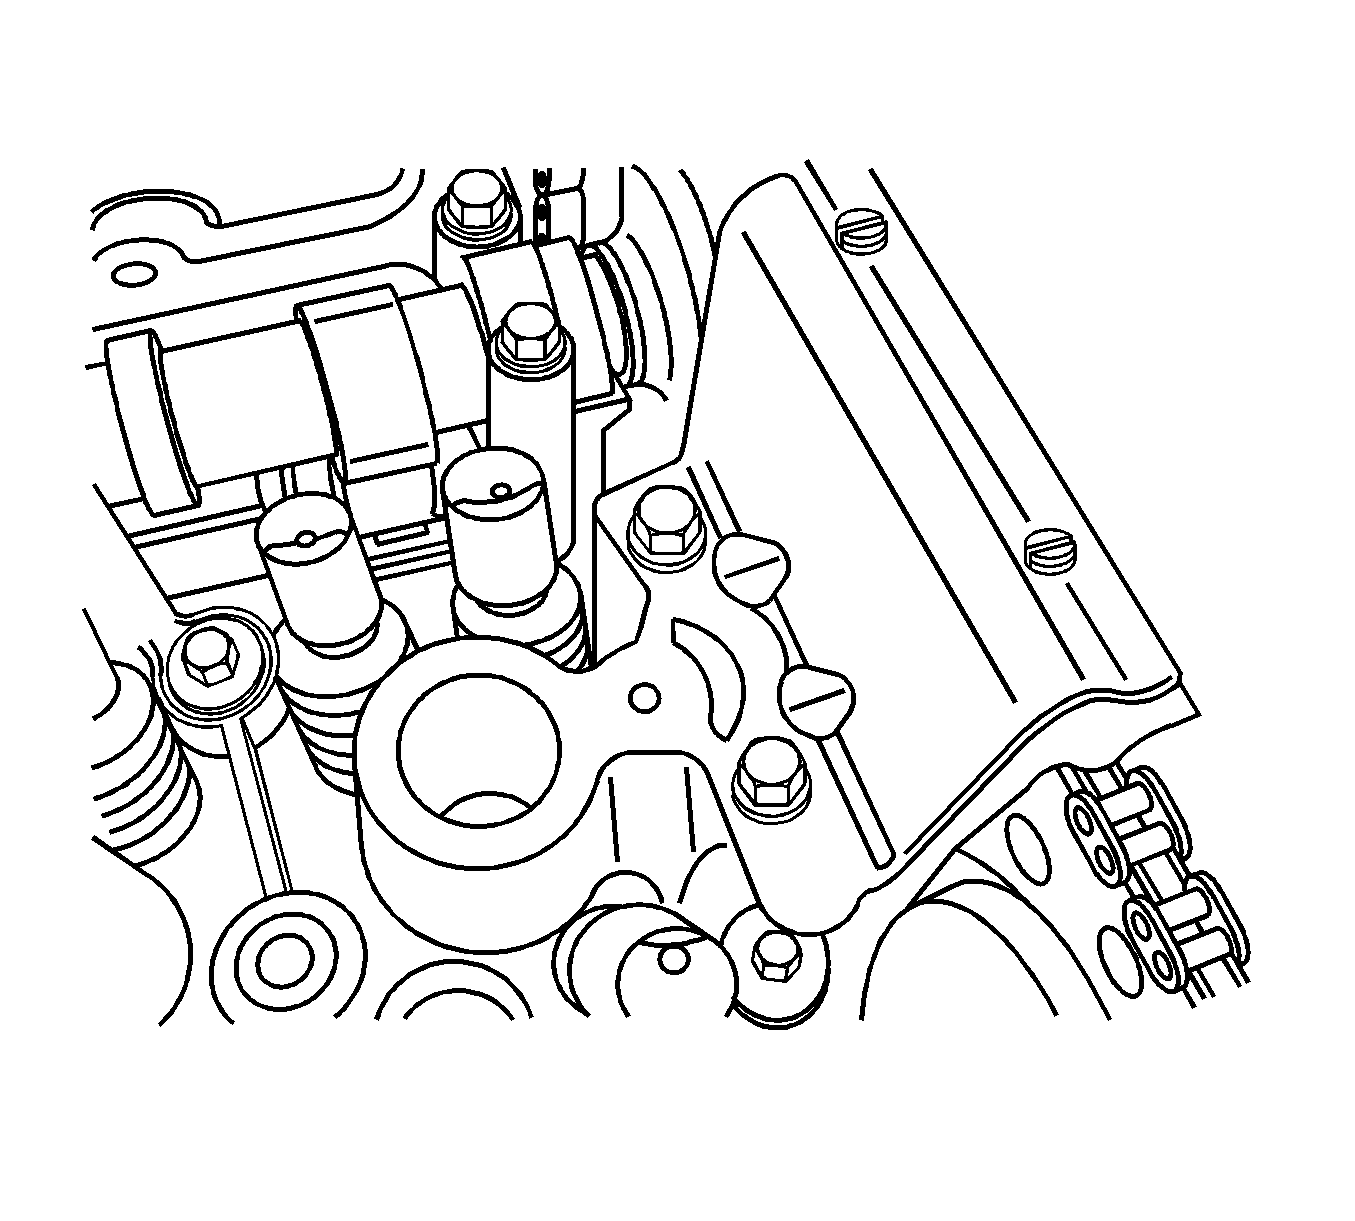
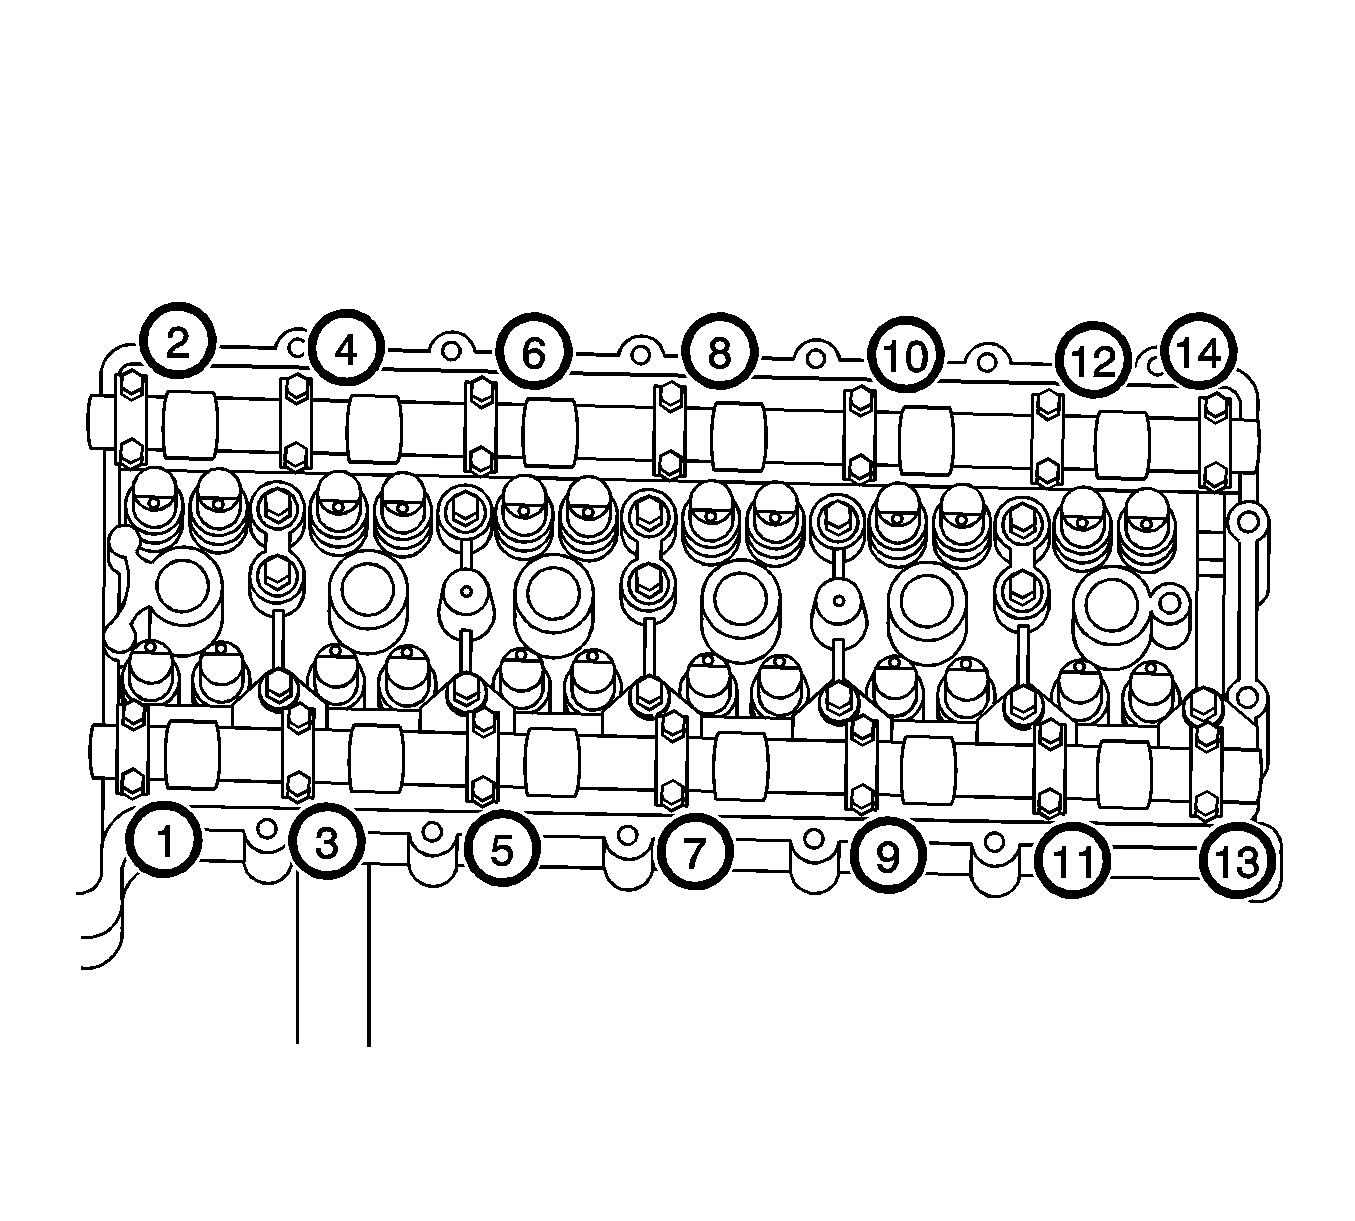
- Gradually remove the camshaft cap bolts in sequence.
- Remove the intake camshaft.
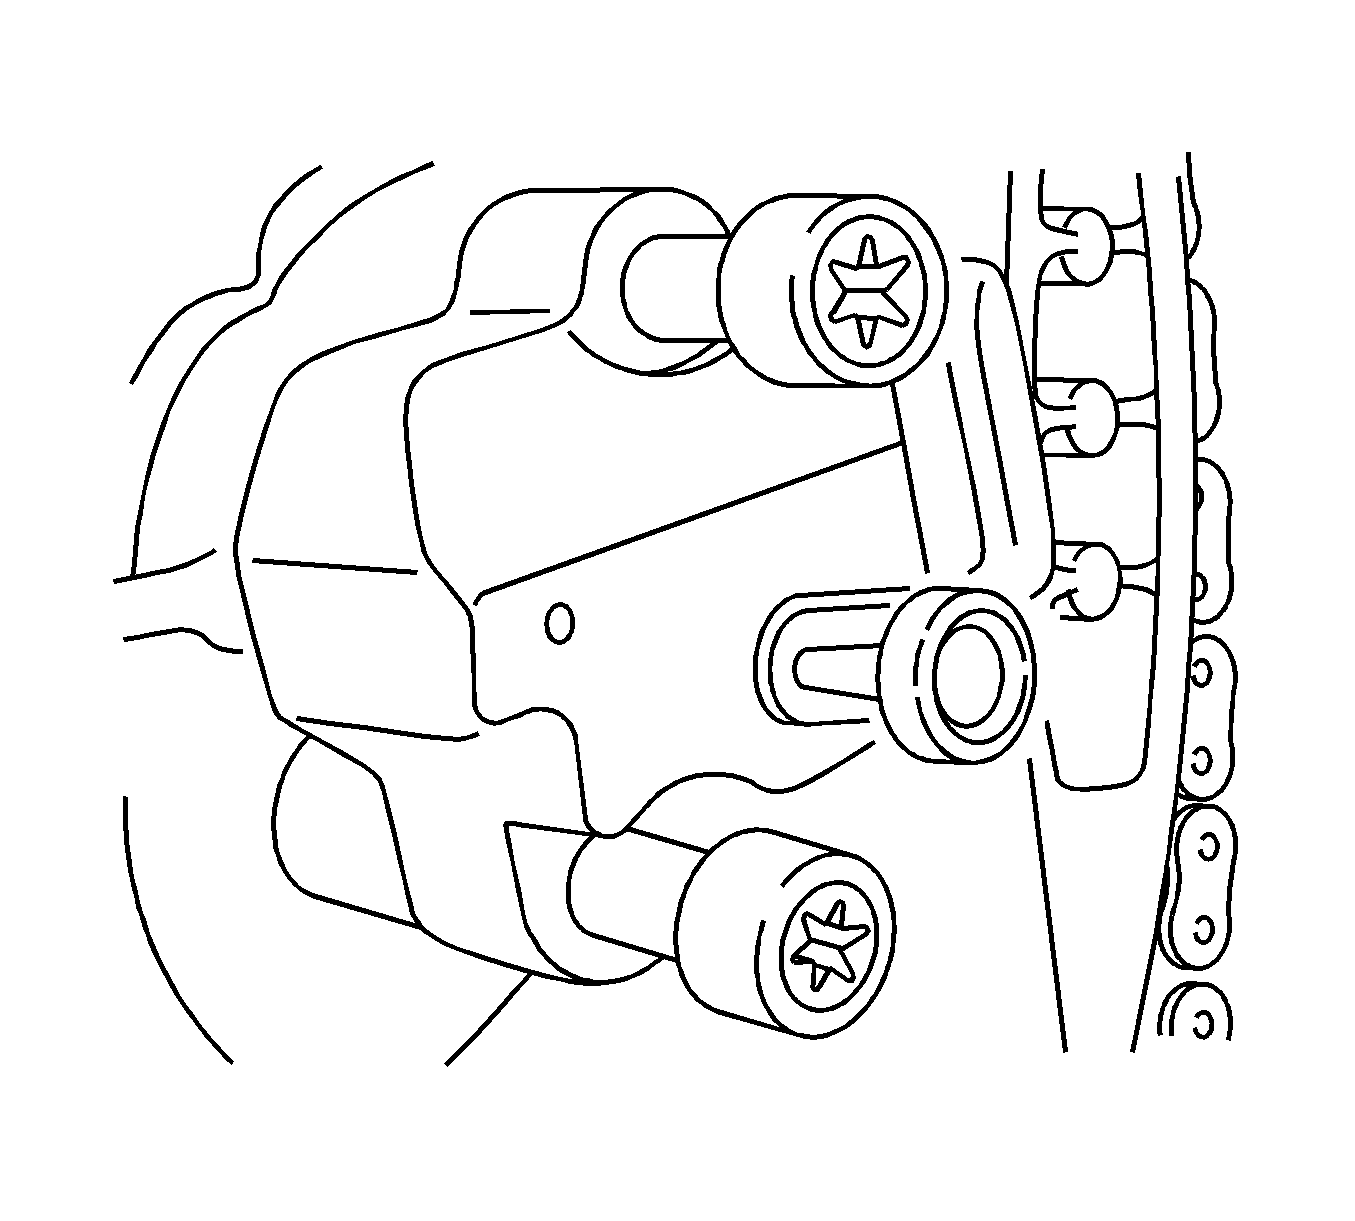
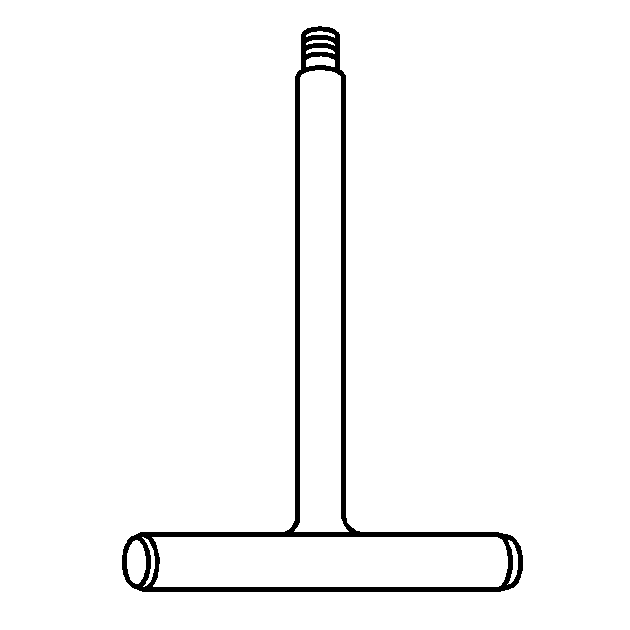
- Install the rocker arm shaft plug removal tool.
- Remove the rocker arm shaft plugs at the end of the cylinder head.
- Using
EN-47614
(1), remove the front/rear rocker
arm shafts.
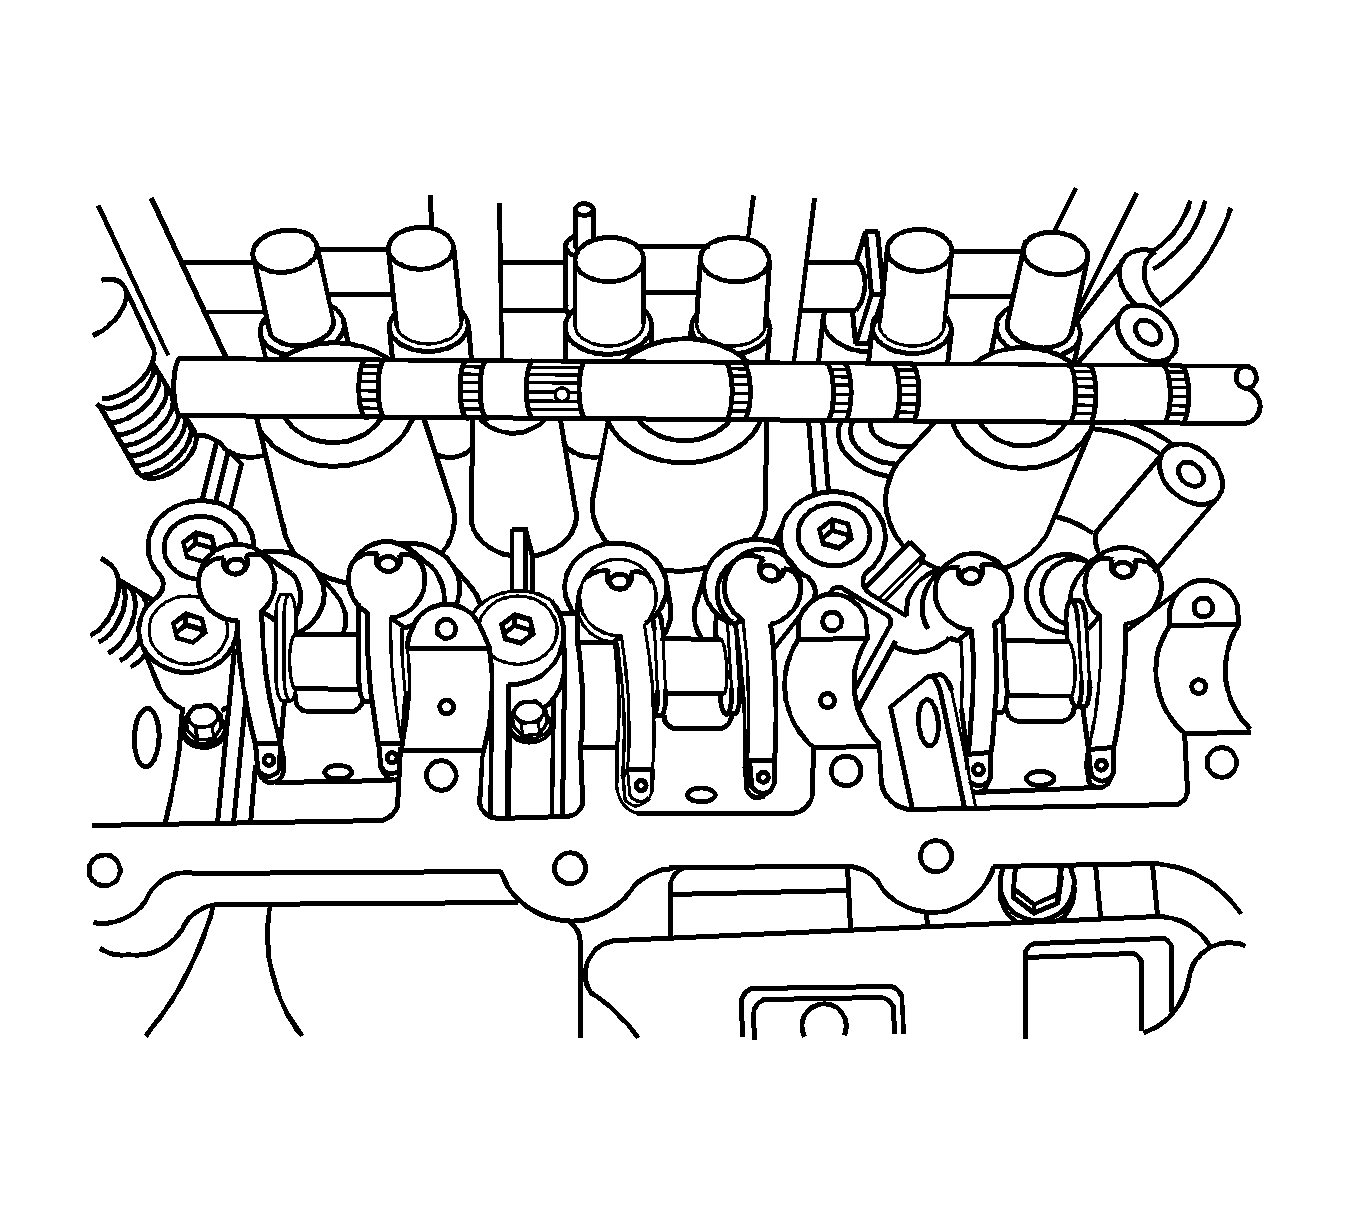
- Remove the rocker arms.
- Soak the rocker arms and shafts in engine oil.
Installation Procedure
- Place the rocker arms on the cylinder head.
Note:
| • | The front rocker arm shaft which will be installed to the timing chain side can be identified by the hole for the rocker arm spring. |
| • | To prevent damage to the rocker arm shaft, rotate the rocker arm shaft right and left when installing. |
- Using
EN-47614
, install the front/rear rocker shaft into the cylinder head.
- Apply sealant to the rocker arm shaft plugs.
Caution: Refer to Fastener Caution in the Preface section.
- Install the rocker arm shaft plugs and tighten to
40 N·m (29 lb ft).
Note: The intake camshaft has one groove which is marked between cam No. 1 and Journal No. 2. The exhaust camshaft has 2 grooves.
- Position the intake and exhaust camshafts.
Note: When installing the camshaft caps, the arrow mark on the camshaft caps should be directed to the intake or exhaust camshaft sprocket.
- Install the exhaust camshaft caps in sequence and tighten to
12 N·m (9 lb ft).
Note: When installing the camshaft caps, the arrow mark on the camshaft caps should be directed to the intake or exhaust camshaft sprocket.
- Tighten the intake camshaft caps in sequence to
12 N·m (9 lb ft).
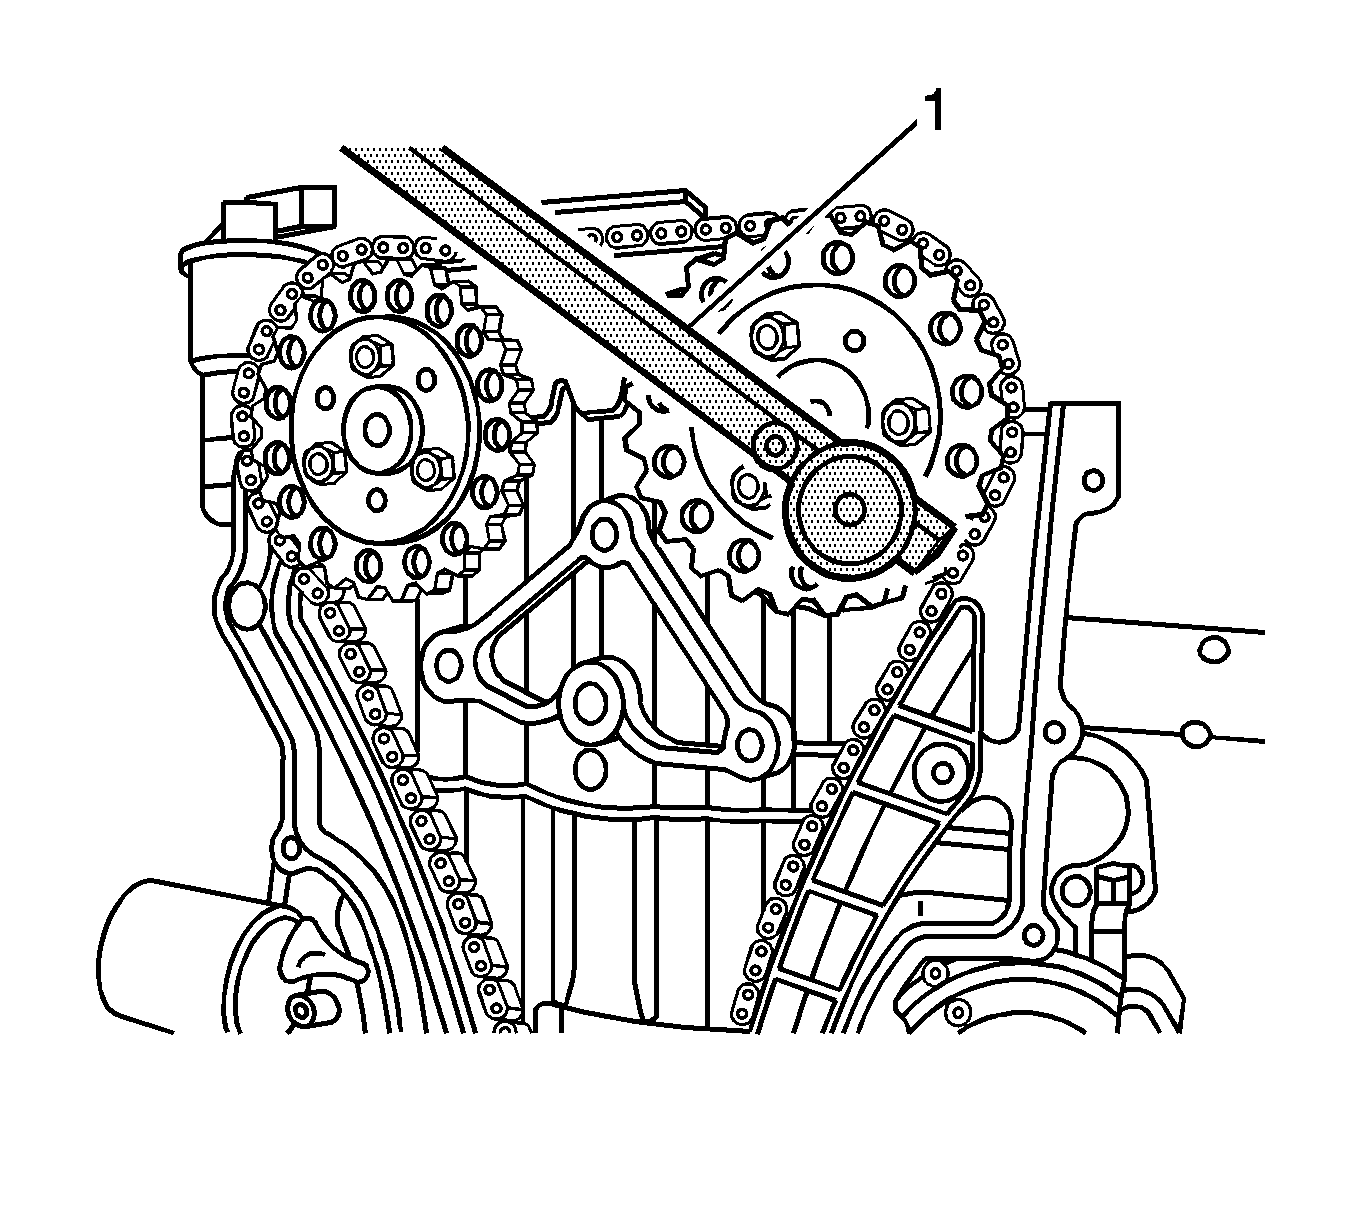
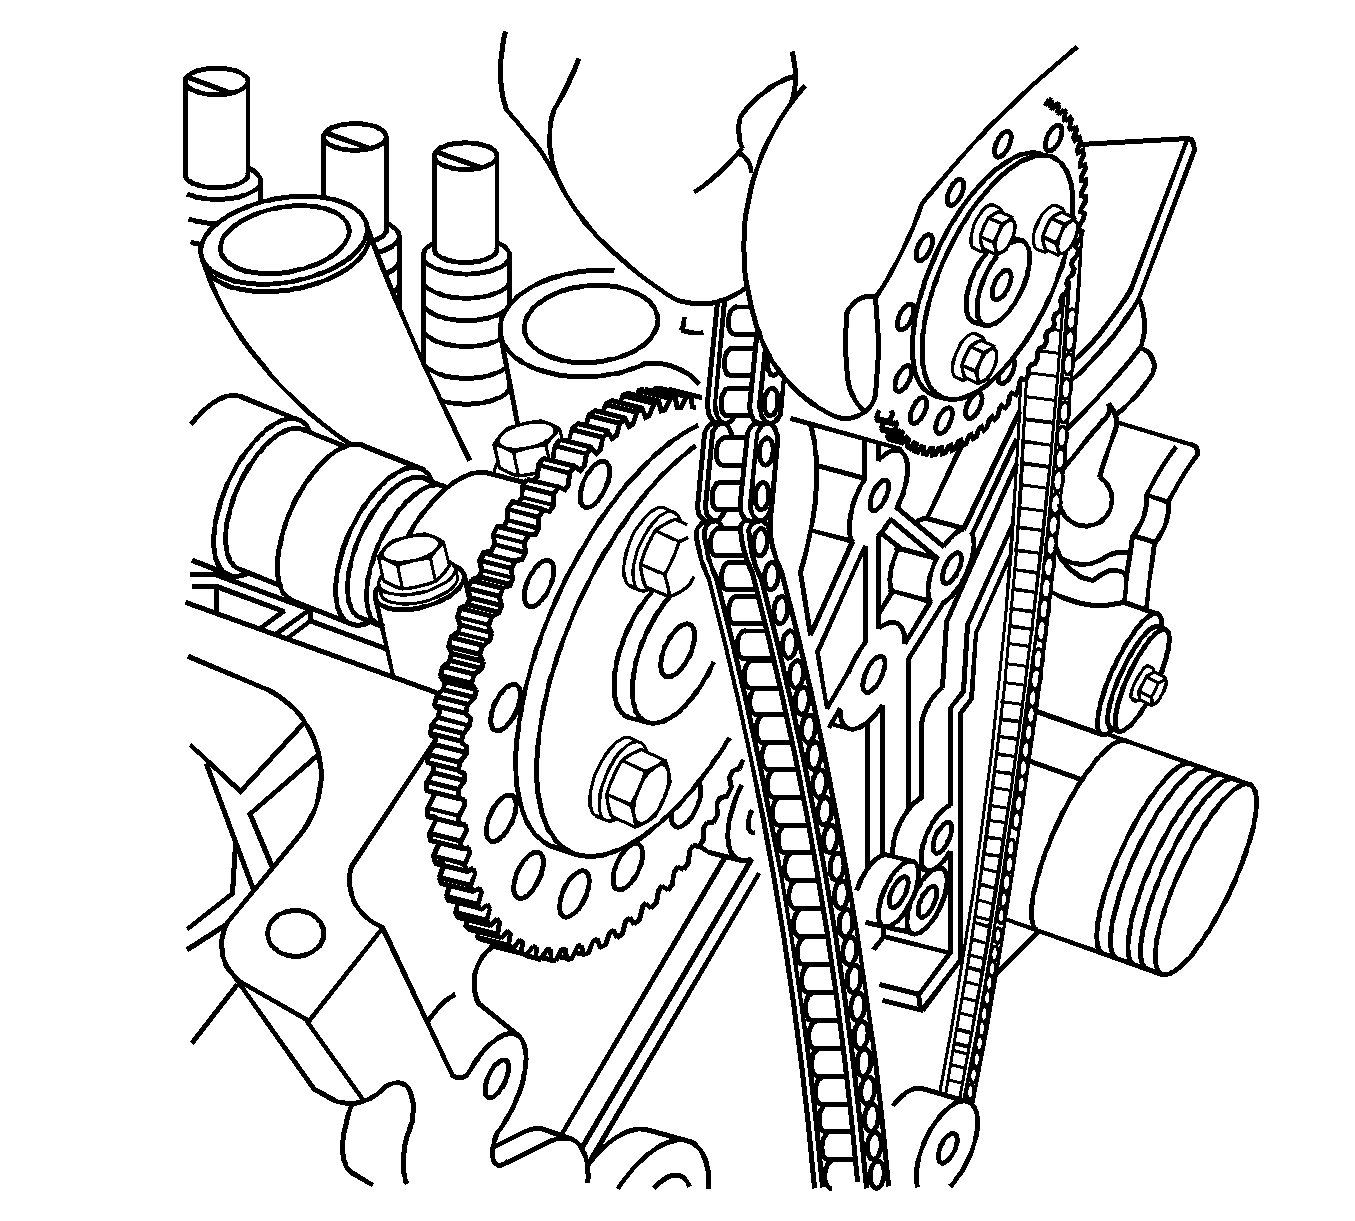
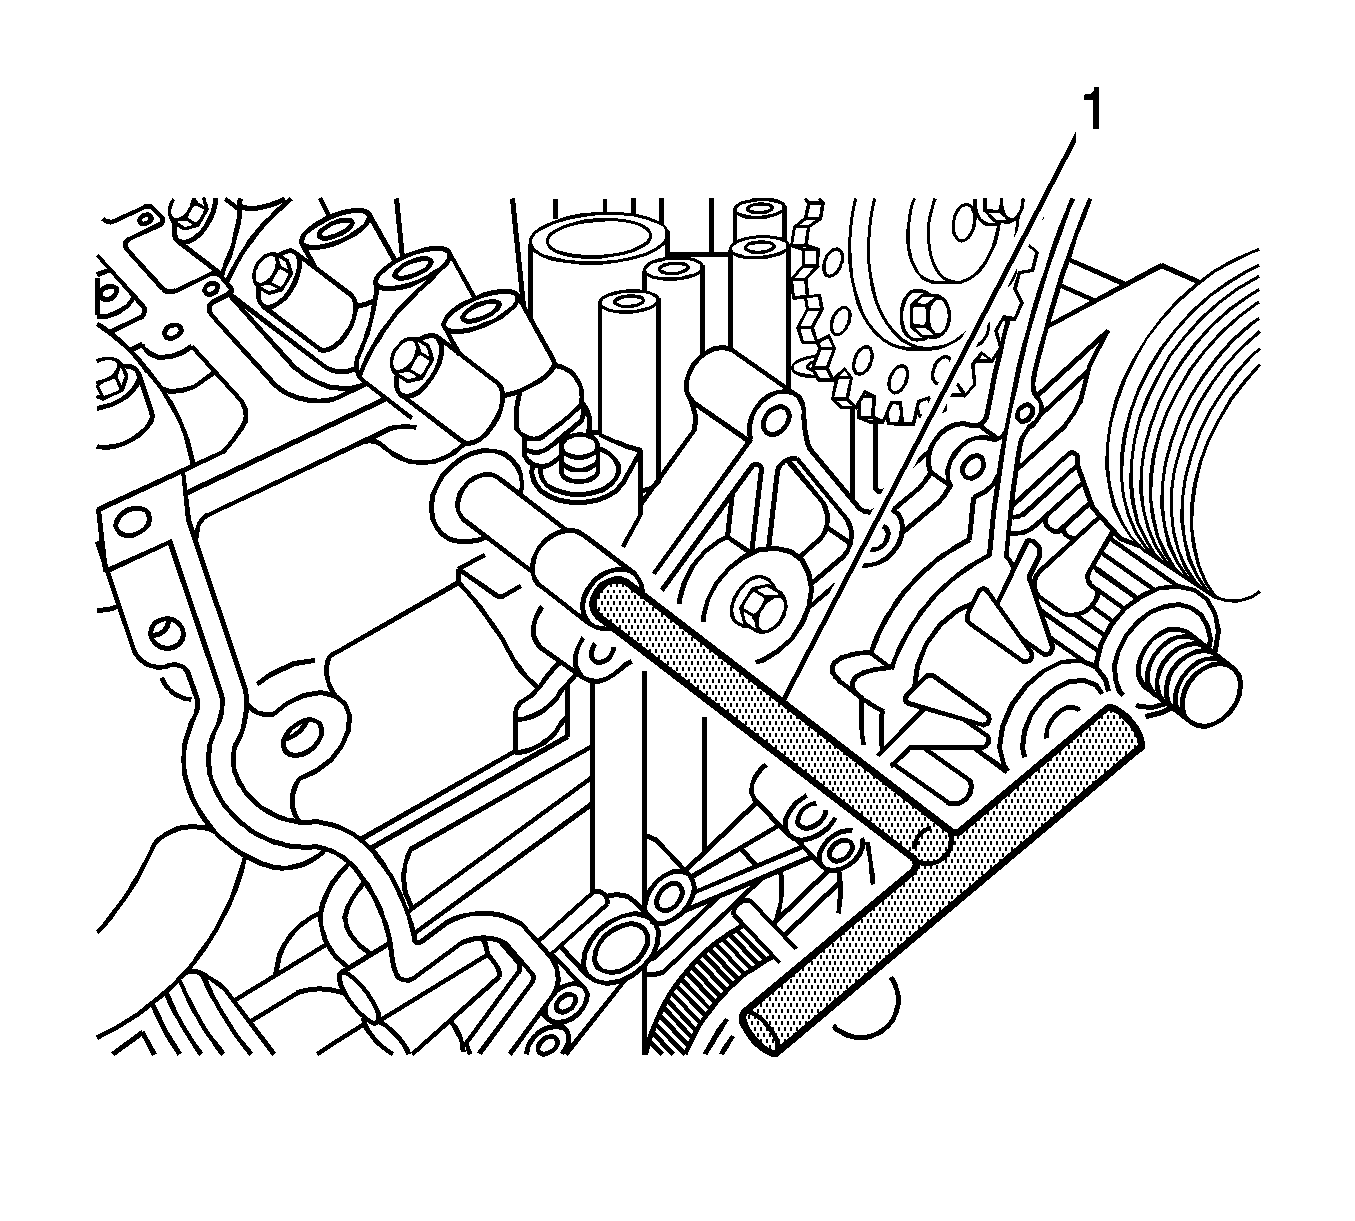
- Using
EN-47613
(1), align both marks on the
camshaft sprockets and on the timing chain, then install the timing chain.
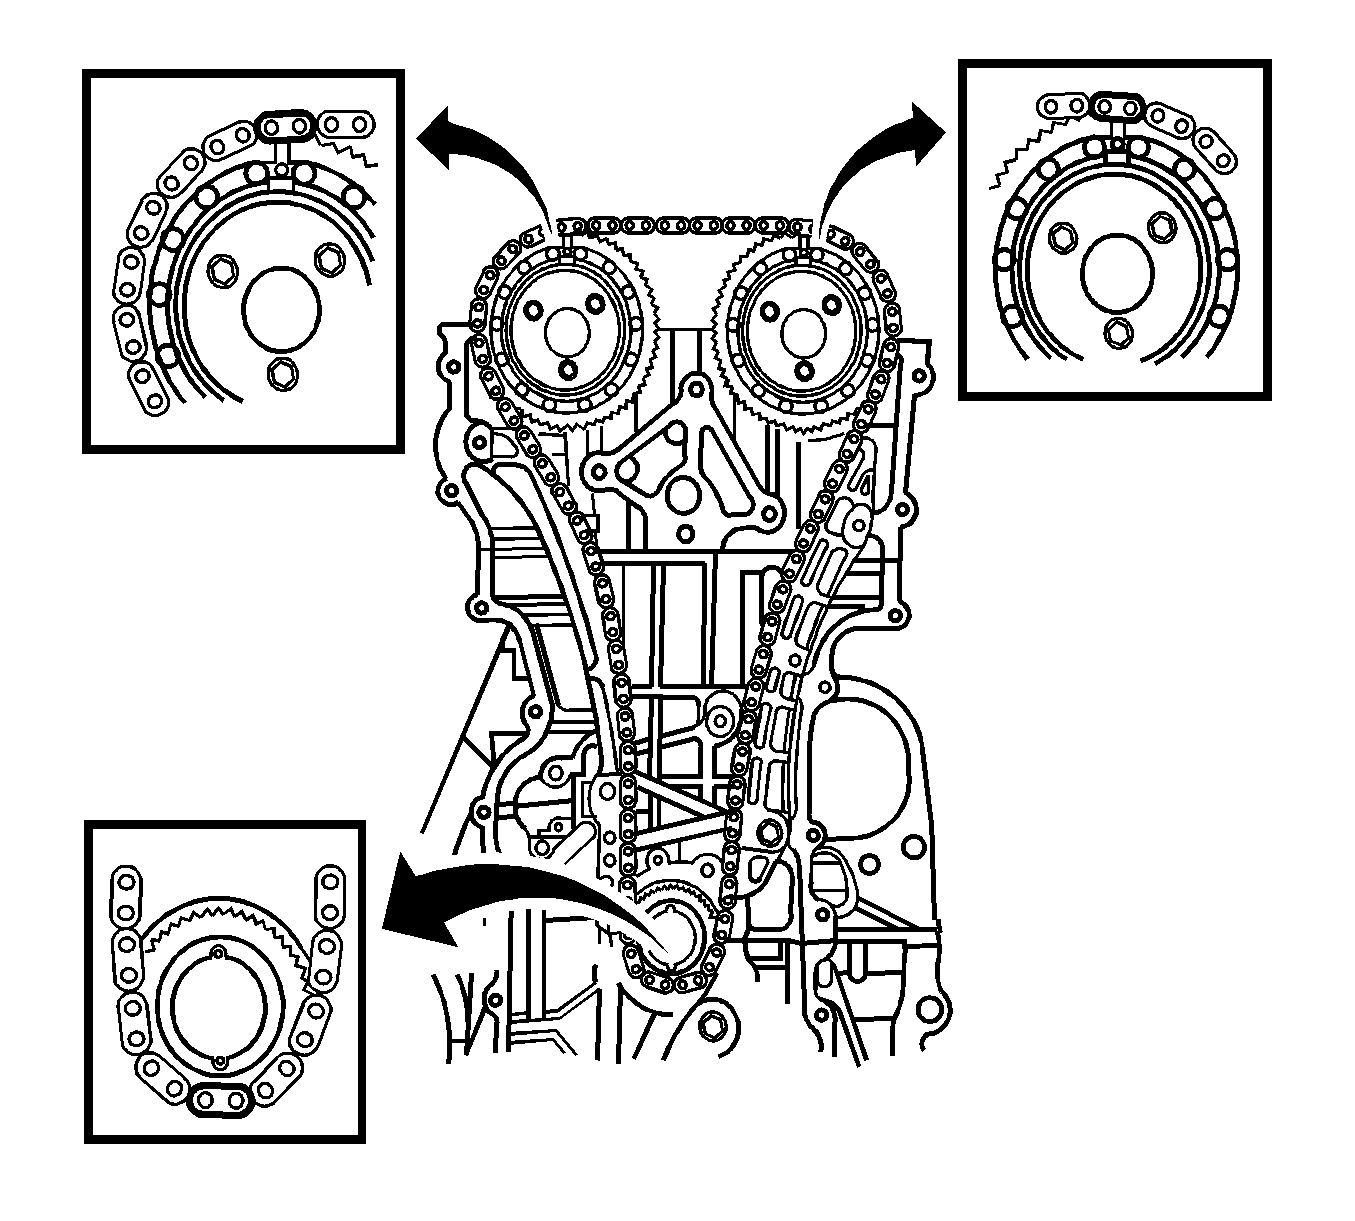
- Ensure the timing marks on the timing chain are aligned with the marks on the intake and exhaust camshaft
sprockets and the crankshaft sprocket.
- Position the timing chain guide.
- Install the timing chain guide bolts and tighten to
20 N·m (15 lb ft).
- Position the timing chain lever.
- Install the timing chain lever bolt and tighten to
20 N·m (15 lb ft).
- Position the timing chain tensioner.
- Install the timing chain tensioner bolts and tighten to
20 N·m (15 lb ft).
- Position the timing chain top guide.
- Install the timing chain top guide bolts and tighten to
10 N·m (89 lb in).
- Install two timing chain dowel rings.
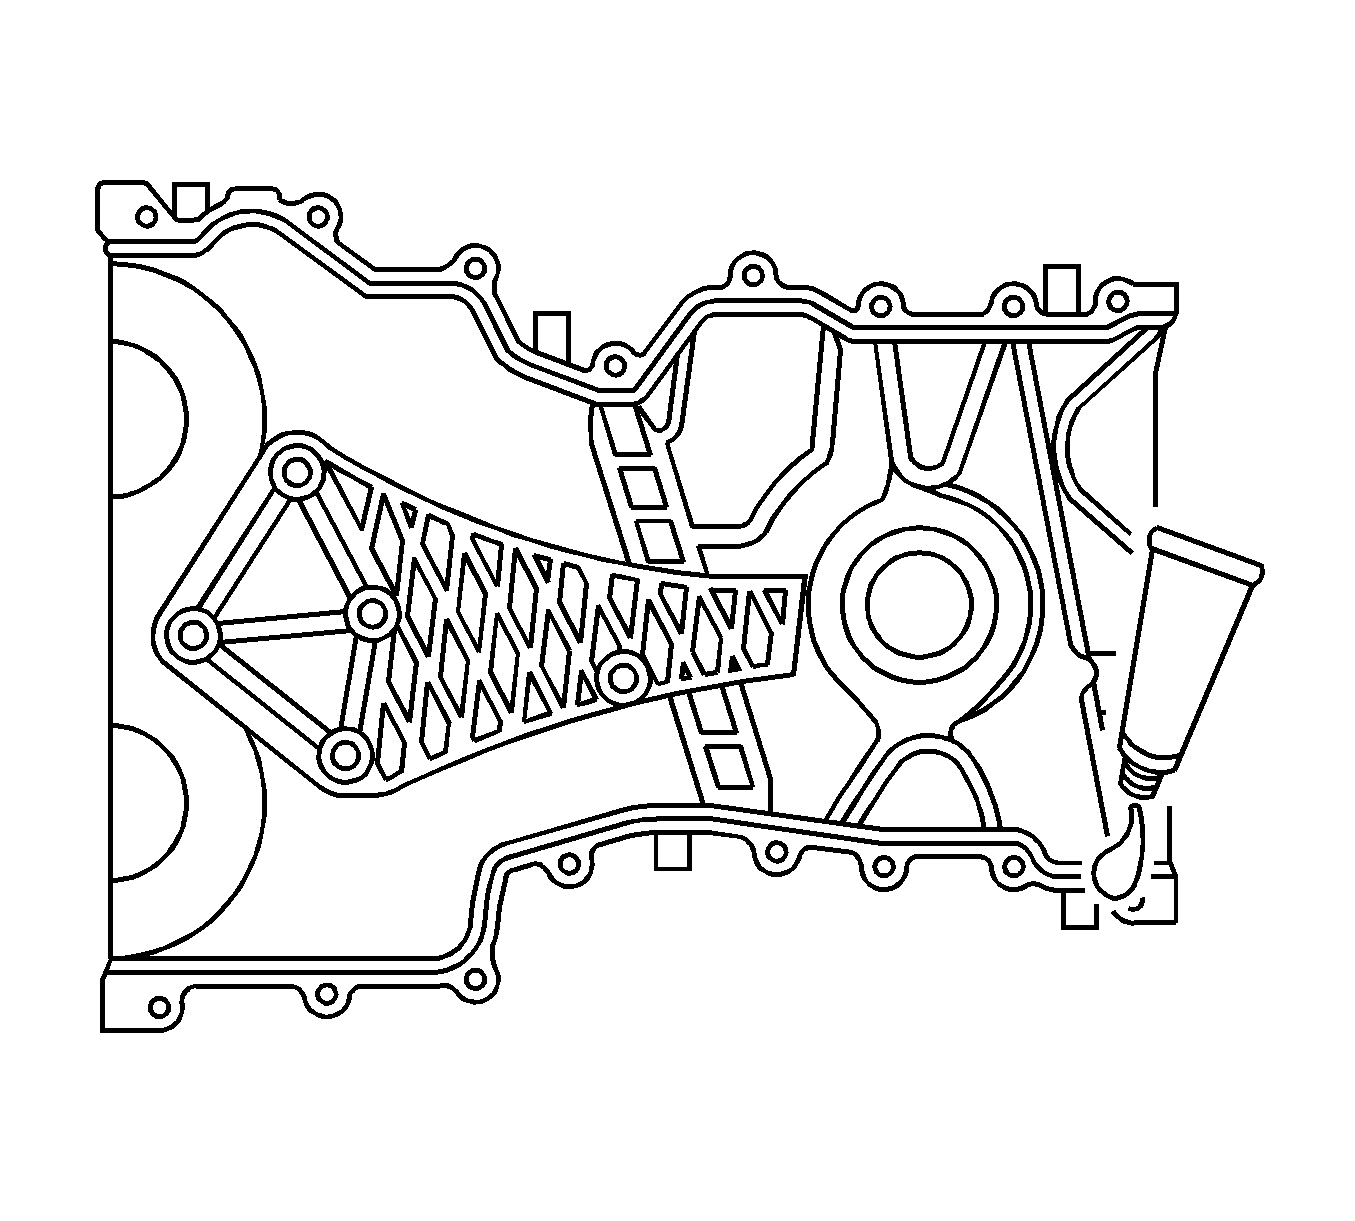
- Apply liquid gasket (Loctite 5900-M8585) on the timing chain cover.
- Using timing chain cover guide pins
EN-47612
(1),
install the timing chain cover
- Install the timing chain cover bolts.
| • | Tighten the center timing chain cover bolt to 20 N·m (15 lb ft). |
| • | Tighten all other timing chain cover bolts to 8 N·m (70 lb in). |
- Position the oil pan.
- Install the oil pan bolts and tighten to
8 N·m (70 lb in).
- Position the water pump pulley.
- Install the water pump pulley bolts and tighten to
10 N·m (89 lb in).
- Position the engine mount bracket support.
- Install the engine mount bracket support bolts and tighten to
28 N·m (21 lb ft).

- Install the crankshaft pulley and the crankshaft pulley bolt.
- Using
EN-47610
(1), and
EN-47611
(2), tighten the crankshaft pulley bolt to
550 N·m (406 lb ft).
- Install the drive belt.
- Apply liquid gasket on the surface of the cylinder head.
- Install the cylinder head cover and the cylinder head cover bolts and tighten to
13 N·m (10 lb ft).
- Install the ignition coil and the ignition coil retaining bolts (1) to
7 N·m
(62 lb in).
- Connect the fuel injectors (1).
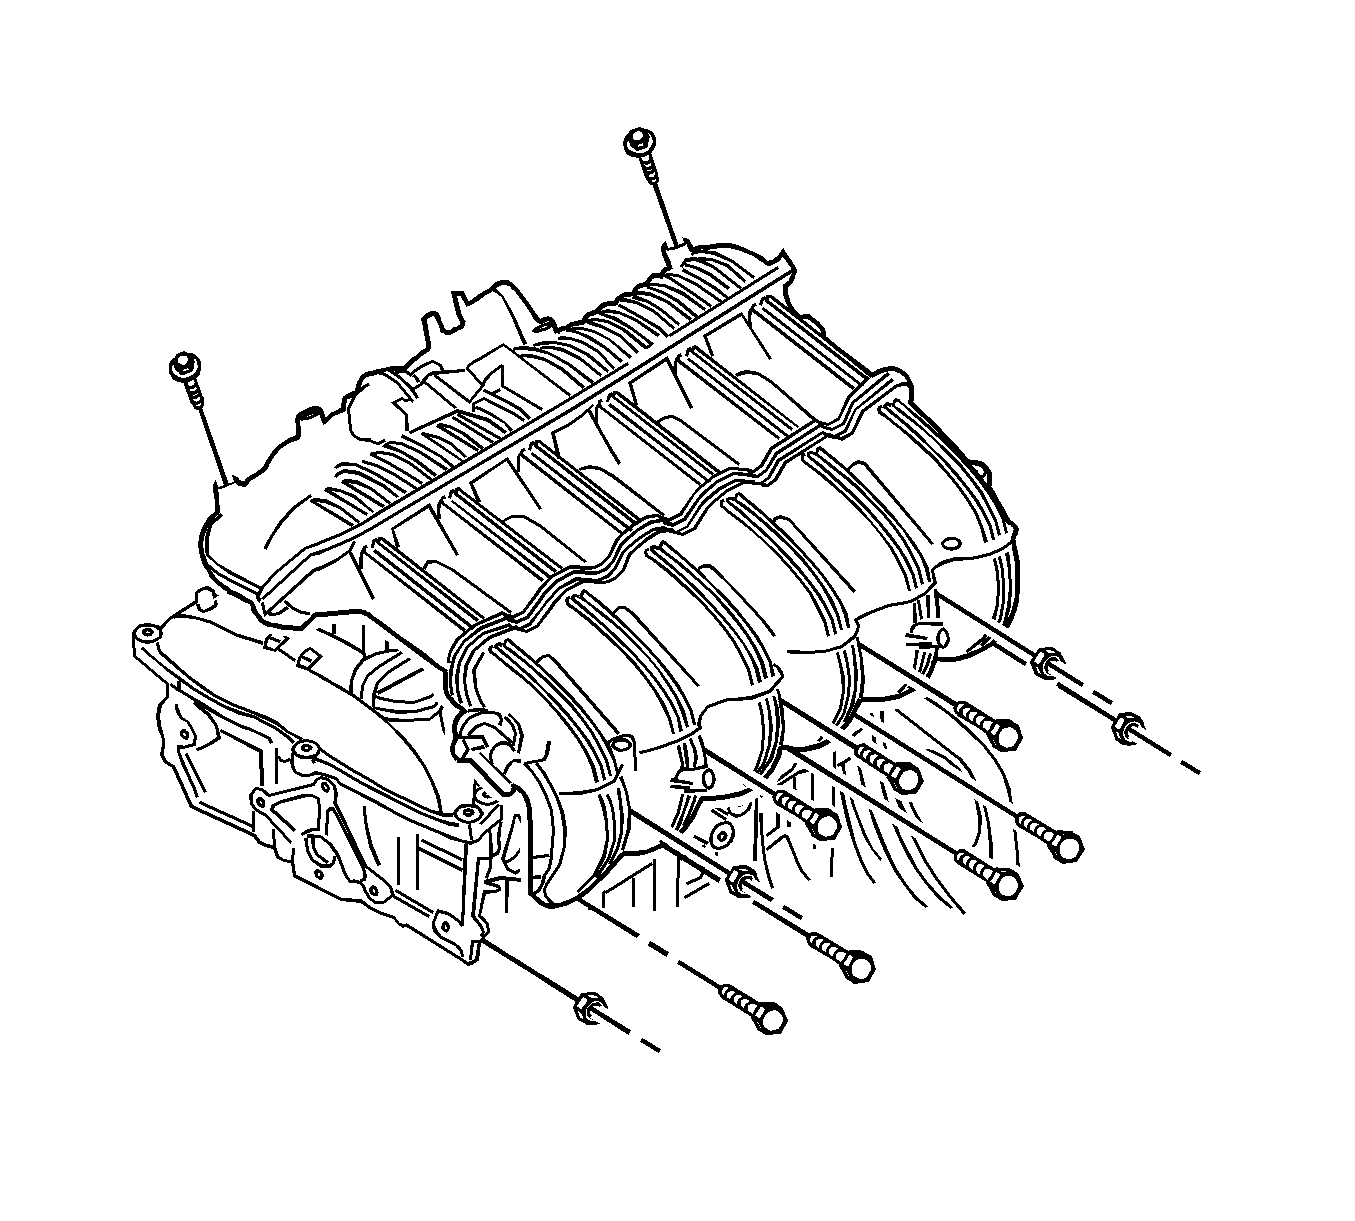
- Discard used intake manifold gaskets and install new ones.
Note: Install the intake manifold after installing the fuel rail.
- Install the intake manifold.
- Install the intake manifold retaining nuts and bolts.
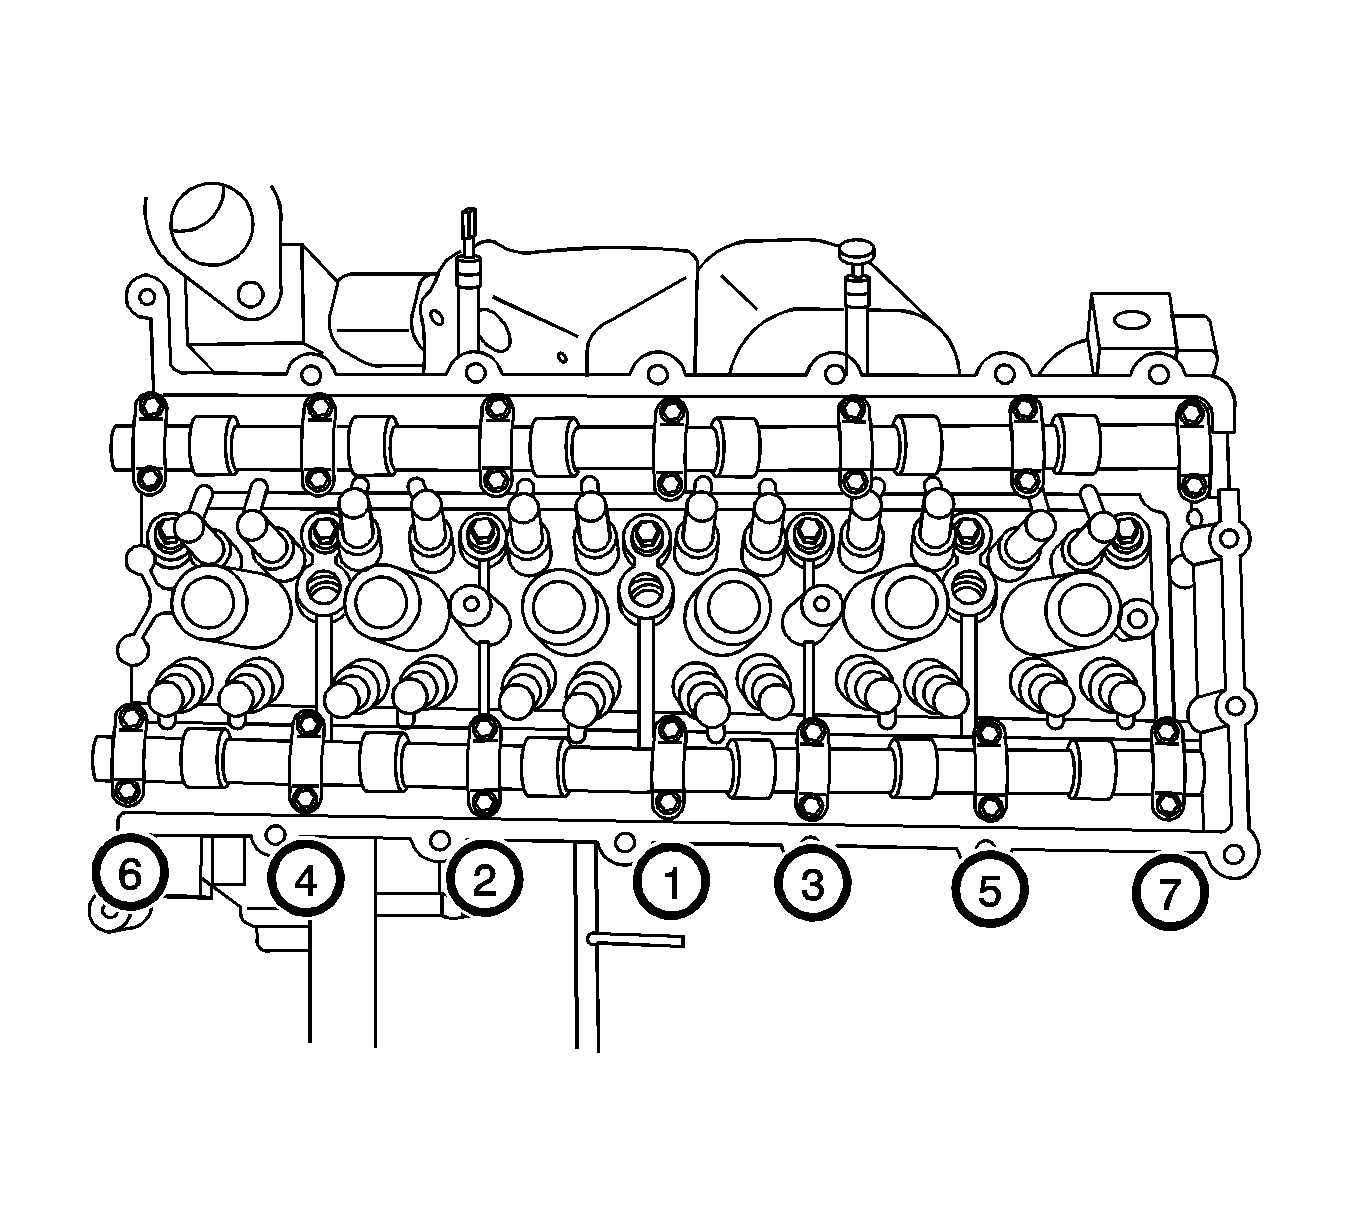
| • | Tighten the 7 intake manifold retaining bolts to
12 N·m (106 lb in). |
| • | Tighten the 4 intake manifold retaining nuts to
12 N·m (106 lb in). |
- Position the VIS vacuum tank (1).
- Install the VIS vacuum tank bolts and tighten to
8 N·m (71 lb in).
- Position the front support bracket (1).
- Install the front support bracket mounting bolts and tighten to
20 N·m (15 lb ft).
- Position the rear support bracket.
- Install the rear support bracket mounting bolts and the rear support bracket (1). Tighten the rear support bracket mounting bolts to
20 N·m (15 lb ft).
- Connect the PCV hose.
- Position the EGR pipe and gasket to the EGR valve adapter.
- Install the EGR pipe mounting bolts (1) and tighten to
10 N·m (89 lb in).
- Install the engine assembly. Refer to
Engine Replacement.
