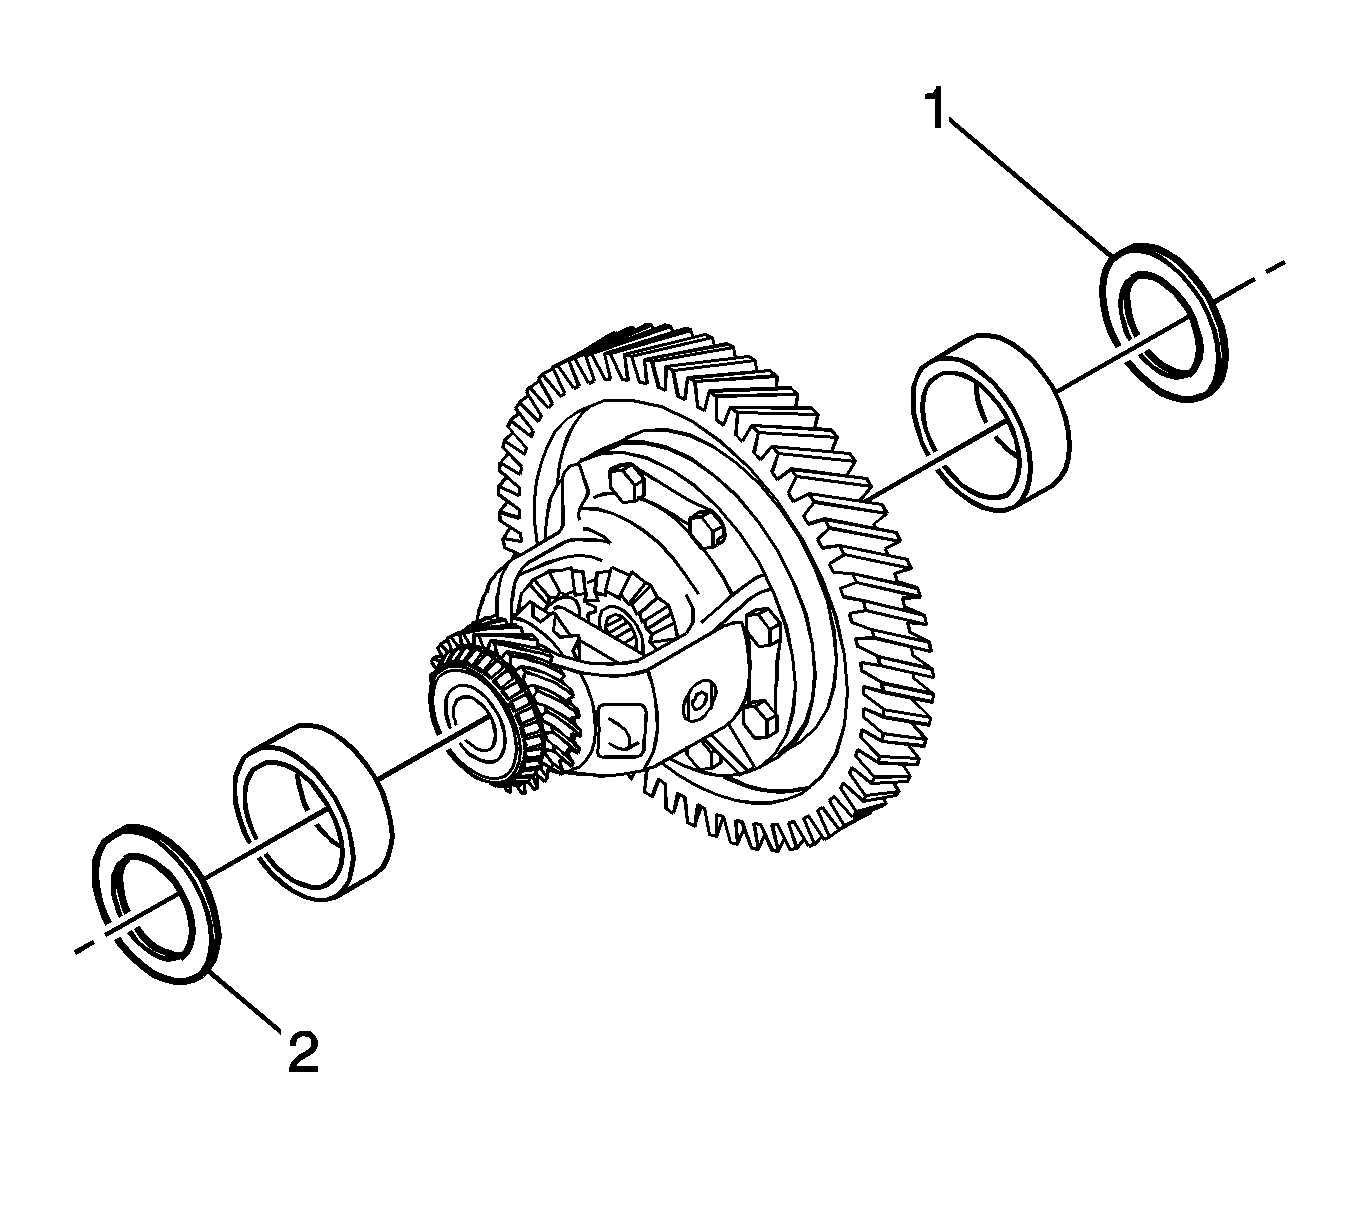
Note: Lubricate all components in transaxle fluid before installation.
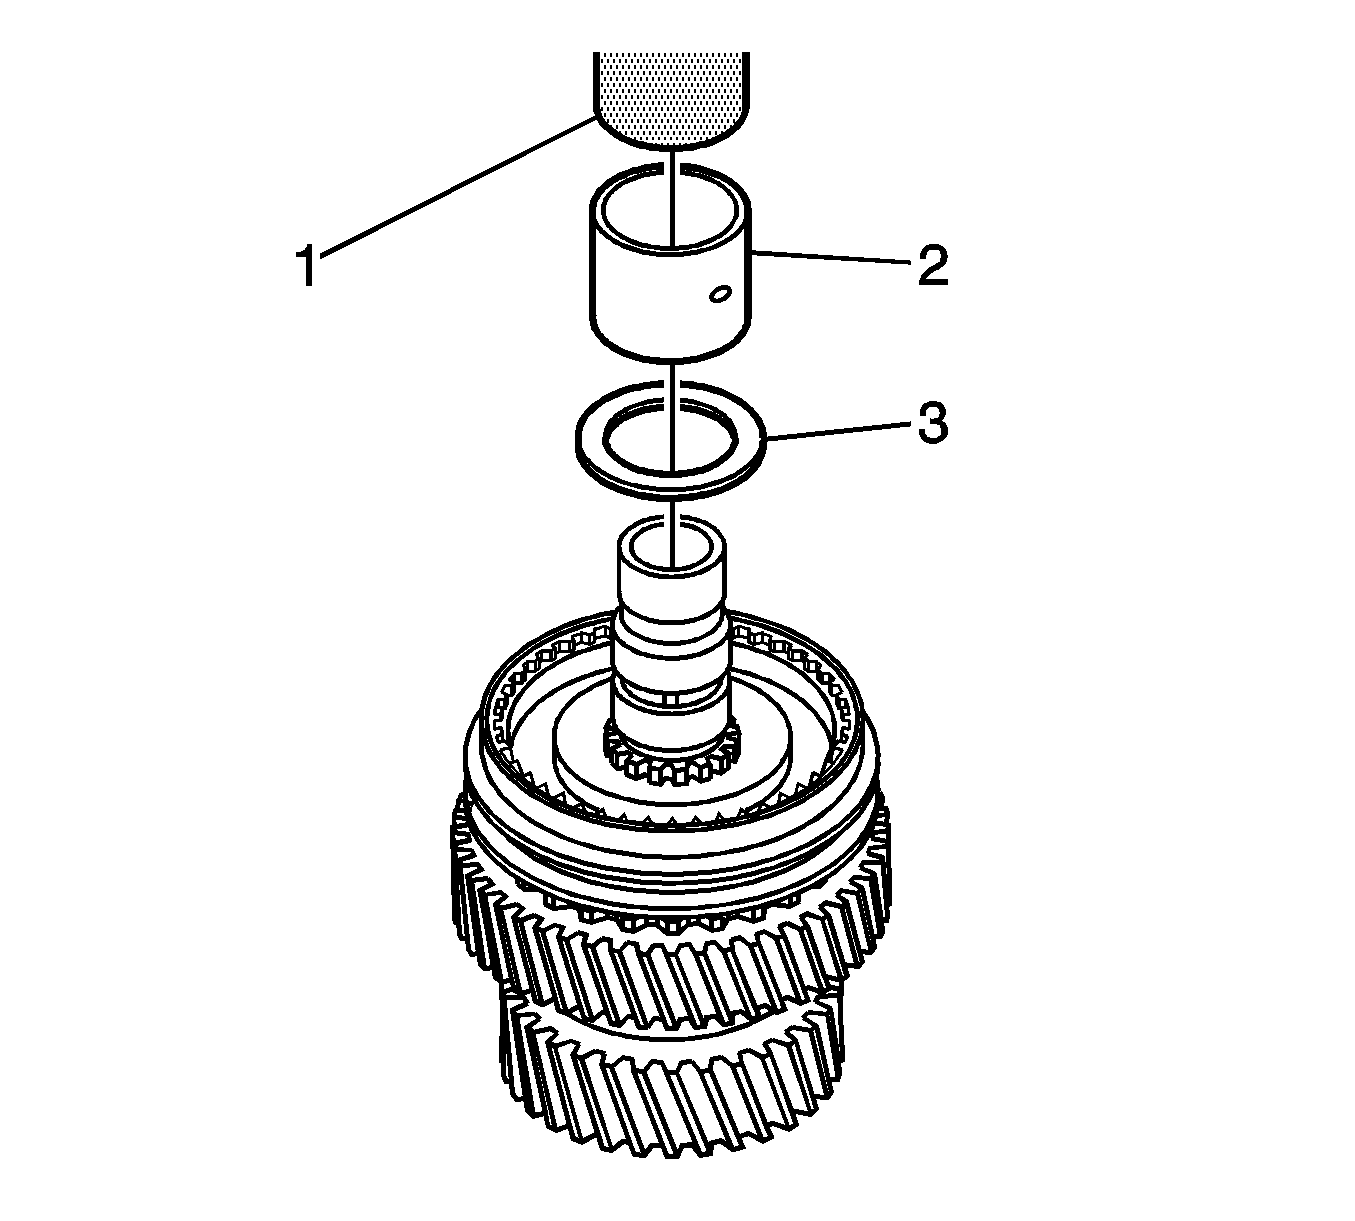
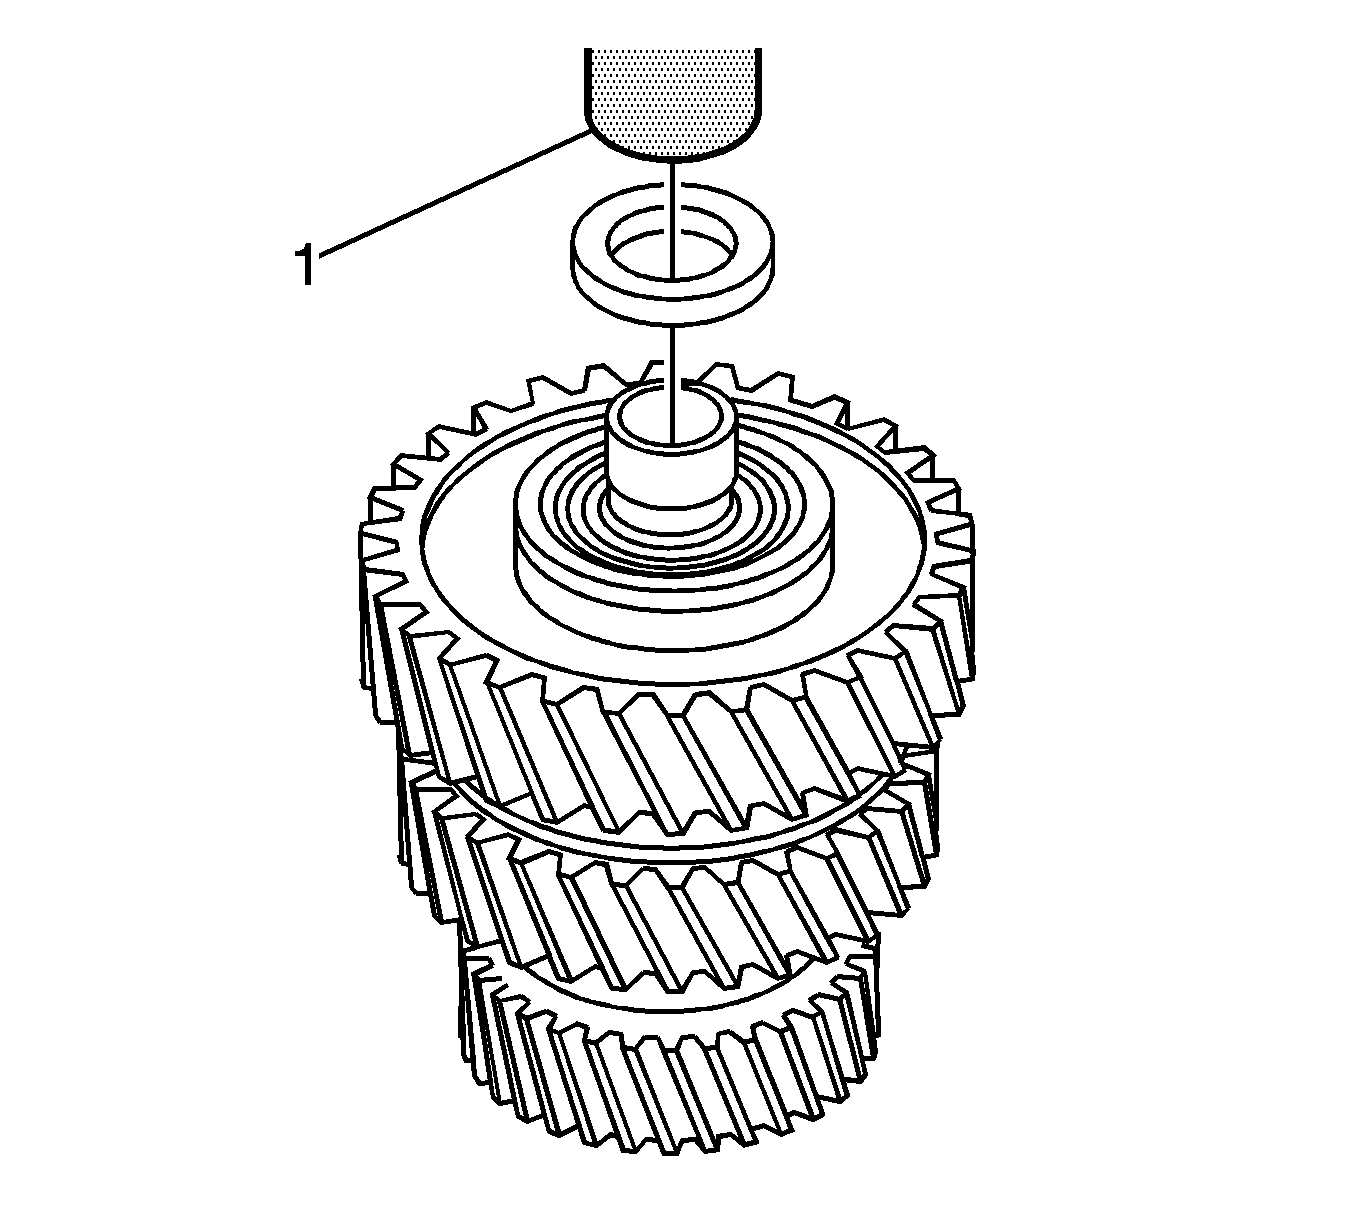
- Install the thrust washer using the DT-48199 (1) and a hydraulic press.
- Install the collar using the DT-48199 and a hydraulic press.
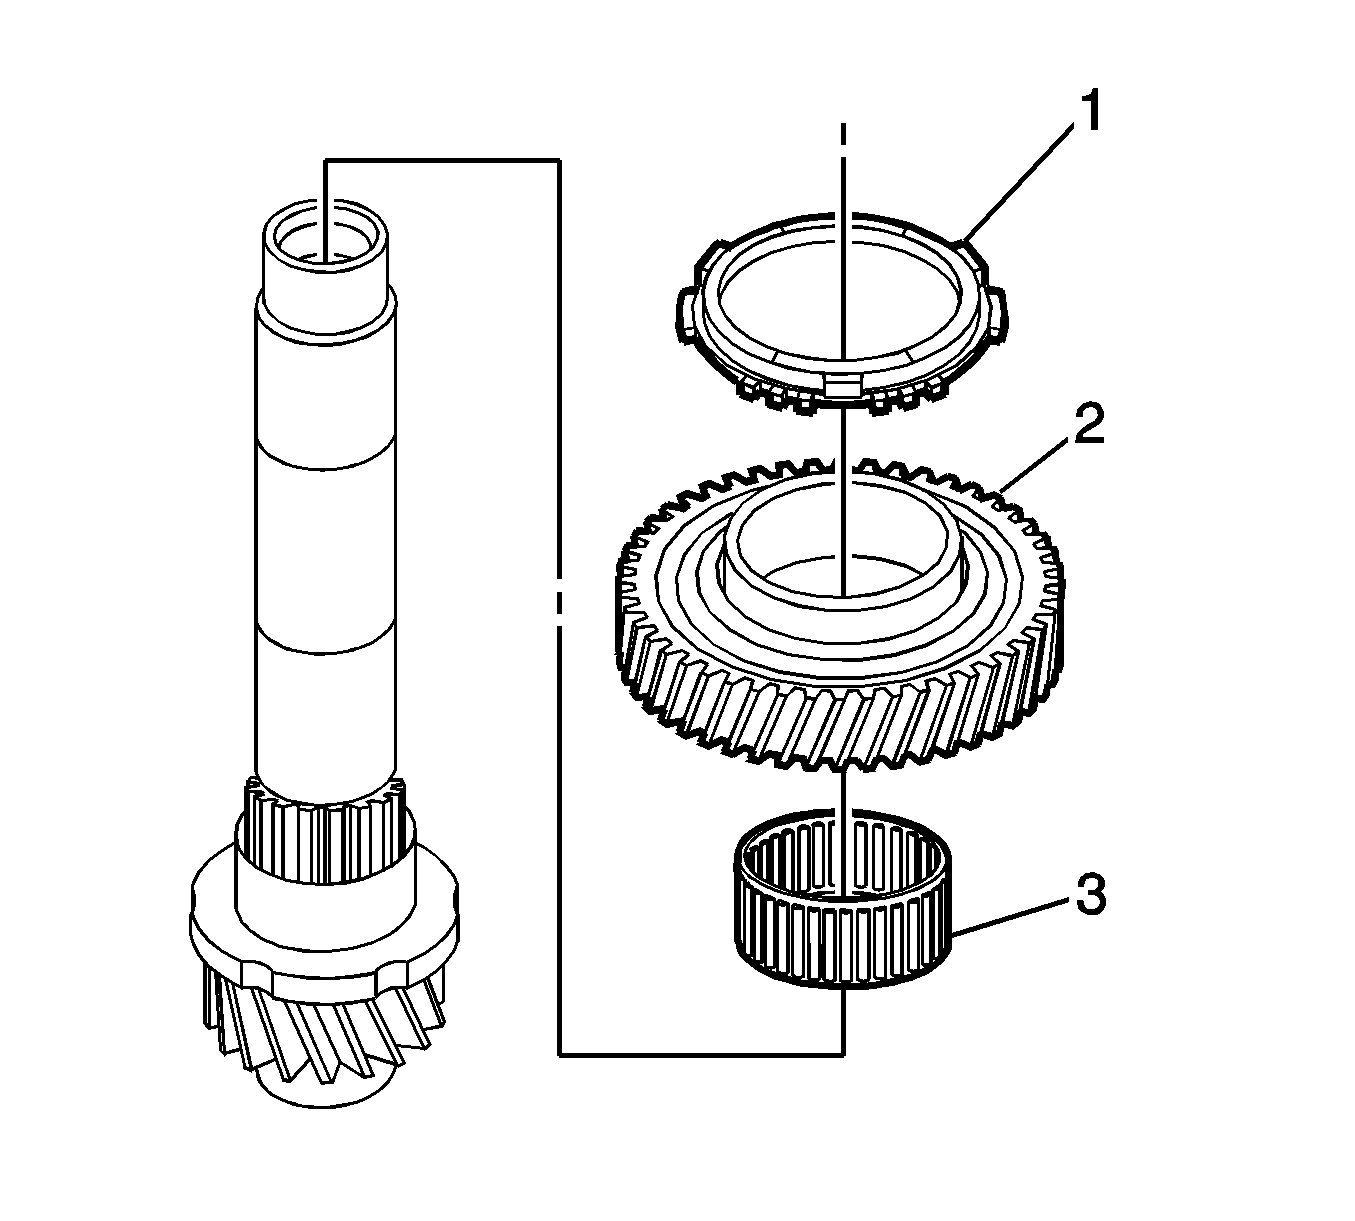
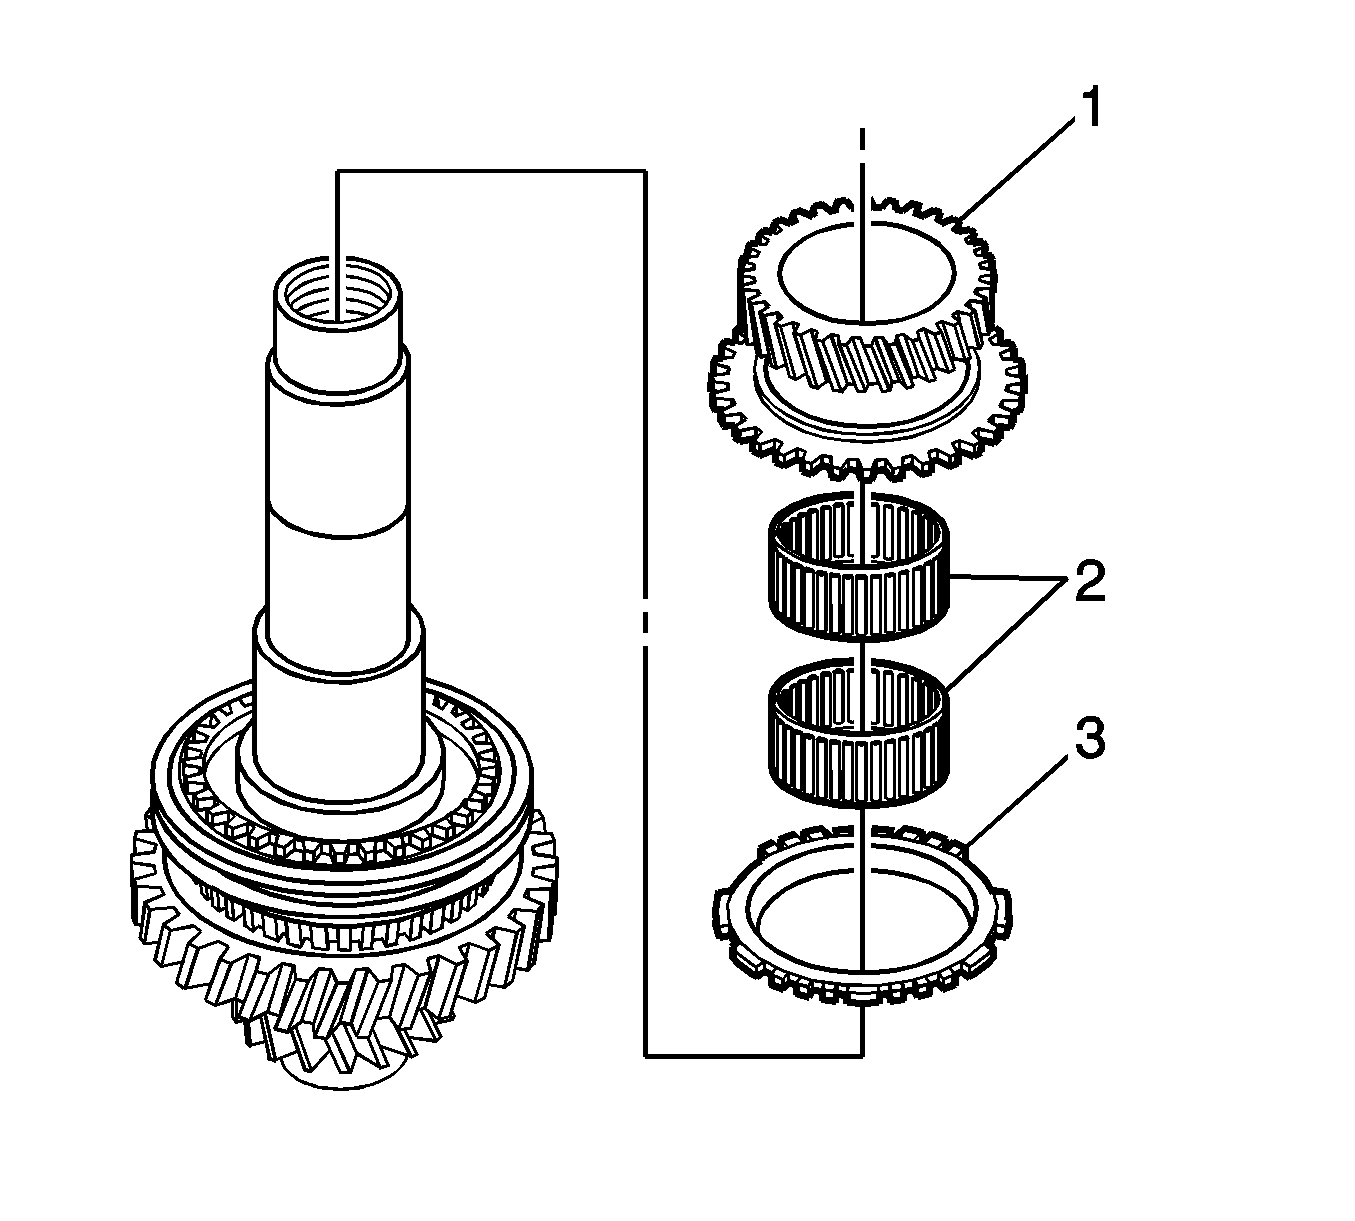
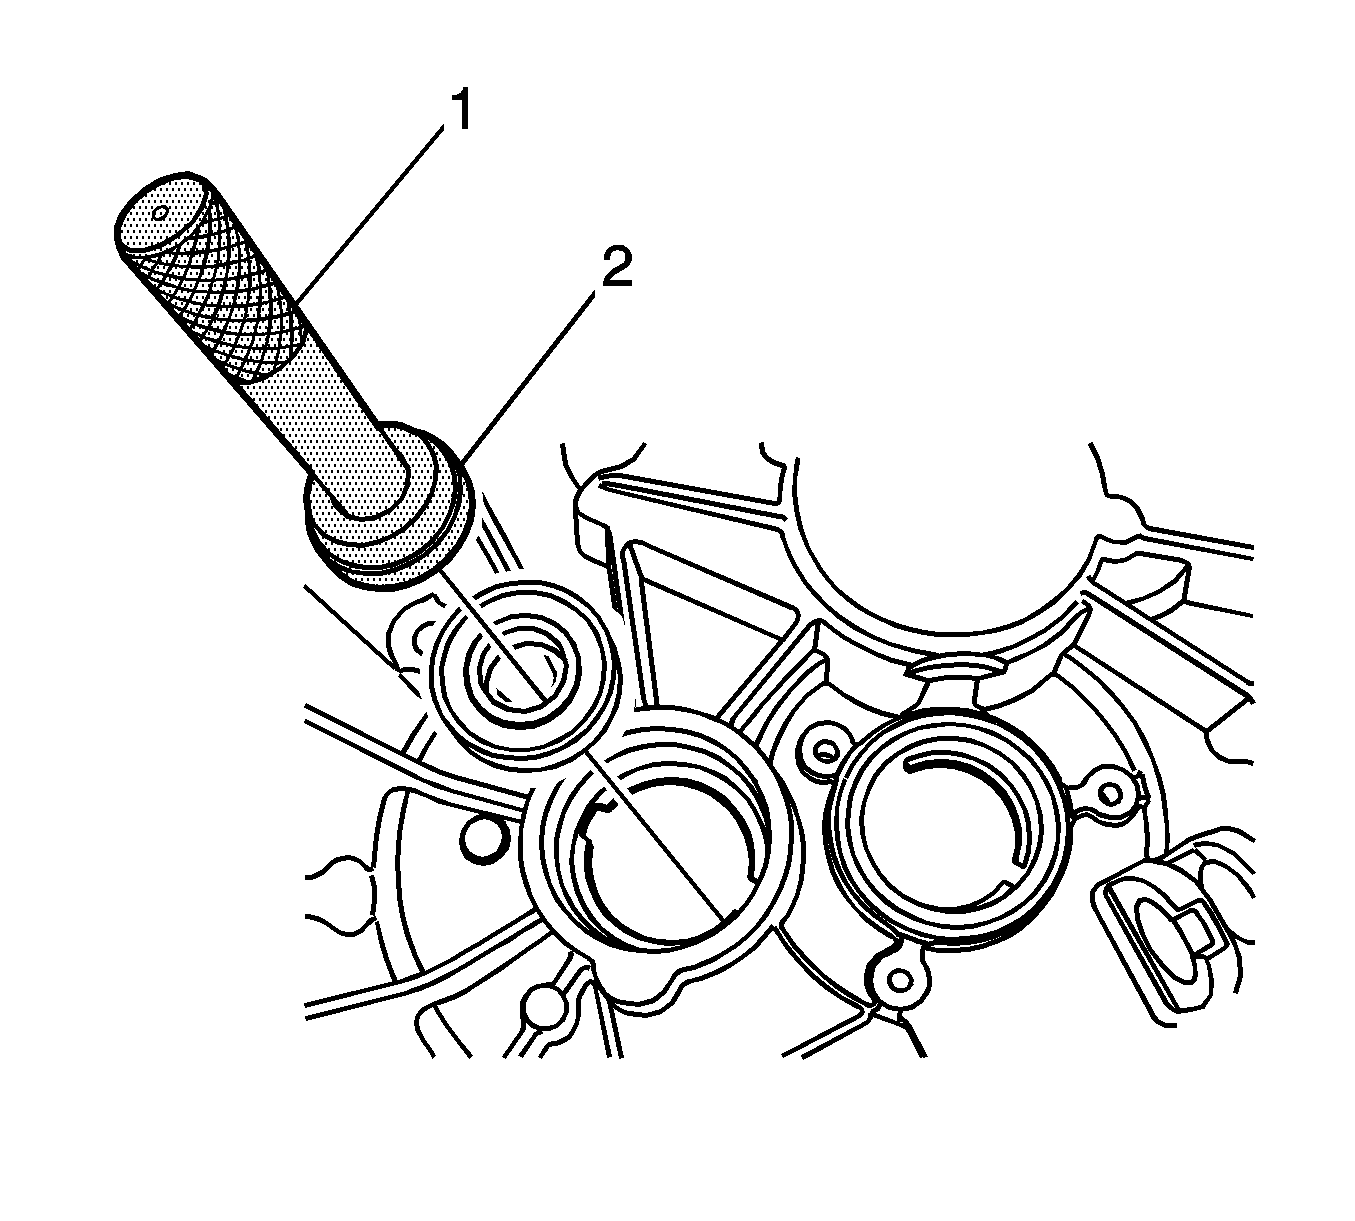
- Install the needle bearings (3).
- Install the reverse gear (2).
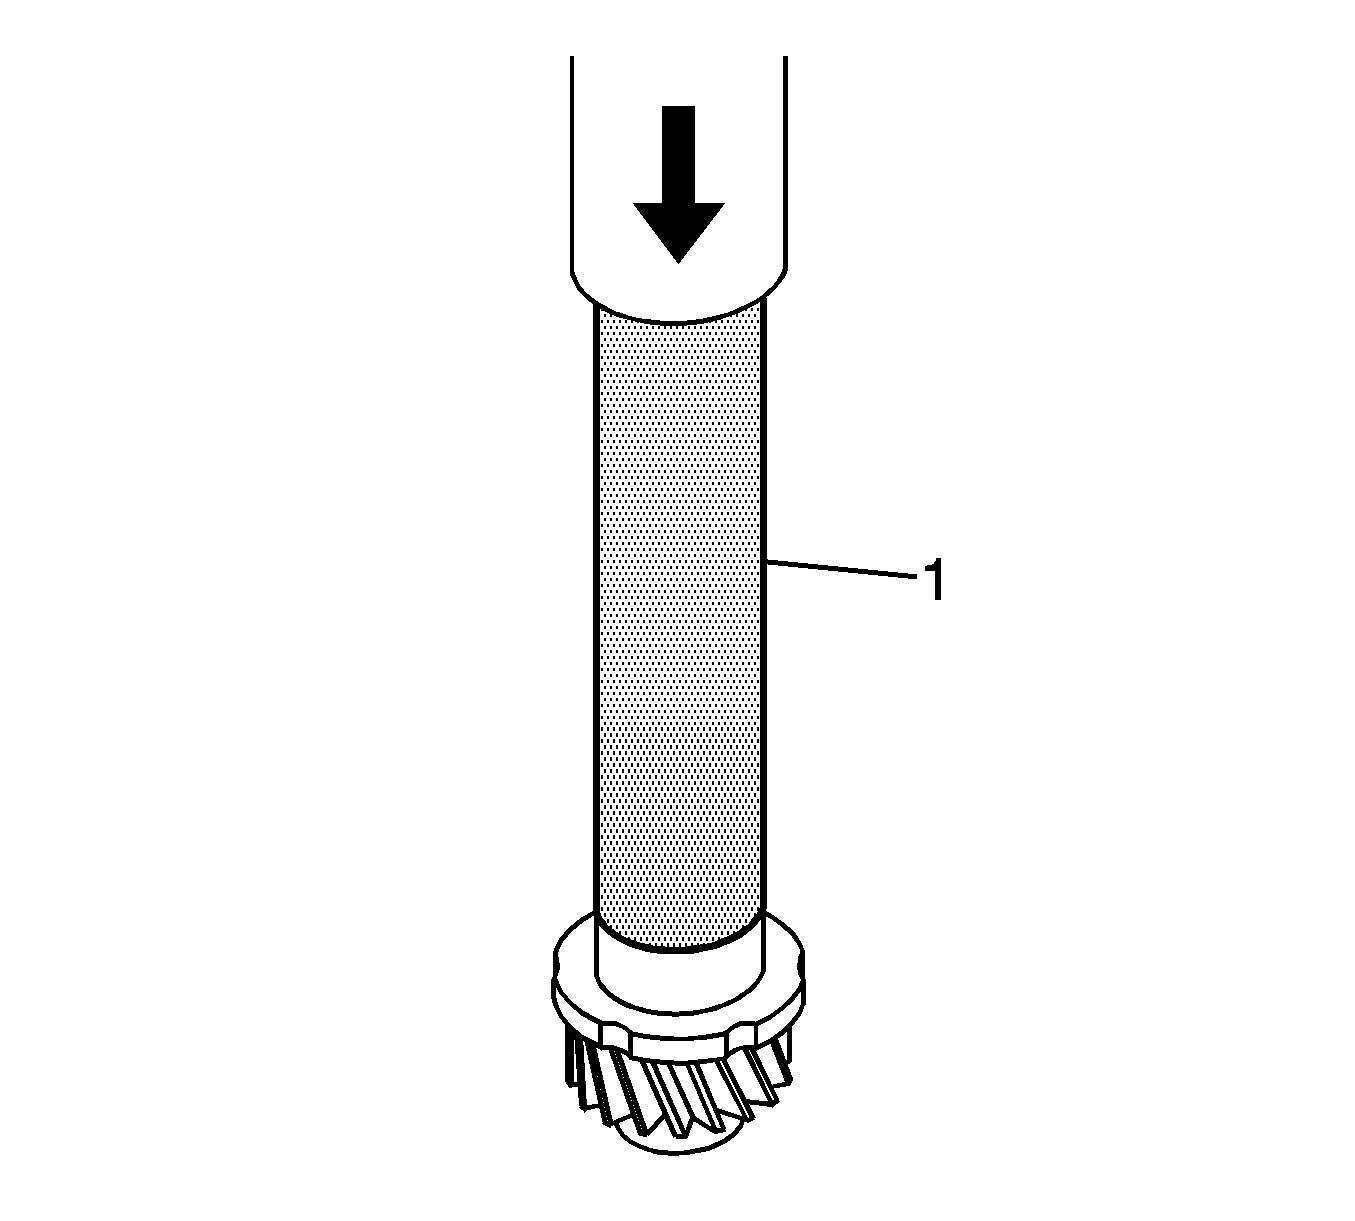
- Install the reverse gear blocking ring (1).
Note:
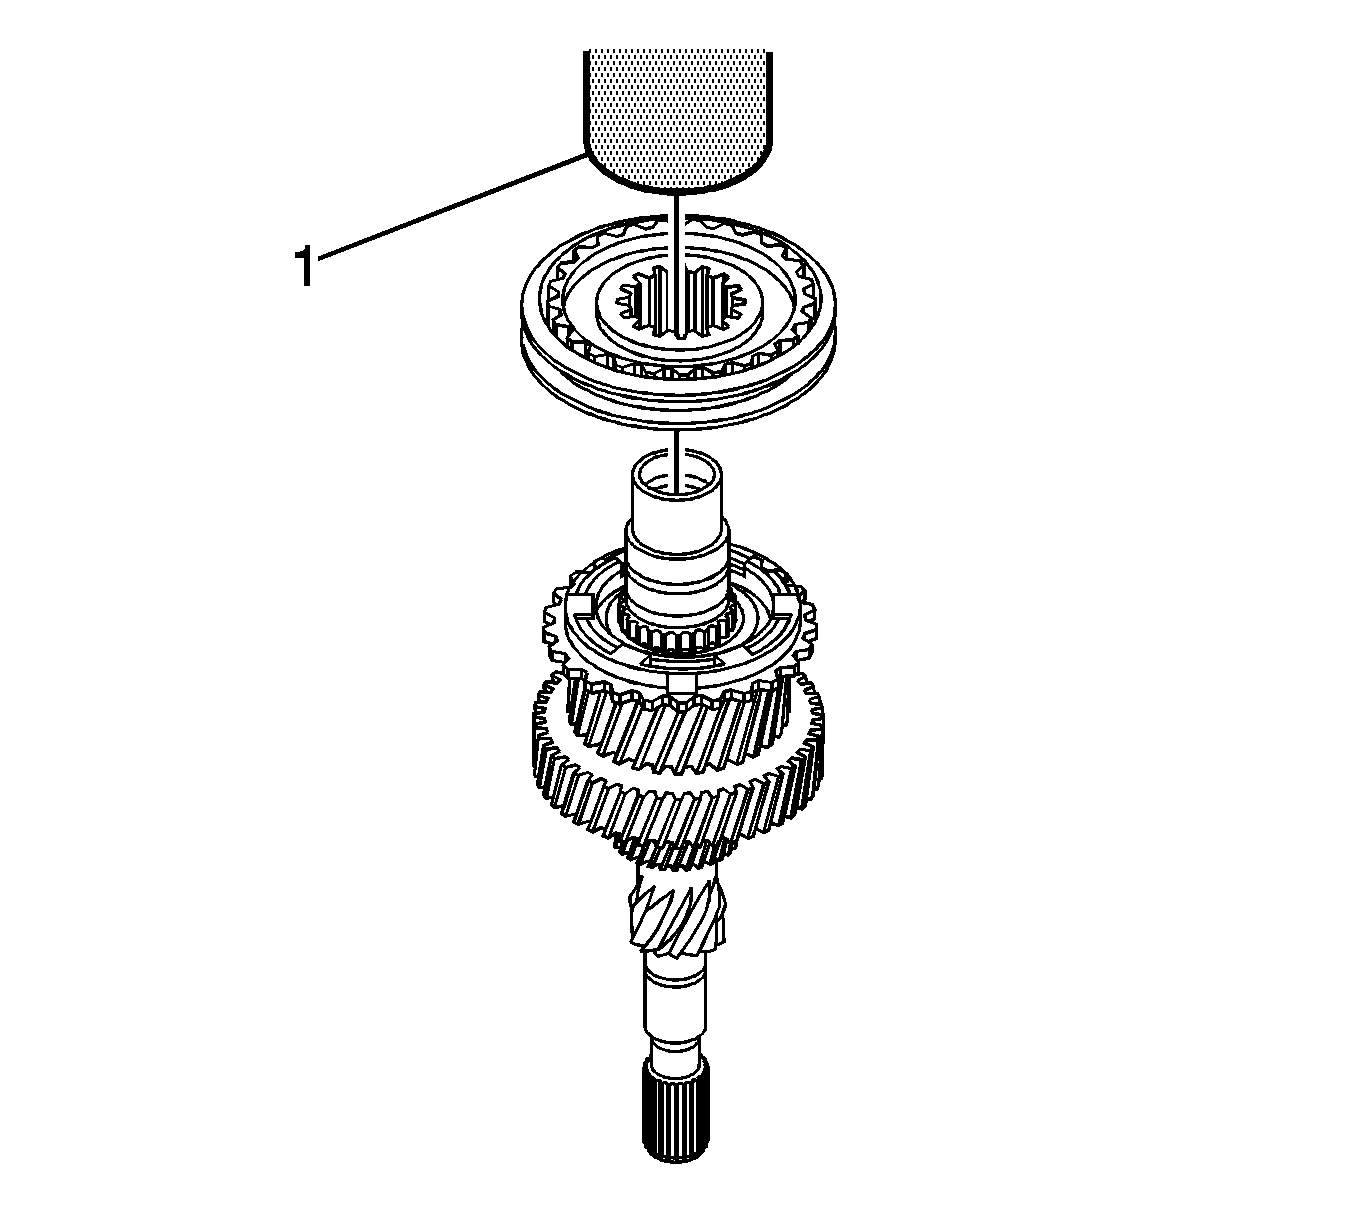
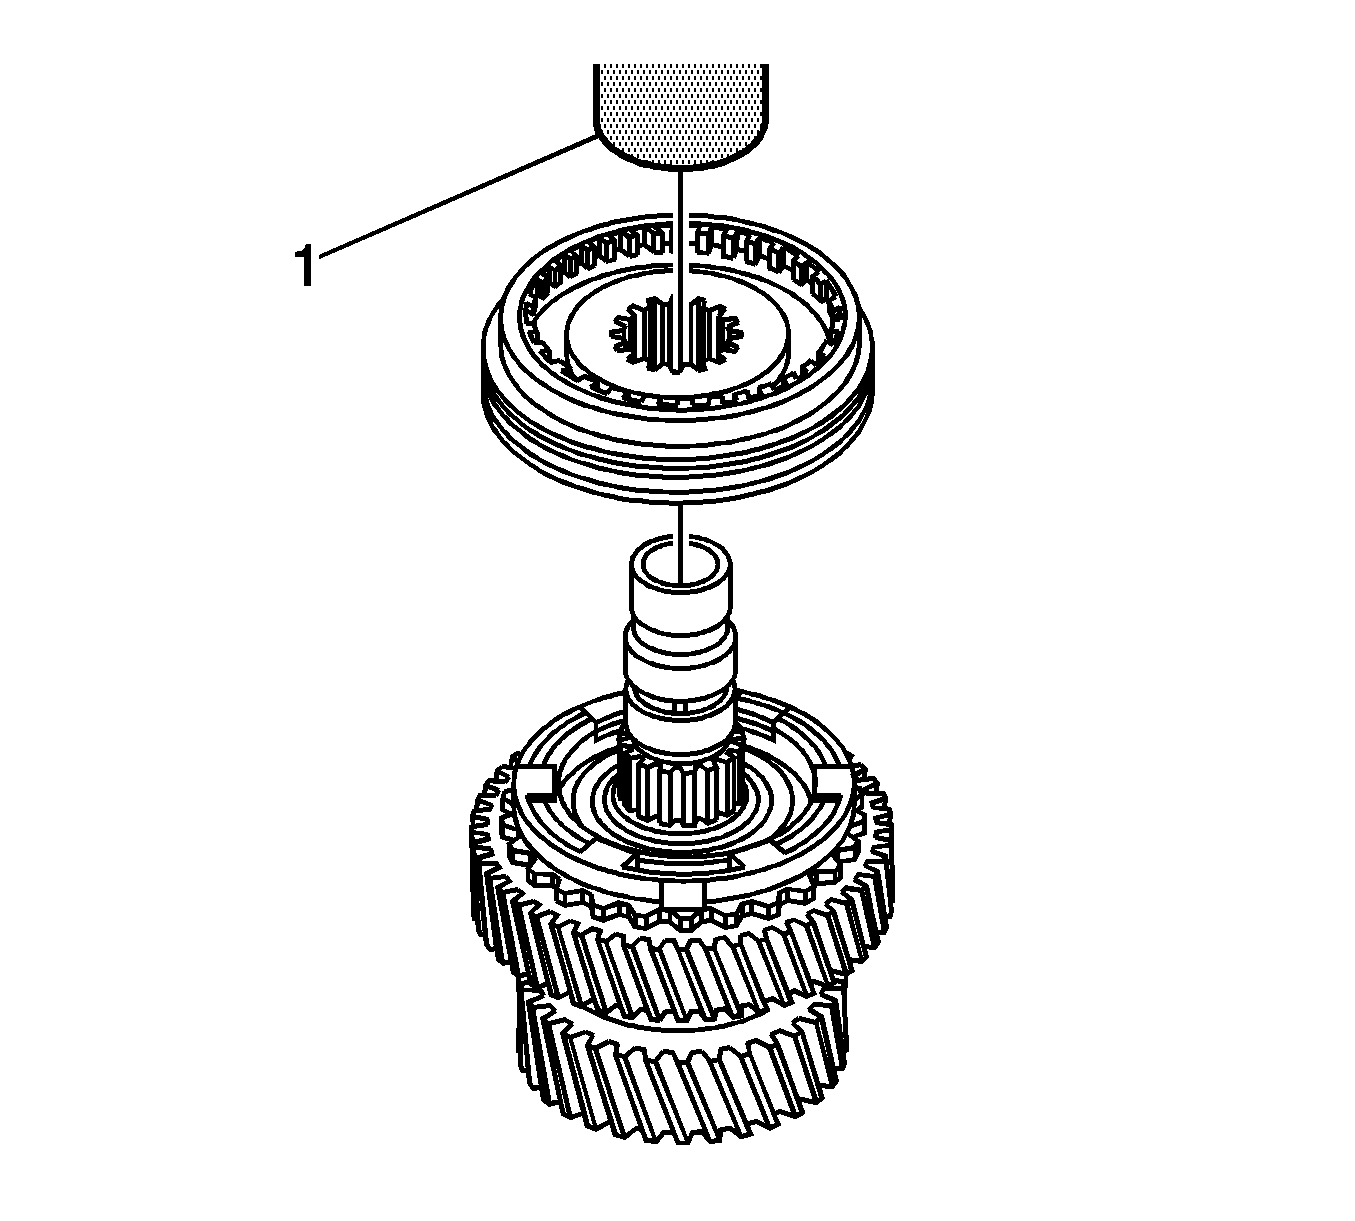
| • | The raised center hub of the 5th/Reverse synchronizer assembly faces the 5th gear. |
| • | Line up the blocking ring tabs and the hub keyways while pressing. |
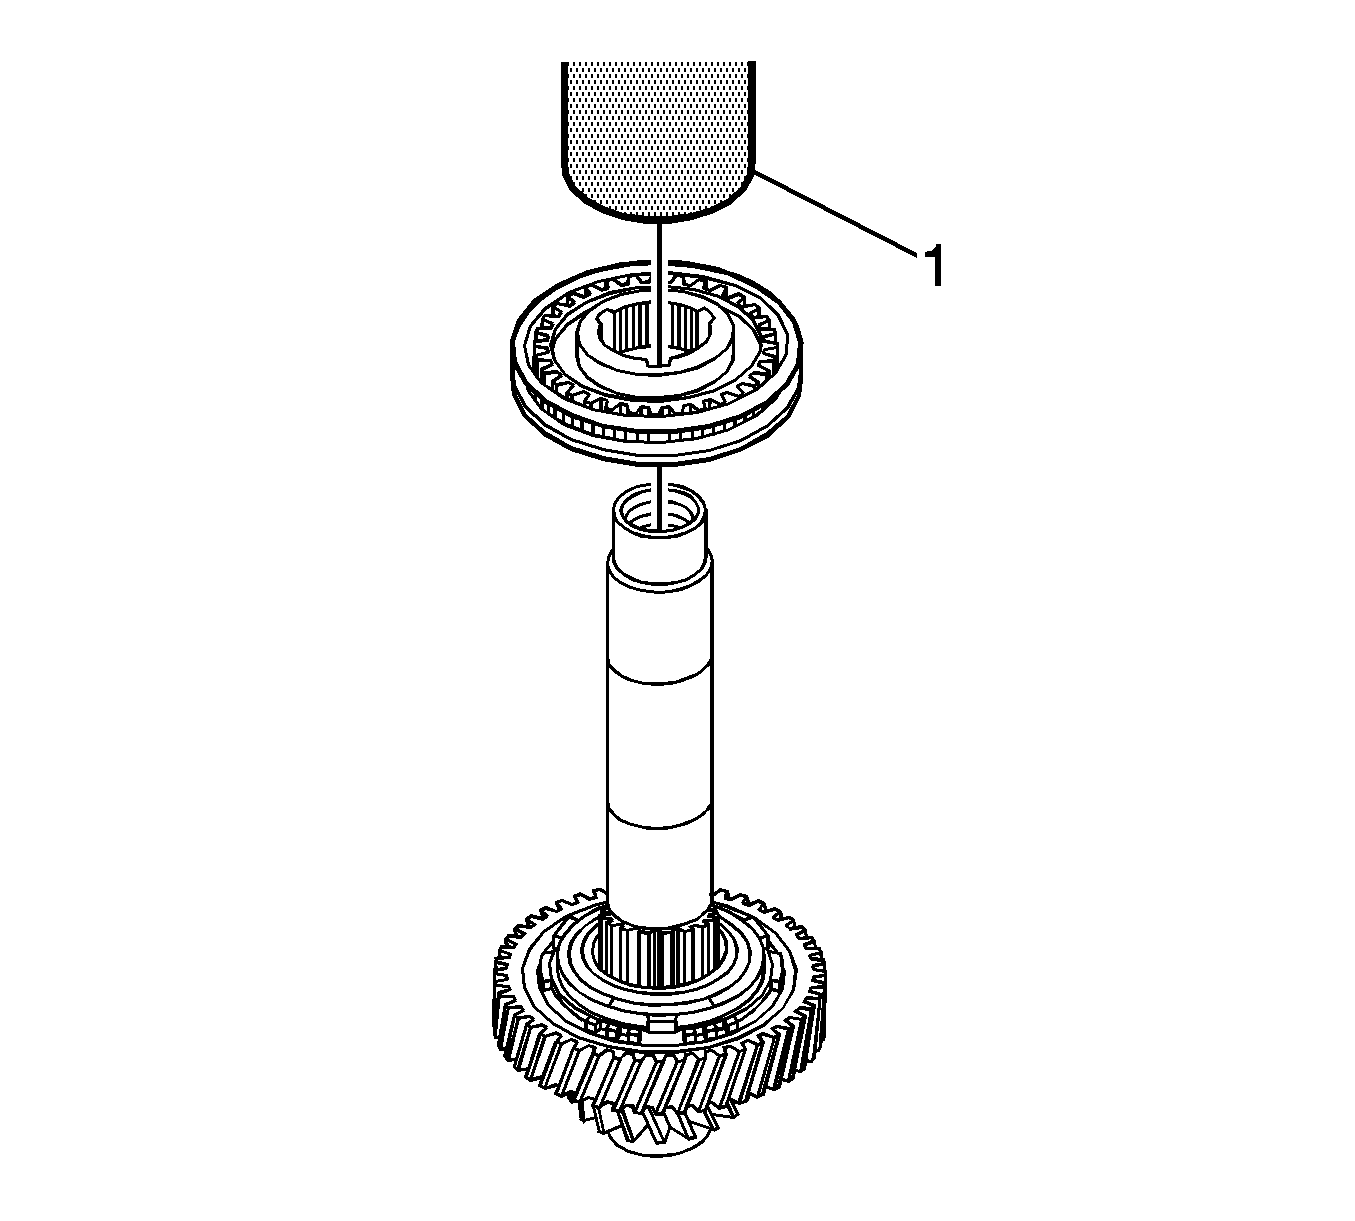
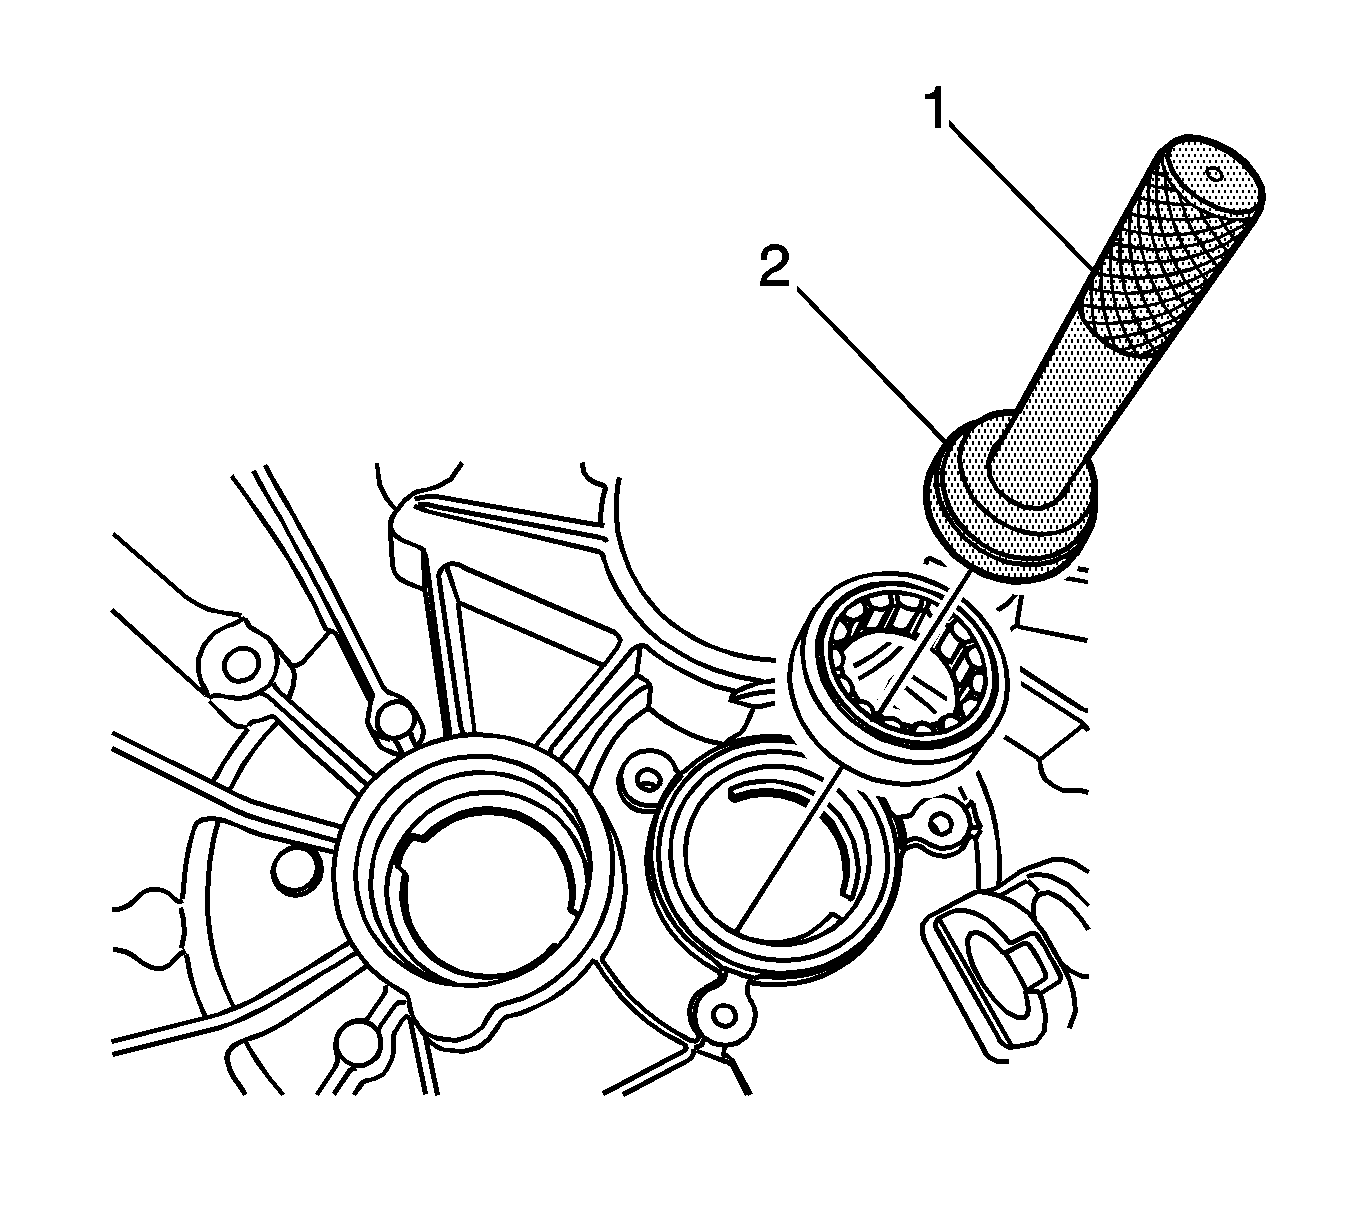
- Install the 5th/Reverse synchronizer using the DT-48199 (1) and a hydraulic press.
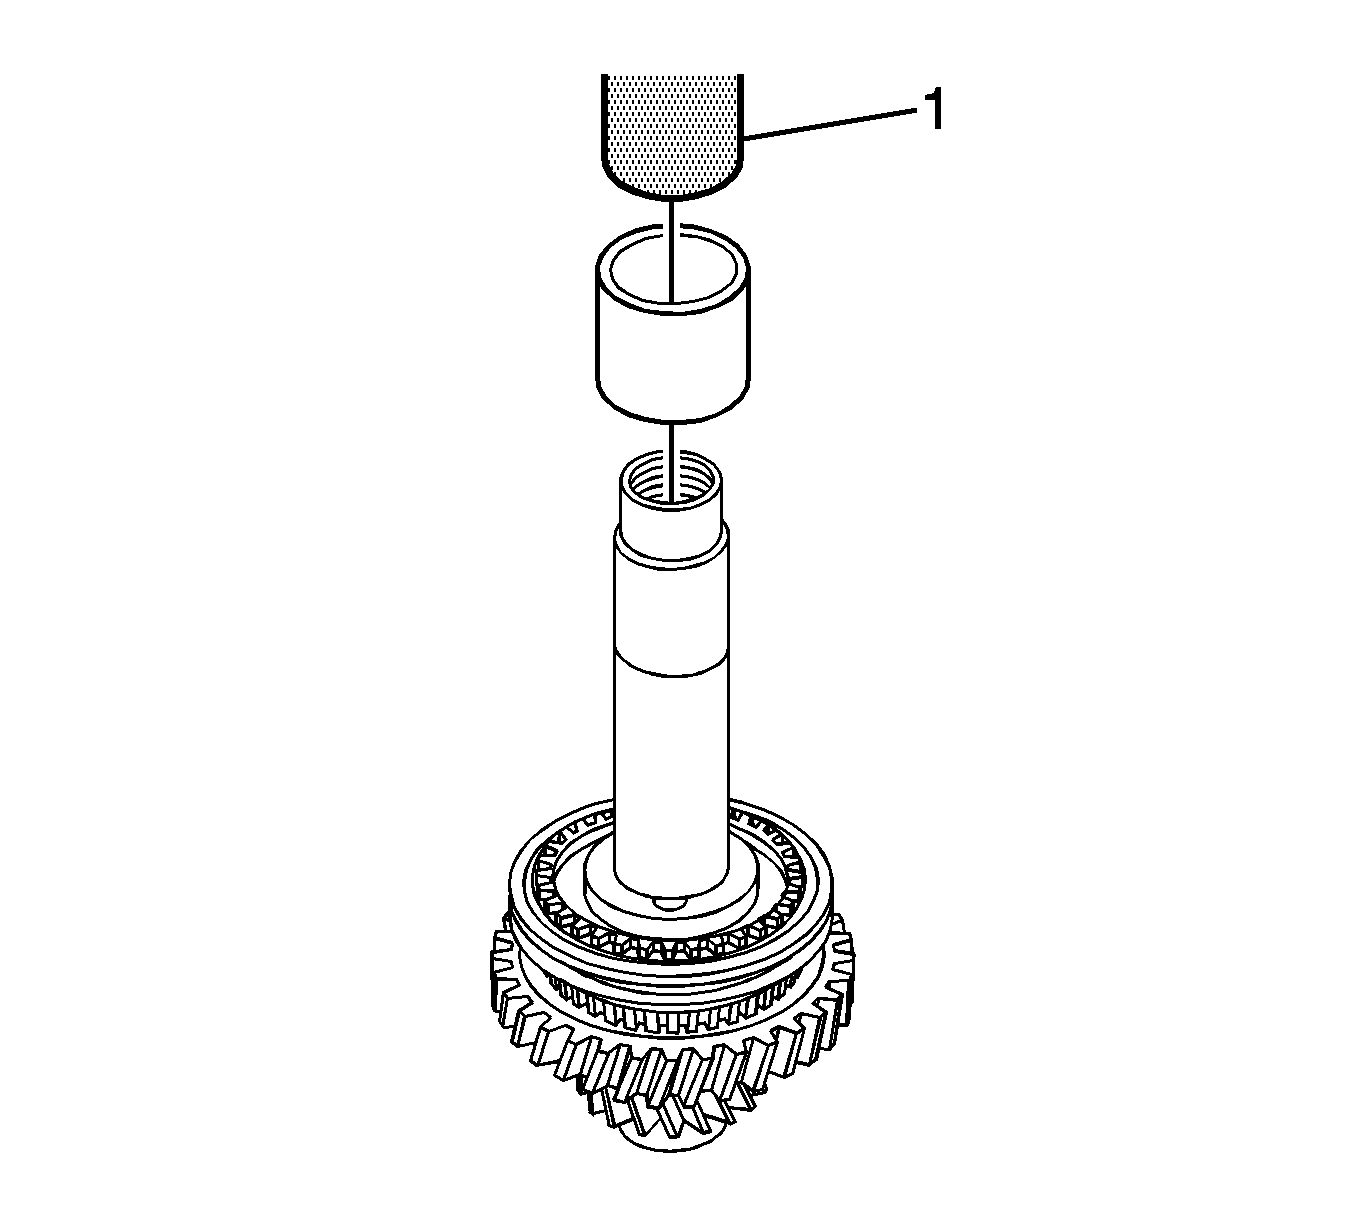
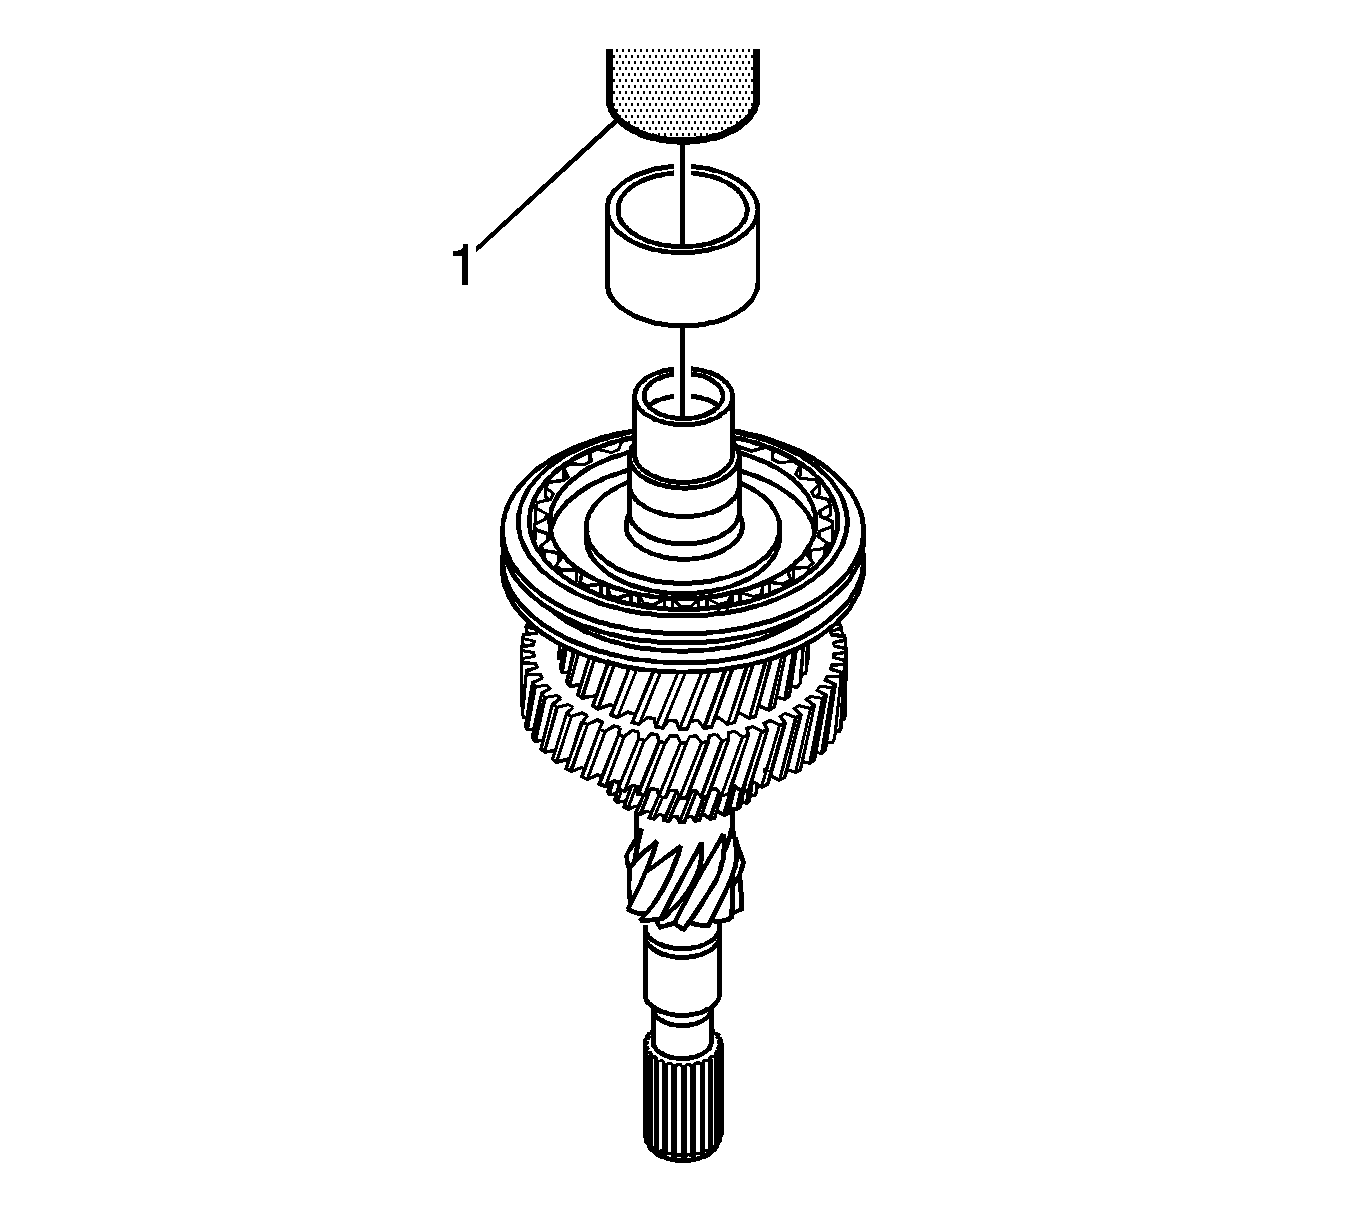
- Install the bearing collar using the DT-48198 (1) and a hydraulic press.
- Install the 5th gear blocking ring (3).
- Install the 2 needle bearings (2).
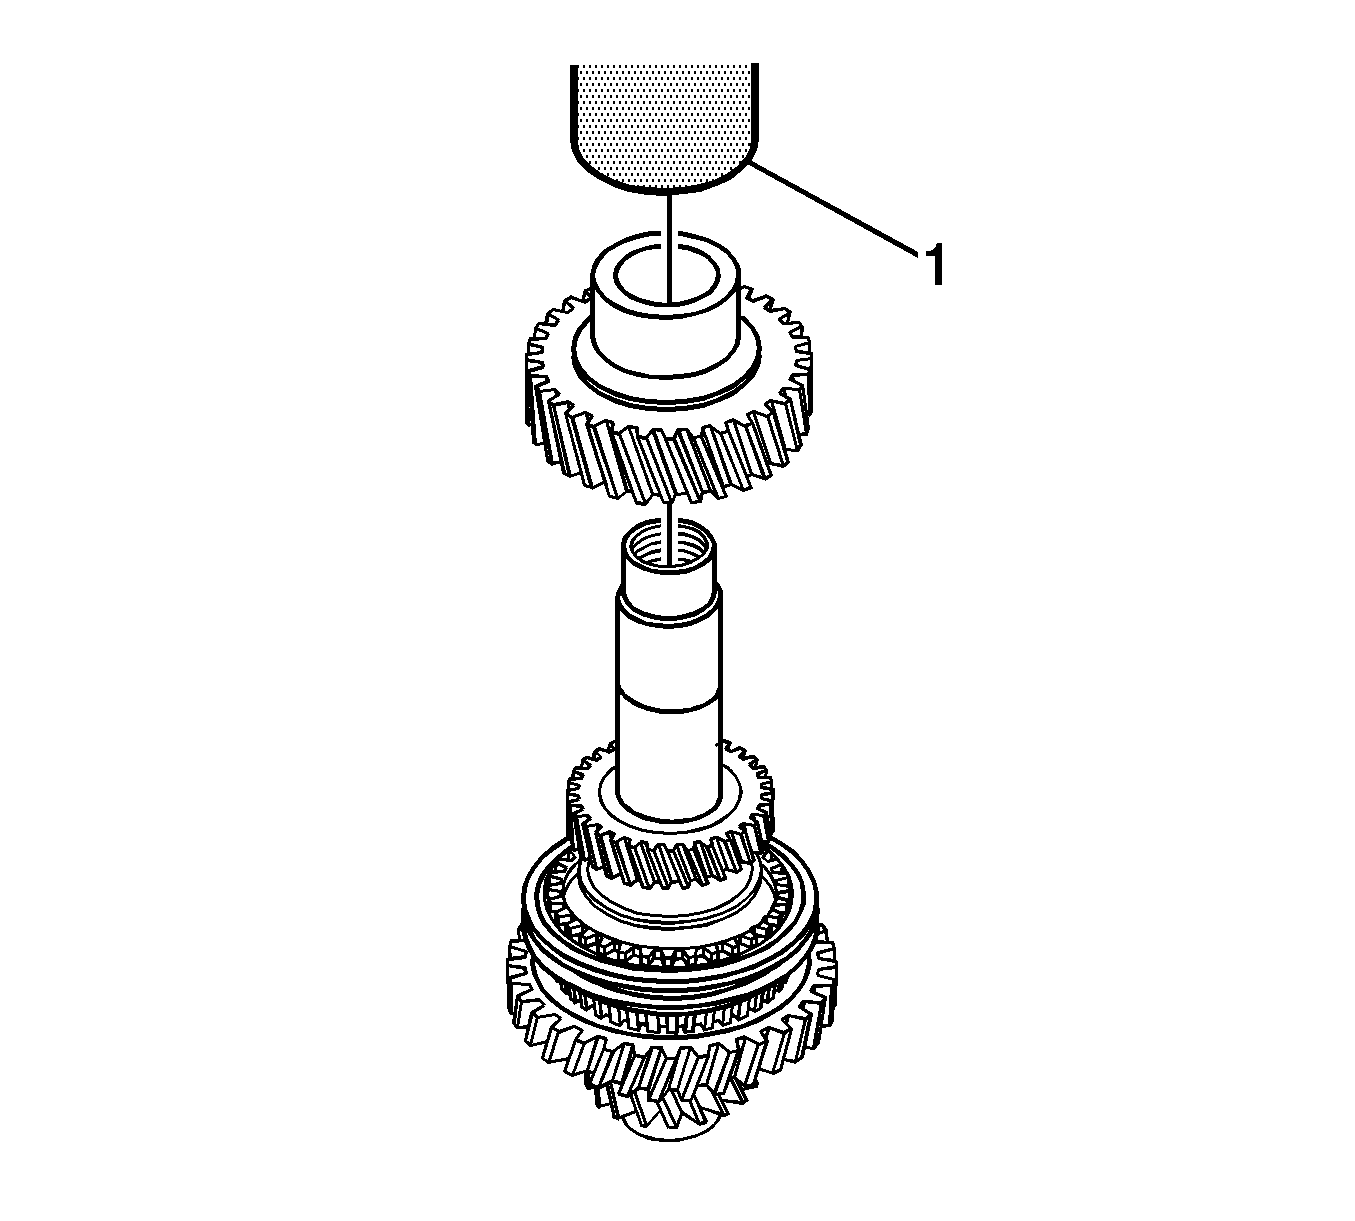
- Install the 5th gear (1).
Note: The 3rd gear will install very tight. Ensure that the mating surfaces are clean.
- Install the 3rd gear using the DT-48196 and a hydraulic press.
Note: The 4th gear will install very tight. Ensure that the mating surfaces are clean.
- Install the 4th gear using the DT-48196 (1) and a hydraulic press.
Note:
| • | Lubricate all components with transaxle fluid before installation. |
| • | The machined surface faces the needle thrust bearing. |
- Install the 5th gear using the DT-48197 (1) and a hydraulic press.

- Install the thrust bearing (2).
- Install the 2 needle bearings (1).
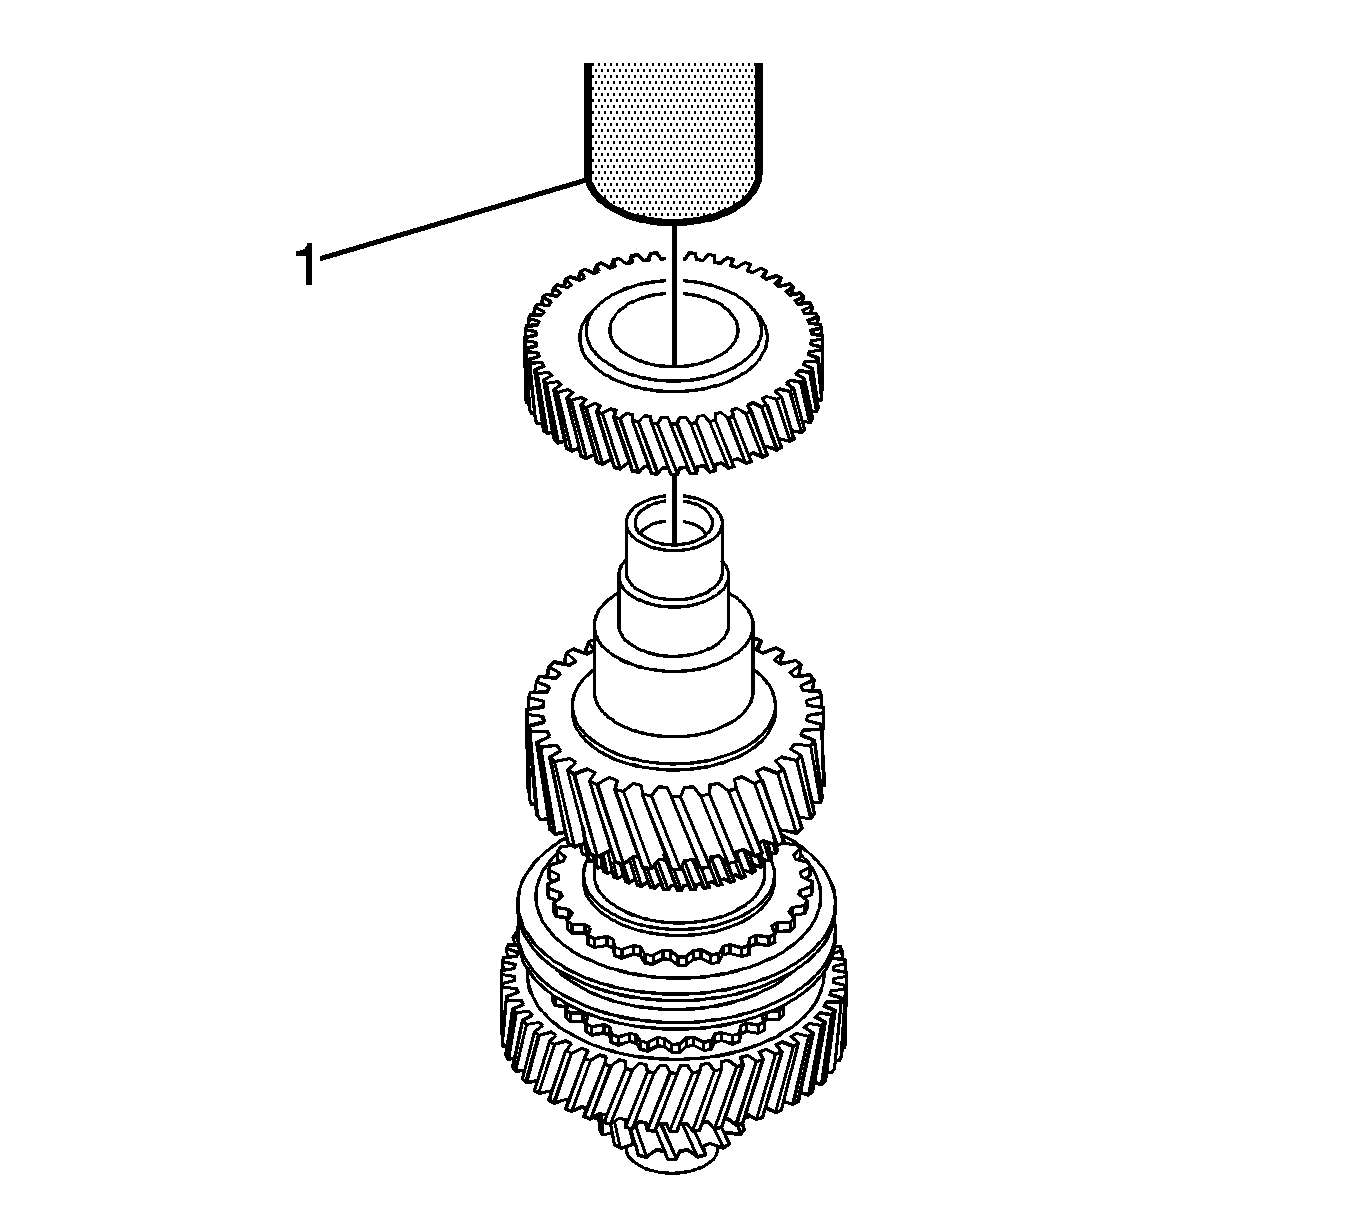
- Install the 3rd gear (4).
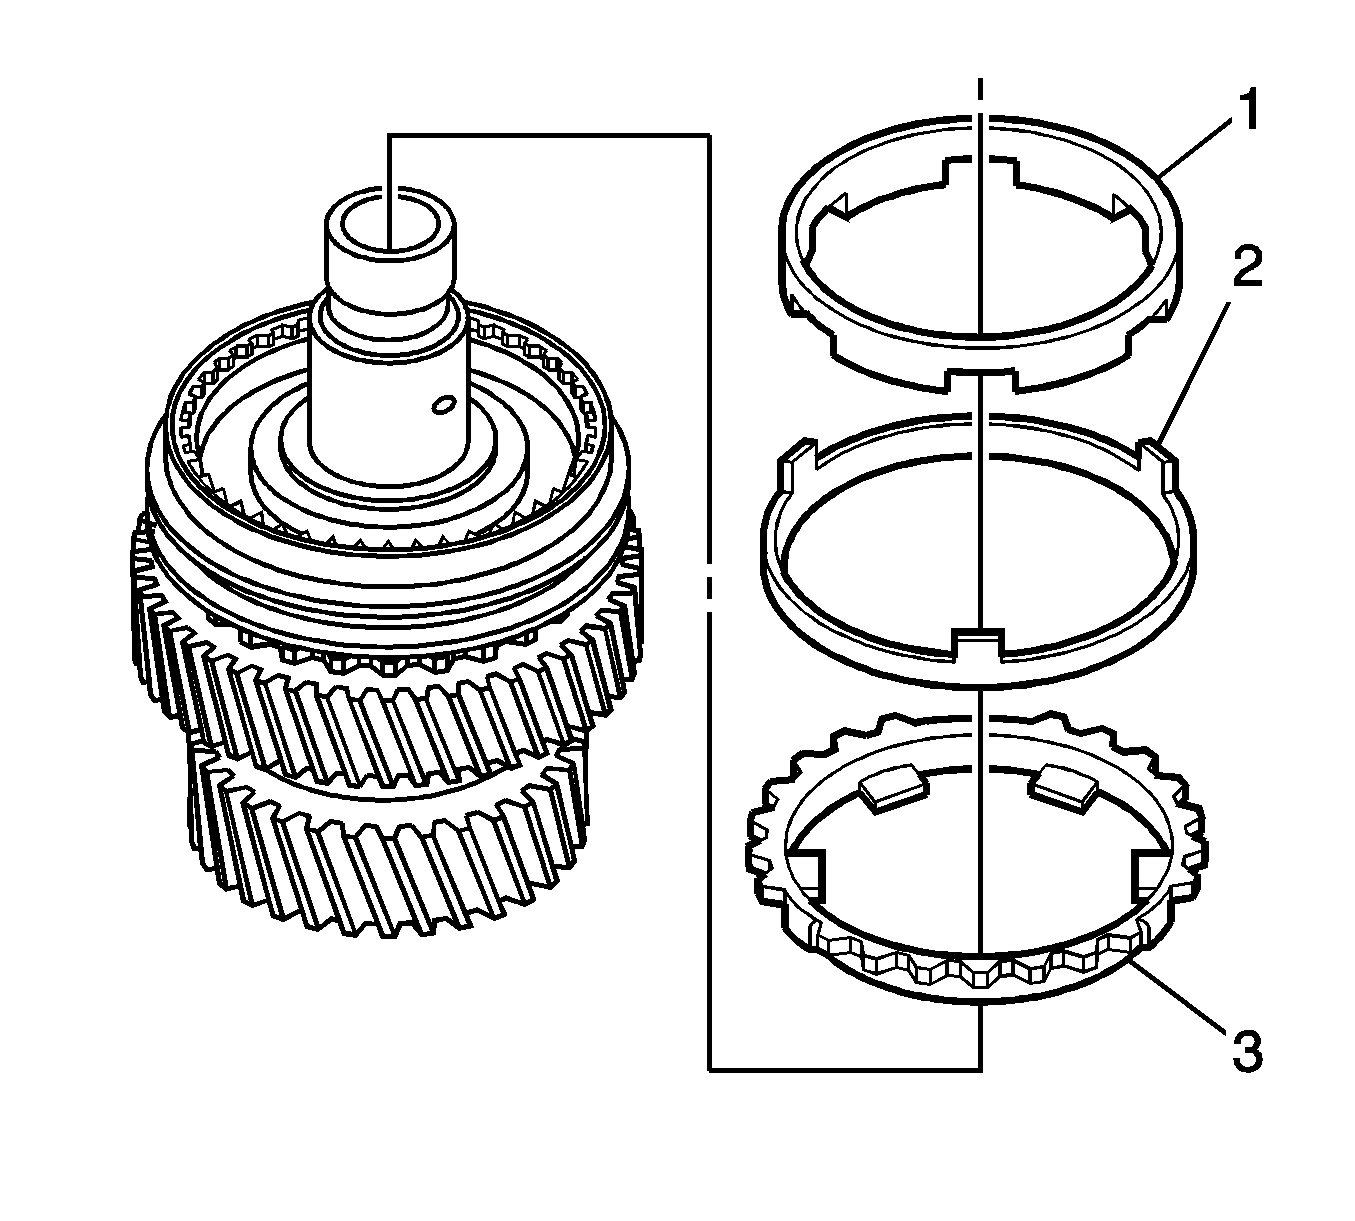
- Install the 3rd gear blocking ring (3).
- Install the thrust bearing (2).
- Install the thrust washer (1).
Note:
| • | The machined surface of the synchronizer faces the thrust washer. |
| • | Align the slots in the synchronizer with the gear blocking ring tabs. |
- Install the 3rd/4th synchronizer using the DT-48195 (1) and a hydraulic press.
- Install the bearing collar using the DT-48195 (1) and a hydraulic press.

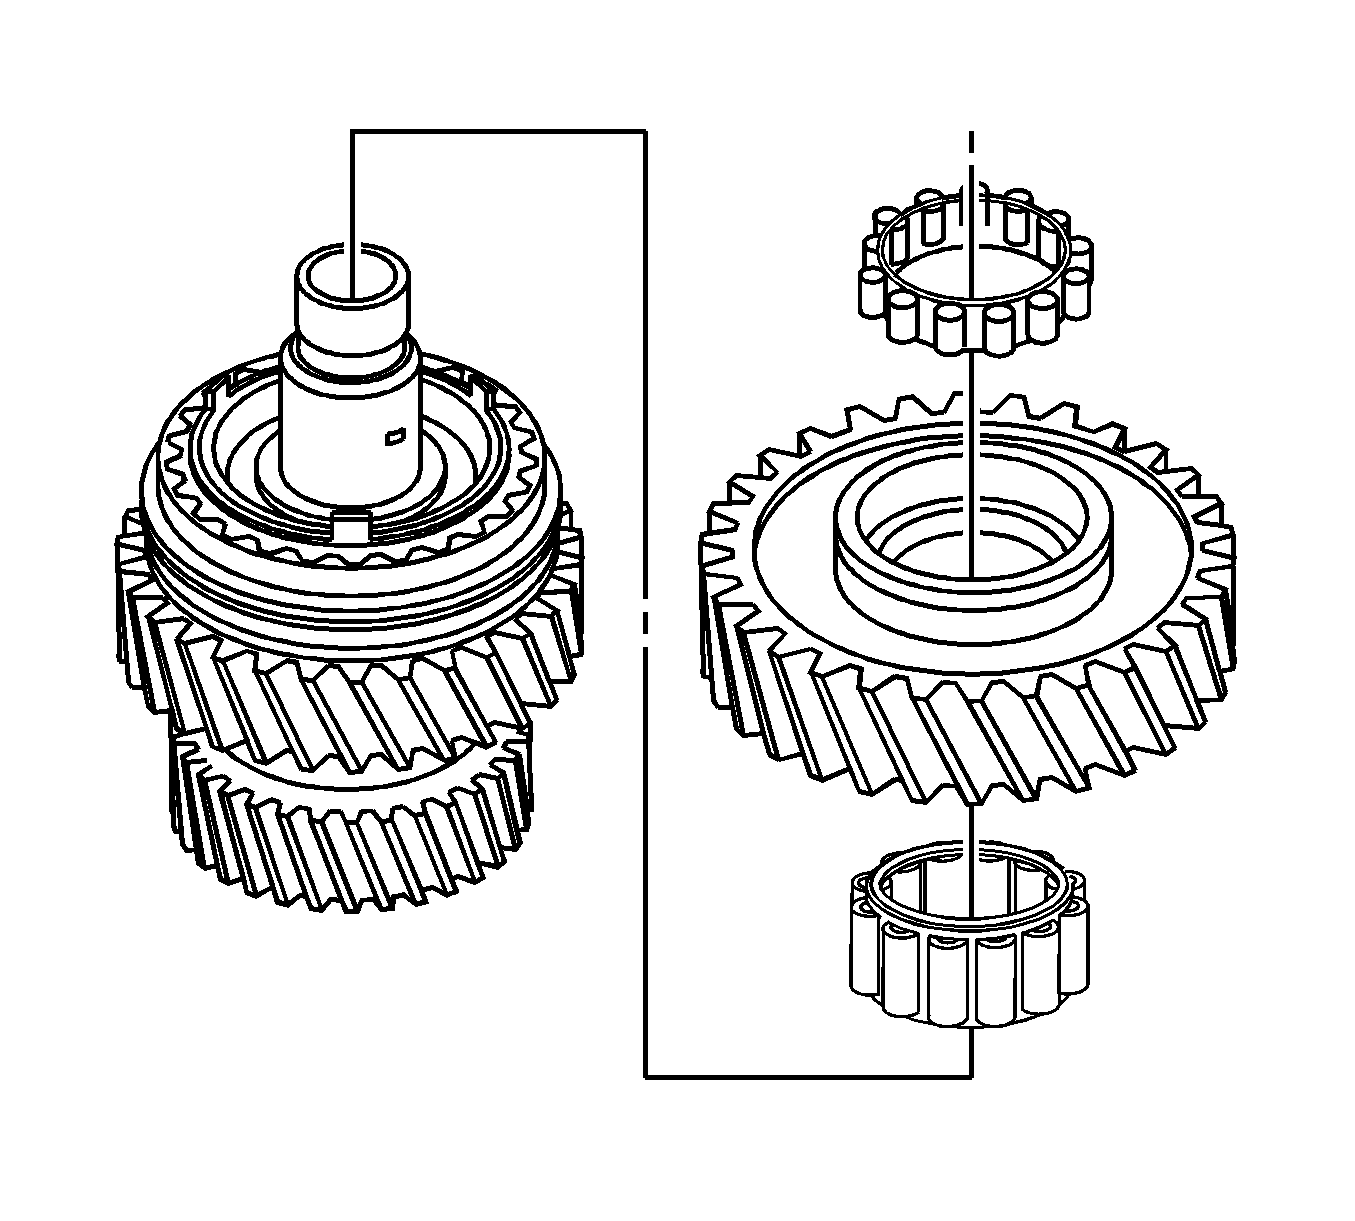
- Install the 4th gear blocking ring (4).
- Install the needle bearing (3).
- Install the 4th gear (2).
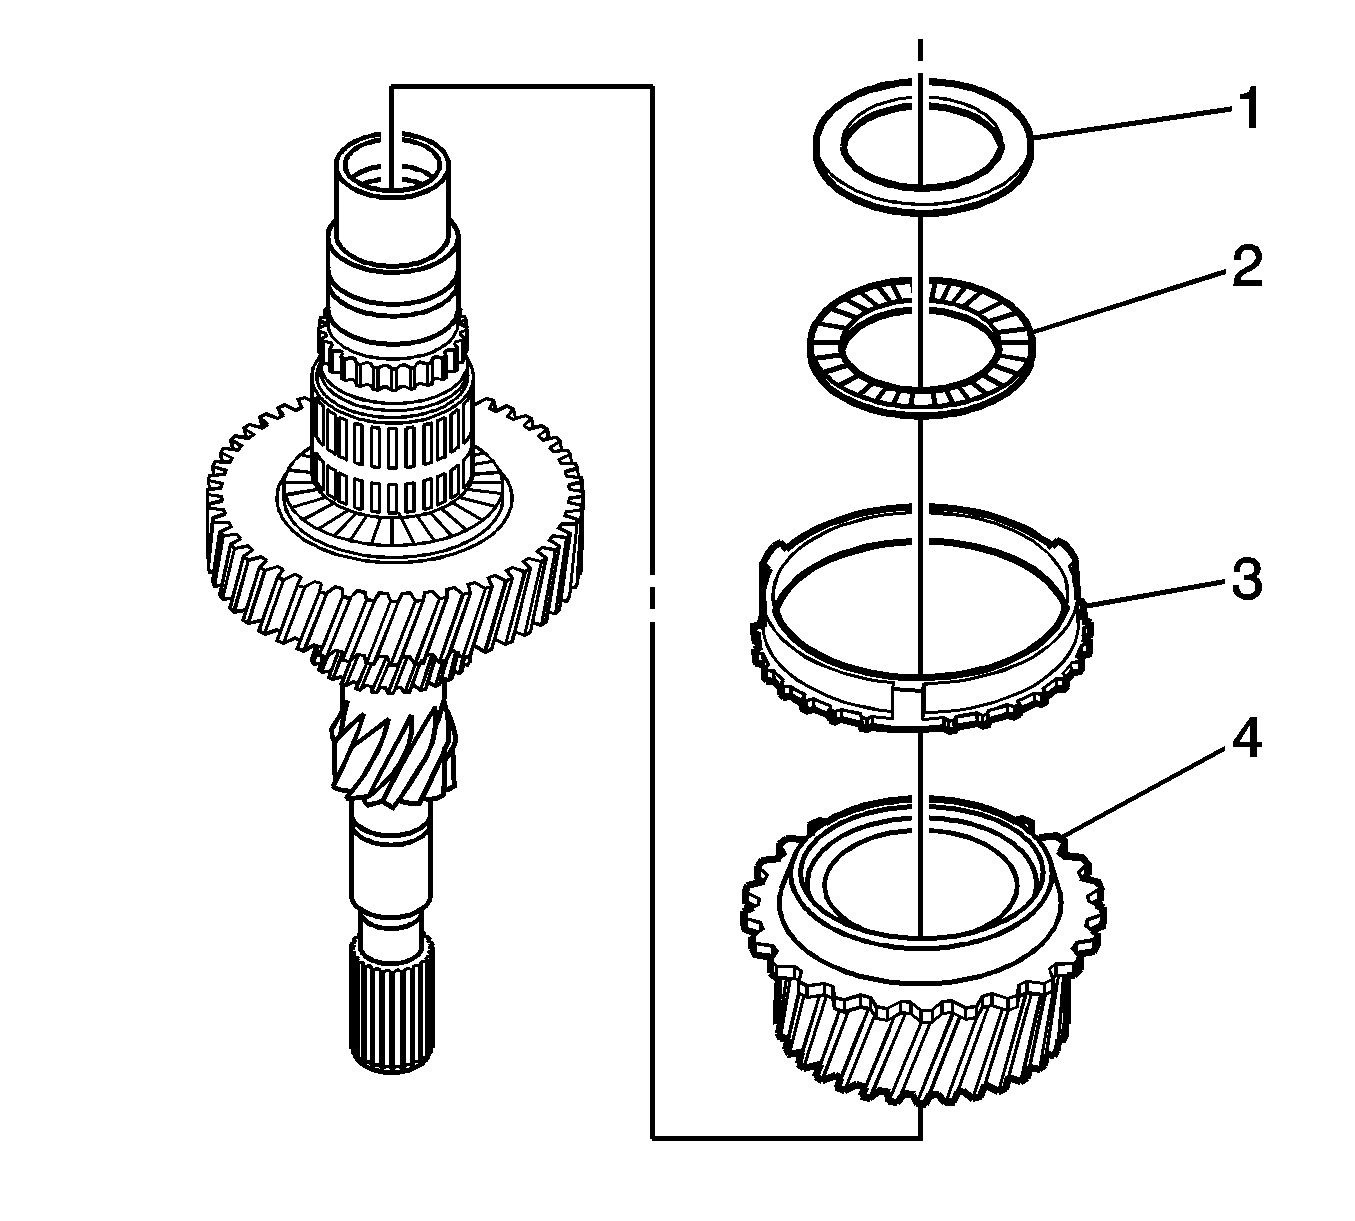
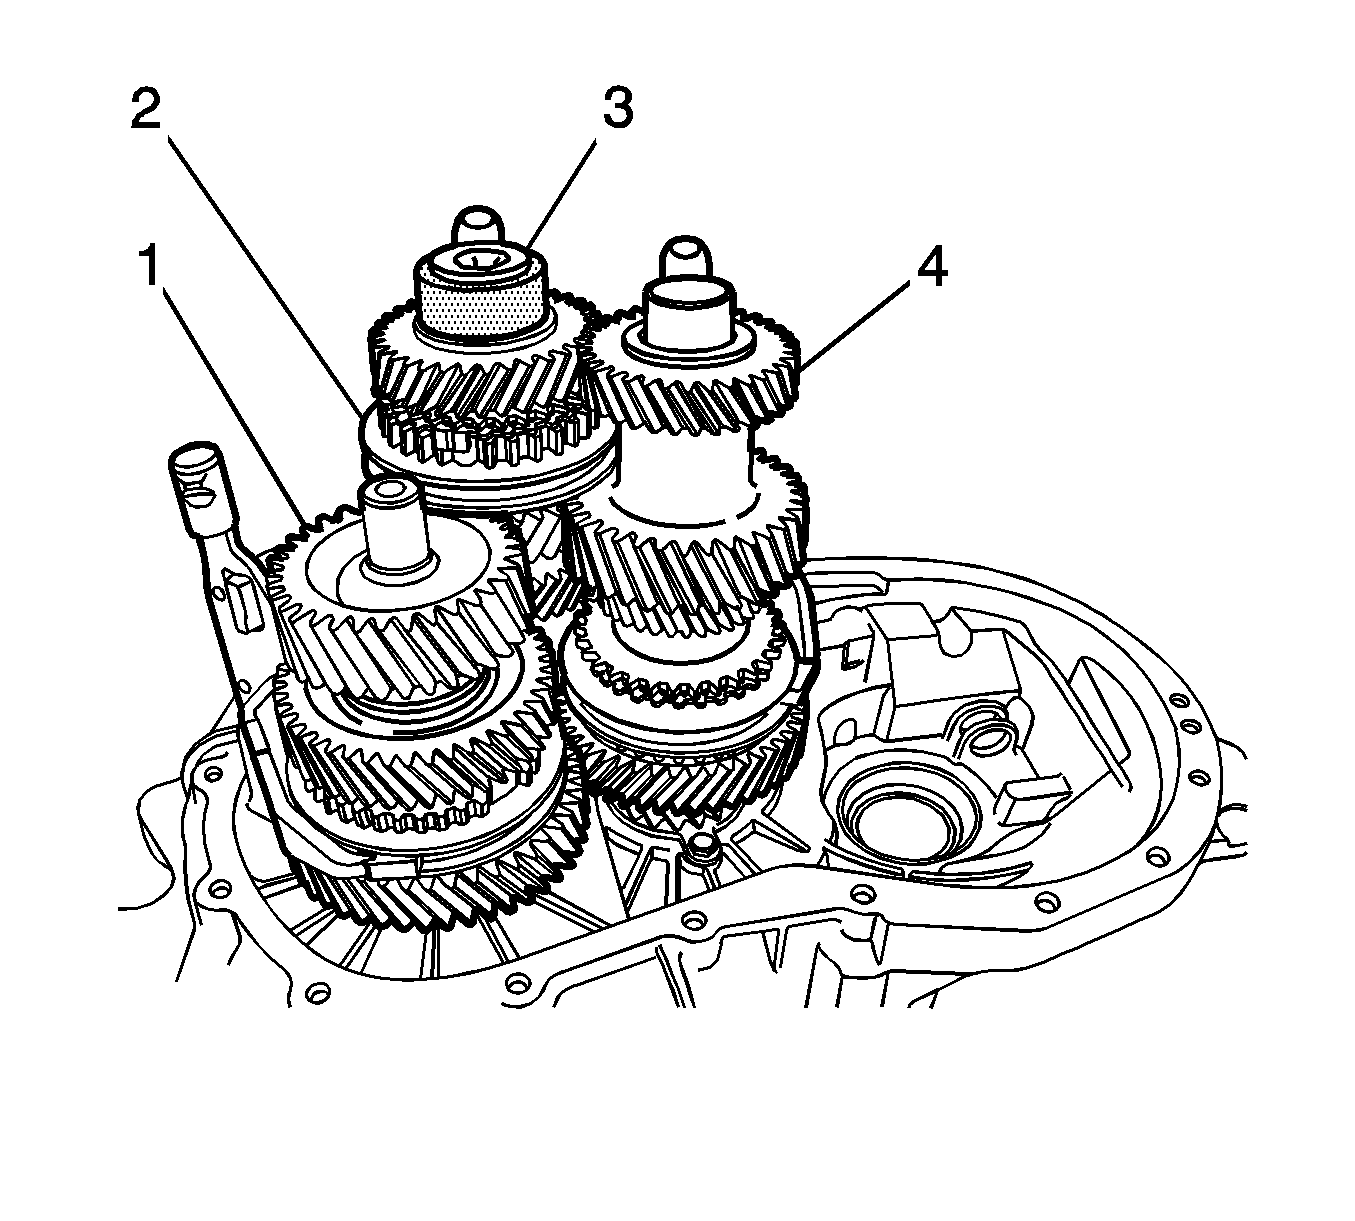
- Install the thrust washer (1).
Note: Lubricate all components with transaxle fluid before installation.
- Install the needle bearing (5).
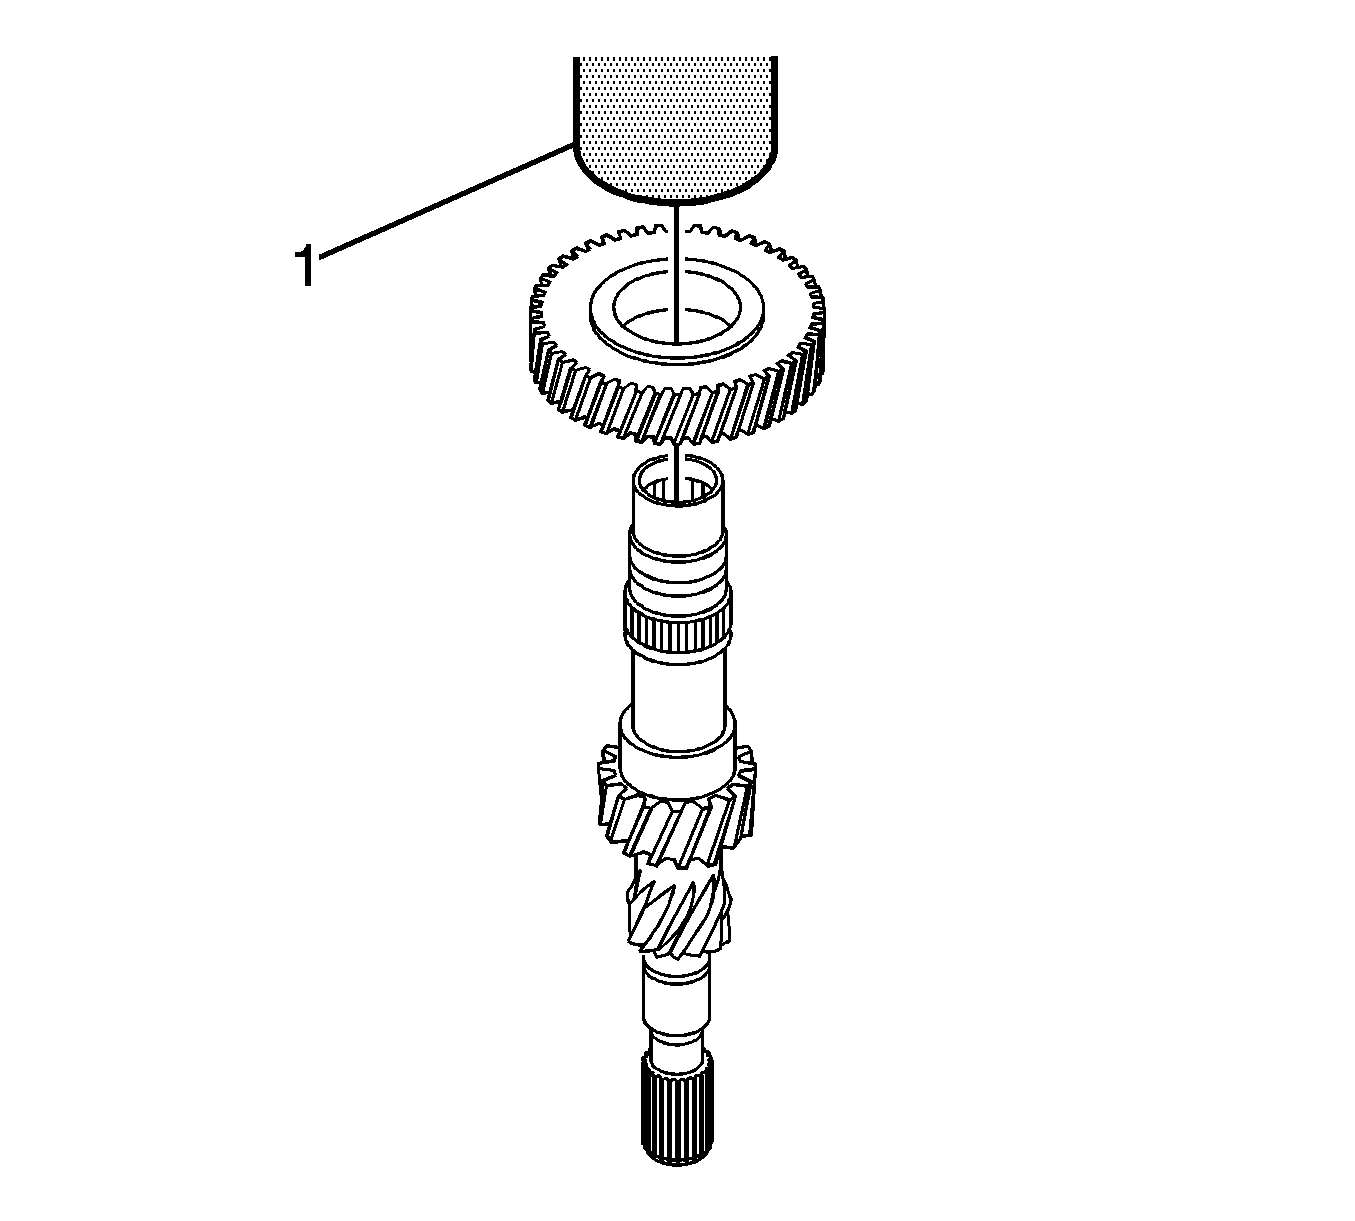
- Install the 2nd gear (4).
- Install the 2nd gear inner cone (3).
- Install the 2nd gear blocking ring (2).
- Install the 2nd gear outer cone (1).
Note:
| • | Make sure to properly align the synchronizer to the gear and notches in the blocking ring. |
| • | Observe the orientation of the synchronizer. The shoulder of the synchronizer faces 1st gear. |
- Install the 1st/2nd synchronizer using the DT-48193 (1) and a hydraulic press.
- Install the thrust washer (2) and the bearing collar (1) using the DT-48193 and a hydraulic press.
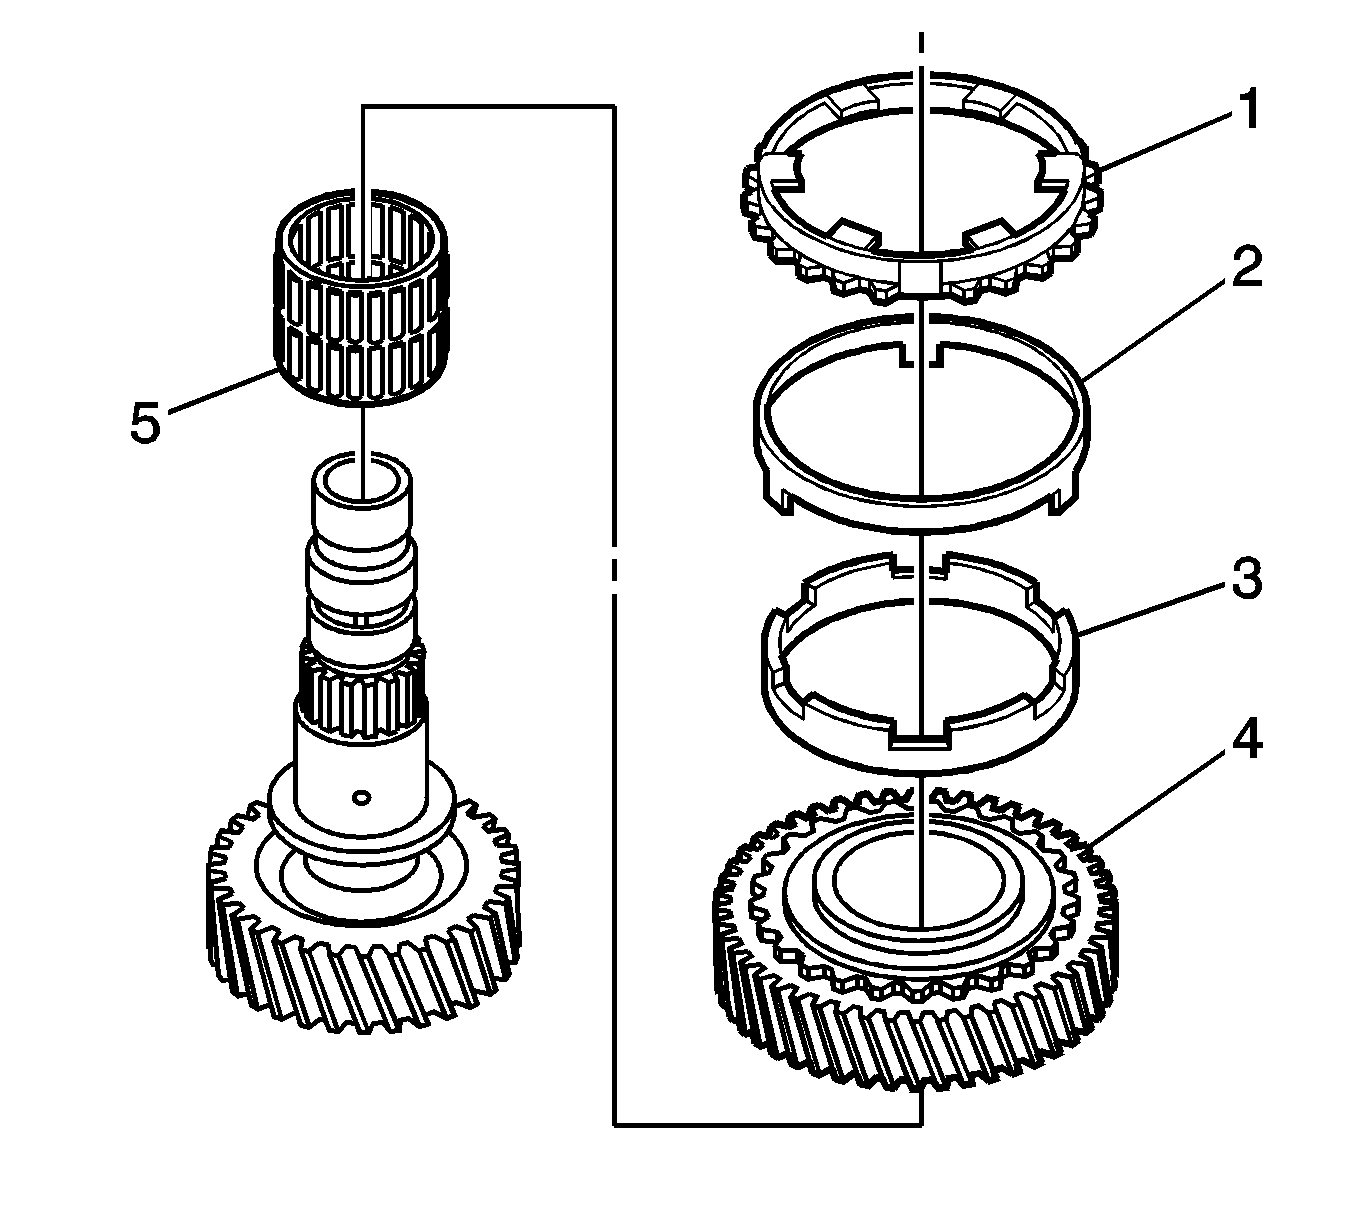
- Install the 1st gear outer cone (3).
- Install the 1st gear blocking ring (2).
- Install the 1st gear inner cone (1).
Note: The steps in both roller bearings must fall into the 1st gear.
- Install the roller bearing.
- Install the 1st gear.
- Install the roller bearing.
- Install the thrust washer using the DT-48193 (1) and a hydraulic press.
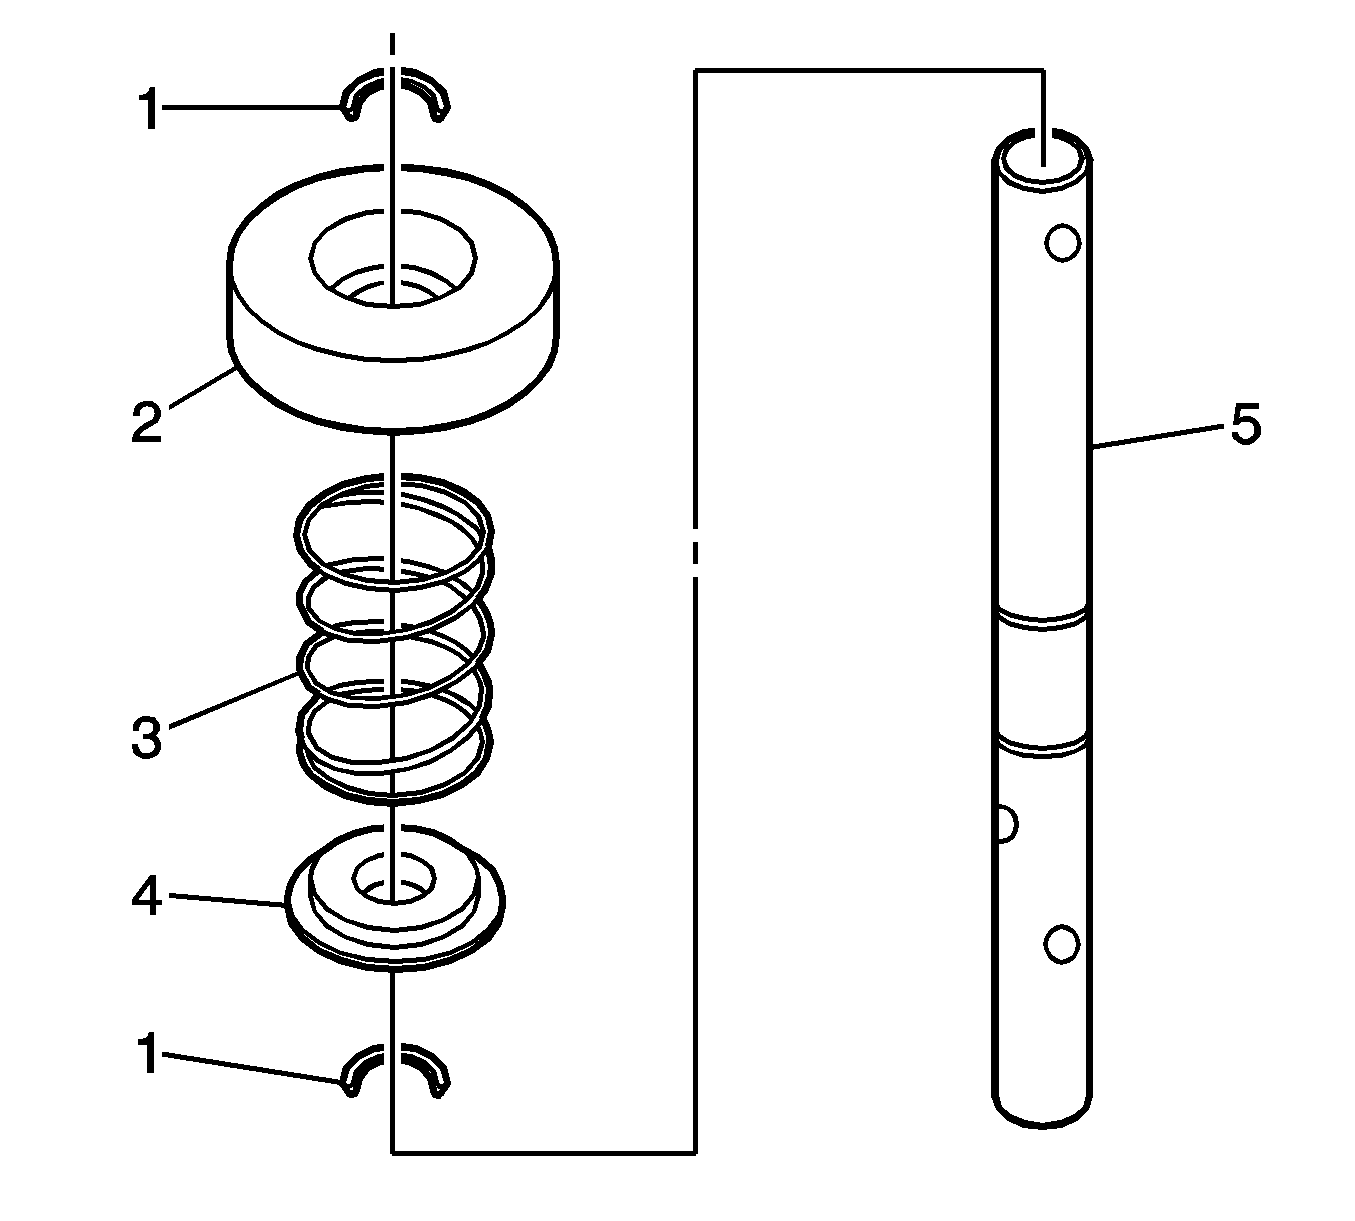
- Install the angle disc (4) onto the shift rod (5).
- Install the 1st/2nd pressure spring (3).
- Install the inner spring seat (2).
- Install new snap rings (1).
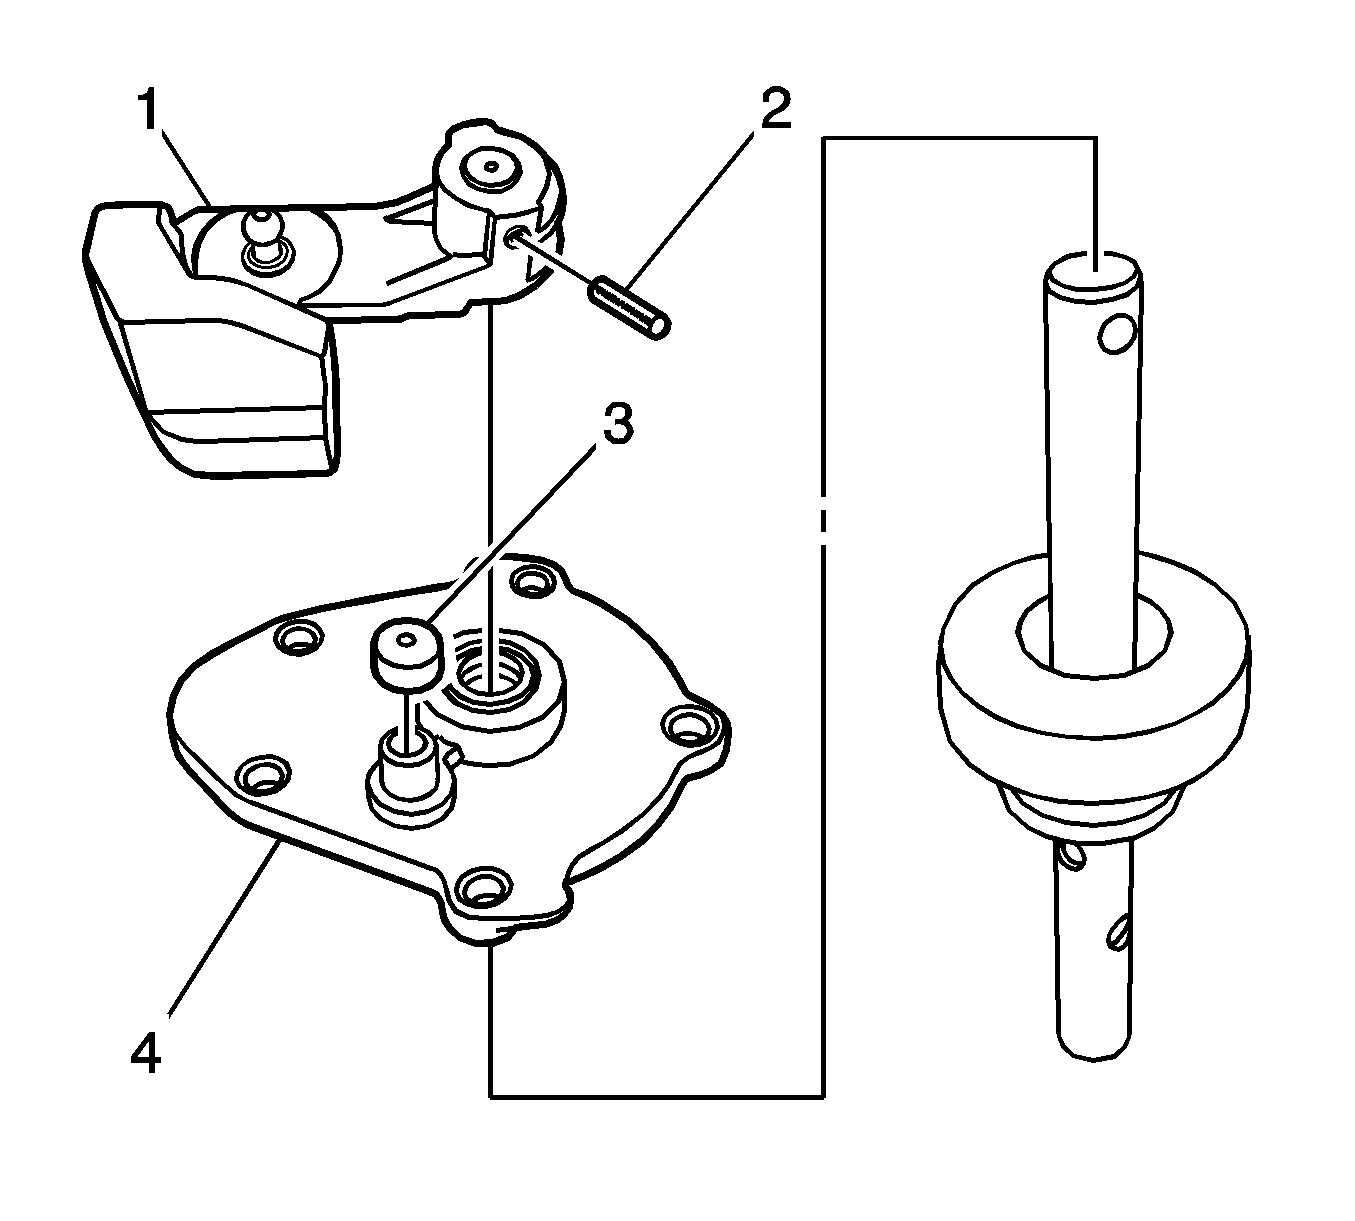
- Install the shift cover (4).
- Install the vent cap (3).
- Install the shift lever (2).
- Install a new coiled pin (1).
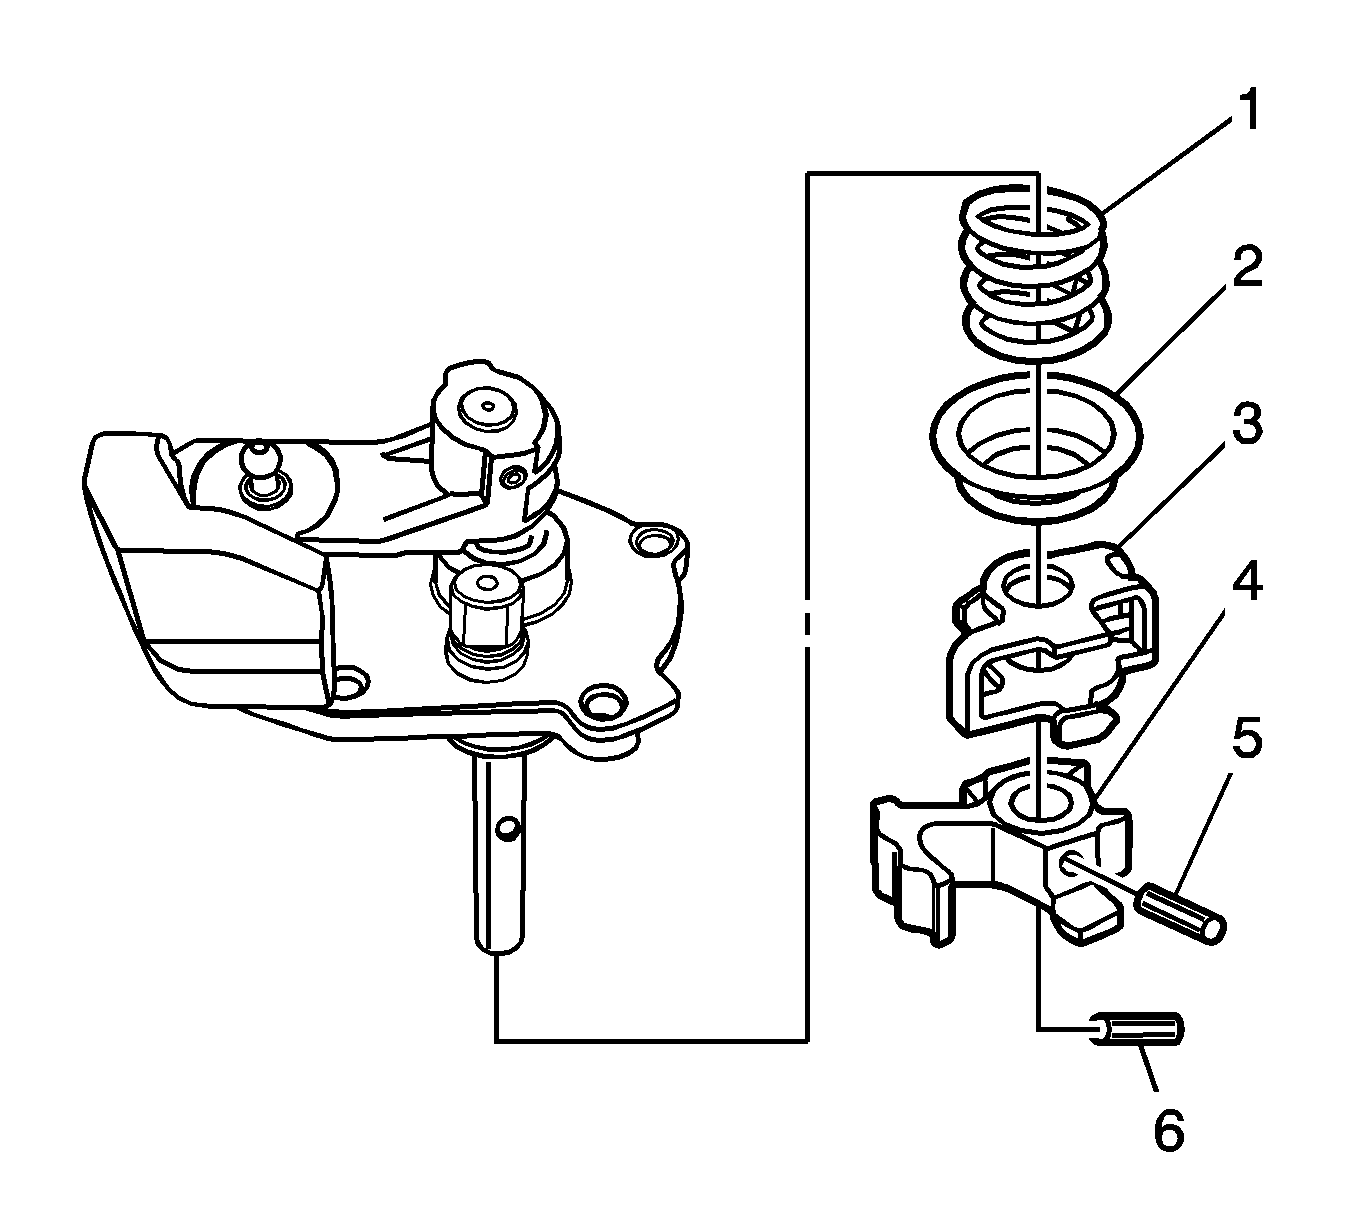
- Install the 5th/reverse pressure spring (1).
- Install the outer spring seat (2).
Note: Properly support the shift finger (4) when installing the roll pin. Do not support the shift finger (4) with the shift interlock (3).
- Install the shift interlock (3) into the shift finger (4).
- Install a new coiled pin (5).
- Install a new coiled pin (6).
- Install a new shaft seal ring to the clutch housing using the
DT-48179
and the DT-48187.
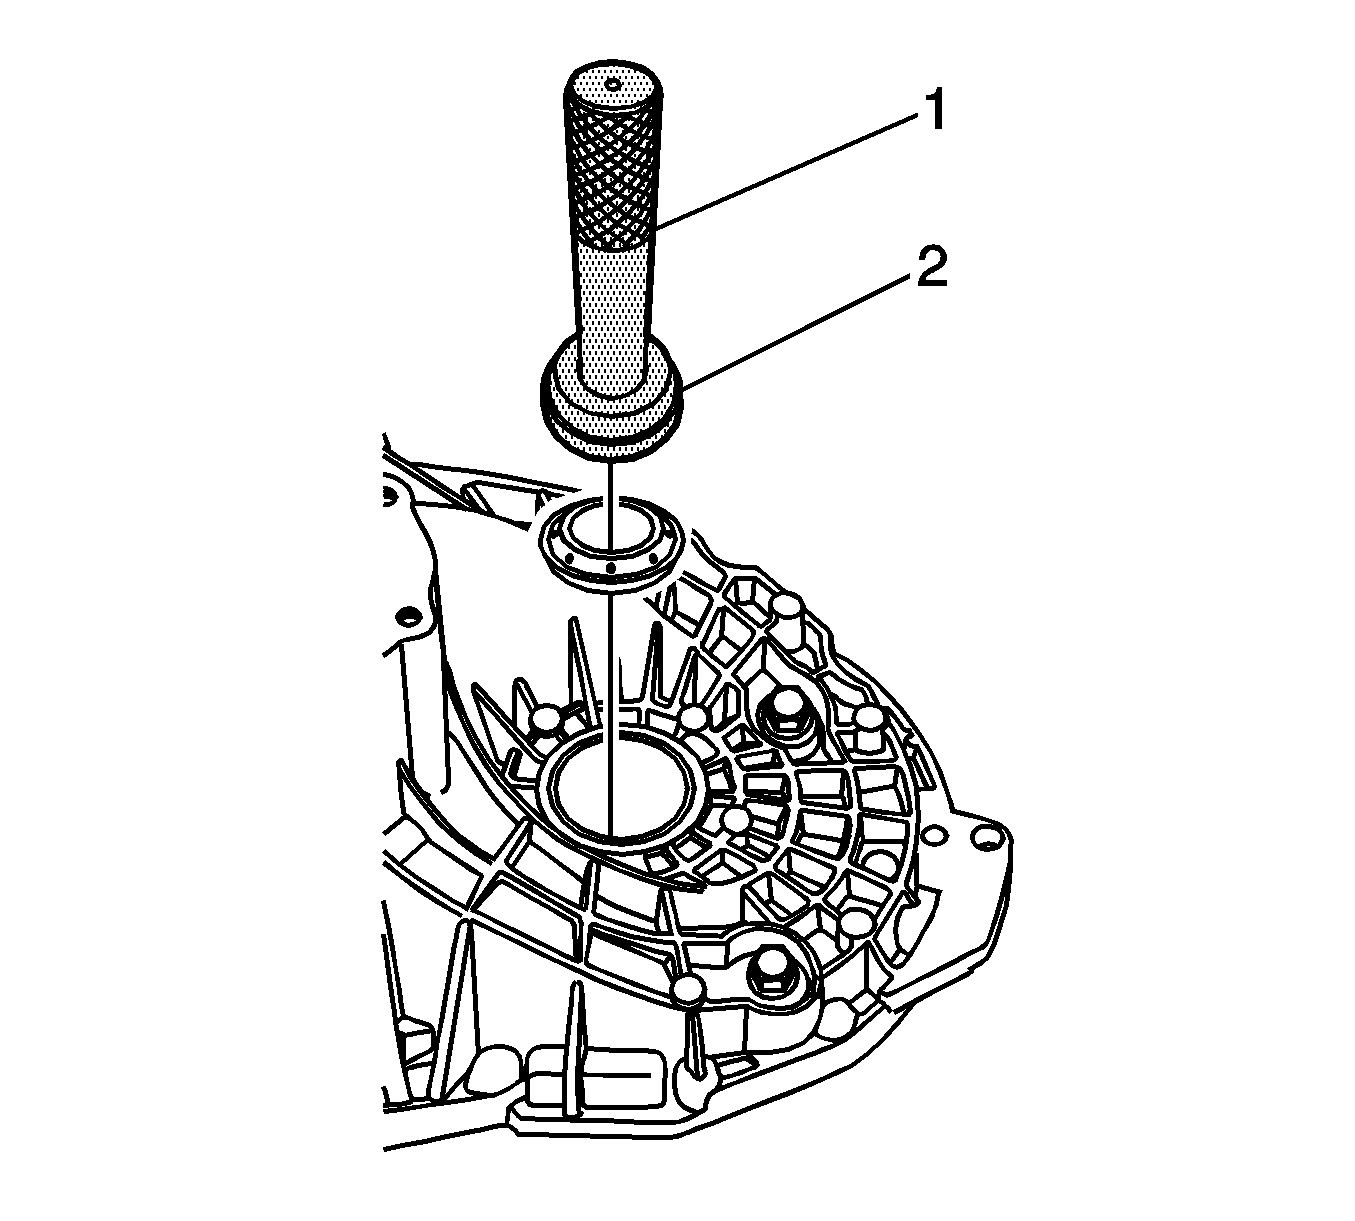
- Install the interm shaft groove ball bearing to the clutch housing using the
DT-48179
(1) and the DT-48185 (2).
- Install the snap ring to the interm shaft groove ball bearing.
- Install the input shaft roller bearing to the clutch housing using the
DT-48179
(1)
and the DT-48184 (2).
- Install a new shaft seal ring to the transaxle housing using
DT-48179
(1)
and the DT-48187 (2).
- Install the input shaft and output shaft groove ball bearings into the transaxle housing using
DT-48179
(1) and the DT-48181 (2).
- Install the needle sleeve flush with the casting in the transaxle housing using
DT-48179
(2)
and the
DT-48182
(1).
Caution: Refer to Fastener Caution in the Preface section.
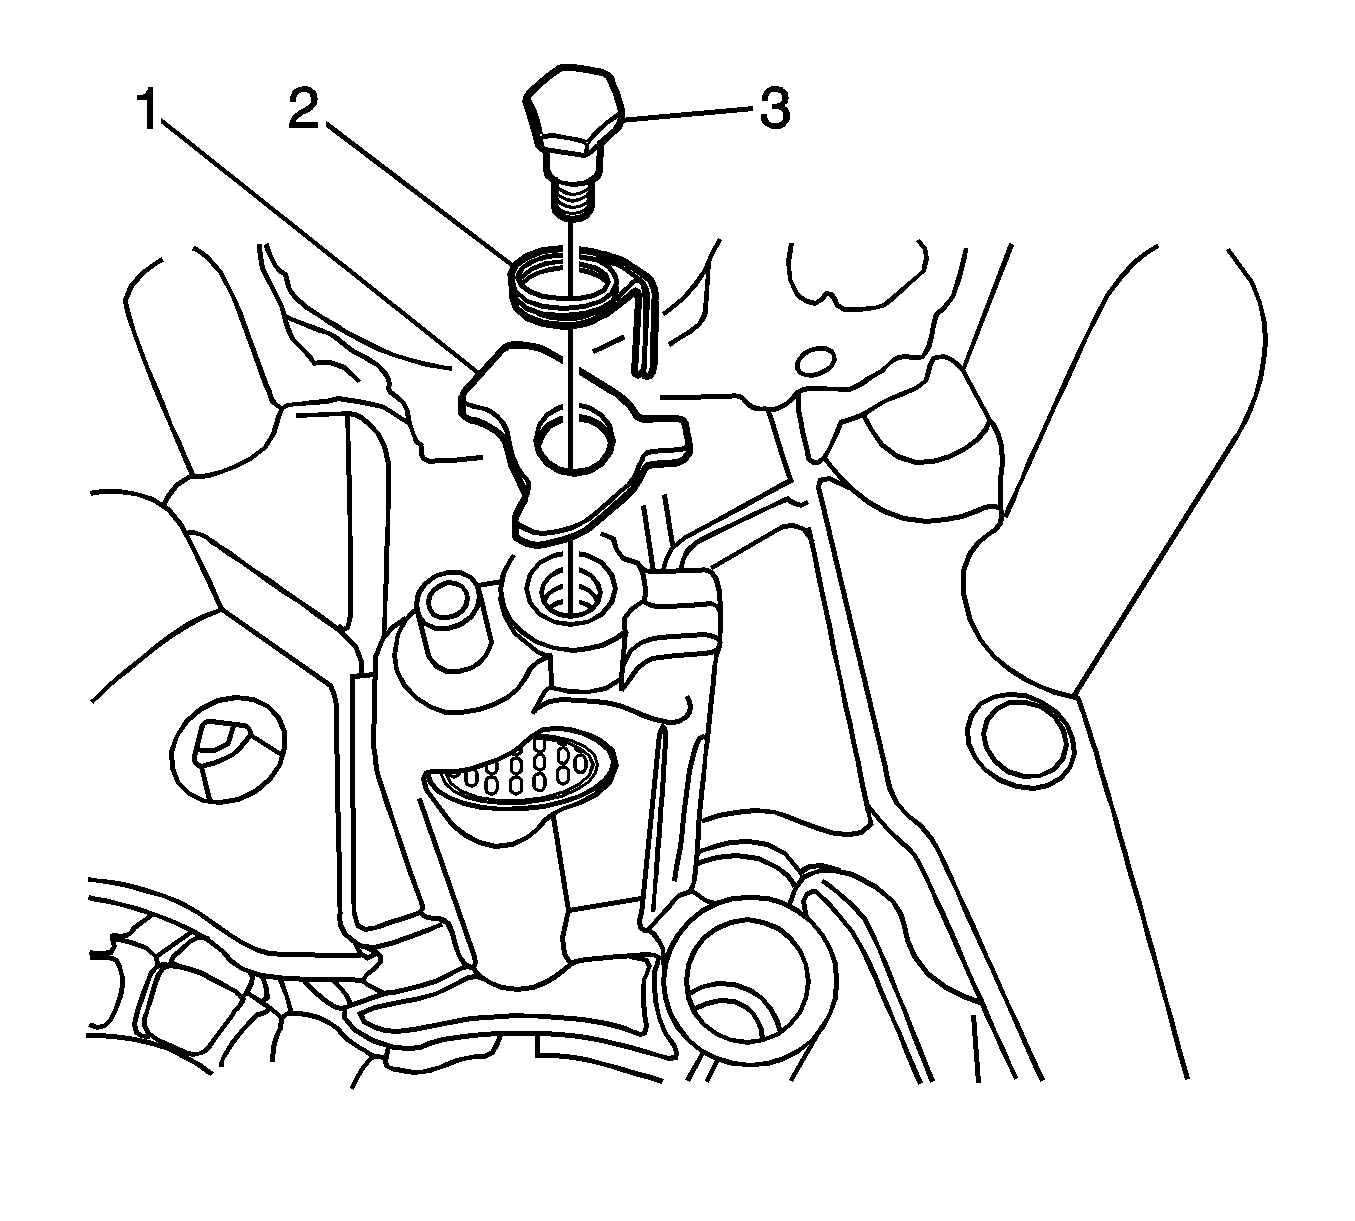
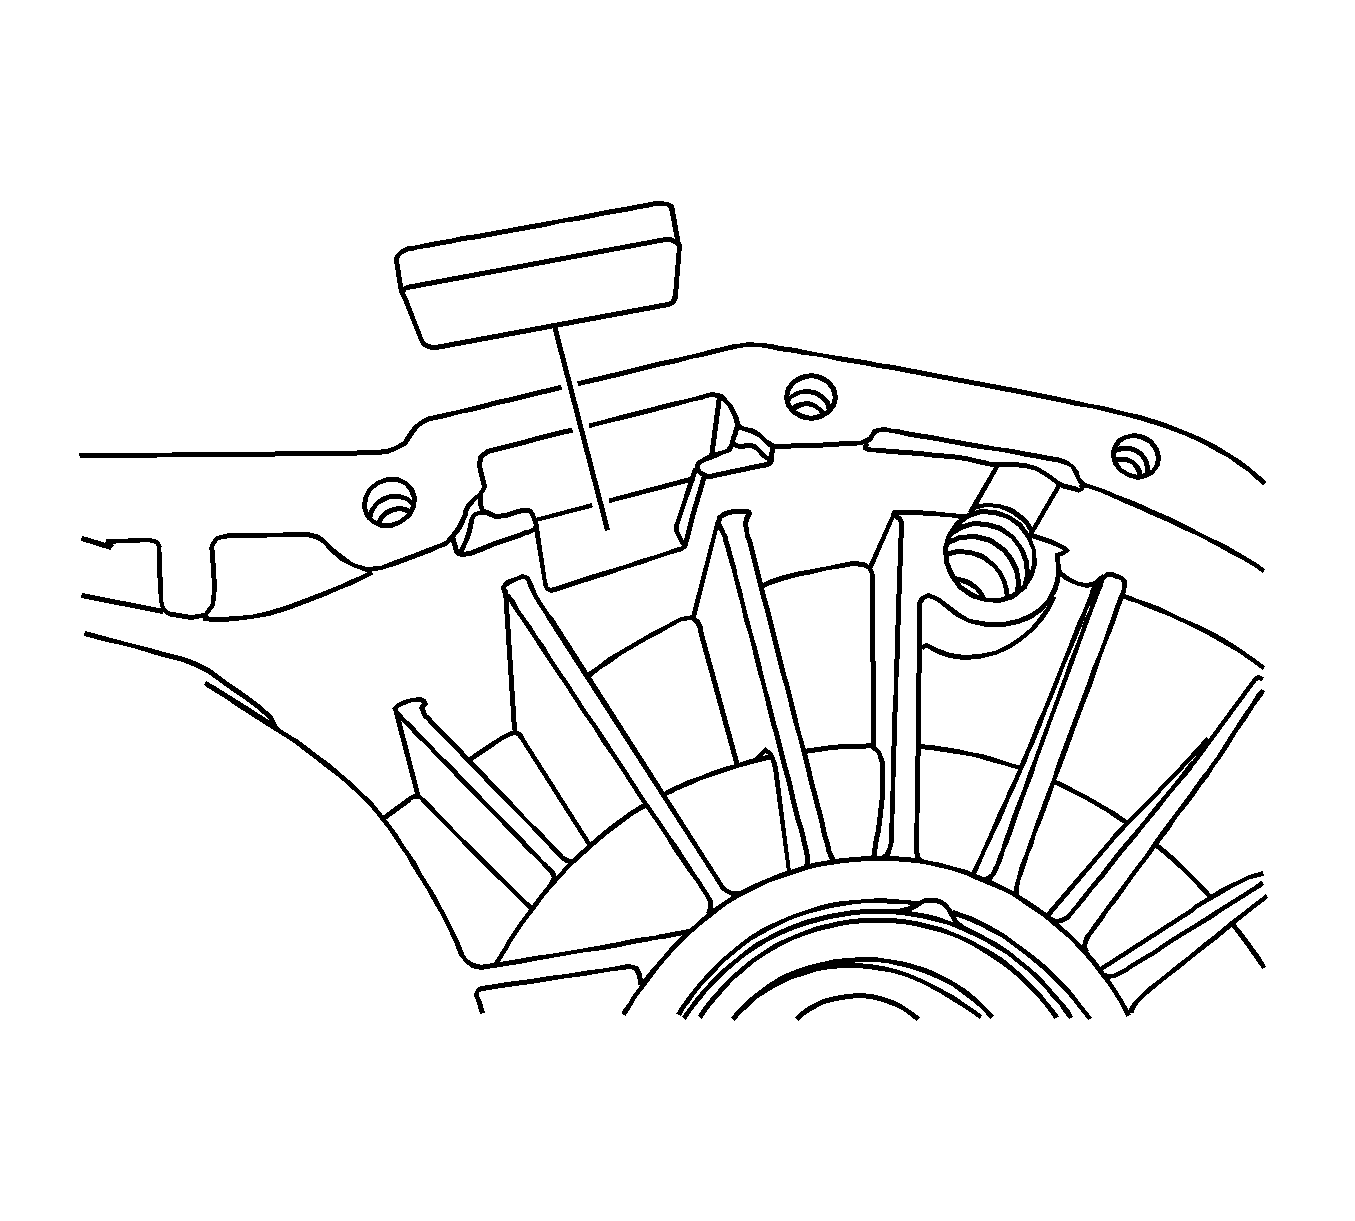
- Install the reverse shifting blocker (1), the torsion spring (2), and a new thread pin (3) to the transaxle housing and tighten to
6-9 N·m (53-80 lb in).
Note: Check the direction of the roller bearing.
- Install the output shaft roller bearing to the clutch housing.
- Install interm (1), input (2), and output (3) shaft assembly with the respective shift forks in the clutch housing.
| 62.1. | Install the DT-48190 and the input shaft retainer plug. |
| 62.2. | Install the interm (1) and input (2) shaft assembly with the respective shift forks. |
| | Note: Position the interm shaft to the groove ball bearing side.
|
| 62.3. | Install the output shaft assembly and the shift fork. |
| 62.4. | After checking the gear engagement, install each shaft assembly completely. |
| 62.5. | Remove the DT-48190 and the input shaft retainer plug. |
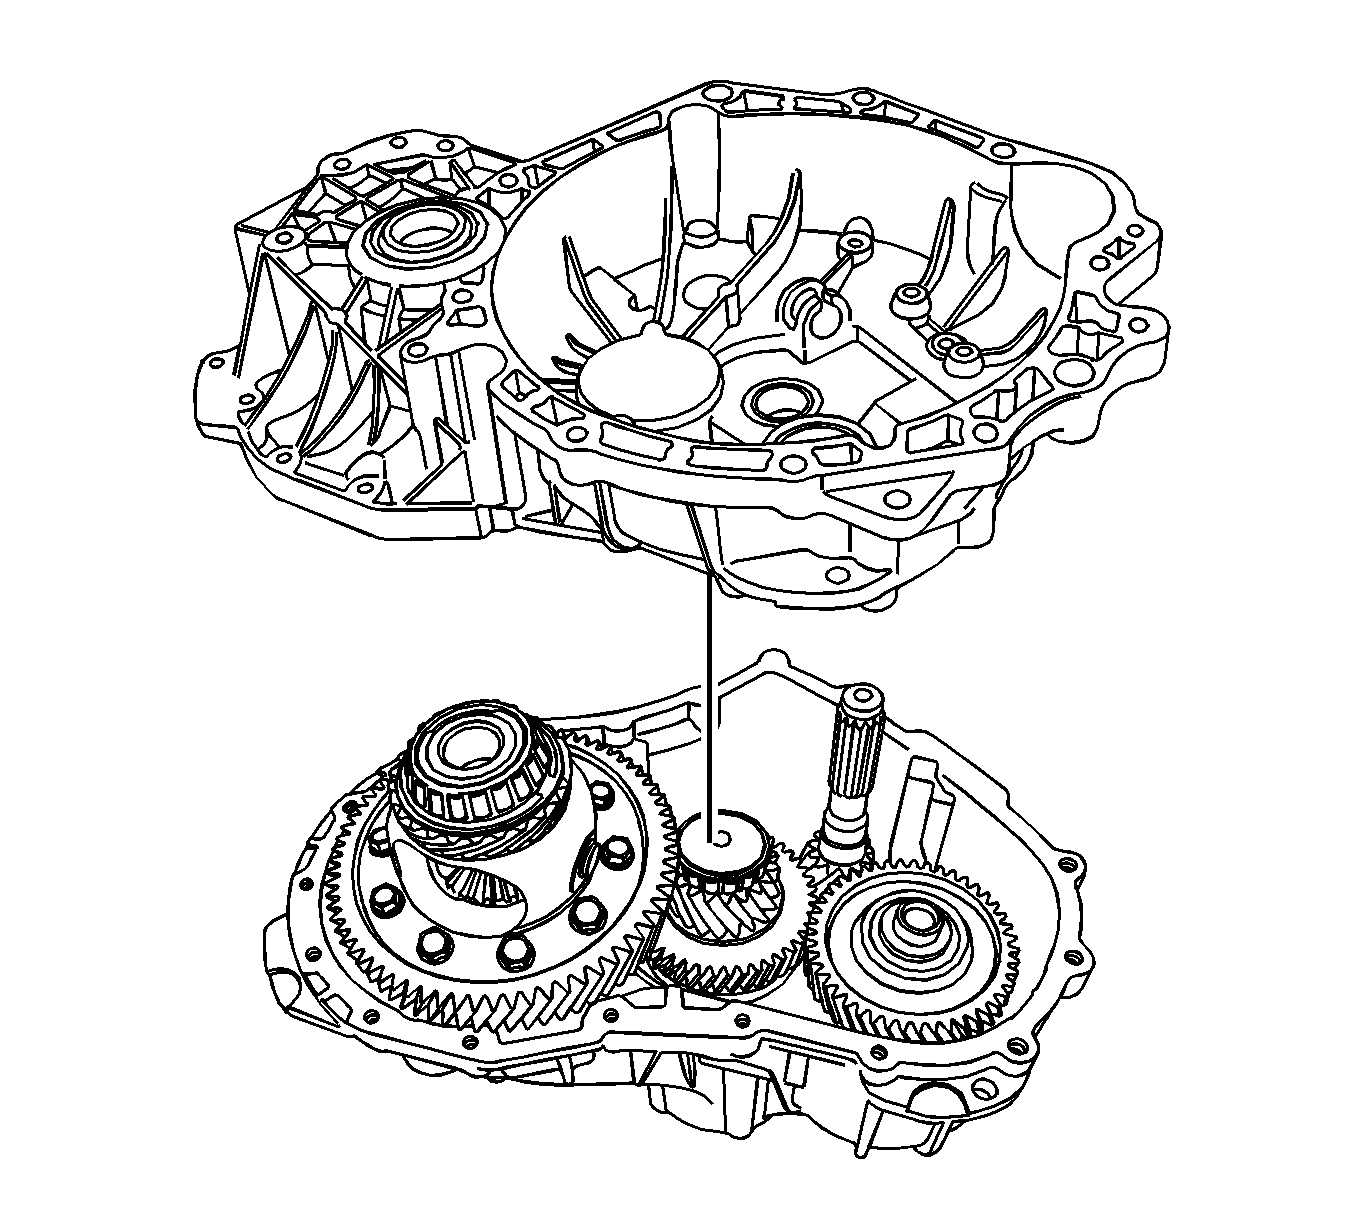
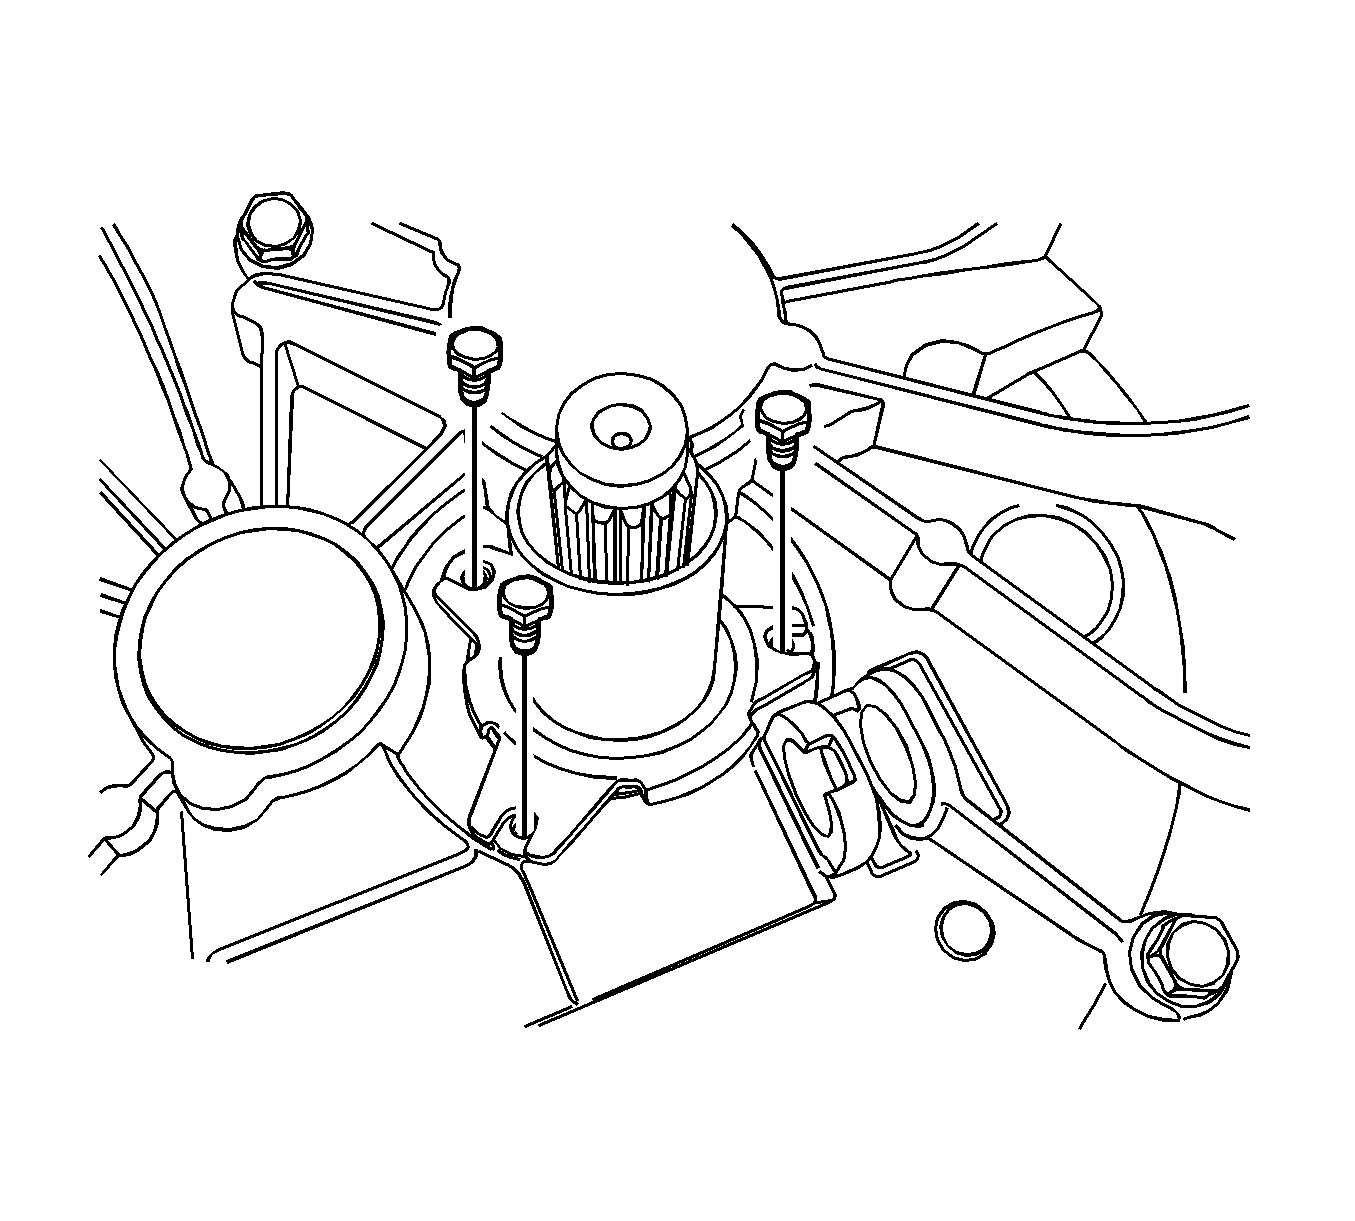
- Install the transaxle housing on the clutch housing.
| 63.1. | Input and output shaft must engage in the groove ball bearings in the transaxle housing. |
| 63.2. | The interm shaft and the shift forks must sit in their opposing bearings in the transaxle housing. |
| | Note: If large forces are necessary when actuating the DT-48187, separate the transaxle housing and the clutch housing again and check positioning of the shaft and shift forks. Repeat operation.
|
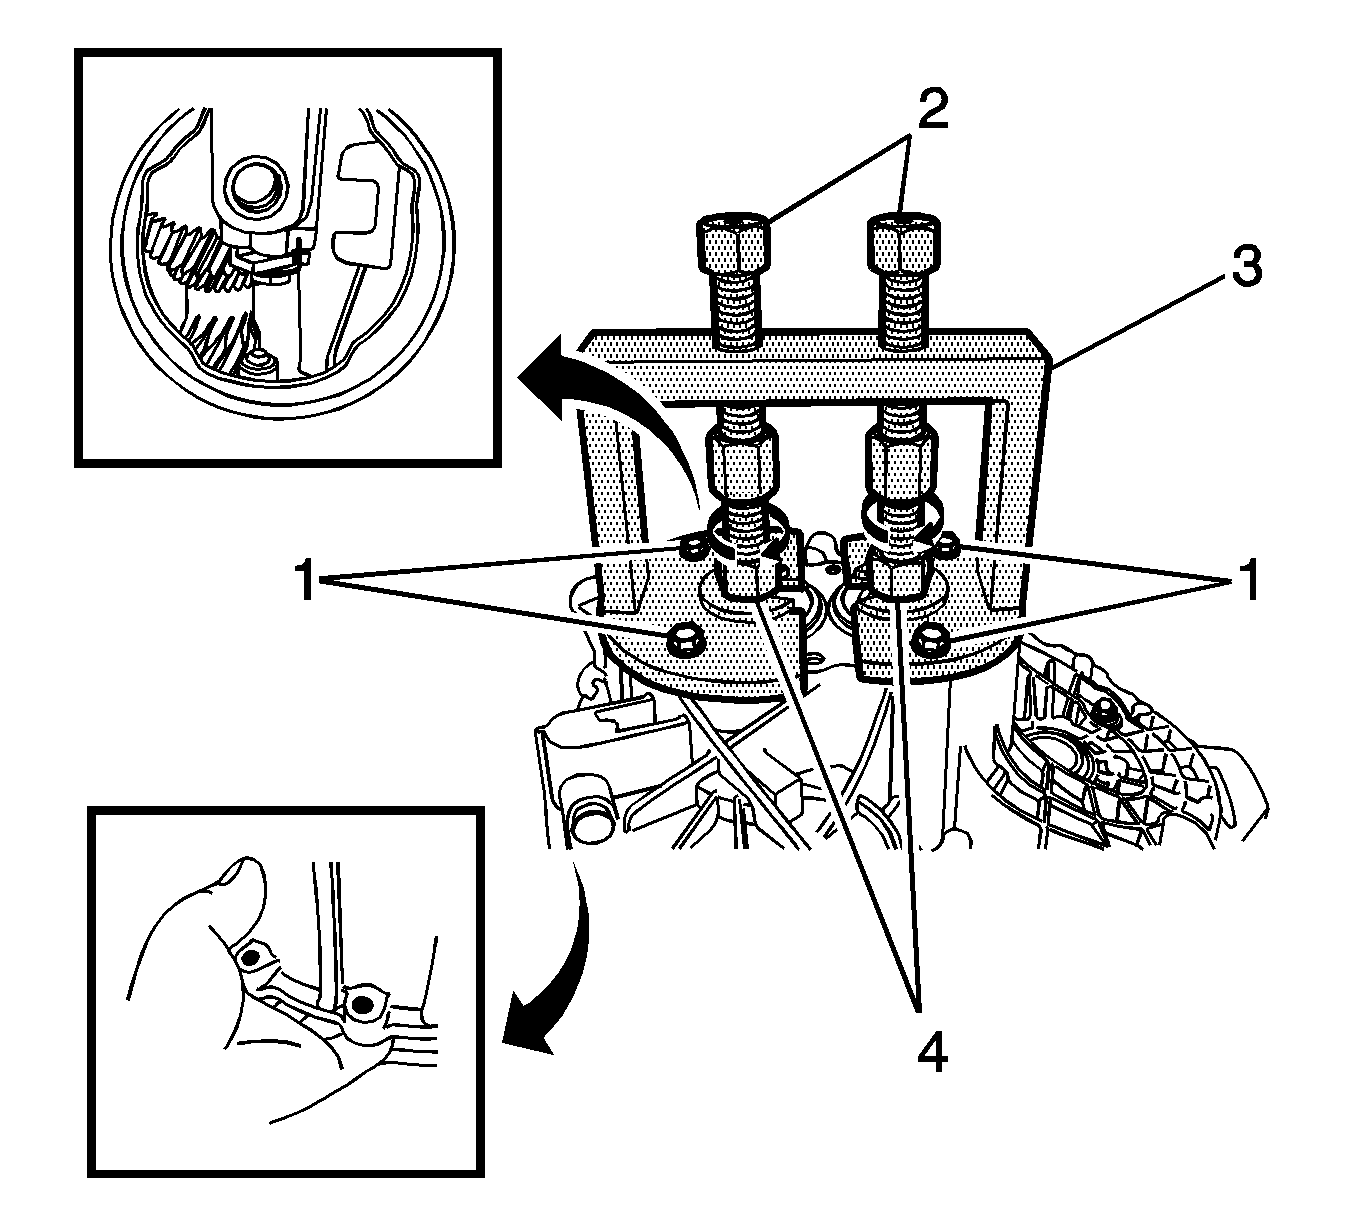
| 63.3. | Install the DT-48187 on the transaxle housing. |
| • | Tighten the 4 bolts (1). |
| • | Screw the spindles into the input and output shaft. |
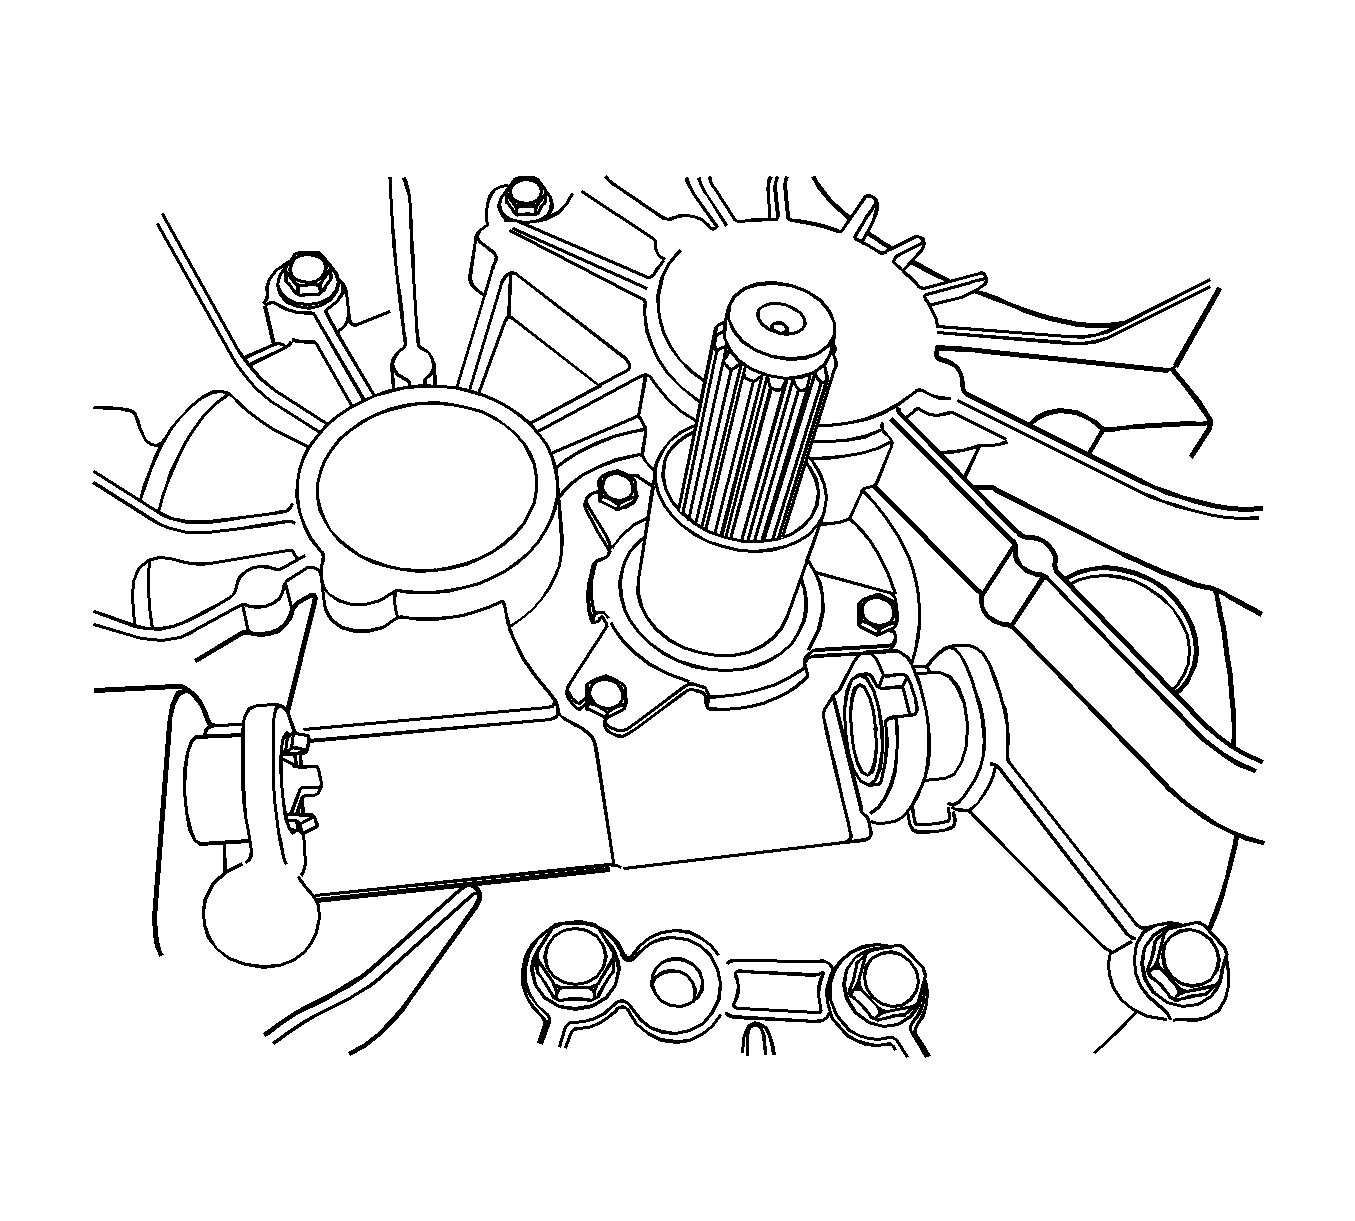
| 63.4. | Draw the input and output shaft evenly into the groove ball bearings in the transaxle housing. |
| • | Hold the spindles (2) using a suitable tool. |
| • | Turn via nuts (3) in direction of the arrow. |
| 63.5. | Remove the DT-48187 from the transaxle housing. |
| • | Unscrew the spindles into the input and output shaft. |
| • | Remove the 4 bolts (1). |
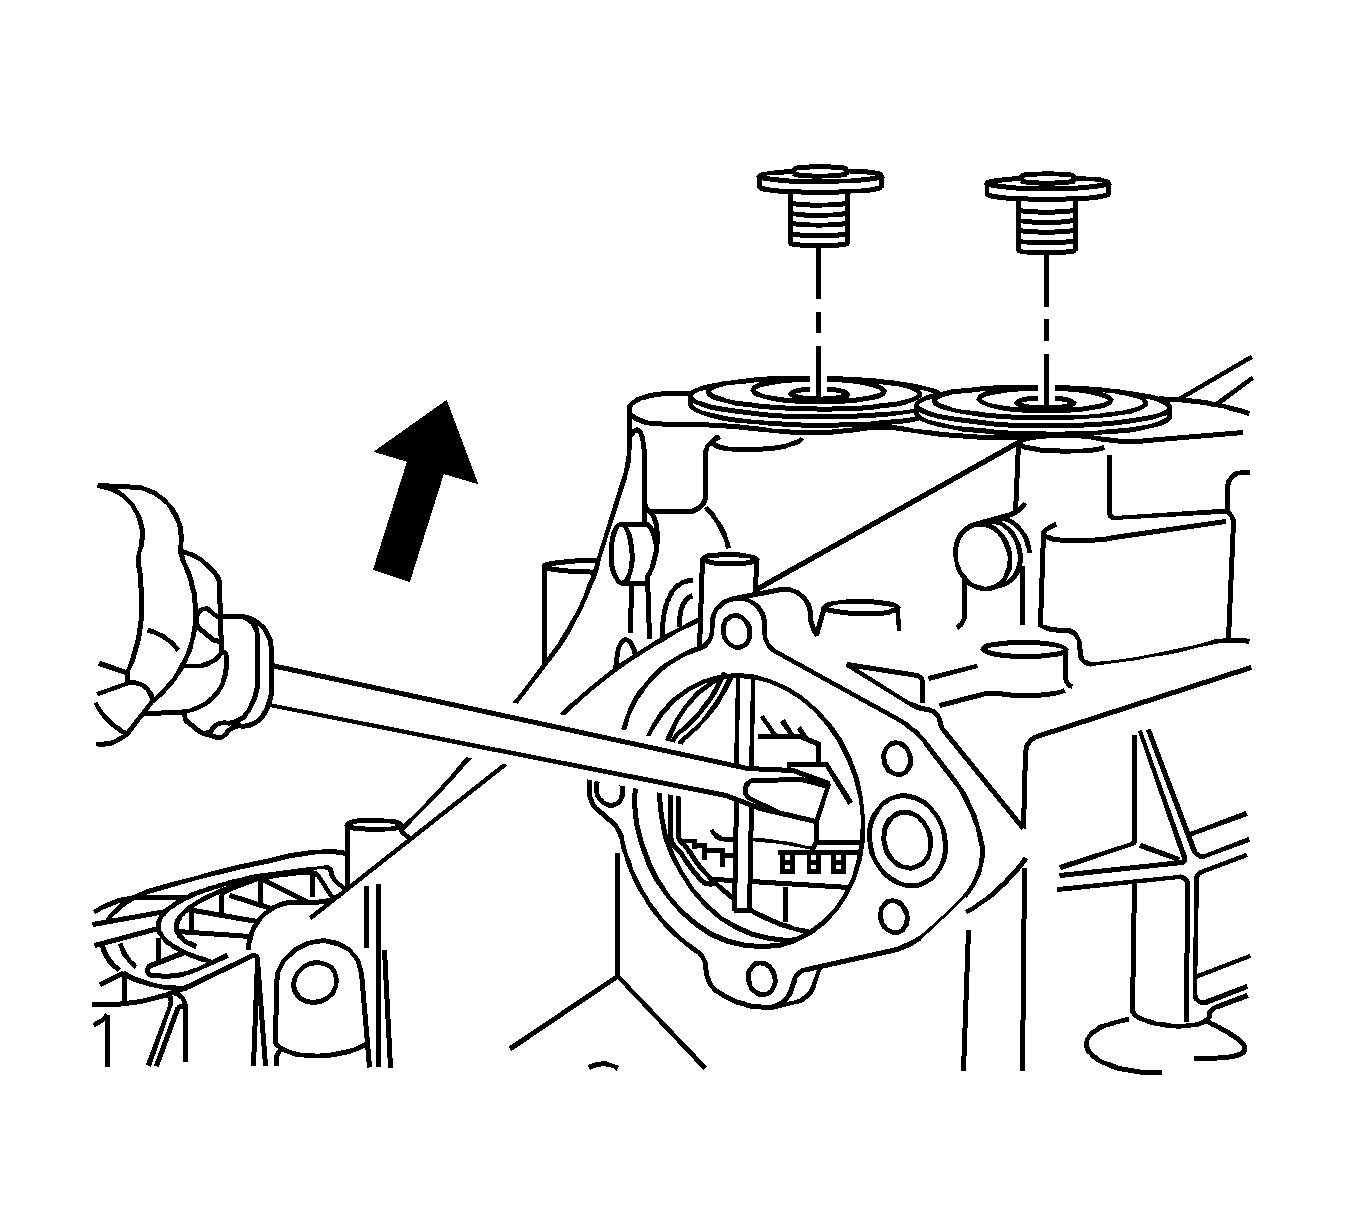
- Shift the transaxle into 4th and 5th gear using a screwdriver in an upward direction.
- Install new input and output shaft bolts while holding the transaxle into 4th and 5th gear in an upward direction and tighten to
90-100 N·m (66-74 lb ft).
Note: Leave area free in order not to block up the oil pipe.
- Apply Loctite 59000 sealant to the transaxle housing rear cover.
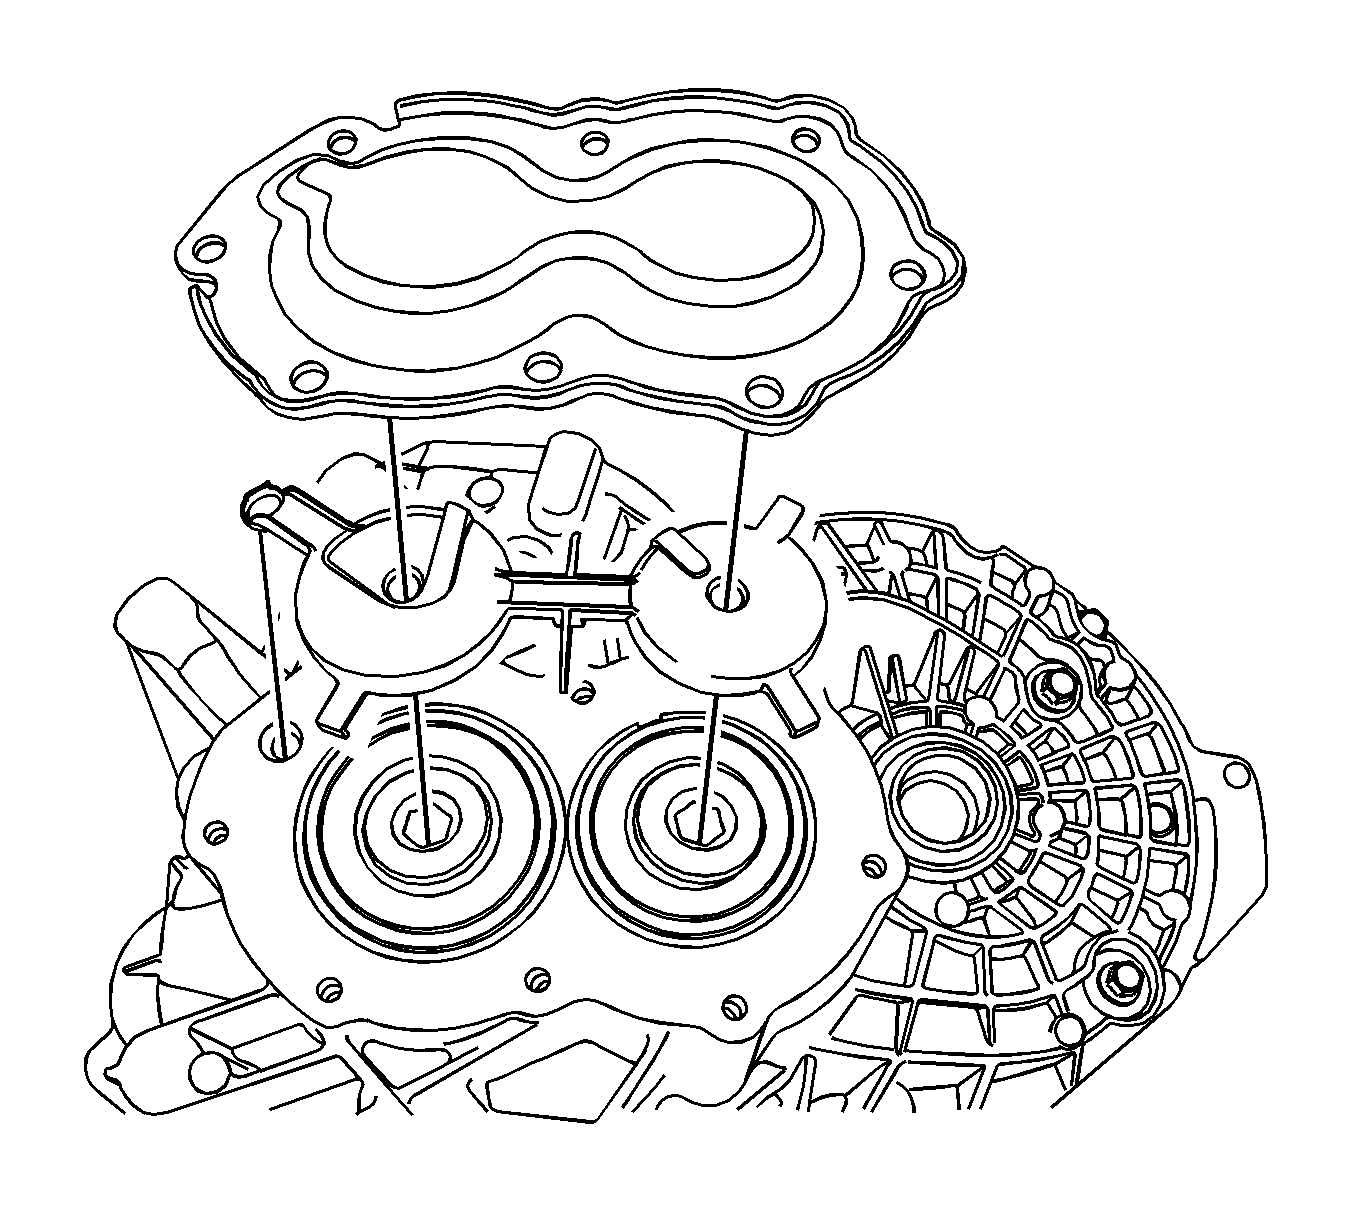
Note: The oil pipe only installs in one direction. Ensure the oil pipe is completely seated in the gear shafts.
- Install the oil pipe and transaxle housing rear cover.
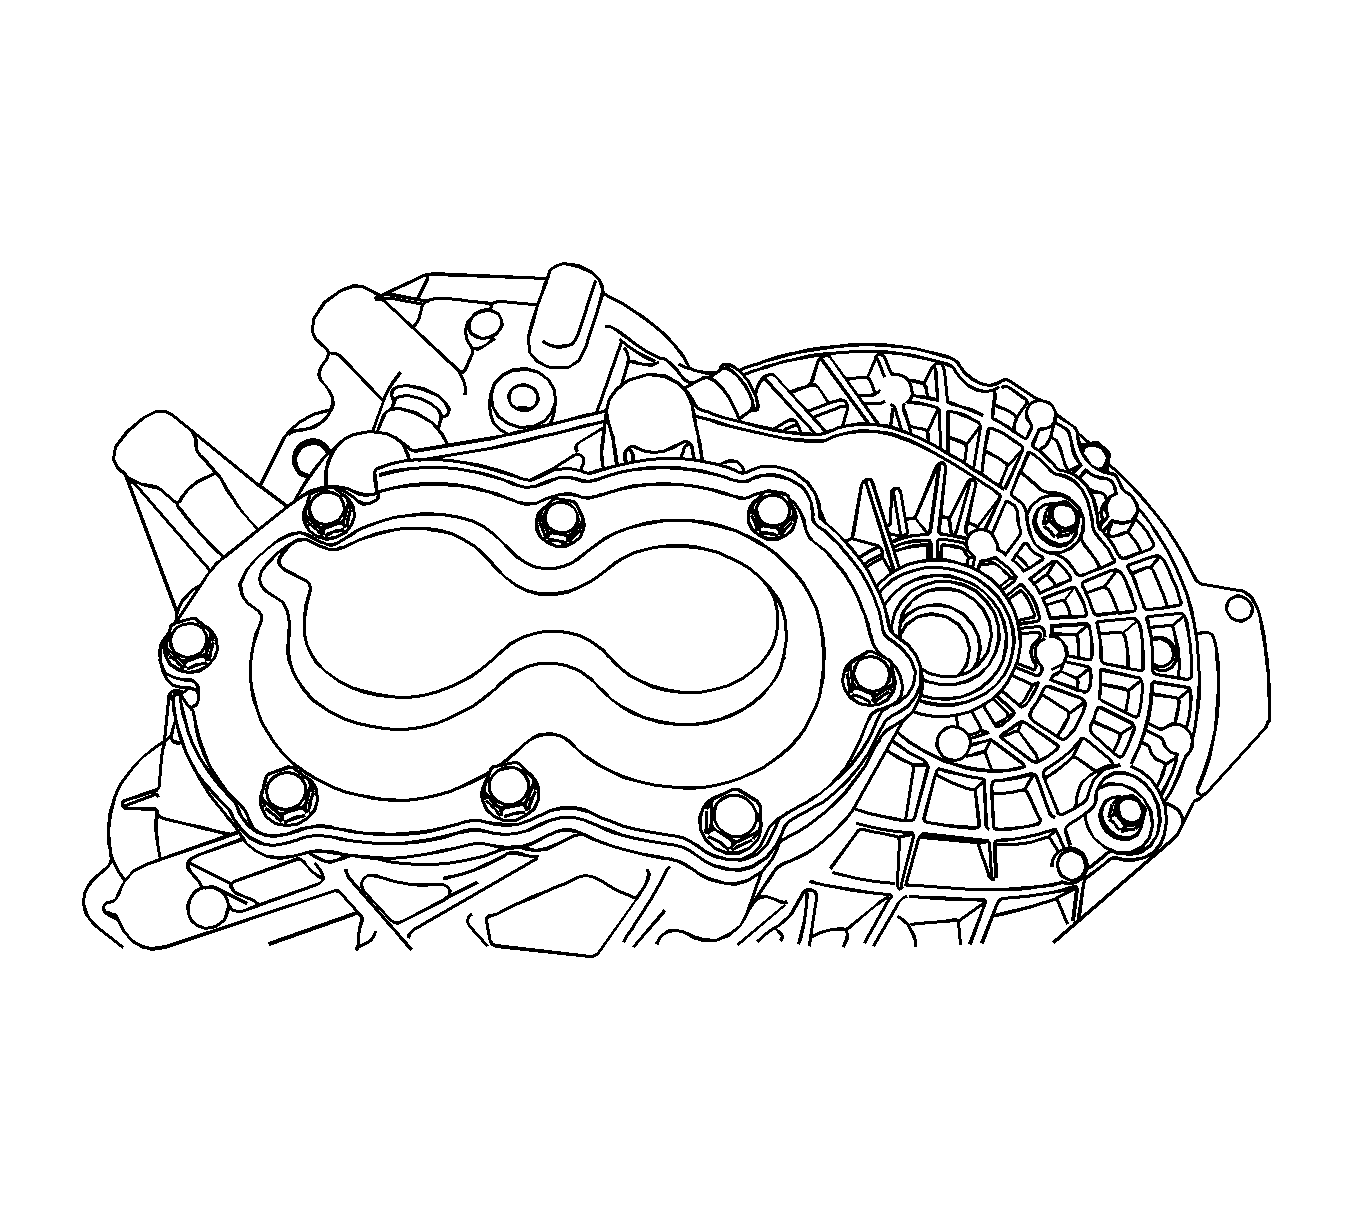
- Install transaxle housing rear cover bolts and tighten to
20-25 N·m (15-18 lb ft).

Note: In line with the interm shaft, use suitable tools to assist in the housing separation.
- Remove the clutch housing from the transaxle housing.
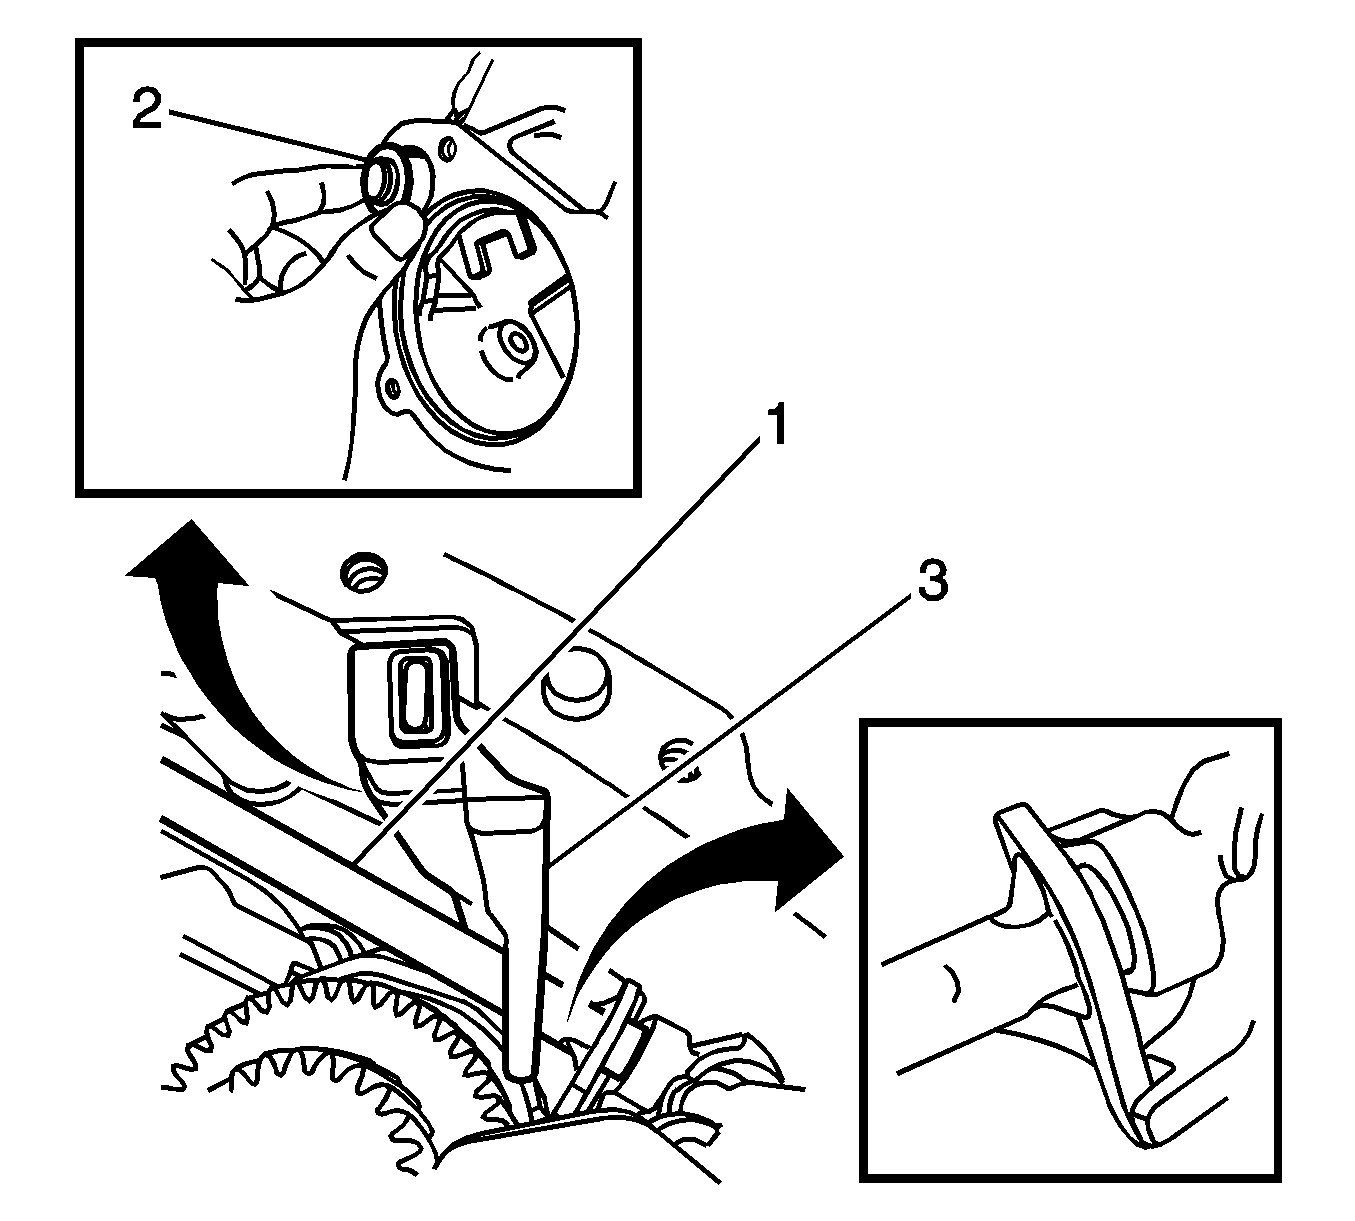
- Install the idle shift rail (1) into the transaxle housing.
- Install the idle shift rail bushing (2) to the transaxle housing.
- Install the drain channel (3) into the transaxle housing.
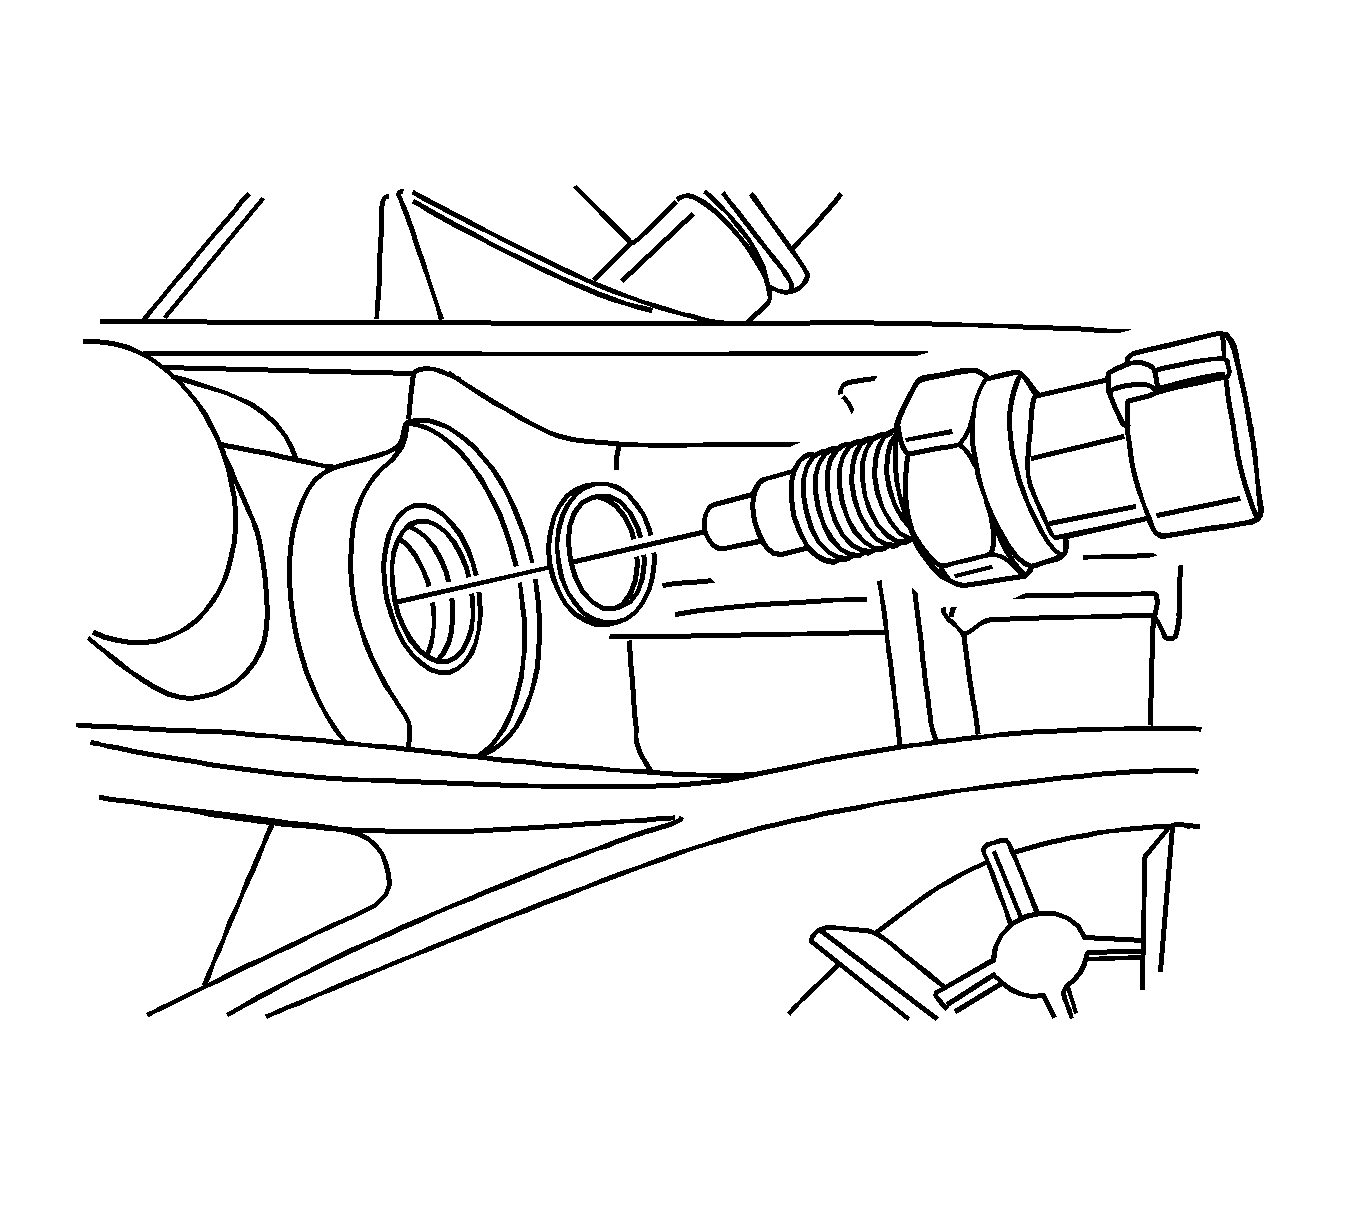
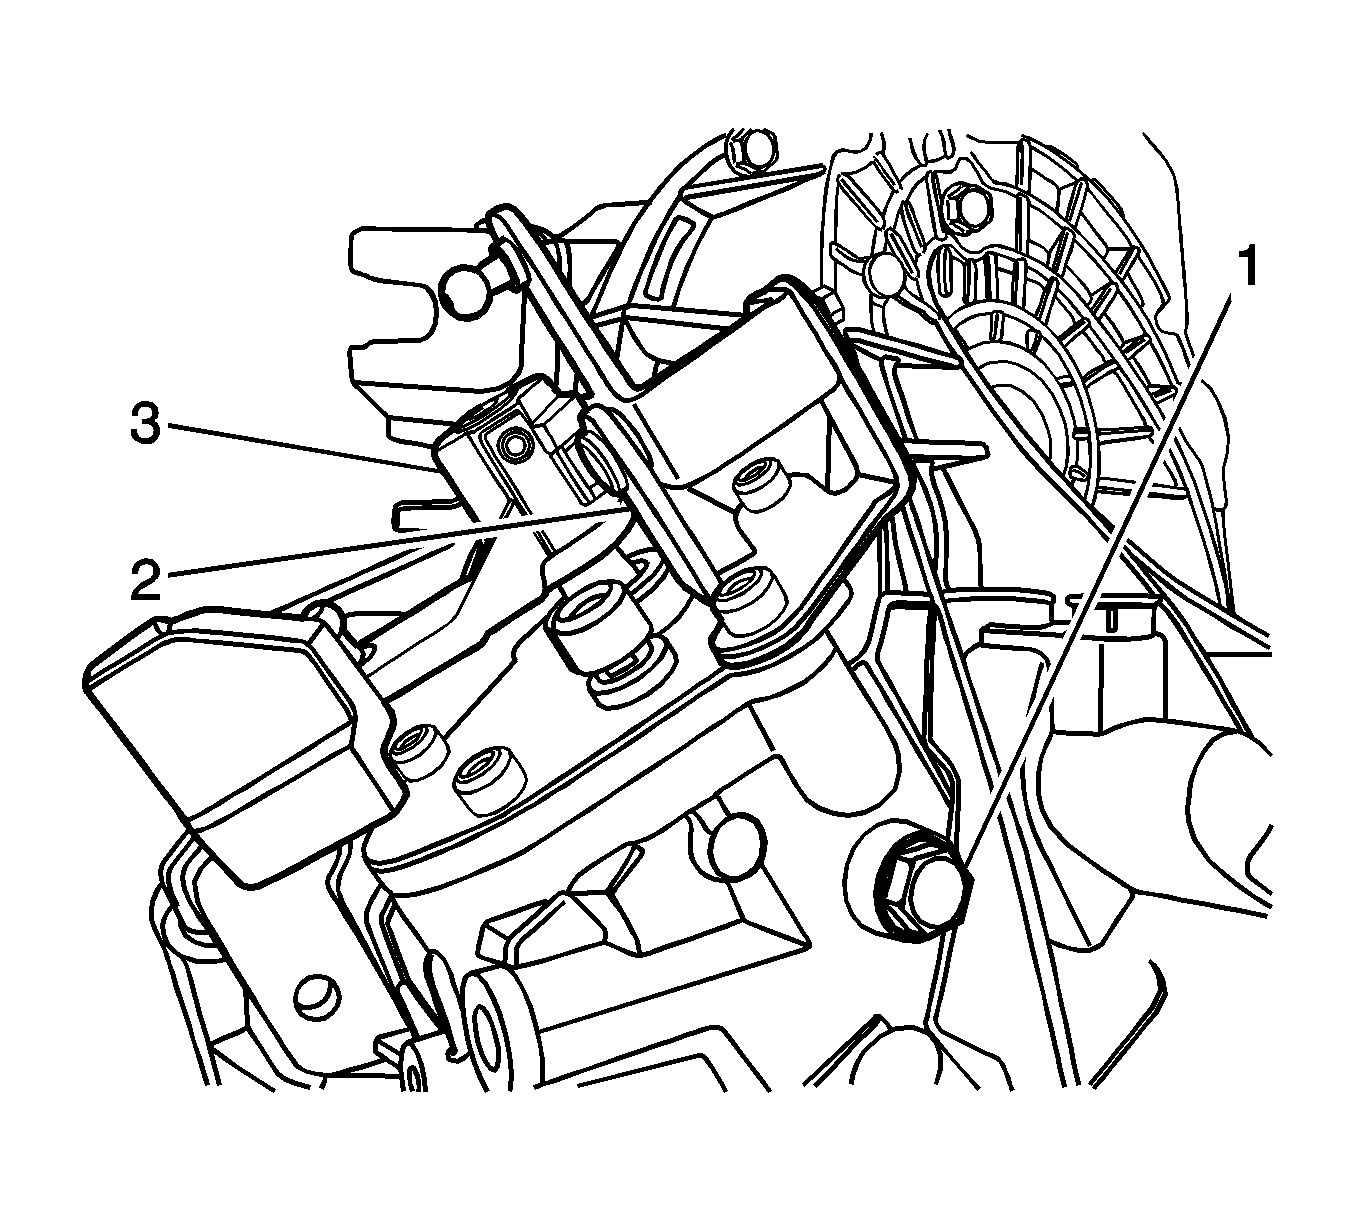
- Install the backup lamp switch and the washer to the transaxle housing and tighten to
20 N·m (15 lb ft).
- Install the shift shaft assembly.
| 74.1. | Apply Loctite 5203 sealer to the transaxle housing to the gear shift cover mating surface. |
| 74.2. | Position the transaxle into Neutral. |
| 74.3. | Install the shift shaft assembly (3). |
| 74.4. | Install the select control lever (2). |
| 74.5. | Install the shift retaining bolts and tighten to
20-25 N·m (15-18 lb ft). |
| 74.6. | Install the shift guide bolt (1) and tighten to
20-25 N·m (15-18 lb ft). |

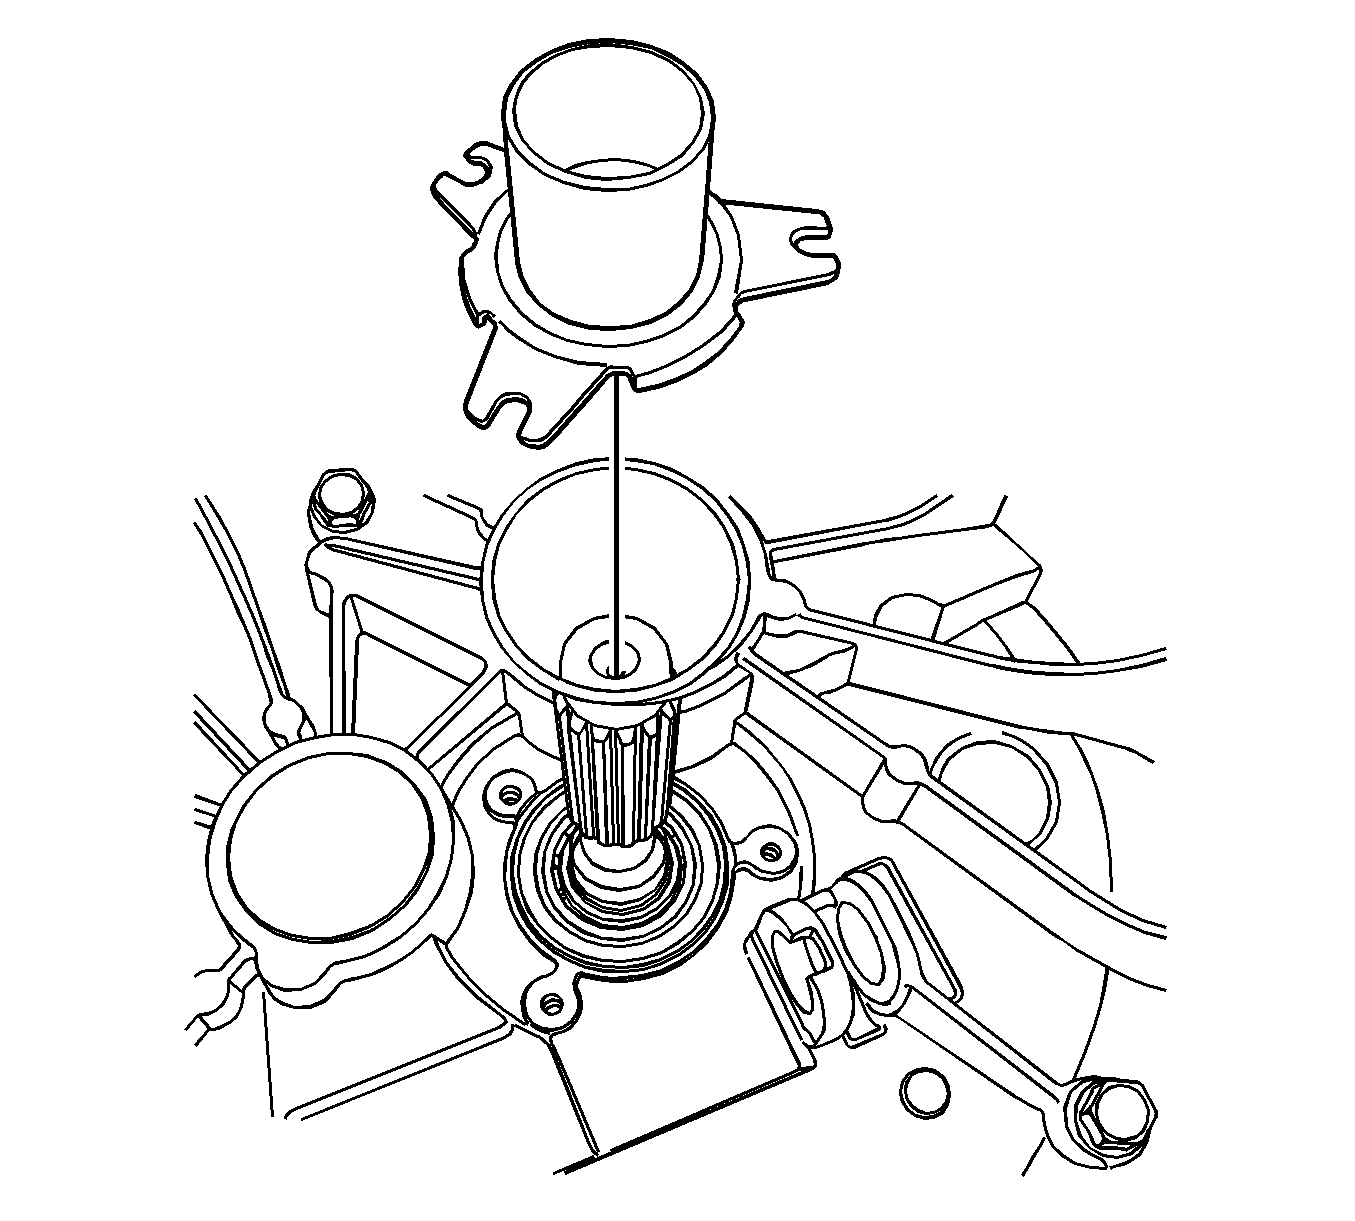
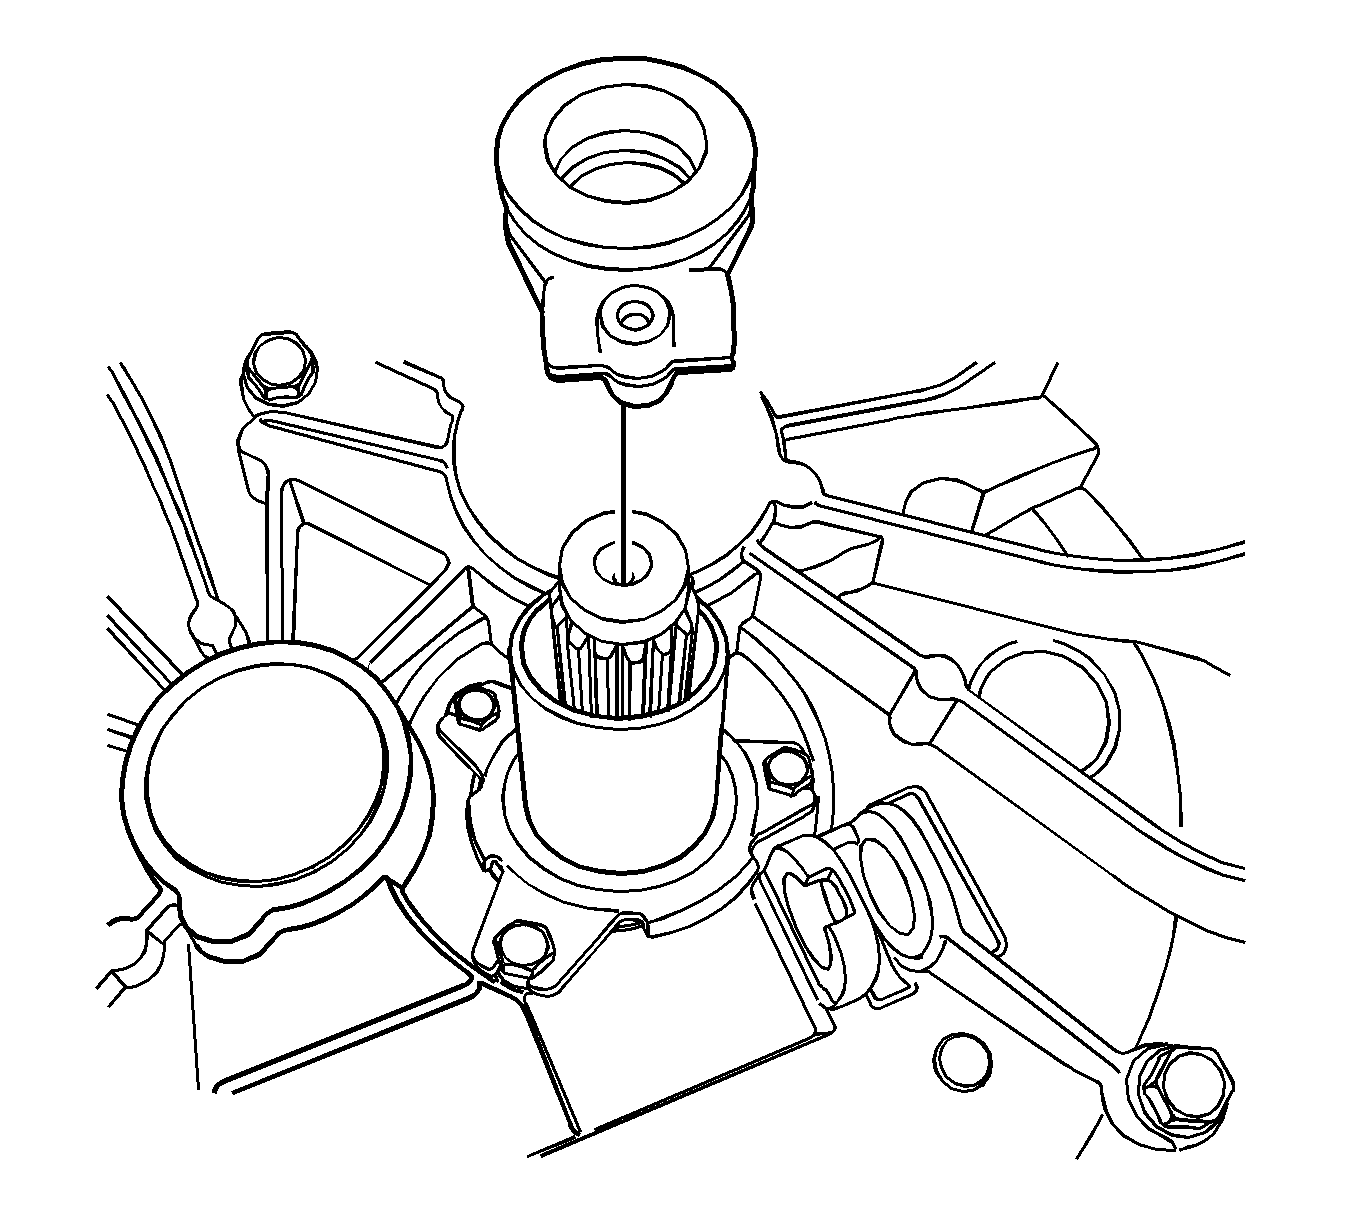
- Install the differential bearing race and the shim to the transaxle housing using the
DT-48179
(1) and the DT-48187 (2). Refer to
Manual Transmission Specifications for shim specifications.
- Install the differential bearing race and the shim to the clutch housing using the
DT-48179
(1) and the DT-48187 (2). Refer to
Manual Transmission Specifications for shim specifications.
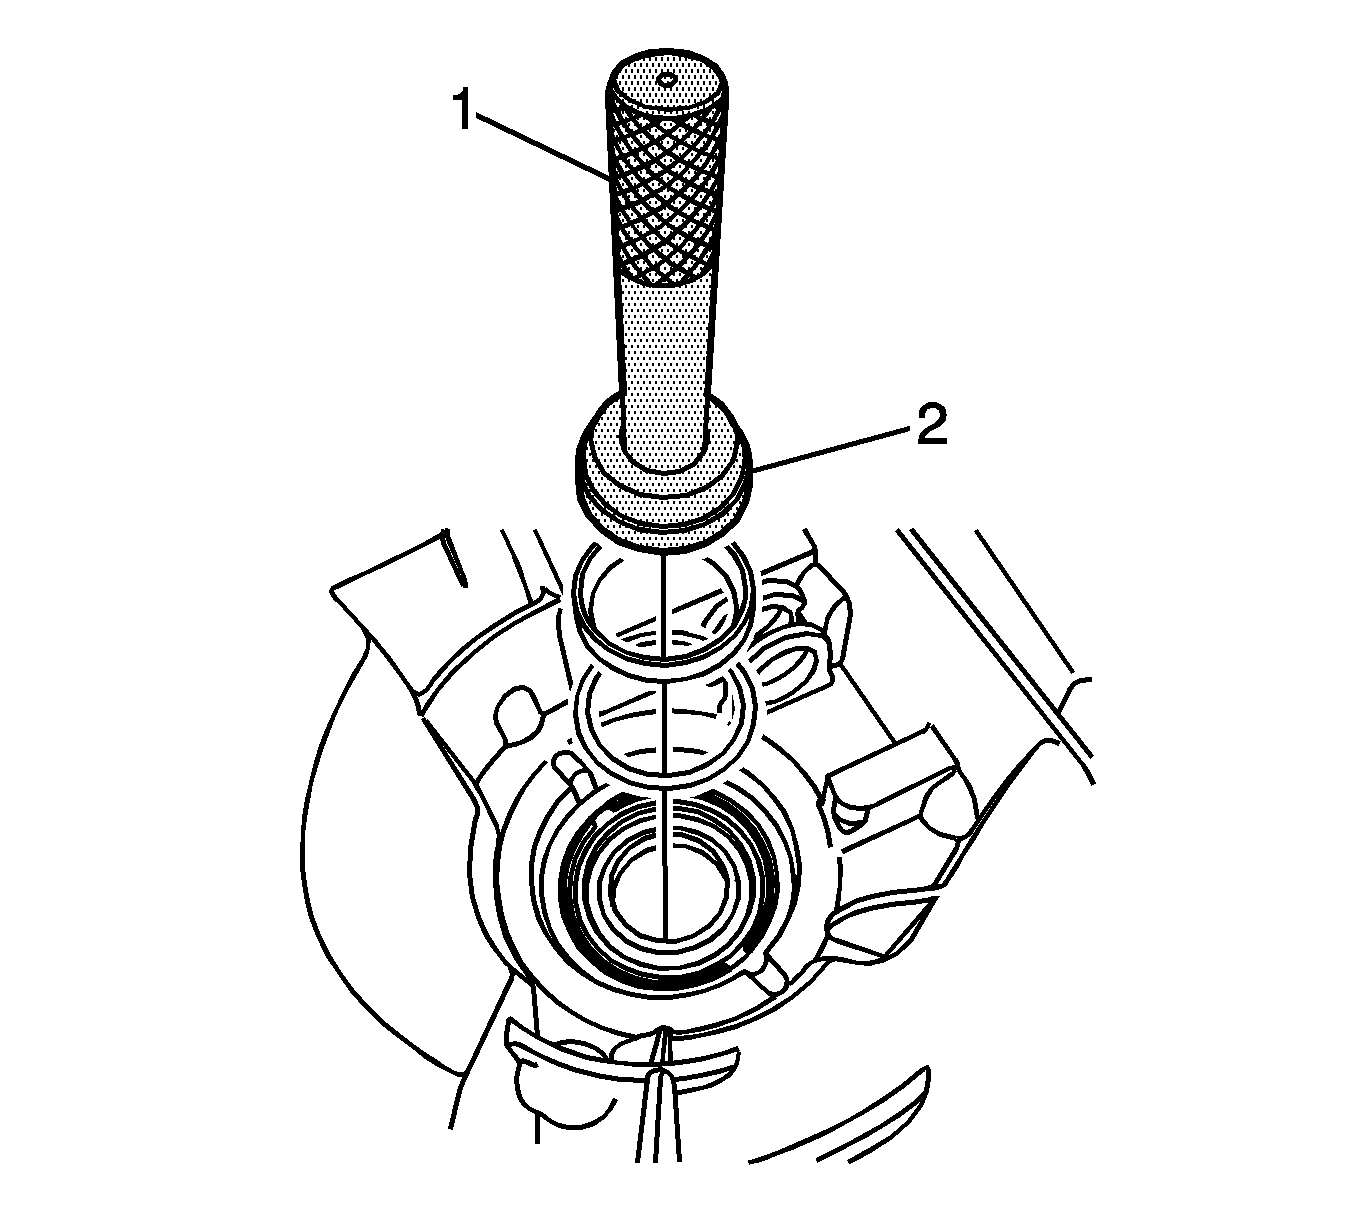
- Install the magnet into the transaxle housing.

- Install the differential into the transaxle housing.
- Apply Loctite 5203 sealer to the transaxle housing to clutch housing mating surface.
Note:
| • | The input and output shaft must engage in its bearing in the clutch housing. |
| • | The gear shift forks sit in their opposing bearings in the clutch housing. |
- Install the clutch housing to the transaxle housing.
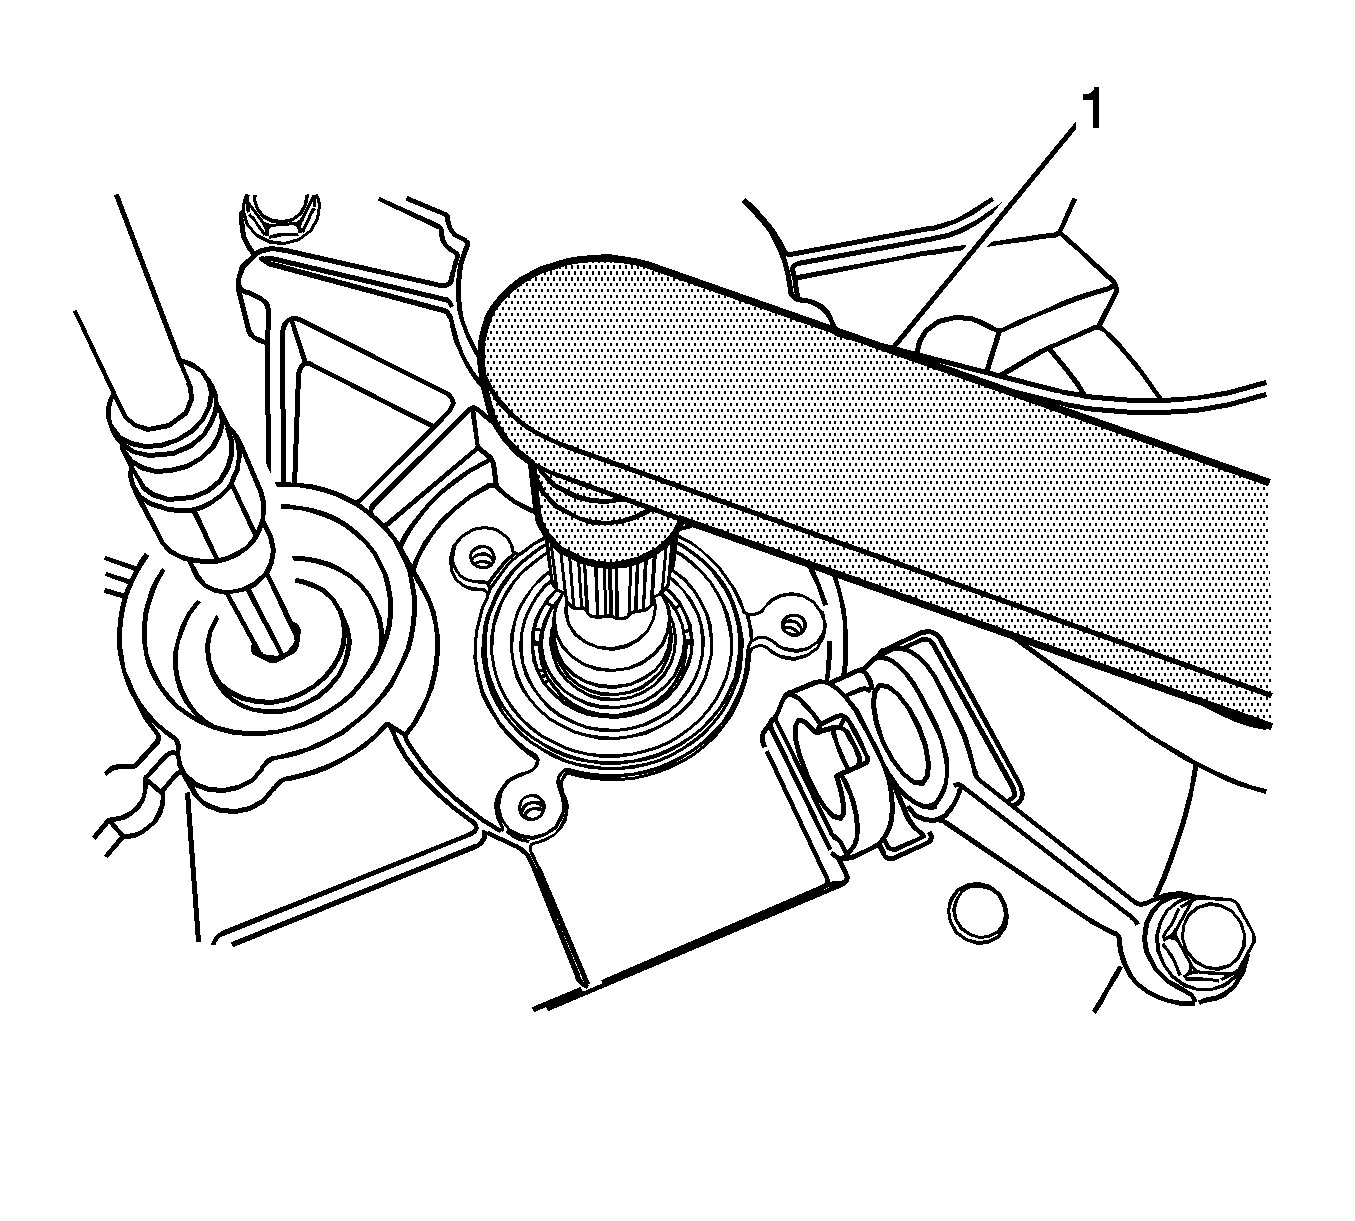
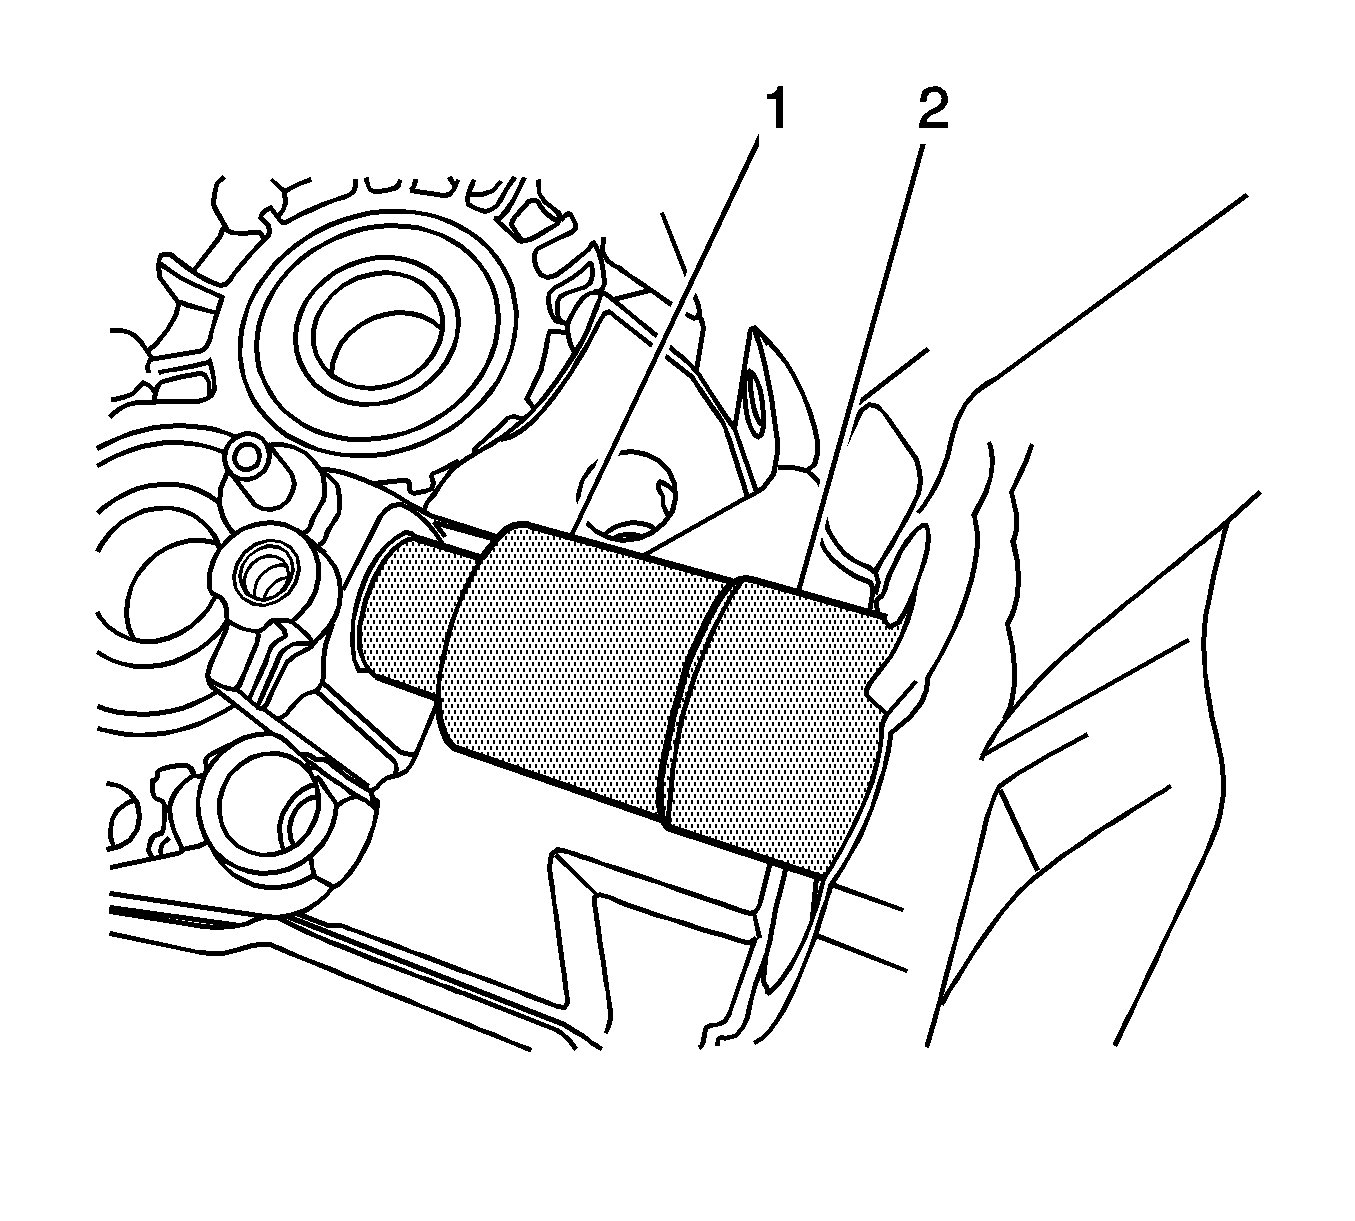
- Hold the input shaft with the DT-48180 (1).
- Draw the interm shaft into the interm shaft groove ball bearing with old retainer plug.
Shift the transaxle into any gear.
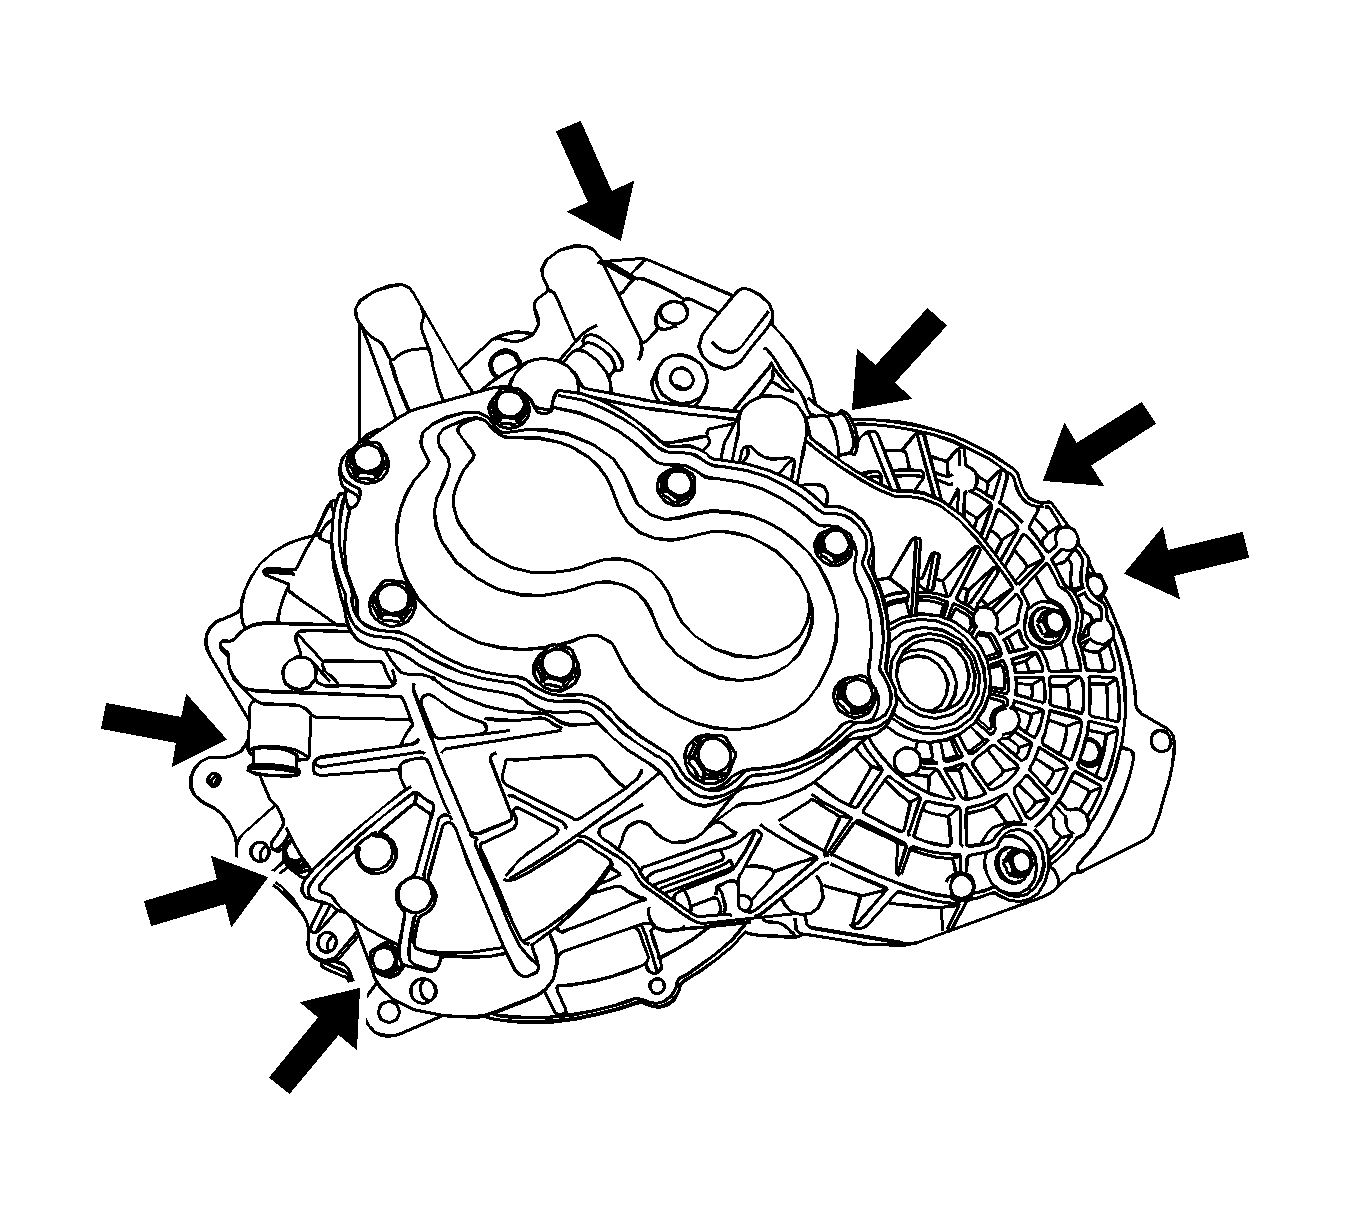
- Install the clutch housing to transaxle housing bolts and tighten to
20-25 N·m (15-18 lb ft).
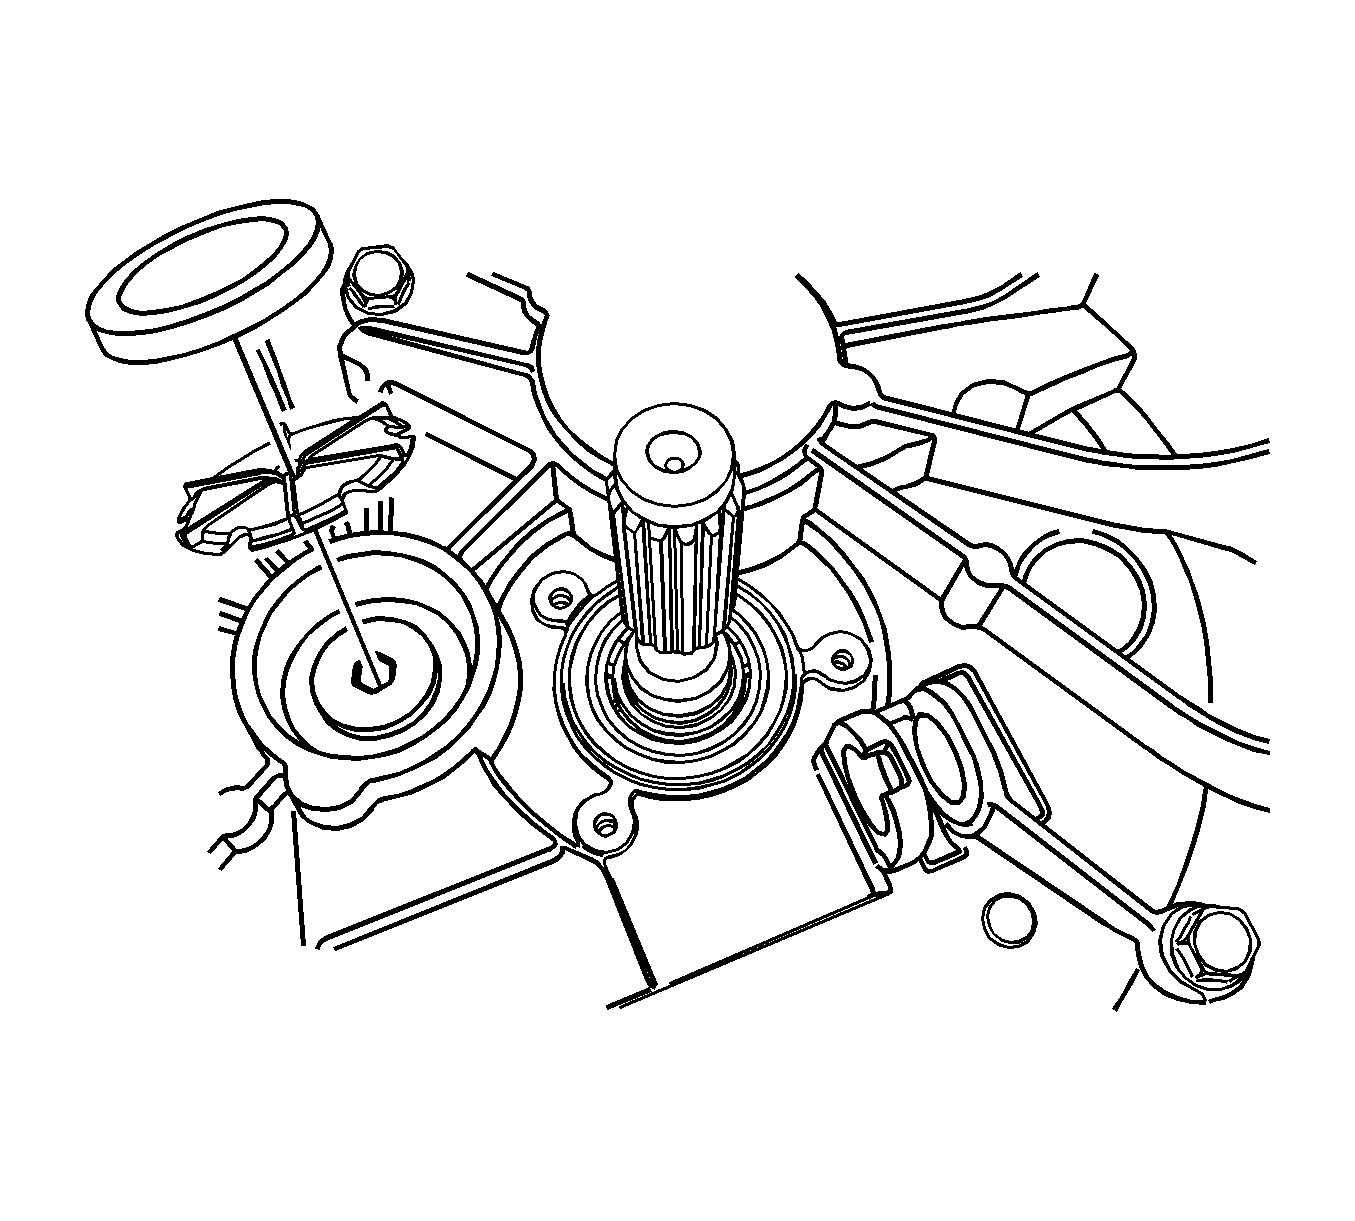
- Remove the old retainer plug from the interm shaft, and install a new retainer plug and tighten to
90-100 N·m (66-74 lb ft).
- Remove the DT-48180.
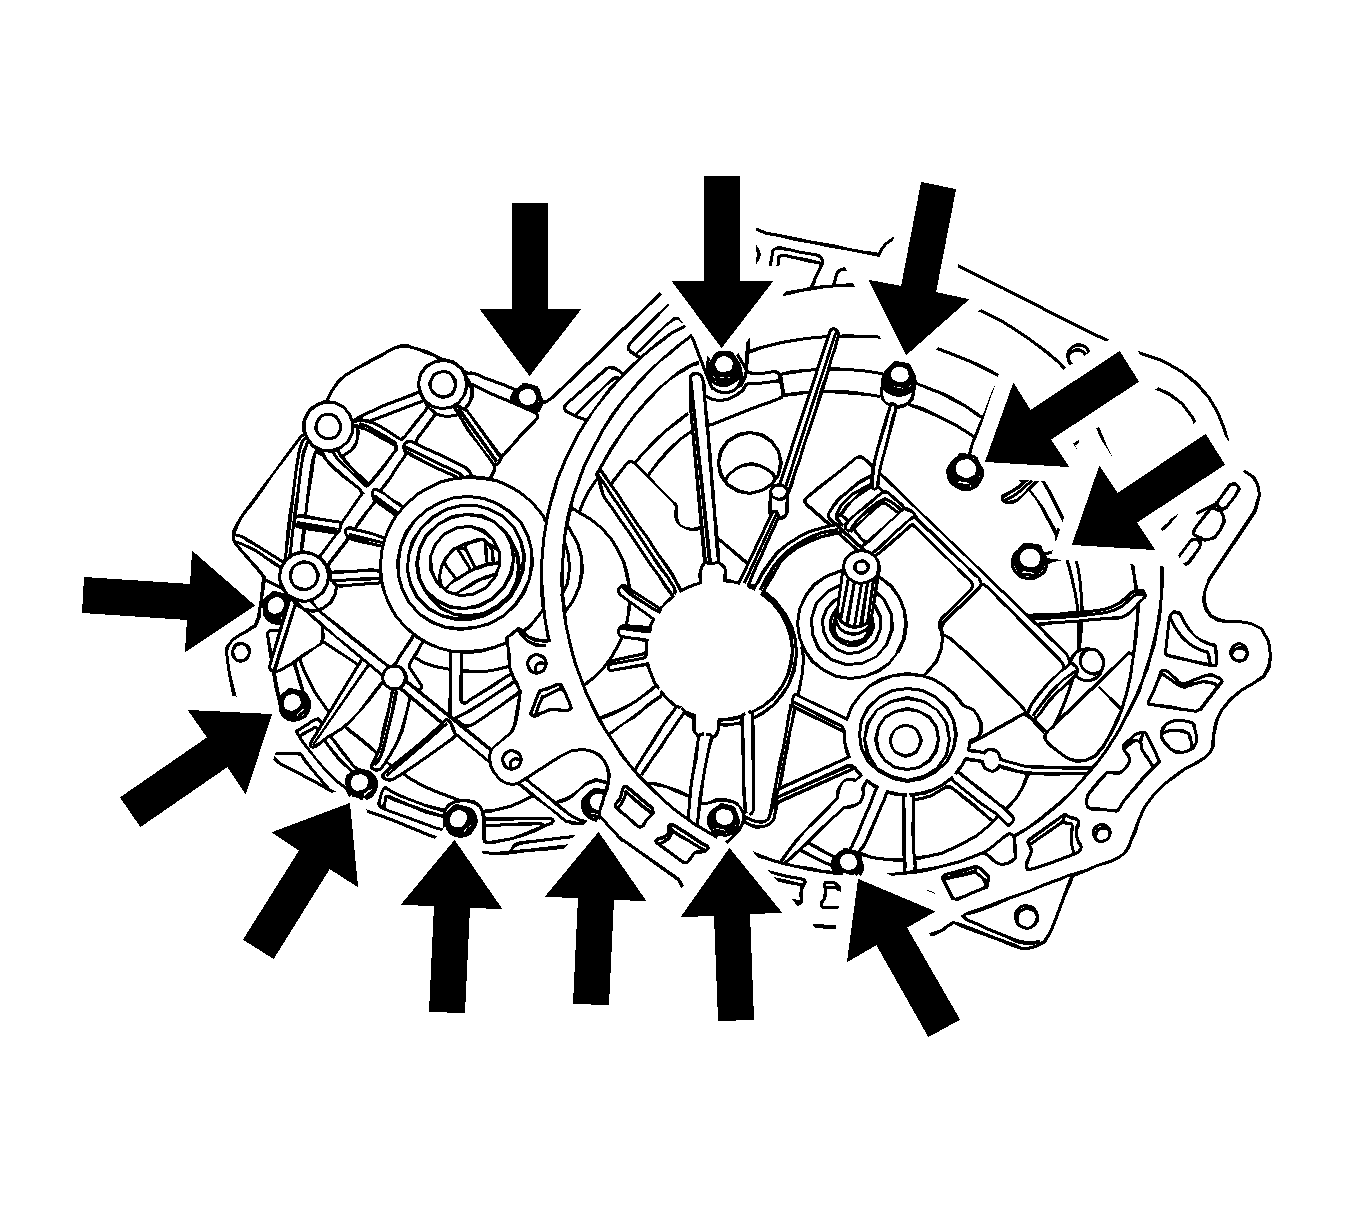
- Install the transaxle housing to clutch housing bolts and tighten to
20-25 N·m (15-18 lb ft).
- Install a new oil pipe into the interm shaft.
- Install a new interm shaft sealing plug.
- Coat the thrust bearing guide surface with multi-purpose grease.
Note: Check the thrust bearing guide mounting points.
- Install the O-ring and the thrust bearing guide.
- Install the thrust bearing guide bolts and tighten to
8-12 N·m (71-106 lb in).
- Coat the release lever shaft bushings with multi-purpose grease.
- Install the release lever shaft bushings in the clutch housing.
- Coat the thrust clutch bearing bore with multi-purpose grease.
- Install the thrust clutch bearing and the clutch release fork.
- Install the clutch release lever.
- Install the clutch release fork bolt and tighten to
20-25 N·m (15-18 lb ft)
- Install the speedometer driven gear and the bolt and tighten to
3-5 N·m (27-44 lb in).
- Install the shift control cable bracket, the washer, and the bolts and tighten to
10-14 N·m (89-124 lb in).
- Install the transaxle into the vehicle. Refer to Transaxle Assembly in this section.
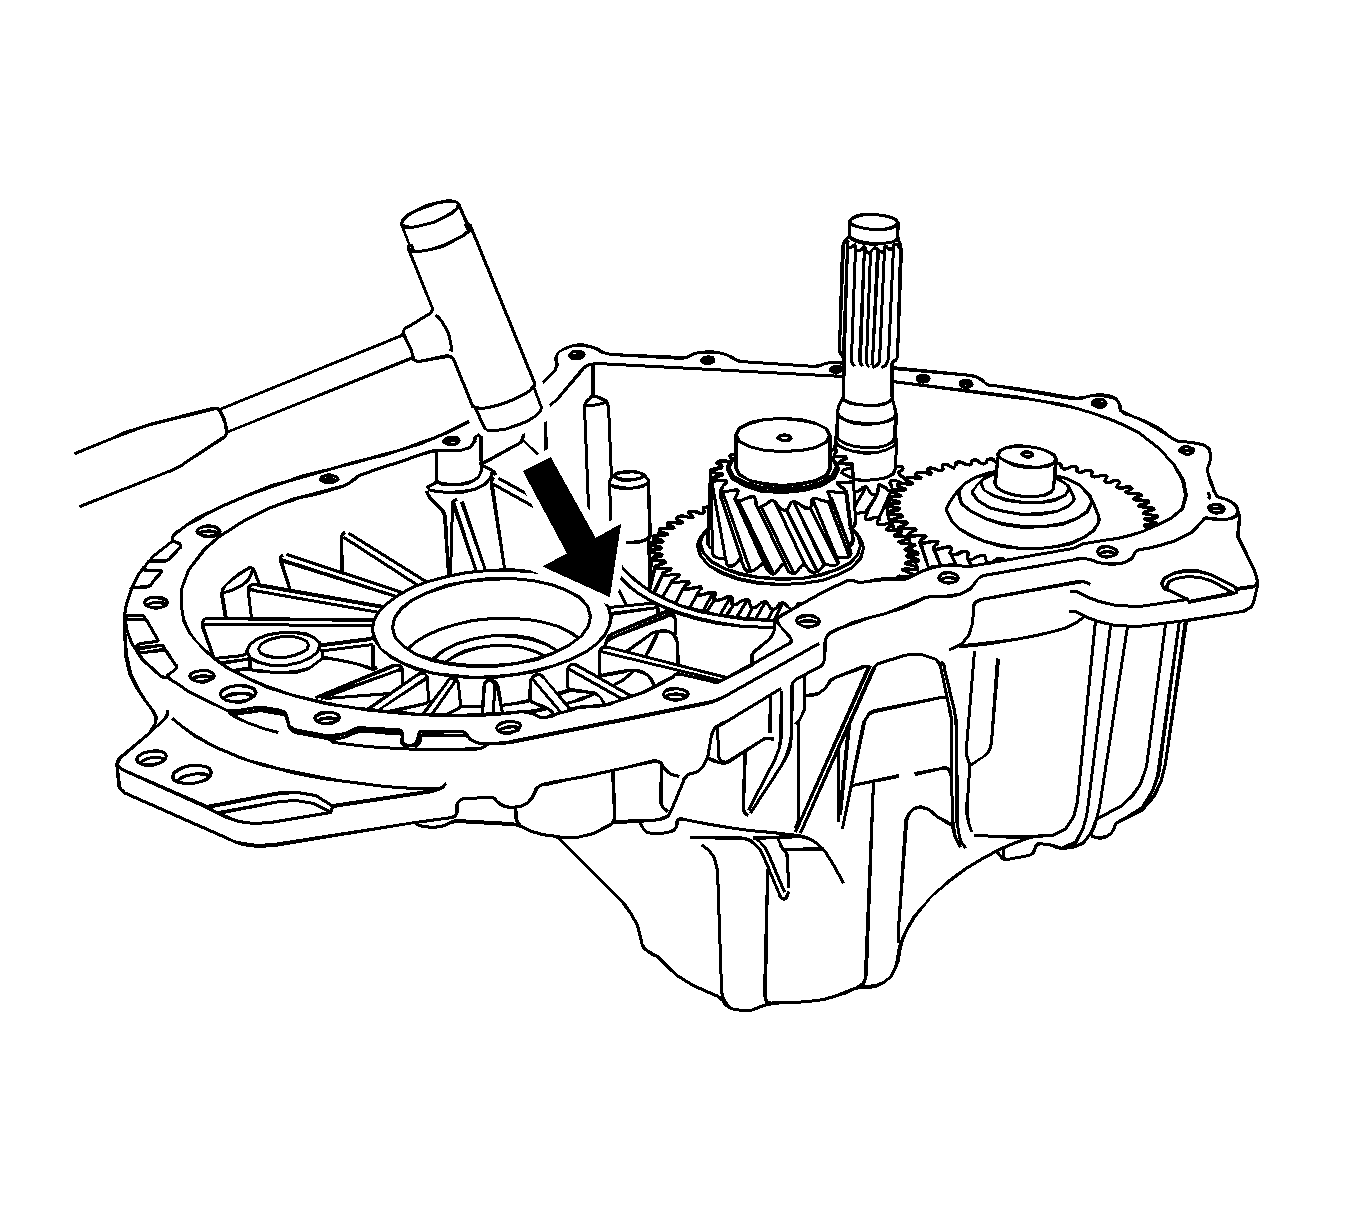
- Using a rubber mallet, tap lightly on the transaxle housing mating surface to ensure the bearings are fully seated.
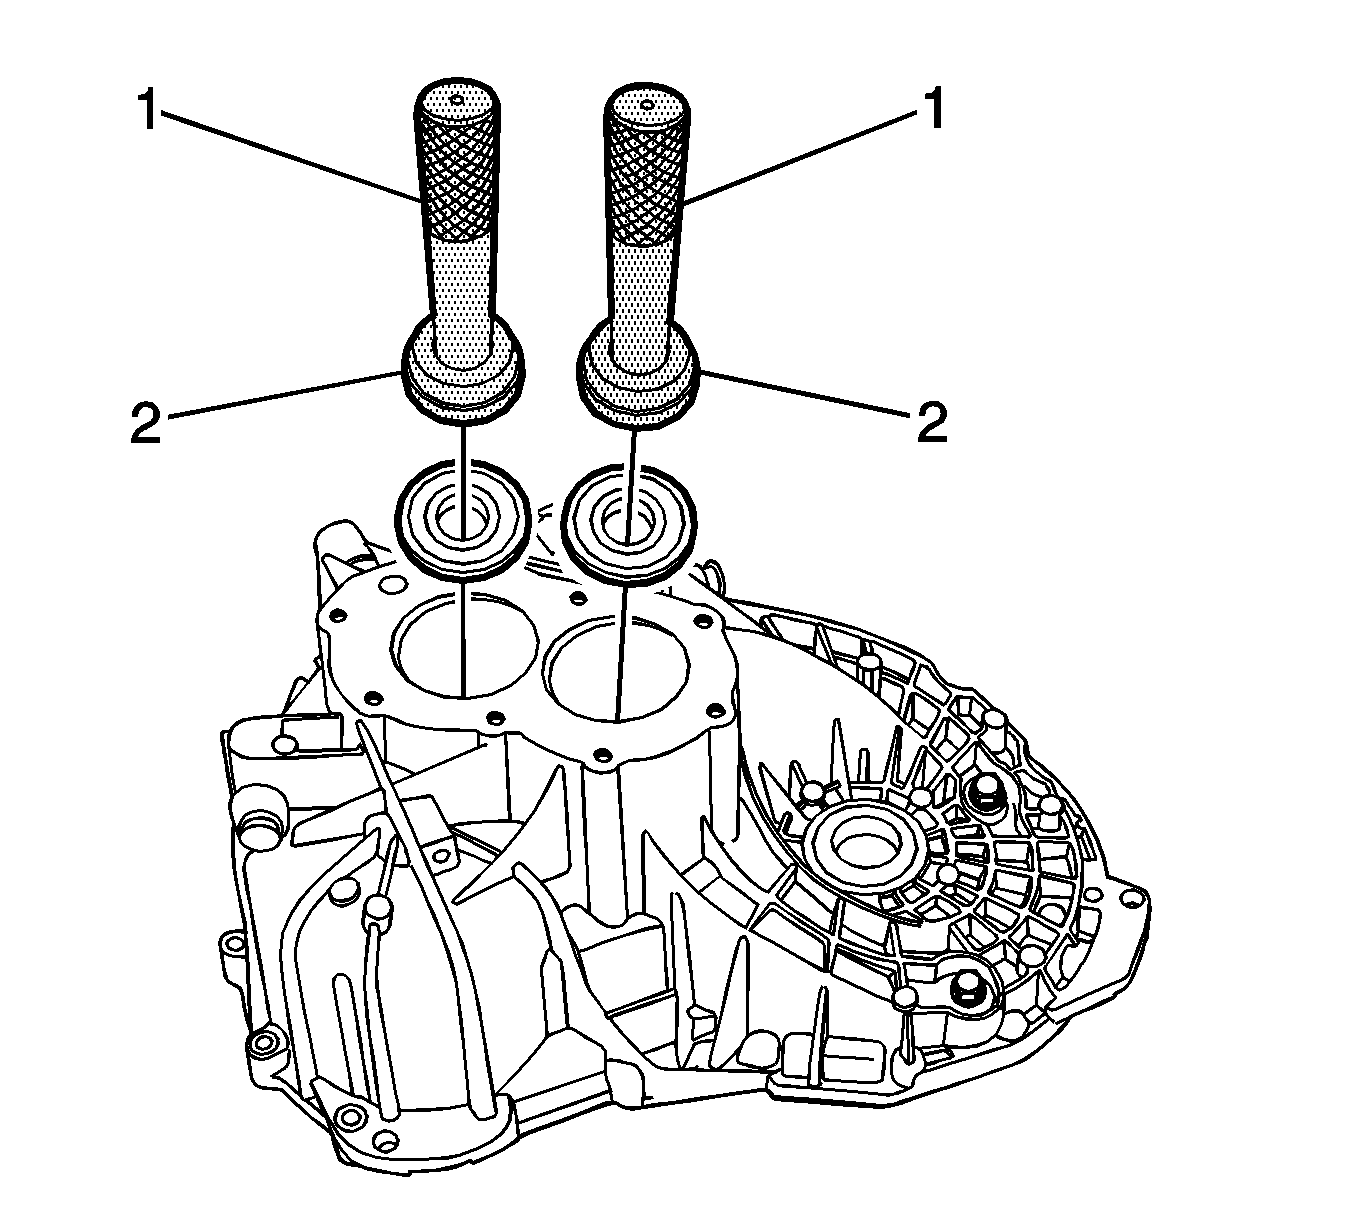
- Install the
DT-48200
(1) to transaxle housing.
Note: Adjust the height of the
DT-48200
for the zero point setting.
- Adjust the zero point setting for each place on the transaxle housing flange surface using the
DT-48200
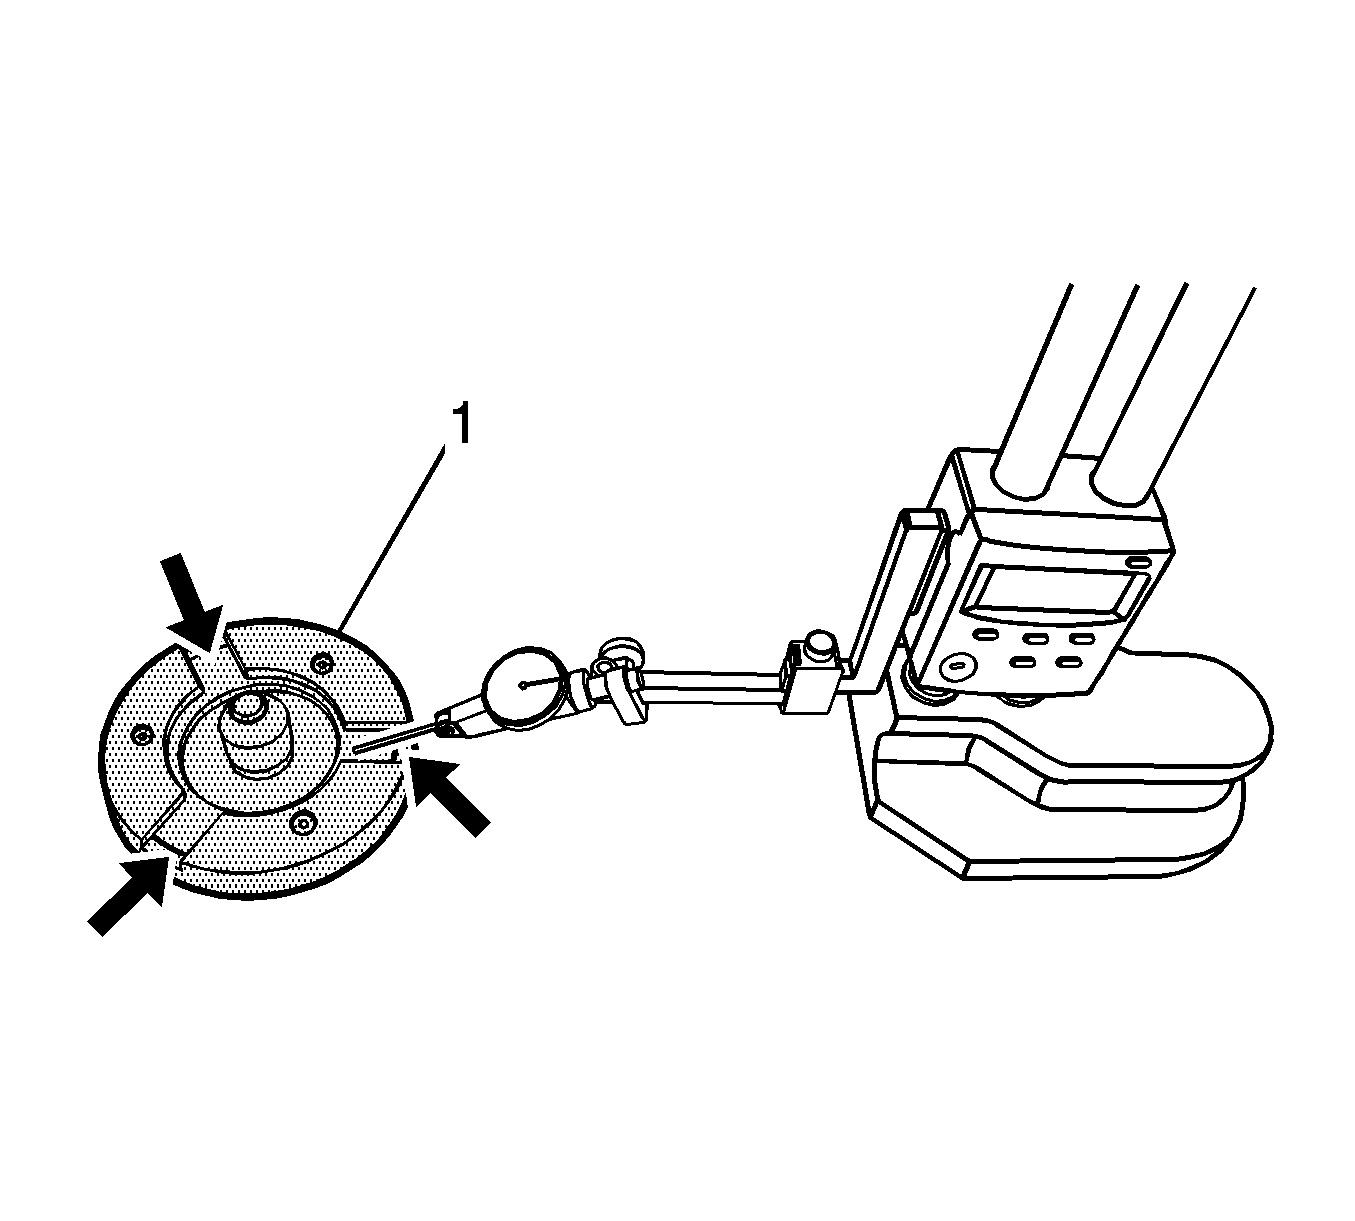
and the height gage.
- Measure the 3 places on the output shaft gear thrust washer surface using the height gage (average = A).
The height from the transaxle housing
flange surface to the thrust washer surface.
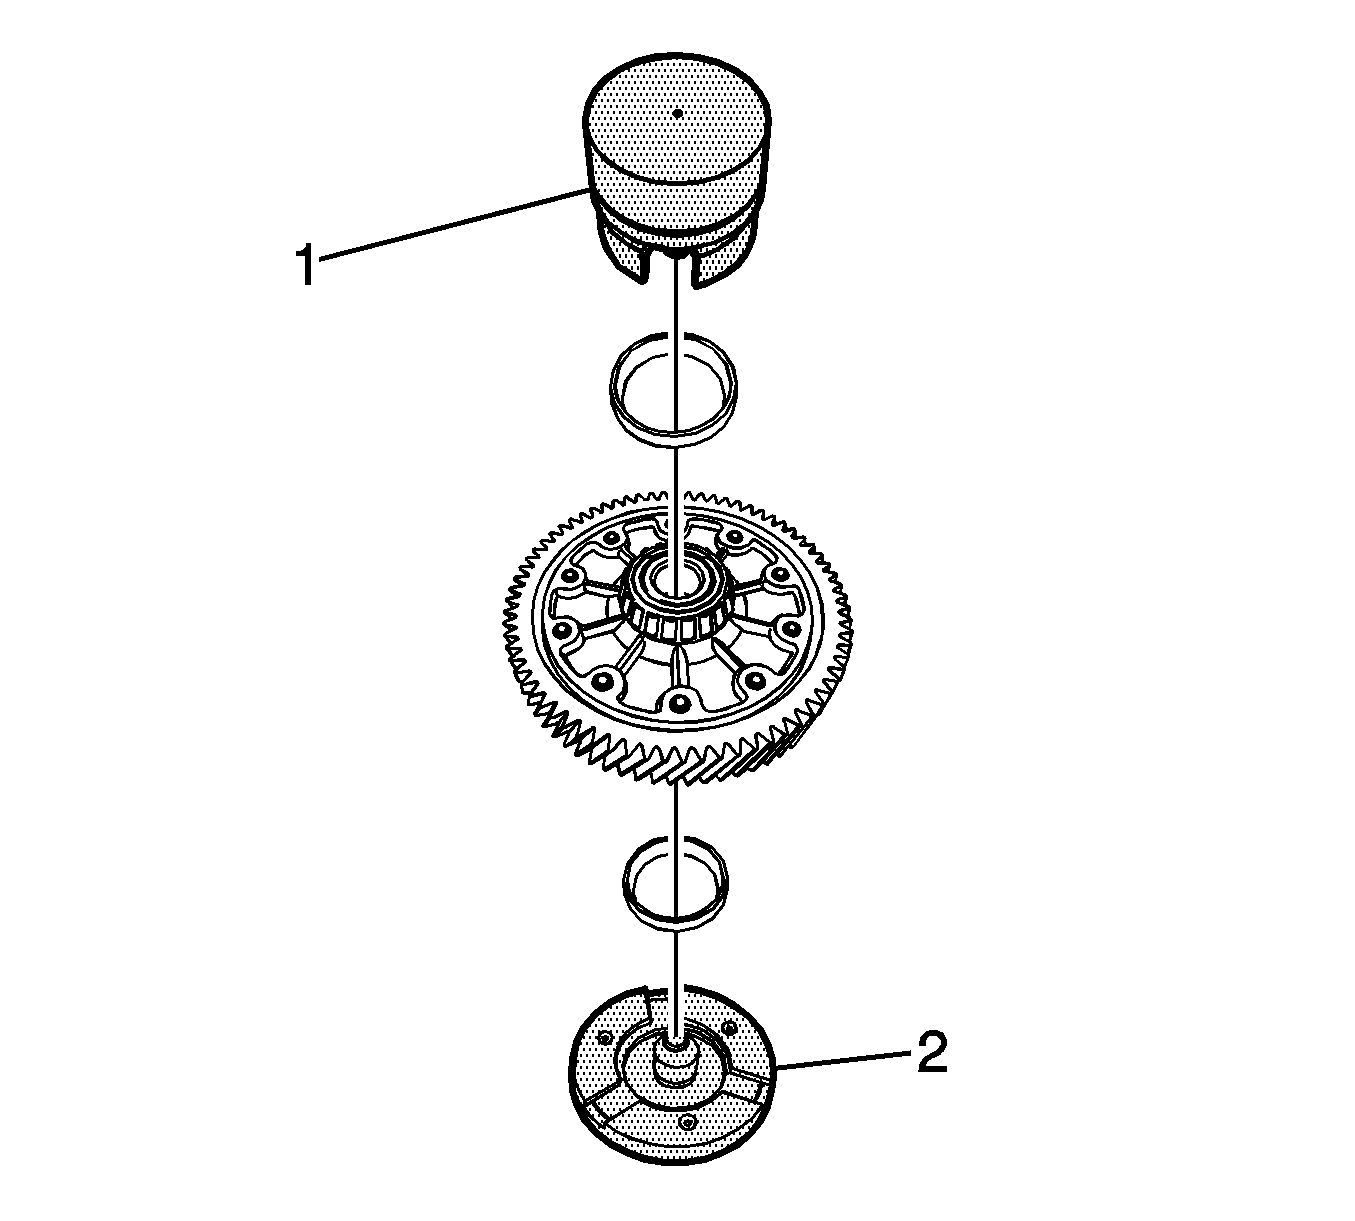
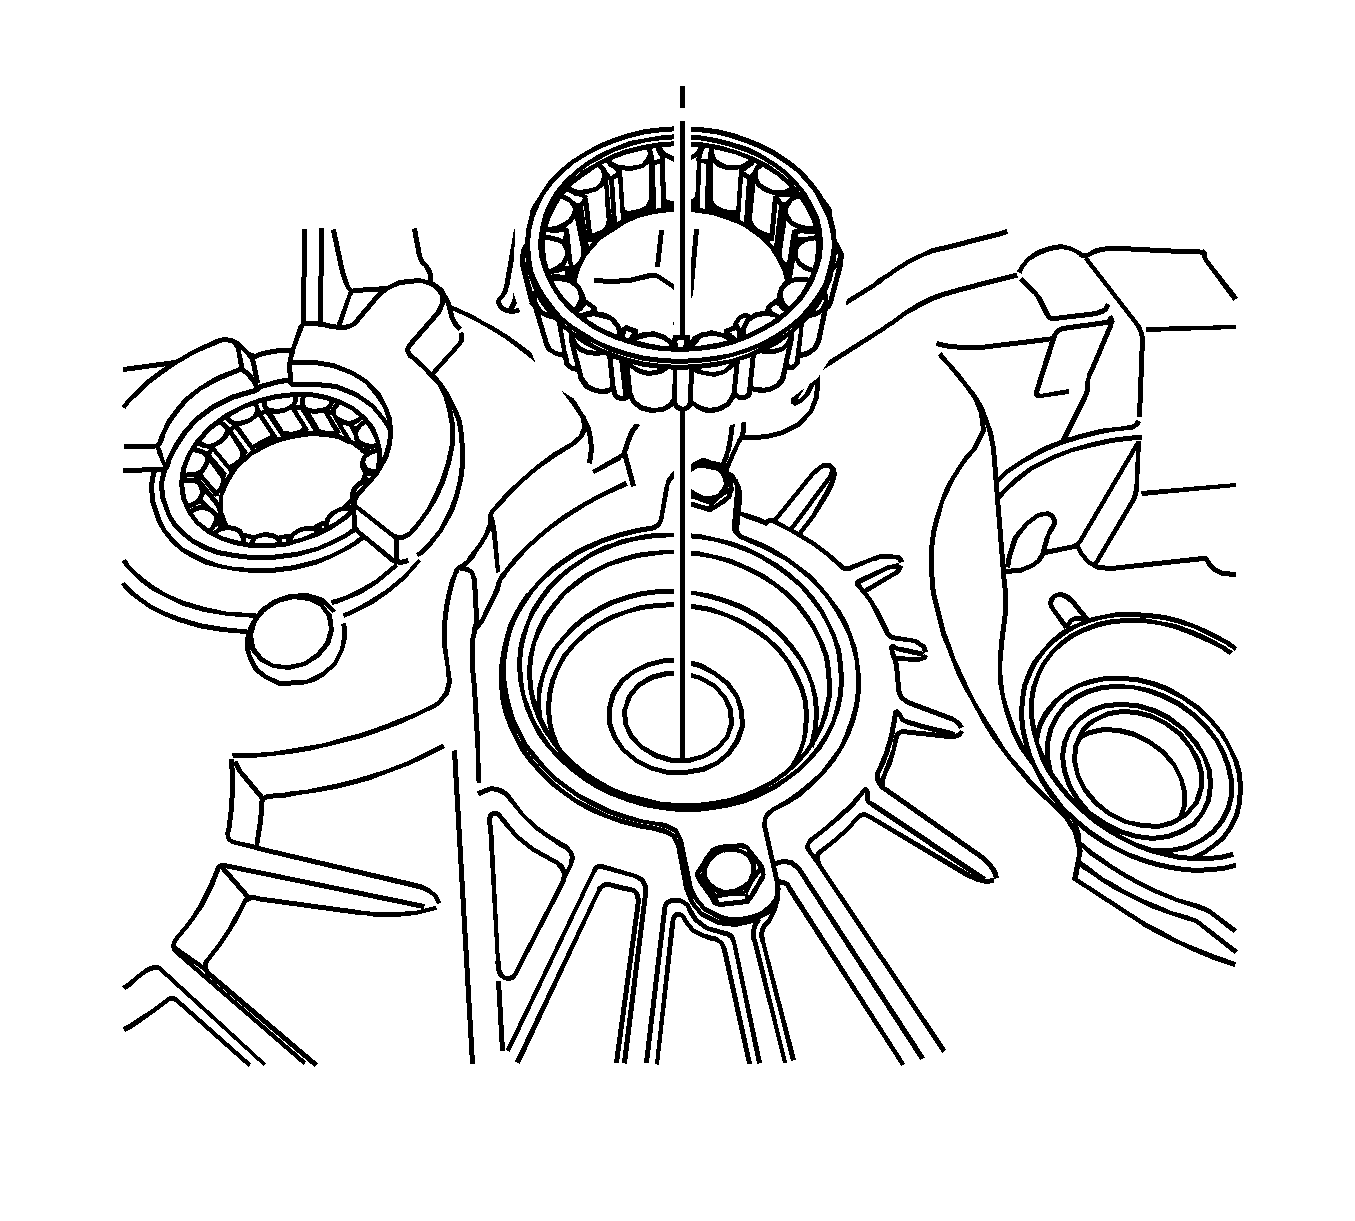
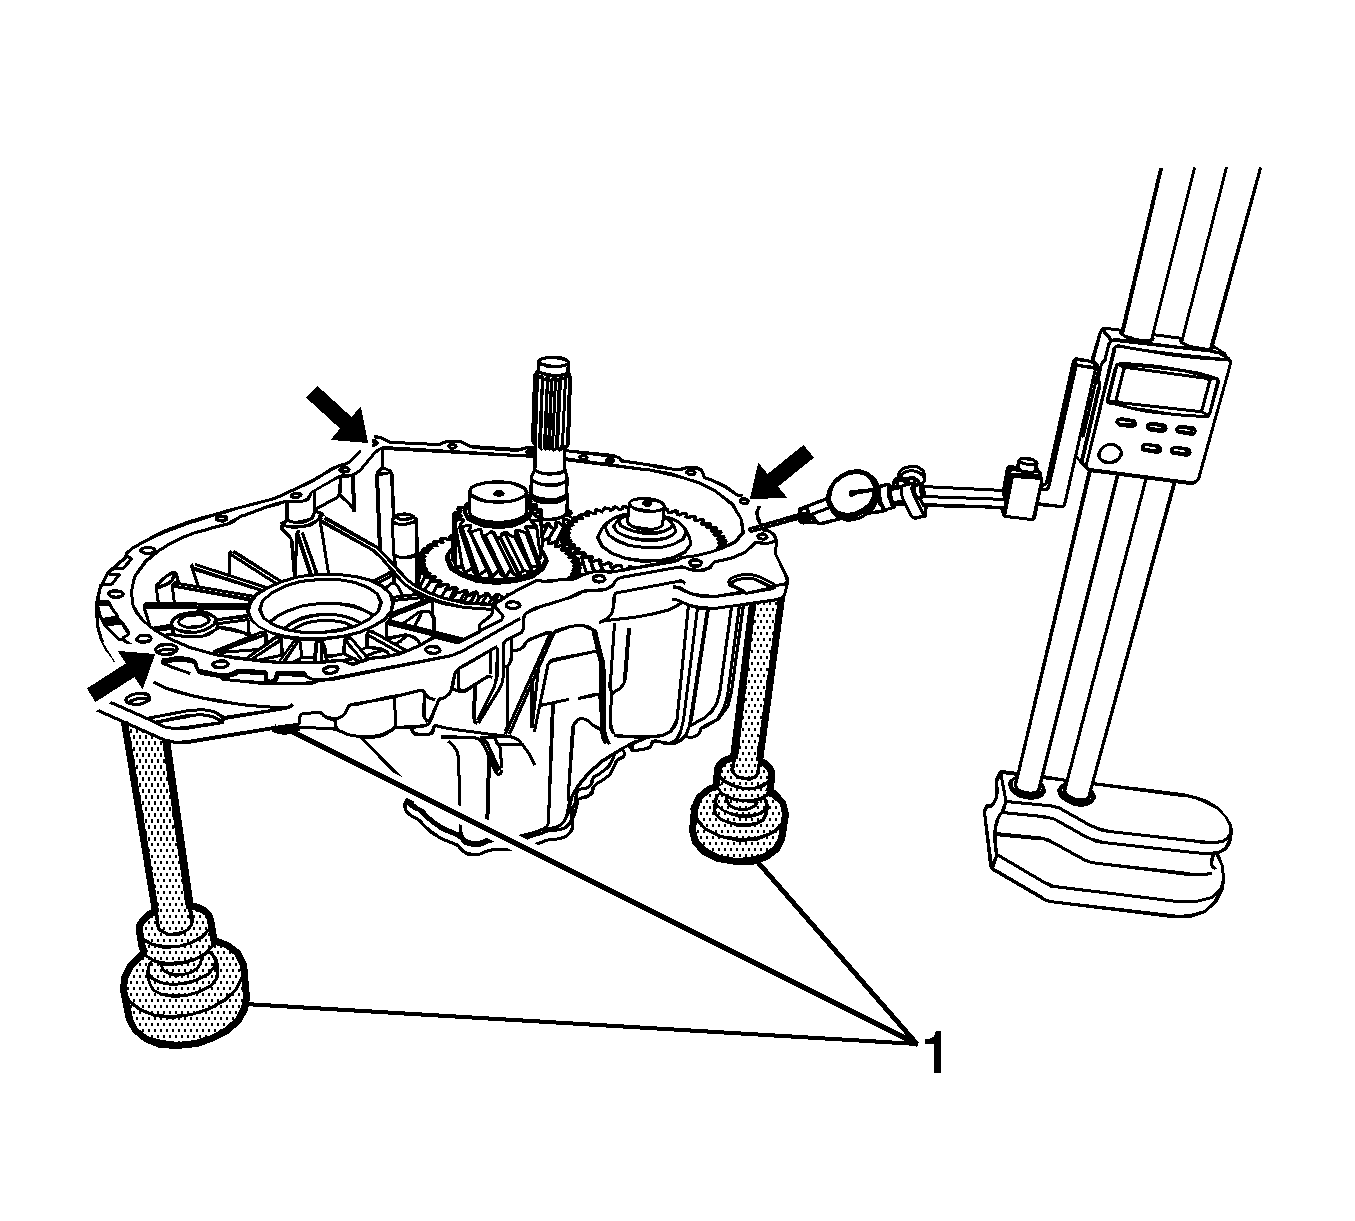
- Place the clutch housing differential bearing race, the differential, the transaxle housing differential bearing race, and the DT-48201 (1)
onto the DT-48202 (2).

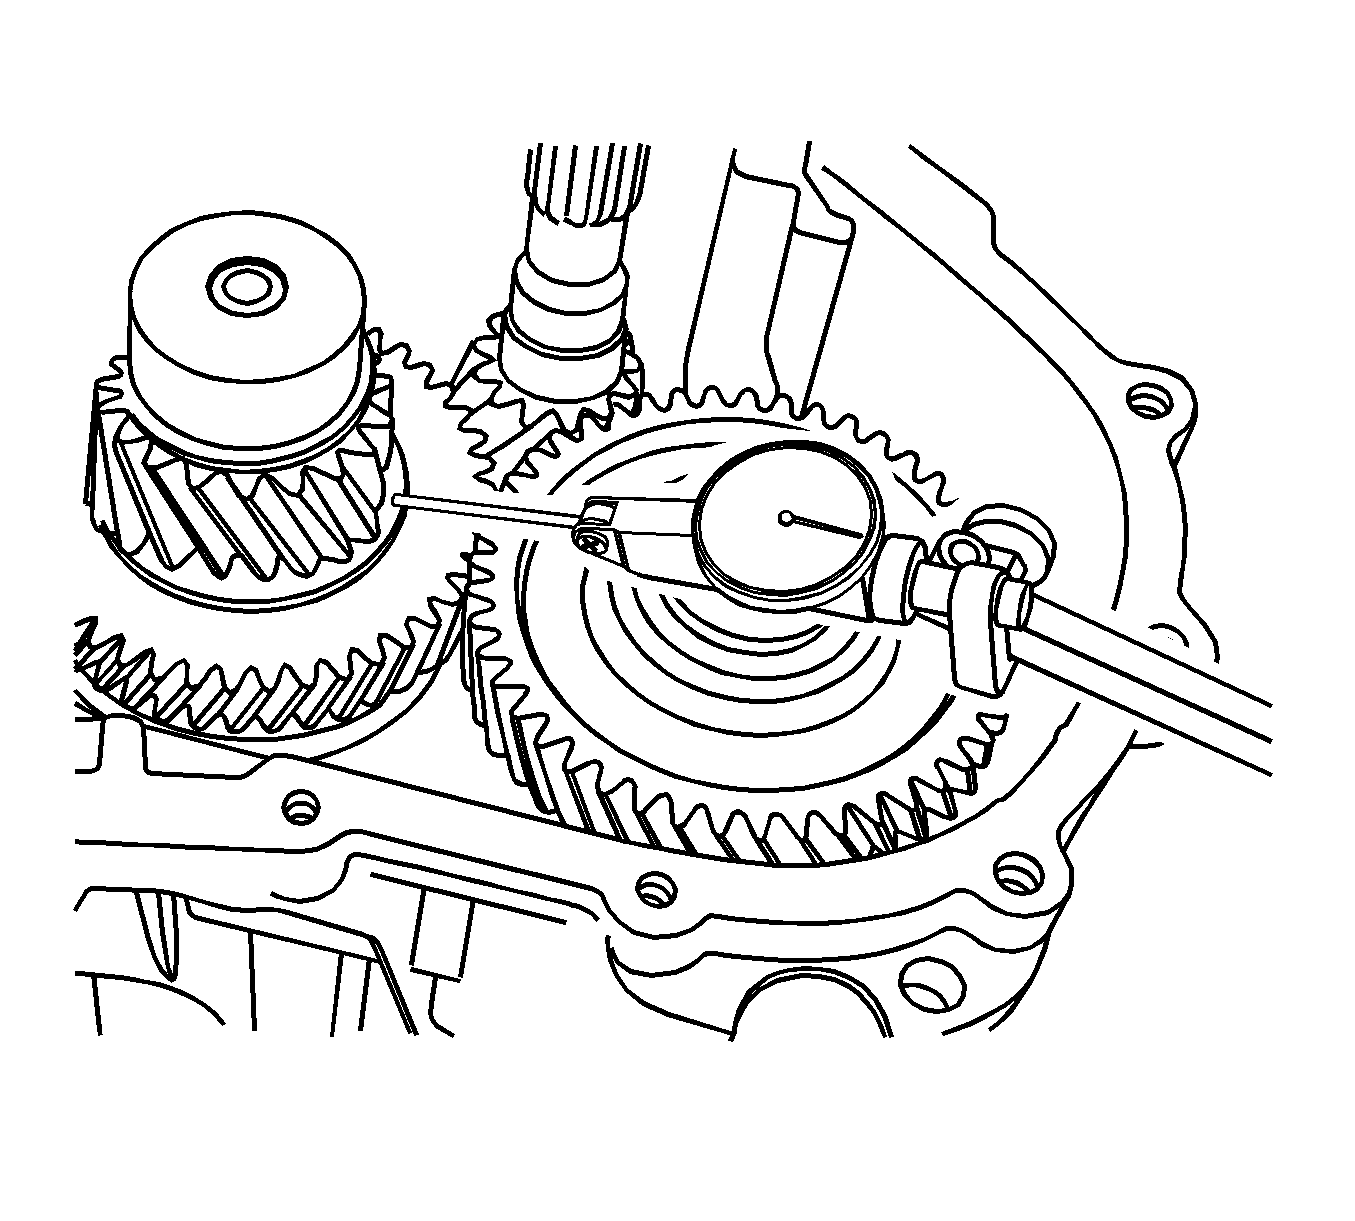
- Adjust the zero pint setting for each place on the transaxle housing differential bearing race surface using the height gage.
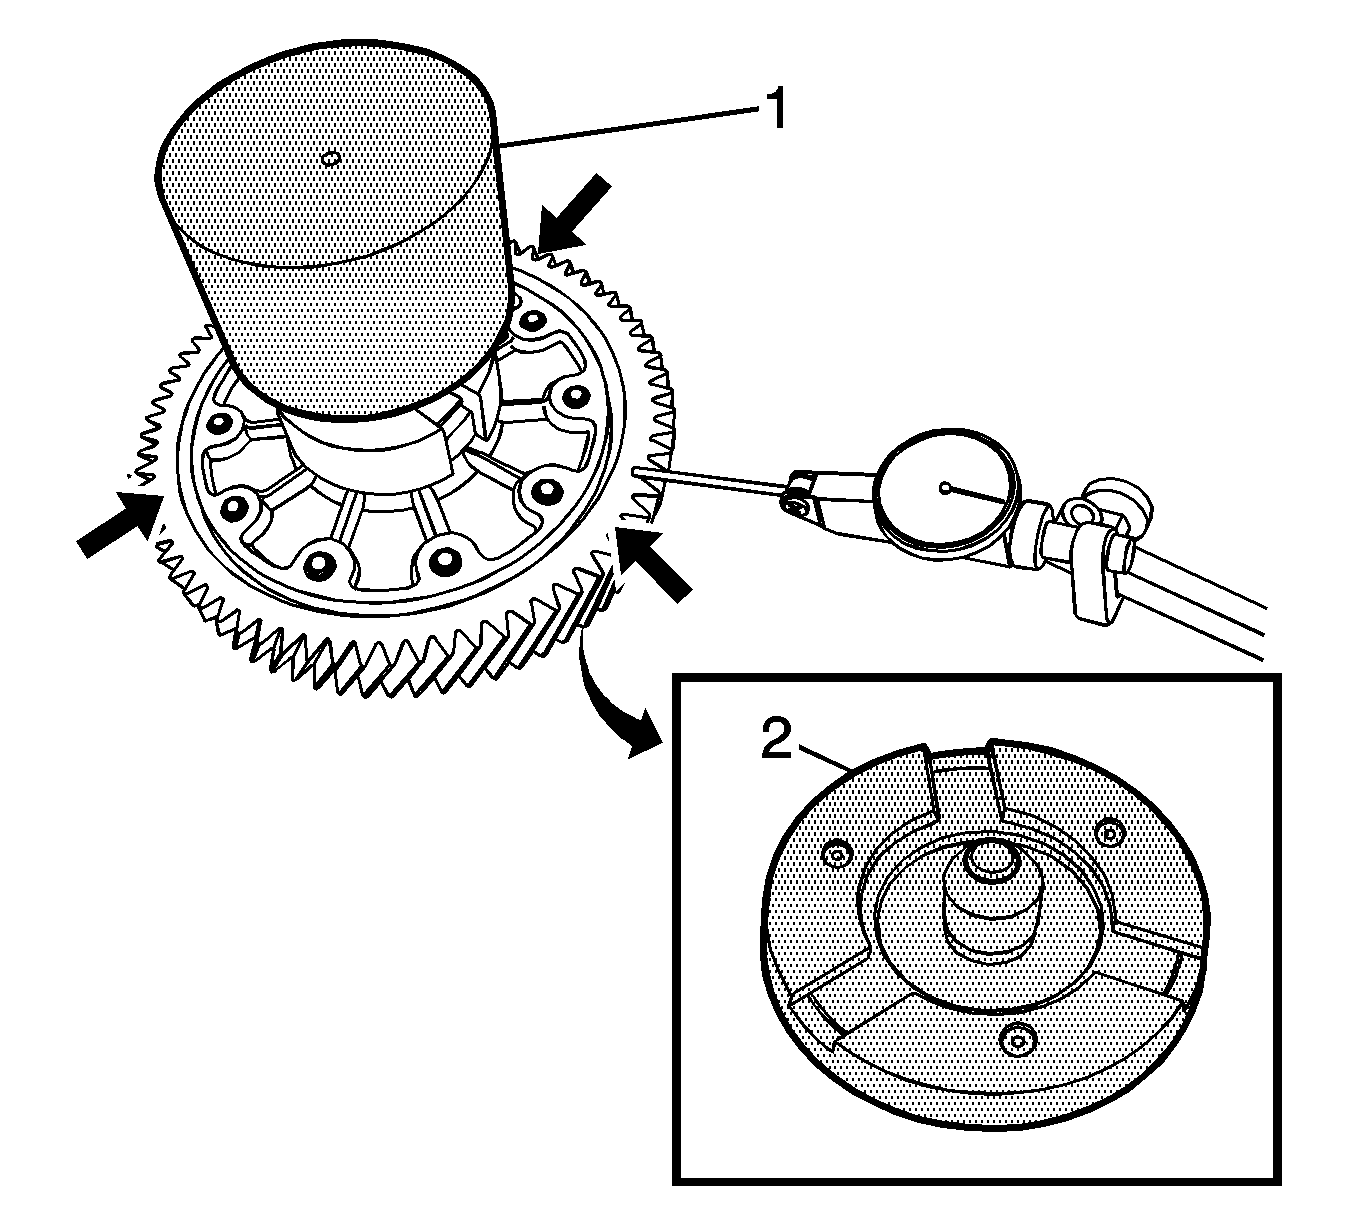
- Measure the 3 places on the differential ring gear surface using the height gage (average = B).
The height from the transaxle housing differential
bearing race to the differential ring gear surface.
- Measure the 3 places on the DT-48202 (1) using the height gage (average = C).
The height from the transaxle housing differential bearing
race to the clutch housing differential bearing race.
- To obtain shim size for transaxle housing shim use the following formula:
1 = 37.2mm - A - B
To obtain shim size for clutch housing shim use the following formula:
2 = 134.08mm - C - 1
