Tools Required
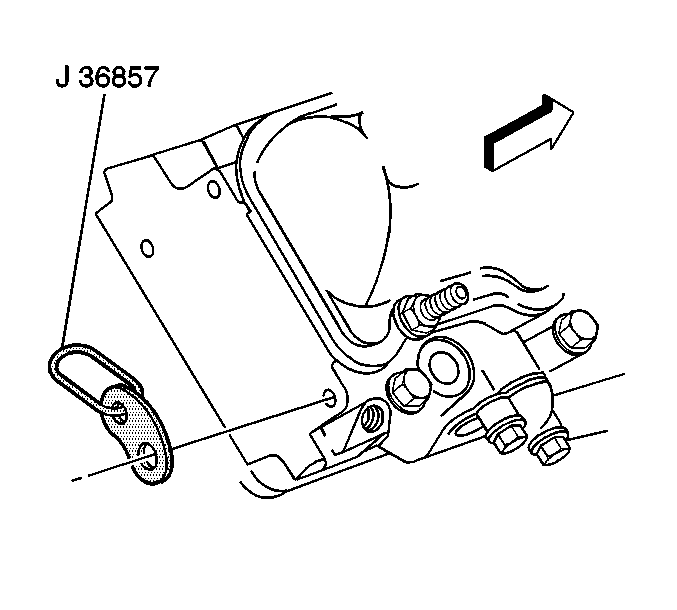
J 36857 Engine Lift Bracket
Removal Procedure
- Remove the hood from the vehicle. Refer to Hood Replacement in Body Front End.
- Remove the battery from the vehicle. Refer to Battery Replacement in Engine Electrical.
- Remove the engine cover from the vehicle. Refer to Engine Cover Replacement in Interior Trim.
- Drain the cooling system. Refer to Cooling System Draining and Filling in Engine Cooling.
- Evacuate the air conditioning system. Refer to Refrigerant Recovery and Recharging in Heating, Ventilation and Air Conditioning.
- Remove the front bumper from the vehicle. Refer to Front Bumper Replacement in Bumpers.
- Remove the grille from the vehicle. Refer to Grille Replacement in Exterior Trim.
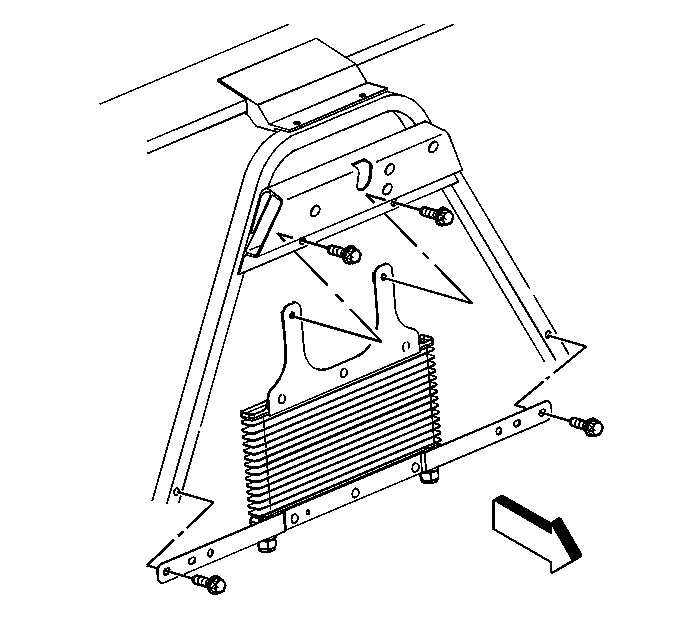
- Remove the auxiliary engine oil cooler from the vehicle (if needed). Refer to Auxiliary Engine Oil Cooler Replacement in Engine Cooling.
- Remove the transmission oil cooler (if equipped).
- Remove the A/C condenser from the vehicle. Refer to Condenser Replacement in Heating, Ventilation and Air Conditioning.
- Remove the radiator from the vehicle. Refer to Radiator Replacement in Engine Cooling.
- Remove the radiator support from the vehicle. Refer to Radiator Support Replacement in Body Front End.
- Remove the radiator hoses from the engine assembly. Refer to Radiator Hose Replacement in Engine Cooling.
- Remove the left accessory mounting bracket from the engine assembly. Refer to Accessory Mounting Brackets Replacement .
- Remove right accessory mounting bracket from the engine assembly. Refer to Accessory Mounting Brackets Replacement .
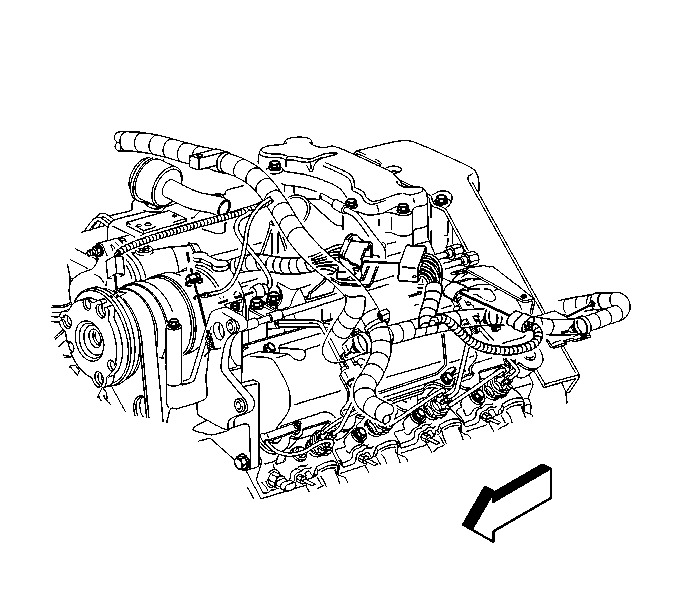
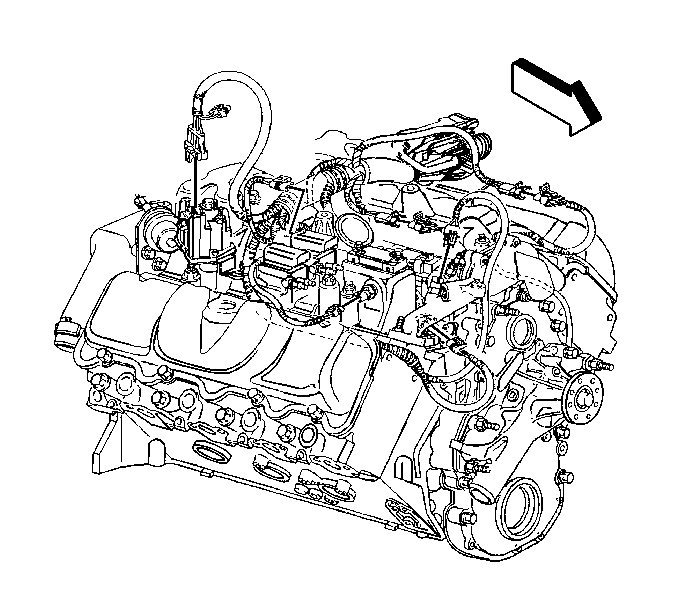
- Remove the engine wiring harness from the left side of the engine assembly.
- Remove the engine wiring harness from the right side of the engine assembly.
- Remove the turbocharger assembly from the engine block. Refer to Turbocharger Replacement .
- Remove the exhaust manifolds from the cylinder heads. Refer to Exhaust Manifold Replacement .
- Remove the lower intake manifold from the engine block. Refer to Intake Manifold Replacement .
- Raise the vehicle and install safety stands. Refer to Vehicle Lifting Caution in Cautions and Notices.
- Remove the starter assembly from the engine block. Refer to Starter Motor Replacement in Engine Electrical.
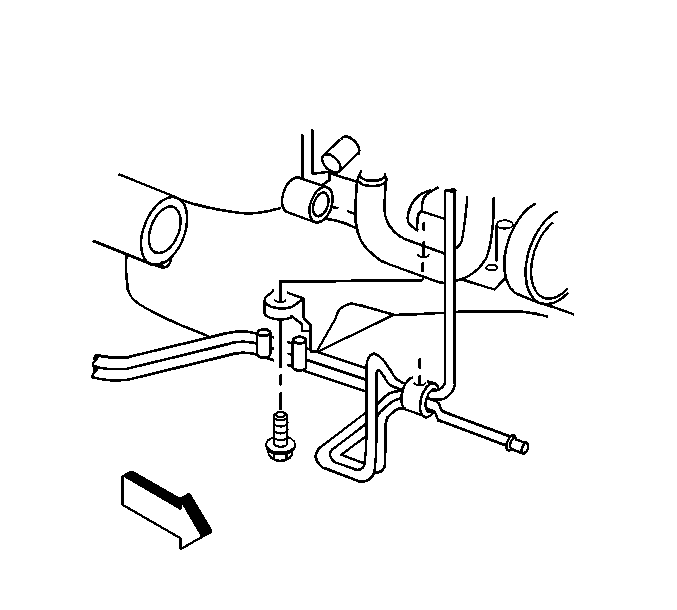
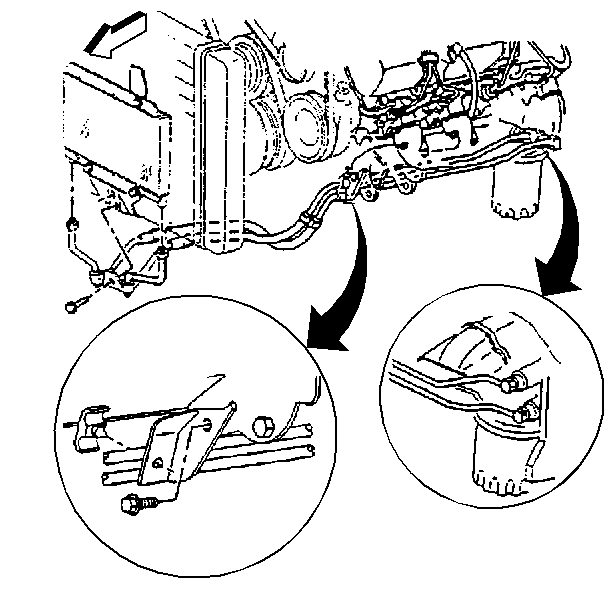
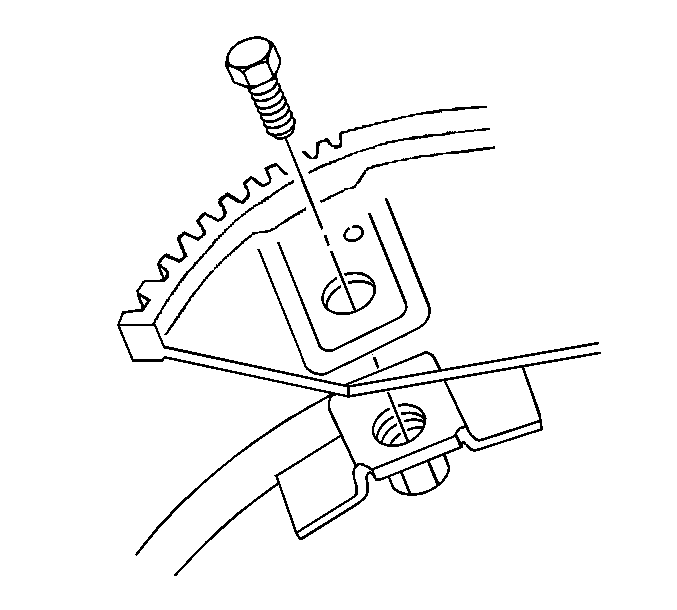
- Remove the transmission oil cooler lines from the retainers on the engine oil pan and secure to the side.
- Remove the engine oil cooler lines from the engine and secure to the side.
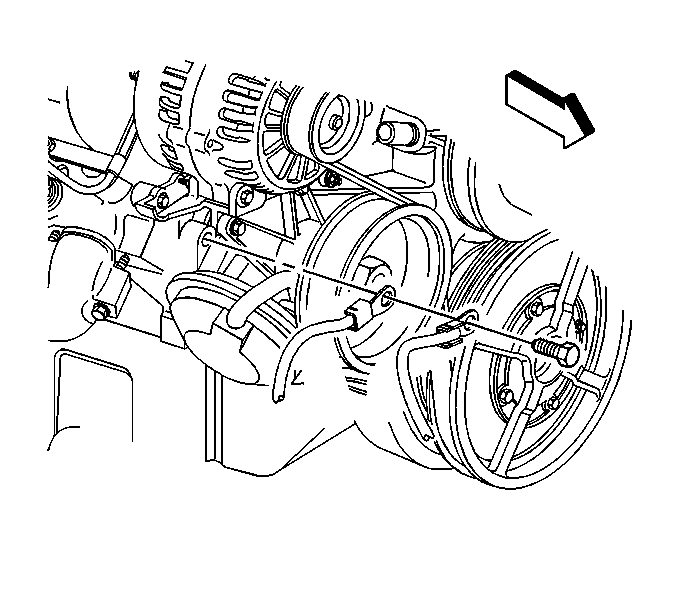
- Remove the bolts from the flywheel to the torque convertor.
- Remove the ground straps from the engine block to the frame.
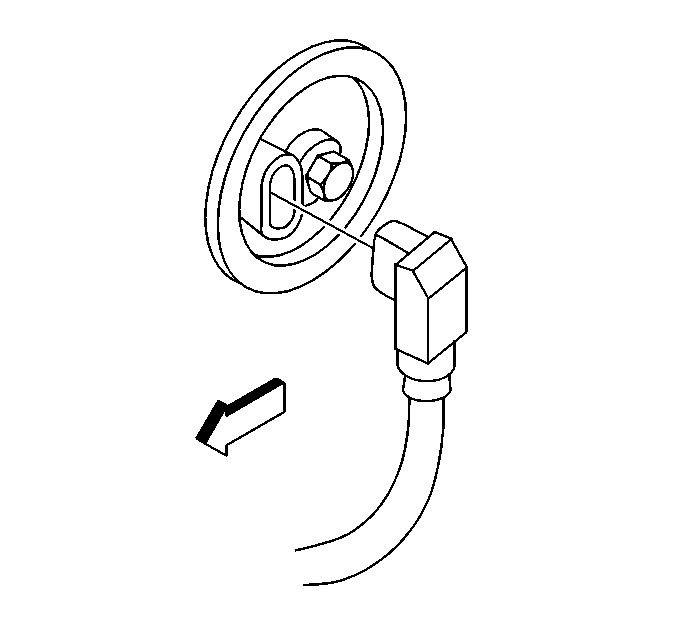
- Remove the electrical connector from the block heater.
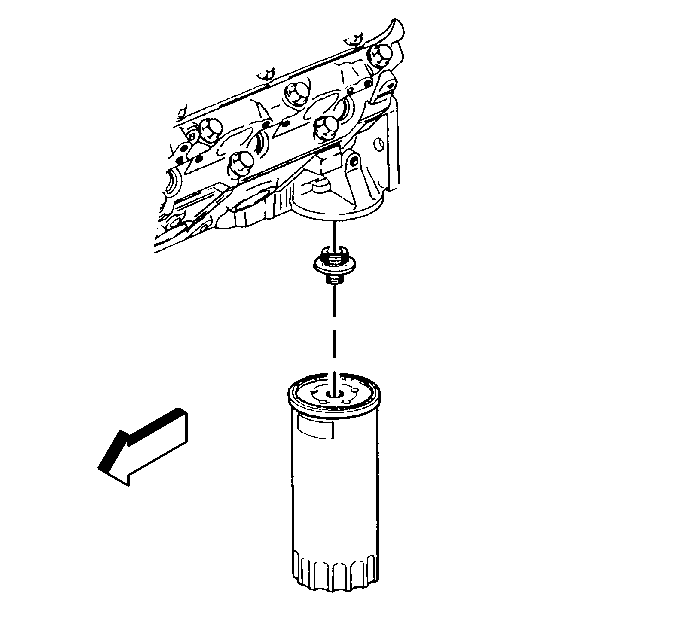
- Remove the engine oil filter.
- Remove the safety stands and lower the vehicle. Refer to Vehicle Lifting Caution in Cautions and Notices.
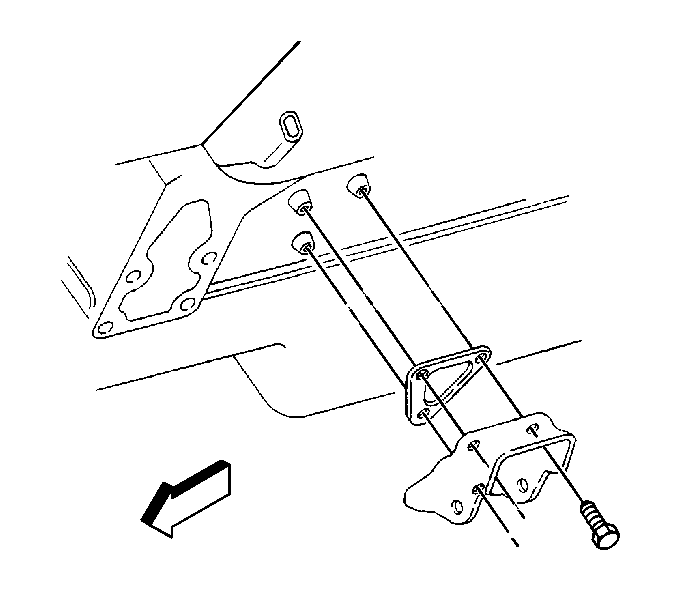
- Install the J 36857 and a length of chain, using GM P/N 23503910 or equivalent attaching bolt to the right cylinder head rear corner and left cylinder head front corner.
- Support the transmission.
- Attach a suitable lifting device to the chain.
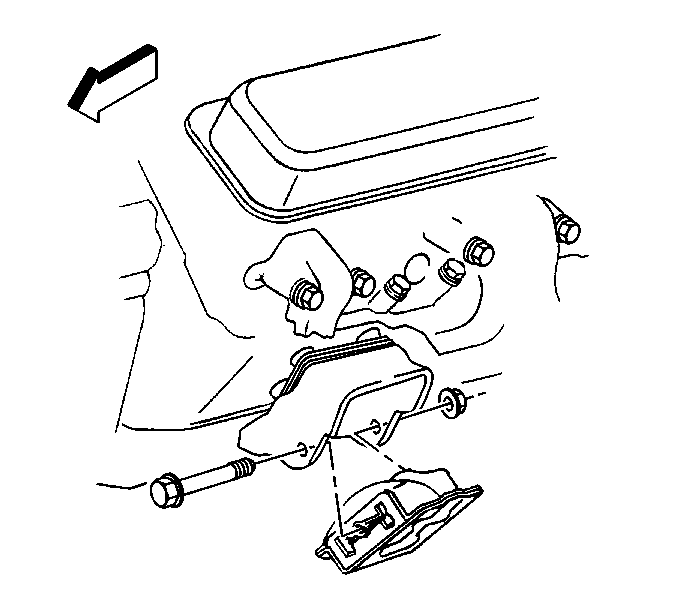
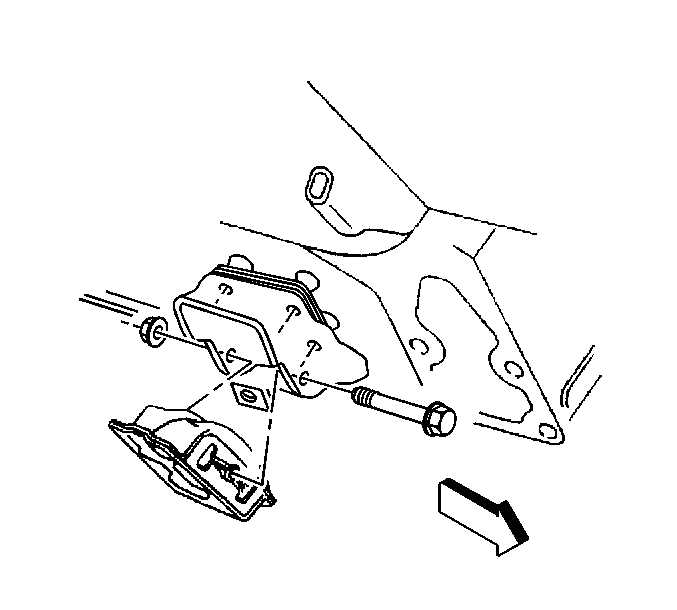
- Remove the engine mount through bolt from the left engine mount.
- Remove the right mount through bolt from the right engine mount.
- Remove the left engine mount from the frame.
- Remove the right engine mount from the frame.
- Remove the engine from the vehicle.
- Remove the flywheel from the crankshaft. Refer to Engine Flywheel Removal .
- Install the engine assembly on a suitable engine stand.
- Remove the lifting device from the engine assembly.
- Remove the lifting brackets from the engine assembly.
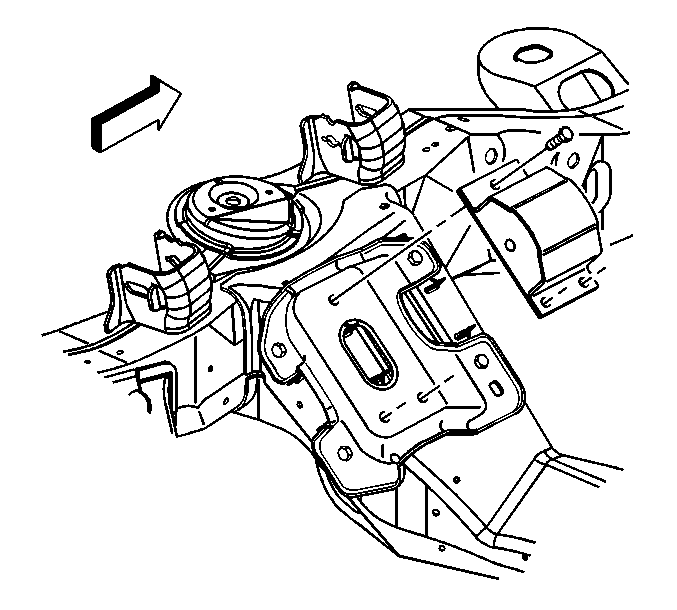
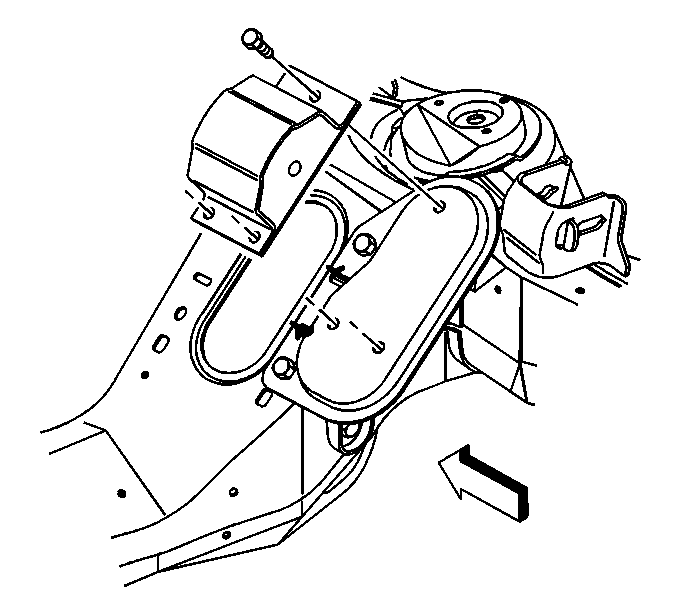
- Remove the engine mount brackets from the engine block.
- Remove the right engine mount bracket from the engine block.
Important: It may be necessary to remove the flywheel from the crankshaft before installing the engine assembly to the engine stand

Installation Procedure
- Install the engine mount bracket to the engine block.
- Install the right engine mount bracket to the engine block.
- Install the J 36857 and a length of chain, using GM P/N 23503910 or equivalent attaching bolt, to the rear of the right cylinder head and the front of the left cylinder head.
- Remove the engine assembly from the engine stand.
- Install the flywheel on the crankshaft. Refer to Engine Flywheel Installation .
- Install the left engine mount to the frame.
- Install the right engine mount to the frame.
- Install the engine assembly in the vehicle.
- Lower the engine assembly on to the engine mount brackets.
- Install the engine mount through bolt for the left side.
- Install the engine mount through bolt for the right side.
- Remove the lifting device from the engine assembly.
- Raise the vehicle and install safety stands. Refer to Vehicle Lifting Caution in Cautions and Notices.
- Install the bolts from the transmission to the engine block. Refer to Transmission Replacement in Transmission/Transaxle.
- Install the bolts from the flywheel to the torque convertor. Refer to Transmission Replacement in Transmission/Transaxle.
- Install the starter assembly to the engine block. Refer to Starter Motor Replacement in Engine Electrical.
- Install the electrical connection for the block heater.
- Install the ground straps from the frame to the engine block.
- Install the transmission oil cooler lines to the retainer.
- Install the engine oil cooler lines to the engine block. Refer to Engine Oil Cooler Hose/Pipe Replacement in Engine Cooling.
- Remove the safety stands and lower the vehicle. Refer to Vehicle Lifting Caution in Cautions and Notices.
- Install the lower intake manifold to the engine block. Refer to Intake Manifold Replacement .
- Install the exhaust manifolds to the cylinder heads. Refer to Exhaust Manifold Replacement .
- Install the turbocharger on the engine block. Refer to Turbocharger Replacement .
- Install the left accessory mounting bracket to the engine block. Refer to Accessory Mounting Brackets Replacement .
- Install the right accessory mounting bracket to the engine block. Refer to Accessory Mounting Brackets Replacement .
- Install the wiring harness to the left side of the engine assembly.
- Install the wiring harness to the right side of the engine assembly.
- Install the radiator hoses to the engine assembly. Refer to Radiator Hose Replacement in Engine Cooling.
- Install the radiator support on the vehicle. Refer to Radiator Support Replacement in Body Front End.
- Install radiator in the vehicle. Refer to Radiator Replacement in Engine Cooling.
- Install the A/C condenser in the vehicle. Refer to Condenser Replacement in Heating, Ventilation, and Air Conditioning.
- Install the transmission auxiliary oil cooler (if equipped). Refer to Transmission Fluid Auxiliary Cooler Replacement in Transmission/Transaxle.
- Install the auxiliary engine oil cooler. Refer to Auxiliary Engine Oil Cooler Replacement in Engine Cooling.
- Install the grille on the vehicle. Refer to Grille Replacement in Exterior Trim.
- Install the front bumper on the vehicle. Refer to Front Bumper Replacement in Bumpers.
- Refill the cooling system. Refer to Cooling System Draining and Filling in Engine Cooling.
- Recharge the A/C system. Refer to Refrigerant Recovery and Recharging in Heating, Ventilation and Air Conditioning.
- Install the battery in the vehicle. Refer to Battery Replacement in Engine Electrical.
- Install the hood assembly on the vehicle. Refer to Hood Replacement in Body Front End.
- Install the engine with the proper type and quantity of engine oil. Refer to Engine Oil and Oil Filter Replacement .
- Install a scan tool and make any adjustment that are necessary.
- Install the engine cover in the vehicle. Refer to Engine Cover Replacement in Interior Trim.
- Perform the TDC offset adjustment procedure. Refer to Fuel Injection Pump Top Dead Center Offset Adjustment in Engine Controls-6.5L-L65.
Notice: Use the correct fastener in the correct location. Replacement fasteners must be the correct part number for that application. Fasteners requiring replacement or fasteners requiring the use of thread locking compound or sealant are identified in the service procedure. Do not use paints, lubricants, or corrosion inhibitors on fasteners or fastener joint surfaces unless specified. These coatings affect fastener torque and joint clamping force and may damage the fastener. Use the correct tightening sequence and specifications when installing fasteners in order to avoid damage to parts and systems.
Tighten
Tighten the engine mount bolts to 54N·m (40 lb ft).
Tighten
Tighten the engine mount bolts to 54N·m (40 lb ft).
Tighten
Tighten the engine mount bolts to 59N·m (44 lb ft).
Tighten
Tighten the engine mount bolts to 59N·m (44 lb ft).
Tighten
Tighten the through bolt to 68N·m (50 lb ft).
Tighten
Tighten the through bolt to 68N·m (50 lb ft).
