Removal Procedure
- Remove the instrument cluster panel. Refer to
Instrument Panel Cluster Trim Plate Bezel Replacement.
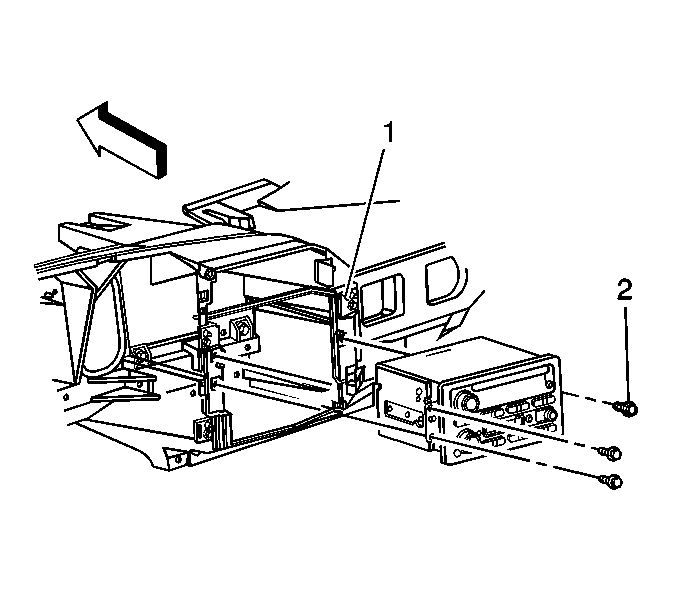
- Remove the screws (2) that secure the radio
to the support bracket (1).
- Remove the radio from the support bracket enough to access the connectors
at rear of the radio.
- Disconnect the electrical/audio and antenna cable connectors from the
radio.
- Remove the radio.
- If removing the radio mounting bracket. Perform the
following steps:
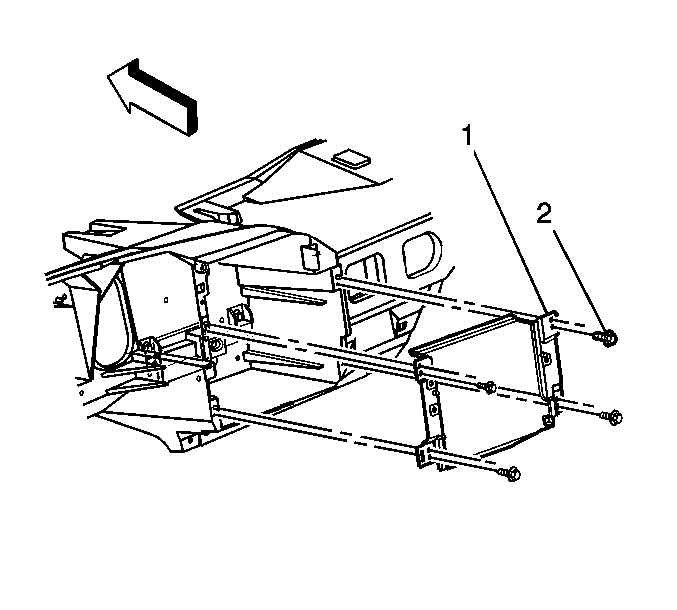
| 6.1. | Detach the clip retaining the HVAC harness to the radio mounting bracket. |
| 6.2. | Remove the screws (2) retaining the radio mounting bracket (1)
to the instrument panel carrier. |
| 6.3. | Remove the radio mounting bracket from the vehicle. |
Installation Procedure
- Install the radio mounting bracket. Perform the following
steps:
| 1.1. | Attach the HVAC harness to the radio mounting bracket with the clip. |
Notice: Refer to Fastener Notice in the Preface section.
| 1.2. | Install the screws (2) in order to retain the radio mounting bracket (1)
to the instrument panel carrier. |
Tighten
Tighten the screws to 3 N·m (27 lb in).
- Connect the electrical/audio and antenna cable connectors
to the radio.
- Install the radio to the support bracket (1).
- Align the radio locator tab into the support bracket locator hole.
- Install the radio screws (2).
Tighten
Tighten the screws to 2 N·m (18 lb in).
- Install the instrument cluster panel. Refer to
Instrument Panel Cluster Trim Plate Bezel Replacement.
- Calibrate the new radio assembly. Refer to
Control Module References.
