For 1990-2009 cars only
Removal Procedure

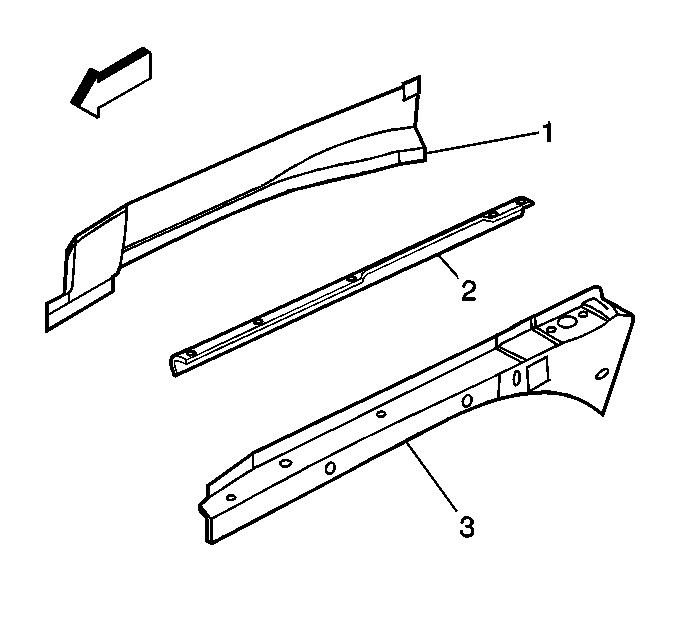
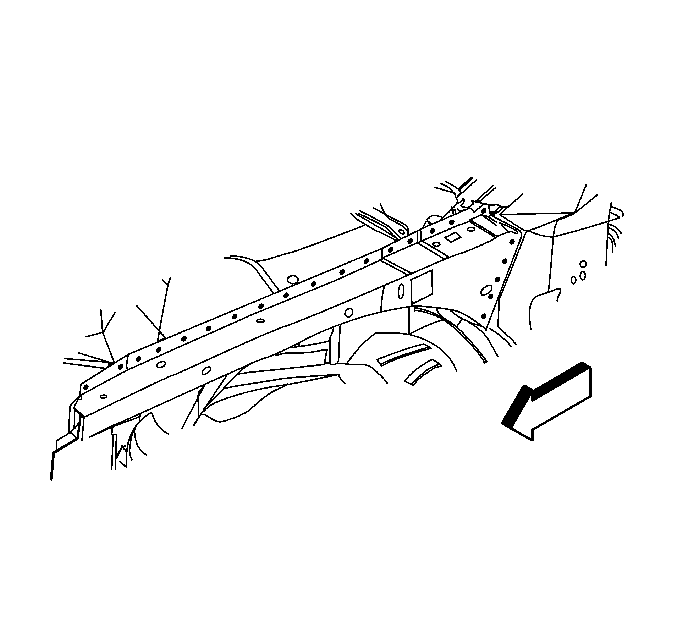
Important: The front upper rail is serviced as 2 components: inner (1) and outer (3) panels. The outer panel is serviced as a sub-assembly and includes an inner reinforcement (2). After the outer rail has been removed, the inner rail is completely accessible and can be serviced at the factory seams.
Important: Sectioning of the front upper rails is not recommended.
- Remove all related panels and components.
- Remove sealers and anti-corrosion materials as necessary.
- Locate, mark, and drill out all factory welds attaching the outer rail.
- Remove the damaged outer rail (3).
- Locate, mark, and drill out the welds attaching the inner rail (1).
- Remove the damaged inner rail.
Installation Procedure
- Prepare the mating surfaces as necessary.
- Drill 8 mm (5/16 in) plug weld holes as necessary in the locations noted from the original panels.
- Temporarily position the inner (1) and outer (3) rails on the vehicle.
- Use 3-dimensional measuring to locate and mark front fender mounting-bolt holes in the outer rail (2).
- Drill 5.5 mm (7/32 in) holes for self-tapping bolts as marked.
- When the service panels are correctly positioned, remove the outer panel and plug weld the inner panel as necessary.
- Reposition the outer rail with frequent measurements to ensure proper fit and alignment.
- Plug weld accordingly.
- Clean and prepare all of the welded surfaces.
- Prime with 2-part catalyzed primer.
- Apply the sealers and the anti-corrosion materials as necessary.
- Install all of the related panels and components.

Important: If the original locations are damaged beyond recognition, locate holes for plug welding 40 mm (1½ in) apart.

Important: Prior to refinishing, refer to GM 4901MD-99 Refinish Manual for recommended products. Do not combine paint systems. Refer to paint manufacturer's recommendations.
