For 1990-2009 cars only
Removal Procedure
- Disconnect the negative battery cable.
- Raise the vehicle. Refer to Lifting and Jacking the Vehicle.
- Remove the transmission assembly. Refer to Transmission Replacement for the automatic transmission or Transmission Replacement for the manual transmission.
- Remove the clutch assembly. (MT vehicle)
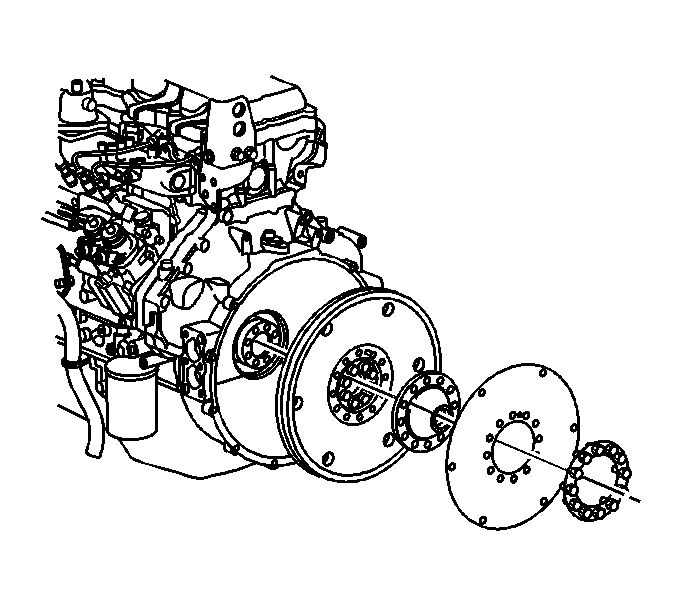
- Remove the flywheel bolts and washer.
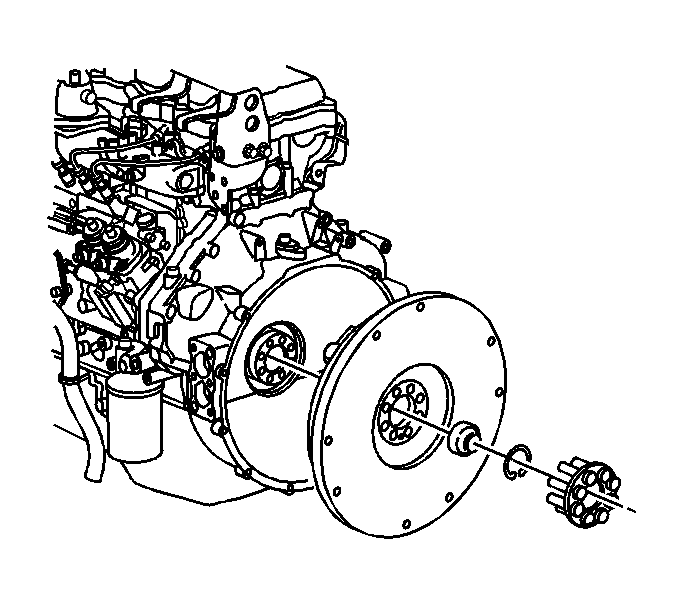
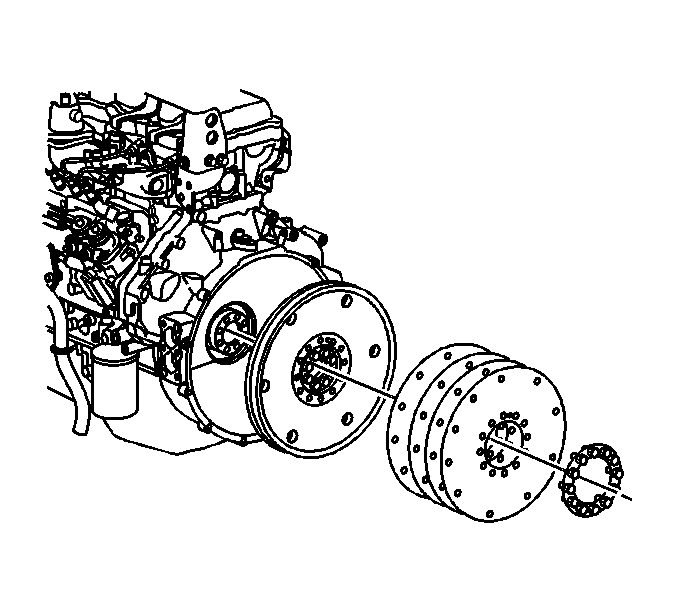
- Remove the flexplate 1 and 2. (AT vehicle).
- Remove the flywheel assembly.
- Inspect the flywheel for burning, scoring, warping or excessive wear.
- Inspect the flywheel ring gear for worn or broken teeth.
Caution: Refer to Battery Disconnect Caution in the Preface section.
Important: In order to maintain the proper component balance, contact surface taper and heat transfer, manual transmission flywheels are NOT to be machined.
Installation Procedure
- Install the flywheel to the crankshaft.
- Install the flywheel bolts and spacer.
- Install the flex plate 1 and 2 with knock pin, confirming the installation direction. (AT vehicle)
- To install the flex plate 1 and 2, insert a shaft to net hole. Remove the shaft after installation of flex plate. (AT vehicle)
- Install the flywheel bolts and washer.
- First stage: 78 N·m (58 lb ft)
- Second Stage: 60 degrees
- Third stage: 60 degrees
- Install the clutch to the flywheel. (MT vehicle)
- Install the transmission assembly. Refer to Transmission Replacement for the automatic transmission or Transmission Replacement for the manual transmission.
- Lower the vehicle.
- Connect the negative battery cable.
Notice: Refer to Fastener Notice in the Preface section.
Tighten
Tighten the flywheel bolts, in the first stage, to 78 N·m (58 lb ft).
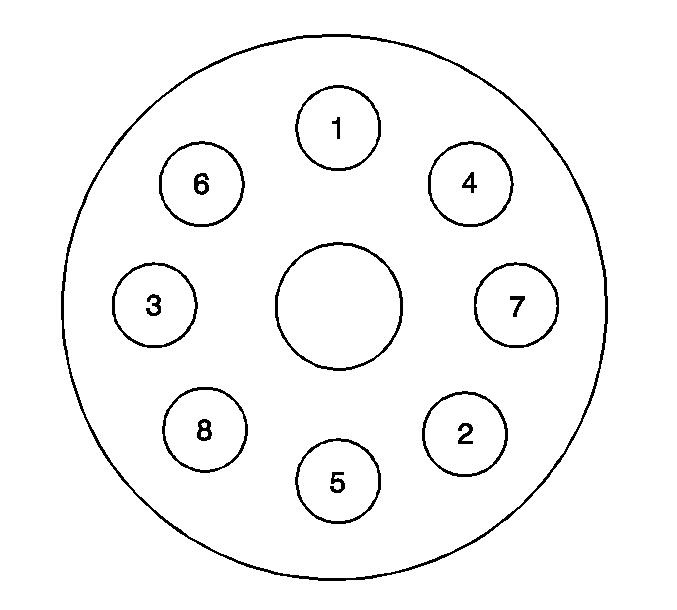
Tighten the flywheel bolts in the following stages according to the order in figure.
Tighten
