Fuel Injector Replacement Right
Tools Required
| • | EN-47909 Injector Bore and Sleeve Cleaning Kit |
| • | J-46594 Fuel Injector Removal Tool |
Removal Procedure
- Remove the engine cover. Refer to Engine Cover Replacement .
- Remove the glow plug control module. Refer to Glow Plug Control Module Replacement .
- Remove the air cleaner . Refer to Air Cleaner Replacement .
- Remove the charged air cooler outlet from the intake. Refer to Charged Air Cooler Hoses/Pipes Replacement .
- Disconnect the negative battery cable. Refer to Battery Negative Cable Disconnection and Connection .
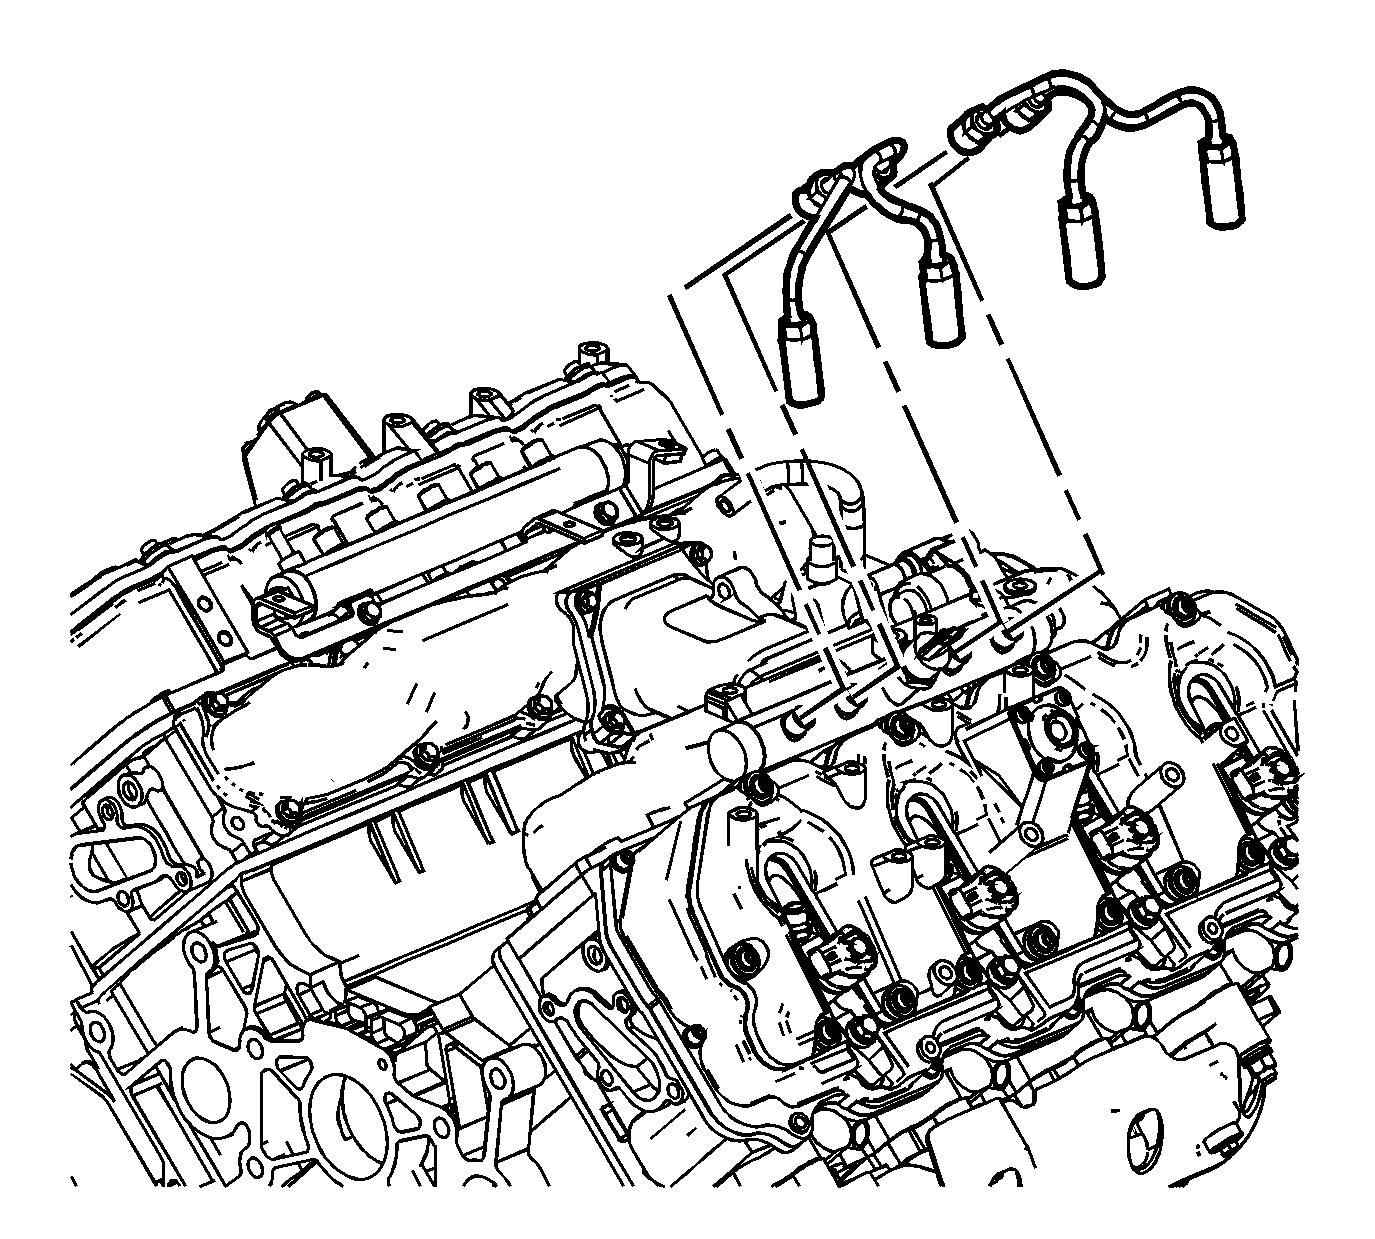
- Remove the fuel injector pipes.
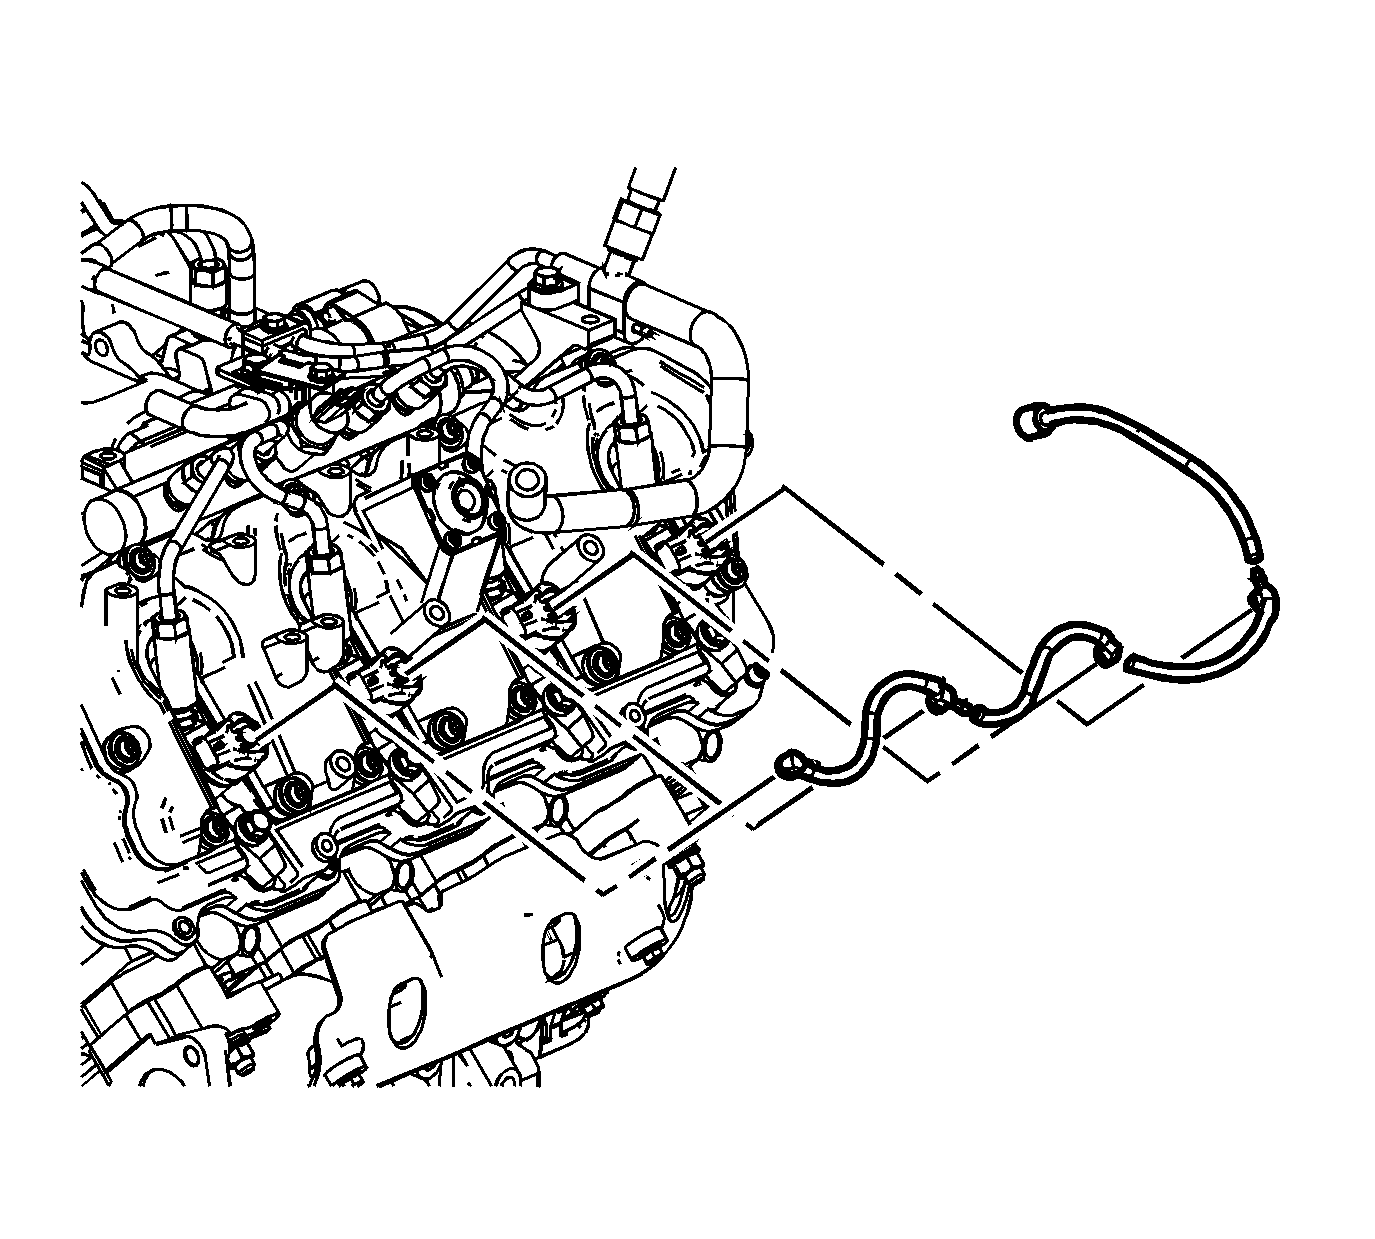
- Remove the fuel return hose clips.
- Remove the fuel return hose from the injectors.
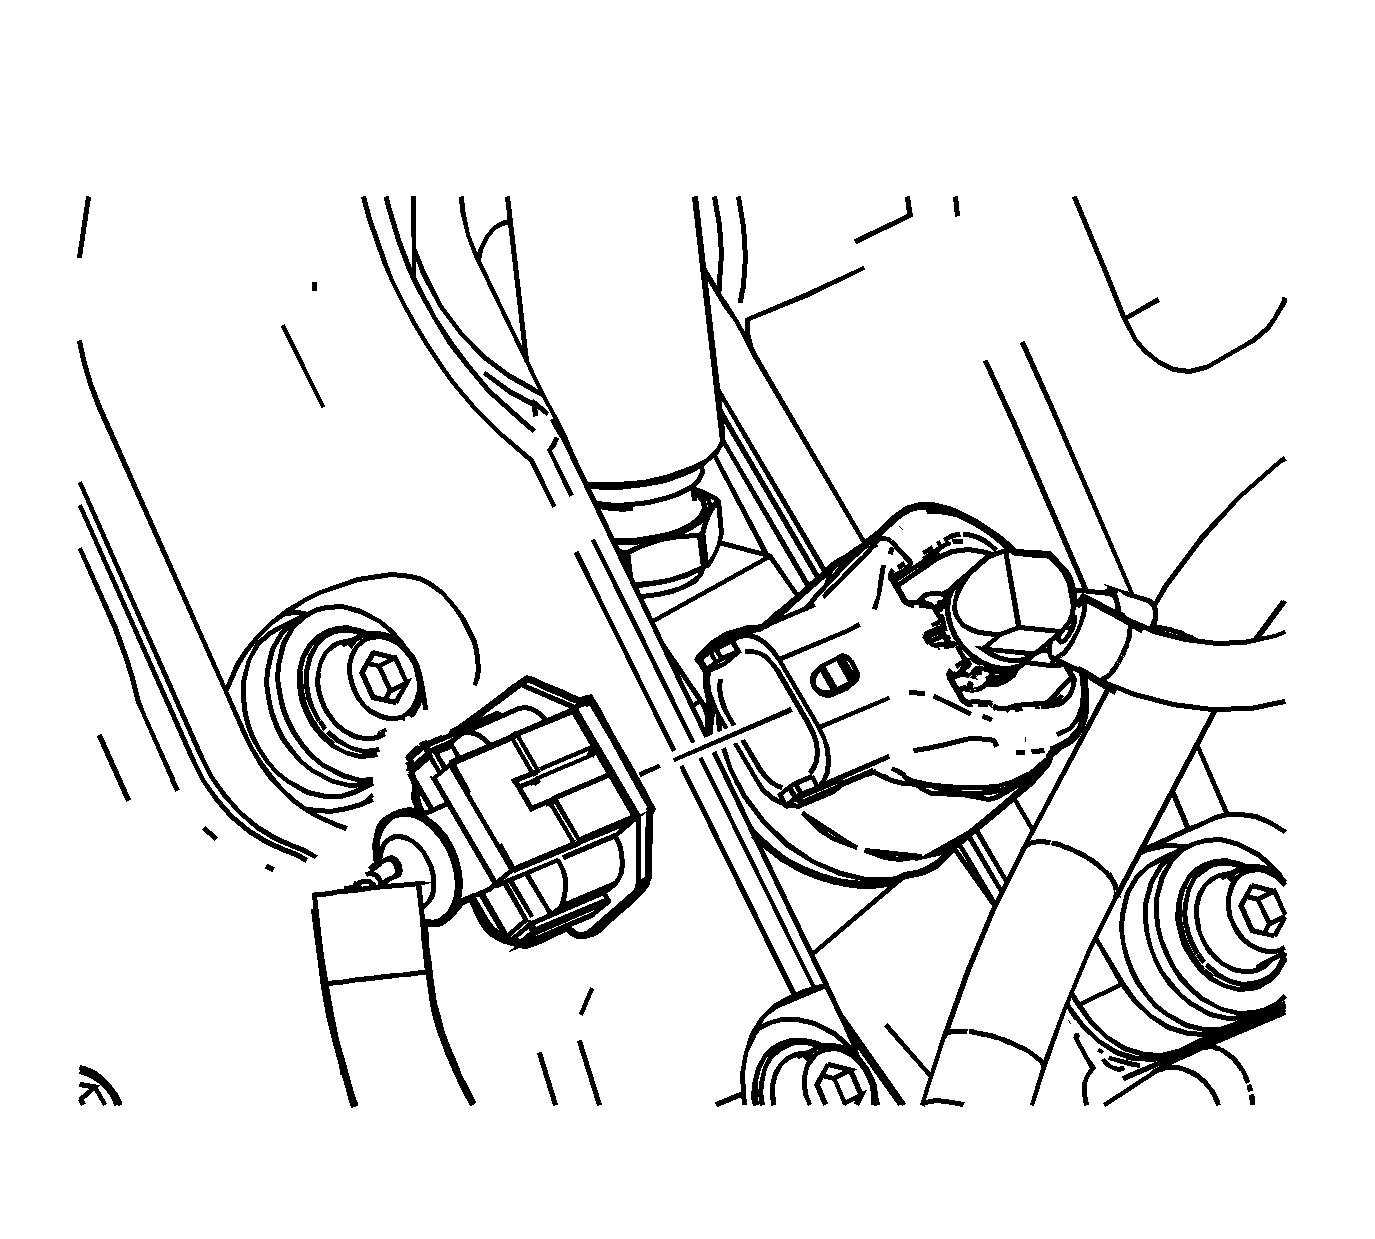
- Disconnect the fuel injector electrical connectors.
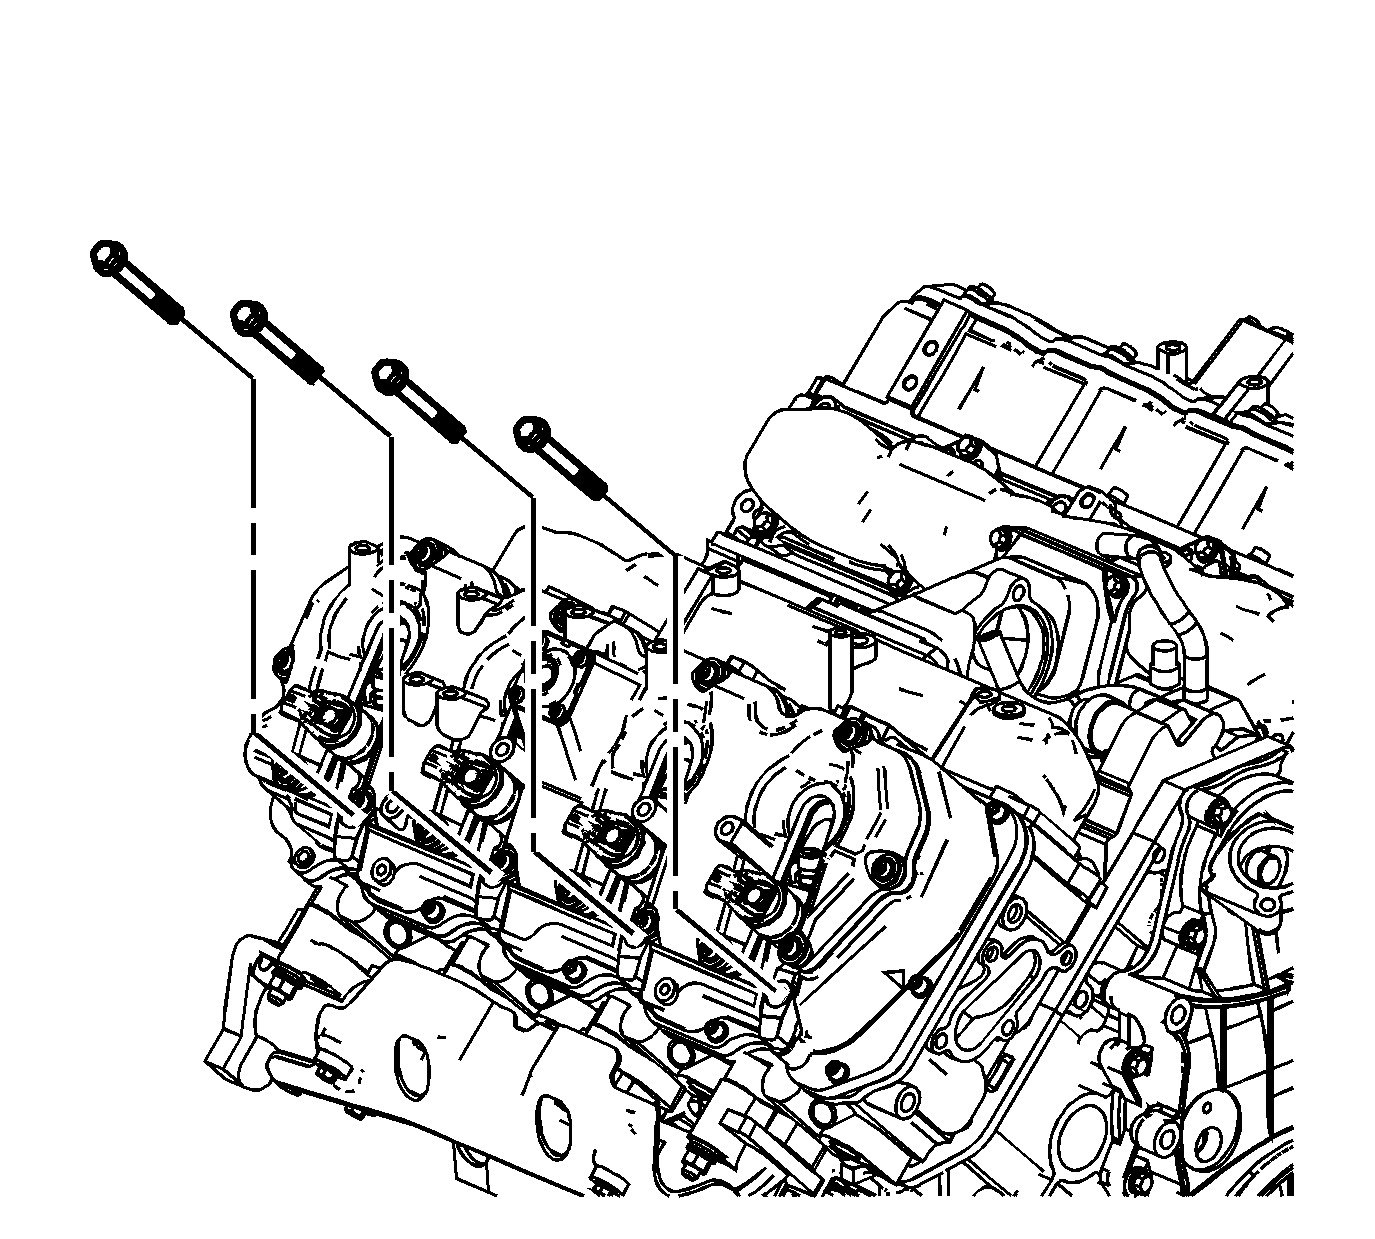
- Remove the fuel injector bracket bolts.
- Install the J-46594 into the bolt hole in the fuel injector bracket.
- Install a flare nut wrench onto the J-46594 and pull back away from the fuel injector, until the injector releases from its seat.
- Remove the J-46594 .
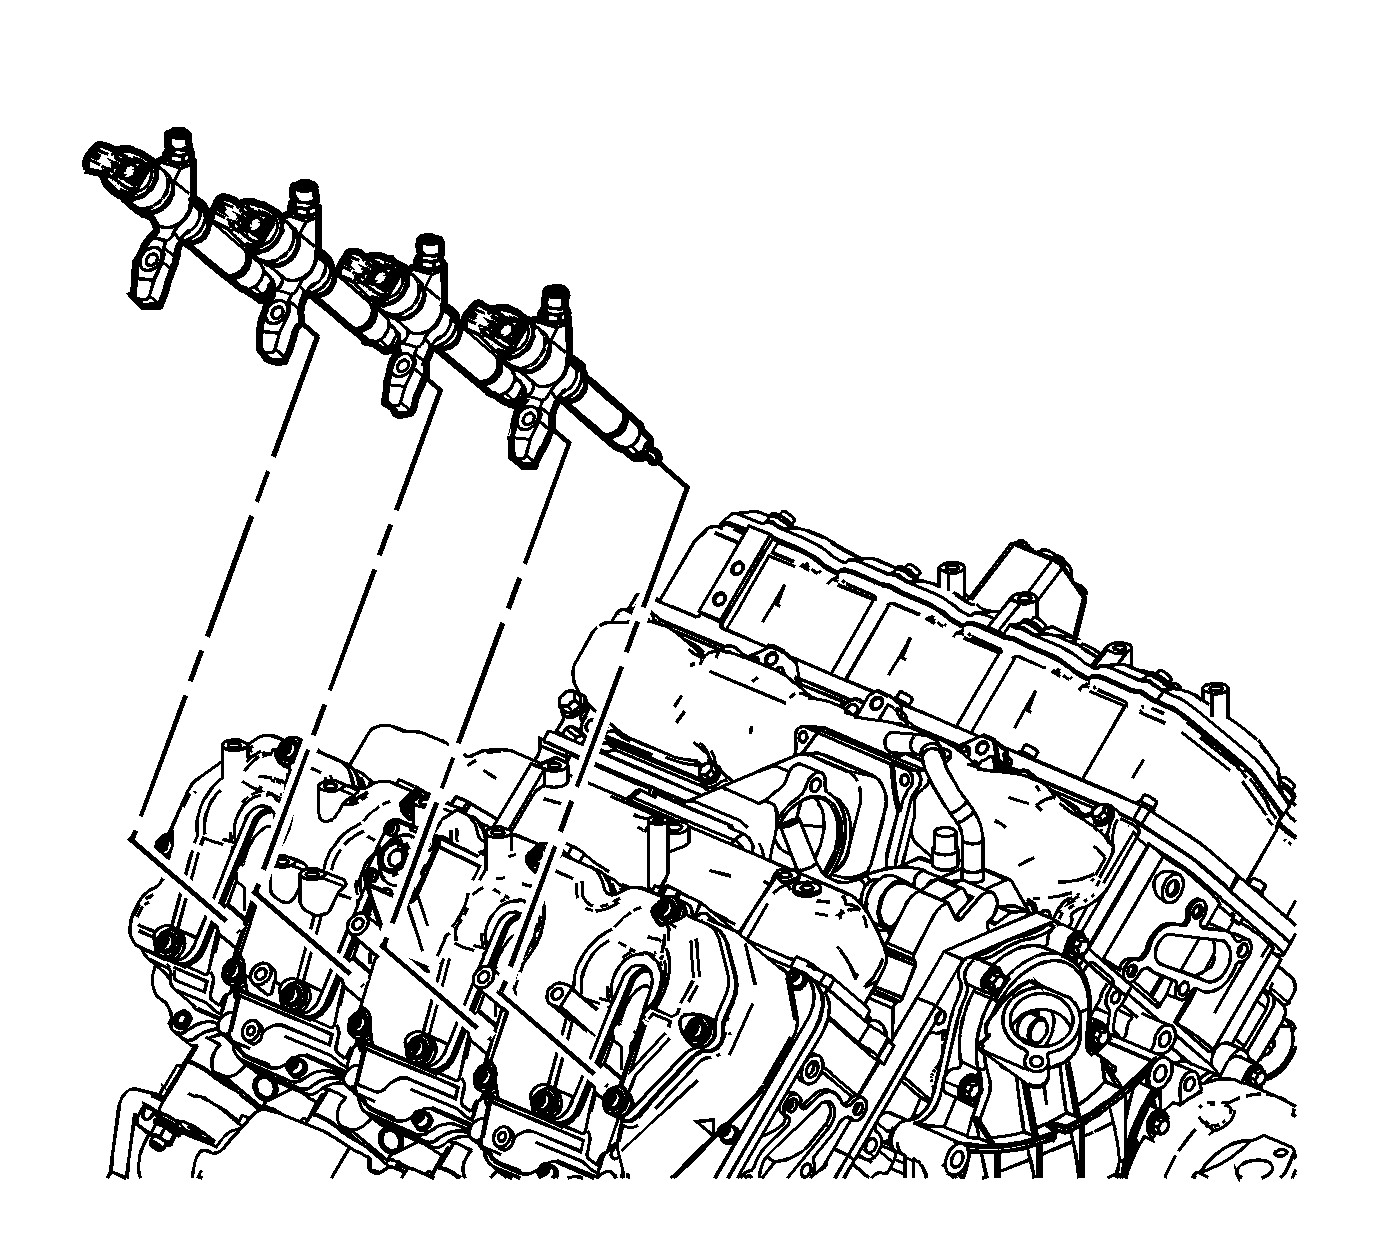
- Remove the fuel injectors with brackets.
- If necessary, remove the fuel injector bracket pins.
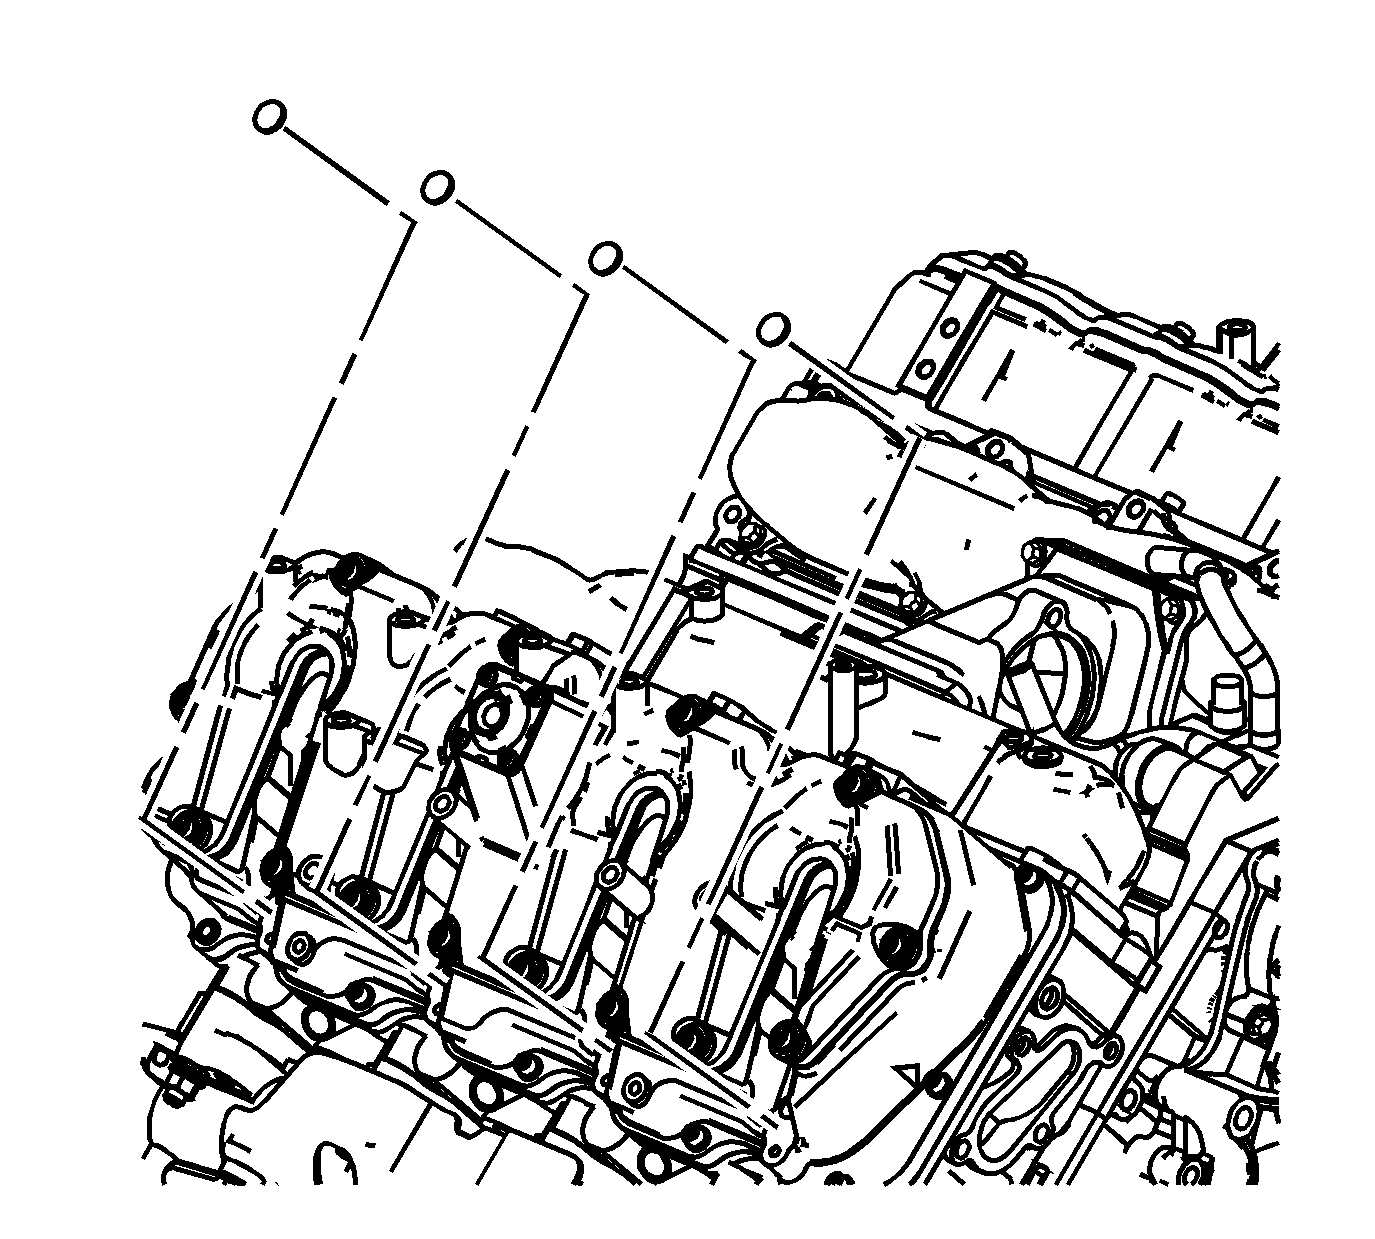
- Remove and discard the copper washer from the fuel injector bore.
- Remove and discard the O-ring from the fuel injector.
Fuel Injector Cleaning and Inspection
Important: If reusing the old injectors perform the following:
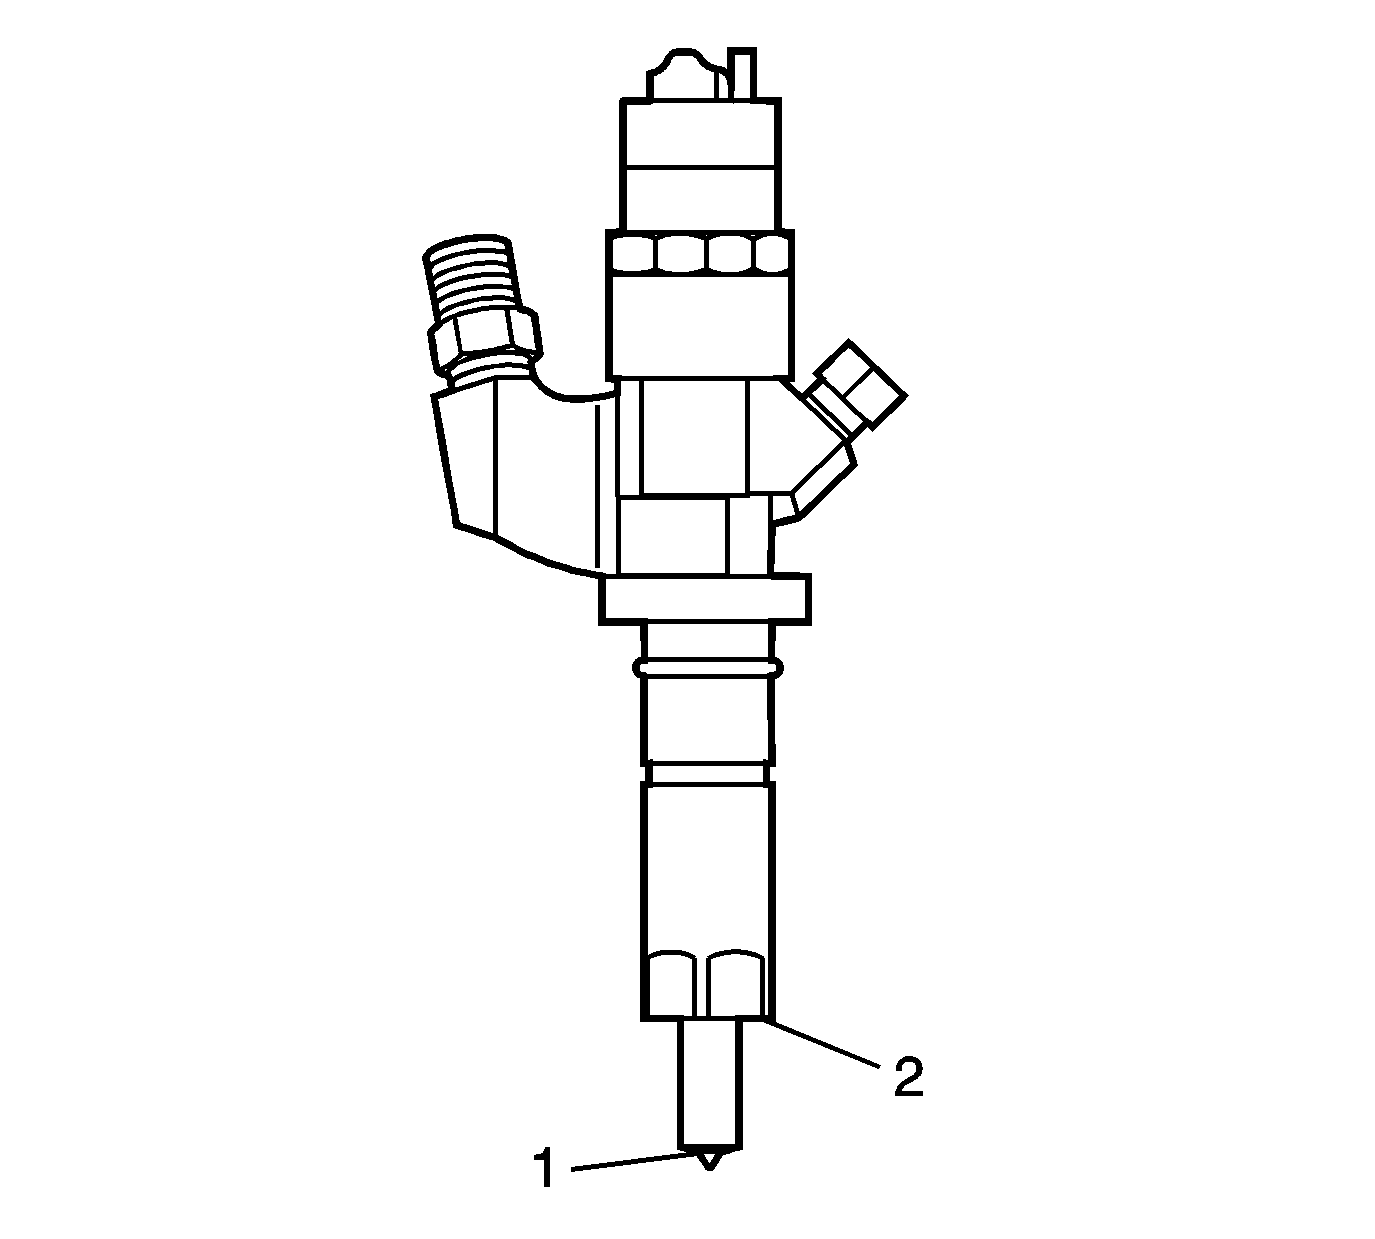
- Use a soft bristle non-metallic brush and Top Engine Cleaner, GM P/N 1052626 or equivalent, to remove any deposits from the nozzle tip (1) and the copper washer sealing area (2) before re-installation.
- Inspect the fuel injector nozzle tip (1) for any signs of discoloration (dark yellow, tan or blue) due to excessive heat.
- Replace the injector if any damage is found.
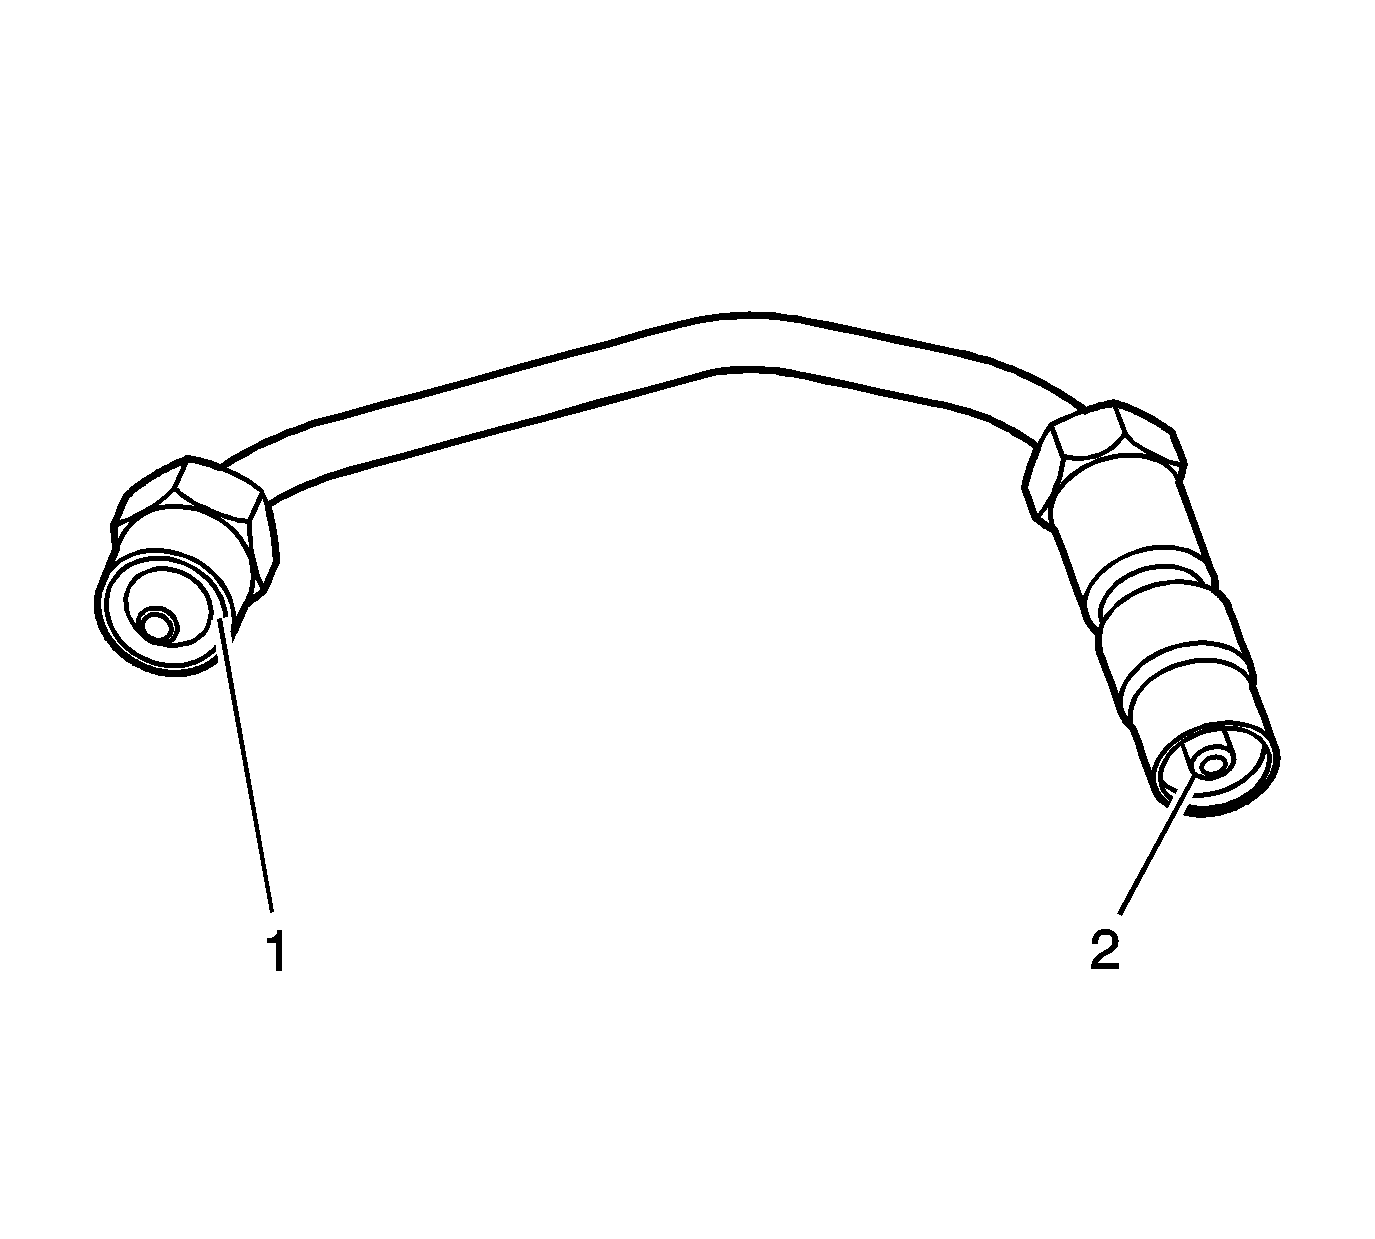
- Clean the fuel injector high pressure line.
- Inspect the fuel injector line for excessive corrosion or damage to the sealing surfaces (1, 2). Replace the line if any damage is found.
Injector Bore Cleaning
Important: The procedure below will aid in the cleaning of carbon deposits from the injector sleeve during an injector replacement.
- Install the EN-47909-2 Radial Brush (brass), to the EN-47909-1 Handle Assembly.
- Insert the brush into the injector bore and rotate the handle in order to break loose any carbon deposits from the injector bore walls and the combustion deck hole.
- Using compressed air, evacuate any debris from the injector bore.
- Remove the radial brush from the handle assembly.
- Install the EN-47909-3 Axial Brush (nylon), to the EN-47909-1.
- Insert the axial brush into the injector bore and rotate the handle while also applying a slight downward pressure, in order to force the brush ends into the bottom corners of the injector bore.
- Using compressed air, evacuate any debris from the injector bore.
- Lightly dampen EN-47909-20 Cotton Swab with Top Engine Cleaner, GM P/N 1052626 (Canadian P/N 993026) or equivalent, and wipe away any deposits from the injector bore.
- Inspect the injector bore for any deposits and repeat brushing if necessary.
- If necessary, crank the engine in order to expel any solvent before starting the engine.
Caution: Wear safety glasses in order to avoid eye damage.
Caution: Wear safety glasses in order to avoid eye damage.
Notice: Do not allow excessive amounts of solvent to go into the cylinder during cleaning. Failure to do so may cause engine damage upon startup.
Caution: Keep hands and face clear of glow plug holes while cranking. Hot liquid or gases may be expelled during cranking.
Caution: Wear safety glasses in order to avoid eye damage.
| 10.1. | Remove the glow plugs. Refer to Glow Plug Replacement - Bank 1 and/or Glow Plug Replacement - Bank 2 . |
| 10.2. | Disable the fuel system. |
| 10.3. | Disconnect the crankshaft position (CKP) sensor electrical connector. |
| 10.4. | Crank the engine in order to expel any excessive solvent. |
| 10.5. | Using the cotton swabs supplied with the kit, wipe the injector bore clean of any solvent and/or debris. |
| 10.6. | Connect the CKP sensor electrical connector. |
| 10.7. | Enable the fuel system. |
| 10.8. | Reinstall the glow plugs. Refer to Glow Plug Replacement - Bank 1 and/or Glow Plug Replacement - Bank 2 . |
Installation Procedure
- Install a NEW copper washer to the fuel injector bore.
- Install a NEW O-ring onto the fuel injector.
- If necessary, install the fuel injector bracket pins.
- Install the fuel injectors with brackets.
- Install the fuel injector bracket bolts.
- Connect the fuel injector electrical connectors.
- Install the fuel return hose to the injectors.
- Install the fuel return hose clips.
- Install the fuel injector pipes.
- Install the glow plug control module. Refer to Glow Plug Control Module Replacement .
- Install the charged air cooler outlet to the intake. Refer to Charged Air Cooler Hoses/Pipes Replacement .
- Connect the negative battery cable. Refer to Battery Negative Cable Disconnection and Connection .
- Install the air cleaner . Refer to Air Cleaner Replacement .
- Install the engine cover. Refer to Engine Cover Replacement .
- If the fuel injectors were replaced, Refer to Fuel Injector Flow Rate Programming .
- Prime the fuel system. Refer to Fuel System Priming .
- Start the engine. If the engine stalls, repeat the above step.
- Once the engine starts, inspect for fuel leaks.


Notice: Refer to Fastener Notice in the Preface section.

Tighten
Tighten the bolts to 30 N·m (22 lb ft).


Tighten
Tighten the fittings to 41 N·m (30 lb ft).
Important: Lubricate the end of the duct prior to installation.
