Removal Procedure
- Set the parking brake.
- Block the vehicle rear wheels.
- Raise the frame until the front tires clear the floor.
- Support the axle with a jack. Raise the axle high enough in order to allow the spring to clear the brackets when you remove the spring.
Notice: Do not use the front crossmember to support the vehicle or the crossmember
may buckle.
- Support the frame using suitable safety stands.
- Remove the following components from the lower mounting brackets (7):
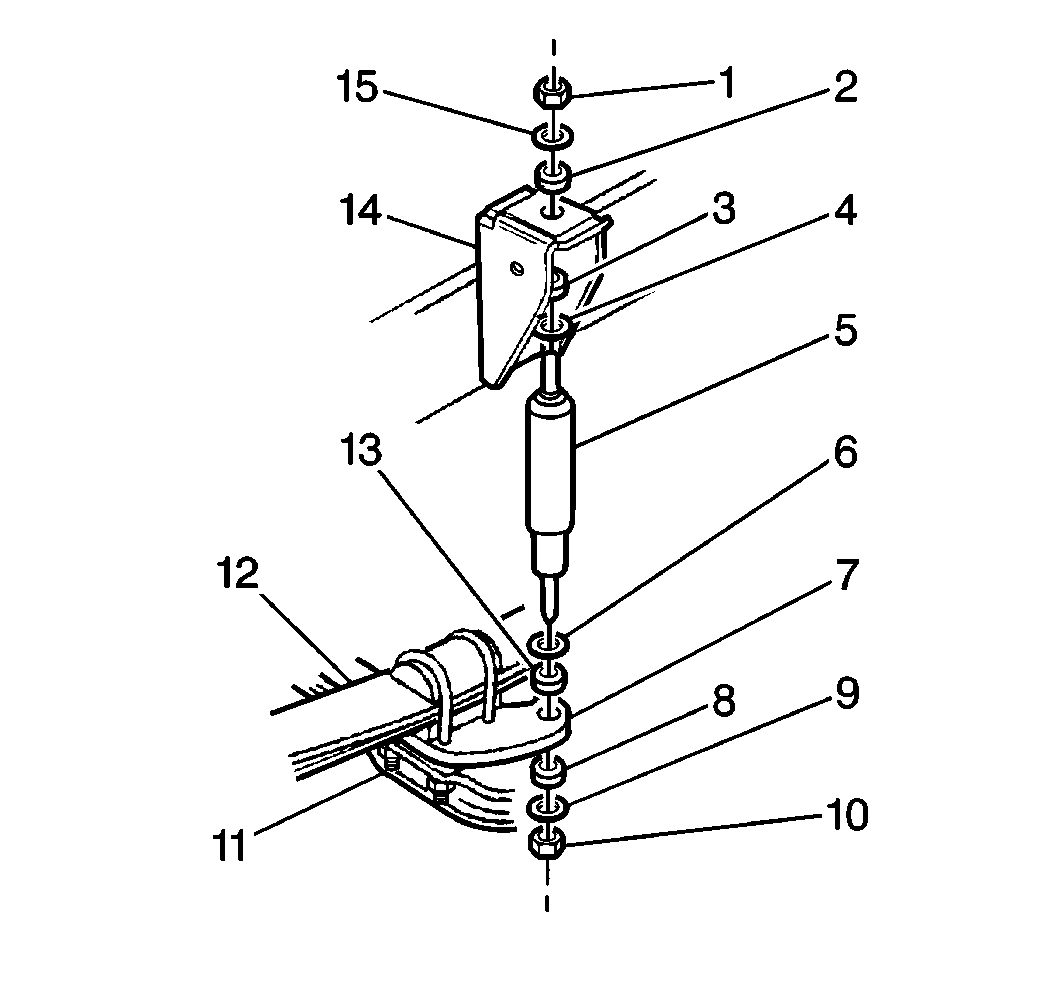
- Remove the shock absorbers (5) from the lower mounting brackets (7). Push the shock absorbers into the fully retracted position.
- Remove the insulators (13) and the washers (6) from the shock absorber lower stem.
- Remove the nuts from the front and rear eye bolts. Loosen the upper rear shackle bolt so that the hanger can pivot.
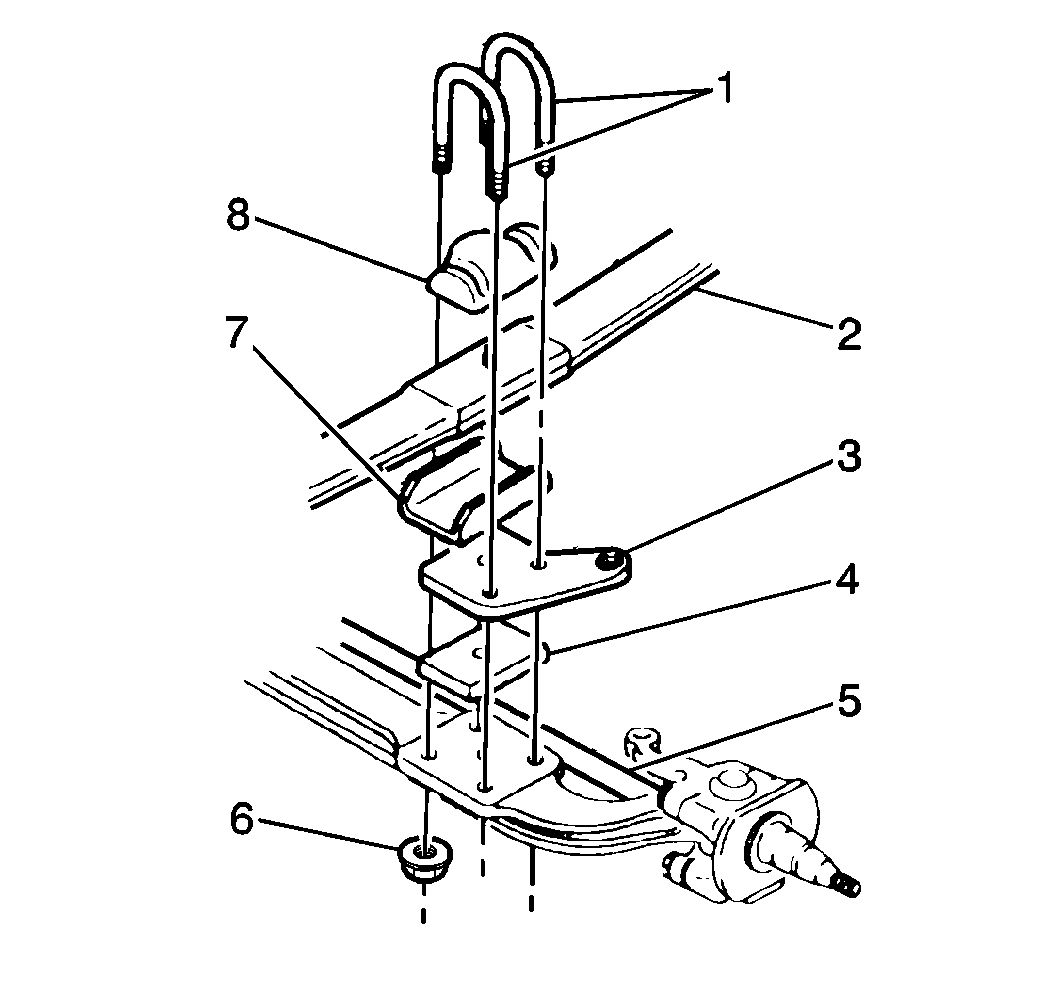
- Remove the nuts (6) and the U-bolts (1). Lower the axle and the tie rod (5) far enough to relieve the tension on the spring (2).
- Remove the front eye bolt.
- Remove the rear eye bolt.
- Remove the following components from the vehicle:
Installation Procedure
- Install the spring (2).
- Install the rear eye bolt and nut.
| 2.1. | Raise the axle and the tie rod (5) in order to support the spring (2). |
| 2.2. | Align the spring center bolt to the axle. |
- Install the front eye bolt and nut.
Notice: Refer to Fastener Notice in the Preface section.
Important: Always install NEW U-bolts when loosened or removed.
- Install the U-bolts (1) and the nuts (6).
Tighten
| • | For 8,100 pound axles, tighten the U-bolt nut to 330 N·m (243 lb ft). |
| • | Tighten the eye bolts to 330 N·m (243 lb ft). |
- Install the flat washer (6) and the insulator (13) onto the shock absorber lower stem.
- Install the shock absorber (5) into the lower mounting bracket (7).
- Install the following components:
Tighten
Tighten the lower shock absorber nut to 85 N·m (63 lb ft).
- Remove the safety stands and lower the vehicle.
