The powertrain relay is a normally open relay. The relay armature is held in the open position by spring tension. Battery positive voltage is supplied directly to the relay coil and the armature contact at all times. The powertrain control module (PCM)
supplies the ground path to the relay coil control circuit, via an internal integrated circuit called an output driver module (ODM). When the PCM commands the relay ON, the relay coil creates an electromagnetic field. This electromagnetic field overcomes the
spring tension and pulls the armature contact into the stationary contact of the relay load circuit. The closing of the relay contacts allows current to flow from the battery to the following fuses and relay.
When the ignition switch is turned to the OFF position, power is interrupted to the output driver module in the PCM, and the relay electromagnetic field collapses. This action allows the spring tension pulling on the armature to separate from the relay
load circuit contact, which interrupts current flow to the fuses and relay.
If the powertrain relay fails to close the engine will crank, but may or may not run. The class II communications will be available with the use of a scan tool.
The powertrain relay system diagnosis table assumes that the vehicle battery is fully charged. Refer to
Battery Inspection/Test
.
Step
| Action
| Values
| Yes
| No
|
Schematic Reference:
Power Distribution Schematics
and
Engine Controls Schematics
Connector End View Reference:
Power and Grounding Connector End Views
and
Electrical Center Identification Views
and
Powertrain Control Module Connector End Views
|
1
| Did you perform the Diagnostic System Check -- Vehicle?
| --
| Go to
Step 2
| Go to
Diagnostic System Check - Vehicle
|
2
|
- Turn ON the ignition, with the engine OFF.
- Remove the underhood junction block cover.
- Probe the following fuses with a test lamp that is connected to a good ground. Refer to
Troubleshooting with a Test Lamp
.
Does the test lamp illuminate on at least one test point of each fuse?
| --
| Go to
Step 3
| Go to
Step 12
|
3
|
- Turn OFF the ignition.
- Probe both test points of the ETC fuse at the underhood junction block with a test lamp that is connected to a good ground.
Does the test lamp illuminate on either test point of the fuse?
| --
| Go to
Step 4
| Go to
Step 39
|
4
|
- Turn OFF the ignition.
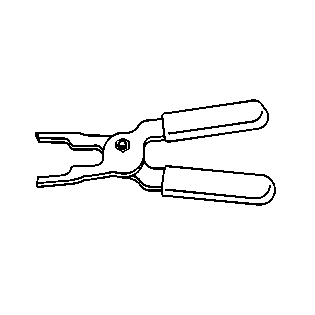
- Remove the powertrain relay from the underhood junction block with the
J 43244
relay puller pliers. Refer to
Relay Replacement
.
- Probe both test points of the ETC fuse at the underhood junction block with a test lamp that is connected to a good ground.
Does the test lamp illuminate on either test point of the fuse?
| --
| Go to
Step 5
| Go to
Step 8
|
5
|
- Turn OFF the ignition.
- Remove the A/C compressor clutch relay from the underhood junction block.
- Probe both test points of the ETC fuse at the underhood junction block with a test lamp that is connected to a good ground.
Does the test lamp illuminate on either test point of the fuse?
| --
| Go to
Step 6
| Go to
Symptoms - Engine Electrical
|
6
|
- Turn OFF the ignition.
- Remove the EMISSION fuse from the underhood junction block.
- Probe both test points of the ETC fuse at the underhood junction block with a test lamp that is connected to a good ground.
Does the test lamp illuminate on either test point of the fuse?
| --
| Go to
Step 7
| Go to
Symptoms - Engine Electrical
|
7
|
- Turn OFF the ignition.
- Remove the ETC fuse from the underhood junction block.
Notice: Refer to Test Probe Notice in the Preface section. - Probe the powertrain relay load circuit terminal at the underhood junction block with a test lamp that is connected to a good ground. Refer to
Probing Electrical Connectors
.
Does the test lamp illuminate?
| --
| Go to
Step 36
| Go to
Symptoms - Engine Electrical
|
8
|
- Turn OFF the ignition.
Notice: Refer to Test Probe Notice in the Preface section. - Probe the powertrain relay coil control circuit terminal in the underhood junction block with a test lamp that is connected to battery positive voltage.
Does the test lamp illuminate?
| --
| Go to
Step 9
| Go to
Step 26
|
9
|
- Turn OFF the ignition.
- Disconnect the powertrain control module (PCM) electrical connector that contains the relay coil control circuit. Refer to
Powertrain Control Module Replacement
.
- Probe the powertrain relay coil control circuit terminal at the underhood junction block with a test lamp that is connected to battery positive voltage.
Does the test lamp illuminate?
| --
| Go to
Step 10
| Go to
Step 32
|
10
|
- Turn OFF the ignition.
- Disconnect the negative battery cable at the battery. Refer to
Battery Negative Cable Disconnection and Connection
.
- Disconnect the underhood junction block electrical connector that contains the powertrain relay coil control circuit. Refer to
Underhood Electrical Center or Junction Block Replacement
.
- Probe the powertrain relay coil control circuit terminal at the underhood junction block electrical connector with a test lamp that is connected to battery positive voltage.
Does the test lamp illuminate?
| --
| Go to
Step 33
| Go to
Step 11
|
11
| Test the underhood junction block powertrain relay coil control bus bar circuit for a short to ground. Refer to
Circuit Testing
.
Did you find a condition?
| --
| Go to
Step 36
| Go to
Intermittent Conditions
|
12
|
- Turn OFF the ignition.
- Remove the powertrain relay from the underhood junction block with the
J 43244
. Refer to
Relay Replacement
.
Notice: Refer to Test Probe Notice in the Preface section. - Probe the battery positive voltage terminal for the relay coil at the underhood junction block with a test lamp that is connected to a good ground.
Does the test lamp illuminate?
| --
| Go to
Step 13
| Go to
Step 24
|
13
|
- Turn OFF the ignition.
- Probe the relay coil control circuit terminal at the underhood junction block with a test lamp that is connected to a good ground.
Does the test lamp illuminate?
| --
| Go to
Step 15
| Go to
Step 14
|
14
|
- Turn ON the ignition, with the engine OFF.
- Probe the powertrain relay coil control circuit at the underhood junction block with a test lamp that is connected to a good ground.
Does the test lamp illuminate?
| --
| Go to
Step 18
| Go to
Step 20
|
15
|
- Turn OFF the ignition.
- Disconnect the PCM electrical connector that contains the relay coil control circuit from the PCM. Refer to
Powertrain Control Module Replacement
.
- Probe the powertrain relay coil control circuit terminal at the underhood junction block with a test lamp that is connected to a good ground.
Does the test lamp illuminate?
| --
| Go to
Step 16
| Go to
Step 32
|
16
|
- Turn OFF the ignition.
- Disconnect the negative battery cable at the battery. Refer to
Battery Negative Cable Disconnection and Connection
.
- Disconnect the underhood junction block electrical connector that contains the powertrain relay coil control circuit. Refer to
Underhood Electrical Center or Junction Block Replacement
.
- Connect the negative battery cable at the battery.
- Probe the powertrain relay coil control circuit terminal at the underhood junction block electrical connector with a test lamp that is connected to a good ground.
Does the test lamp illuminate?
| --
| Go to
Step 34
| Go to
Step 17
|
17
| Test the underhood junction block powertrain relay coil control bus bar circuit for a short to voltage. Refer to
Circuit Testing
.
Did you find a condition?
| --
| Go to
Step 36
| Go to
Step 26
|
18
|
- Turn OFF the ignition.
- Disconnect the PCM electrical connector that contains the relay coil control circuit. Refer to
Powertrain Control Module Replacement
.
- Turn ON the ignition, with the engine OFF.
- Probe the powertrain relay coil control circuit terminal at the underhood junction block with a test lamp that is connected to a good ground.
Does the test lamp illuminate?
| --
| Go to
Step 19
| Go to
Step 32
|
19
|
- Turn OFF the ignition.
- Disconnect the negative battery cable at the battery. Refer to
Battery Negative Cable Disconnection and Connection
.
- Disconnect the underhood junction block electrical connector that contains the powertrain relay coil control circuit. Refer to
Underhood Electrical Center or Junction Block Replacement
.
- Remove the powertrain relay coil control circuit wire terminal from the underhood junction block electrical connector.
- Connect the electrical connector that contained the powertrain relay control circuit to the underhood junction block.
- Connect the negative battery cable at the battery.
- Turn ON the ignition, with the engine OFF.
- Probe the powertrain relay coil control circuit terminal at the PCM connector with a test lamp that is connected to a good ground. Refer to
Probing Electrical Connectors
.
Does the test lamp illuminate?
| --
| Go to
Step 34
| Go to
Step 36
|
20
|
- Turn OFF the ignition.
- Probe the battery positive voltage terminal for the powertrain relay armature at the underhood junction block with a test lamp that is connected to a good ground.
Does the test lamp illuminate?
| --
| Go to
Step 21
| Go to
Step 24
|
21
|
- Turn ON the ignition, with the engine OFF.
- Probe the relay coil control circuit terminal at the underhood junction block with a test lamp that is connected to battery positive voltage.
Does the test lamp illuminate?
| --
| Go to
Step 25
| Go to
Step 22
|
22
|
- Turn OFF the ignition.
- Disconnect the negative battery cable at the battery. Refer to
Battery Negative Cable Disconnection and Connection
.
- Disconnect the underhood junction block electrical connector that contains the powertrain relay coil control circuit. Refer to
Underhood Electrical Center or Junction Block Replacement
.
- Disconnect the PCM electrical connector that contains the powertrain relay coil control circuit from the PCM. Refer to
Powertrain Control Module Replacement
.
- Measure the resistance of the powertrain relay coil control circuit from the underhood junction block electrical connector to the PCM electrical connector with a digital multimeter (DMM). Refer to
Troubleshooting with a Digital Multimeter
.
Does the resistance measure greater than the specified value?
| 5 ohms
| Go to
Step 35
| Go to
Step 23
|
23
| Test the underhood junction block powertrain relay coil control bus bar circuit for a high resistance or an open.
Did you find a condition?
| 5 ohms
| Go to
Step 36
| Go to
Step 32
|
24
| Probe the mounting stud for the battery positive battery cable at the underhood junction block with a test lamp that is connected to a good ground.
Does the test lamp illuminate?
| --
| Go to
Step 36
| Go to
Symptoms - Engine Electrical
|
25
|
- Turn OFF the ignition.
- Connect a 20-amp fused jumper wire between the battery positive voltage terminal for the relay armature at the underhood junction block to the relay load circuit terminal at the underhood junction block. Refer to
Using Fused Jumper Wires
.
- Probe the following fuses with a test lamp that is connected to a good ground.
Does the test lamp illuminate on at least one test point of each fuse?
| --
| Go to
Step 26
| Go to
Step 36
|
26
| Measure the resistance from terminal 85 of the relay to terminal 86 with a DMM. Refer to
Troubleshooting with a Digital Multimeter
.
Does the resistance measure within the specified range?
| 70-110 ohms
| Go to
Step 27
| Go to
Step 37
|
27
| Measure the resistance from terminal 30 of the relay to terminal 87 with a DMM.
Does the DMM display the specified value?
| ∞ ohms
| Go to
Step 28
| Go to
Step 37
|
28
| Measure the resistance from terminal 30 of the relay to terminal 85 with a DMM.
Does the DMM display the specified value?
| ∞ ohms
| Go to
Step 29
| Go to
Step 37
|
29
| Measure the resistance from terminal 85 of the relay to terminal 87 with a DMM.
Does the DMM display the specified value?
| ∞ ohms
| Go to
Step 30
| Go to
Step 37
|
30
|
- Connect a 20-amp fused jumper wire from the battery positive cable at the battery to relay terminal 85. Refer to
Using Fused Jumper Wires
.
- Connect a jumper wire from the negative battery cable at the battery to relay terminal 86.
- Measure the resistance from terminal 30 of the relay to terminal 87 with a DMM.
Does the resistance measure greater than the specified value?
| 3 ohms
| Go to
Step 37
| Go to
Step 31
|
31
| Test for shorted or poor connections at the powertrain relay location on the underhood junction block. Refer to
Testing for Intermittent Conditions and Poor Connections
.
Did you find a condition?
| --
| Go to
Step 36
| Go to
Intermittent Conditions
|
32
| Test for shorted or poor connections at the PCM electrical connectors. Refer to
Testing for Intermittent Conditions and Poor Connections
.
Did you find and correct the condition?
| --
| Go to
Step 39
| Go to
Step 38
|
33
| Repair the short to ground in the relay coil control circuit between the underhood junction block electrical connector and the PCM electrical connector. Refer to
Wiring Repairs
.
Did you complete the repair?
| --
| Go to
Step 39
| --
|
34
| Repair the short to voltage in the relay coil control circuit between the underhood junction block electrical connector and the PCM electrical connector. Refer to
Wiring Repairs
.
Did you complete the repair?
| --
| Go to
Step 39
| --
|
35
| Repair the high resistance or an open in the relay coil control circuit between the underhood junction block electrical connector and the PCM electrical connector. Refer to
Wiring Repairs
.
Did you complete the repair?
| --
| Go to
Step 39
| --
|
36
| Replace the underhood junction block. Refer to
Underhood Electrical Center or Junction Block Replacement
.
Did you complete the replacement?
| --
| Go to
Step 39
| --
|
37
| Replace the powertrain relay. Refer to
Relay Replacement
.
Did you complete the replacement?
| --
| Go to
Step 39
| --
|
38
| Replace the PCM. Refer to
Powertrain Control Module Replacement
.
Did you complete the replacement?
| --
| Go to
Step 39
| --
|
39
|
- Reassemble the vehicle as necessary.
- Replace any open fuses.
- Turn OFF the ignition for 30 seconds.
Does the engine start and run?
| --
| Go to
Step 40
| Go to
Engine Cranks But Does Not Run
|
40
|
- Clear the DTC with a scan tool.
- Operate the vehicle for 5 minutes.
Does a DTC set during this ignition cycle?
| --
| Go to
Diagnostic Trouble Code (DTC) List - Vehicle
| System OK
|
