Body Side Molding Replacement Coupe
Adhesive Body Side Moldings End Loose
Important: The body side moldings are attached to the body panels with adhesive
tape. To insure a good replacement of new or old moldings emblems and name
plates, the panel surface should be warm 21°C to 32°C (70°F
to 90°F), clean, and free of any wax or oily film. Methods are listed
to attach loose molding ends, completely removed moldings and replacement
moldings emblem and name plates.
- Wash the affected area with soap and water and wipe dry. Wipe the panel
and the adhesive side of the molding with a clean rag using Varnish Makers
and Painters (VM&P) naphtha.
- If needed apply a length of masking tape as a molding guide. A
straightedge may also be used.
- Apply the adhesive to the back of the molding and press in place.
If the adhesive GM P/N 1052621 or equivalent is used apply the
constant pressure to the molding for 30 seconds or until a firm bond
has been made.
Adhesive Body Side Molding Completely Removed
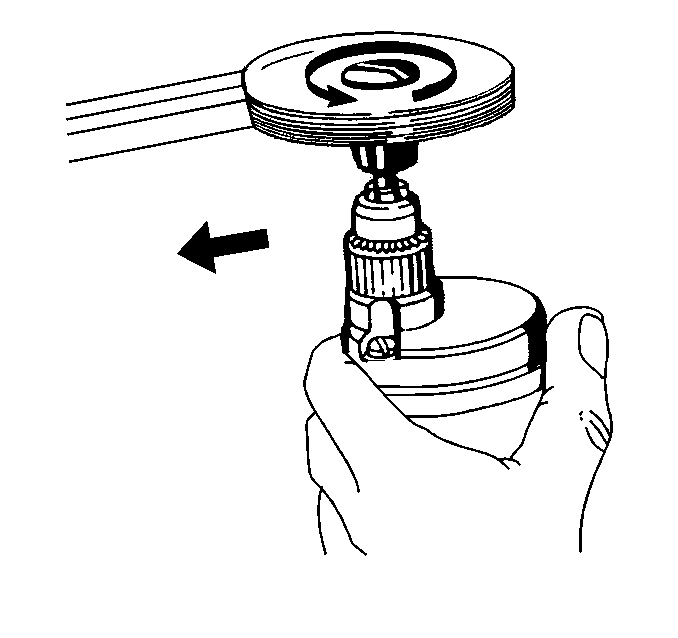
- Remove all adhesive from the body panel
and the back of the molding using 3M scotch brite molding adhesive
remover disk 3M P/N 07501 or equivalent.
- Wash the affected panel area with soap and water
and wipe dry.
- Remove all traces of adhesive from the body panel and the back
of the molding using Varnish Makers and Painters (VM&P) naphtha.
- Mark the proper position of the molding with a length of masking
tape. Use adjacent moldings as a guide.

- Warm the body panel with the heat lamp
or the heat gun to a minimum of 21°C (70°F).
- Apply a piece of double-coated foam tape
3M P/N 06382 Gray or equivalent to the molding.
- Align the molding to the tape guideline on the body panel.
- Peel the backing from the end of the molding.
- Press firmly into place while continuing to remove the backing.
- Hand roll the molding to the body to ensure the proper adhesion.
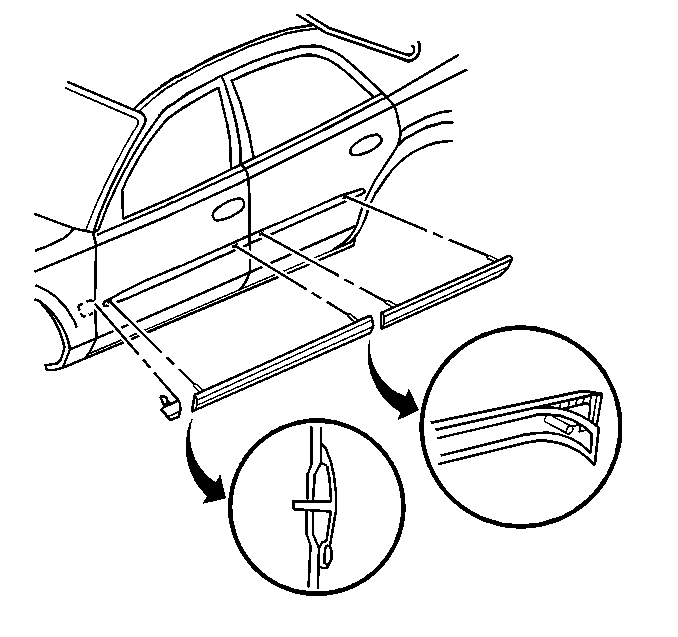
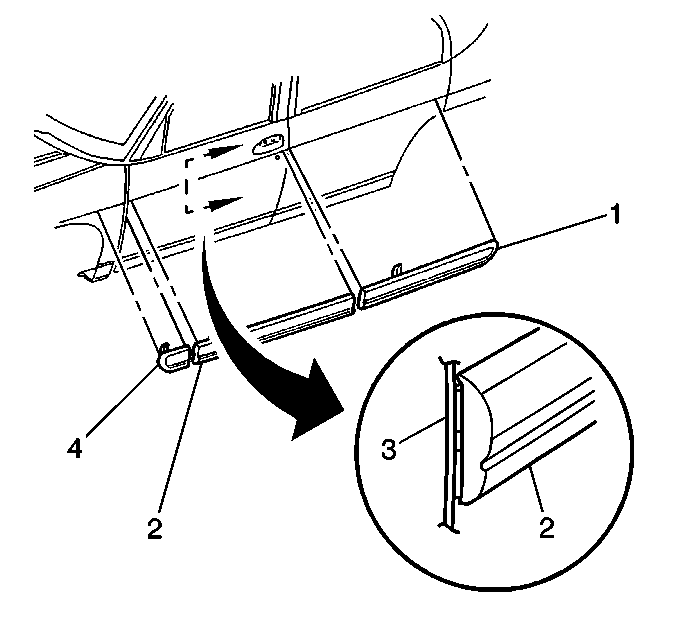
Body Side Molding Replacement Sedan
Removal Procedure
- Use a heat gun in order
to heat the body side molding (1,2,4):
| • | Position the heat gun 152 mm (6 in) from the surface. |
| • | Apply heat using a circular motion for 30 seconds. |
- Use a flat-bladed plastic tool in order to peel the body side
molding (1,2,4) from the panel surface.
Do not damage the paint.
Installation Procedure
- Mark the proper position of the body side molding (1,2,4)
with masking tape.
- Clean the body panel.
Use varnish makers and painters (VM&P) naphtha or isopropyl alcohol.
- Warm the body panel with a heat lamp or heat gun to a minimum
of 21°C (70°F).
- Peel the backing from the front end of the body side molding (1,2,4).
Do not touch the adhesive backing.
- Press the body side molding (1,2,4)
to the body while continuing to remove the backing.
- Hand roll the body side molding to the body in order to ensure
proper adhesion.
- Ensure that the body side molding ends do not overlap the following
components:
- Inspect the body side molding ends for bonding.
- Hand roll loose ends of the body side molding.
