For 1990-2009 cars only
Clutch Assembly Replacement D16 and D20 Manual Transaxle
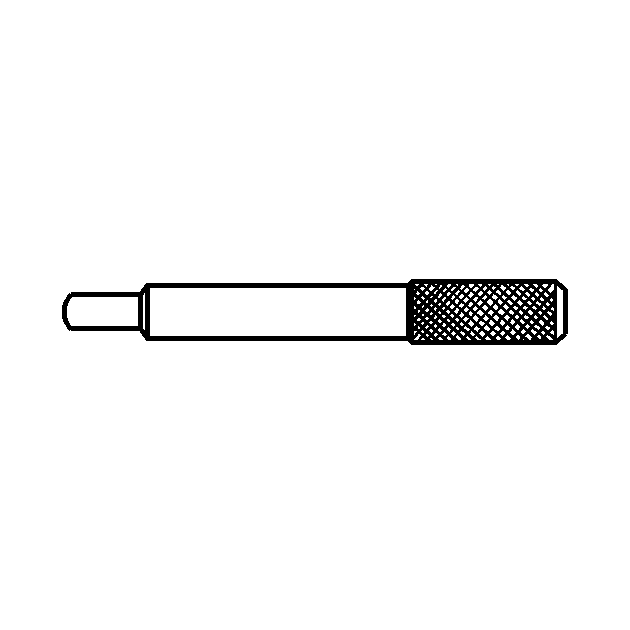
Special Tools
J 42474 Clutch Arbor
Removal Procedure
- Disconnect the negative battery cable.
- Remove the transaxle from the vehicle. Refer to Transmission Replacement for the D16 transaxle or Transmission Replacement for the D20 transaxle.
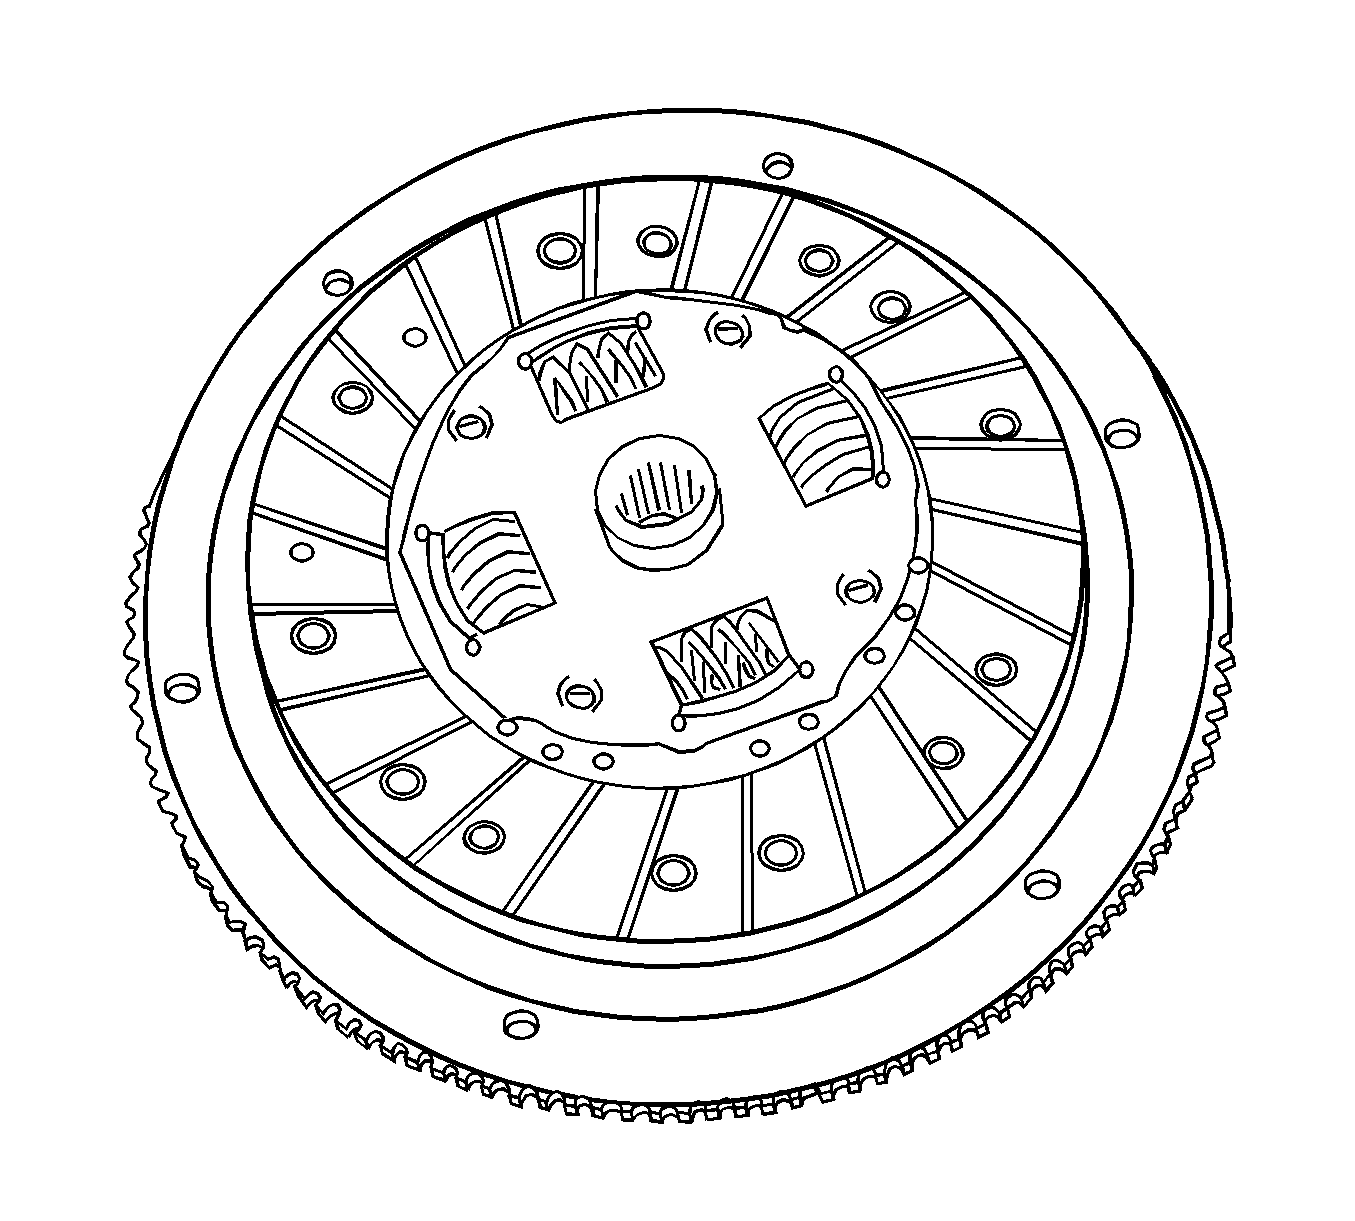
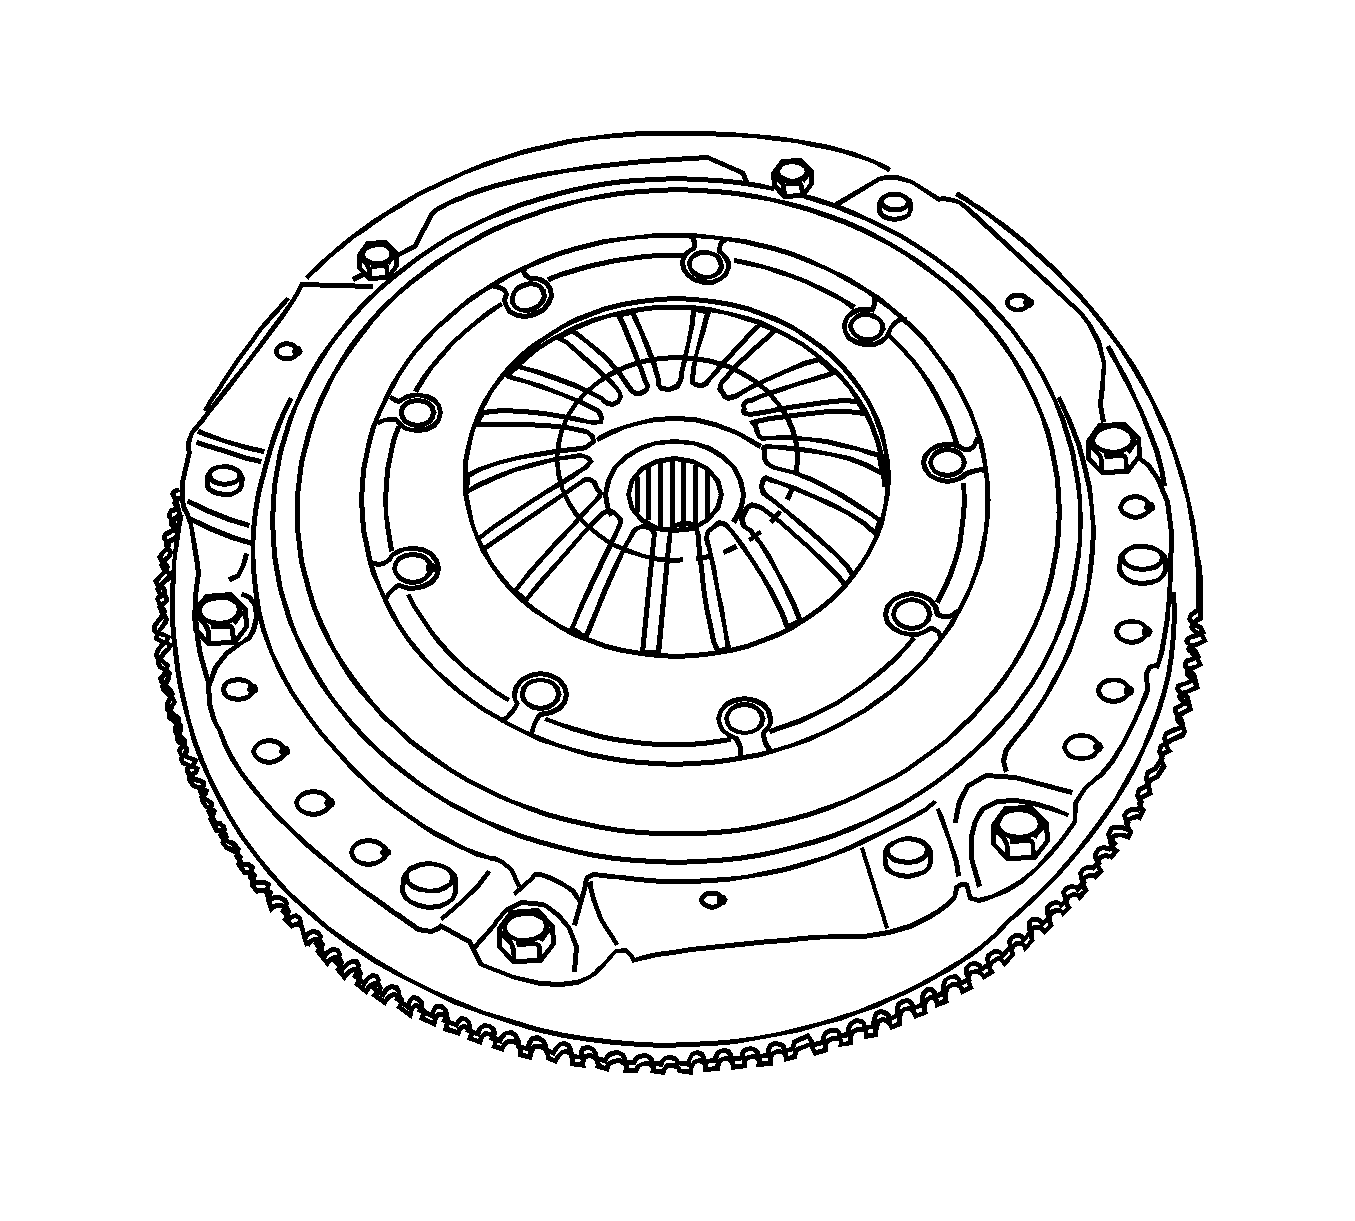
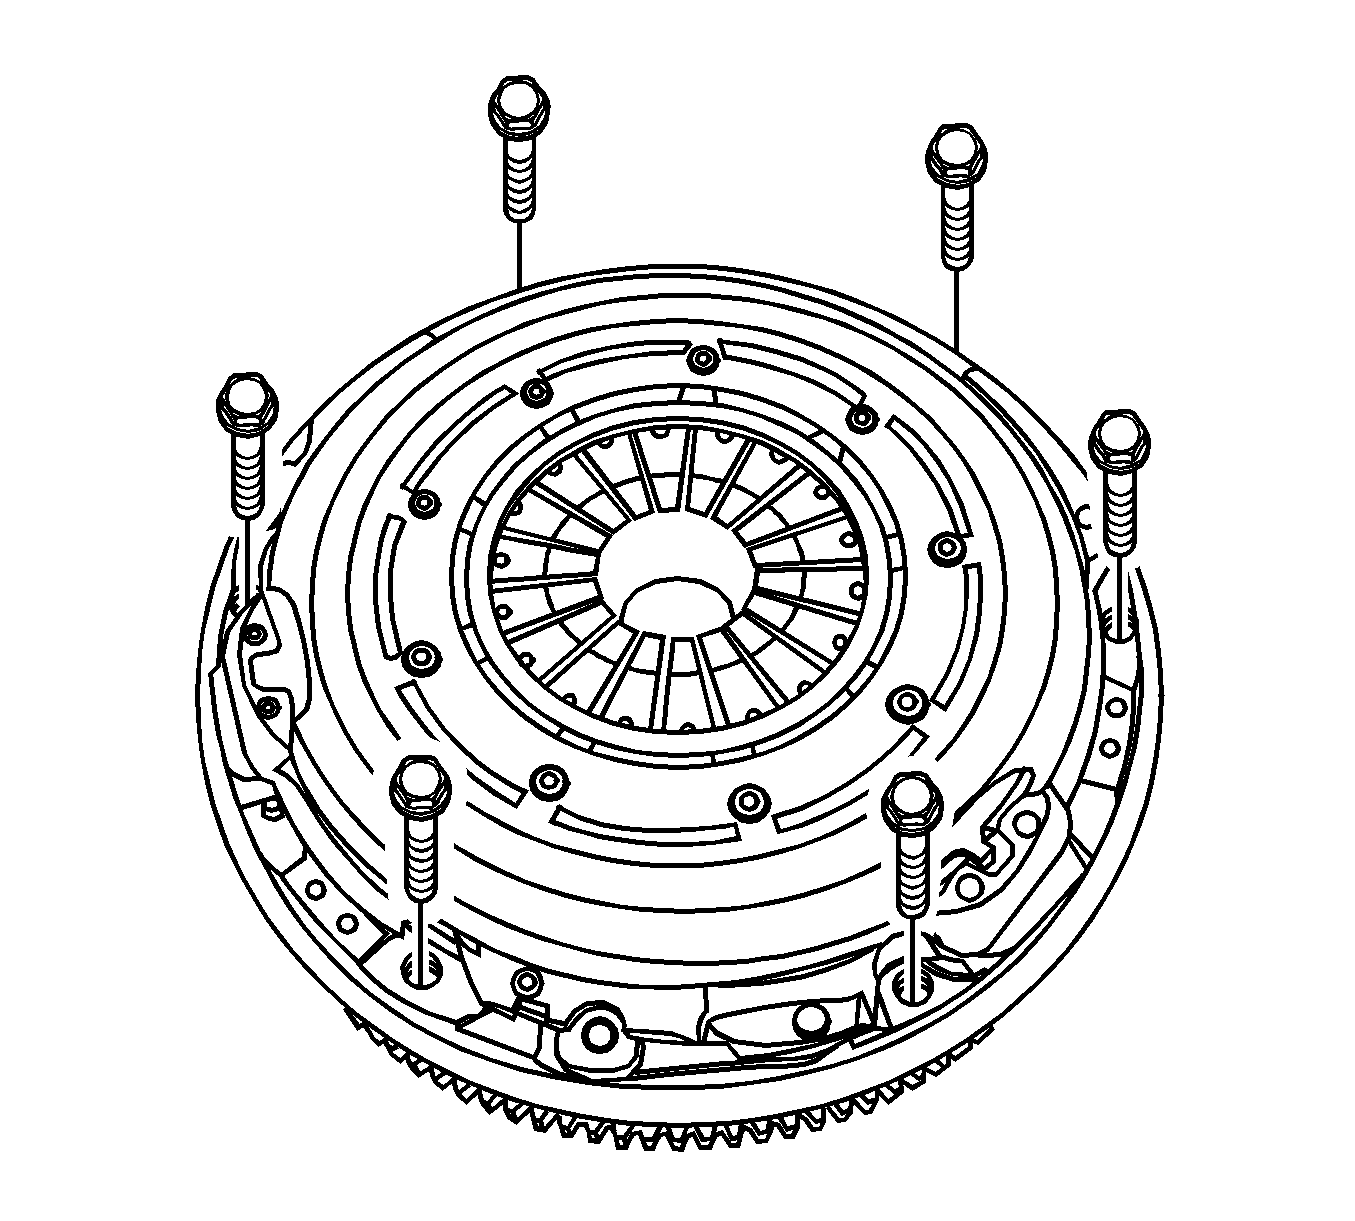
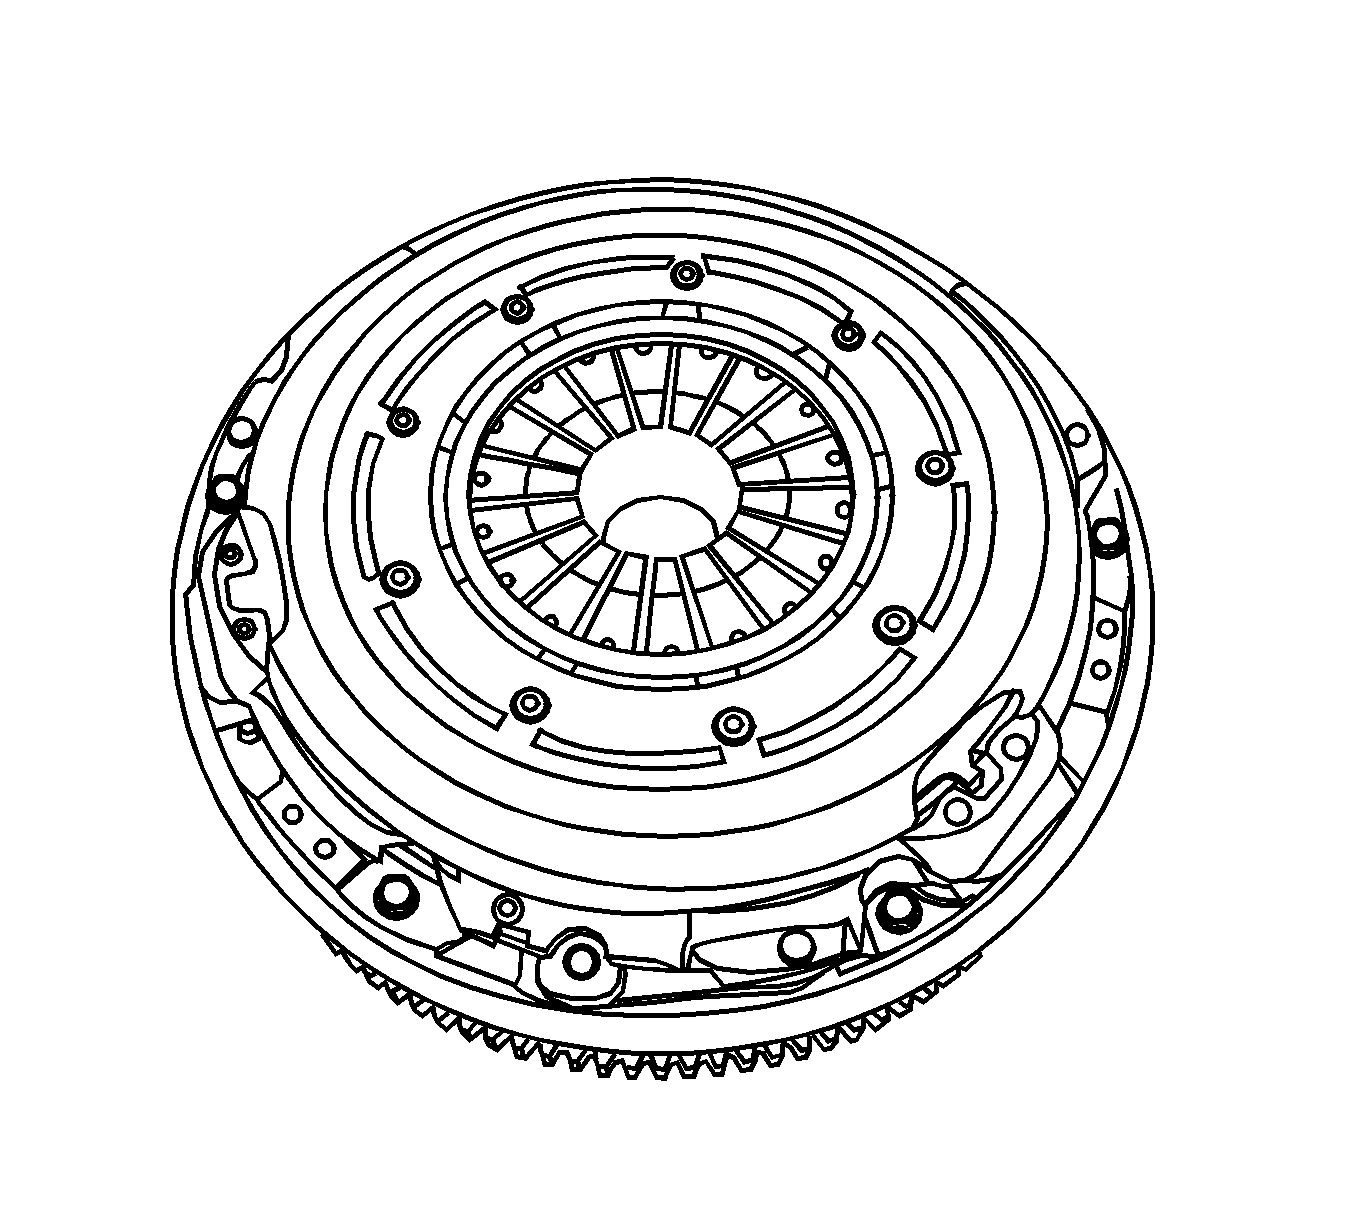
- Remove the pressure plate bolts and the pressure plate.
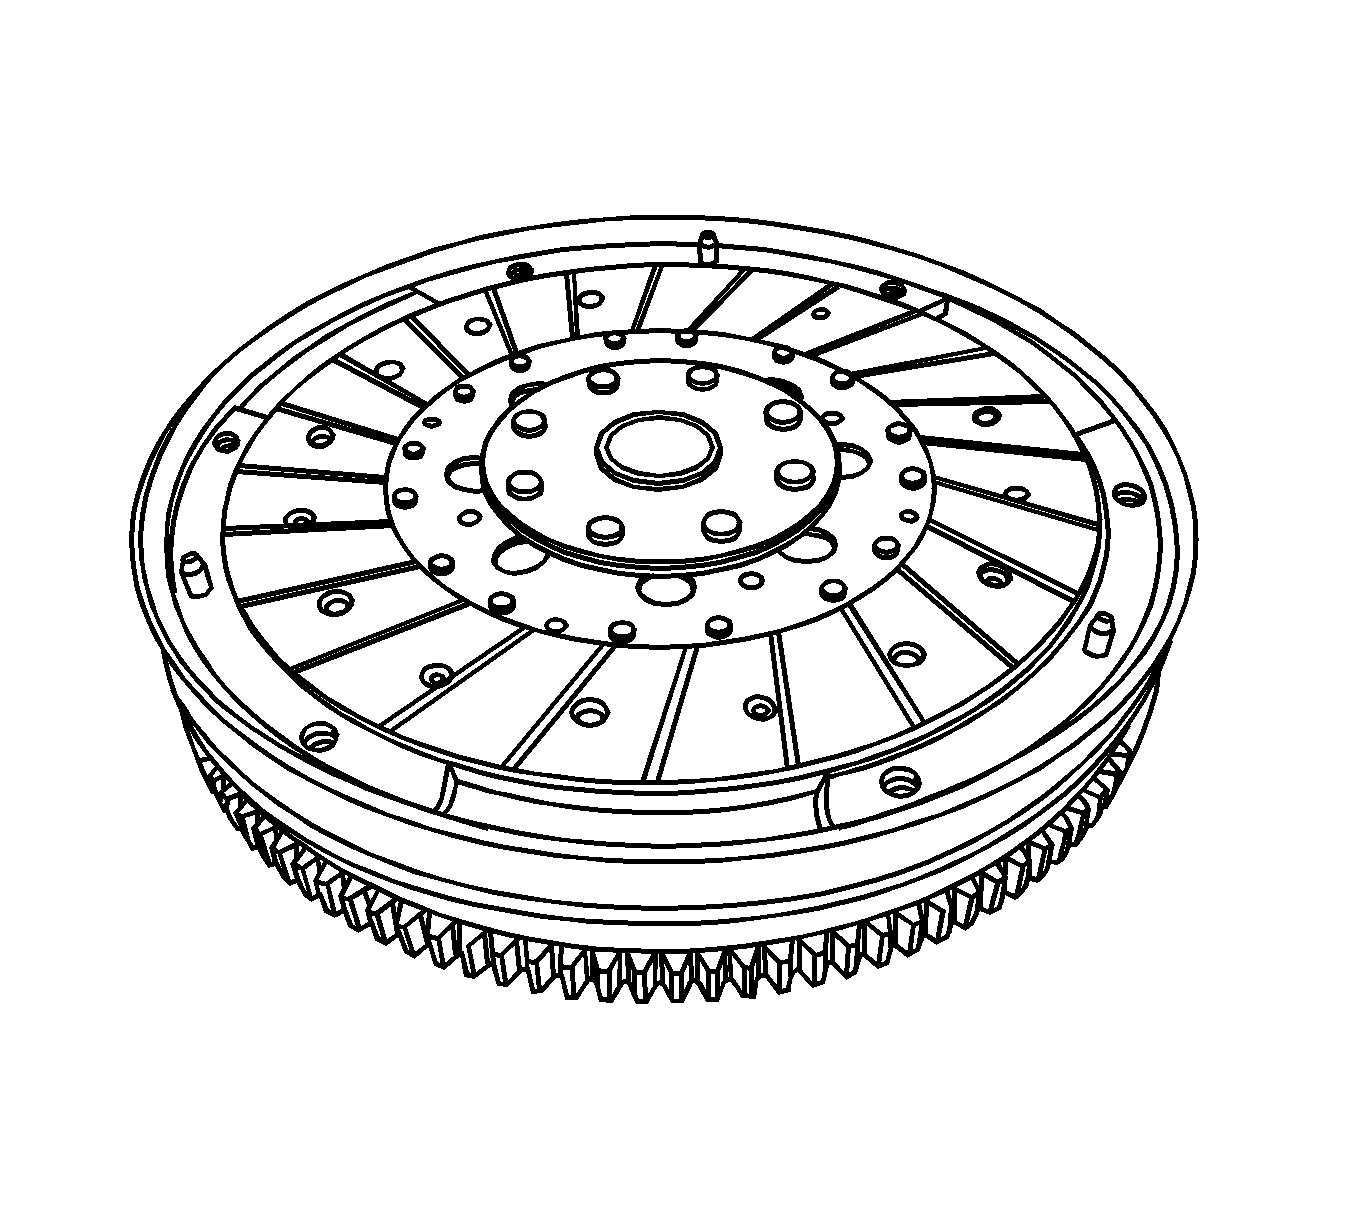
- Remove the clutch disc from the flywheel.
Warning: Refer to Battery Disconnect Warning in the Preface section.

Note: Support the pressure plate when you remove the last bolt.
Clutch Disc - Inspection Procedure
- Inspect the worn or oily contamination on the clutch surface.
- Inspect the damaged or weakened torsion spring.
- Inspect the warped or bent clutch disc. After inspection, replace with a new clutch disc, if necessary.
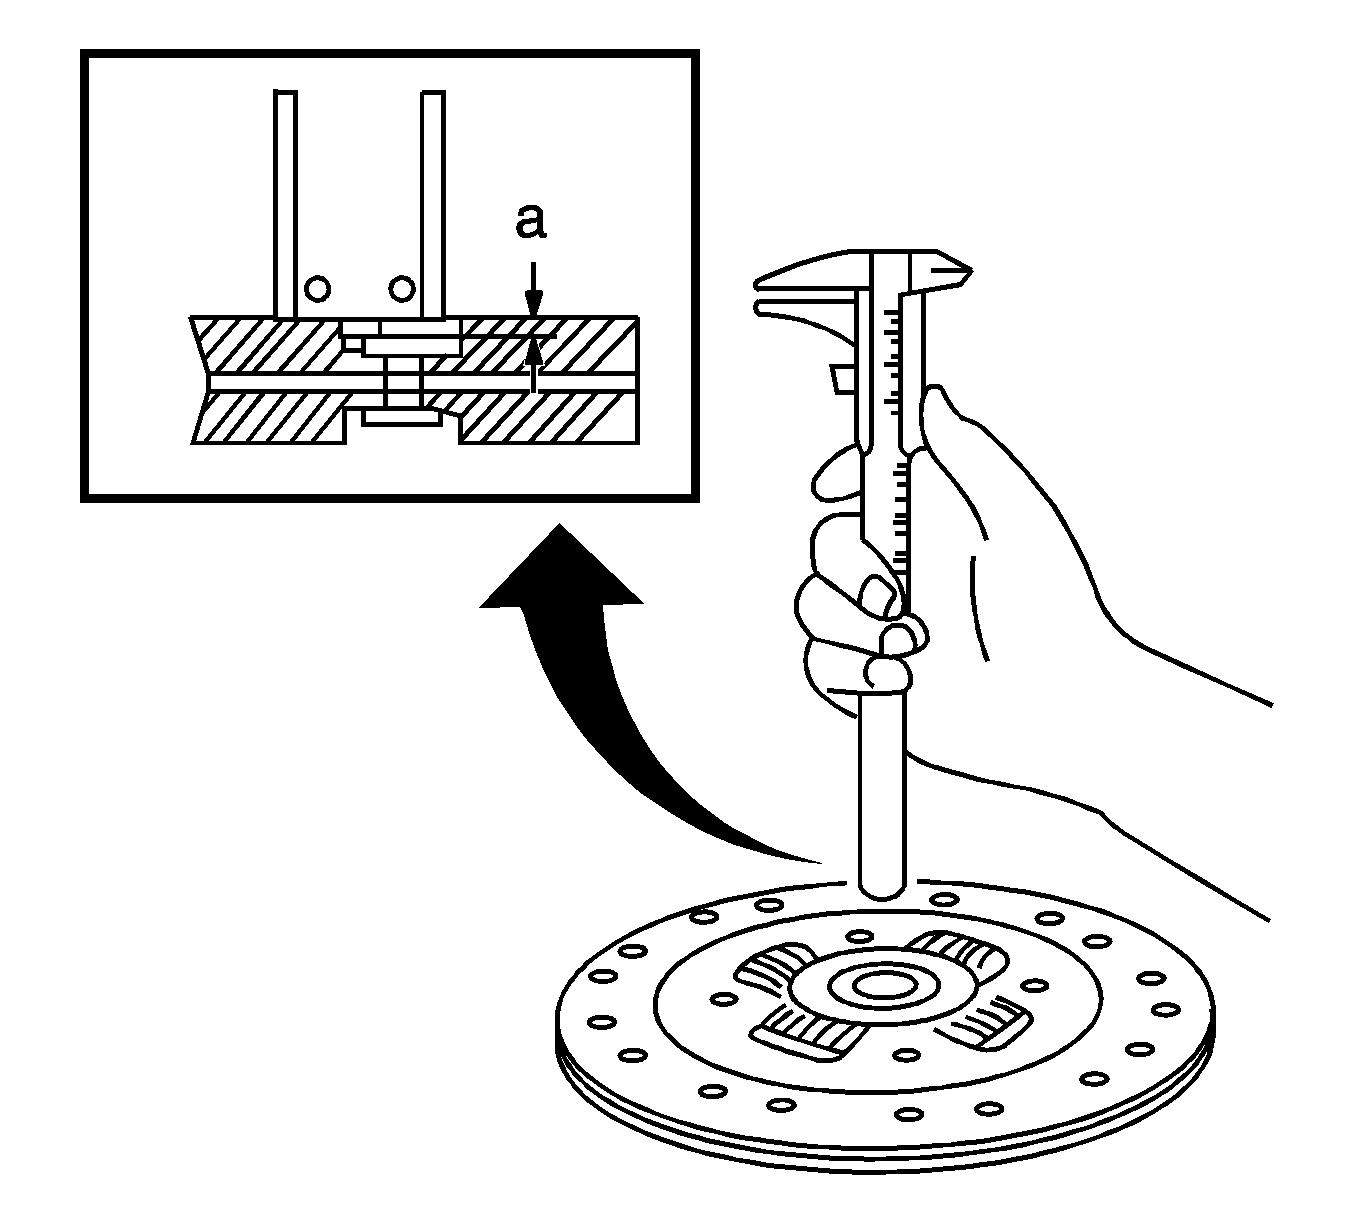
- Measure the rivet head depth from the clutch disc surface.
- Replace the clutch disc if the measured value is below the limit.
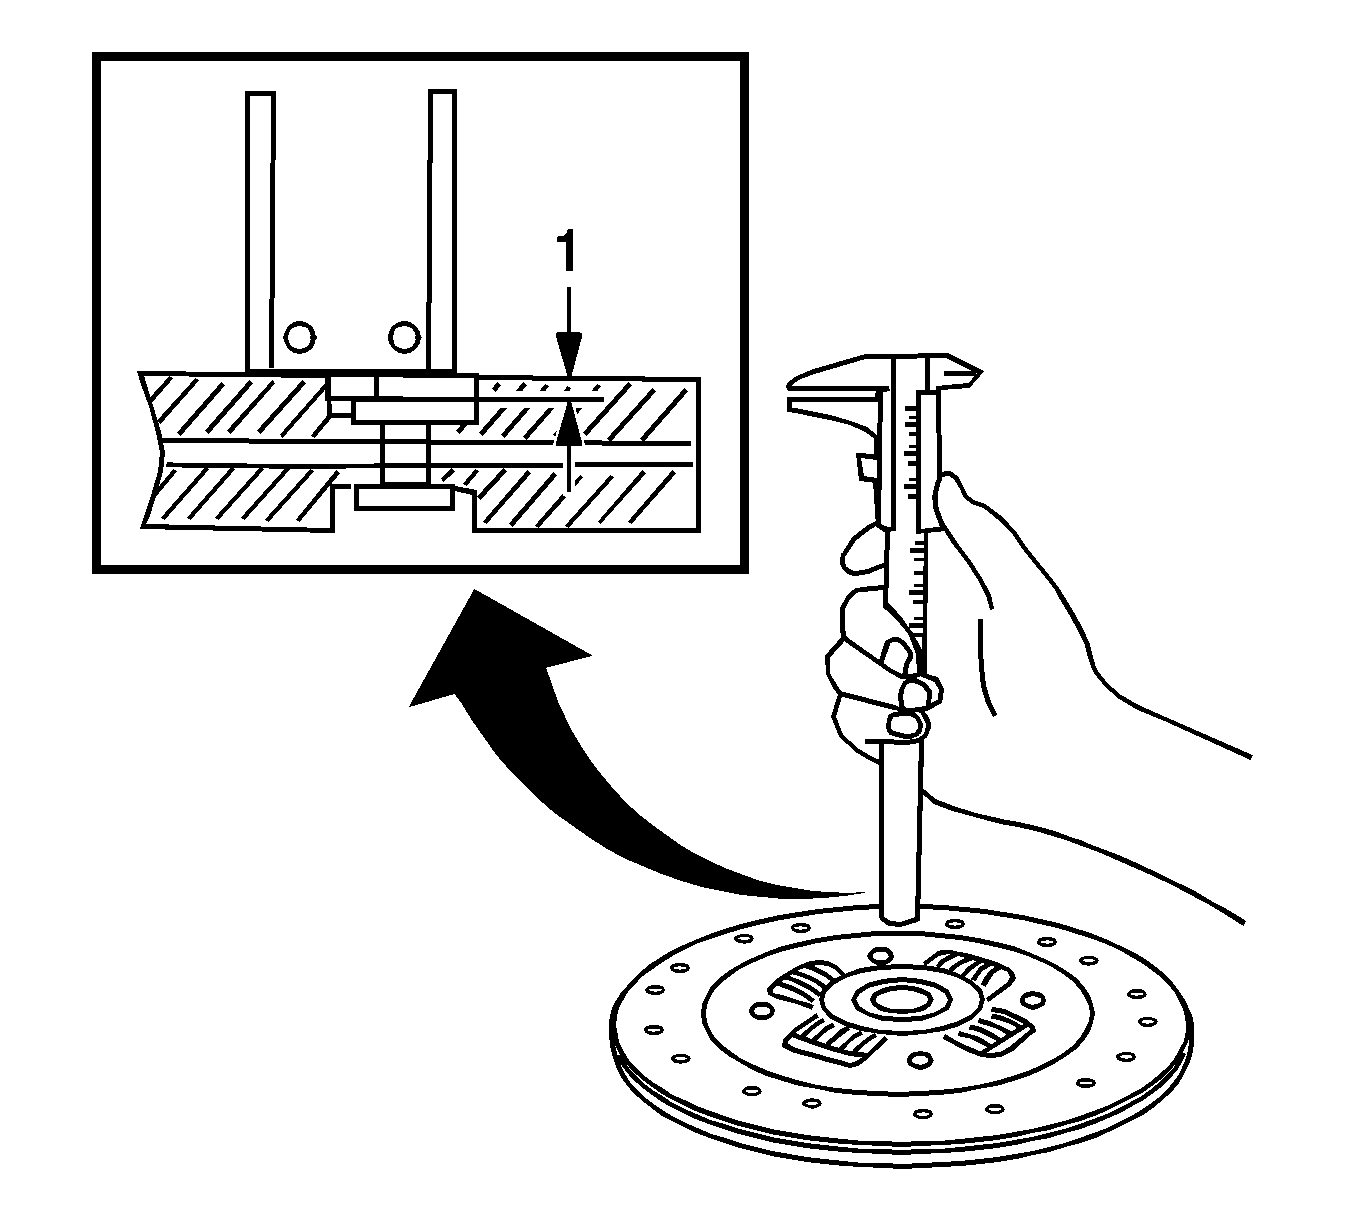
Specification
The rivet head depth limit is 0.3 mm (0.012 in).
Pressure Plate - Inspection Procedure
- Inspect for a worn diaphragm spring finger.
- Inspect for a worn or cracked pressure plate surface.
- Inspect for a polluted face by the oil. After inspection, replace the pressure plate if necessary.
Installation Procedure
- Coat the spline on the clutch disc with multi-purpose grease.
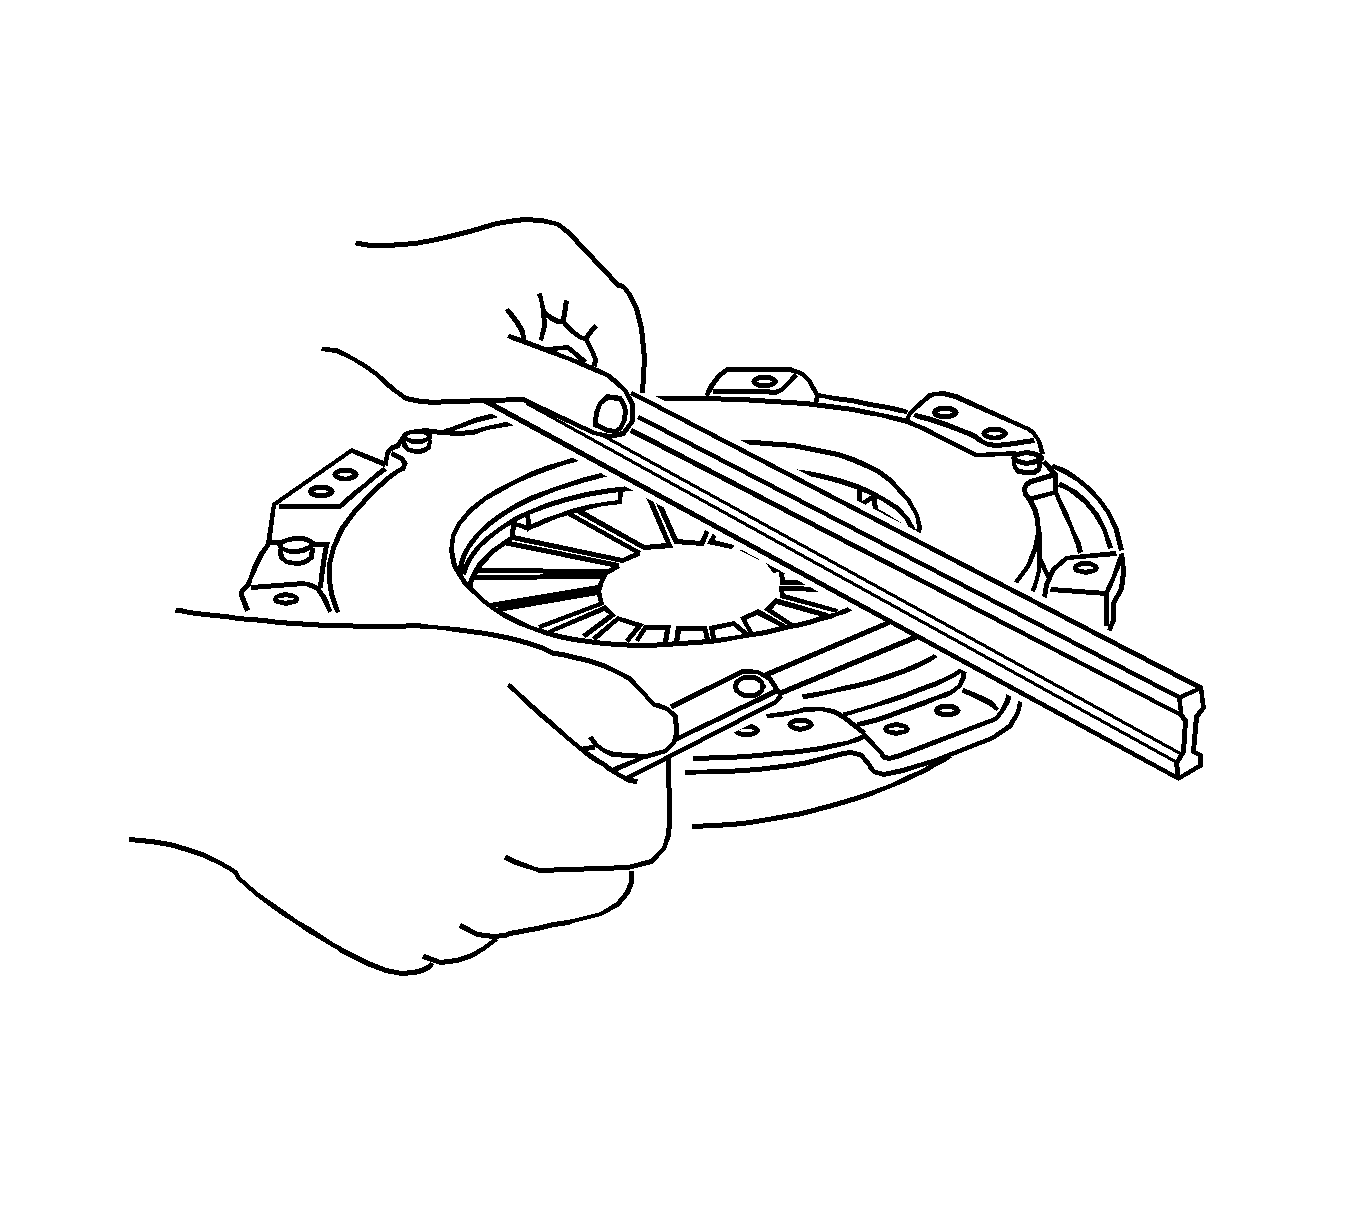
- Align the pressure plate and the clutch disc onto the flywheel using the J 42474 .
- Install the pressure plate bolts and tighten to 15 N·m (11 lb ft).
- Remove the J 42474 .
- Install the transaxle into the vehicle. Refer to Transmission Replacement for the D16 transaxle or Transmission Replacement for the D20 transaxle.
- Connect the negative battery cable.
Caution: Refer to Fastener Caution in the Preface section.
Clutch Assembly Replacement D33 Manual Transaxle
Removal Procedure
- Disconnect the negative battery cable.
- Remove the transaxle from the vehicle. Refer to Transmission Replacement.
- Remove the pressure plate bolts and the pressure plate.
- Remove the clutch disc from the flywheel.
Warning: Refer to Battery Disconnect Warning in the Preface section.
Note: Support the pressure plate when you remove the last bolt.
Clutch Disc Inspection
- Visual Inspection
- Clutch Disc Inspection
| • | Inspect the worn or oily contamination on the clutch surface. |
| • | Inspect the damaged or weakened torsion spring. |
| • | Inspect the a warped or bent clutch disc. After inspection, replace new pressure plate and new clutch disc, if necessary. |
| • | Measure the rivet head depth from the clutch disc surface. |
| • | Replace new pressure plate and new clutch disc if the measured value is below the limit. |
| • | Rivet Head Depth (Limit) : 1.2 mm (0.047 in). |
Pressure Plate Inspection
- Check for a worn diaphragm spring finger.
- Check for a worn or cracked pressure plate surface.
- Check for the polluted face by the oil. After inspection, replace new pressure plate and new clutch disc, if necessary.

Installation Procedure
- Coat the spline on the clutch disc with multi-purpose grease.
- Align the pressure plate and the clutch disc onto the flywheel using a suitable tool.
- Install the pressure plate bolts and tighten to 28 N·m (21 lb ft).
- Install the transaxle into the vehicle. Refer to Transmission Replacement.
- Connect the negative battery cable.
Caution: Refer to Fastener Caution in the Preface section.
Note: When replacing the pressure plate or the clutch disc, replace both the pressure plate and the clutch disc with new ones.
