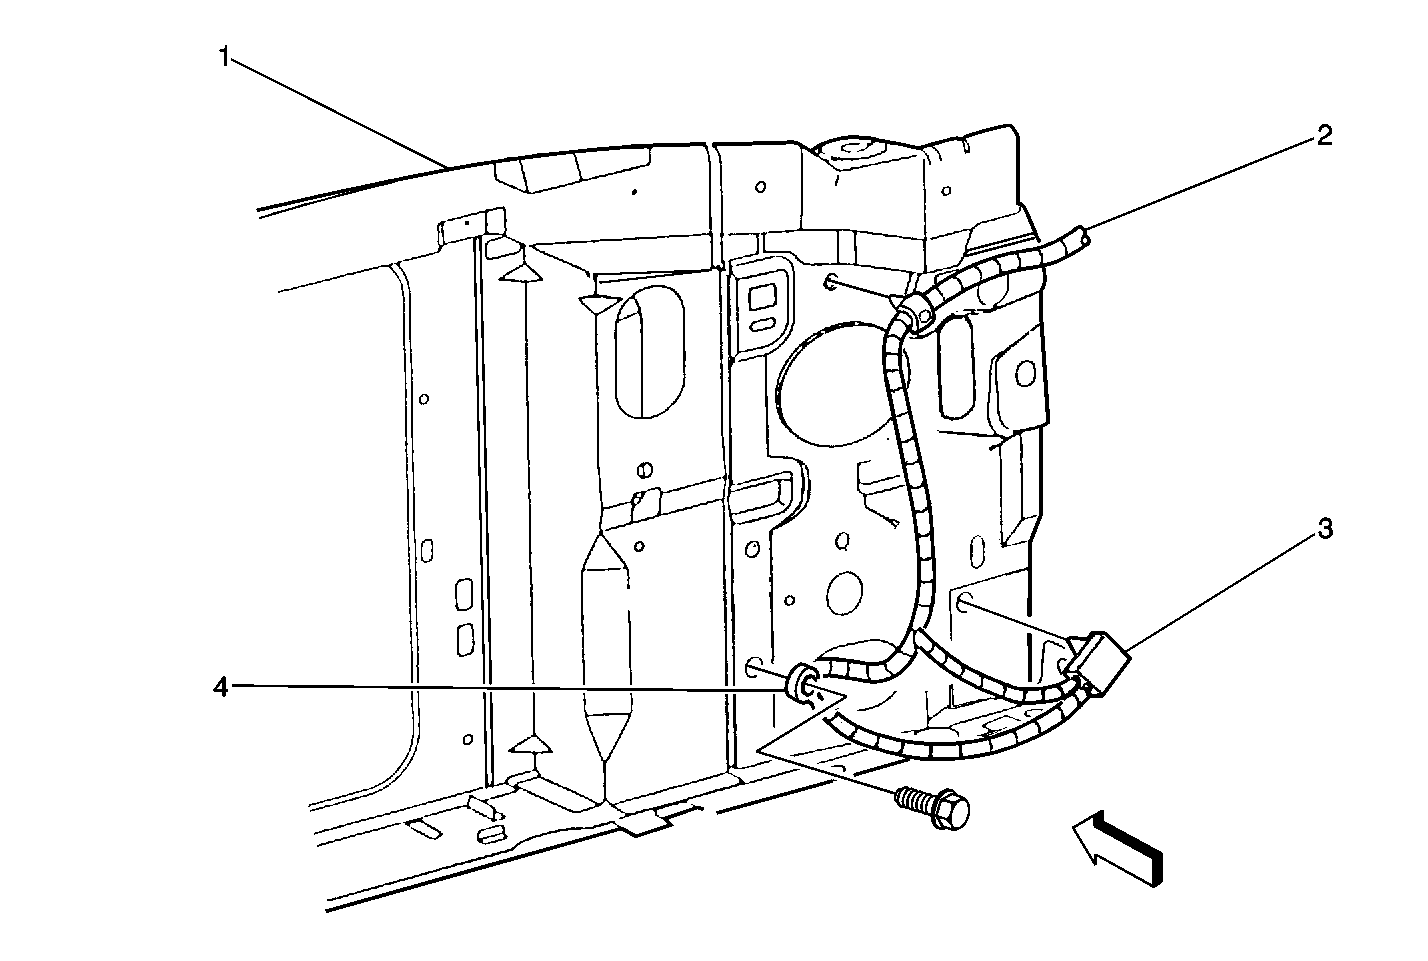
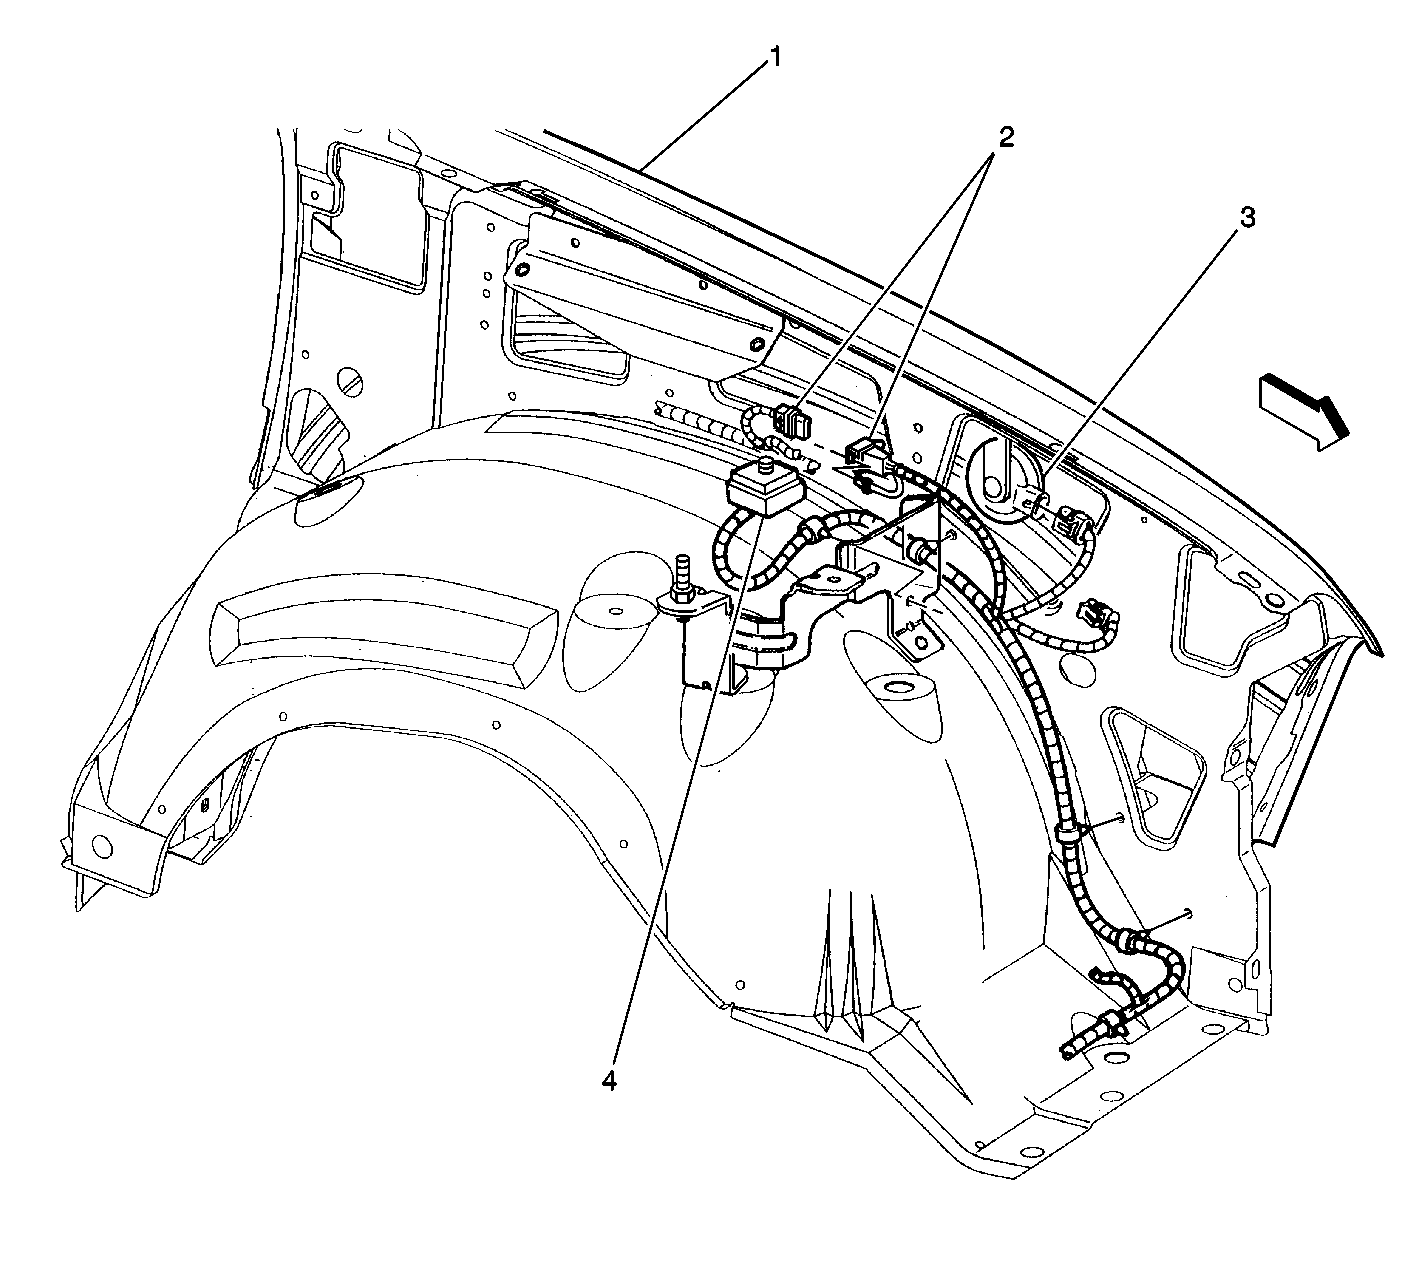
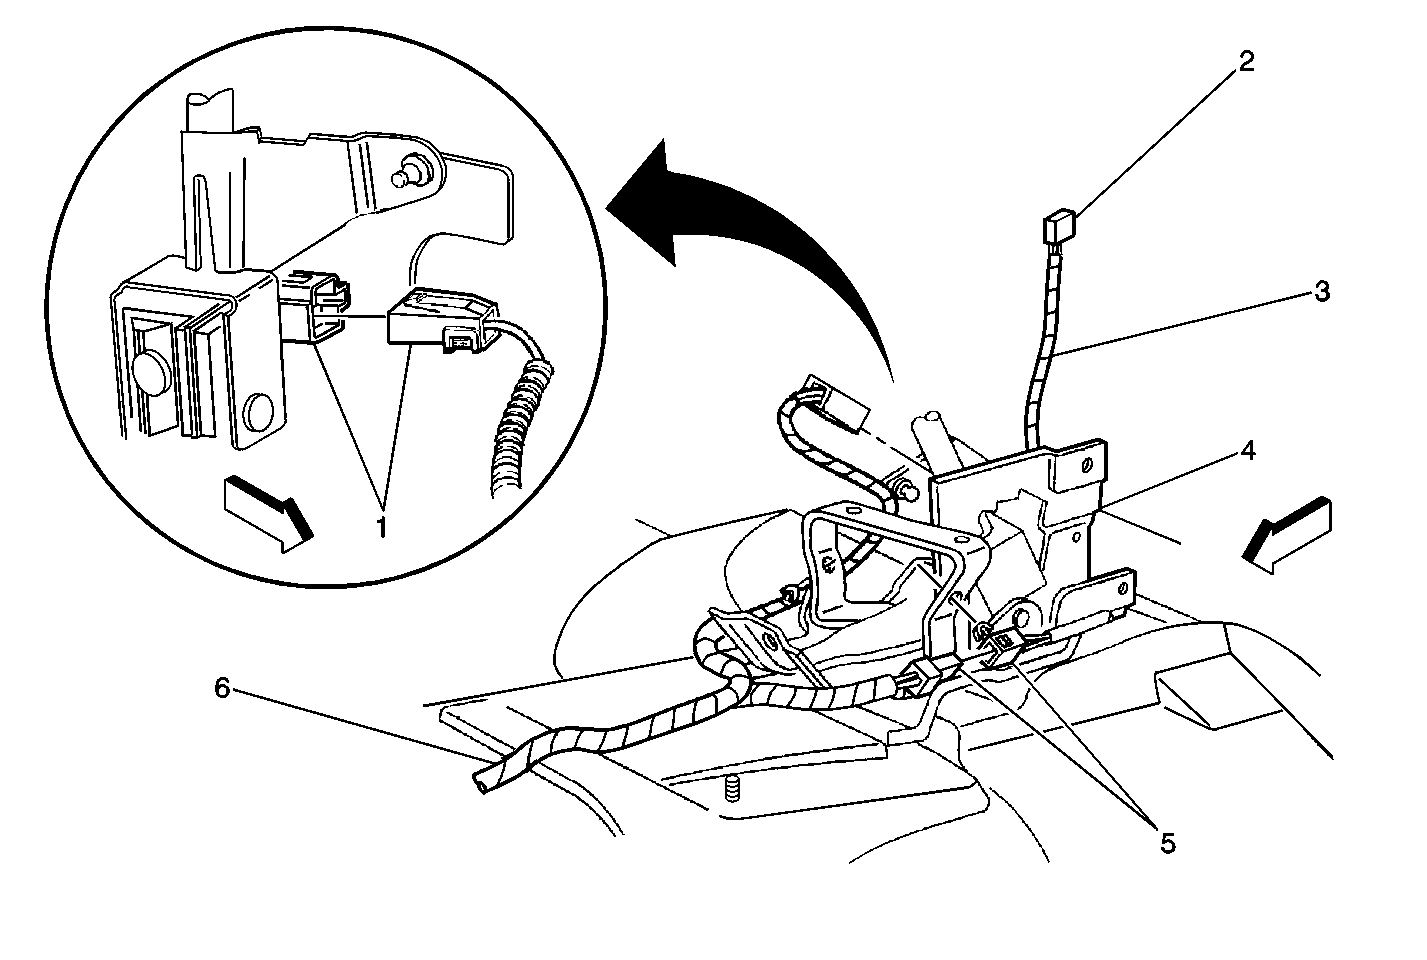
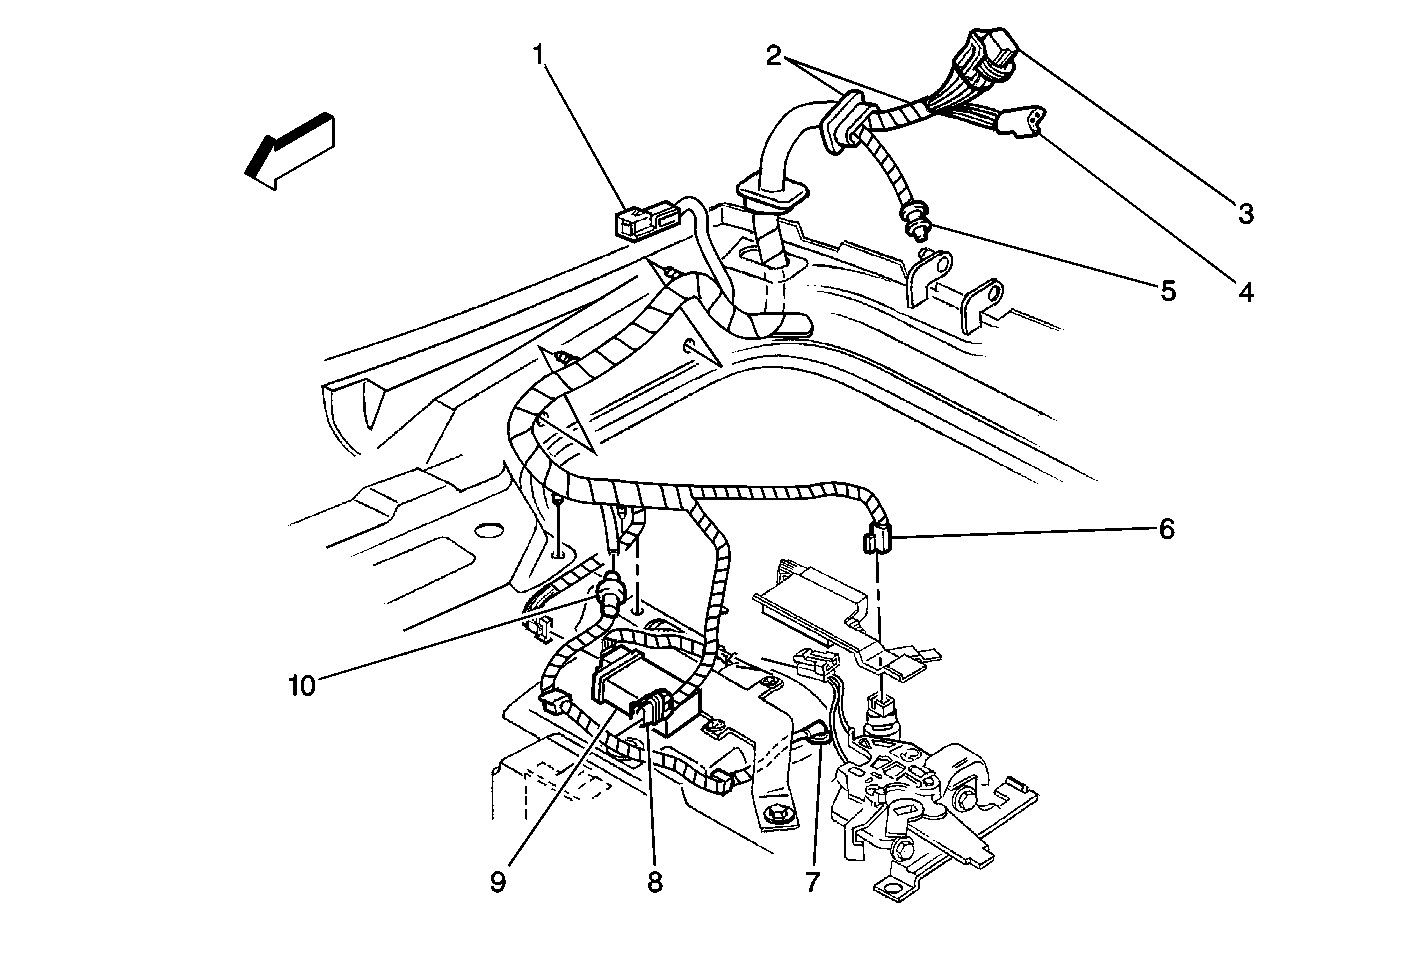
| Figure 1: |
Radiator Support, Inside RH
|
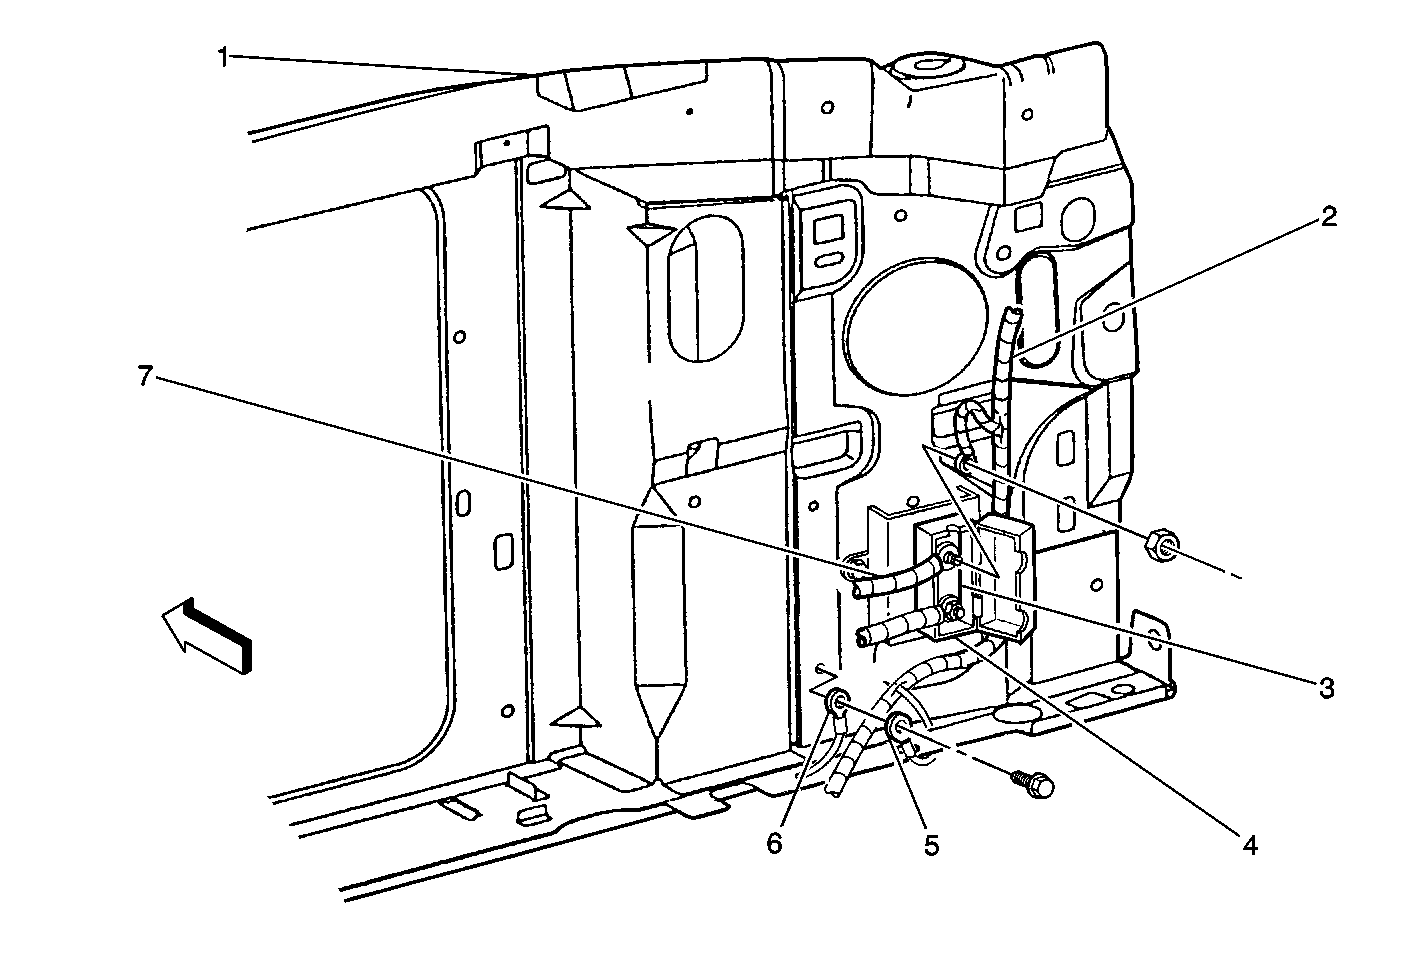
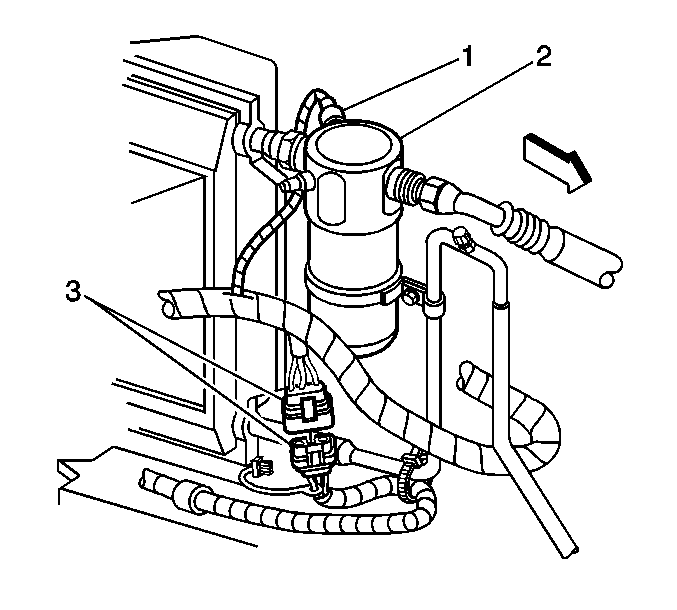
| Figure 2: |
Battery MegaFuse and Air Injection (AIR) Jumper
Harness
|
| Figure 3: |
Air Injection (AIR) Fuse Block
|
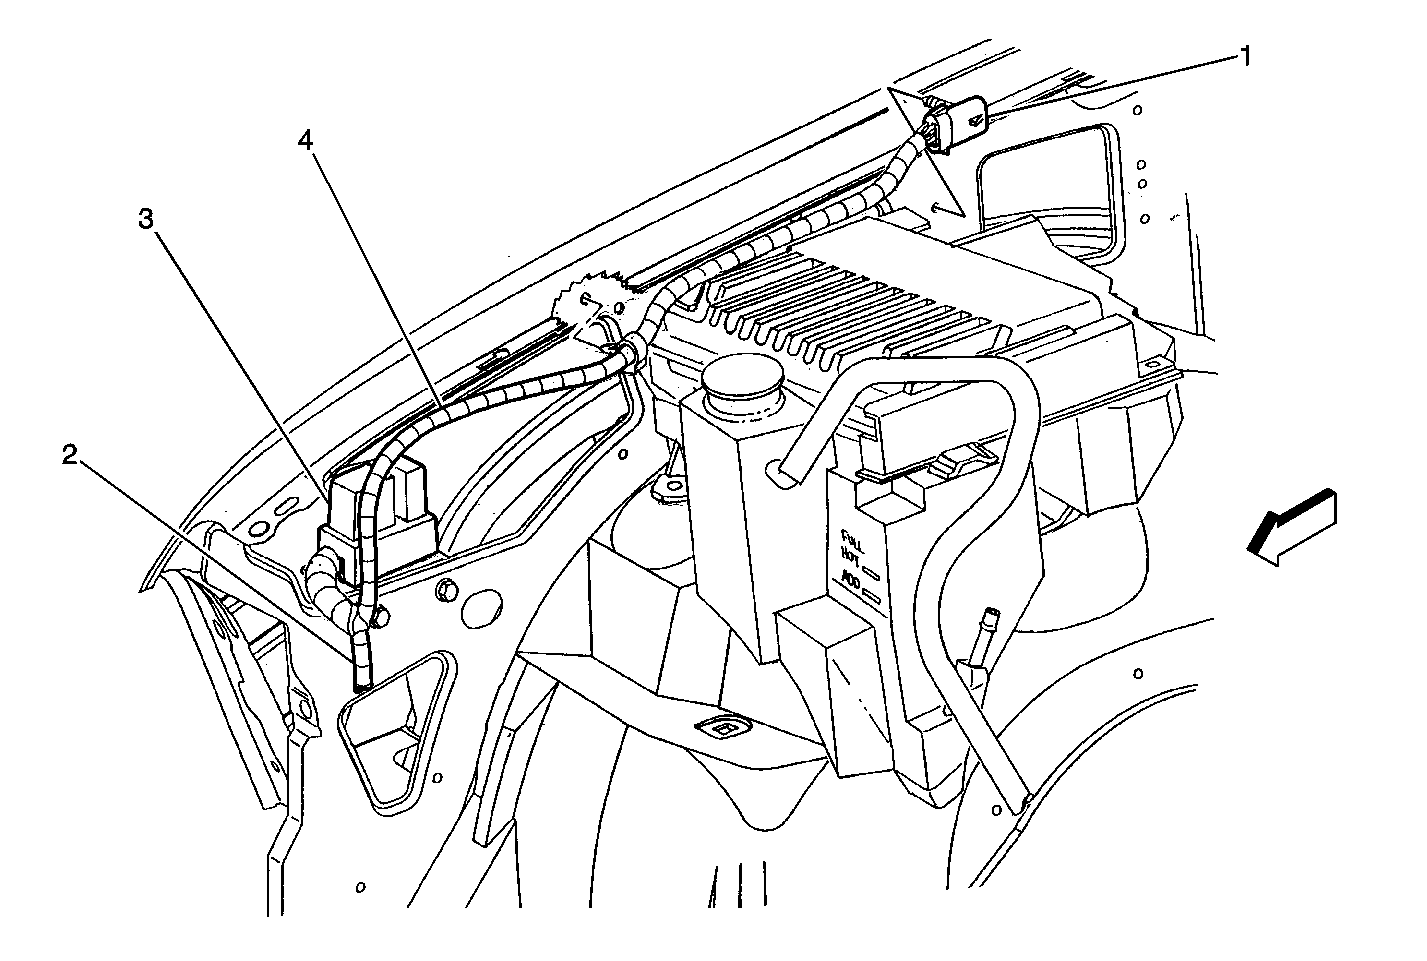
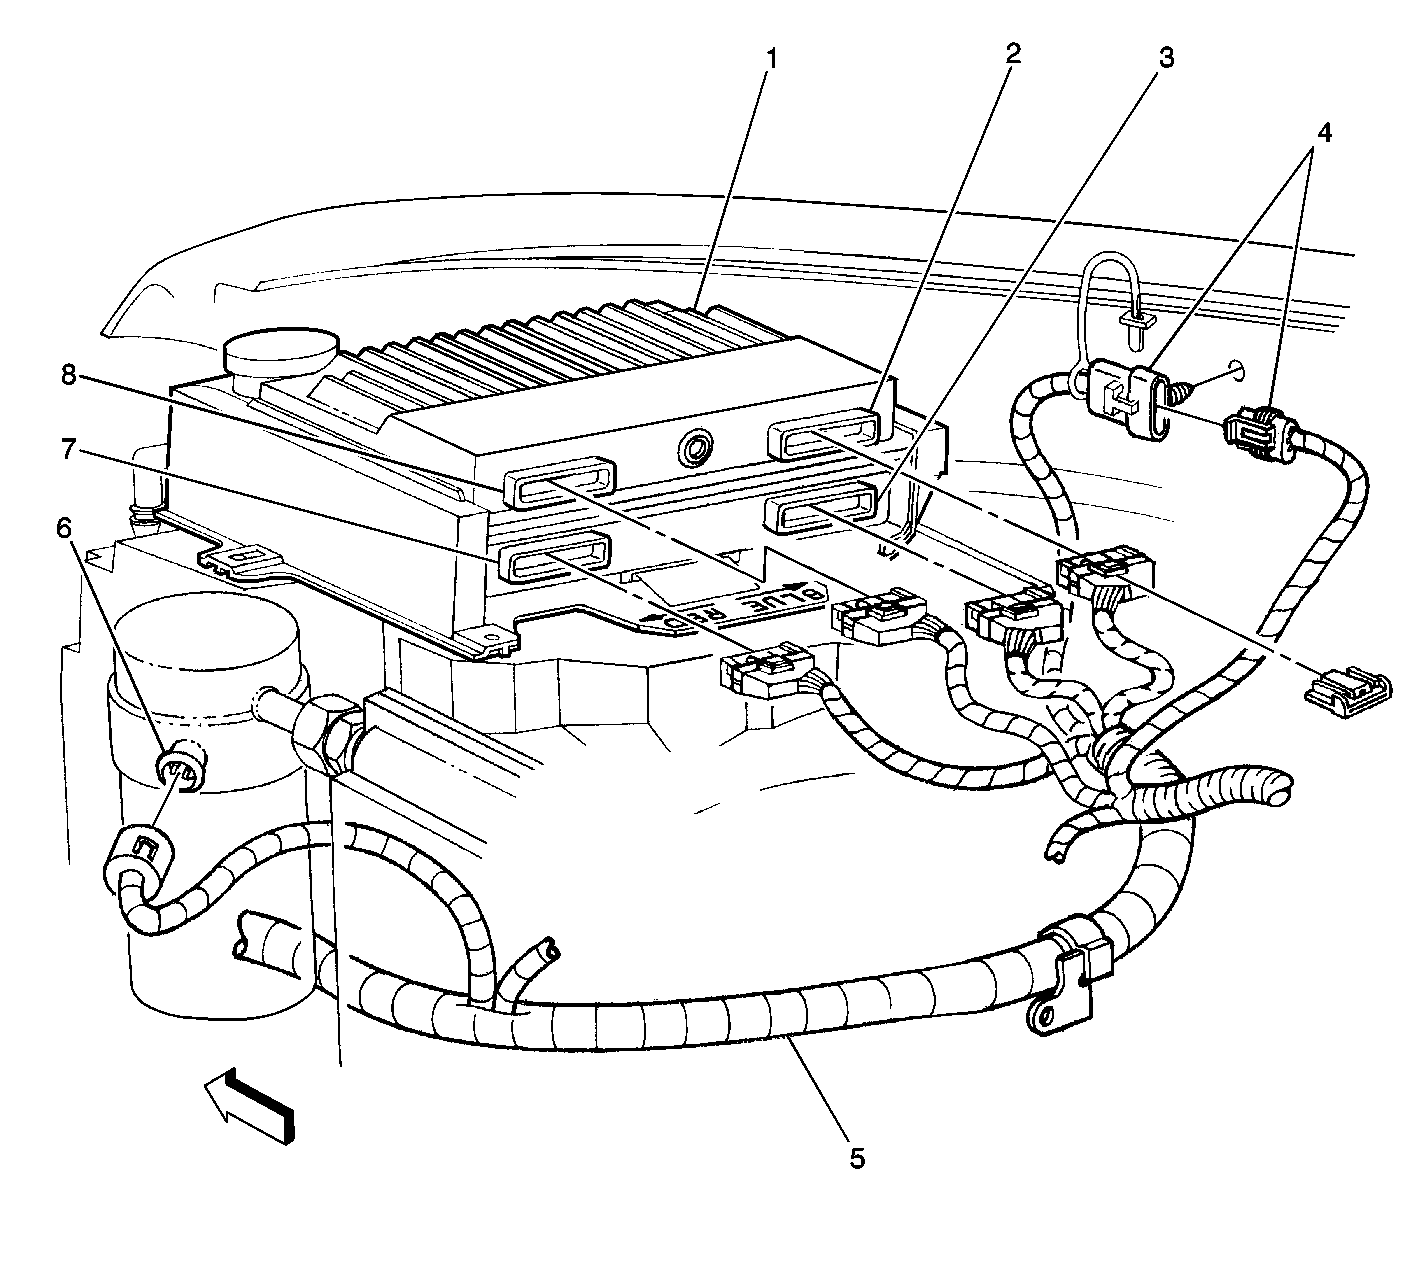
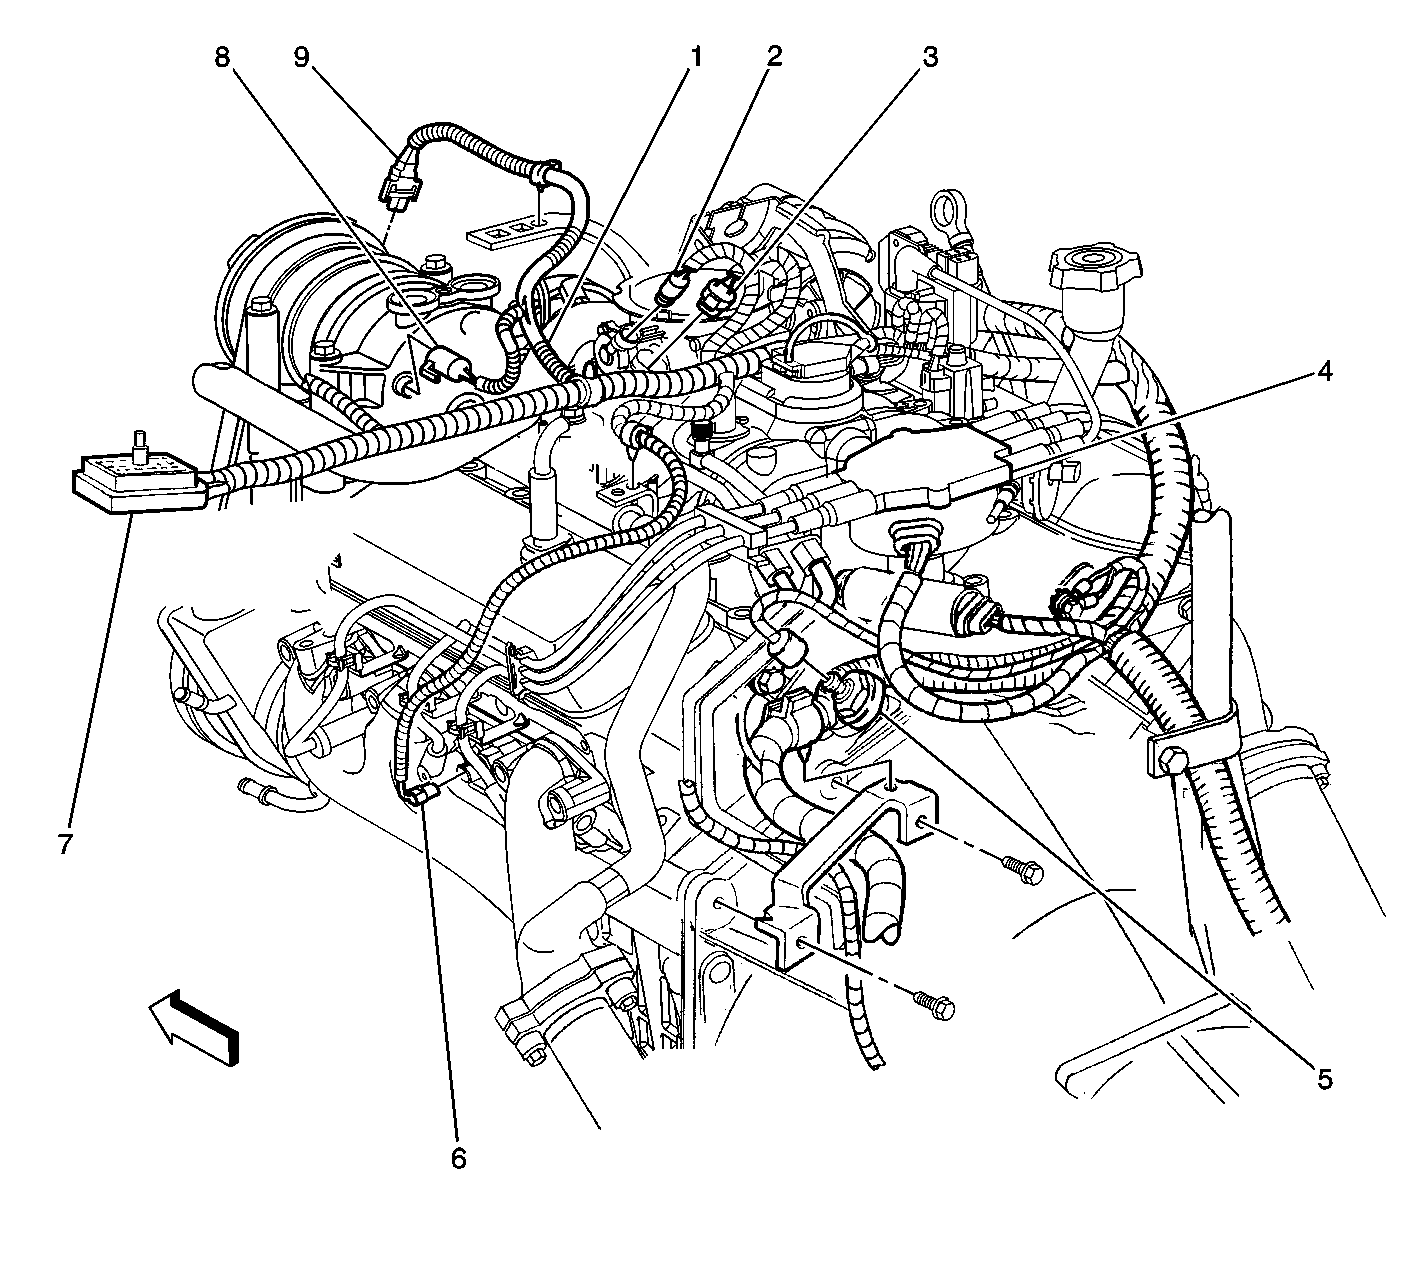
| Figure 4: |
Engine Compartment Details
|
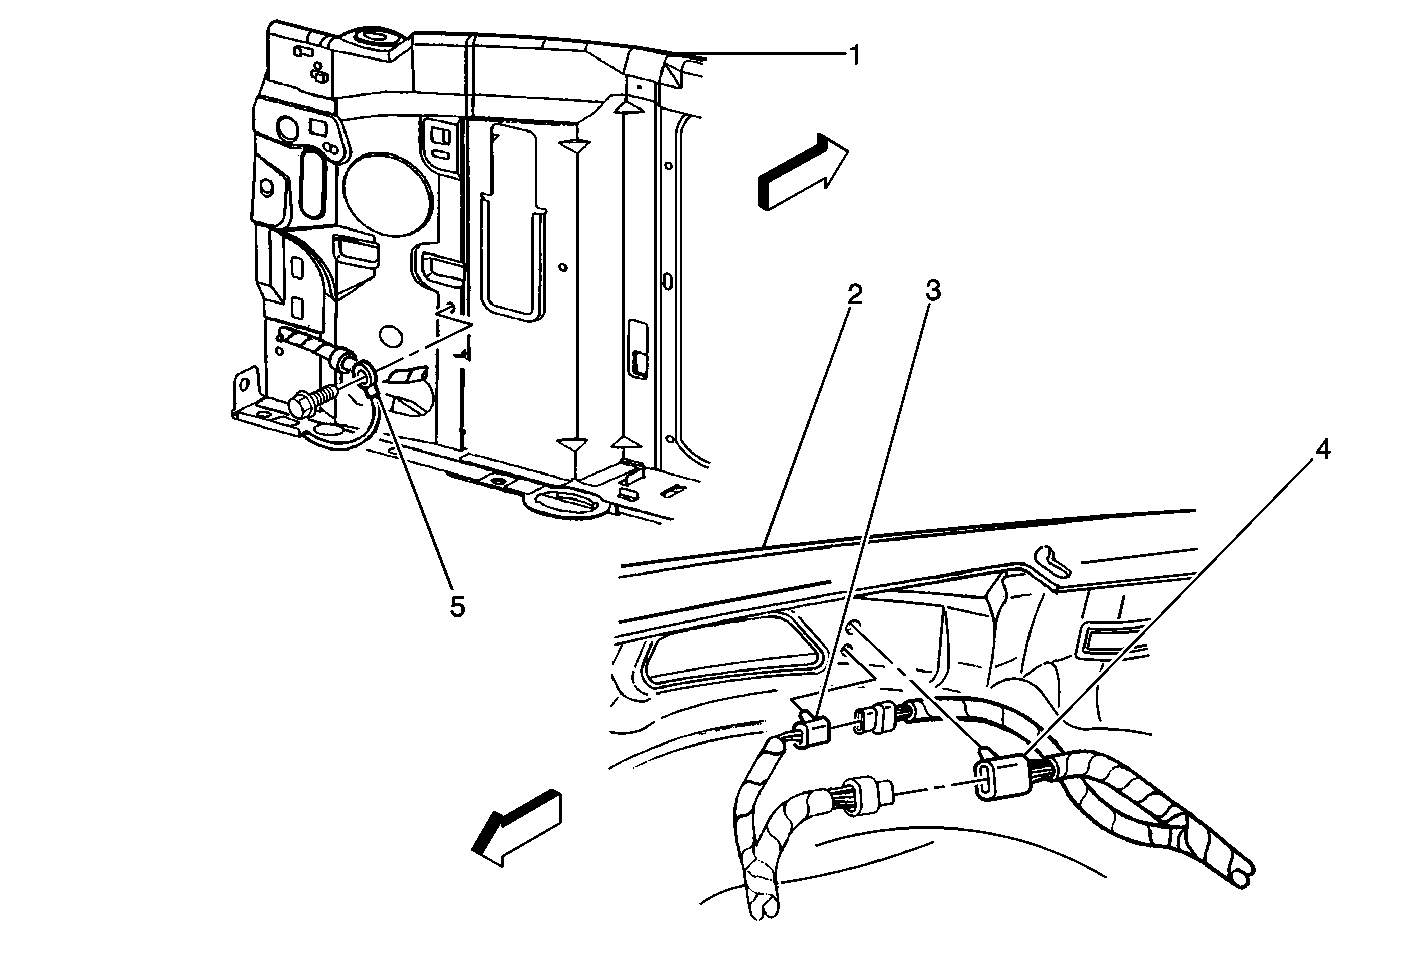
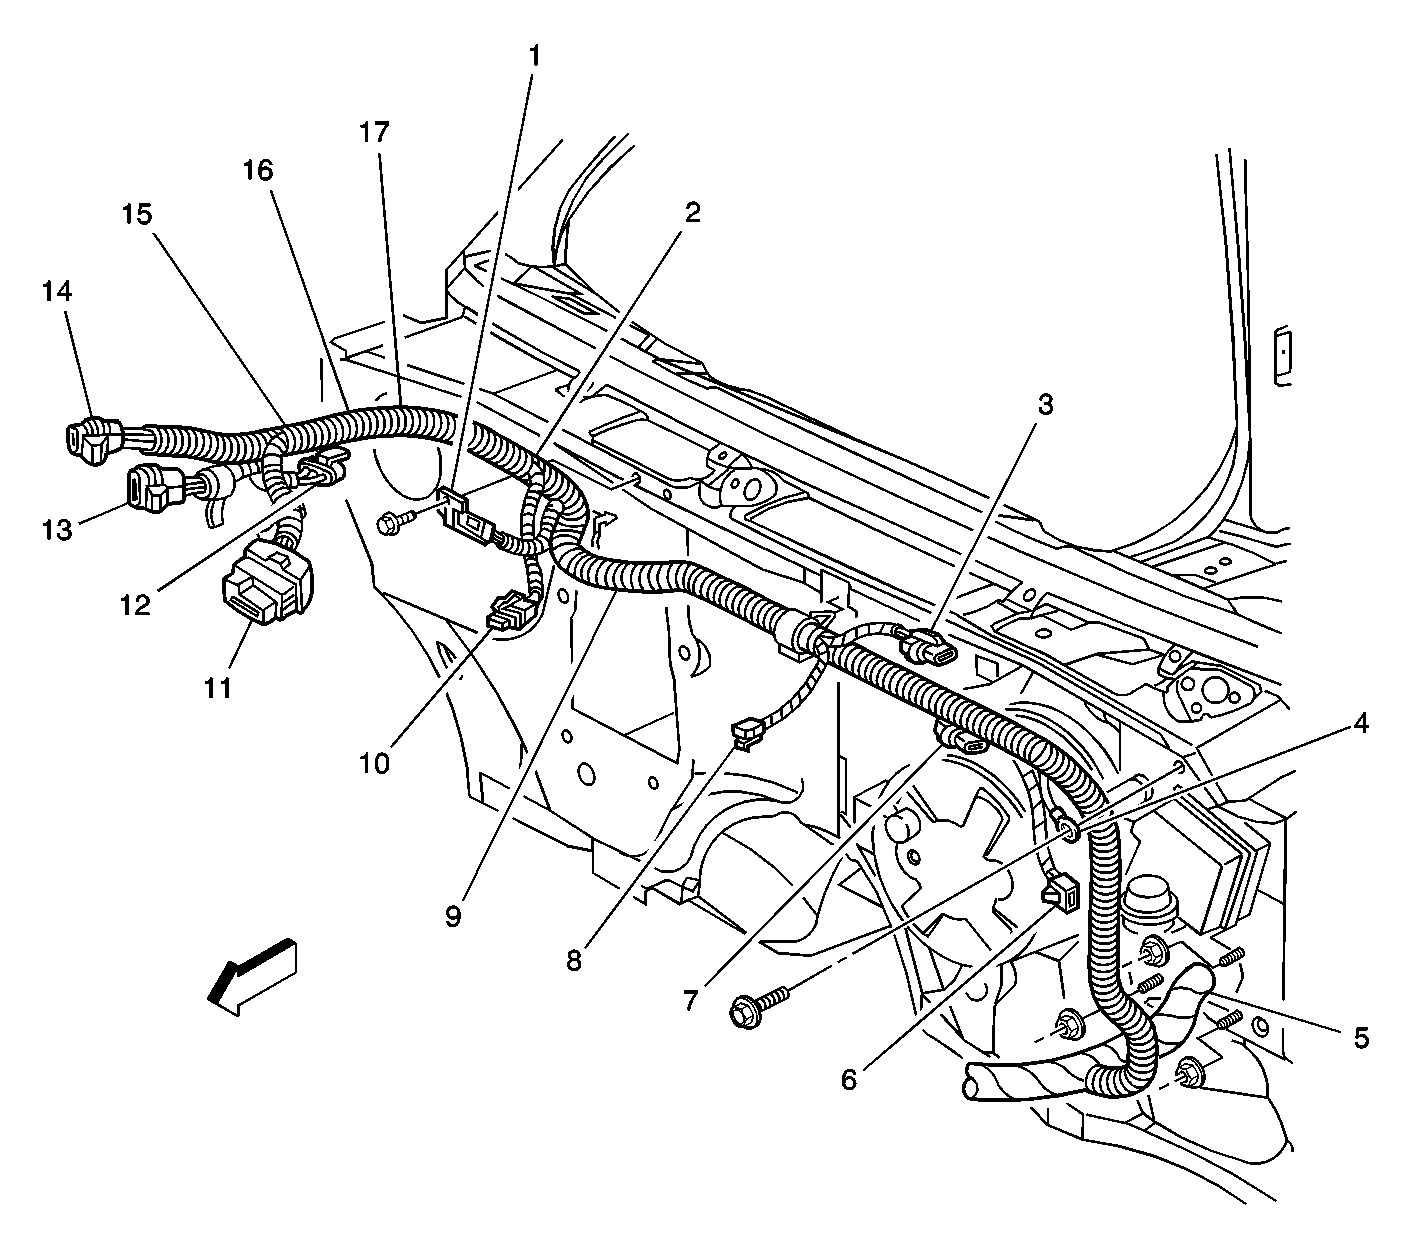
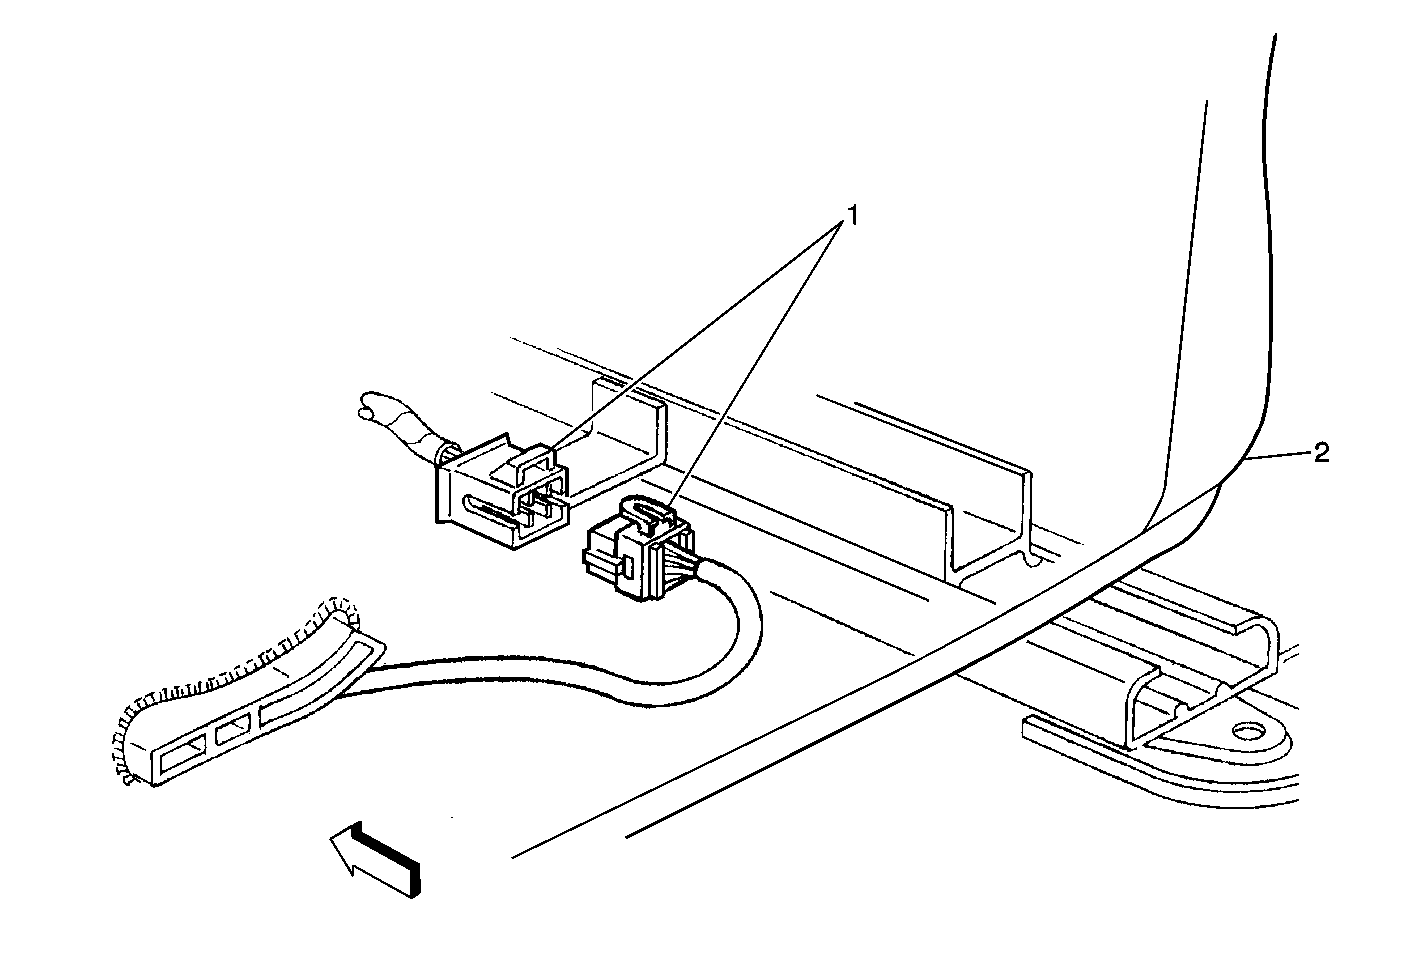
| Figure 5: |
Inline Connector C106
|
| Figure 6: |
A/C Accumulator (4.3L)
|
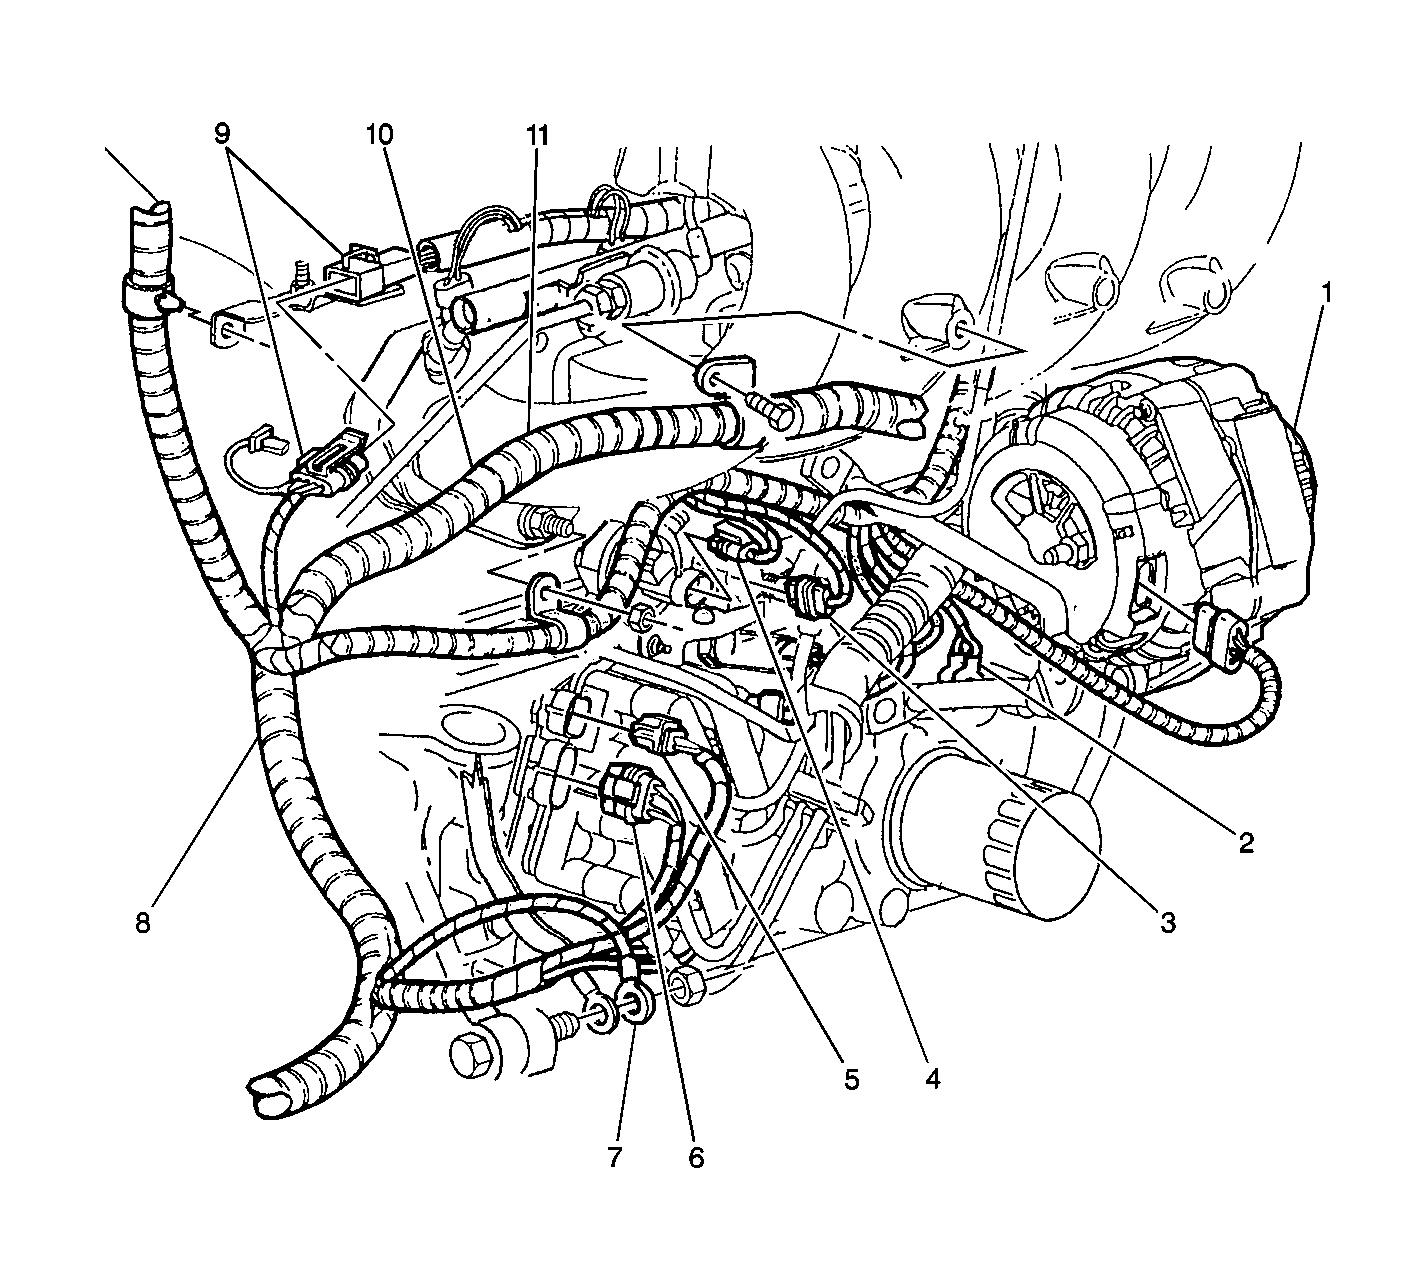
| Figure 7: |
Vehicle Control Module (VCM) 4.3 L
|
| Figure 8: |
Engine, LF (2.2 L)

|
| Figure 9: |
Engine, LR (2.2L)
|
| Figure 10: |
Engine, RF (4.3L)

|
| Figure 11: |
Engine, LR (4.3L)
|
| Figure 12: |
Heated Oxygen Sensor (HO2S) Extension Harness (4.3L)

|
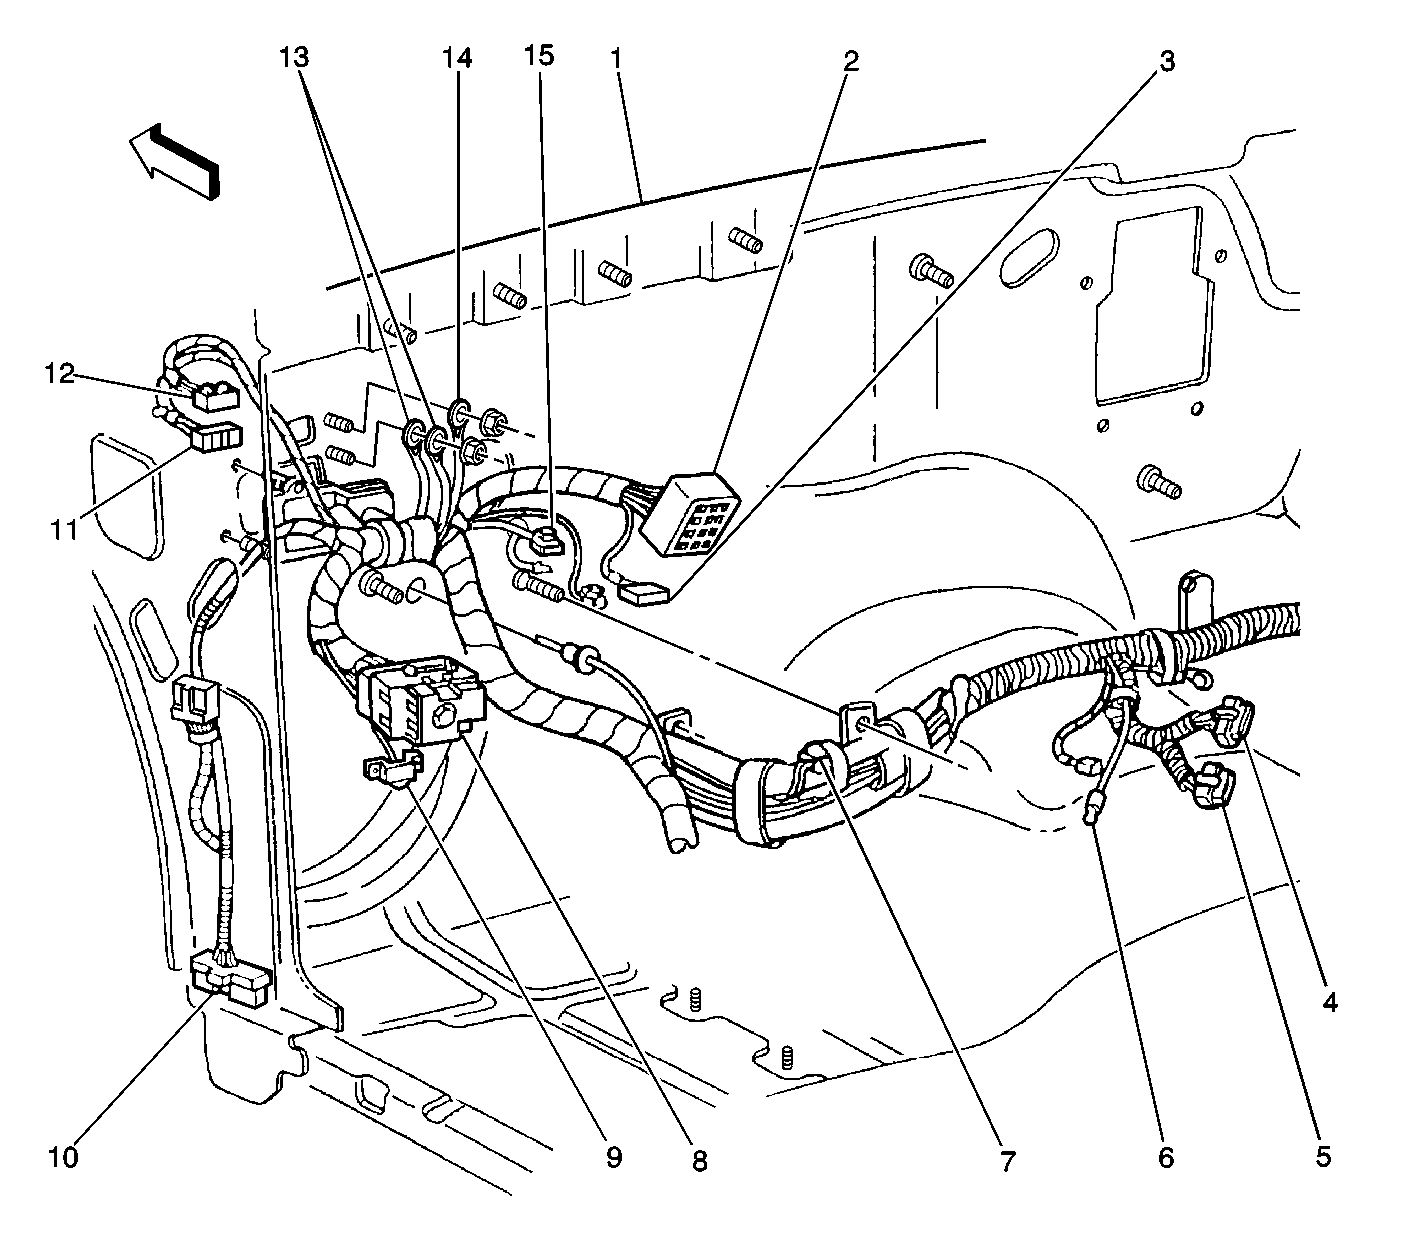
| Figure 13: |
Body Wiring Harness, Engine Compartment
|
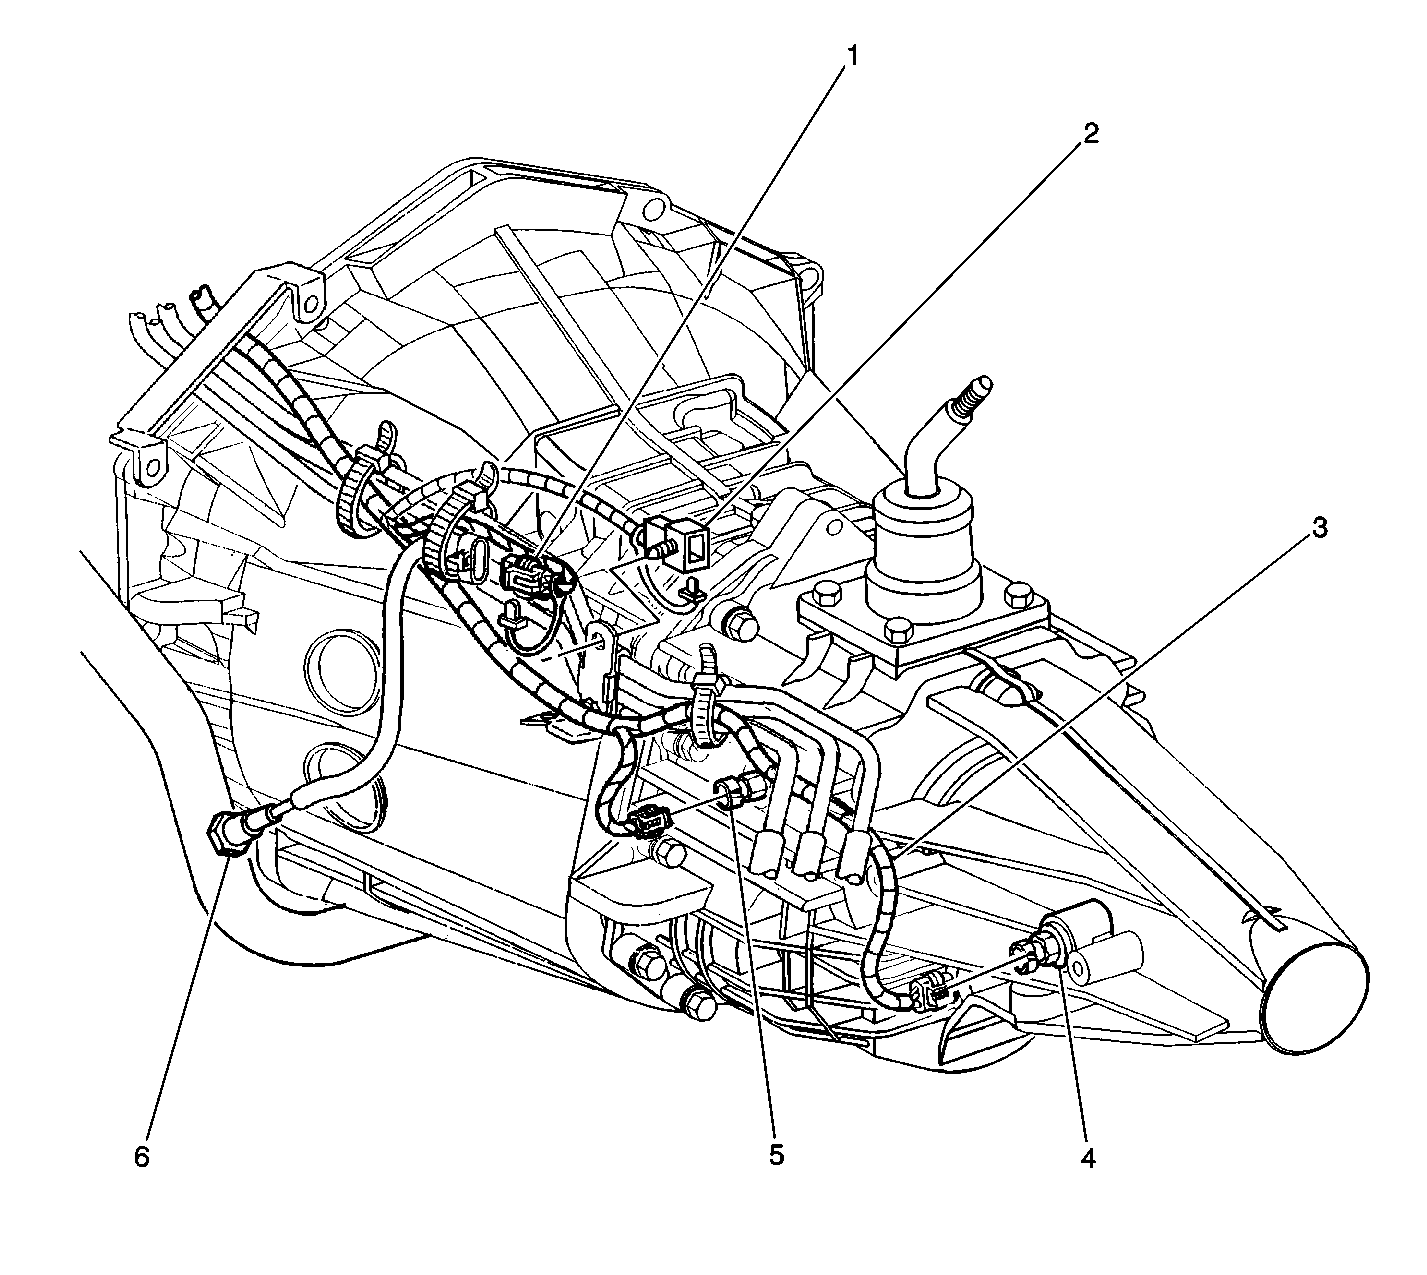
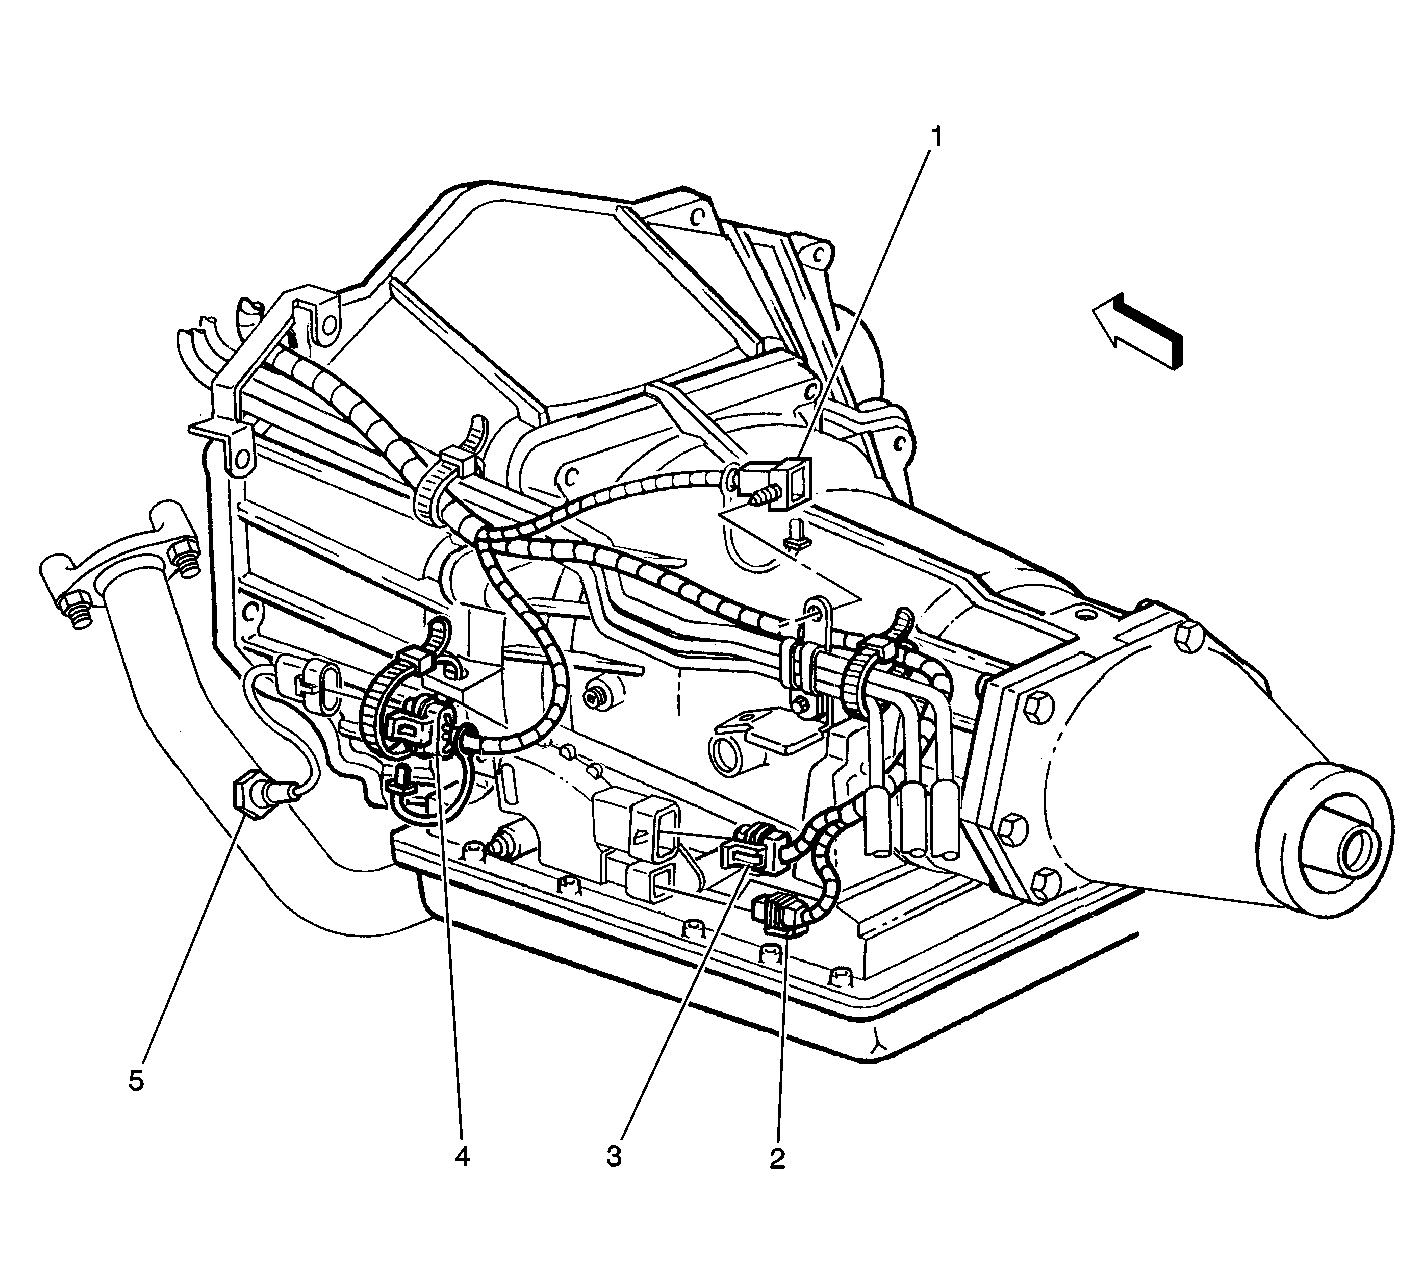
| Figure 14: |
Manual Transmission, LH (4.3L)
|
| Figure 15: |
Automatic Transmission (2.2L)
|
| Figure 16: |
Transmission Range Switch (w/ A/T) 4.3L Shown, 2.2L Similar
|
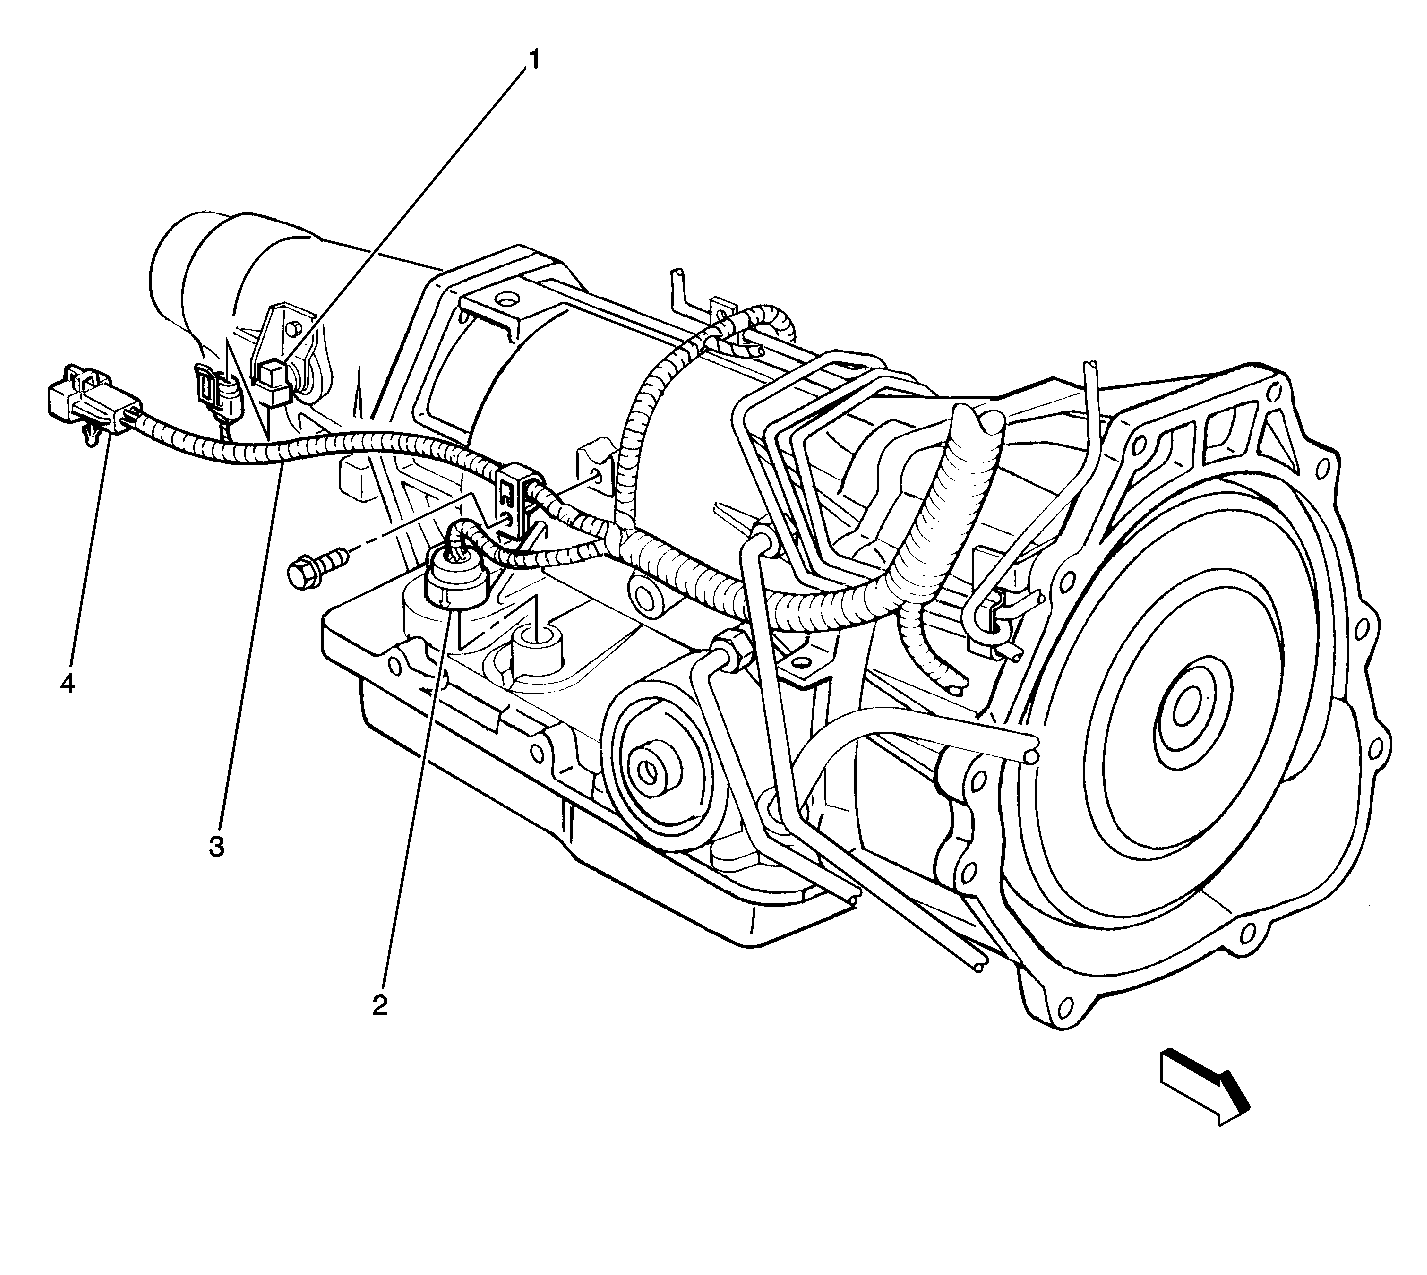
| Figure 17: |
Automatic Transmission, RH (4.3 L)
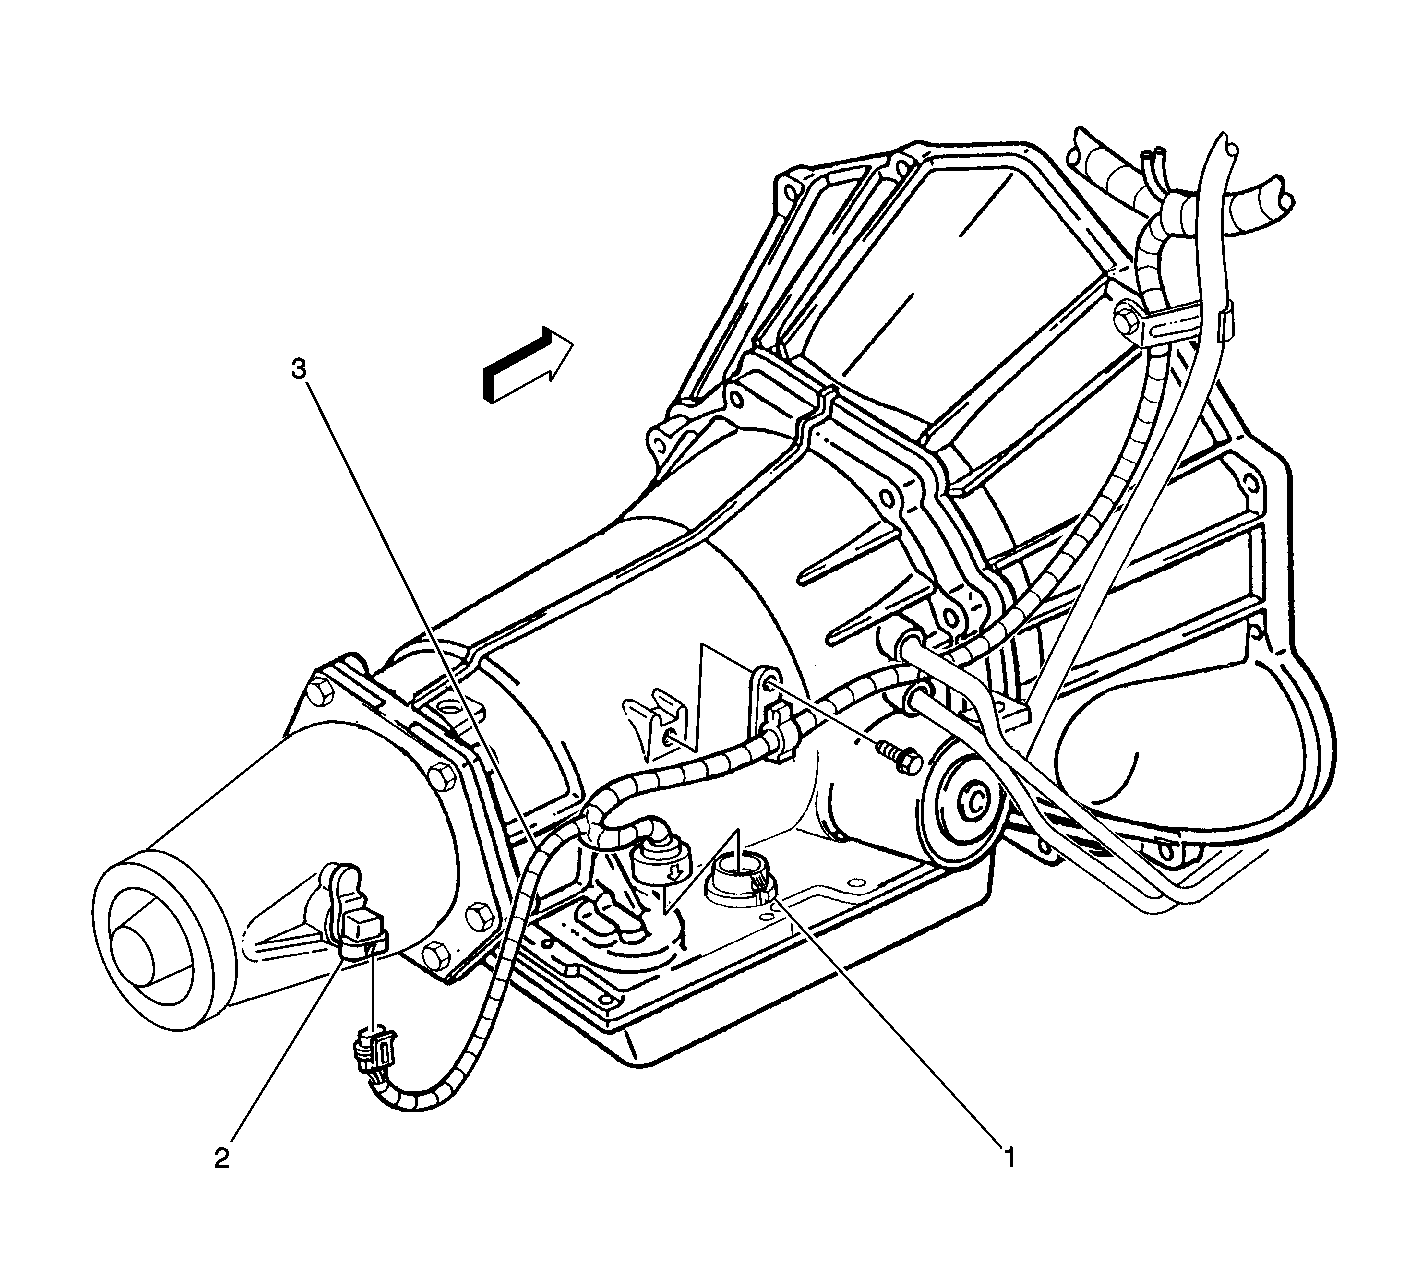
|
| Figure 18: |
Transfer Case
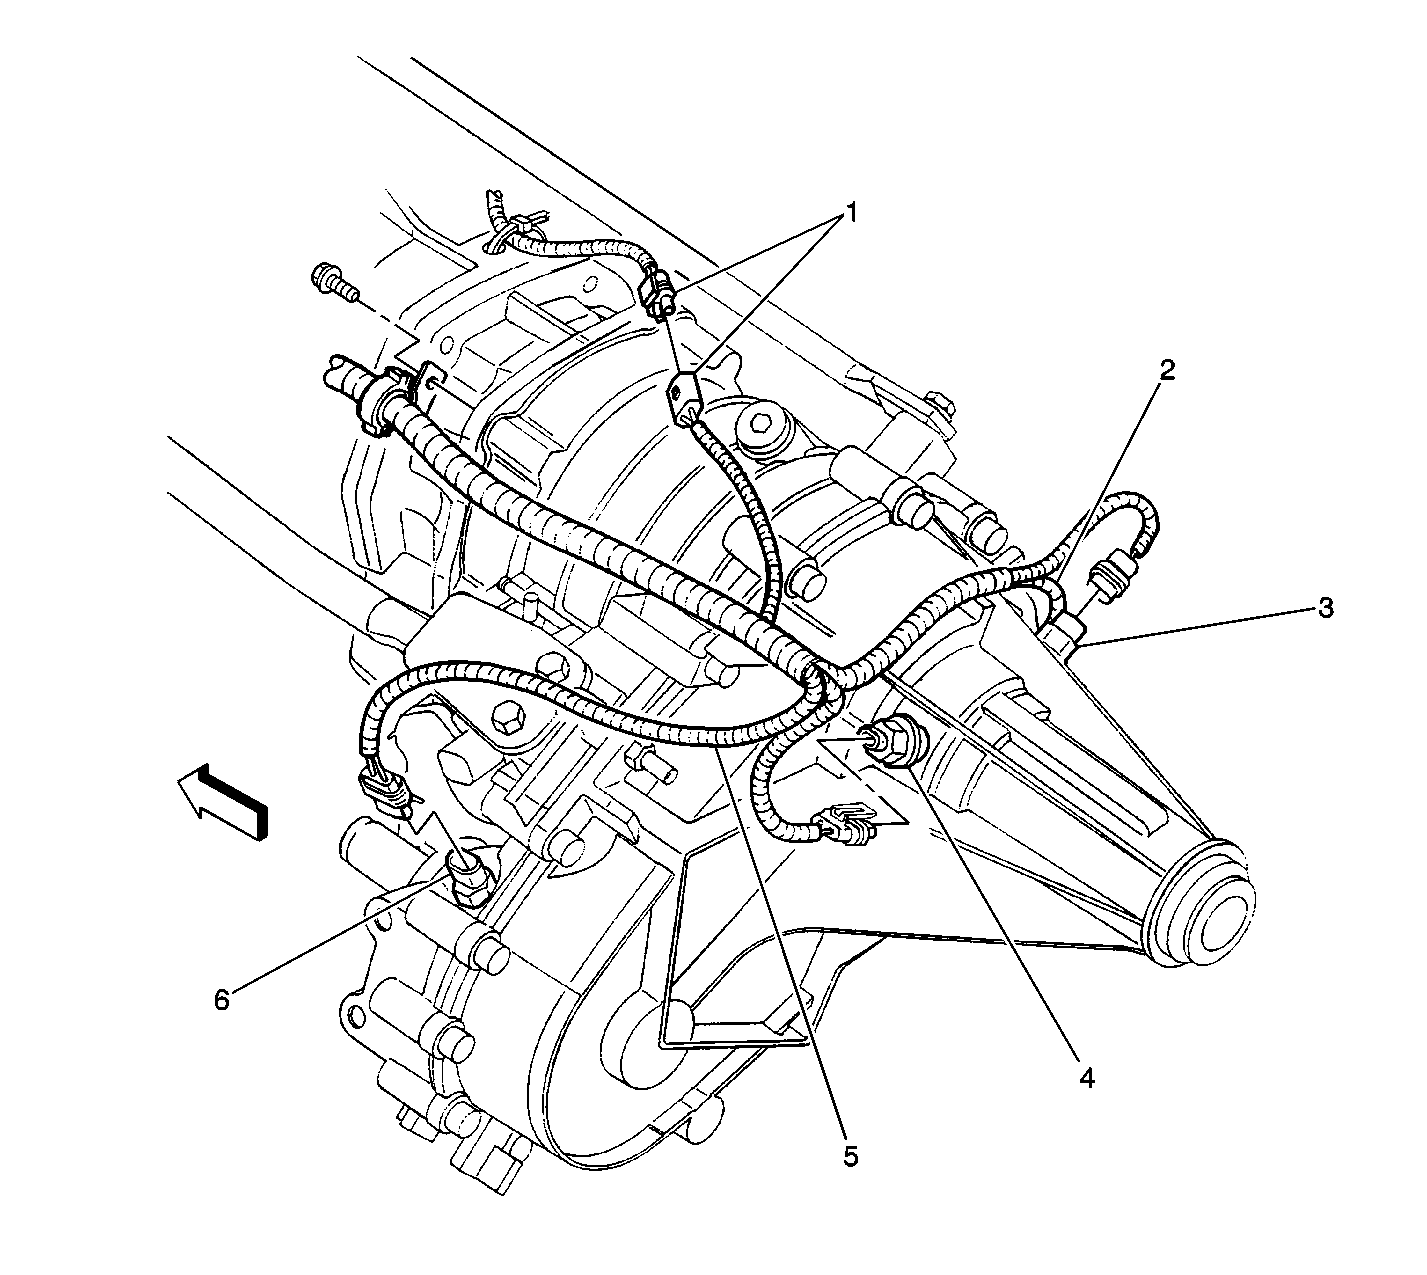
|
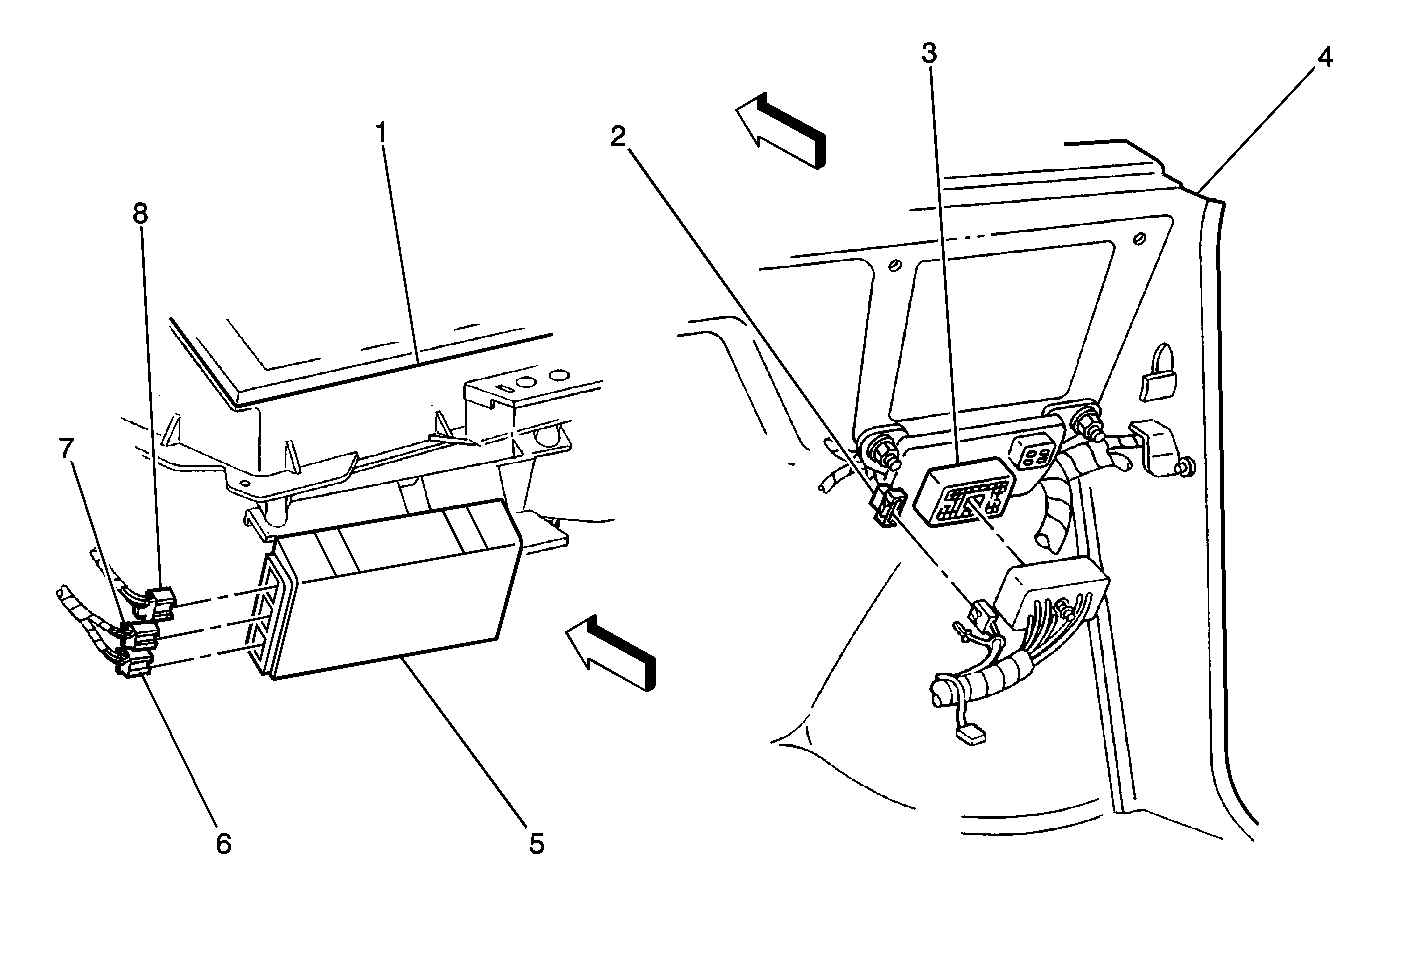
| Figure 19: |
Instrument Panel, LF
|
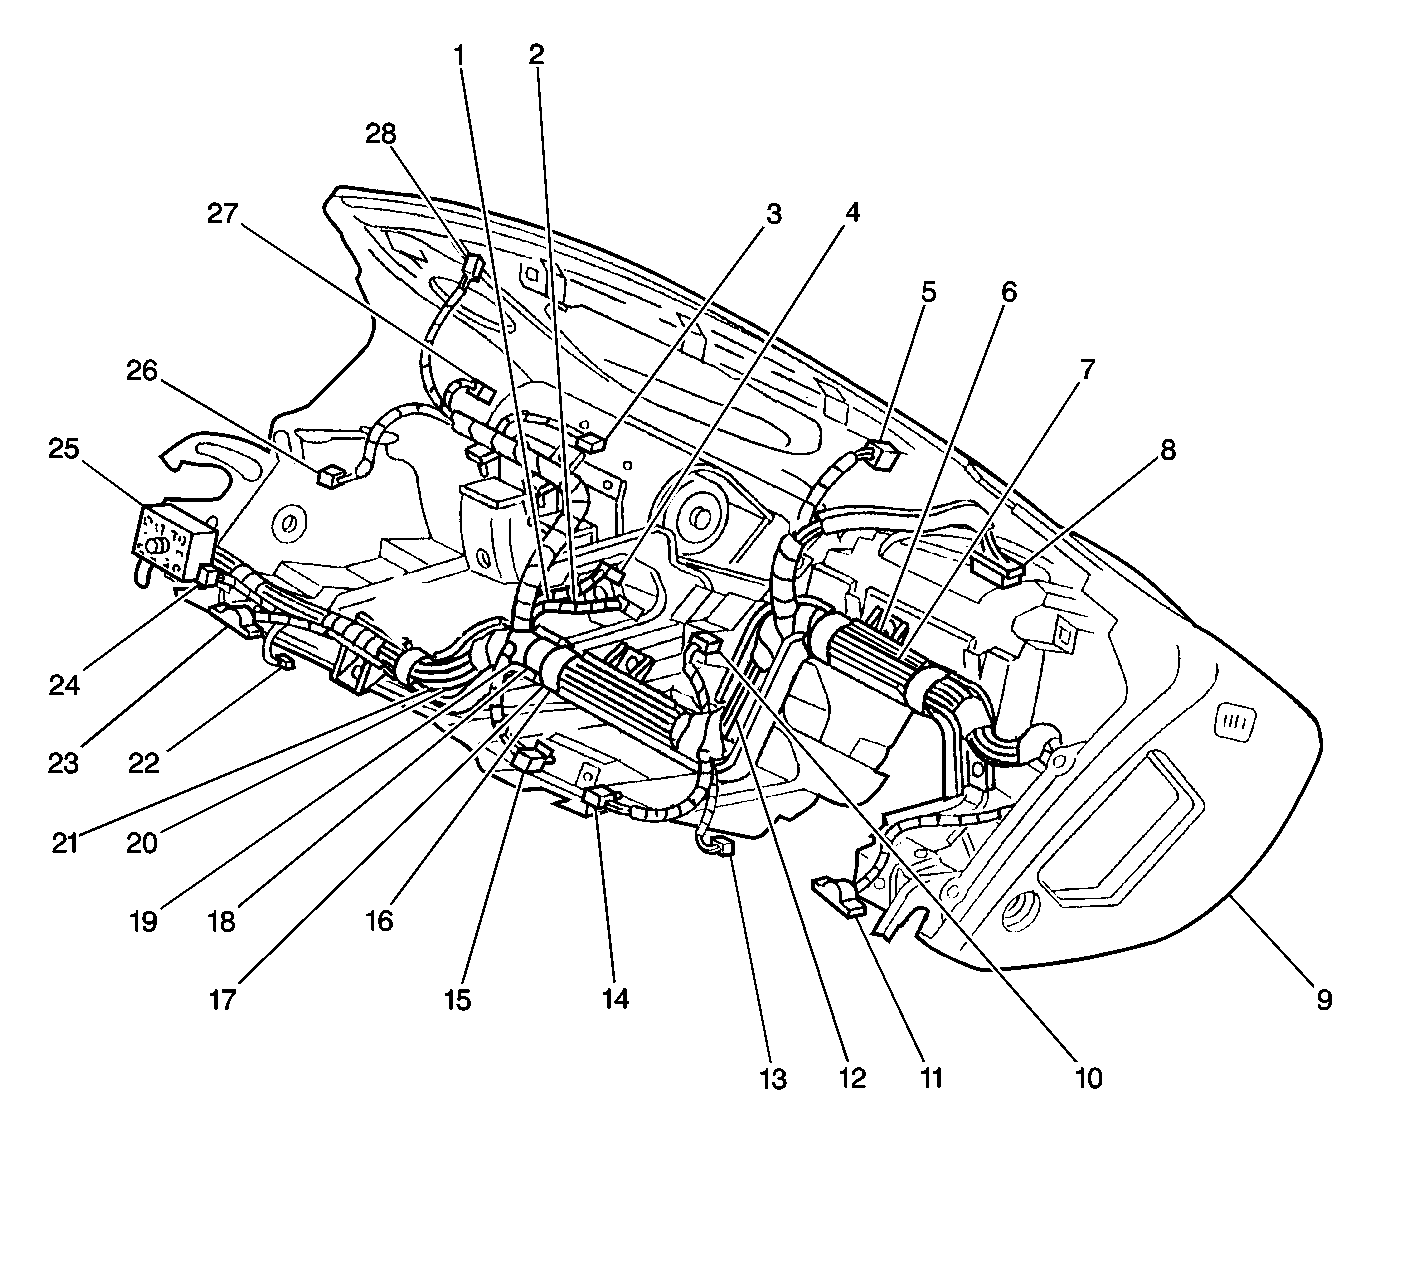
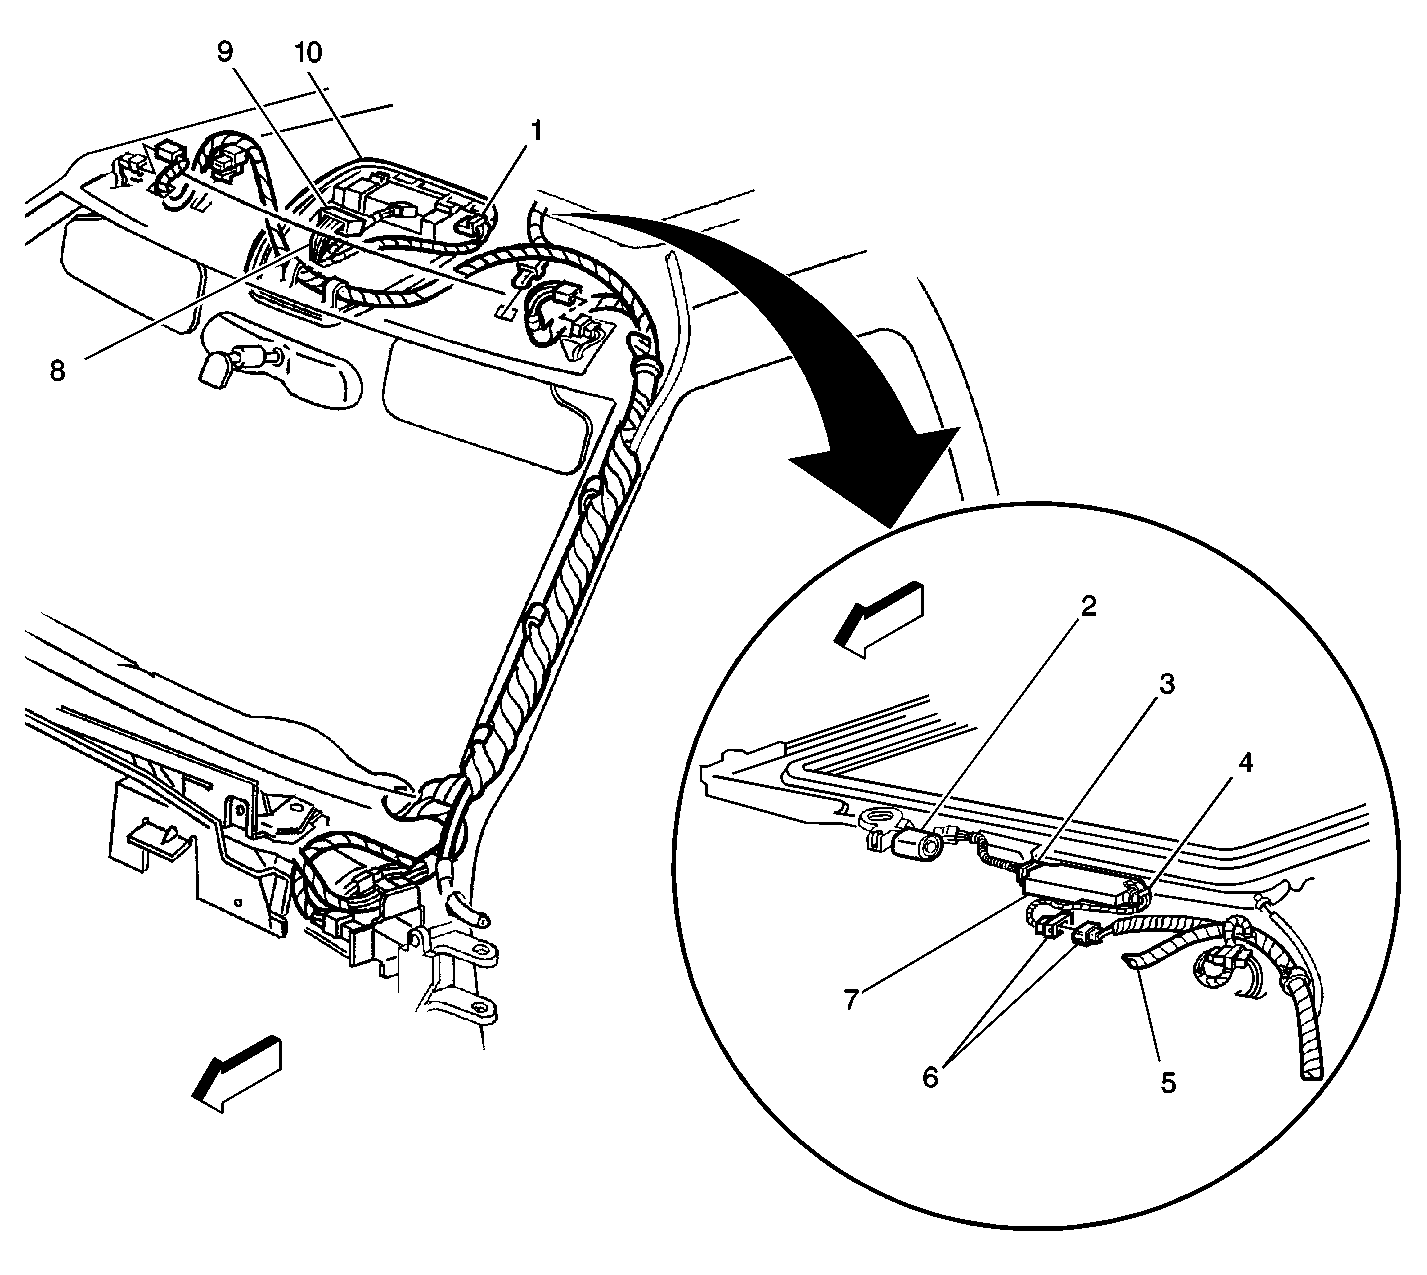
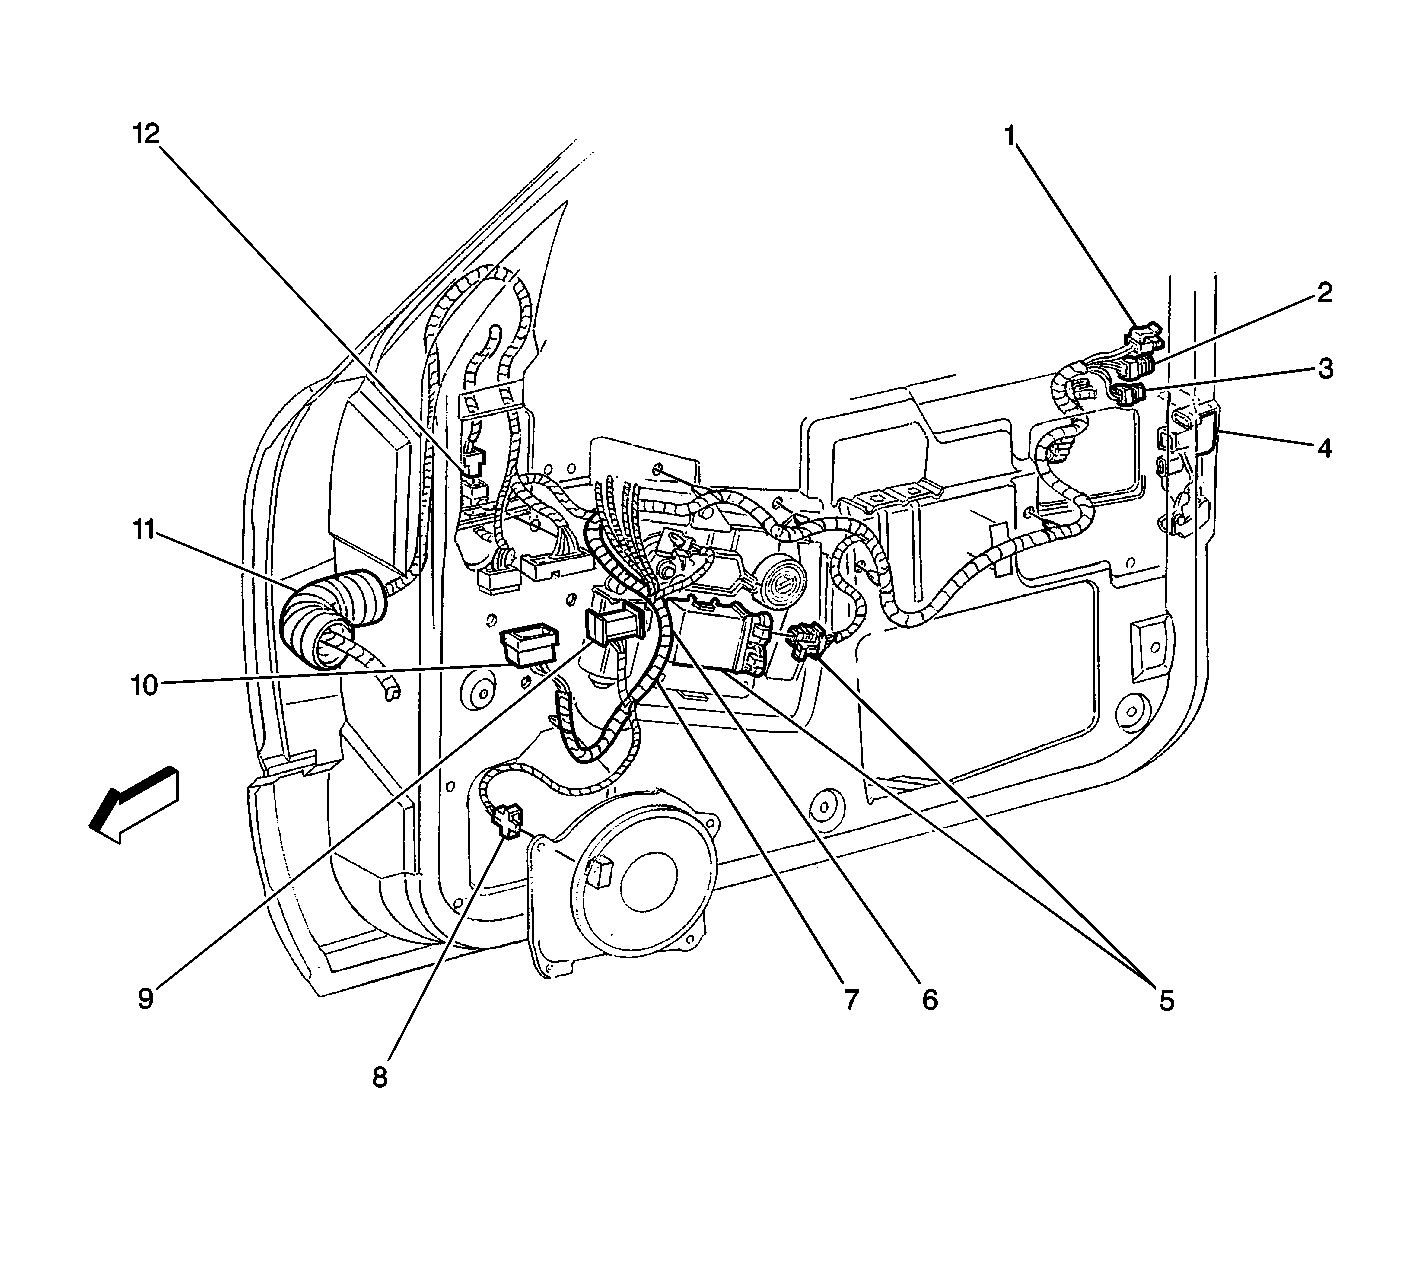
| Figure 20: |
Instrument Panel Details, RH
|
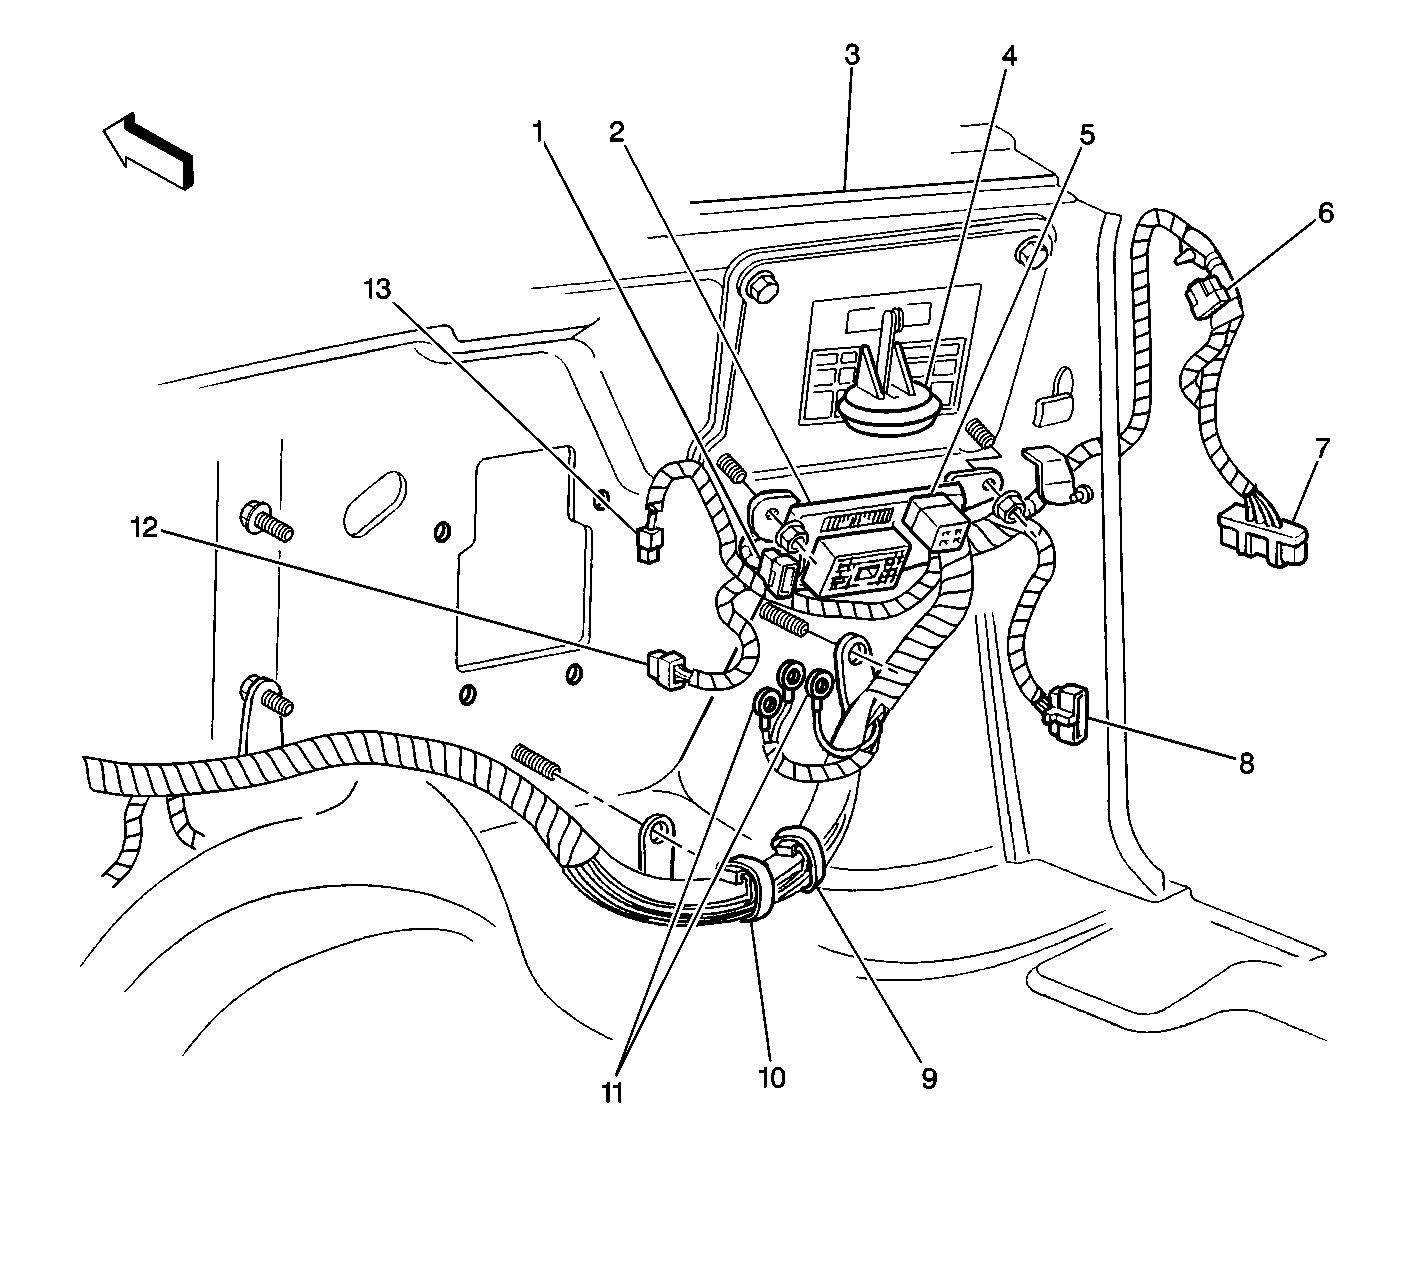
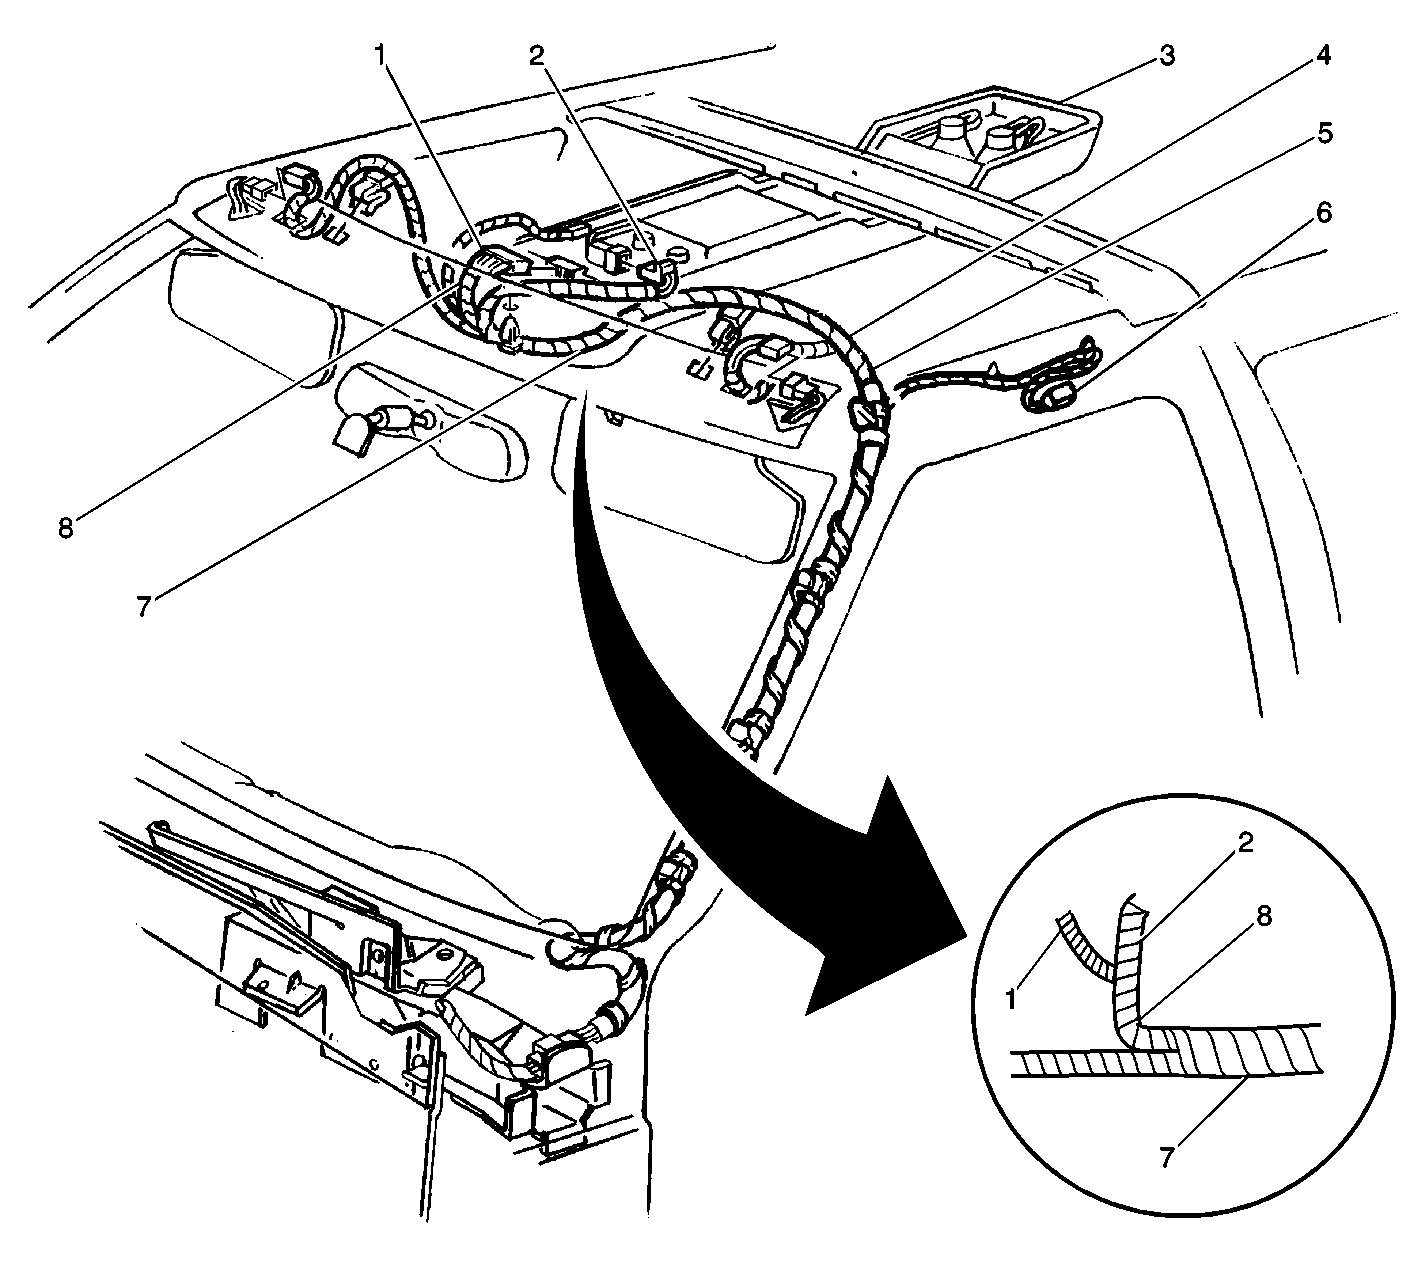
| Figure 21: |
Instrument Panel, RF
|
| Figure 22: |
IP Wiring Harness
|
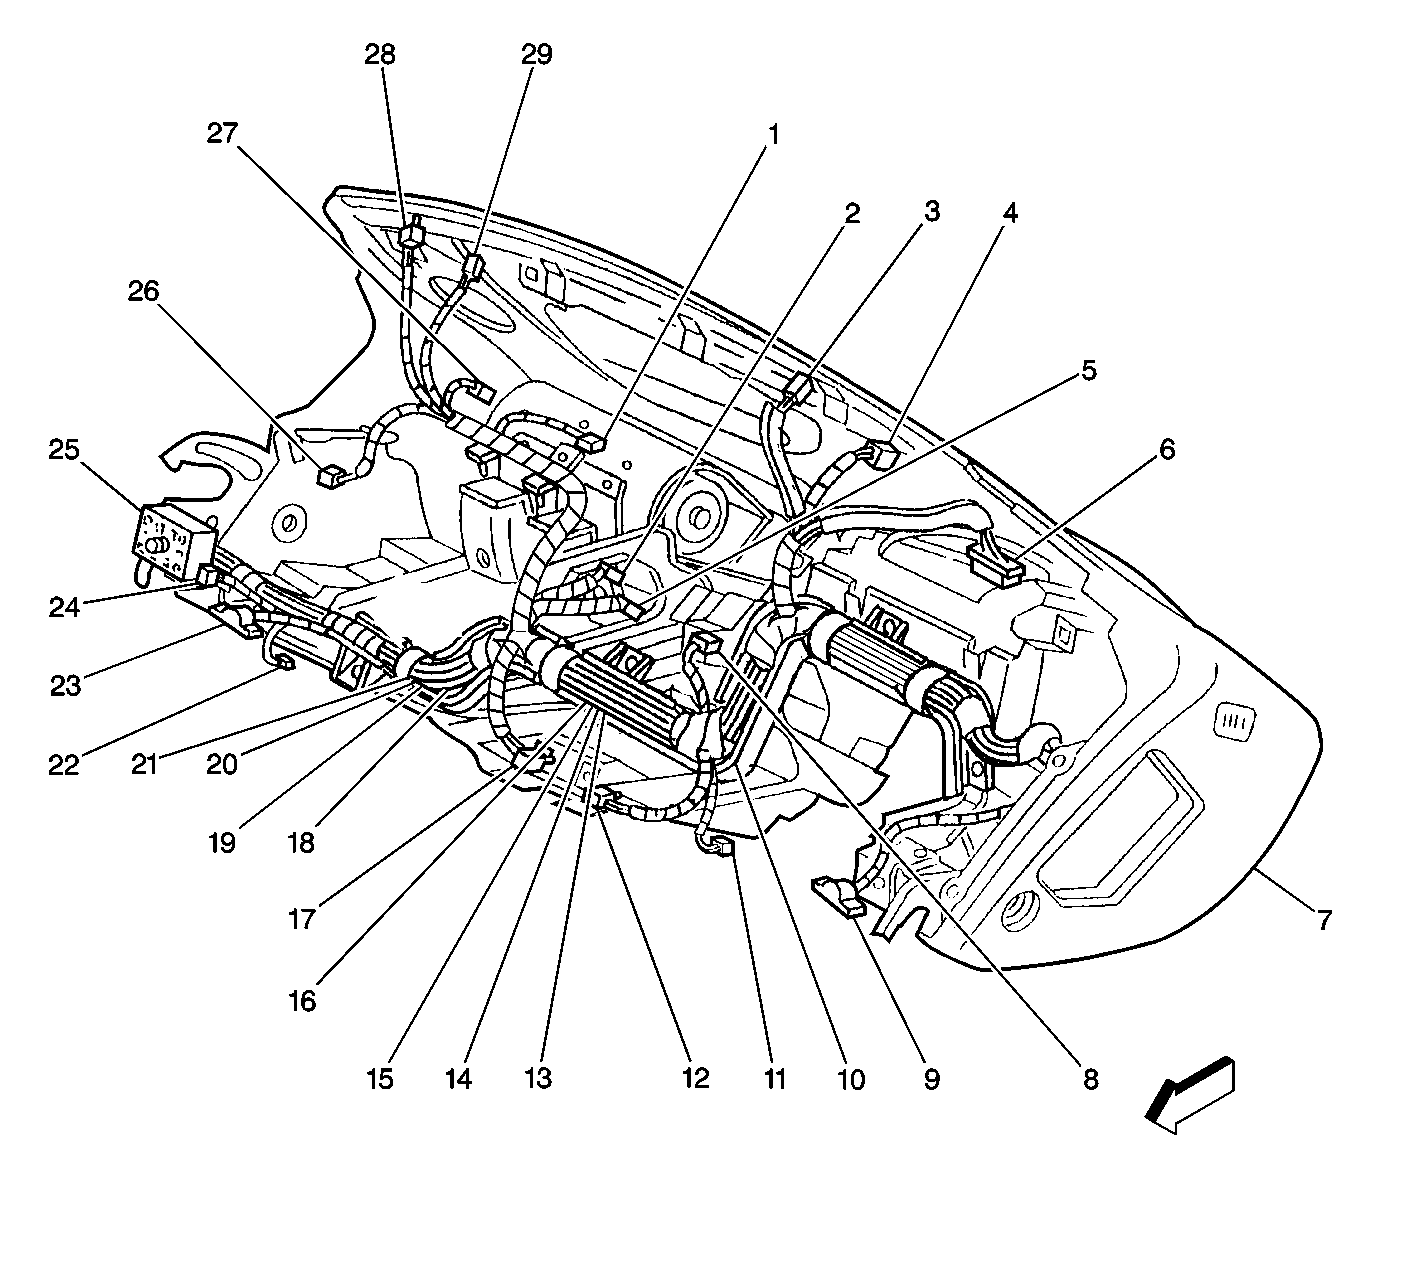
| Figure 23: |
Instrument Panel, LH (RH Similar)

|
| Figure 24: |
IP Wiring Harness Composite View (with Auto A/C)
|
| Figure 25: |
IP Wiring Harness Composite View (without Auto A/C)
|
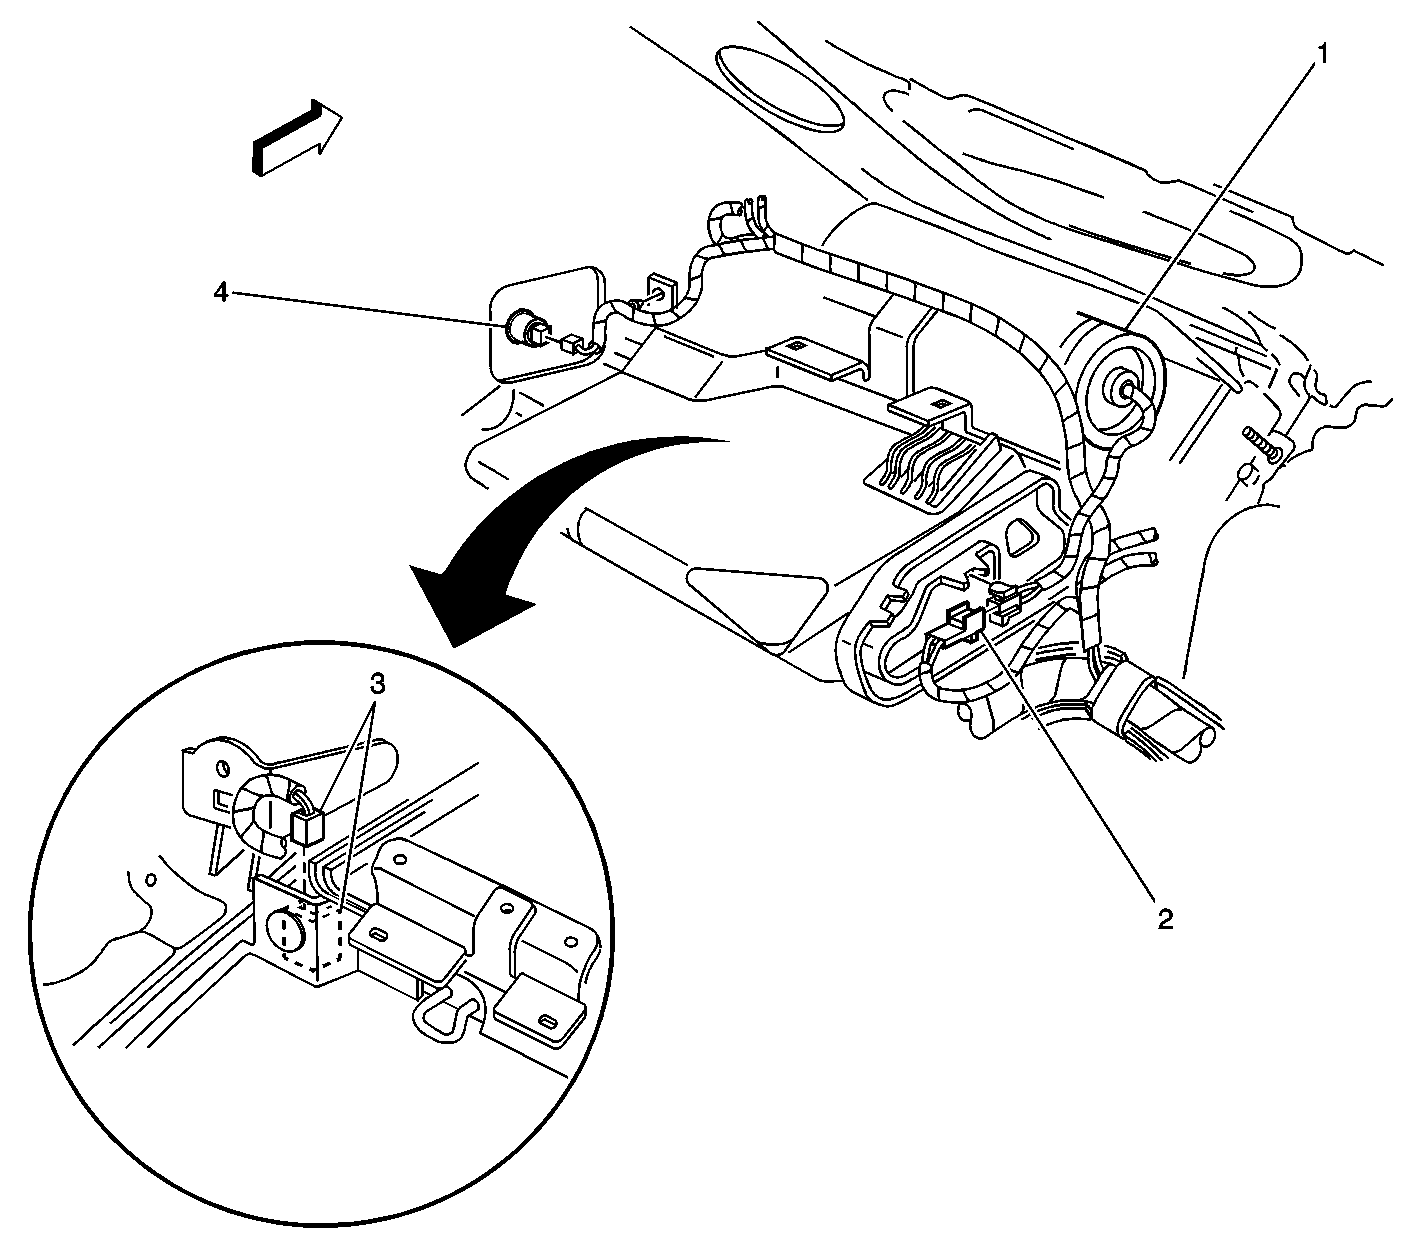
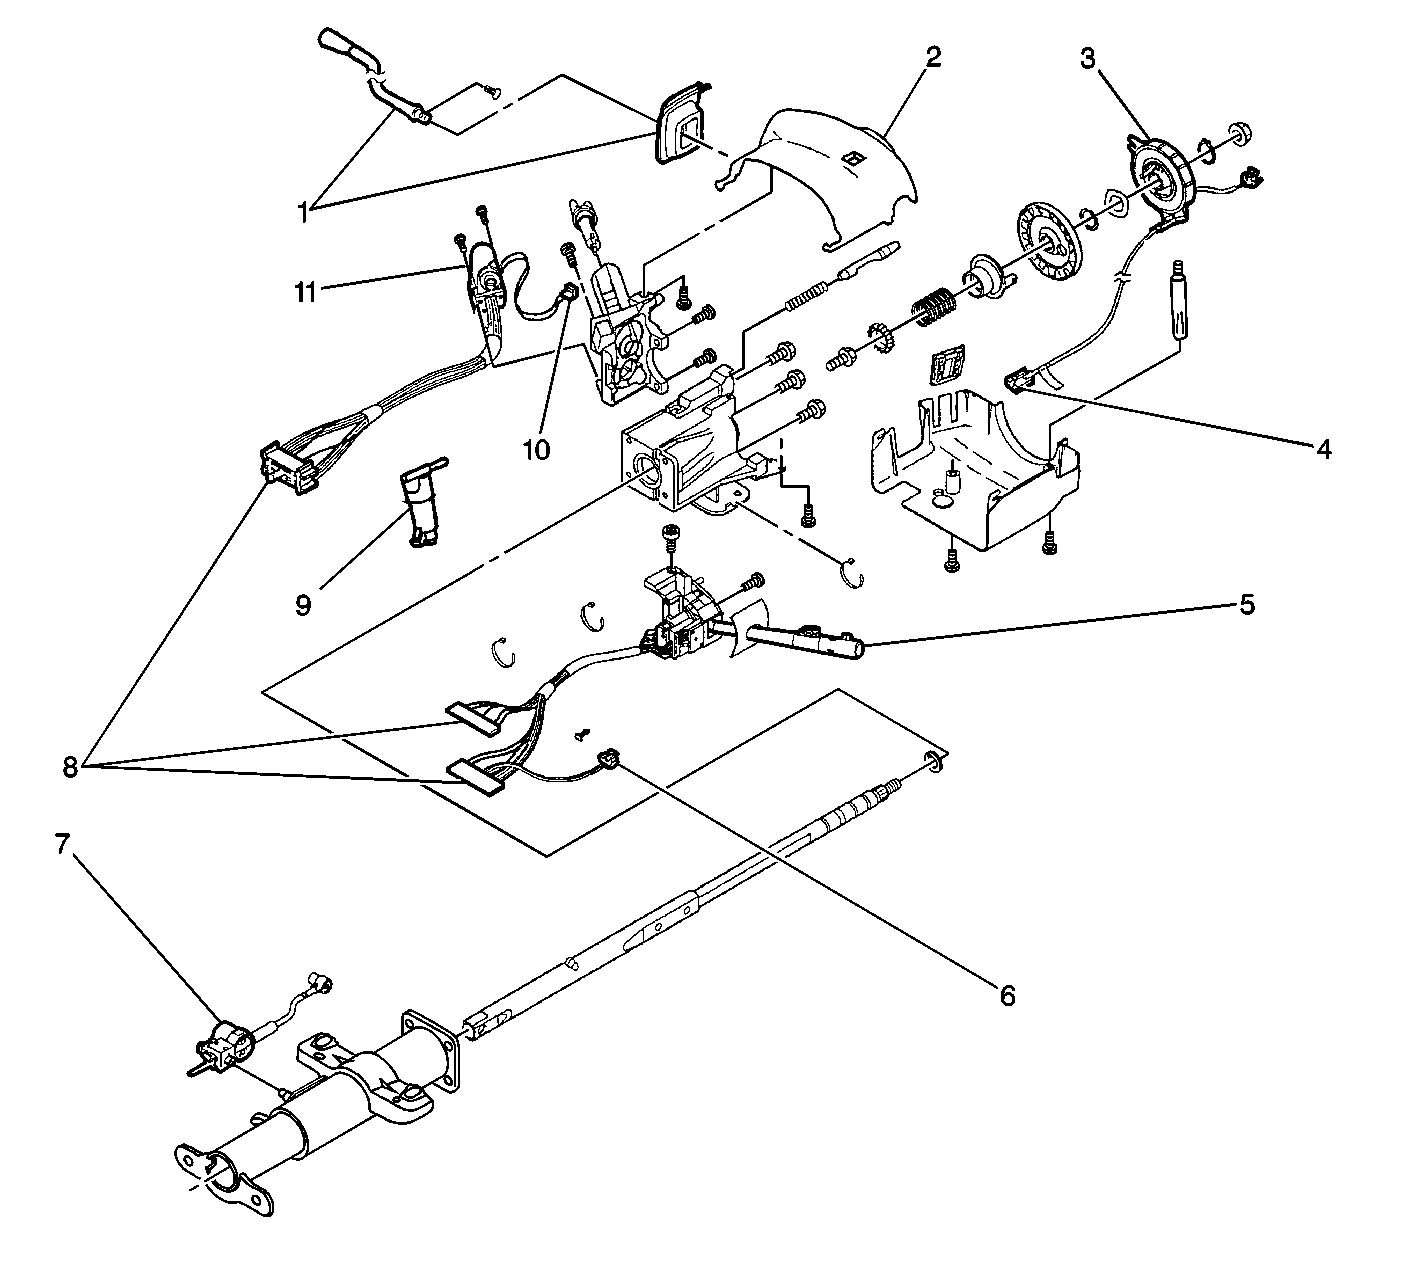
| Figure 26: |
Steering Column Components
|
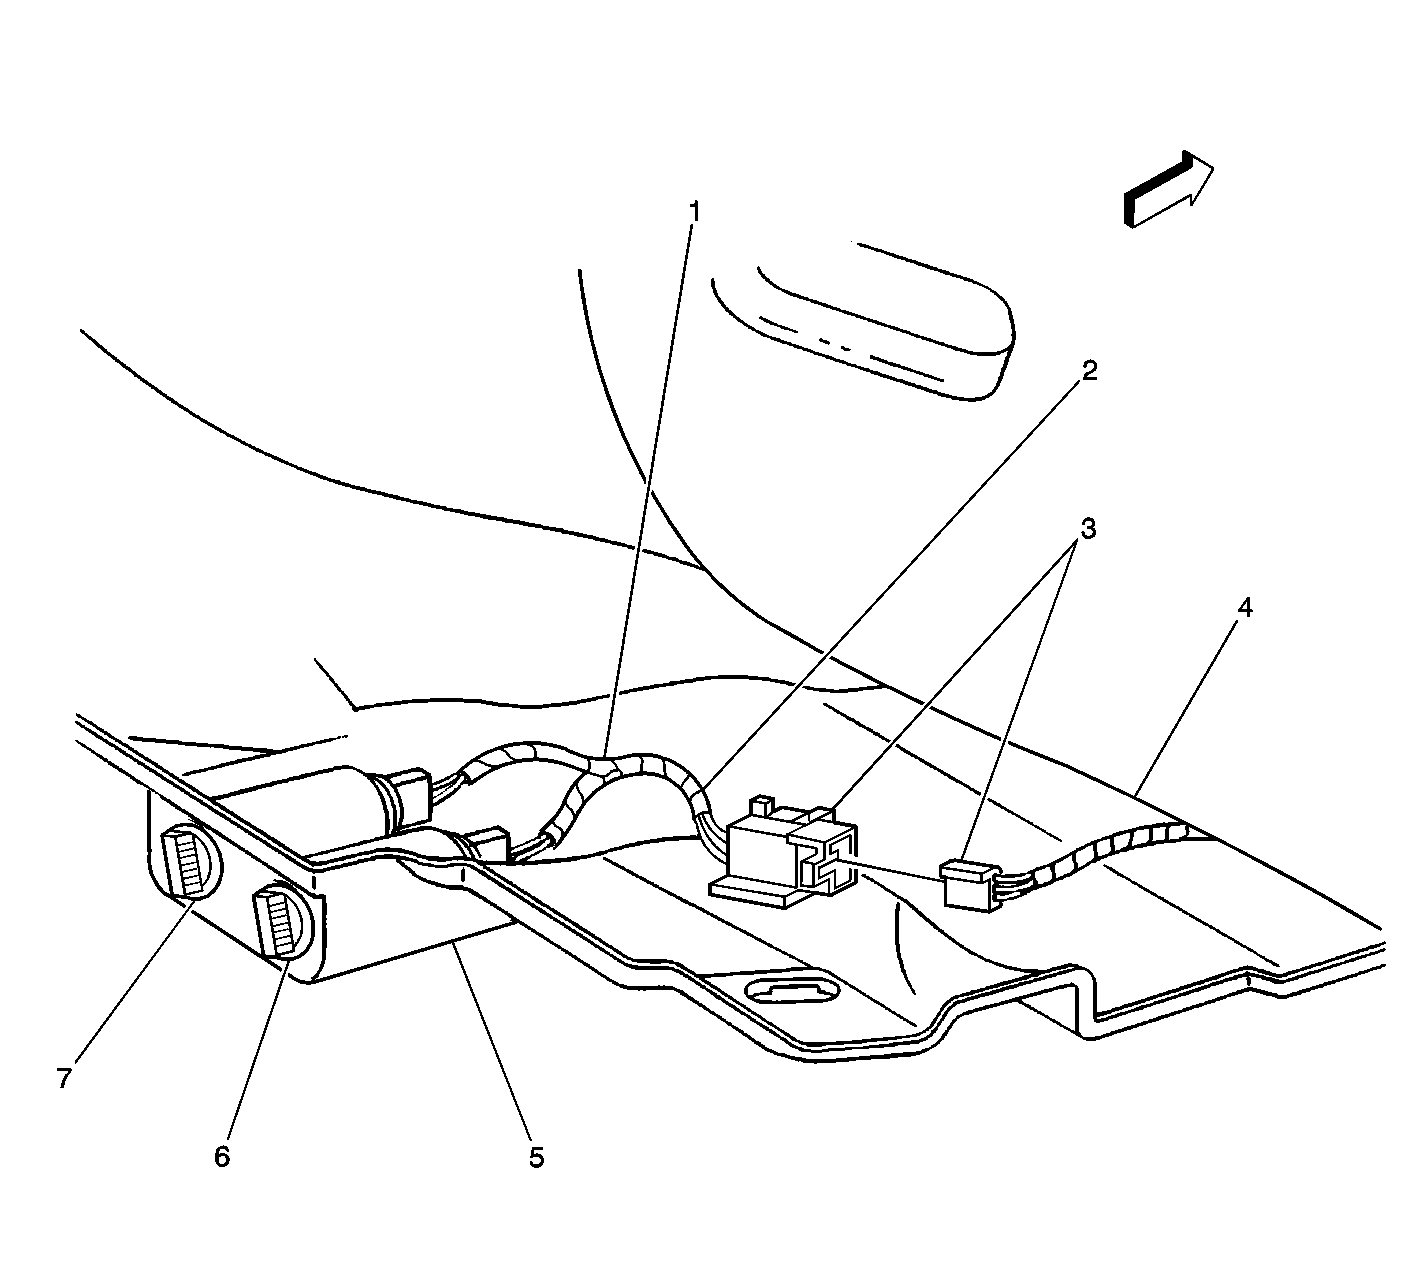
| Figure 27: |
Auxiliary Power Tray
|
| Figure 28: |
Dome Lamp Harness (Regular Cab Pickup)
|
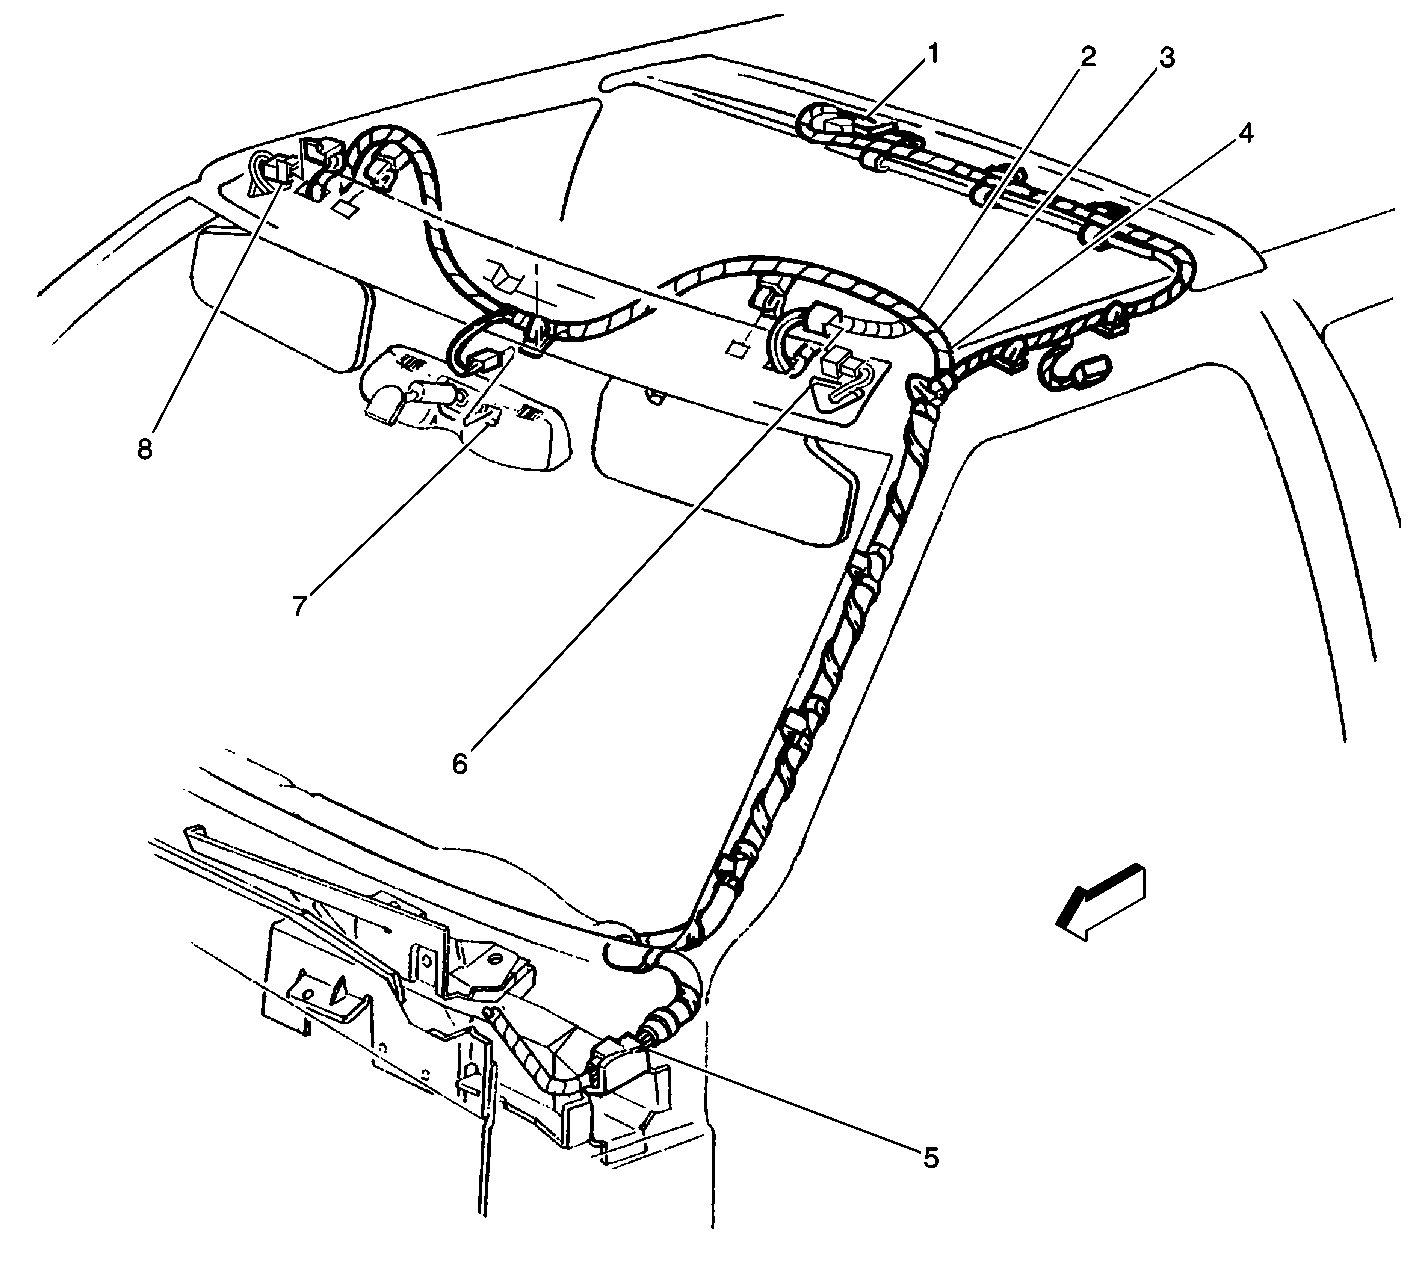
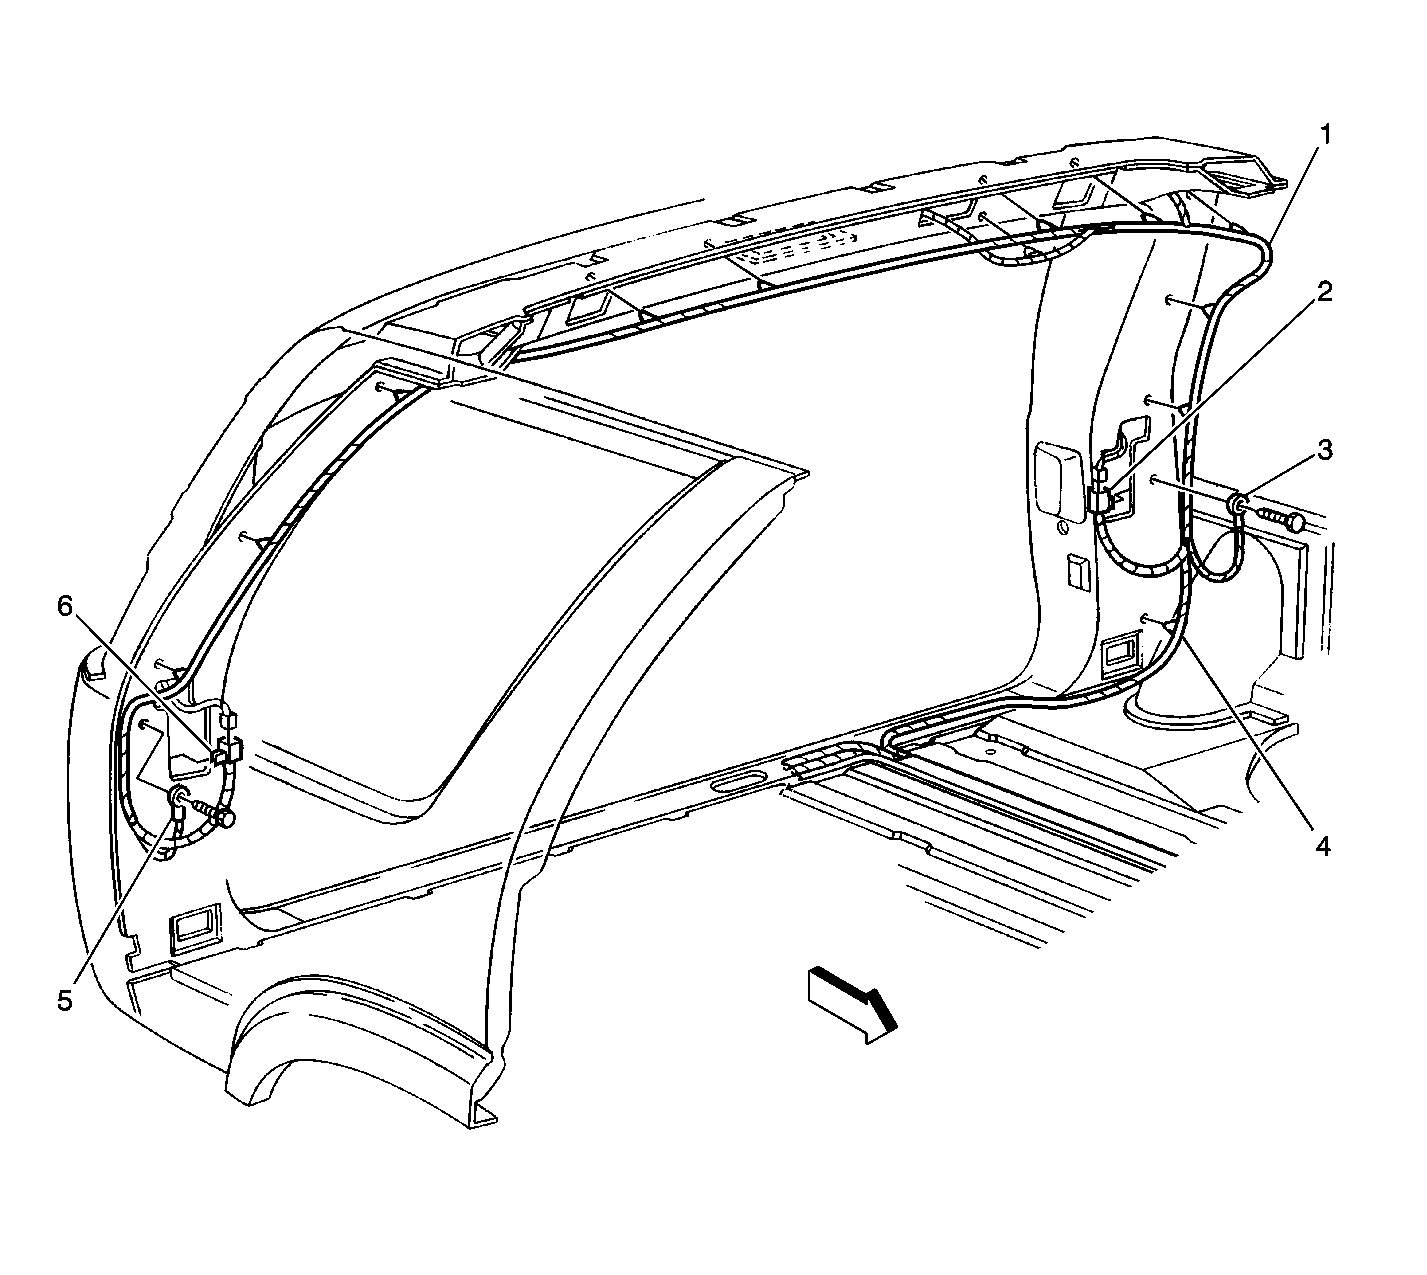
| Figure 29: |
Sunroof (Utility)
|
| Figure 30: |
Dome Lamp Harness w/o Driver Information Display Module (Utility)
|
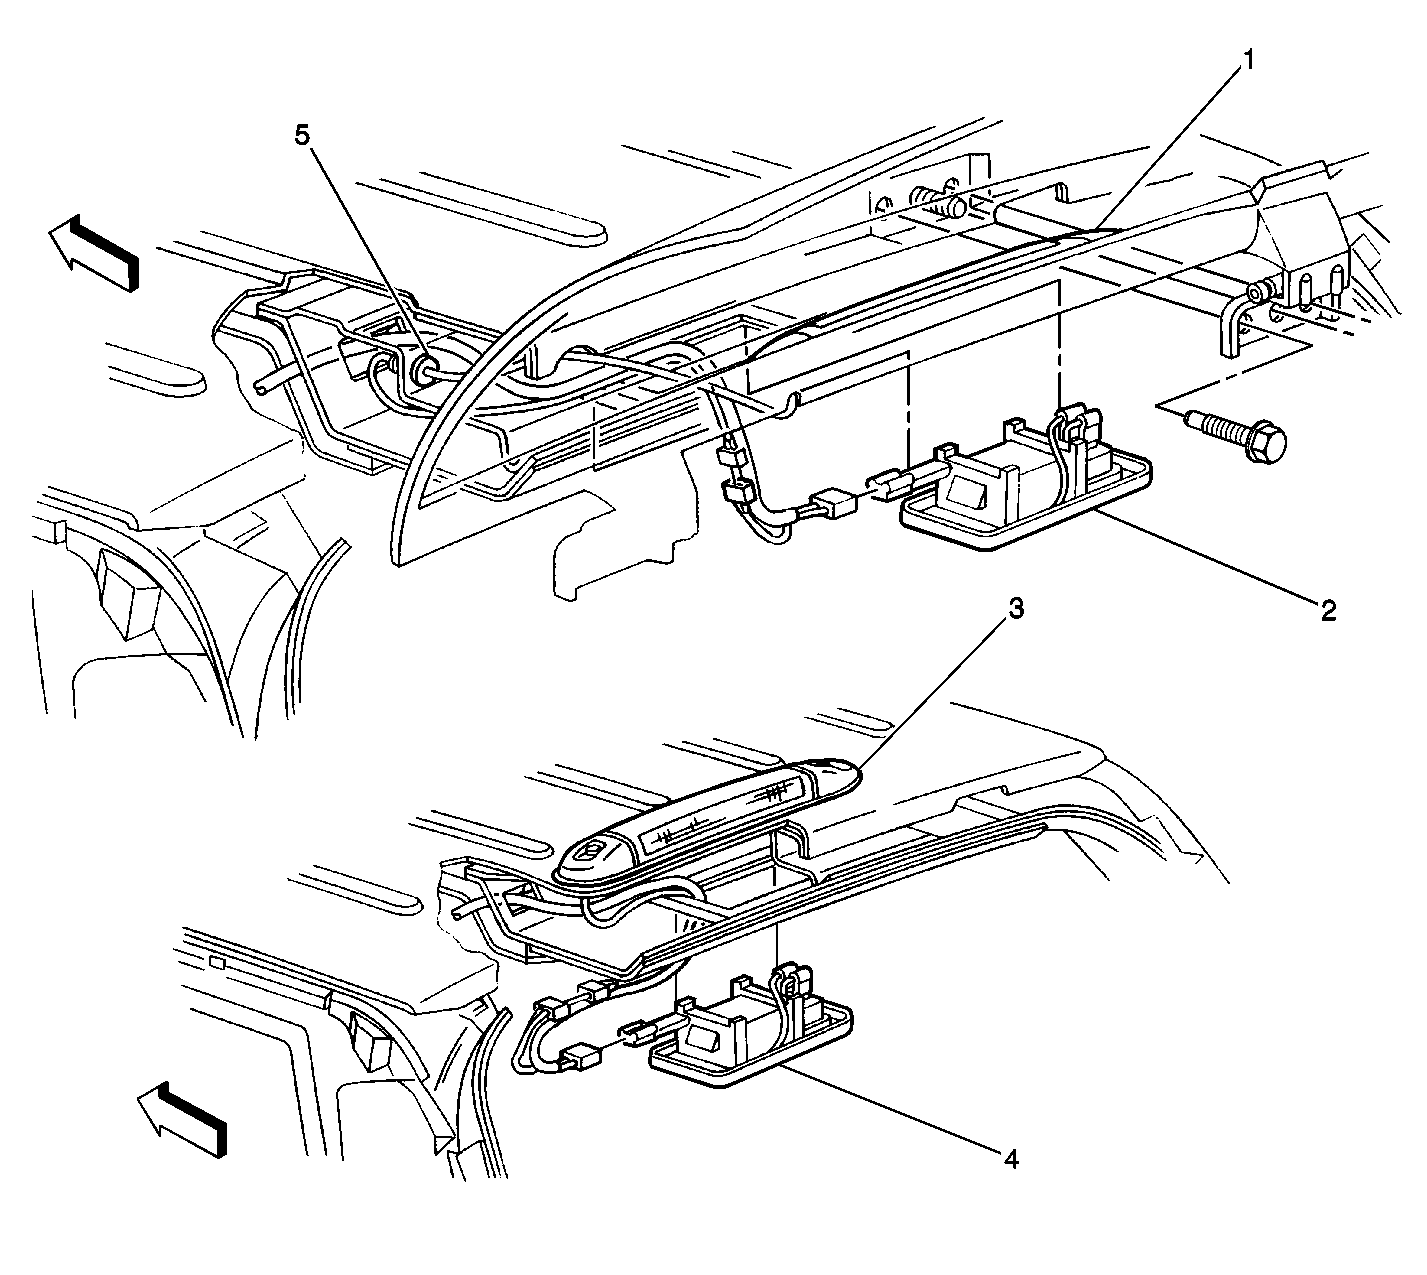
| Figure 31: |
Driver Information Display Module w/ Sunroof
|
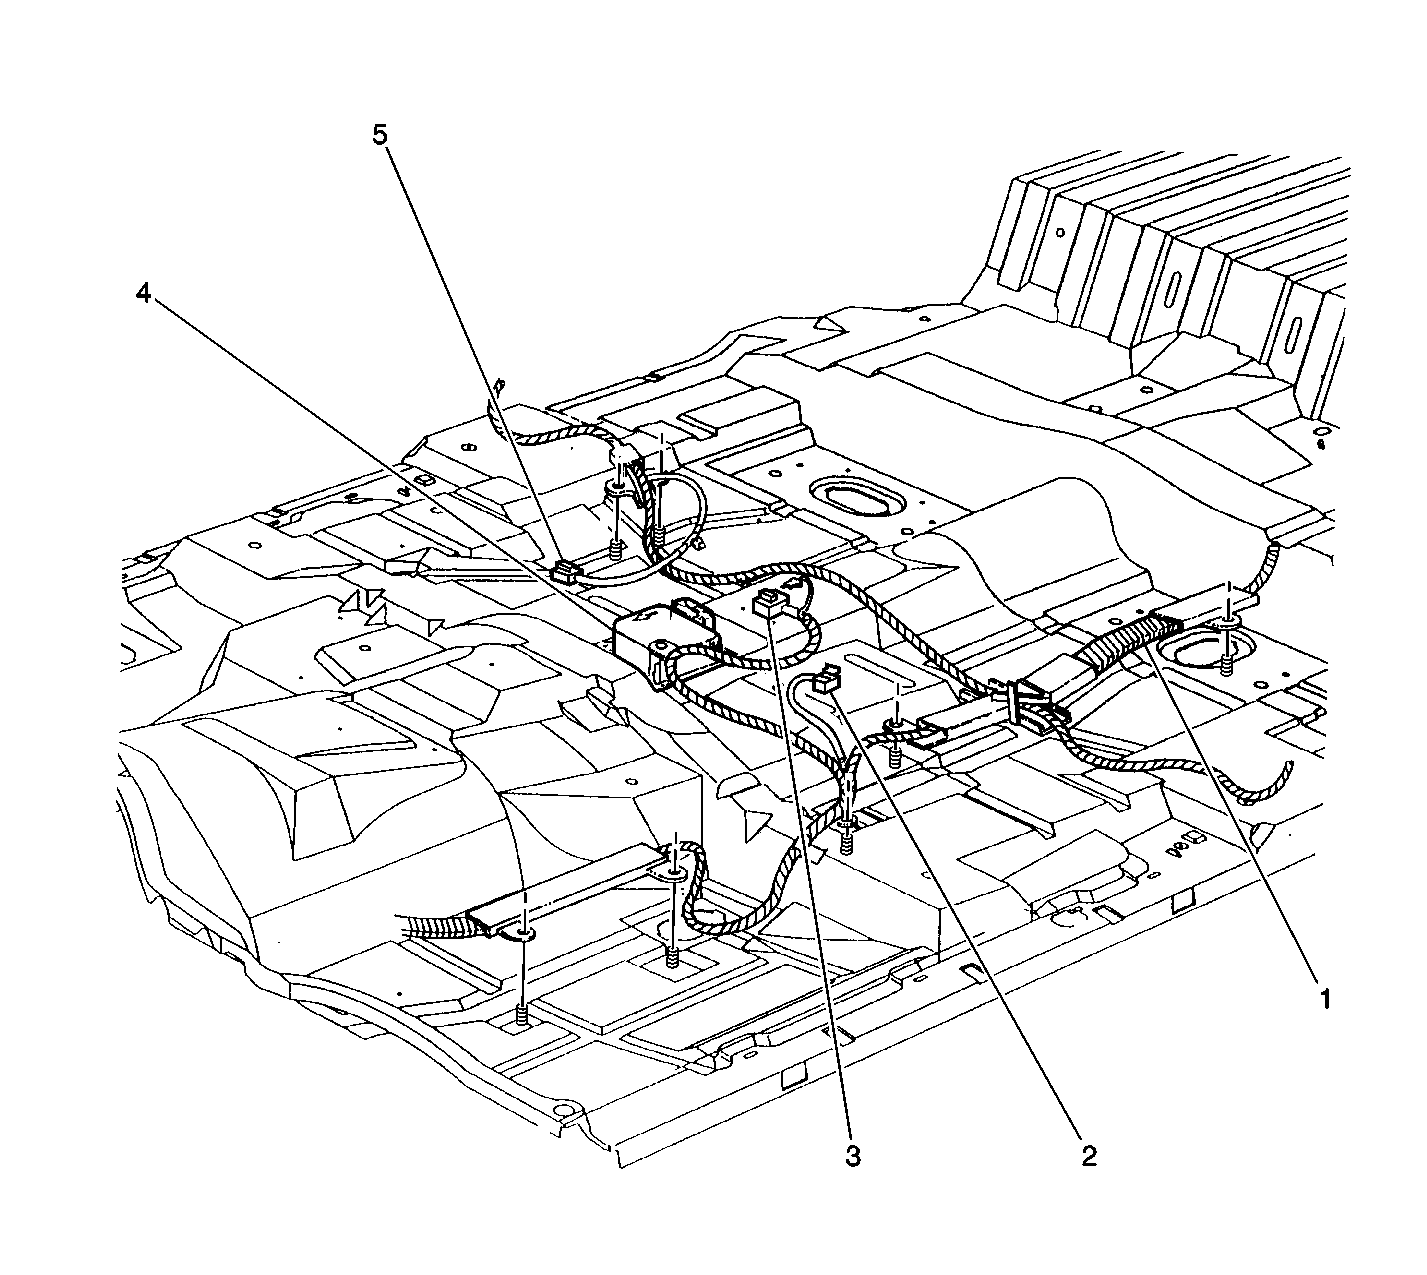
| Figure 32: |
Floor Panel, Utility
|
| Figure 33: |
Floor Shifter Harness Connections
|
| Figure 34: |
Body Wiring to Left Front Seat
|
| Figure 35: |
Doors (RF Shown, LF Similar)
|
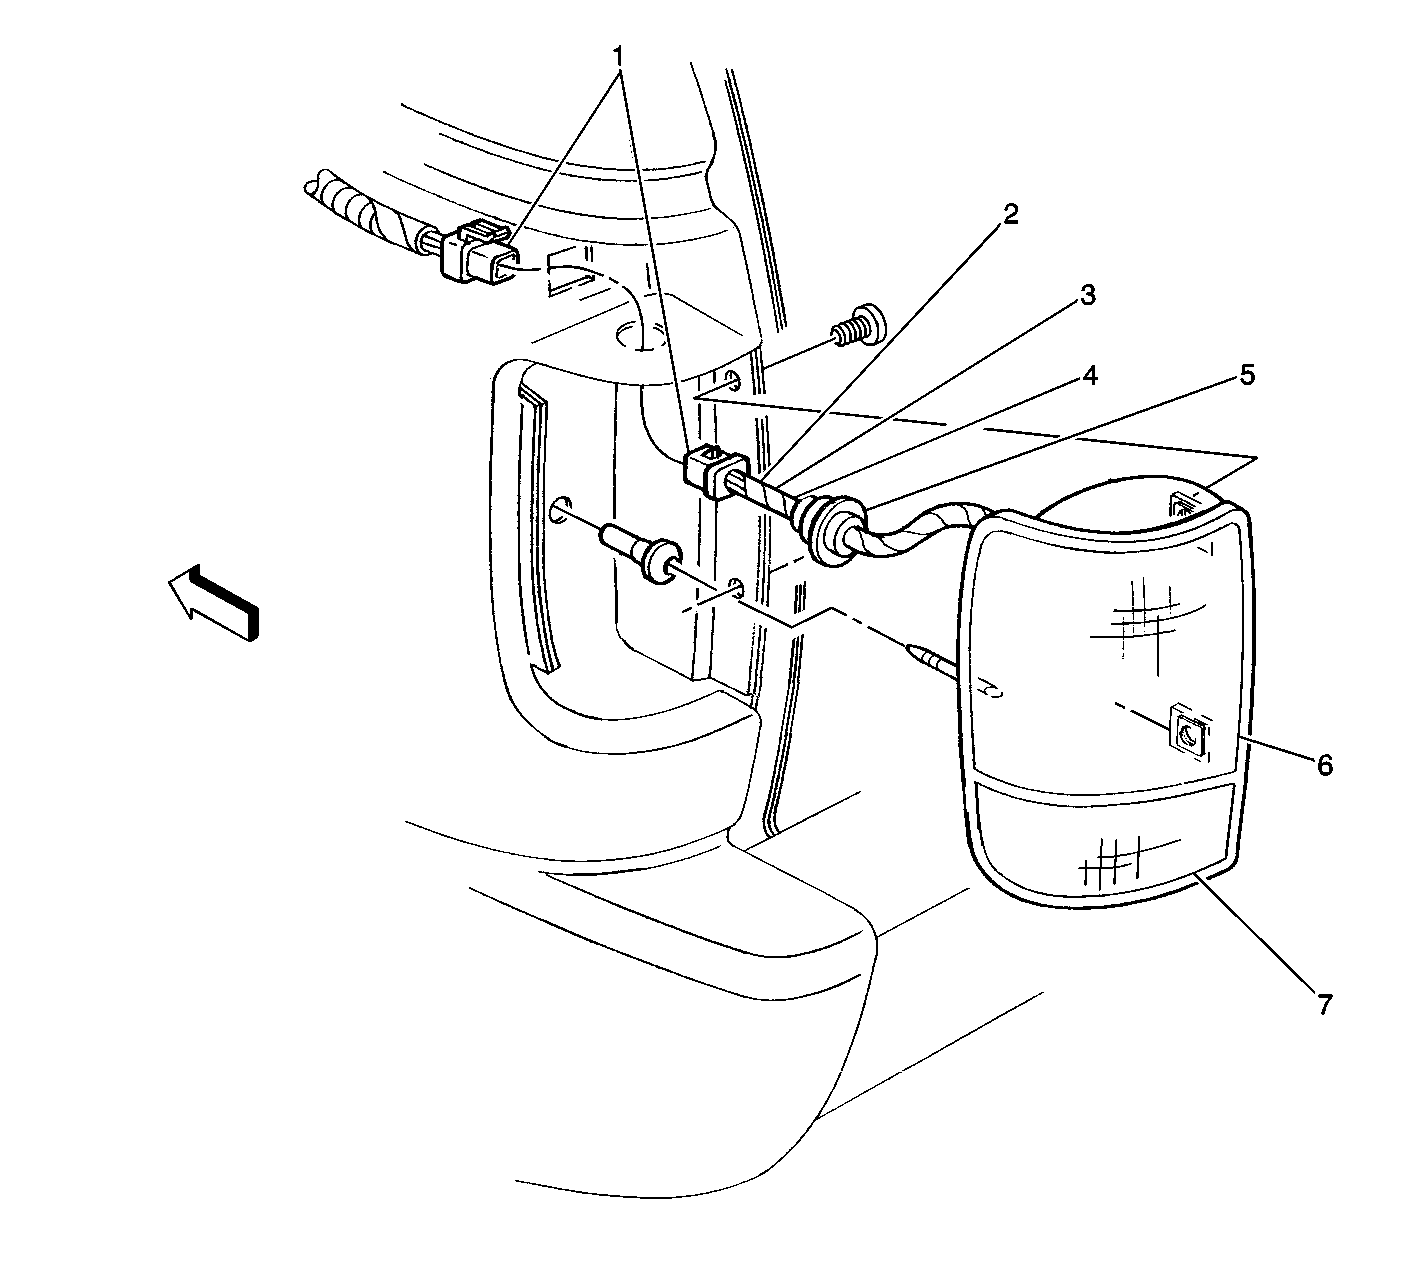
| Figure 36: |
Outside Rear View Mirror
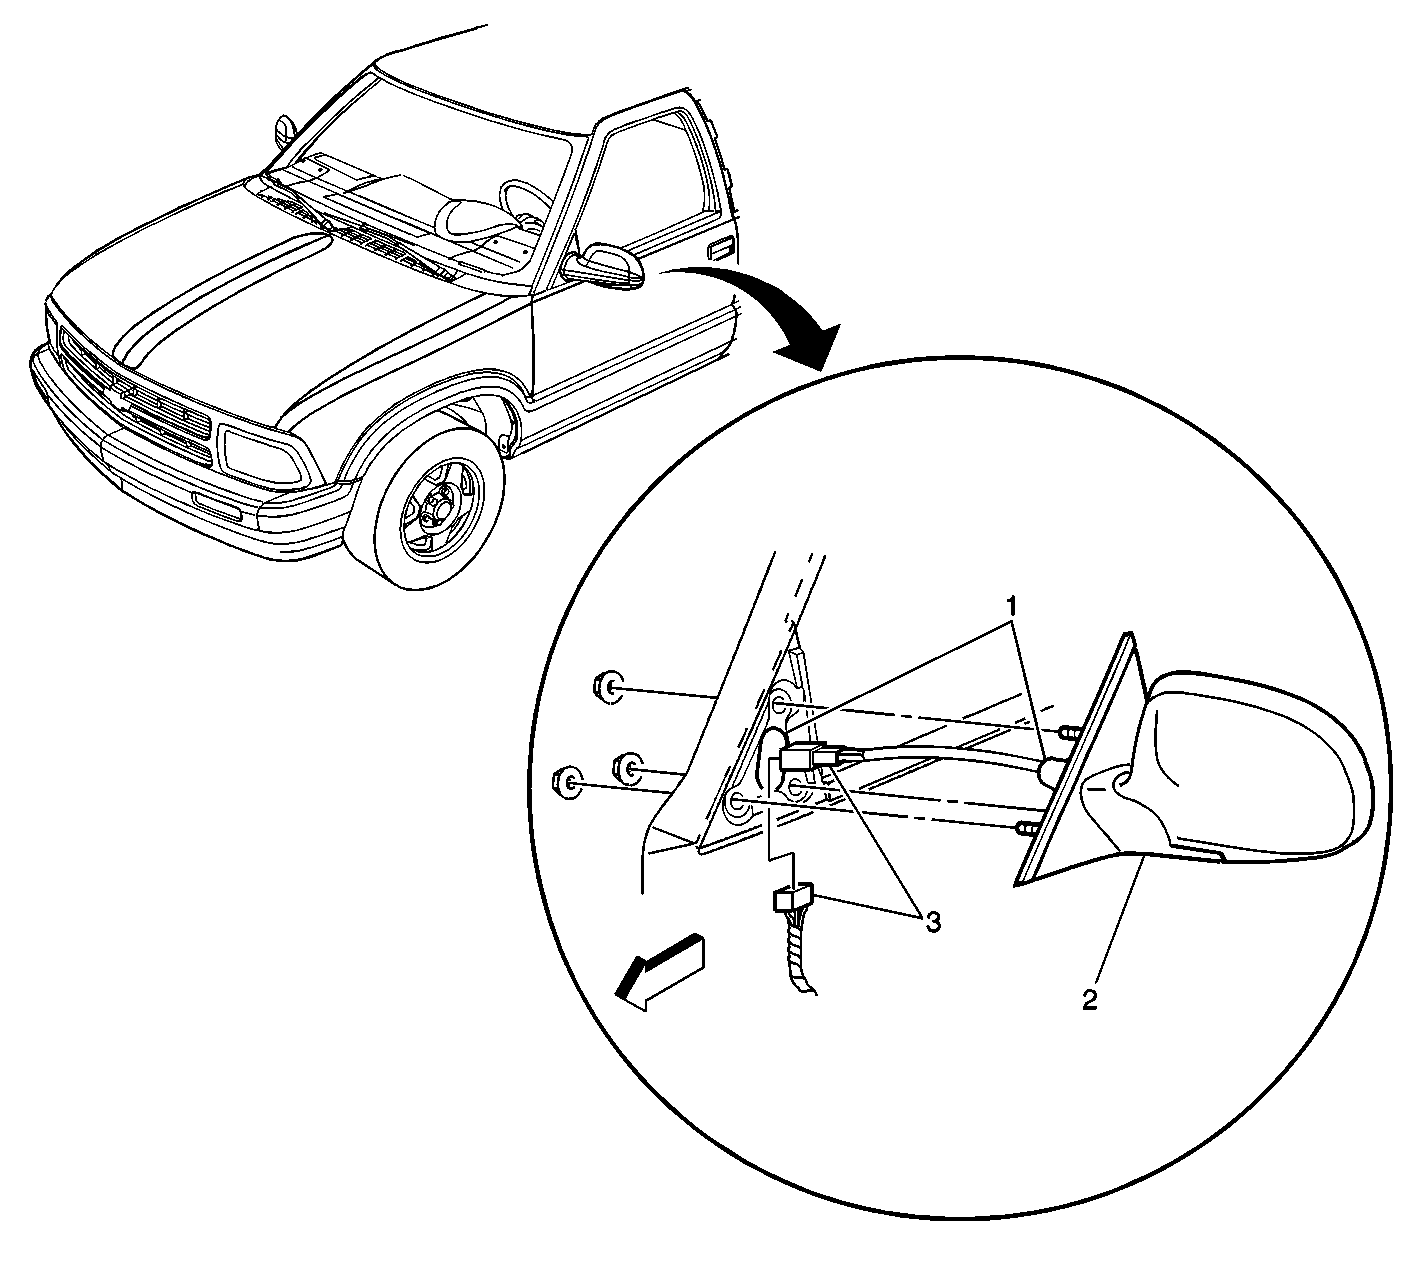
|
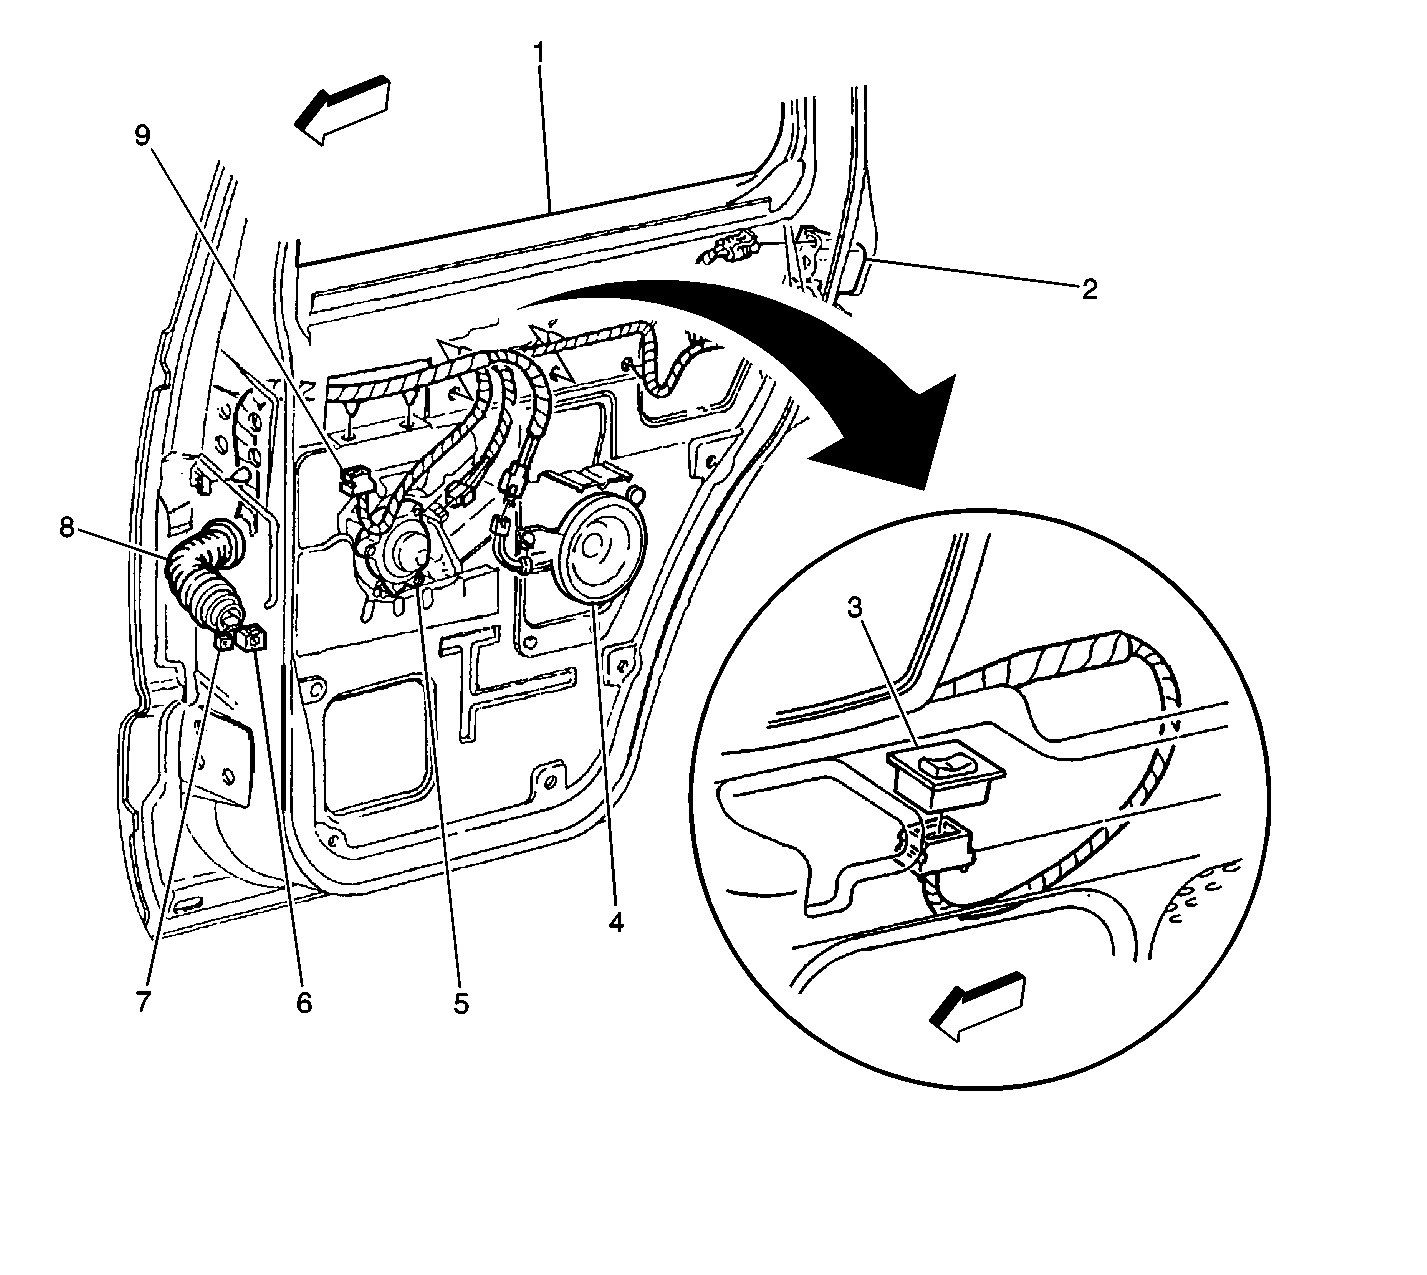
| Figure 37: |
Rear Door Wiring Harness (RH Shown, LH Opposite)
|
| Figure 38: |
Rear Door Details (RH Shown, LH Opposite) - 2 & 4 Door Utility
|
| Figure 39: |
Body Wiring Views
|
| Figure 40: |
Body Wiring to Body Side Trim Panel
|
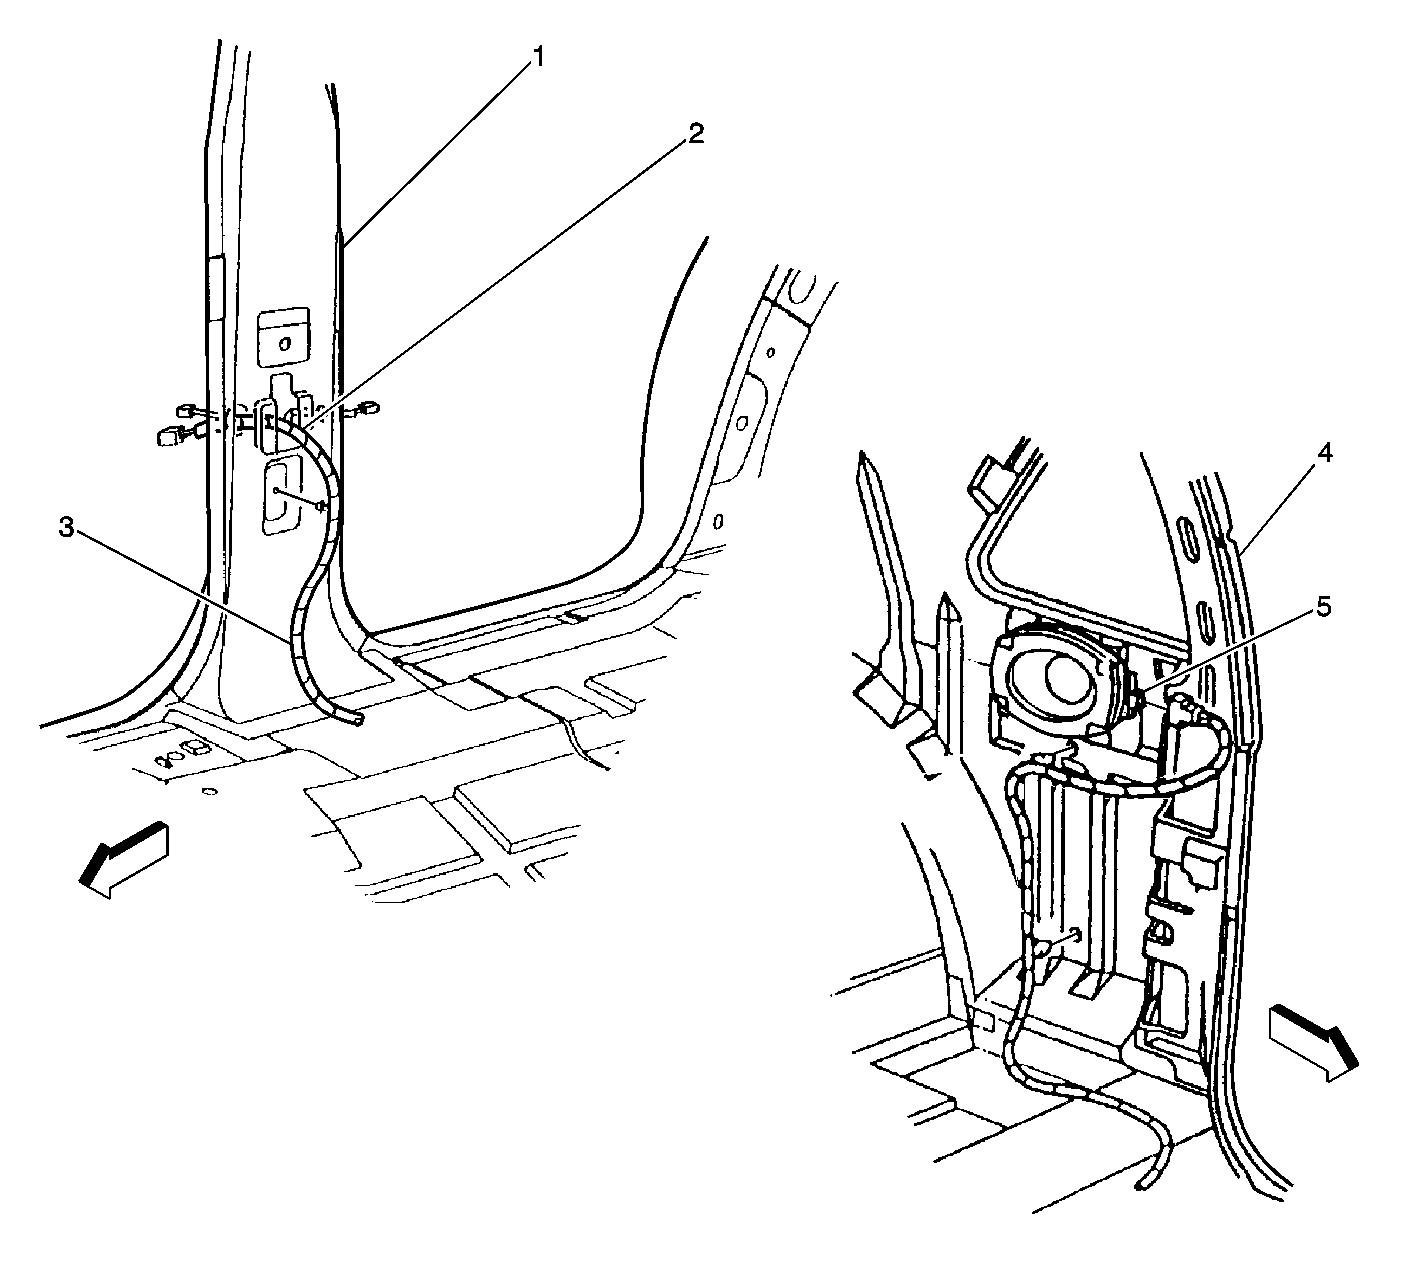
| Figure 41: |
Body Opening Frame, Rear
|
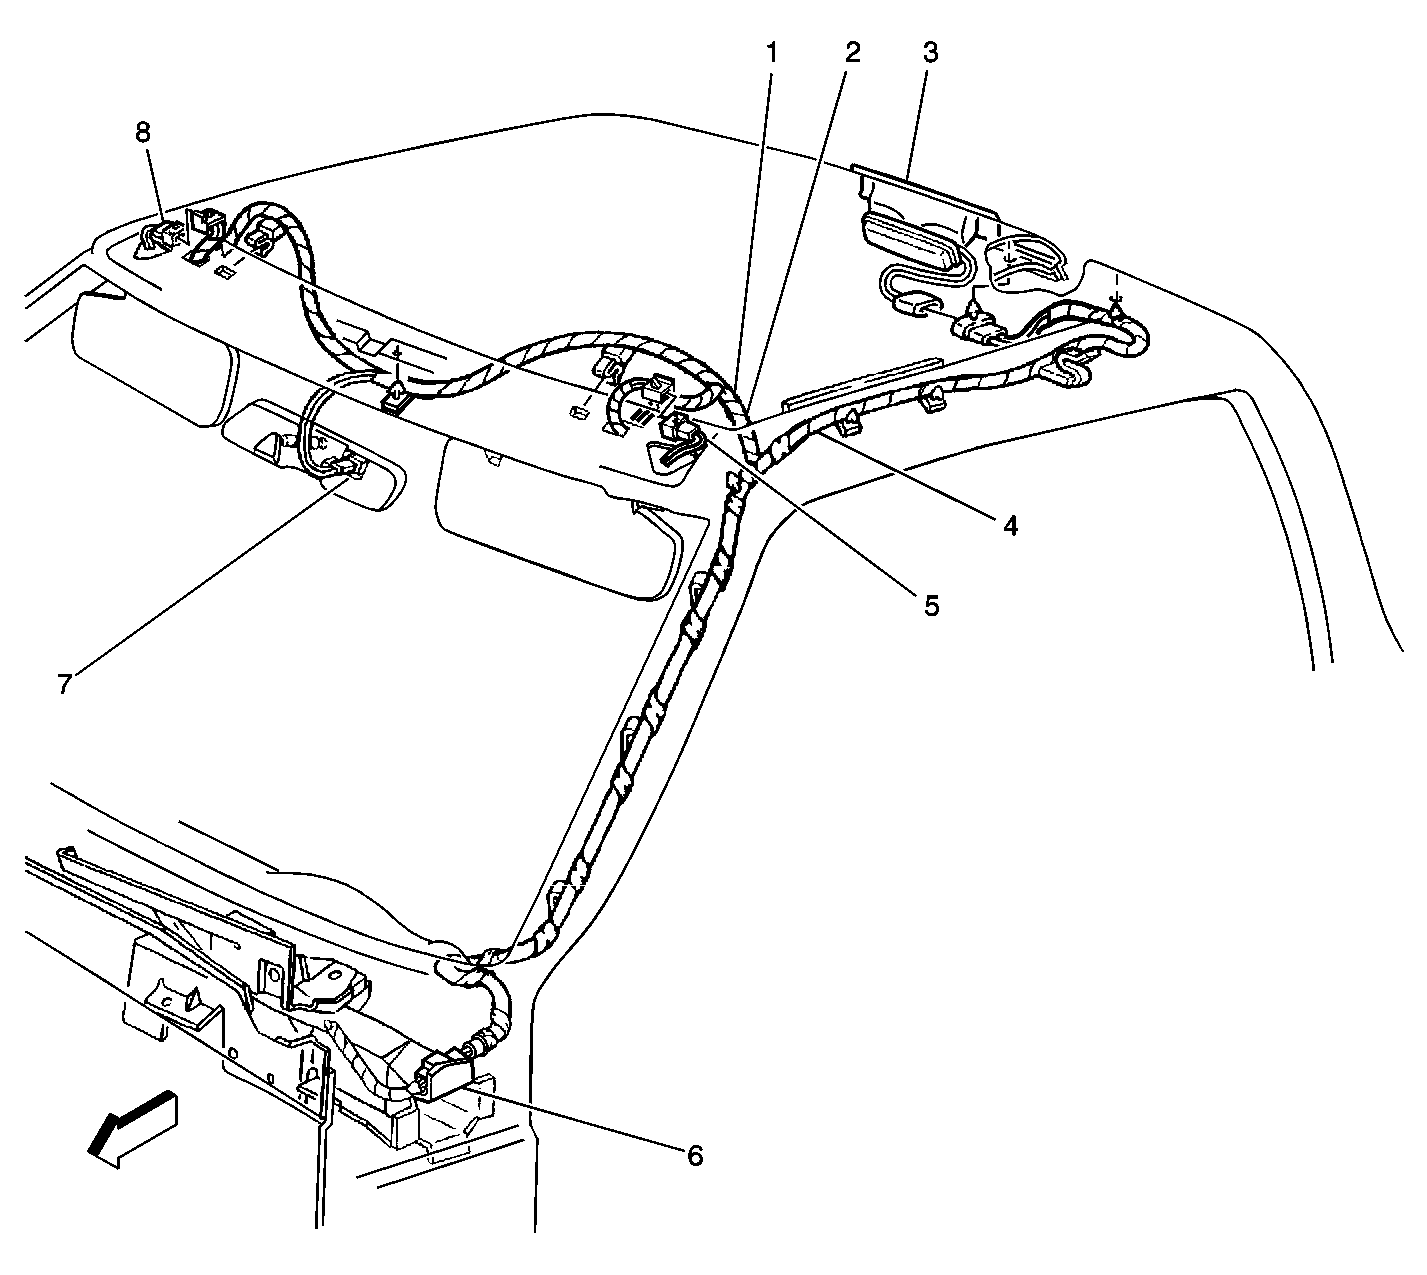
| Figure 42: |
Rear Roof (Utility)
|
| Figure 43: |
Rear Lamps Connection (Utility LH Side Shown, RH Side Similar)
|
| Figure 44: |
Rear Lamps (Pickup)
|
| Figure 45: |
Endgate Connectors
|
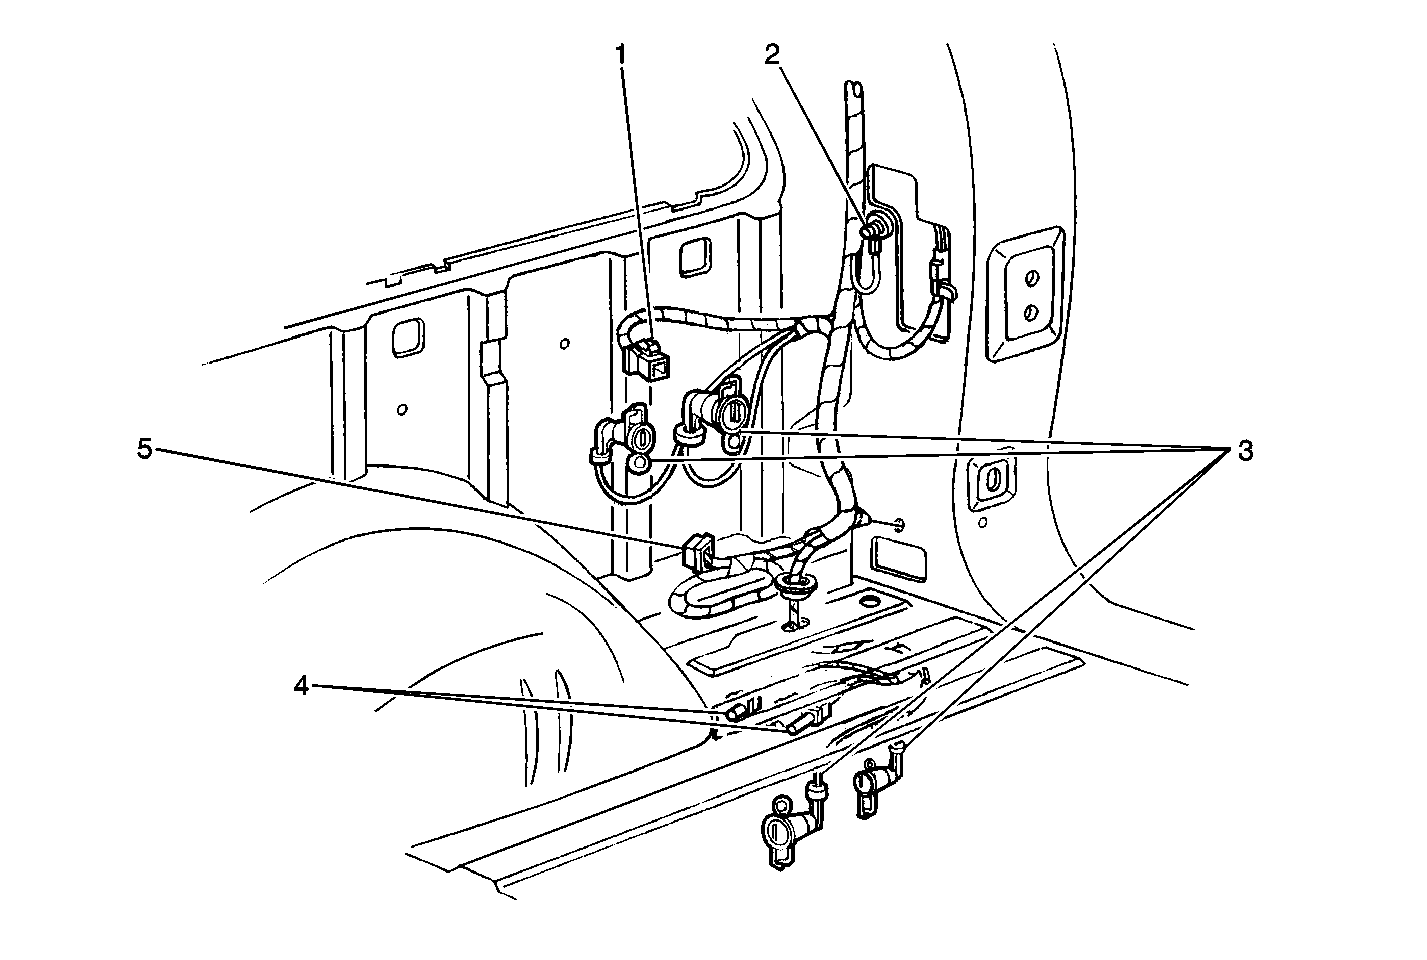
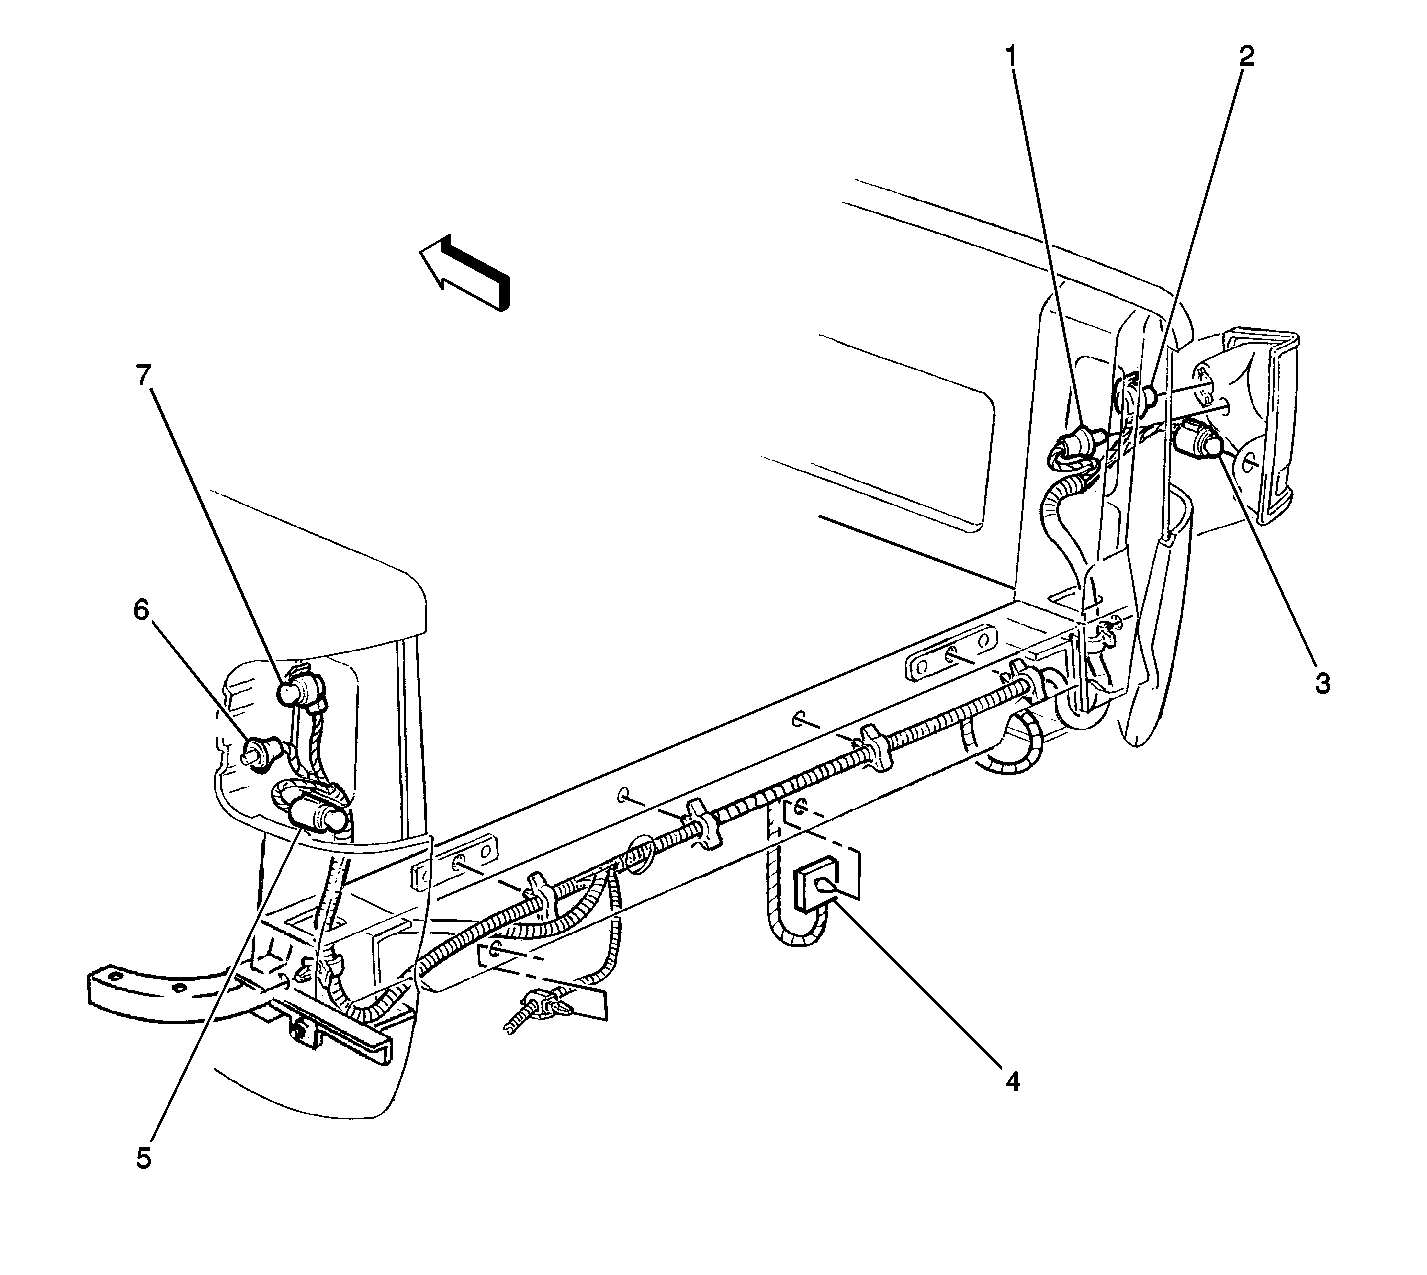
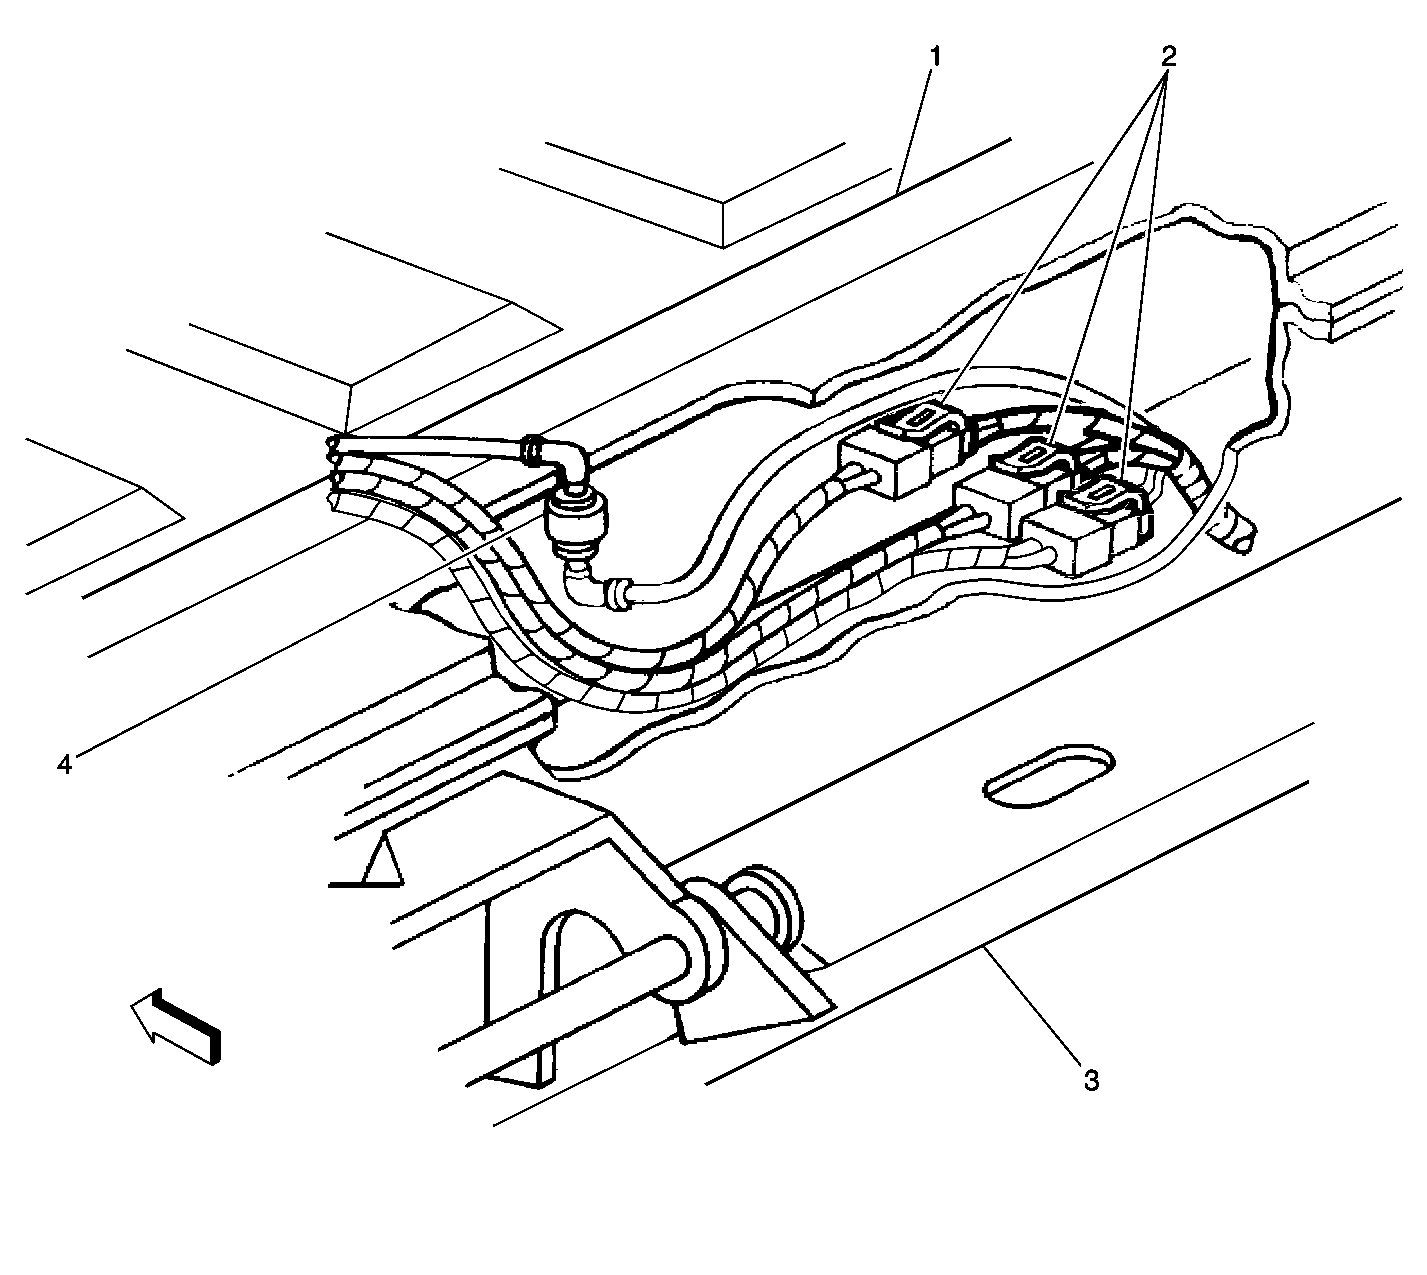
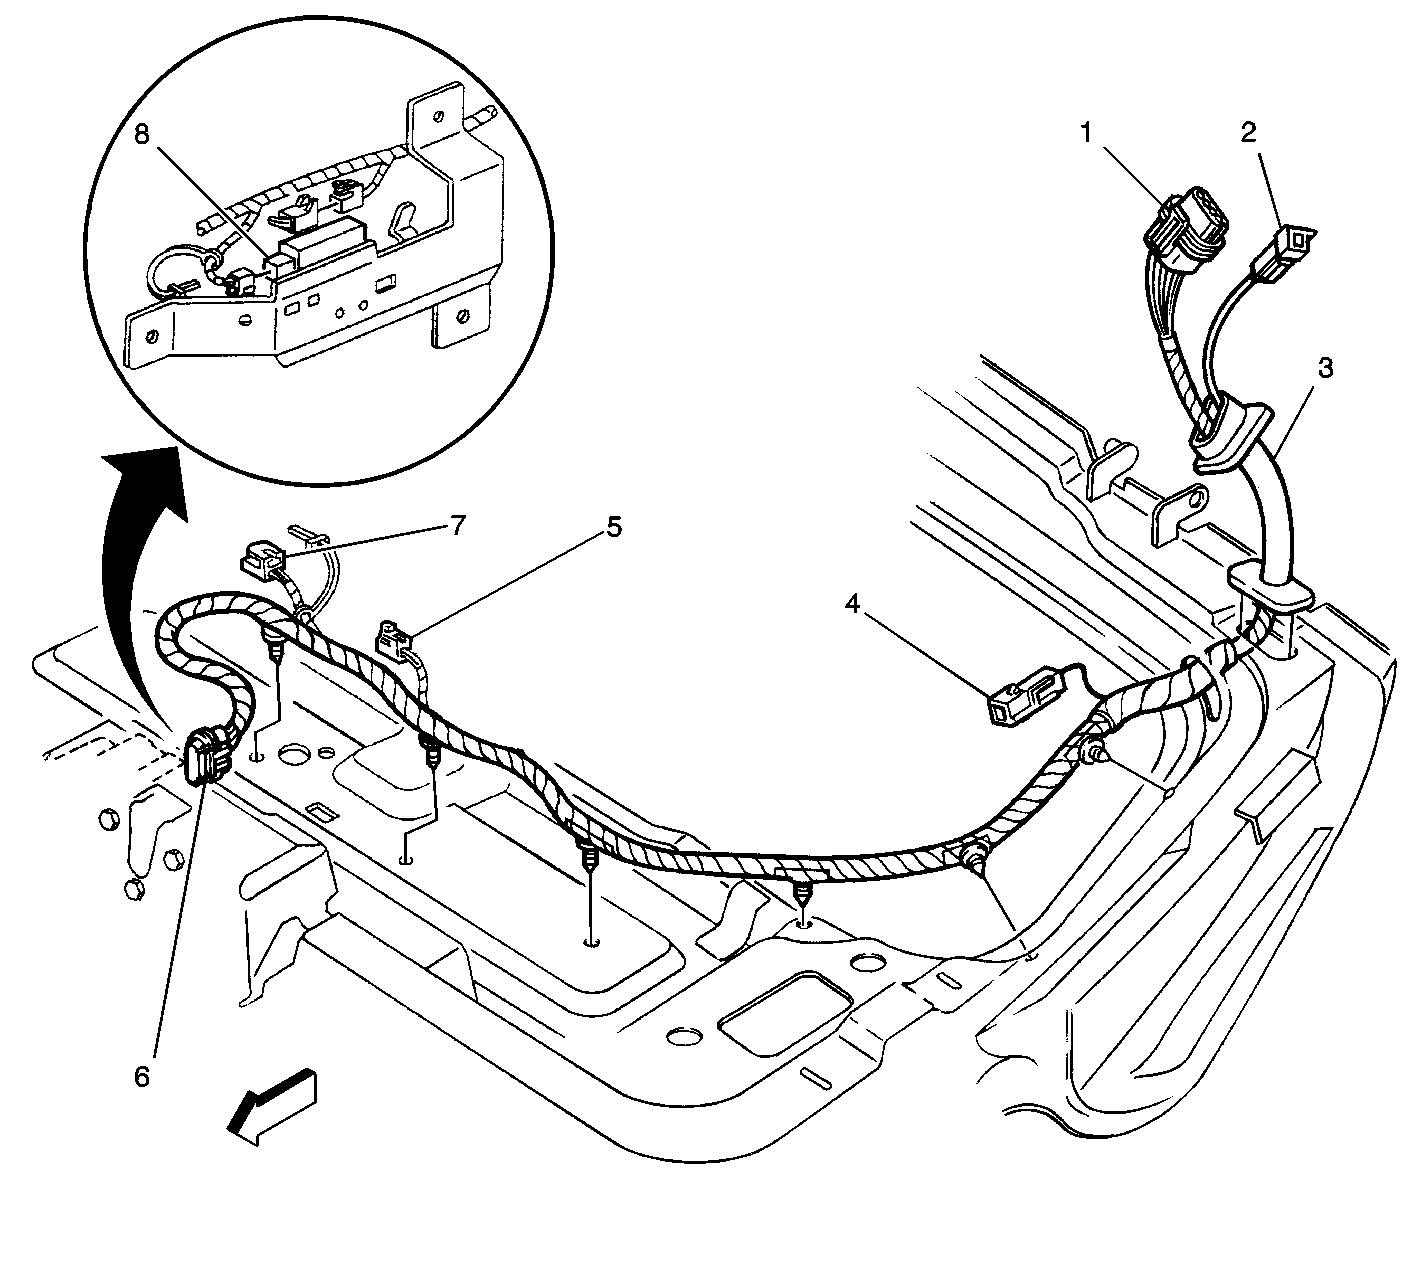
| Figure 46: |
Rear Framerail-Pickup
|
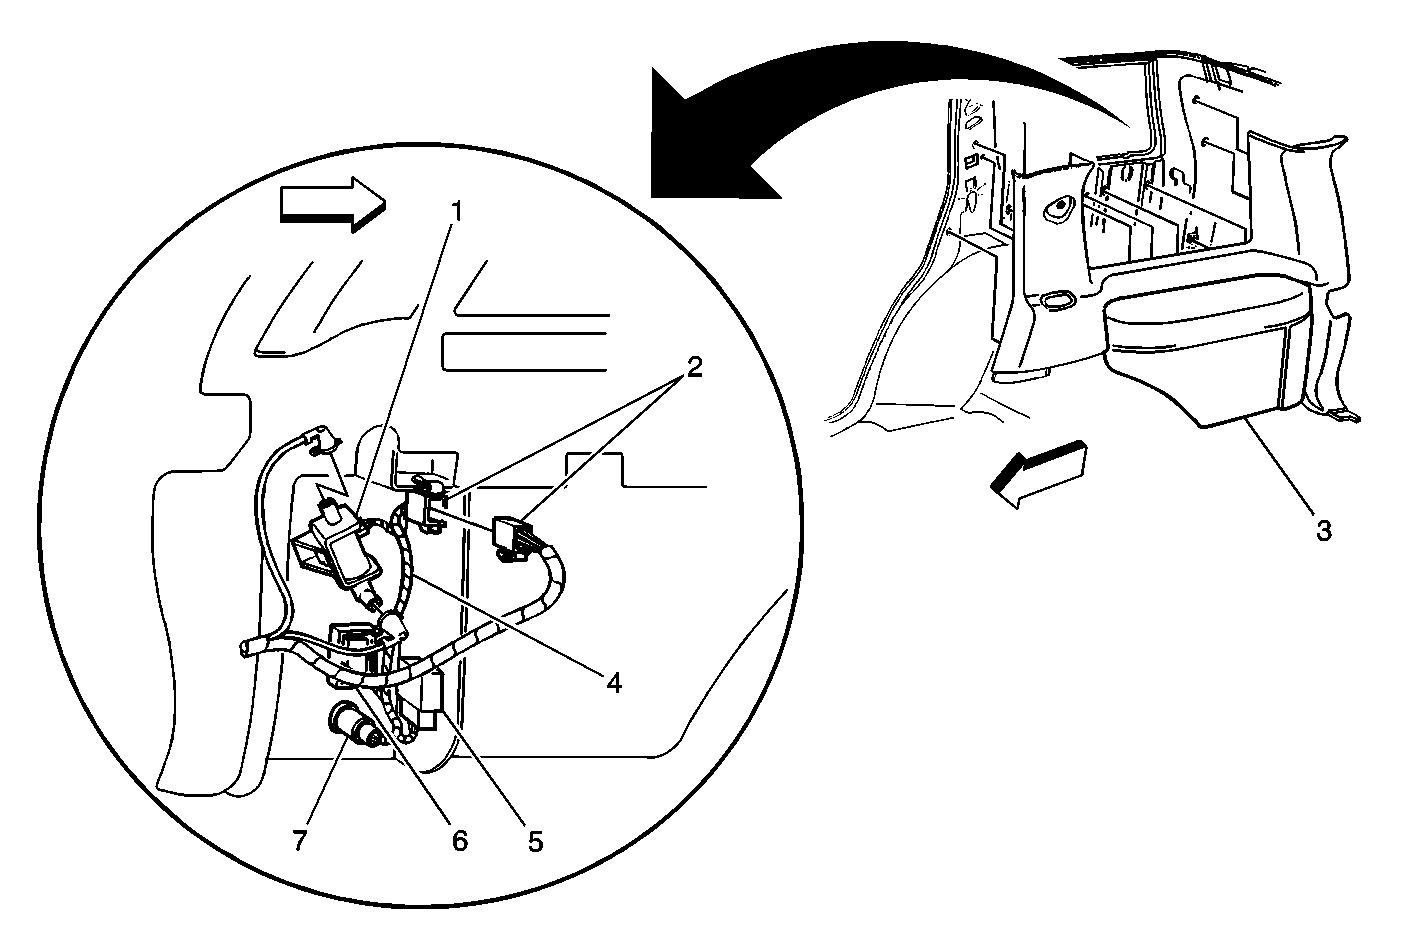
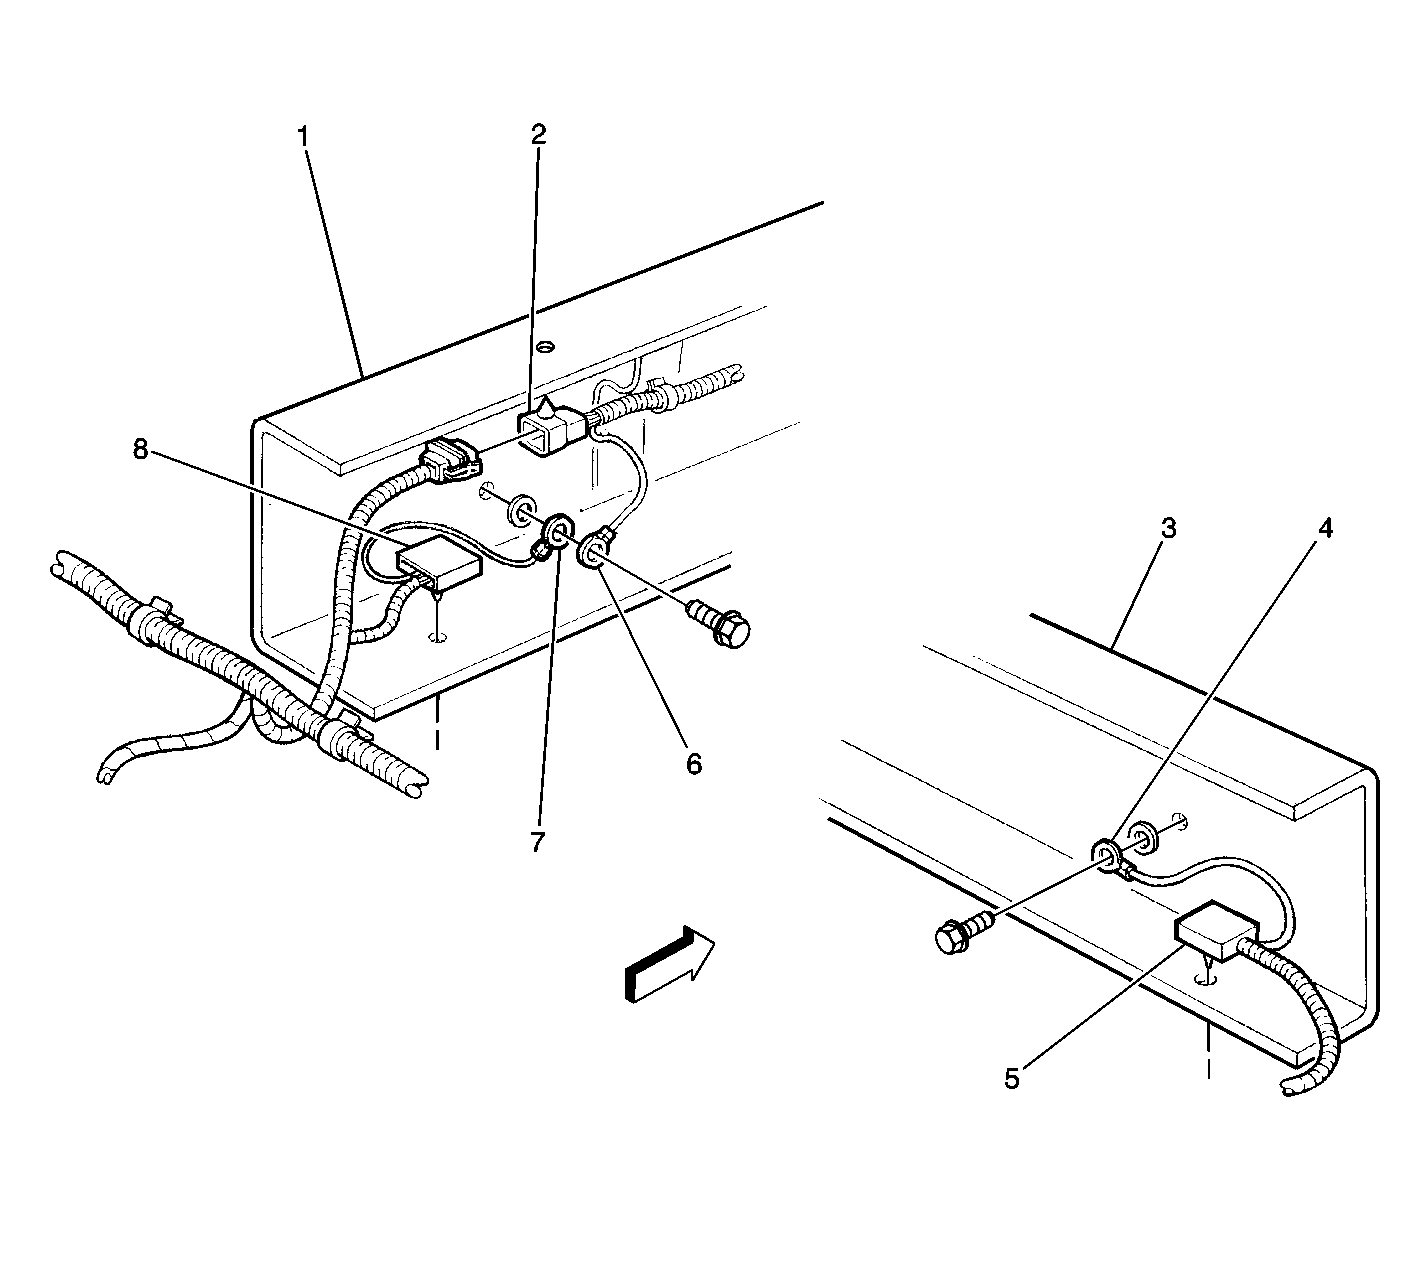
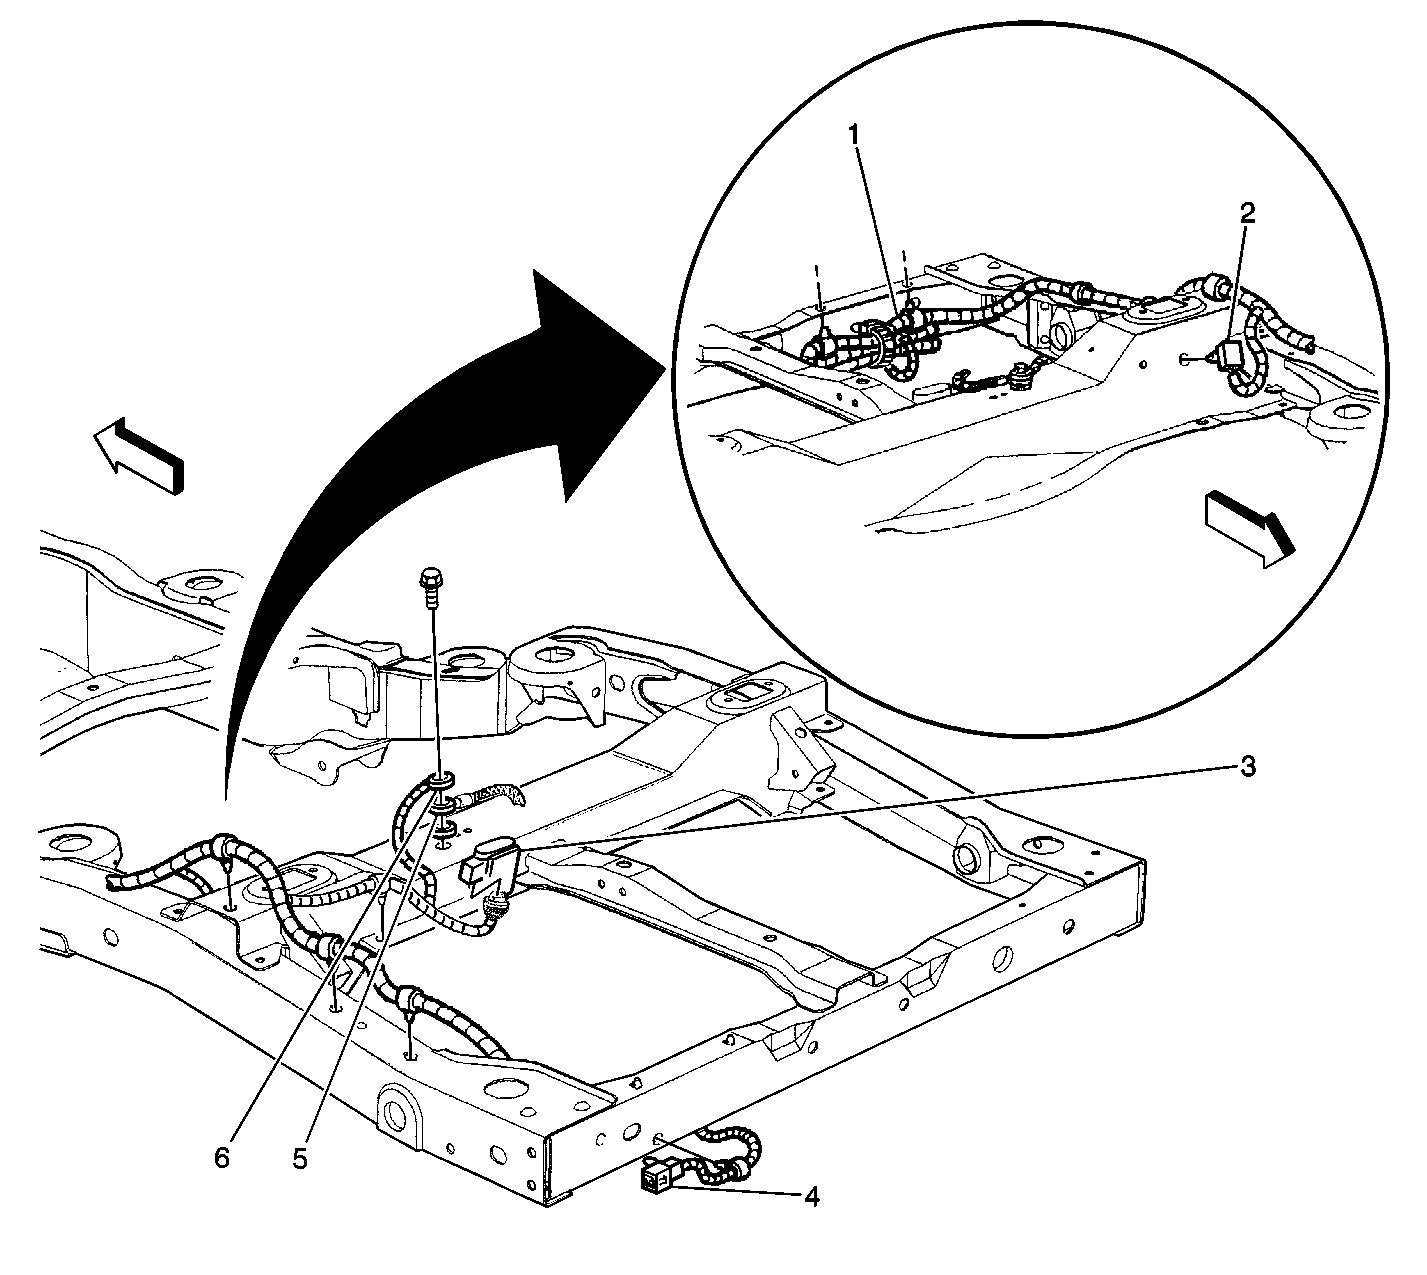
| Figure 47: |
Rear Frame Location View, 4-Door Utility
|
| Figure 48: |
Liftgate LH (Utility)
|
| Figure 49: |
Liftgate Location View RH (Utility)
|
