For 1990-2009 cars only

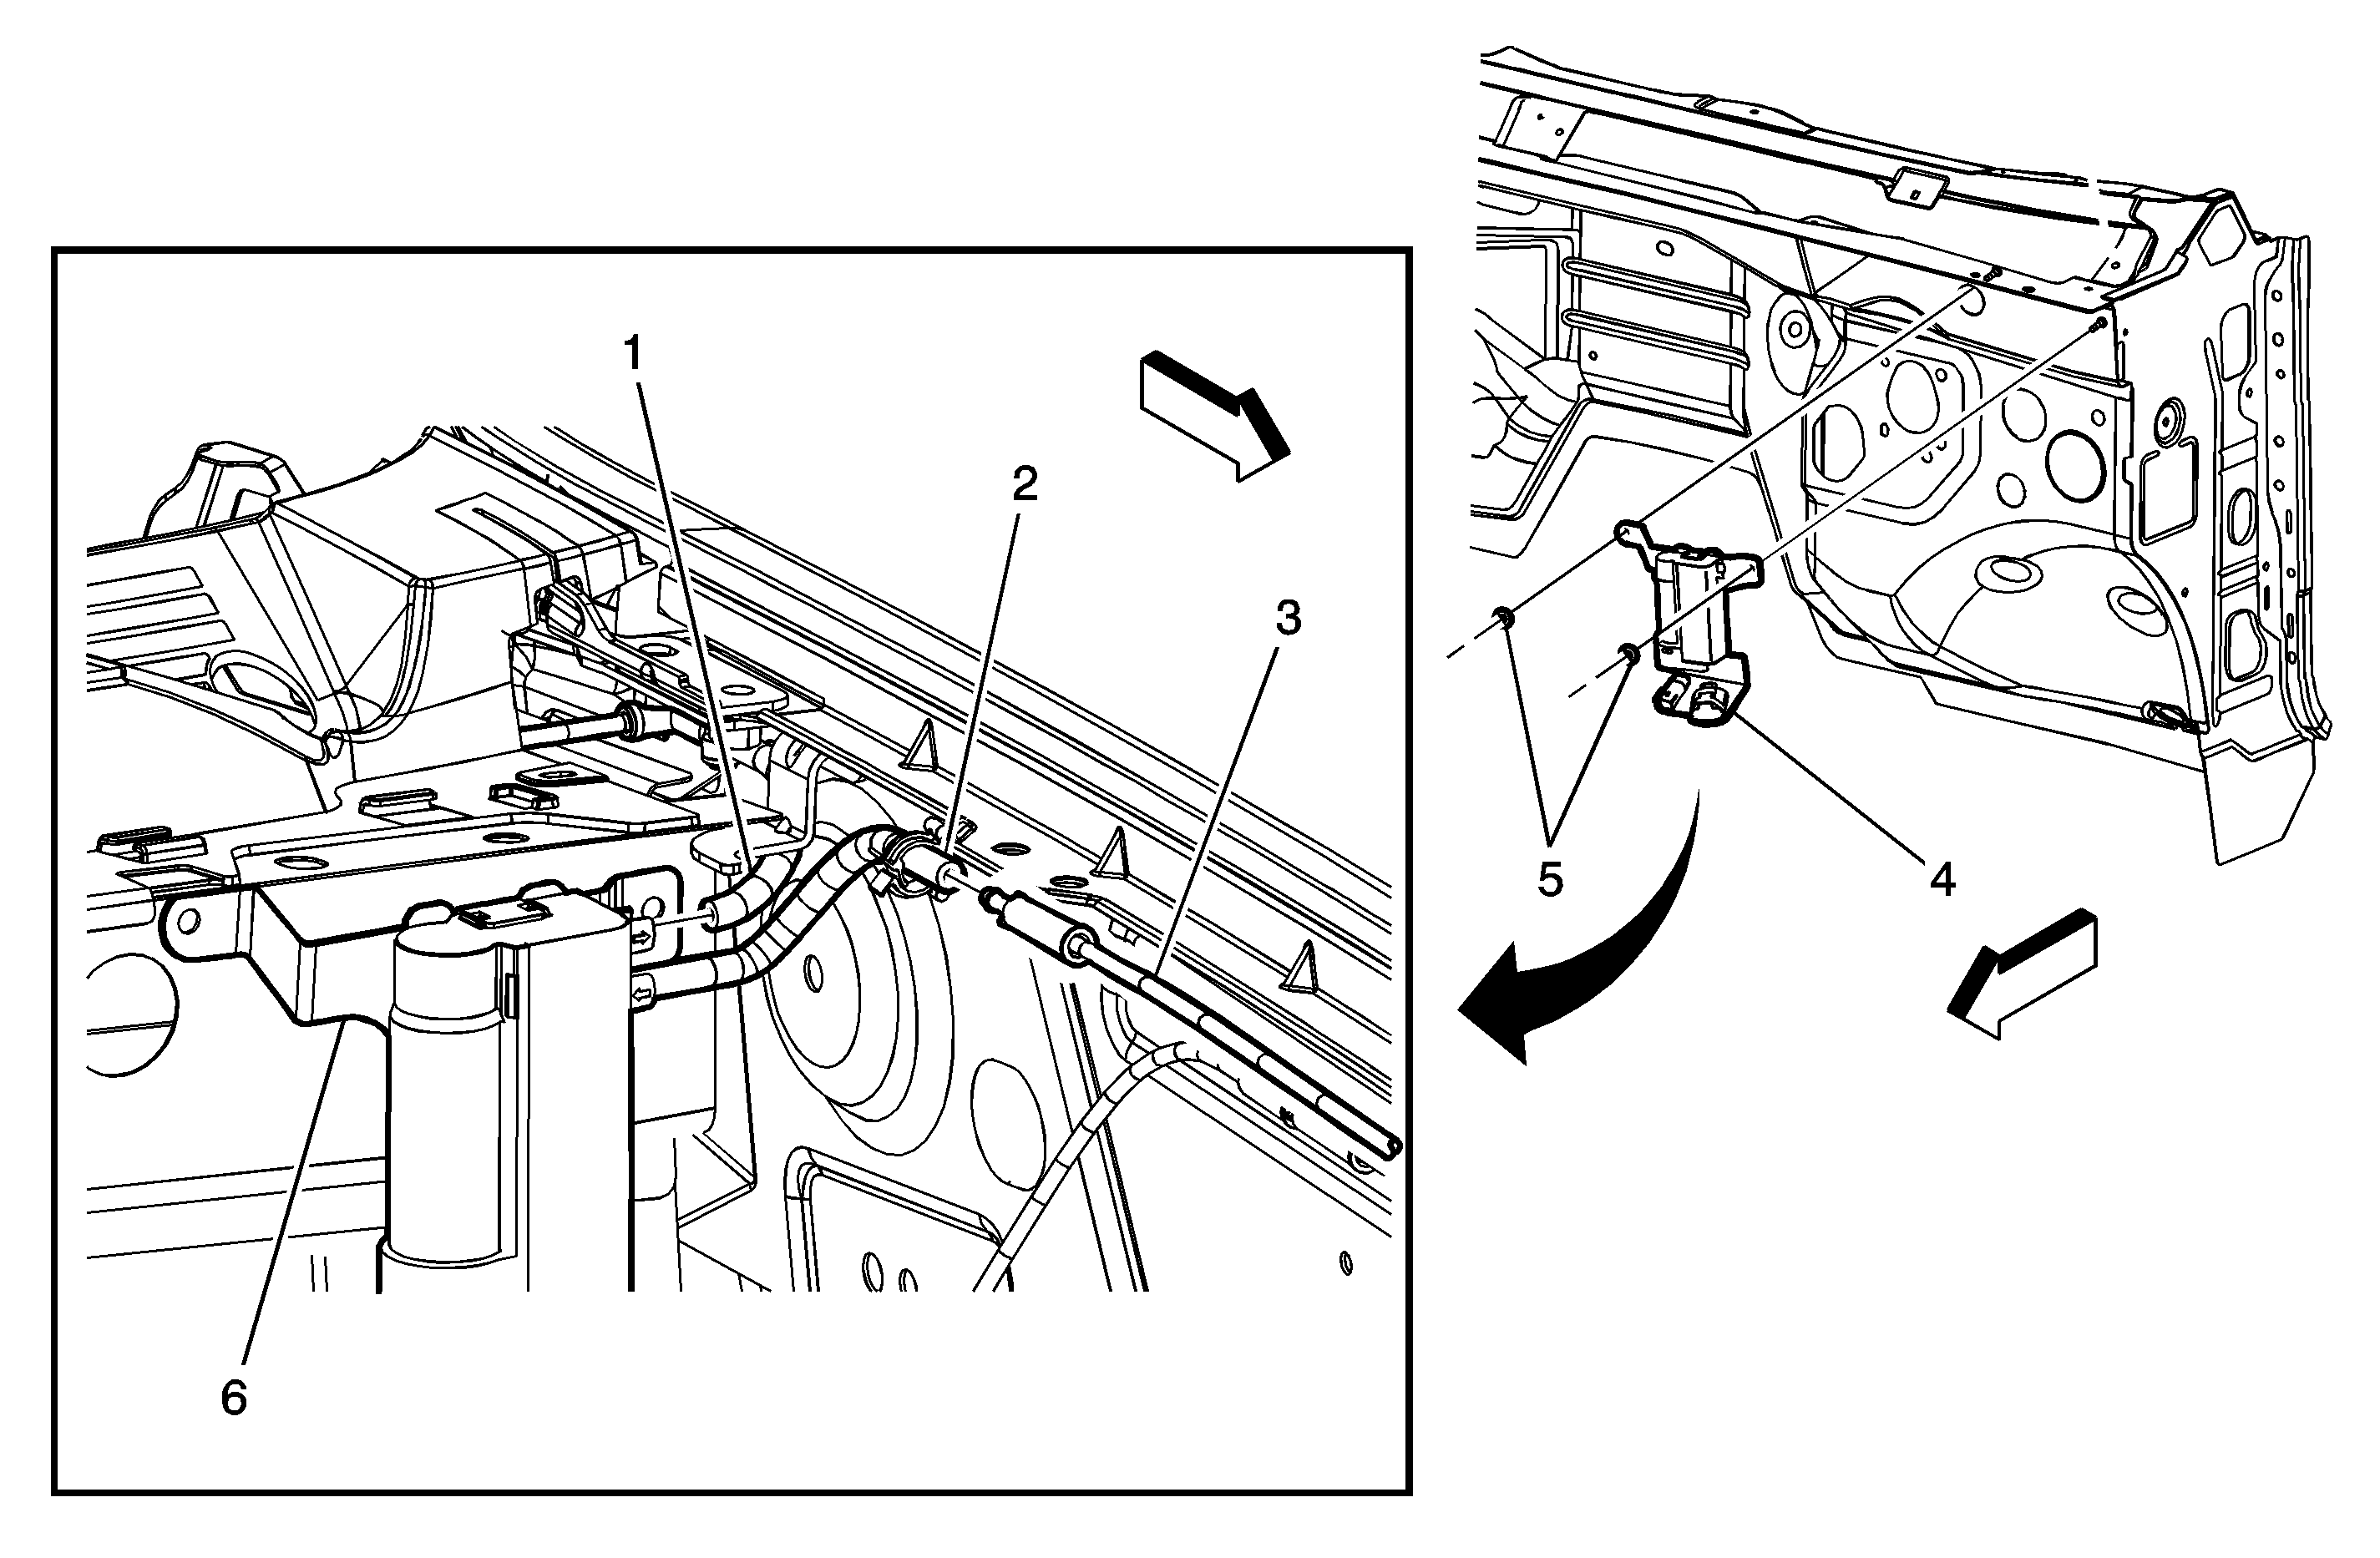
Callout | Component Name |
|---|---|
Preliminary ProcedureRemove the left side front fender rear upper bracket in order to access the heater more efficiently. Refer to Front Fender Rear Upper Bracket Replacement. | |
1 | Windshield Washer Nozzle Hose (Outlet) Tip |
2 | Windshield Washer Pump Hose (Inlet) |
3 | Windshield Washer Pump Hose |
4 | Windshield Washer Solvent Heater Assembly Electrical Connector (Qty: 2) Tip |
5 | Windshield Washer Solvent Heater Assembly Nut (Qty: 2) Caution: Refer to Fastener Caution in the Preface section. Tip Tighten |
6 | Windshield Washer Solvent Heater Assembly Procedure
|
