Front Wheel Hub, Bearing, and Seal Replacement 4WD
Tools Required
| • | J 37763 Front Wheel Bearing Lock Nut Remover |
| • | J 37781 Rear Axle Shaft and Brake Drum Remover |
| • | J 2619-01 Slide Hammer |
Removal Procedure
Important: You may replace the following components together as an assembly:
• The hub • The wheel bearings • The wheel bolts • The speed sensor reluctor wheel, if equipped
- Raise and support the vehicle. Refer to Lifting and Jacking the Vehicle in General Information.
- Remove the tire and wheel assembly. Refer to Tire and Wheel Removal and Installation in Tires and Wheels.
- If the wheel center cap remains on the hub, remove the wheel center cap.
- Remove the brake rotor. Refer to Brake Rotor Replacement in Disc Brakes.
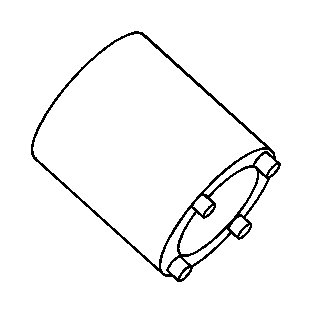
- Remove the 6 bolts (1) and the axle hub lock cover (2) with the wheel bearing cap.
- Remove the drive shaft retention ring.
- Remove the wheel drive shaft washer.
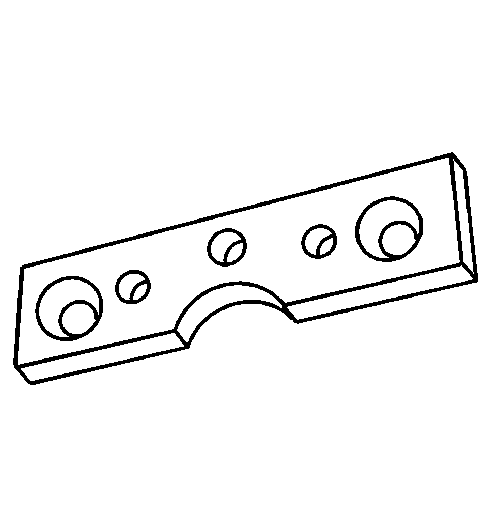
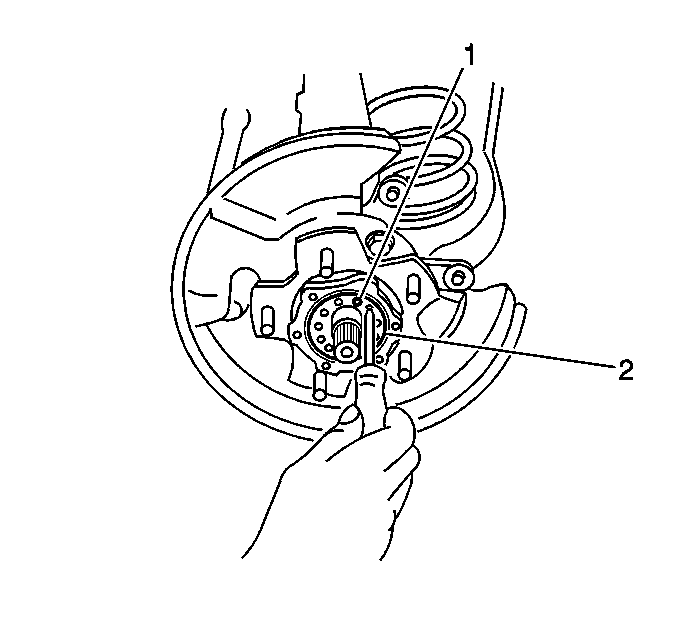
- Remove the 4 screws (1) and the bearing adjustment nut washer (2).
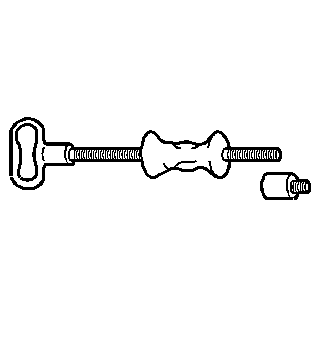
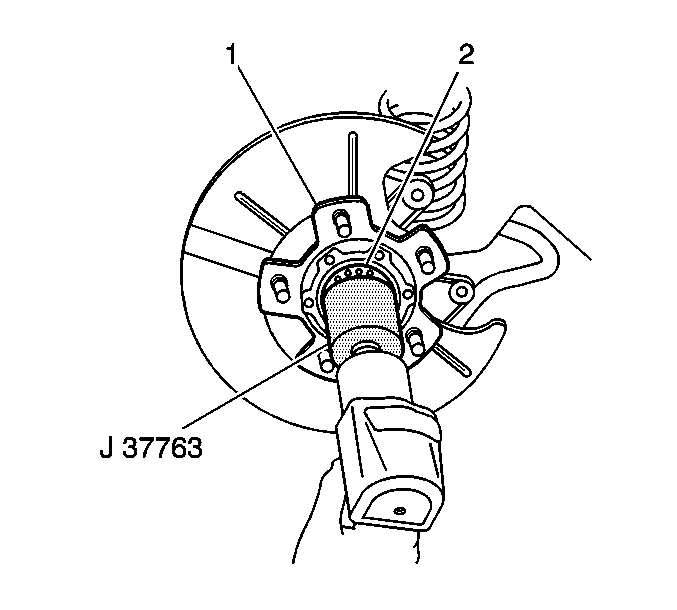
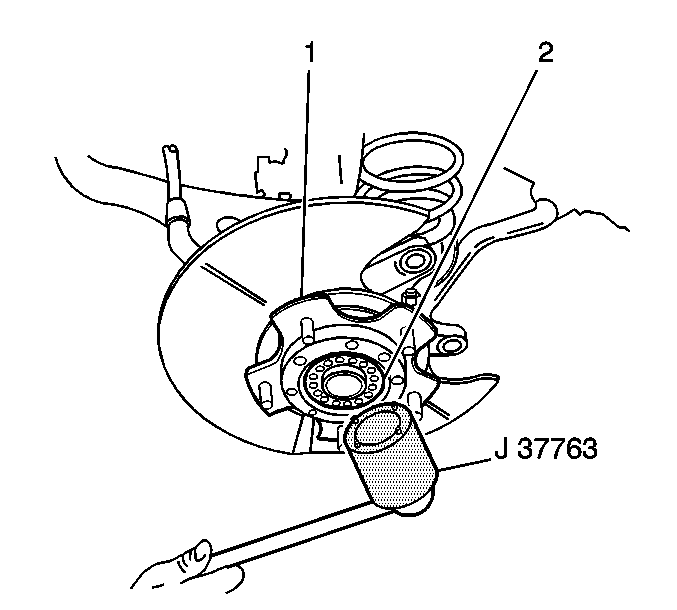
- Use the J 37763 in order to remove the wheel bearing adjustment nut (2).
- Remove the wheel bearing washer.
- If necessary, use the J 37781 and the J 2619-01 in order to remove the following components:
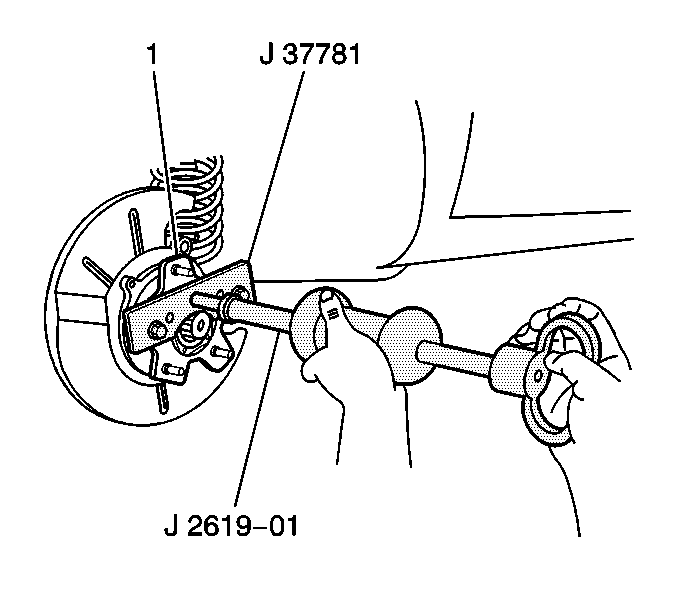
| • | The hub (1) |
| • | The wheel bearings |
| • | The wheel bolts |
| • | The speed sensor reluctor wheel, if equipped |
Installation Procedure
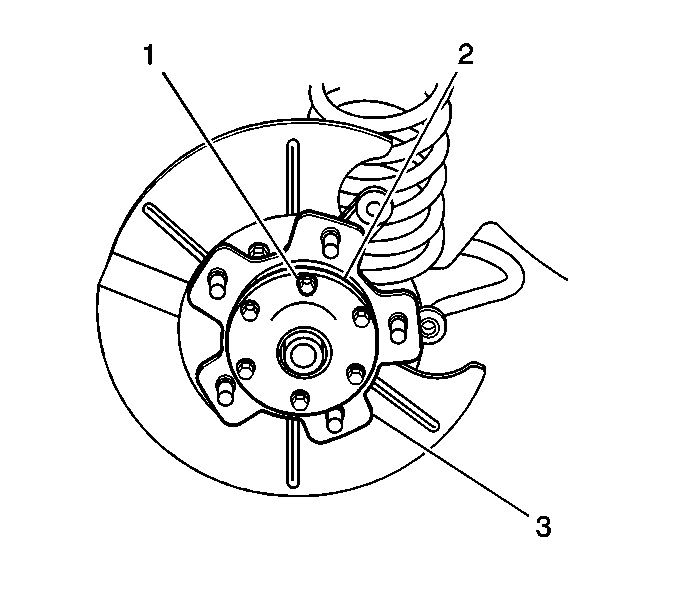
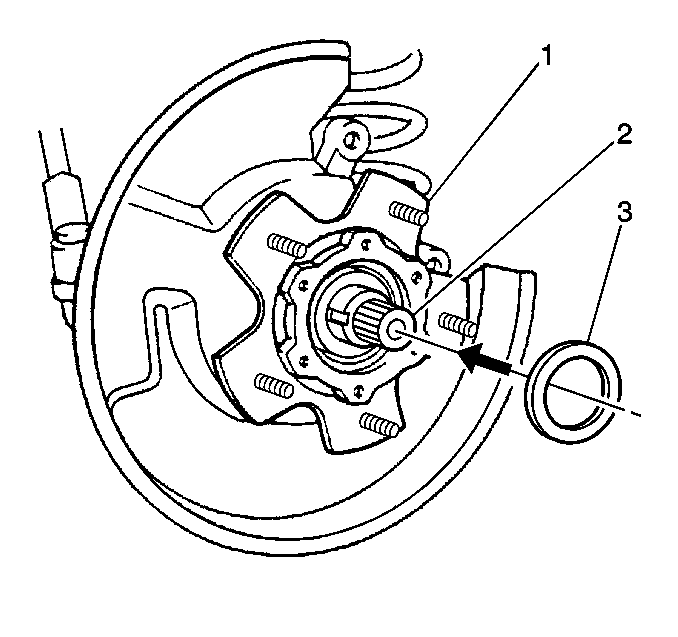
- Install the hub (1) to the spindle (2).
- Verify the wheel bearing races and the hub are in the proper position on the spindle.
- Install the wheel bearing washer (3).
- Use the J 37763 in order to install the wheel bearing adjustment nut (2).
- Install the bearing adjustment nut washer (2). Verify that the screw holes align.
- Install the 4 screws (1).
- Apply chassis lubricant, GM P/N 12377985 (Canadian P/N 88901242) or an equivalent lithium lubricant, to the wheel drive shaft washer and to the spindle.
- Install the wheel drive shaft washer to the end of the drive axle.
- Install the drive shaft retention ring to the end of the drive axle. If necessary, pull the wheel drive shaft slightly in order to seat the retention ring.
- Clean the axle hub lock cover sealing surface.
- Clean the hub sealing surface.
- Apply Red RTV Silicone Sealant, GM P/N 12378478 (Canadian P/N 88900041) or equivalent, to the axle hub lock cover.
- Install the axle hub lock cover (2) to the front hub (3).
- Install the 6 bolts (1).
- If necessary, use a plastic hammer in order to install the wheel bearing cap to the axle hub lock cover. Tap the collar of the cap until the collar contacts the cover.
- Install the brake rotor. Refer to Brake Rotor Replacement in Disc Brakes.
- Install the wheel center cap.
- Install the tire and wheel assembly. Refer to Tire and Wheel Removal and Installation in Tires and Wheels.
- Lower the vehicle.
Important: Hold the inner race in the proper position in the hub.
Notice: Refer to Fastener Notice in the Preface section.
Tighten
Tighten the nut to 216 N·m (159 lb ft).
Tighten
Tighten the bolts to 25 N·m (18 lb ft).
Important: If the wheel bearing cap does not fit or is damaged, install a new wheel bearing cap.
Front Wheel Hub, Bearing, and Seal Replacement 2WD
Tools Required
J 37763 Front Wheel Bearing Lock Nut Remover
Removal Procedure
Important: You may replace the following components together as an assembly:
• The hub • The wheel bearings • The wheel bolts • The speed sensor reluctor wheel, if equipped
- Raise and support the vehicle. Refer to Lifting and Jacking the Vehicle in General Information.
- Remove the tire and wheel assembly. Refer to Tire and Wheel Removal and Installation in Tires and Wheels.
- Remove the brake rotor. Refer to Brake Rotor Replacement in Disc Brakes.
- Remove the cap from the hub.
- Remove the 4 screws (1) and the bearing adjustment nut washer (2).
- Use the J 37763 in order to remove the wheel bearing adjustment nut (2).
- Remove the wheel bearing washer.
- Remove the following components:

| • | The hub (1) |
| • | The wheel bearings |
| • | The wheel bolts |
| • | The speed sensor reluctor wheel, if equipped |
Installation Procedure
- Install the hub (1) to the spindle.
- Verify the wheel bearing races and the hub are in the proper position on the spindle.
- Install the wheel bearing washer.
- Use the J 37763 in order to install the wheel bearing adjustment nut (2).
- Install the bearing adjustment nut washer (2). Verify that the screw holes align.
- Install the 4 screws (1).
- Verify the sealing surface of the cap is clean and not damaged.
- Apply Red RTV Silicone Sealant, GM P/N 12378478 (Canadian P/N 88900041), or the equivalent sealant, to the sealing surface of the cap.
- Use a plastic hammer in order to install the cap. Tap the collar of the cap until the collar contacts the hub.
- Install the brake rotor. Refer to Brake Rotor Replacement in Disc Brakes.
- Install the tire and wheel assembly. Refer to Tire and Wheel Removal and Installation in Tires and Wheels.
- Lower the vehicle.
Important: Hold the inner race in the proper position in the hub.
Notice: Refer to Fastener Notice in the Preface section.
Tighten
Tighten the nut to 216 N·m (159 lb ft).
Important: If the cap does not fit or is damaged, install a new cap.
