Removal Procedure
- Raise the vehicle. Support the vehicle. Refer to Lifting and Jacking the Vehicle in General Information.
- Place a drain pan or suitable container under the rear axle housing.
- Remove the rear axle housing drain plug (2) from the rear axle housing.
- Drain the rear axle housing.
- Remove the rear tire and wheel assemblies. Refer to Tire and Wheel Removal and Installation in Tires and Wheels.
- Remove the rear brake drums from the rear axle. Refer to Brake Drum Replacement in Drum Brakes.
- Remove both rear axle shafts from the rear axle housing. Refer to Rear Axle Shaft Replacement .
- Remove the following from the vehicle:
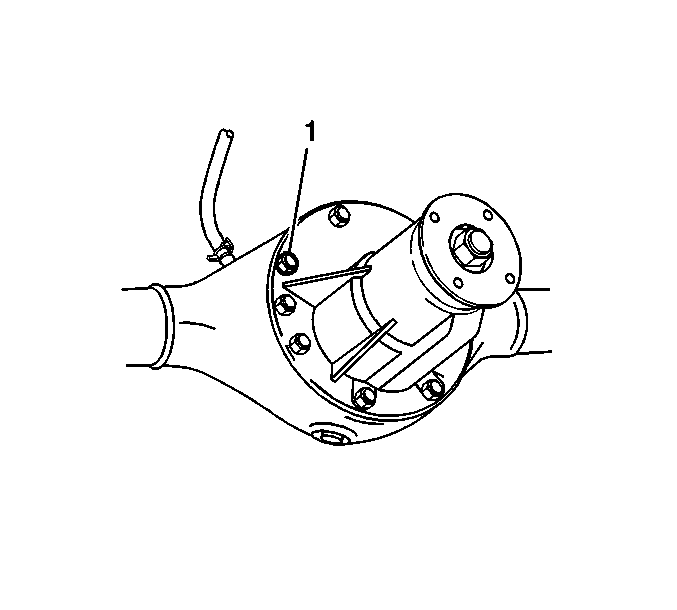
- Remove the 8 nuts and the differential carrier (1).
- Remove the rear axle housing (2).
- Clean the oil and sealant from the differential carrier and the rear axle housing mating surfaces.
- Inspect the differential carrier. Refer to Rear Axle Disassemble .

Important: To ensure rear propeller shaft balance, an index mark (reference mark) must be placed on the differential pinion flange and the rear propeller shaft flange so that the rear propeller shaft can be installed in the same position from which it was removed. If this procedure is not followed, a driveline imbalance may result causing vibration, premature component wear or other undesirable characteristics.
| • | The 4 bolts |
| • | The 4 nuts |
| • | The rear propeller shaft (2) |
Installation Procedure
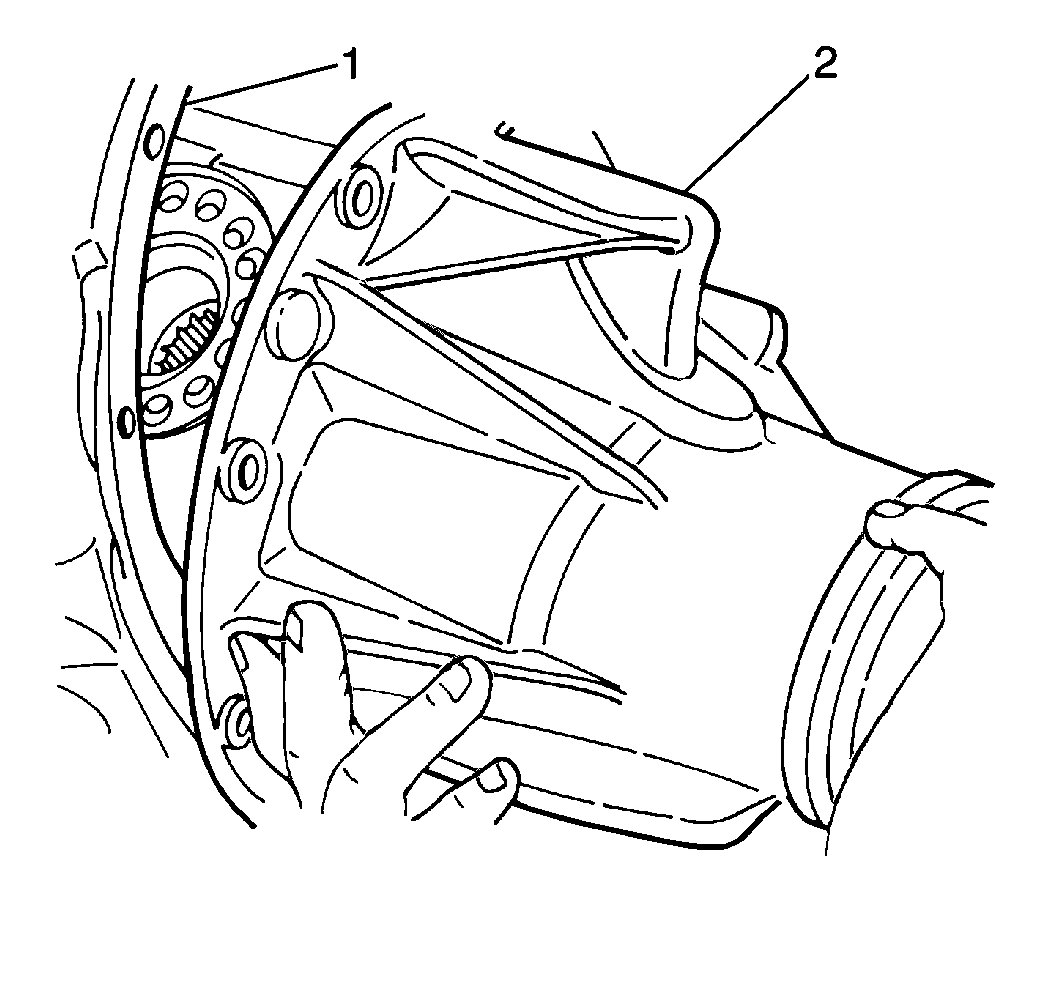
- Apply RTV silicone gasket and sealer GM P/N 12346240 (Canadian P/N 10953493), or equivalent, to the differential carrier mating surface (1) on the rear axle housing (2).
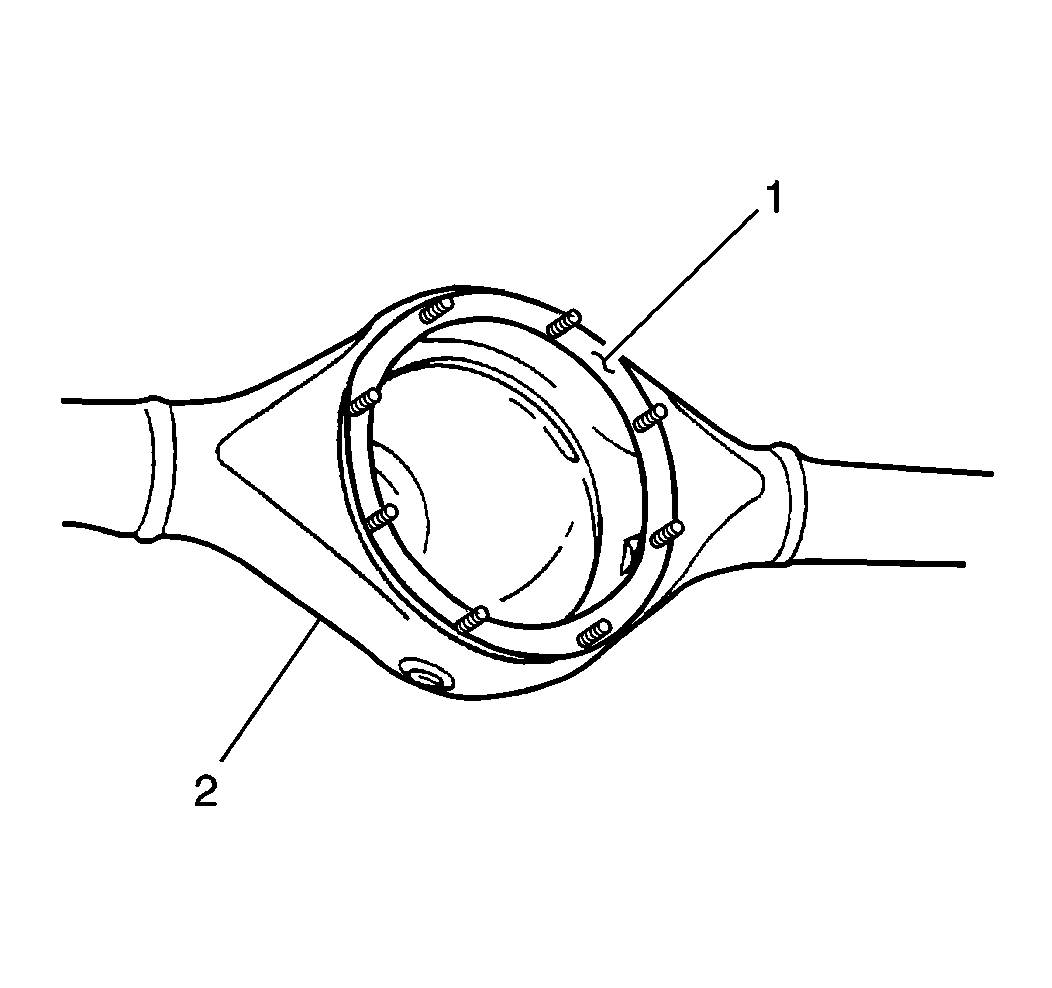
- Install the differential carrier into the rear axle housing. Secure the differential carrier with 8 nuts (1).
- Install the rear propeller shaft (2) into the vehicle. Secure with 4 nuts and bolts.
- Install both rear axle shafts into the rear axle housing. Refer to Rear Axle Shaft Replacement .
- Install the rear brake drums to the rear axle. Refer to Brake Drum Replacement in Drum Brakes.
- Install the rear tire and wheel assemblies. Refer to Tire and Wheel Removal and Installation in Tires and Wheels.
- Apply GM P/N 12346004 (Canadian P/N 10953480), or equivalent, to the threaded portion of the rear axle housing drain plug.
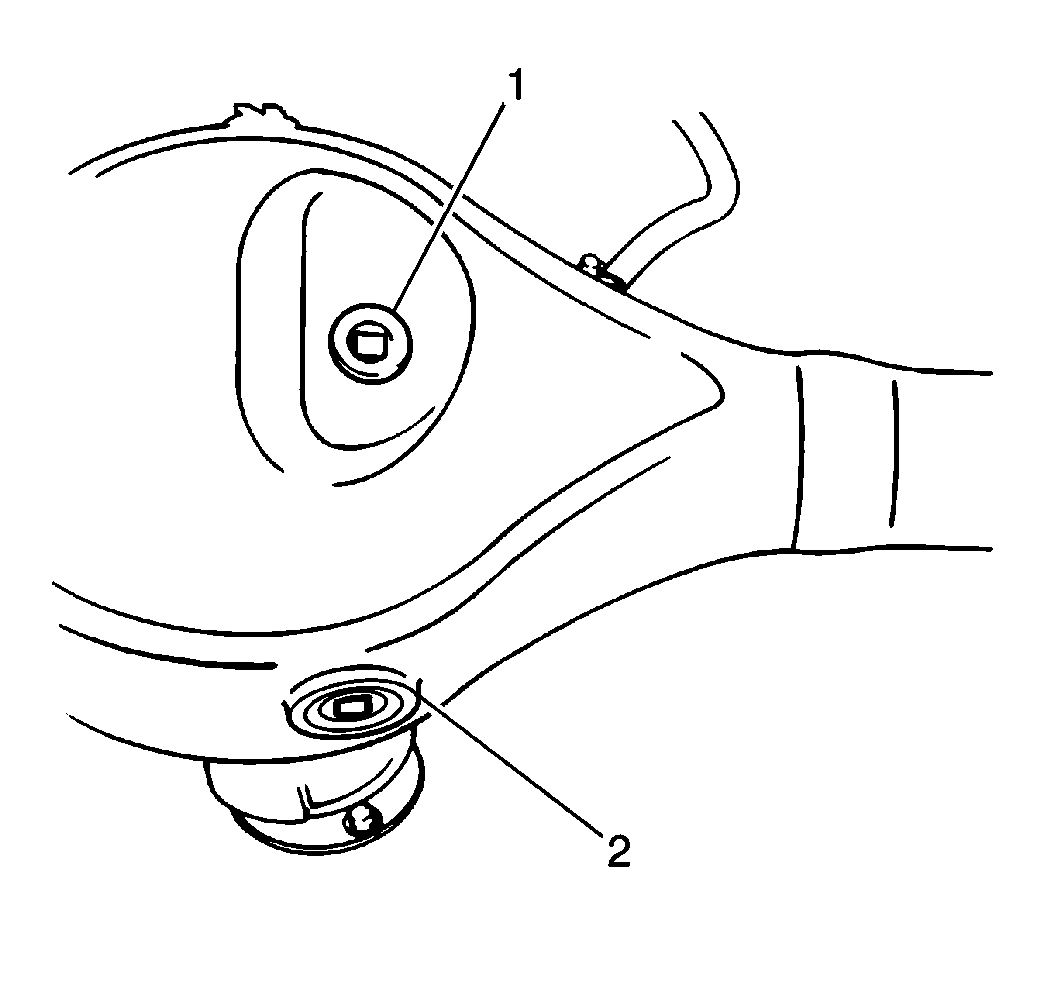
- Install the rear axle housing drain plug (2) into the rear axle housing.
- Refill the rear axle housing with approximately 2.2 liters (4.6 pts) of 80W-90 GL5 lubricant GM P/N 12345977 (Canadian P/N 10953482), or equivalent. The oil level should be even with the bottom of the rear axle housing oil level/filler plug hole.
- Install the rear axle housing oil level/filler plug (1) into the rear axle housing.
- Remove the drain pan from under the rear axle housing.
- Lower the vehicle.
Notice: Use the correct fastener in the correct location. Replacement fasteners must be the correct part number for that application. Fasteners requiring replacement or fasteners requiring the use of thread locking compound or sealant are identified in the service procedure. Do not use paints, lubricants, or corrosion inhibitors on fasteners or fastener joint surfaces unless specified. These coatings affect fastener torque and joint clamping force and may damage the fastener. Use the correct tightening sequence and specifications when installing fasteners in order to avoid damage to parts and systems.
Tighten
Tighten the differential carrier nuts to 55 N·m (41 lb ft).
Tighten
Tighten the rear propeller shaft nuts and bolts to 50 N·m
(37 lb ft).
Tighten
Tighten the rear axle housing drain plug to 25 N·m (18 lb ft).
Tighten
Tighten the rear axle housing oil level/filler plug to 43 N·m
(32 lb ft).
