Tools Required
| • | J 23911 Pinion
Oil Seal Installer |
Removal Procedure
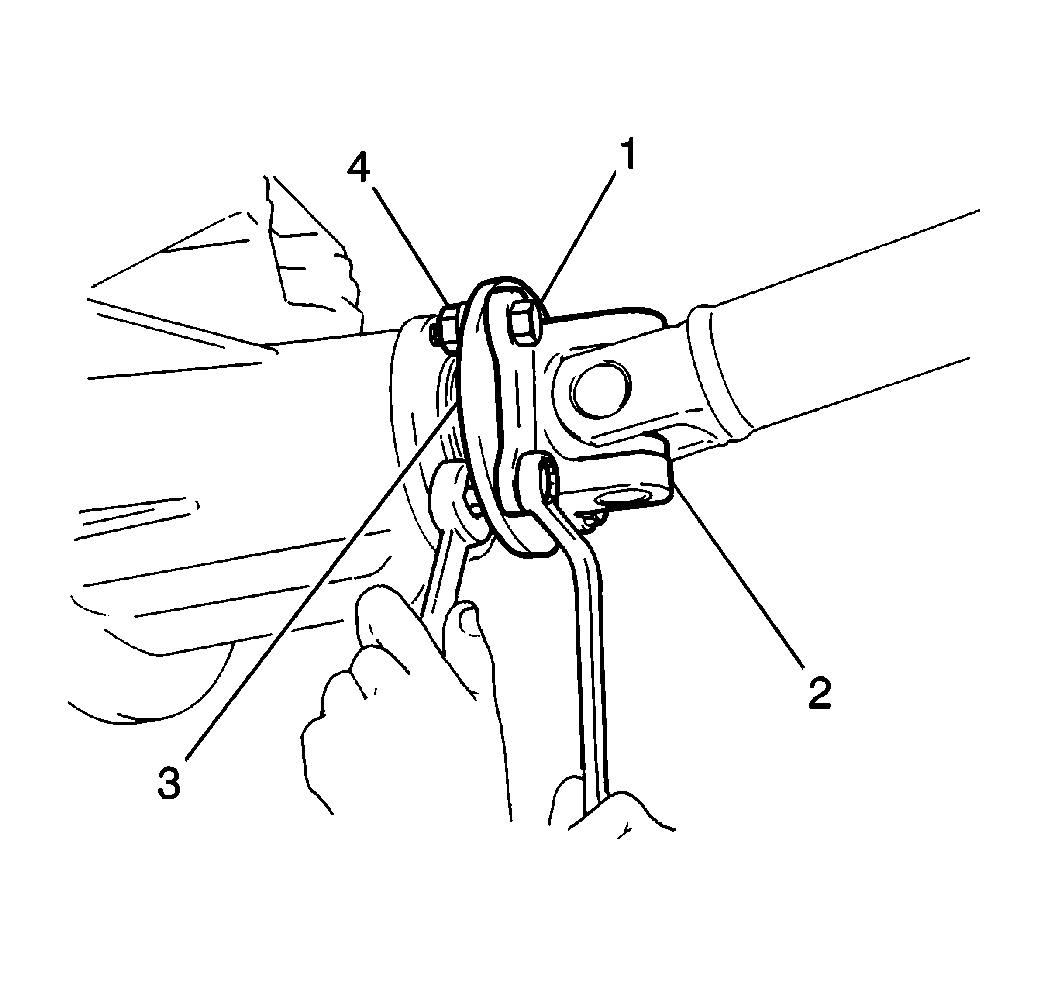
- Remove the bolt and retainers.
Important: Observe and mark the positions of all the driveline components, relative
to the propeller shaft and the axles, prior to disassembly. These components
include the propeller shafts, drive axles, pinion flanges, output
shafts, etc. Reassemble all the components in the exact places
in which you removed the parts. Follow any specifications, torque
values, and any measurements made prior to disassembly.
- Mark the installed position of the propeller shaft and the pinion flange.
Reassemble the propeller shaft and the pinion flange in the same position.
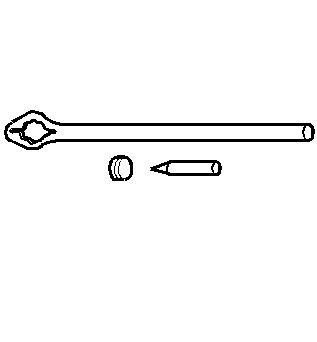
- Remove the propeller shaft (2) from the pinion flange (3).
| 3.1. | Use a piece of tape to hold the bearing caps. |
| 3.2. | Secure the propeller shaft up and out of the way in order to not put
any stress on the universal joints. |
| 3.3. | Make an alignment mark on the pinion stem, pinion flange, and the pinion
flange nut. Record the number of exposed threads on the pinion
stem for reference. |
| 3.4. | Drain the axle fluid. |

- Measure the amount of torque required
to turn the pinion using an inch-pound torque wrench. Record this
measurement for reassembly. This will give combined pinion bearing,
seal, carrier bearing, axle bearing, and seal preload.
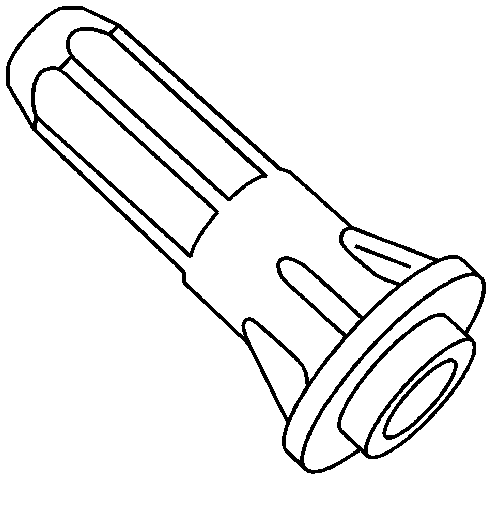
- Remove the pinion flange nut (1) and the washer.
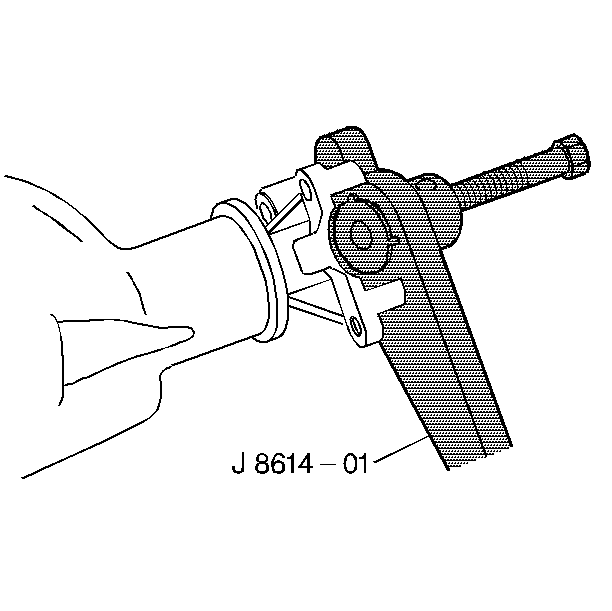
- Use J 8614-01
in order to
hold the pinion flange.
- Remove the pinion flange. Place a container under the flange in order
to retrieve the lubricant.
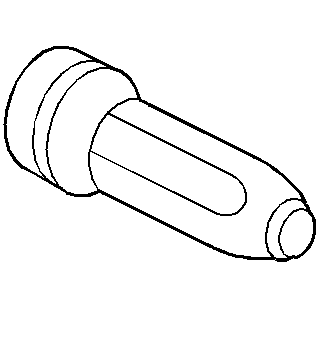
- Remove the oil seal. Use a seal removal tool. Do not damage the carrier.
- Inspect the seal surface of the pinion flange for tool marks, nicks,
or damage, such as a groove worn by the seal. Replace the flange, if
necessary. Refer to
Universal Joint Replacement
.
- Inspect the carrier bore for burrs that may cause leaks around the
outside of the seal.
Installation Procedure
Important: Do not hammer the pinion flange onto the pinion stem.
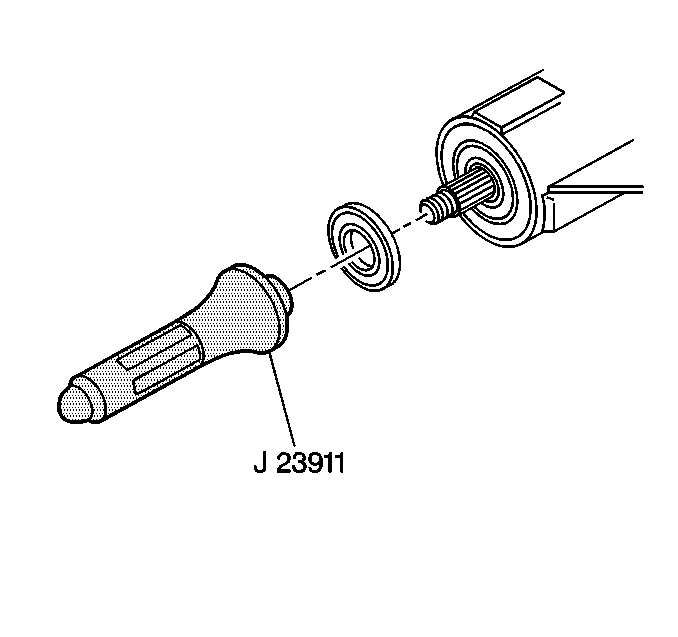
- Install
a new seal using J 23911
.
- Apply seal lubricant GM P/N 1050169 (Canadian P/N 992709)
to the outside of the pinion flange and the sealing lip of the new seal.
- Install the pinion flange.
Notice: Use the correct fastener in the correct location. Replacement fasteners
must be the correct part number for that application. Fasteners requiring
replacement or fasteners requiring the use of thread locking compound or sealant
are identified in the service procedure. Do not use paints, lubricants, or
corrosion inhibitors on fasteners or fastener joint surfaces unless specified.
These coatings affect fastener torque and joint clamping force and may damage
the fastener. Use the correct tightening sequence and specifications when
installing fasteners in order to avoid damage to parts and systems.
- Install the washer and nut.
Tighten
Tighten the nut on the pinion stem as close to the original marks as possible
without going past the mark. Use the reference mark and the thread
count as a reference. Tighten the nut in increments. Turn the pinion
flange several times after each tightening in order to set the
rollers.
Important: If the original preload torque was less than 3 lb-in., reset the torque
specification to 3-5 lb-in.
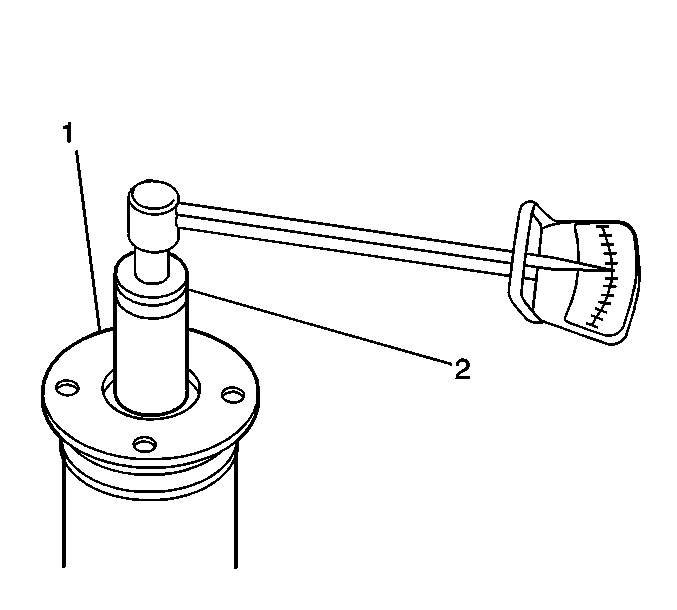
- Measure the torque required to rotate
the pinion (1). Compare this with the torque recorded earlier. Continue
to tighten and measure a little at a time until the same preload
is achieved.
- Align the propeller shaft with the alignment marks made previously.
Use J 8614-01
in order to
hold the pinion flange.
- Install the propeller shaft to the pinion flange.
- Install the bolts and retainers.
Tighten
Tighten the bolts to 45 N·m (33 lb ft).
