For 1990-2009 cars only
Tools Required
J 45101-100 Conical Brake Rotor Washers
Adjustment Procedure
- Measure the brake rotor thickness variation. Refer to Brake Rotor Thickness Variation Measurement .
- Measure the brake rotor LRO. Refer to Brake Rotor Assembled Lateral Runout Measurement .
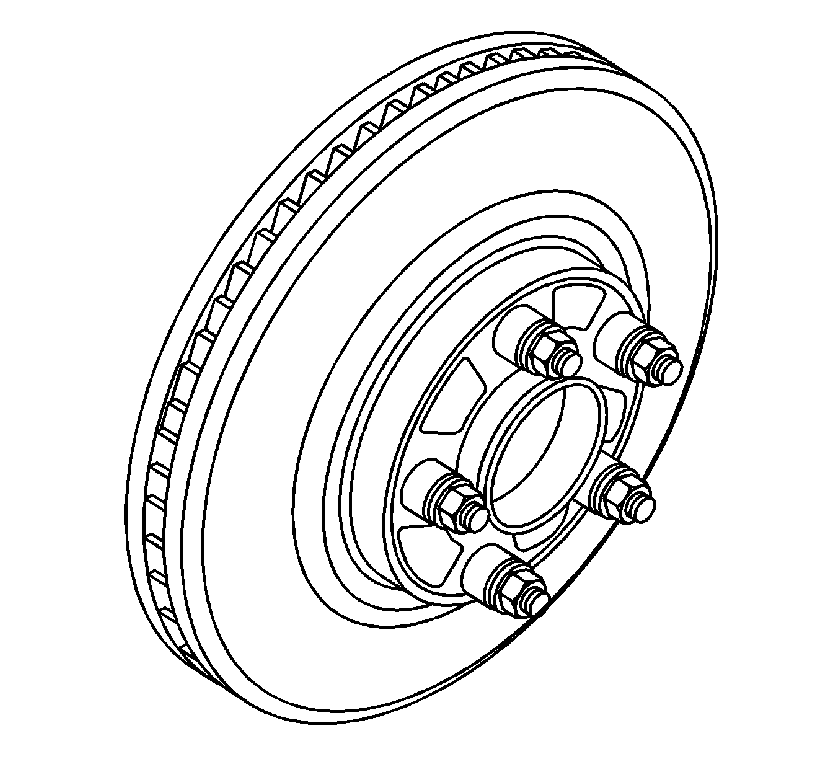
- Remove the J 45101-100 and the wheel nuts.
- Remove the rotor from the hub.
- Inspect the mounting surface of the hub and the brake rotor. Verify the surfaces are clean.
- Verify the caliper is hanging in a position away from any rotating components, such as the rotor and the lathe.
- Follow the lathe manufacturer's instructions in order to install the lathe.
- Follow the lathe manufacturer's instructions in order to refinish the brake rotor.
- Measure the thickness of the rotor. Refer to Brake Rotor Thickness Measurement .
- If the thickness is less than the specification, replace the brake rotor.
- If the thickness is greater than the specification, complete the following steps:
- Remove the lathe from the vehicle.
- Clean both sides of the rotor with denatured alcohol, or an equivalent approved brake cleaner.
- Measure the brake rotor LRO. Refer to Brake Rotor Assembled Lateral Runout Measurement .
- If the brake rotor LRO is greater than the specification, refer to Brake Rotor Assembled Lateral Runout Correction .
- If the brake rotor LRO is less than the specification, install the brake caliper.
- Press the brake pedal several times in order to position the brake rotor.
- Remove the wheel nuts.
- Remove the J 45101-100 .
- Install the tire and wheel assemblies. Refer to Tire and Wheel Removal and Installation .
Important: Brake rotor thickness variation greater than the specification can cause brake pulsation.
Important: Brake rotor assembled lateral runout (LRO) greater than the specification can cause brake pulsation.
| 11.1. | Use the correct lathe speed setting in order to apply a non-directional finish. |
| 11.2. | If the lathe has a non-directional finishing tool, use 120 grit aluminum oxide sandpaper in order to apply a non-directional finish. |
| 11.3. | If the lathe does not have a non-directional finishing tool, use a sanding block and 150 grit aluminum oxide sandpaper in order to apply a non-directional finish. |
