Tools Required
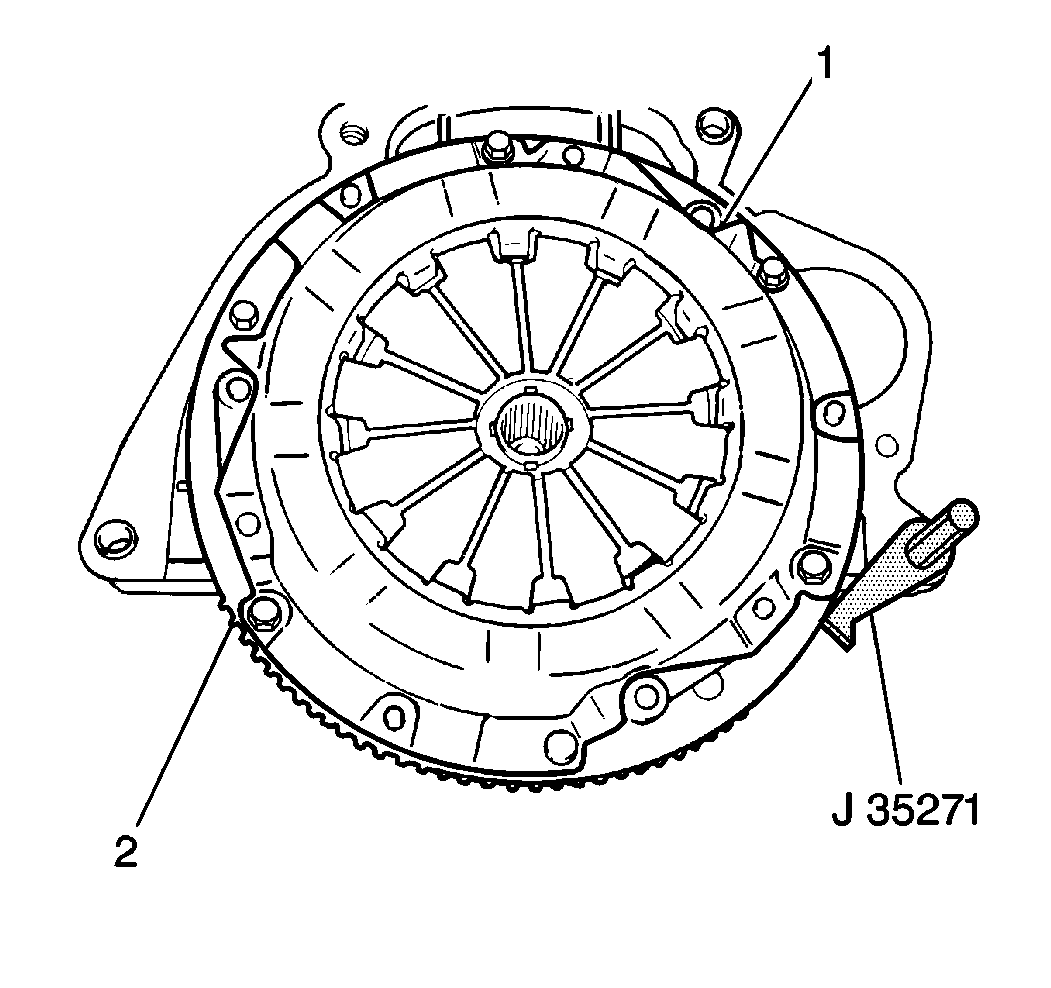
J 35271 Flywheel Holder
Removal Procedure
- Remove the manual transmission assembly from the vehicle. Refer to Two-Wheel-Drive Transmission Replacement or Four-Wheel-Drive Transmission Replacement in Manual Transmission.
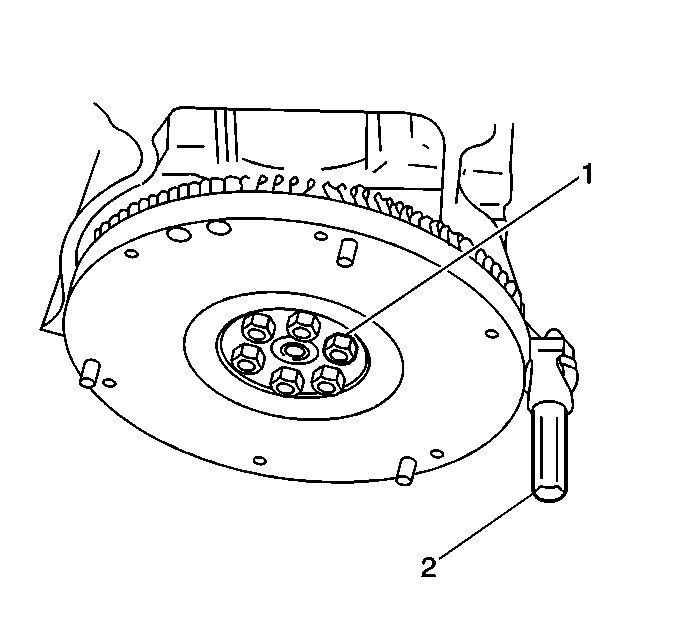
- Install the J 35271 to the engine block in order to hold the flywheel stationary (2).
- Install a universal clutch alignment arbor to support the clutch disc during the pressure plate removal.
- Slowly loosen the 6 pressure plate cover bolts evenly until the pressure plate diaphragm spring tension is completely released.
- Remove the 6 pressure plate cover bolts and the pressure plate assembly from the flywheel.
- Remove the clutch disc and the universal clutch alignment arbor from the flywheel.
- Remove the J 35271 from the engine block.
- Clean the flywheel and pressure plate-to-clutch disc mating surfaces of all oil, grease and metallic particles.
- Clean the clutch disc using a clean, dry cloth.
- Inspect the flywheel for:
- Inspect the pilot bearing for smooth rotation. If the bearing does not spin freely, replace the pilot bearing. Refer to Clutch Pilot Bearing Replacement .


Important: DO NOT use alcohol-based solvents or other cleaning agents on the clutch disc. Using solvents on the clutch disc may cause slipping and premature clutch wear.
| • | Cracks |
| • | Heat checking |
| • | Grooves and excessive wear |
| • | If the flywheel appears excessively worn, resurface or replace the flywheel as necessary. Refer to Engine Flywheel Replacement in Engine Mechanical-2.0L. or Engine Flywheel Replacement in Engine Mechanical-2.5L. |
Installation Procedure
- If the flywheel was removed, install the flywheel. Refer to Engine Flywheel Replacement in Engine Mechanical-2.0L or Engine Flywheel Replacement in Engine Mechanical-2.5L.
- Install the J 35271 (2) to the engine block in order to hold the flywheel stationary.
- Install the clutch disc to the flywheel using the universal clutch alignment arbor to center the disc on the flywheel and support the disc in place.
- Install the pressure plate to the flywheel; secure the pressure plate with 6 pressure plate cover bolts (1).
- Remove the J 35271 from the engine block and the universal clutch alignment arbor.
- Lubricate the transmission input shaft splines and the clutch release bearing with a thin coat of wheel bearing lubricant GM P/N 1051344 (Canadian P/N 993037), or the equivalent.
- Lubricate the pilot bearing with a thin coat of wheel bearing lubricant GM P/N 1051344 (Canadian P/N 993037), or the equivalent.
- Install the manual transmission assembly into the vehicle. Refer to Two-Wheel-Drive Transmission Replacement or Four-Wheel-Drive Transmission Replacement in Manual Transmission.

Important: When installing the clutch disc, make sure the torsional springs are offset to the rear facing the transmission.
Notice: Use the correct fastener in the correct location. Replacement fasteners must be the correct part number for that application. Fasteners requiring replacement or fasteners requiring the use of thread locking compound or sealant are identified in the service procedure. Do not use paints, lubricants, or corrosion inhibitors on fasteners or fastener joint surfaces unless specified. These coatings affect fastener torque and joint clamping force and may damage the fastener. Use the correct tightening sequence and specifications when installing fasteners in order to avoid damage to parts and systems.
Tighten
Tighten the 6 pressure plate bolts evenly in a diagonal pattern to prevent
clutch disc distortion. Then, tighten the 6 bolts in the same diagonal
pattern to 23 N·m (17 lb ft).
