Tools Required
J 25300-D Headlamp
Aimer

- Aim the headlamps for
proper illumination of the road. Check the headlamp aim whenever any of the
following are true:
| • | When a new headlamp capsule is installed |
| • | If service or repairs to the front end area have (or may have)
disturbed the headlamps or their mounting. |

- Some state and local laws
specify requirements for headlamp aim. All of these laws must be followed
when performing any headlamp aiming operation.

- Prior to aiming headlamps,
the following steps must be taken:
| • | Ensure that all of the components are back in their original place
if any service has been performed. |
| • | Place the vehicle on a level surface. |
| • | Stop all other work on the vehicle. |
| • | Fill the fuel tank to half full. |
| • | If the vehicle is intended for heavy loads or tows a trailer,
these loads must be simulated. |
Headlamp Aiming by the Screen Method

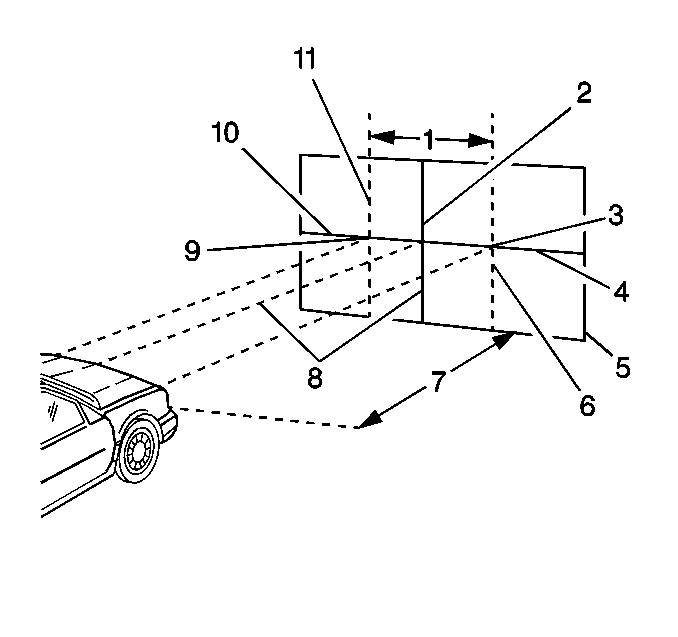
- Locate the vehicle so
that it is square with the screen and the front of the headlamps, directly
over a reference line which has been painted on the floor.
- Locate the center line on the aiming screen so that the aiming
screen is in line with the center of the vehicle.
| 2.1. | Mark the center of the front and rear windows with narrow strips
of masking tape. |
| 2.2. | Use the masking tape strips in order to locate the center line
(2) of the aiming screen directly in line with the vehicle axis (8). |
Equipment Needed
Aiming Area Required
- A specific aiming area in a darkened location is desired.
Ensure that the room is sufficient for the vehicle and for an additional
7.6 m (25 ft) measured from the face of the lamps to the front
of the screen.
- Ensure that the floor on which the vehicle rests is flat and level
with the bottom of the screen. If the floor is not level, compensate.
Aiming Screen
- Ensure that the screen includes the following provisions:
| • | Is 1.5 m (5 ft) high and 3.6 m (12 ft)
wide |
| • | Has a matte white surface well shaded from extraneous light |
| • | Is properly adjusted to the floor on which the vehicle stands |
- Make provisions for moving the screen so that it can be aligned
parallel with the rear axle.
- Make provisions for moving the screen so that a horizontal line
drawn perpendicularly from the centerline of the screen will pass an equal
distance midway between the two headlamps.
- The screen is provided with the following components:
| • | A fixed vertical centerline |
| • | Two laterally adjustable vertical tapes |
| • | One vertically adjustable horizontal tape |
- If a regular commercial aiming screen is not available, the screen
may consist of a vertical wall having a clear uninterrupted area of approximately
1.8 m (6 ft) high and 3.6 m (12 ft) wide.
Finish the surface with a washable non-gloss white paint.
- After the aiming screen has been set up, paint a reference line
on the floor directly under the lens of the lamps in order to indicate the
proper location of the headlamps when they are being aimed.
Headlamp Aiming Procedure
- With the vehicle properly located and loaded, switch the headlamps
to low beam.
- Observe the left and the top edges of the high intensity zone
on the screen.
The edges of the high intensity zone should fall within the specifications.
- If any adjustments are needed, perform the adjustment in the following
manner:
| • | For horizontal adjustments, make the adjustment with the inner
adjustment screw. |
| • | For vertical adjustments, make the adjustment with the upper adjustment
screw. |
Headlamp Aiming-Using the Headlamp Aimer
Notice: In order to avoid any possibility of damage, regardless of weather a
vehicle has glass or plastic headlamps, it is recommended that the headlamps
not be illuminated when using aiming equipment which uses a suction cup device
for attachment.

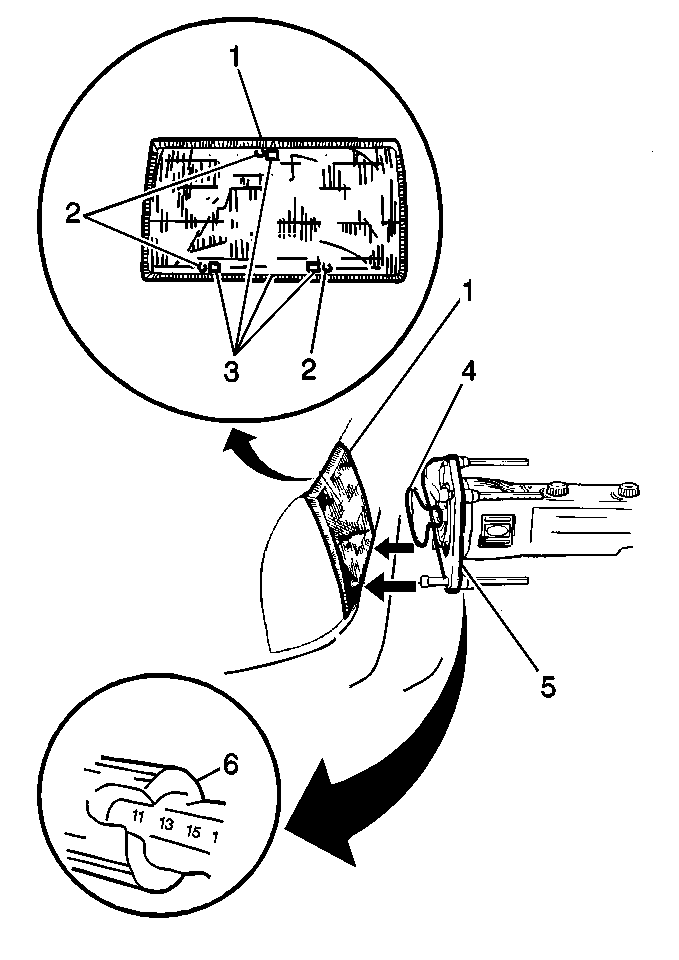
- Adjust the headlamp aimers
(1) for the floor level.
- Select the appropriate adapter (6) from the J 25300-D
.
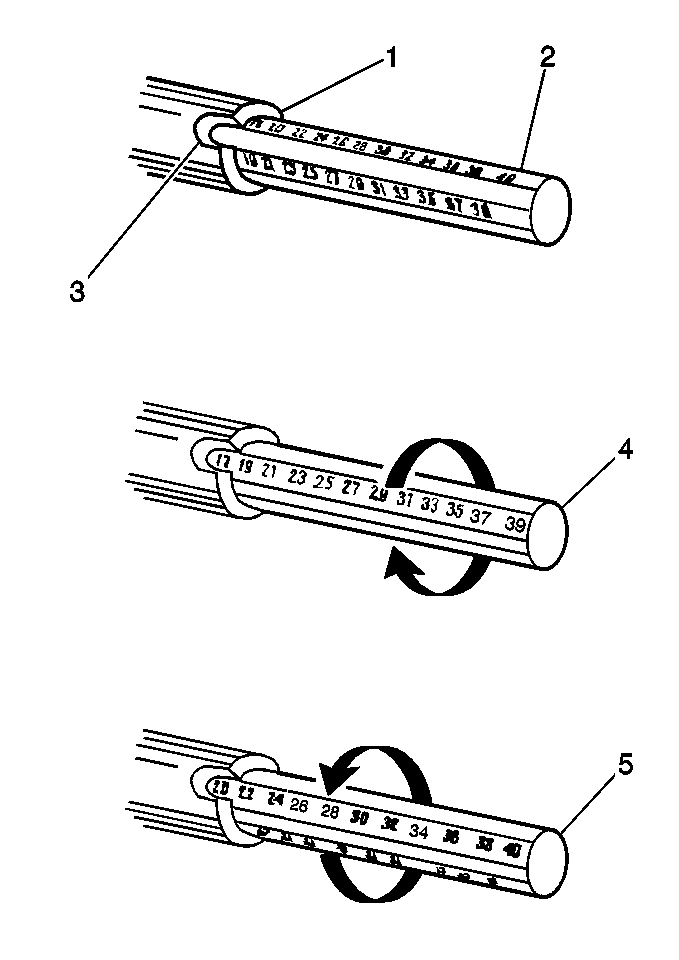
- Set the adjustment rods (3) to the numbers shown on the front
of the headlamp console.
- Attach the adapter (5) to the Aimer from J 25300-D
.
- Attach the aimers to the headlamp capsule.

- Ensure that the adjustment
rods (2) contact the aiming pads. You may have to add or remove an extension
stud.
- Aim the headlamps according to the aiming tool manufacturer's
instructions.
- If any adjustments are needed, perform the adjustment in the following
manner:
| • | For horizontal adjustments, make the adjustment with the inner
adjustment screw. |
| • | For vertical adjustments, make the adjustment with the upper adjustment
screw. |


