The numbers below refer to the step numbers on the diagnostic table.
Step
| Action
| Yes
| No
|
|
Caution: One or more of the following guidelines may apply when performing specific required tests in the work stall:
| • | When a test requires spinning the drive wheels with the vehicle jacked up, adhere to the following precautions: |
| - | Do not exceed 56 km/h (35 mph) when spinning one drive wheel with the other drive wheel stopped. This limit is necessary because the speedometer indicates only one-half the actual vehicle speed under these conditions. Personal injury
may result from excessive wheel spinning. |
| - | If all of the drive wheels are spinning at the same speed, do not exceed 112 km/h (70 mph). Personal injury may result from excessive wheel spinning. |
| - | All persons should stay clear of the rotating components and the balance weight areas in order to avoid possible personal injury. |
| - | When running an engine in the repair stall for an extended period of time, use care not to overheat the engine and the transmission. |
| • | When a test requires jacking up the vehicle and running with the wheels and brake rotors removed, adhere to the following precautions: |
| - | Support the suspension at normal ride height. |
| - | Do not apply the brake with the brake rotors removed. |
| - | Do not place the transmission in PARK with the drive axles spinning. |
| - | Turn Off the ignition in order to stop the powertrain components from spinning. |
| • | When running an engine in the work stall, use the exhaust removal system to prevent breathing dangerous gases. |
|
1
| Were you
sent here from the Vibration Analysis - Engine/Accessory Isolation table?
| Go to
Step 2
| Go to
Vibration Analysis - Engine/Accessory Isolation
|
2
|
- Raise and suitably support the vehicle. Refer to
Lifting and Jacking the Vehicle
in General Information.
- Remove the flywheel/flexplate-to-torque converter bolts access
cover, if equipped.
- Determine if sufficient clearance exists to separate the transmission
torque converter away from the engine flywheel/flexplate and safely secure
the torque converter from accidentally engaging with the flywheel/flexplate.
Is there sufficient clearance to separate and safely secure the transmission
torque converter away from the engine flywheel/flexplate?
| Go to
Step 3
| Go to
Step 9
|
3
|
- With the flywheel/flexplate-to-torque converter access cover still
removed, and with the vehicle still raised, mark the position of the transmission
torque converter in relation to the engine flywheel/flexplate.
- Disconnect the torque converter and move it away from the flywheel/flexplate.
- Secure the transmission torque converter away from the engine
flywheel/flexplate.
- Lower the vehicle, start the engine and allow the engine to idle.
- Raise and suitably support the vehicle. Refer to
Lifting and Jacking the Vehicle
in General Information.
- Visually inspect the flywheel/flexplate for excessive lateral
runout.
- Lower the vehicle.
- Turn OFF the ignition.
Did the flywheel/flexplate exhibit excessive lateral runout?
| Go to
Step 6
| Go to
Step 4
|
4
|
- Raise and suitably support the vehicle. Refer to
Lifting and Jacking the Vehicle
in General Information.
- Inspect the flywheel/flexplate for the following:
| • | Looseness at the engine crankshaft |
| • | Missing balance weights |
Did the flywheel/flexplate exhibit any of the conditions listed?
| Go to
Step 6
| Go to
Step 5
|
5
|
- With the transmission torque converter still secured away from
the engine flywheel/flexplate to avoid accidental engagement with the flywheel/flexplate,
lower the vehicle.
- Block the front wheels.
- Apply BOTH the service brakes and the park brake.
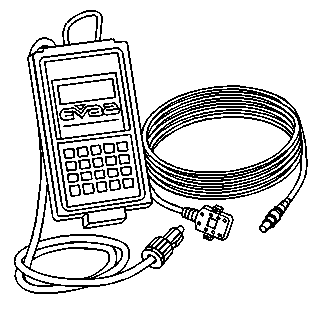
- With the scan tool and the J 38792-A
, electronic vibration analyzer (EVA), still installed, start
the engine.
- Place the transmission in NEUTRAL or PARK.
- Slowly increase the engine speed (RPM) to the level at which the
disturbance is most noticeable.
- Record the engine RPM obtained on the scan tool and the most dominant
frequency reading if obtained on the J 38792-A
.
- Turn OFF the ignition.
Has the disturbance been significantly reduced or eliminated?
| Go to
Step 7
| Go to
Step 9
|
6
|
- If the flywheel/flexplate is loose at the engine crankshaft, tighten
the flywheel/flexplate mounting bolts in sequence and to specification.
- If the flywheel/flexplate is cracked, damaged, and/or has missing
balance weights, replace the damaged flywheel/flexplate.
Refer to
Engine Flywheel Replacement
in Engine Mechanical - 3.4L.
Did you complete the tightening or replacement?
| Go to
Step 12
| --
|
7
|
- Raise and suitably support the vehicle. Refer to
Lifting and Jacking the Vehicle
in General Information.
- Re-index the transmission torque converter to the engine flywheel/flexplate,
120 degrees from its original position.
- Reconnect the transmission torque converter to the engine flywheel/flexplate.
- Lower the vehicle.
- Block the front wheels.
- Apply BOTH the service brakes and the park brake.
- With the scan tool and the J 38792-A
still installed, start the engine.
- Place the transmission in NEUTRAL or PARK.
- Slowly increase the engine speed (RPM) to the level at which the
disturbance is most noticeable.
- Record the engine RPM obtained on the scan tool and the most dominant
frequency reading if obtained on the J 38792-A
.
- If the disturbance is still noticeable, re-index the torque converter
again to obtain the least amount of disturbance.
Has the disturbance been significantly reduced or eliminated?
| Go to
Step 12
| Go to
Step 8
|
8
| Replace the out-of-balance
transmission torque converter.
Did you complete the replacement?
| Go to
Step 12
| --
|
9
|
- Raise and suitably support the vehicle. Refer to
Lifting and Jacking the Vehicle
in General Information.
- Position the J 38792-A
sensor onto the underside of the engine oil pan, along the FRONT edge.
- Lower the vehicle.
- Block the front wheels.
- Apply BOTH the service brakes and the park brake.
- With the scan tool and the J 38792-A
, still installed, start the engine.
- Place the transmission in NEUTRAL or PARK.
- Slowly increase the engine speed (RPM) to the level at which the
disturbance is most noticeable.
- Record the engine RPM obtained on the scan tool and the most dominant
frequency reading if obtained on the J 38792-A
from the underside of the engine oil pan.
- Repeat steps 1 through 9, placing the J 38792-A
sensor onto the underside of the engine oil pan, along the
REAR edge.
Is the disturbance greater along the FRONT of the engine?
| Go to
Step 11
| Go to
Step 10
|
10
| Replace the imbalanced engine flywheel/flexplate. Refer to
Engine Flywheel Replacement
in Engine Mechanical
- 3.4L.
Did you complete the replacement?
| Go to
Step 12
| --
|
11
| Replace
the engine crankshaft (harmonic) balancer. Refer to
Crankshaft Balancer Replacement
in Engine Mechanical - 3.4L.
Did you complete the replacement?
| Go to
Step 12
| --
|
12
|
- Install or connect any components that were removed or disconnected
during diagnosis.
- Perform the Vibration Analysis - Road Testing table. Refer
to
Vibration Analysis - Road Testing
.
Is the disturbance still present?
| Go to
Vibration Diagnostic Aids
| System OK
|
