For 1990-2009 cars only
Removal Procedure
Caution: Refer to Brake Fluid Irritant Caution in the Preface section.
Notice: Refer to Brake Fluid Effects on Paint and Electrical Components Notice in the Preface section.
Notice: Always connect or disconnect the wiring harness connector from the EBCM/EBTCM with the ignition switch in the OFF position. Failure to observe this precaution could result in damage to the EBCM/EBTCM.
- Turn the ignition switch to the OFF position.
- Remove the air cleaner housing from the engine compartment. Refer to Air Cleaner Assembly Replacement for the 3.4L engine.
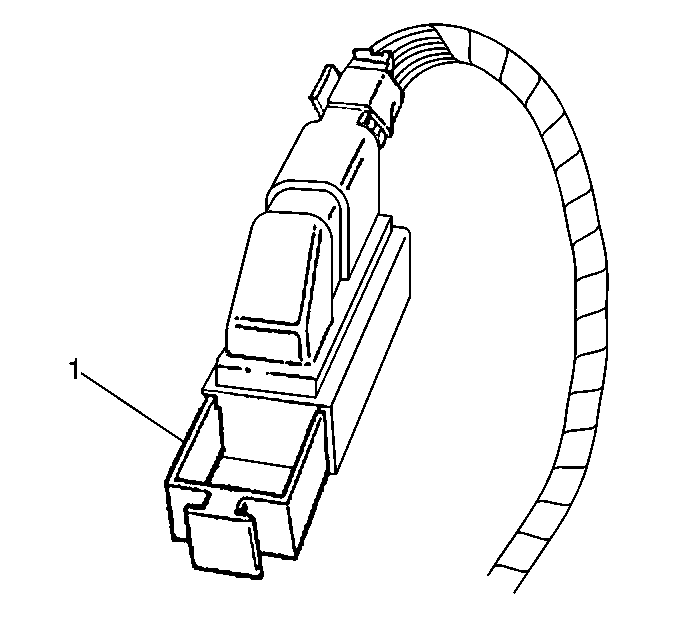
- Disconnect the electronic brake control module (EBCM) harness connector.
- Brush off any dirt/debris that has accumulated on the assembly.
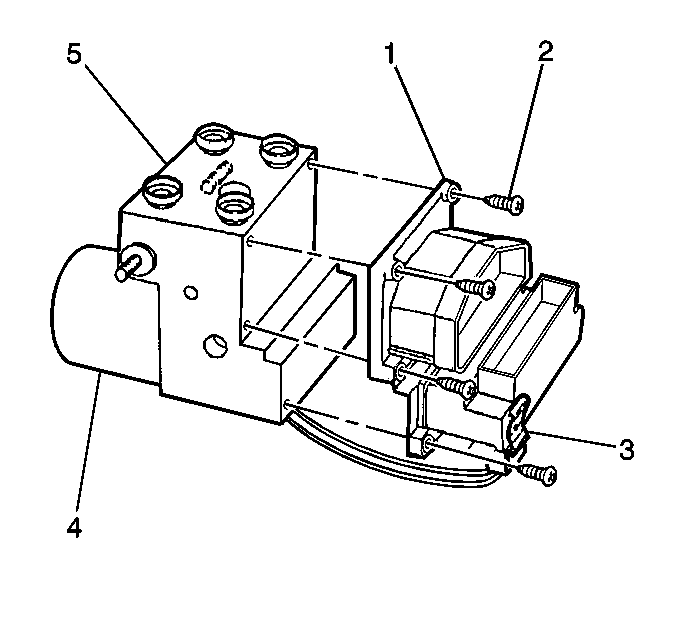
- Disconnect the pump motor connector (3) at the bottom of the EBCM.
- Remove the 6 EBCM to BPMV screws (2).
- Separate the EBCM from the BPMV by gently pulling apart until separated (1).

Important:
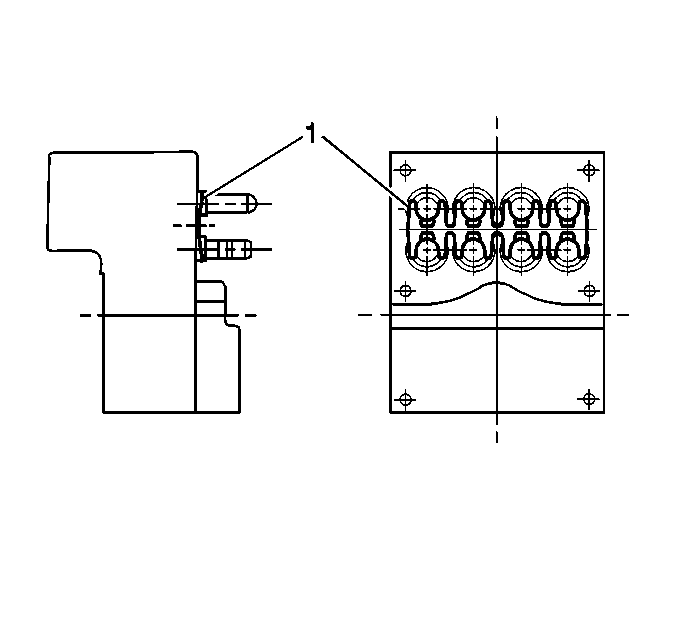
• Do not damage the seal by prying the EBCM from the brake pressure modulator valve (BPMV). • Do not damage the solenoid valves while removing the EBCM from the BPMV.


Installation Procedure
- Clean the BPMV surface with alcohol using a clean rag.
- Install the EBCM (1) to the BPMV.
- Install the 6 screws that attaches the EBCM to BPMV.
- Connect the pump motor connector to the bottom of the EBCM.
- Connect the EBCM harness connector and depress the locking tab (1) to secure.
- Install the air cleaner housing. Refer to Air Cleaner Assembly Replacement for the 3.4L engine.
- Turn the ignition switch to the RUN position, do not start engine.
- Perform the diagnostic system check. Refer to Diagnostic System Check - Vehicle in Vehicle DTC Information.
- Refer to Control Module References for programming and setup information.
Important: Use only new wave springs and screws supplied with the new EBCM.

Notice: Refer to Fastener Notice in the Preface section.
Tighten
| • | Tighten the top 4 mounting screws to 5 N·m (44 lb in). Tighten screws in an X pattern. |
| • | Tighten the bottom 2 mounting screws to 5 N·m (44 lb in). |

