For 1990-2009 cars only
Removal Procedure
Caution: Refer to Fuel and Evaporative Emission Pipe Caution in the Preface section.
Caution: Refer to Gasoline/Gasoline Vapors Caution in the Preface section.
Notice: Refer to Fuel and Evaporative Emission Hose/Pipe Connection Cleaning Notice in the Preface section.
- Raise and support the vehicle. Refer to Lifting and Jacking the Vehicle in General Information.
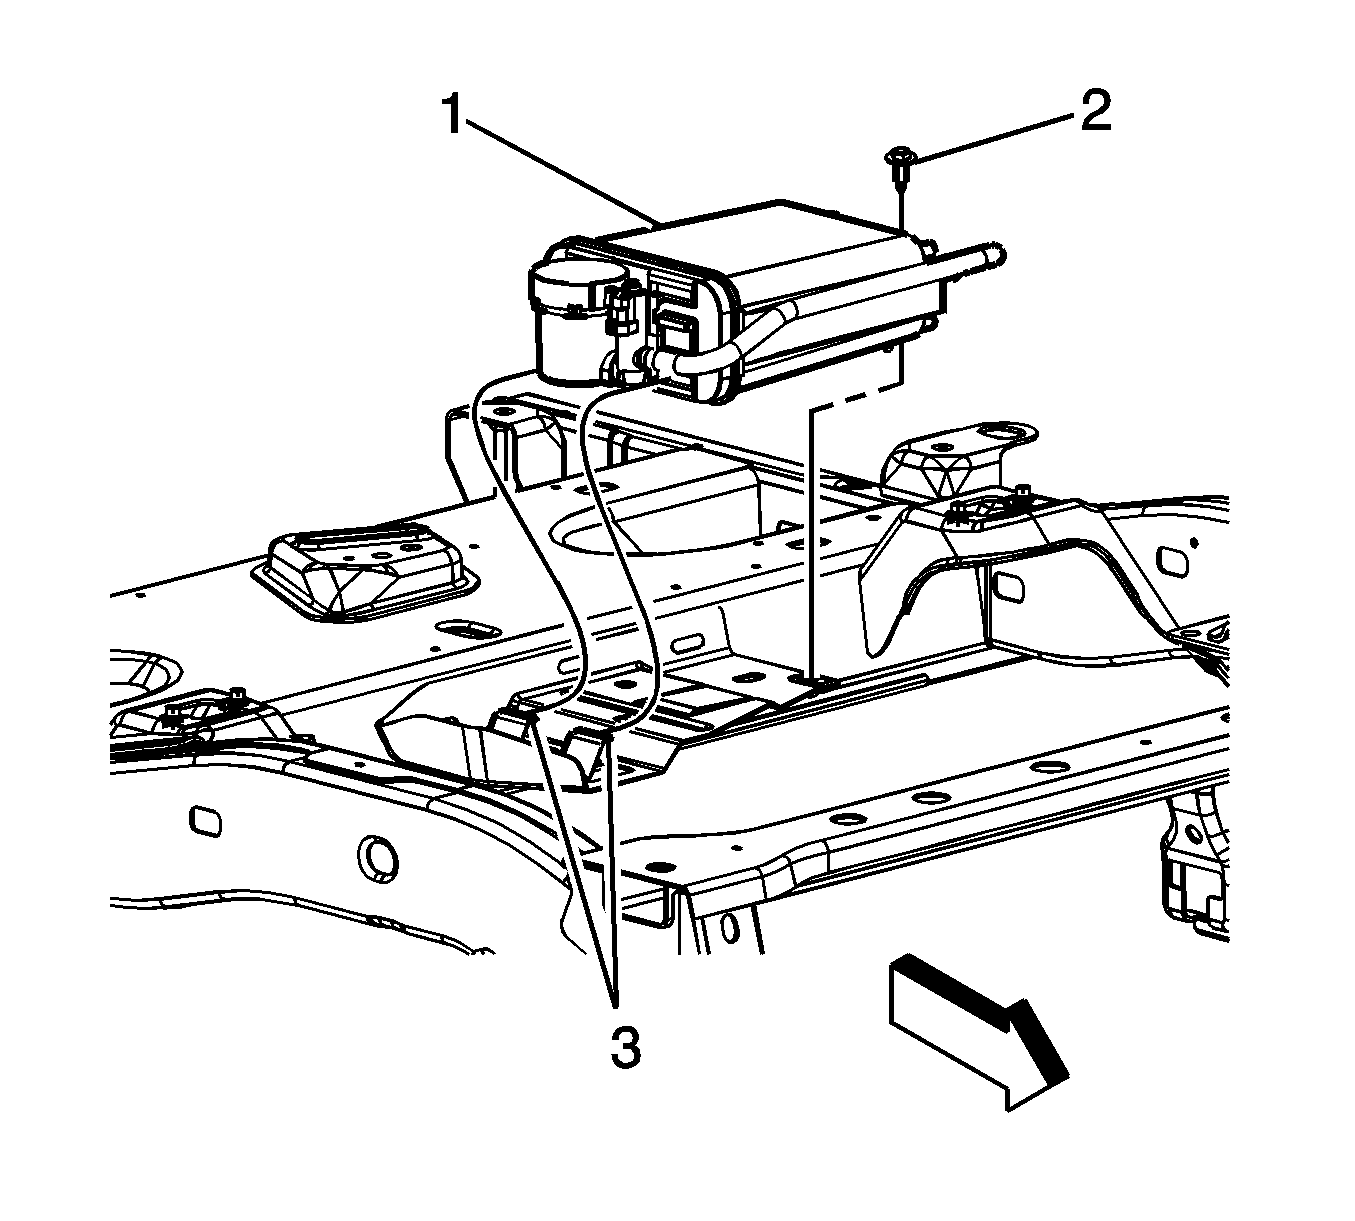
- Disconnect the electrical connector from the evaporative emission (EVAP) canister vent solenoid valve (4).
- Disengage the bracket retaining tab and remove the EVAP canister vent solenoid valve (4).
- Refer to Plastic Collar Quick Connect Fitting Service in order to disconnect the following from the EVAP canister (5):
- Remove the bolt (2) securing the EVAP canister (1) to the crossmember.
- Disengage the EVAP canister (1) from the crossmember bracket tabs (3).
- Remove the EVAP canister (1) from the vehicle.
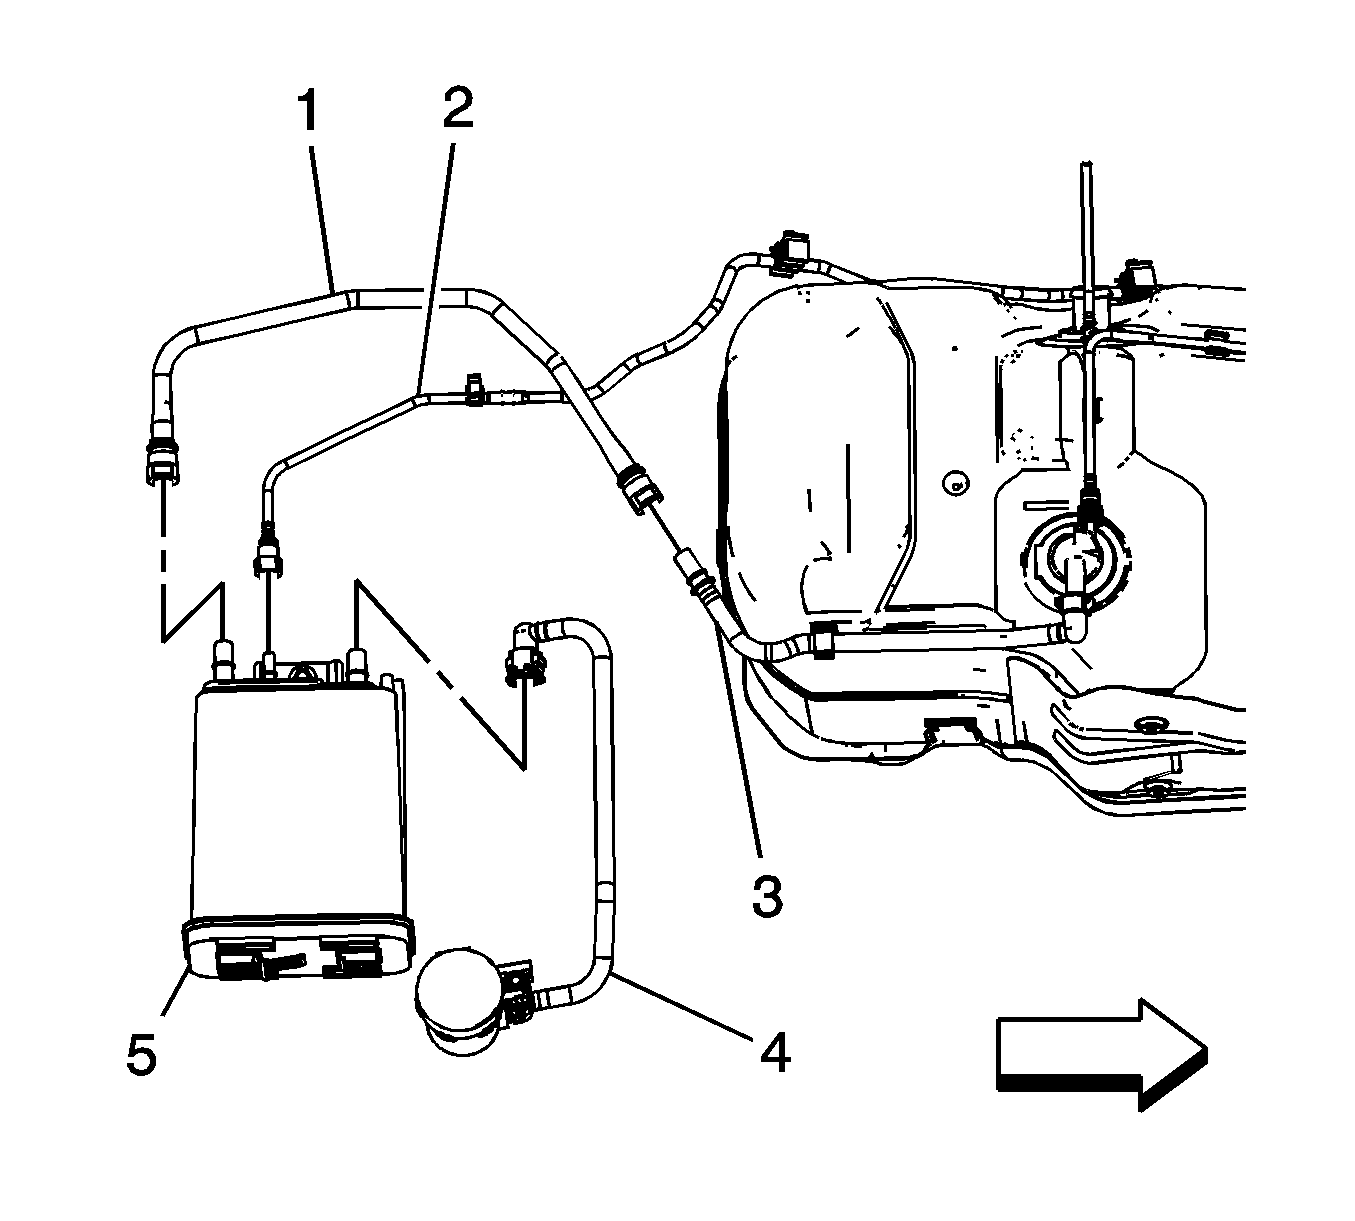
| • | The EVAP vent hose (1) |
| • | The EVAP chassis hose/pipe (2) |
| • | The EVAP canister vent solenoid valve (4) |
Installation Procedure
- Position the EVAP canister (1) to the crossmember bracket tabs (3).
- Install the bolt (2) securing the EVAP canister (1) to the crossmember.
- Slide the EVAP canister vent solenoid valve (4) over the bracket.
- Refer to Plastic Collar Quick Connect Fitting Service in order to connect the following to the EVAP canister (5):
- Connect the electrical connector to the EVAP canister vent solenoid valve (4).
- Lower the vehicle.
Notice: Refer to Fastener Notice in the Preface section.
Tighten
Tighten the evaporative emission (EVAP) canister bolt to 25 N·m(18 lb ft).
Ensure the valve (4) is properly retained to the bracket.
| • | The EVAP vent hose (1) |
| • | The EVAP chassis hose/pipe (2) |
| • | The EVAP canister vent solenoid valve (4) |
