Important: Make sure all of the tools, the differential side bearing bores, and
the pinion bearing cups are clean before proceeding.
- Lubricate the pinion bearings with axle lubricant. Refer to
Fluid and Lubricant Recommendations
in Maintenance
and Lubrication.
- Install the pinion bearings into the axle housing.
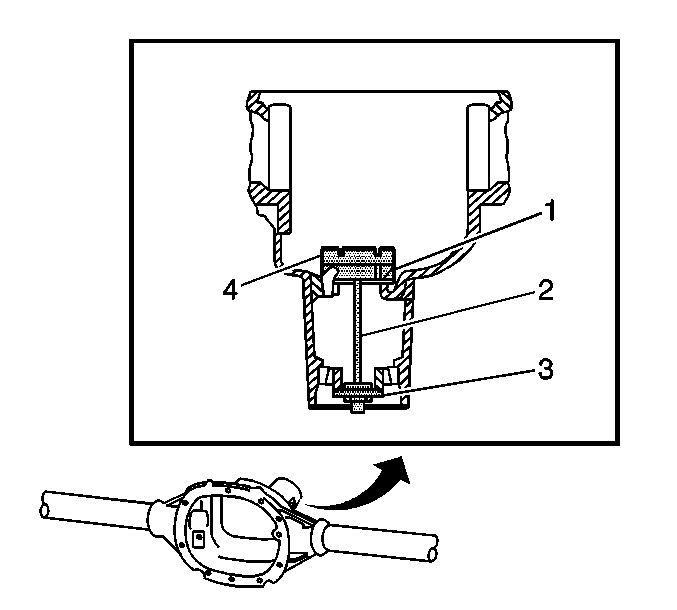
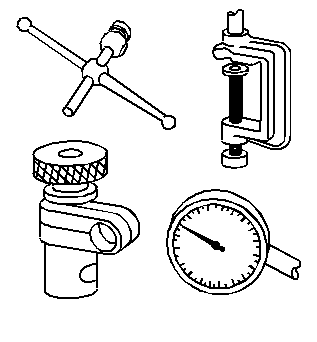
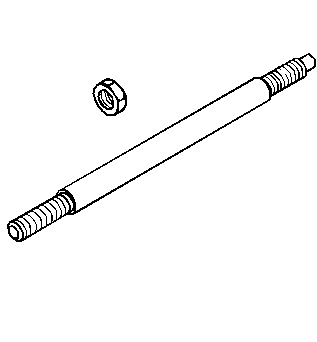
- Assemble the J 21777-40
(1), the J 21777-43
(2), the J 21777-42
(3), and the J 23597-11
(4) as shown.
Notice: Use the correct fastener in the correct location. Replacement fasteners
must be the correct part number for that application. Fasteners requiring
replacement or fasteners requiring the use of thread locking compound or sealant
are identified in the service procedure. Do not use paints, lubricants, or
corrosion inhibitors on fasteners or fastener joint surfaces unless specified.
These coatings affect fastener torque and joint clamping force and may damage
the fastener. Use the correct tightening sequence and specifications when
installing fasteners in order to avoid damage to parts and systems.
- While holding the J 21777-43
stationary, install an inch-pound torque wrench on the nut of the J 21777-43
.
Tighten
Tighten the nut on the J 21777-43
until a rotating torque of 1.7-2.8 N·m (15-25 lb in)
is obtained.
Rotate the assembly several times in both directions in order to seat
the pinion bearings.
- Check the rotating torque of the assembly. If the rotating torque
is less than 1.7 N·m (15 lb in), continue to tighten
the nut on the J 21777-43
until a rotating torque of 1.7-2.8 N·m (15-25 lb in)
is obtained.
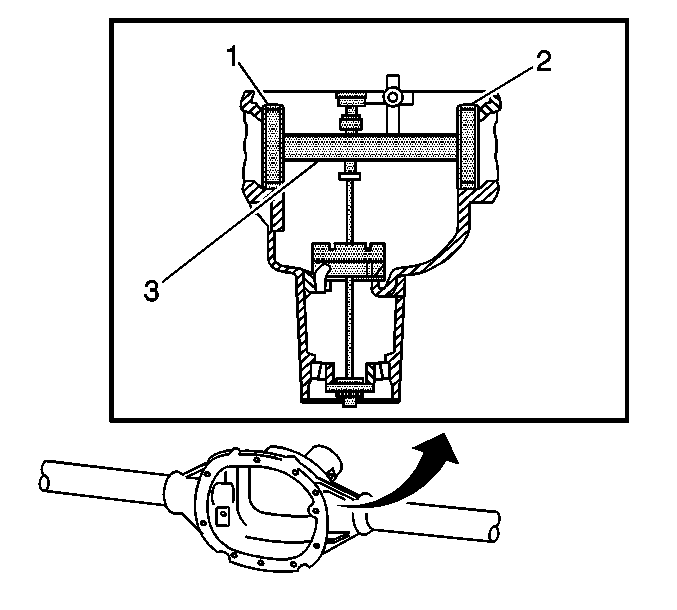
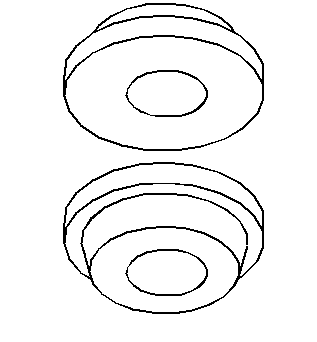
- Assemble the J 21777-45
(1, 2) to the J 23597-1
(3) and install into the differential carrier bore of the axle housing
as shown.
- Install the bearing caps.
- Install the bearing cap bolts.
Tighten
Tighten the bearing cap bolts to 75 N·m (55 lb ft).
- Rotate the J 23597-1
within the J 21777-45
. The J 23597-1
must rotate back and forth freely within the discs. If the J 23597-1
does not rotate freely, disassemble
the components, inspect for proper seating and/or mis-aligned components
and re-assemble.
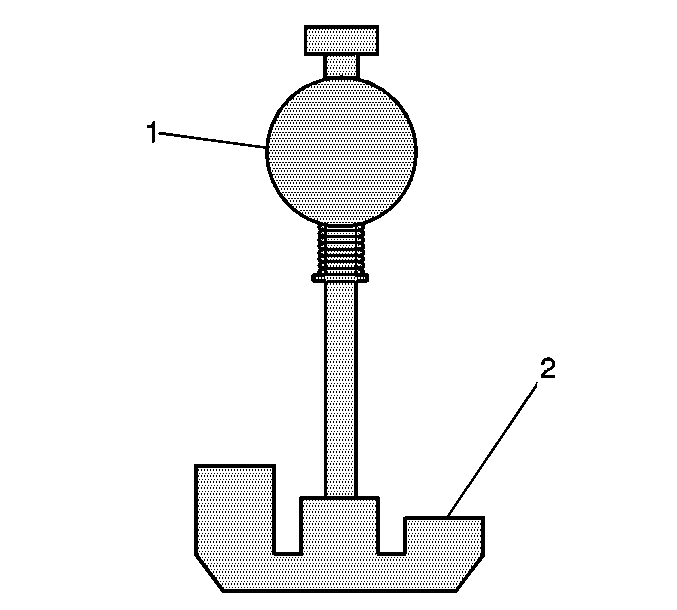
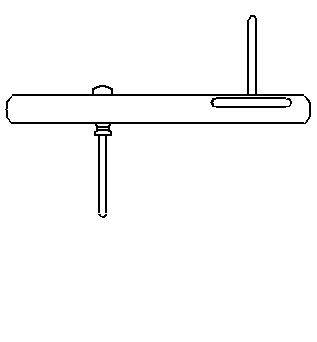
- Align the plunger of the J 23597-1
(1) to the J 23597-11
(2).
- Install the J 8001
to the J 23597-1
as follows:
| 11.2. | Place the contact pad of the J 8001
onto the mounting post of the J 23597-1
. |
| 11.3. | With the contact pad of the J 8001
touching the mounting post of the J 23597-1
, loosen the lock nut on the J 8001
and push down on the J 8001
until the needle the J 8001
has turned 3/4 of a turn clockwise. |
| 11.4. | Tighten the clamp on the J 8001
finger tight. |
- Move the plunger of the J 23597-1
back and forth until the needle of the J 8001
indicates the greatest deflection.
The deflection is the point where the needle changes direction.
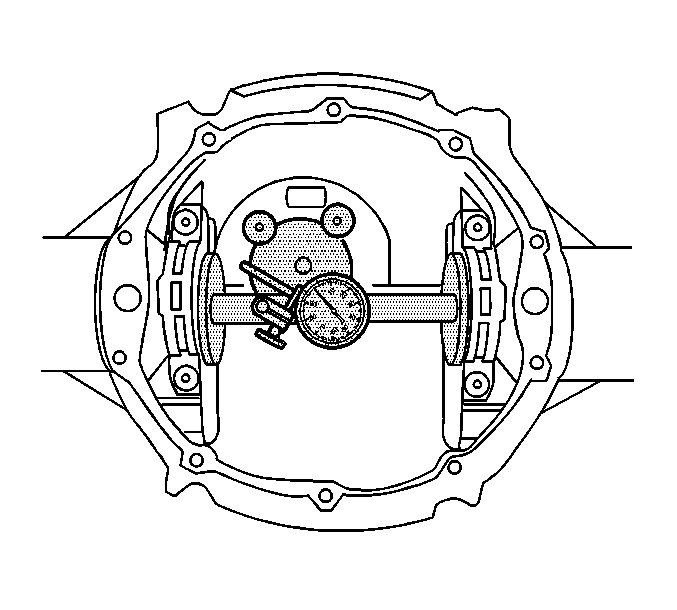
- At the greatest point
of deflection, move the housing of the J 8001
until the needle indicates zero.
- Move the plunger of the J 23597-1
back and forth again to verify the zero setting. Adjust
the housing of the J 8001
as
necessary to set the needle to zero.
- Rotate the plunger of the J 23597-1
from the J 23597-11
until it no longer touches theJ 23597-11
.
- The value indicated on the J 8001
is the thickness of the shim needed in order to set the depth
of the pinion.
- Select the shim that indicates the proper thickness. Measure the
shim with a micrometer in order to verify that the thickness is correct.
- Remove the pinion depth setting tools.
- Remove the pinion bearings.
- Install the pinion shim between the pinion gear and the inner
pinion bearing. Refer to
Drive Pinion Bearings Replacement
.
