DTC 81 Fuel Pump Relay Control Circuit
Diagnostic Instructions
| • | Perform the Powertrain On Board Diagnostic (OBD) System Check prior to using this diagnostic procedure. |
| • | Review Strategy Based Diagnosis for an overview of the diagnostic approach. |
| • | Diagnostic Procedure Instructions provide an overview of each diagnostic category. |
DTC Descriptors
DTC 81: Fuel Pump Relay Control CircuitDiagnostic Fault Information
Circuit | Short to Ground | Open/High Resistance | Short to Voltage | Signal Performance |
|---|---|---|---|---|
Battery Voltage - Relay Switch | 1 | 2 | -- | -- |
Fuel Pump Supply Voltage | 1 | 2 | 3 | -- |
Fuel Pump Relay Control | 3 | 81 | 81 | -- |
Fuel Pump Relay Coil Ground | -- | 81 | -- | -- |
| ||||
Circuit/System Description
The engine control module (ECM) provides a ground to the coil side of the fuel pump relay whenever the engine is cranking or running. The control module enables the fuel pump relay as long as the engine is cranking or running, and ignition system reference pulses are received. If no ignition system reference pulses are received, the control module turns OFF the fuel pump. The fuel pump relay control circuit is equipped with a feedback circuit that is monitored by the ECM. The ECM can determine if the control circuit is open, shorted to ground, or shorted to a voltage by monitoring the feedback voltage.
Reference Information
Schematic Reference
Connector End View Reference
Engine Control Module Connector End Views
Electrical Information Reference
Scan Tool Reference
Engine Control Module Scan Tool Information
Circuit/System Verification
- Cycle the ignition ON and OFF. You should hear or feel an audible click from the fuel pump relay. Repeat as necessary in order to verify operation.
- Attempt to start the engine. Observe the DTC information with a scan tool. DTC 81 - Fuel Pump Relay Control Circuit should not set.
Circuit/System Testing
- Ignition OFF, disconnect the fuel pump relay.
- Ignition ON, test for B+ between the ignition voltage circuit terminal 86 and ground.
- Ignition OFF, connect a test lamp between the control circuit terminal 85 and B+.
- Ignition ON, the test lamp should turn ON for approximately 3 seconds and then OFF. Repeat as necessary in order to verify operation.
- If all circuits/connections test normal, test or replace the fuel pump relay.
| ⇒ | If less than the specified range, repair the open/high resistance in ignition voltage circuit of the fuel pump relay. |
| ⇒ | If the test lamp remains OFF all the time, test the control circuit for a short to ground or an open/high resistance. If circuit/connections test normal, replace the ECM. |
| ⇒ | If the test lamp remains ON all the time, test the control circuit for a short to voltage. If circuit/connections test normal, replace the ECM. |
Component Testing
- Test for 70-110 ohms between terminals 85 and 86 of the fuel pump relay.
- Test for infinite resistance between the following terminals of the fuel pump relay:
- Connect a 20A fused jumper wire from the positive terminal of the battery to relay terminal 86. Connect a jumper wire from the negative terminal of the battery to relay terminal 85. Test for less than 2 ohms between terminals 30 and 87 of the relay.
| ⇒ | If not within the specified range, replace the fuel pump relay. |
| • | 30 and 86 |
| • | 30 and 87 |
| • | 30 and 85 |
| • | 85 and 87 |
| ⇒ | If continuity is detected, replace the fuel pump relay. |
| ⇒ | If greater than the specified range, replace the fuel pump relay. |
Repair Instructions
Perform the Diagnostic Repair Verification after completing the diagnostic procedure.
| • | Engine Control Module Replacement for engine control module replacement, setup, and programming |
DTC 81 Fuel Injector A or B Control Circuit
Diagnostic Instructions
| • | Perform the Powertrain On Board Diagnostic (OBD) System Check prior to using this diagnostic procedure. |
| • | Review Strategy Based Diagnosis for an overview of the diagnostic approach. |
| • | Diagnostic Procedure Instructions provide an overview of each diagnostic category. |
DTC Descriptors
DTC 81: Fuel Injector A or B Control CircuitCircuit/System Description
The engine control module (ECM) enables the fuel injectors for each cylinder group. Ignition voltage is supplied to the fuel injectors. The ECM controls each fuel injector group by grounding the control circuit via a solid state device called a driver. The ECM monitors the status of each driver.
Diagnostic Aids
The following fuel injectors correspond the appropriate Diagnostic Trouble Code (DTC).
DTC 81 - Fuel Injector A Control Circuit
| • | Fuel Injector 1 |
| • | Fuel Injector 4 |
| • | Fuel Injector 6 |
| • | Fuel Injector 7 |
DTC 81 - Fuel Injector B Control Circuit
| • | Fuel Injector 2 |
| • | Fuel Injector 3 |
| • | Fuel Injector 5 |
| • | Fuel Injector 8 |
Reference Information
Schematic Reference
Connector End View Reference
Engine Control Module Connector End Views
Electrical Information Reference
Scan Tool Reference
Engine Control Module Scan Tool Information
Special Tools
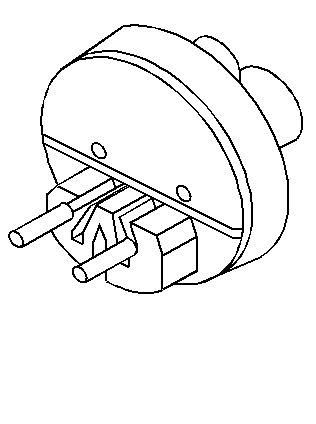
J 34730-405 Injector Test Lamp
Circuit/System Verification
Engine idling, observe the DTC information with a scan tool. DTC 81 - Fuel Injector A or B Control Circuit should not set.
Circuit/System Testing
- Ignition OFF, disconnect the harness connector at one of the appropriate fuel injectors. Refer to Diagnostic Aids.
- Ignition ON, verify that a test lamp illuminates between the ignition 1 voltage circuit terminal B and ground.
- Ignition OFF, connect a J 34730-405 between the control circuit terminal A and the ignition 1 voltage circuit terminal B.
- Engine idling, the test lamp should flash.
- If all circuits test normal, test or replace the fuel injector.
| ⇒ | If the test lamp does not illuminate, repair the ignition 1 voltage circuit for a short to ground or an open/high resistance. Replace the fuse if necessary. |
| ⇒ | If the test lamp is always ON, test the control circuit for a short to ground. If circuit tests normal, replace the ECM. |
| ⇒ | If the test lamp is always OFF, test the control circuit for a short to voltage or an open/high resistance. If circuit tests normal, replace the ECM. |
Component Testing
- Ignition OFF, disconnect the harness connector at the appropriate fuel injector.
- Test for 11-14 ohms between the ignition 1 voltage terminal A and the control terminal B.
- Test for infinite resistance between both fuel injector terminals and the fuel injector housing.
- If less than the specified range, replace the fuel injector.
Important: The engine coolant temperature (ECT) sensor must be between 10-32°C (50-90°F) in order for an accurate measurement.
| ⇒ | If not within the specified range, replace the fuel injector. |
Repair Instructions
Perform the Diagnostic Repair Verification after completing the diagnostic procedure.
| • | Engine Control Module Replacement for engine control module replacement, setup, and programming |
DTC 81 5 Volt Reference Circuit Out of Range
Diagnostic Instructions
| • | Perform the Powertrain On Board Diagnostic (OBD) System Check prior to using this diagnostic procedure. |
| • | Review Strategy Based Diagnosis for an overview of the diagnostic approach. |
| • | Diagnostic Procedure Instructions provide an overview of each diagnostic category. |
DTC Descriptors
DTC 81: 5-Volt Reference Circuit Out of RangeDiagnostic Fault Information
Circuit | Short to Ground | Open/High Resistance | Short to Voltage | Signal Performance |
|---|---|---|---|---|
Manifold Absolute Pressure (MAP) Sensor 5-Volt Reference Circuit | 81, 34 | 34 | 81, 33 | -- |
Throttle Position (TP) Sensor 5-Volt Reference Circuit | 81, 22 | 22 | 81, 21 | -- |
Circuit/System Description
The engine control module (ECM) has 2 5-volt reference circuits. The ECM provides the 5-volt reference to various sensors. Each reference circuit provides a 5-volt reference for greater than one sensor. A short to ground or voltage on one of the 5-volt reference circuits will affect all components connected to that 5-volt reference circuit. The ECM monitors the voltage on the 5-volt reference circuits.
Diagnostic Aids
If a shared 5-volt reference circuit is shorted to ground or shorted to a voltage, other 5-volt reference circuits may be affected.
The 5-volt reference circuit provides 5 volts to the following sensors:
| • | The manifold absolute pressure (MAP) sensor |
| • | The throttle position (TP) sensor |
Reference Information
Schematic Reference
Connector End View Reference
Engine Control Module Connector End Views
Electrical Information Reference
Scan Tool Reference
Engine Control Module Scan Tool Information
Circuit/System Verification
Ignition ON, observe the DTC information with a scan tool. DTC 81-5 Volt Reference Circuit Out of Range should not set.
Circuit/System Testing
- Ignition OFF, disconnect the harness connector at the MAP sensor and the TP sensor.
- Ignition ON, test for 4.8-5.2 volts between one of the 5-volt reference circuits and ground.
- Connect each component associated with the 5-volt reference circuit one at a time while monitoring the DMM. The voltage should remain within 4.8-5.2 volts.
- If all circuits test normal, replace the ECM.
Important: Additional DTCs will set when disconnecting the components.
| ⇒ | If less than the specified range, test for a short to ground on both of the 5-volt reference circuits. If all circuits test normal, replace the ECM. |
| ⇒ | If greater than the specified range, test for a short to voltage on the 5-volt reference circuit for each component. If both circuits test normal, replace the ECM. |
Important: A short to voltage on the signal circuit of certain components may cause this DTC to set.
| ⇒ | If less than the specified range when a component is connected, replace the component. |
| ⇒ | If greater than the specified range when a component is connected, test the component signal circuit for a short to voltage. |
Repair Instructions
Perform the Diagnostic Repair Verification after completing the diagnostic procedure.
| • | Engine Control Module Replacement for ECM replacement, setup, and programming |
DTC 81 Depspower Circuit Out of Range
Diagnostic Instructions
| • | Perform the Powertrain On Board Diagnostic (OBD) System Check prior to using this diagnostic procedure. |
| • | Review Strategy Based Diagnosis for an overview of the diagnostic approach. |
| • | Diagnostic Procedure Instructions provide an overview of each diagnostic category. |
DTC Descriptors
DTC 81: Depspower Circuit Out of RangeCircuit/System Description
The engine control module (ECM) has 2 5-volt reference circuits. The ECM provides the 5-volt reference to various sensors. Each reference circuit provides a 5-volt reference for greater than one sensor. A short to ground or voltage on one of the 5-volt reference circuits will affect all components connected to that 5-volt reference circuit. The ECM monitors the voltage on the 5-volt reference circuits.
Diagnostic Aids
If a shared 5-volt reference circuit is shorted to ground or shorted to a voltage, other 5-volt reference circuits may be affected.
The depspower circuit provides 5 volts to the following sensors:
| • | The crankshaft position (CKP) sensor |
| • | The camshaft position (CMP) sensor |
Reference Information
Schematic Reference
Connector End View Reference
Engine Control Module Connector End Views
Electrical Information Reference
Scan Tool Reference
Engine Control Module Scan Tool Information
Circuit/System Verification
Ignition ON, observe the DTC information with a scan tool. DTC 81-Depspower Circuit Out of Range should not set.
Circuit/System Testing
- Ignition OFF, disconnect the harness connector at the CKP sensor and the CMP sensor.
- Ignition ON, test for 4.8-5.2 volts between one of the 5-volt reference circuits and ground.
- Connect each component associated with the 5-volt reference circuit one at a time while monitoring the DMM. The voltage should remain within 4.8-5.2 volts.
- If all circuits test normal, replace the ECM.
Important: Additional DTCs will set when disconnecting the components.
| ⇒ | If less than the specified range, test for a short to ground on both of the 5-volt reference circuits. If all circuits test normal, replace the ECM. |
| ⇒ | If greater than the specified range, test for a short to voltage on the 5-volt reference circuit for each component. If both circuits test normal, replace the ECM. |
Important: A short to voltage on the signal circuit of certain components may cause this DTC to set.
| ⇒ | If less than the specified range when a component is connected, replace the component. |
| ⇒ | If greater than the specified range when a component is connected, test the component signal circuit for a short to voltage. |
Repair Instructions
Perform the Diagnostic Repair Verification after completing the diagnostic procedure.
| • | Engine Control Module Replacement for ECM replacement, setup, and programming |
DTC 81 Crankshaft Position Sensor Circuit
Diagnostic Instructions
| • | Perform the Powertrain On Board Diagnostic (OBD) System Check prior to using this diagnostic procedure. |
| • | Review Strategy Based Diagnosis for an overview of the diagnostic approach. |
| • | Diagnostic Procedure Instructions provide an overview of each diagnostic category. |
DTC Descriptors
DTC 81: Crankshaft Position (CKP) Sensor CircuitCircuit/System Description
The crankshaft position (CKP) sensor signal indicates the crankshaft speed and position. The CKP sensor produces an AC voltage of different amplitude and frequency. The frequency depends on the velocity of the crankshaft, and the AC voltage output depends on the crankshaft position and battery voltage. The CKP sensor works in conjunction with a 24X reluctor wheel attached to the crankshaft. The engine control module (ECM) can synchronize the ignition timing, fuel injector timing, and spark knock control based on the CKP and the camshaft position (CMP) sensor inputs.
Diagnostic Aids
The following conditions could also set the DTCs:
| • | Physical damage to the CKP sensor or the reluctor wheel |
| • | Excessive play or looseness of the CKP sensor or the reluctor wheel |
| • | Improper installation of the CKP sensor or the reluctor wheel |
| • | Foreign material passing between the CKP sensor and the reluctor wheel |
| • | Excessive air gap between the CKP sensor and the reluctor wheel |
Reference Information
Schematic Reference
Connector End View Reference
Engine Control Module Connector End Views
Electrical Information Reference
Scan Tool Reference
Engine Control Module Scan Tool Information
Circuit/System Verification
- Attempt to start the engine, observe the DTC information with a scan tool. DTC 81-Crankshaft Position (CKP) Sensor Circuit should not set.
- Move related harnesses/connectors of the CKP sensor and verify the engine does not stumble, stall, or change engine speed.
Important: If you were sent here from Engine Cranks but Does Not Run, proceed to Circuit/System Testing.
Circuit/System Testing
- Ignition OFF, disconnect the harness connector at the CKP sensor.
- Test for less than 5 ohms between the low reference circuit terminal B and ground.
- Ignition ON, test for 4.8-5.2 volts between the 5-volt reference circuit terminal A and ground.
- Test for 2-3 volts between the signal circuit terminal C and ground.
- If all circuits test normal, replace the CKP sensor.
| ⇒ | If greater than the specified range, test the low reference circuit for an open/high resistance. If the circuit tests normal, replace the ECM. |
| ⇒ | If less than the specified range, test the 5-volt reference circuit for a short to ground or an open/high resistance. If the circuit tests normal, replace the ECM. |
| ⇒ | If greater than the specified range, test the 5-volt reference circuit for a short to voltage. If the circuit tests normal, replace the ECM. |
| ⇒ | If less than the specified range, test the signal circuit for a short to ground or an open/high resistance. If the circuit tests normal, replace the ECM. |
| ⇒ | If greater than the specified range, test the signal circuit for a short to voltage. If the circuit tests normal, replace the ECM. |
Repair Instructions
Perform the Diagnostic Repair Verification after completing the diagnostic procedure.
| • | Engine Control Module Replacement for ECM replacement, setup, and programming |
DTC 81 Camshaft Position Sensor Circuit
Diagnostic Instructions
| • | Perform the Powertrain On Board Diagnostic (OBD) System Check prior to using this diagnostic procedure. |
| • | Review Strategy Based Diagnosis for an overview of the diagnostic approach. |
| • | Diagnostic Procedure Instructions provide an overview of each diagnostic category. |
DTC Descriptors
DTC 81: Camshaft Position (CMP) Sensor CircuitCircuit/System Description
The camshaft position (CMP) sensor correlates the crankshaft to camshaft position so that the engine control module (ECM) can determine which cylinder is ready to be fueled by an injector. As the camshaft rotates, the reluctor wheel interrupts a magnetic field produced by the sensor which creates a signal that is sent the ECM on the signal circuit.
Diagnostic Aids
The following conditions could also set the DTC:
| • | Physical damage to the CMP sensor or the reluctor wheel |
| • | Excessive play or looseness of the CMP sensor or the reluctor wheel |
| • | Improper installation of the CMP sensor or the reluctor wheel |
| • | Foreign material passing between the CMP sensor and the reluctor wheel |
| • | Excessive air gap between the CMP sensor and the reluctor wheel |
Reference Information
Schematic Reference
Connector End View Reference
Engine Control Module Connector End Views
Electrical Information Reference
Scan Tool Reference
Engine Control Module Scan Tool Information
Circuit/System Verification
Start the engine, observe the DTC information with a scan tool. DTC 81-Camshaft Position (CMP) Sensor Circuit should not set.
Circuit/System Testing
- Ignition OFF, disconnect the harness connector at the CMP sensor.
- Test for less than 5 ohms between the low reference circuit terminal B and ground.
- Ignition ON, test for 4.8-5.2 volts between the 5-volt reference circuit terminal A and ground.
- Test for 2-3 volts between the signal circuit terminal C and ground.
- If all circuits test normal, replace the CMP sensor.
| ⇒ | If greater than the specified range, test the low reference circuit for an open/high resistance. If the circuit tests normal, replace the ECM. |
| ⇒ | If less than the specified range, test the 5-volt reference circuit for a short to ground or an open/high resistance. If the circuit tests normal, replace the ECM. |
| ⇒ | If greater than the specified range, test the 5-volt reference circuit for a short to voltage. If the circuit tests normal, replace the ECM. |
| ⇒ | If less than the specified range, test the signal circuit for a short to ground or an open/high resistance. If the circuit tests normal, replace the ECM. |
| ⇒ | If greater than the specified range, test the signal circuit for a short to voltage. If the circuit tests normal, replace the ECM. |
Repair Instructions
Perform the Diagnostic Repair Verification after completing the diagnostic procedure.
| • | Engine Control Module Replacement for ECM replacement, setup, and programming |
