For 1990-2009 cars only
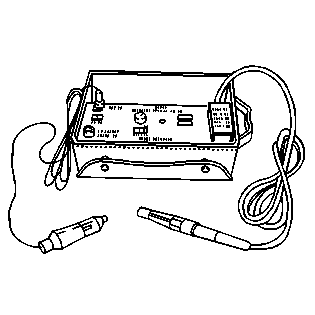
Special Tools
J 39400-A Halogen Leak Detector
Removal Procedure
- Recover the refrigerant from the system. Refer to Refrigerant Recovery and Recharging.
- Drain the engine coolant if necessary. Refer to Cooling System Draining and Filling.
- Raise the vehicle. Refer to Lifting and Jacking the Vehicle.
- Remove the right assist step if necessary. Refer to Assist Step Replacement.
- Remove the rear wheelhouse liner. Refer to Wheelhouse Panel Replacement.
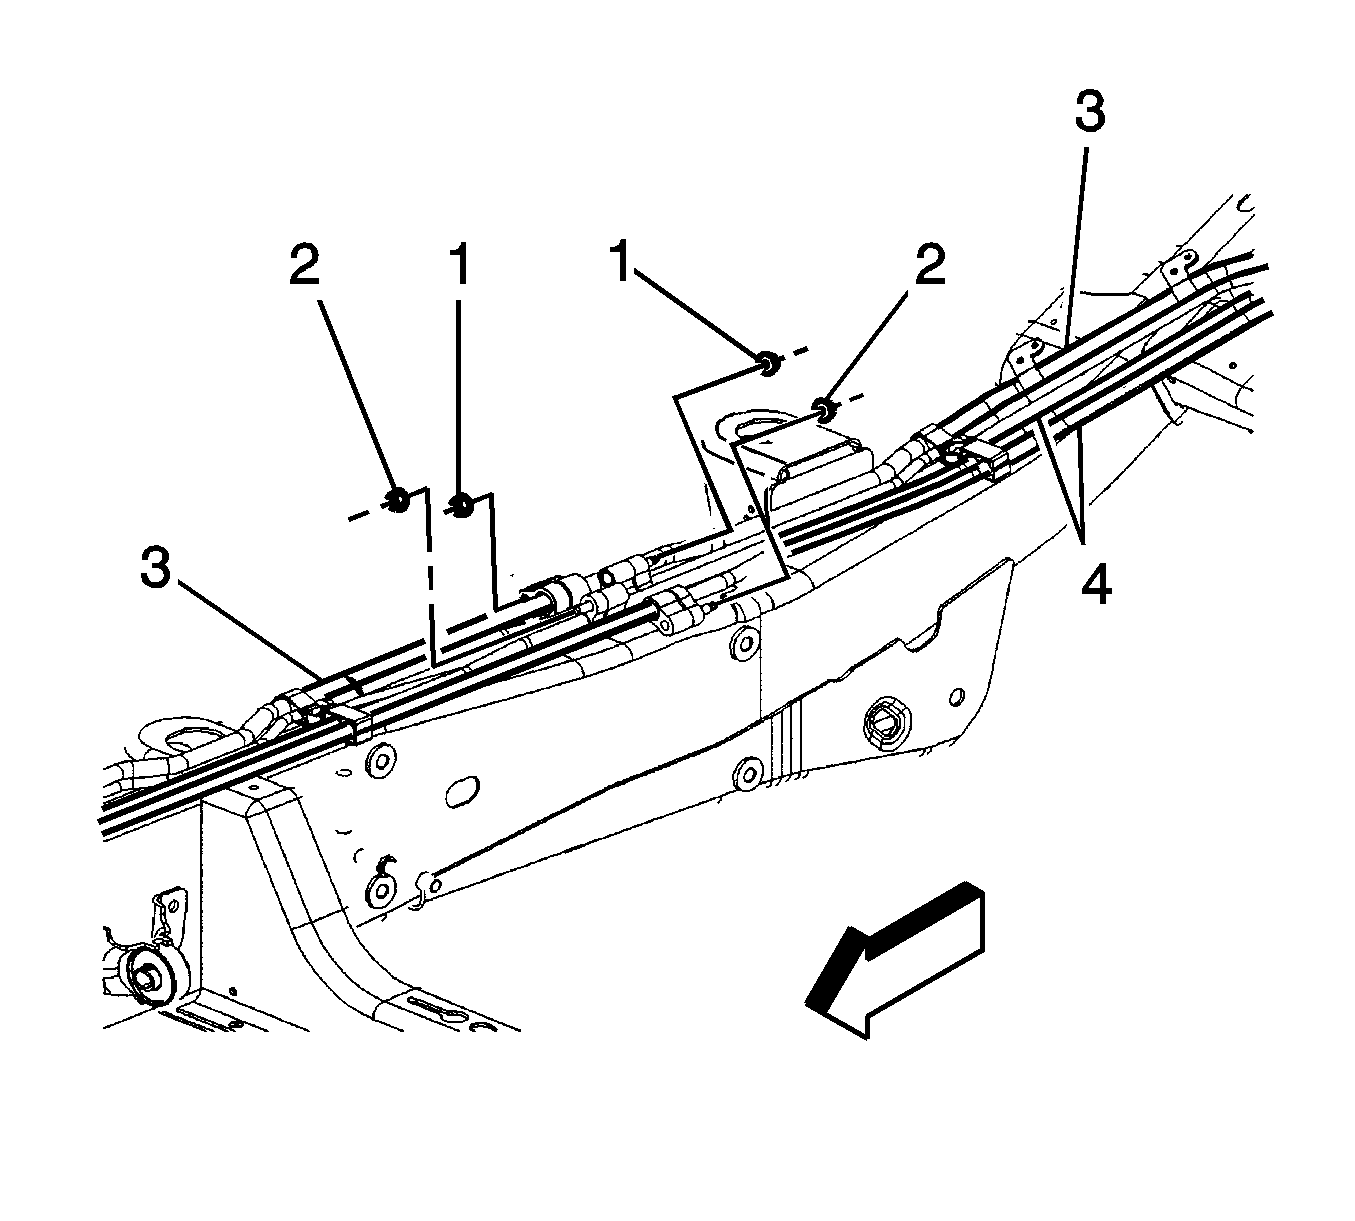
- Remove the auxiliary A/C evaporator tubes connector nuts (1) from the intermediate connection point.
- Remove the auxiliary heater tubes connector nuts (2) if necessary.
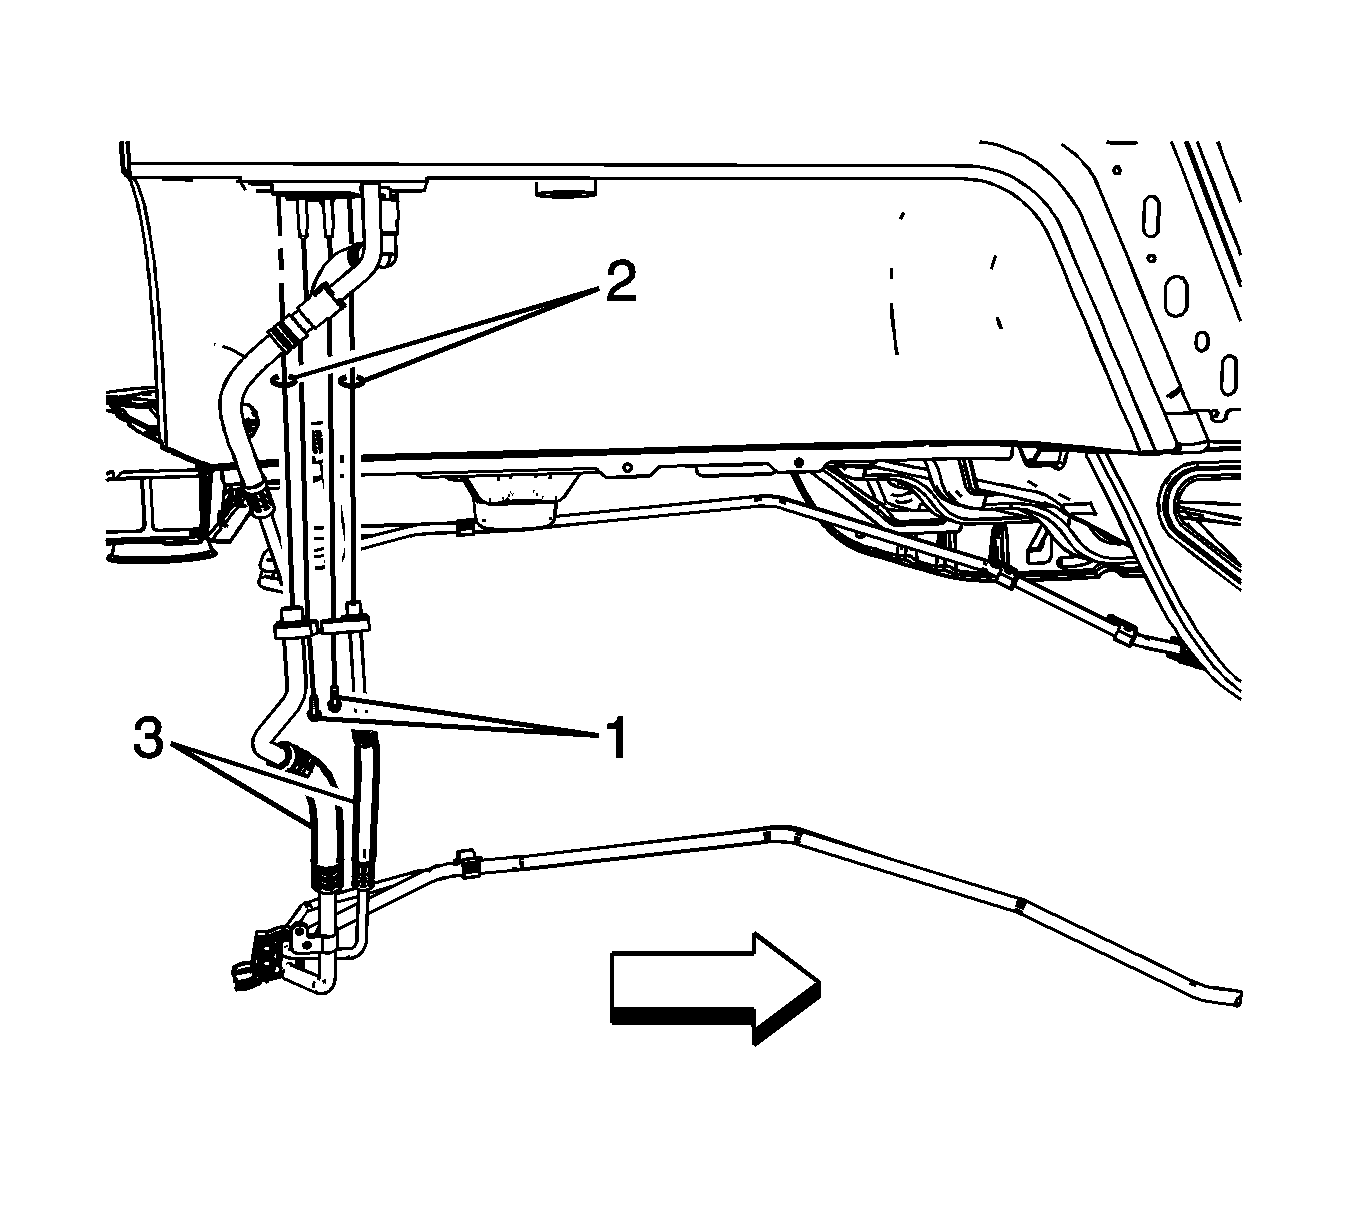
- Remove the retaining nut (1) and the auxiliary A/C evaporator tubes (3) from the auxiliary HVAC module.
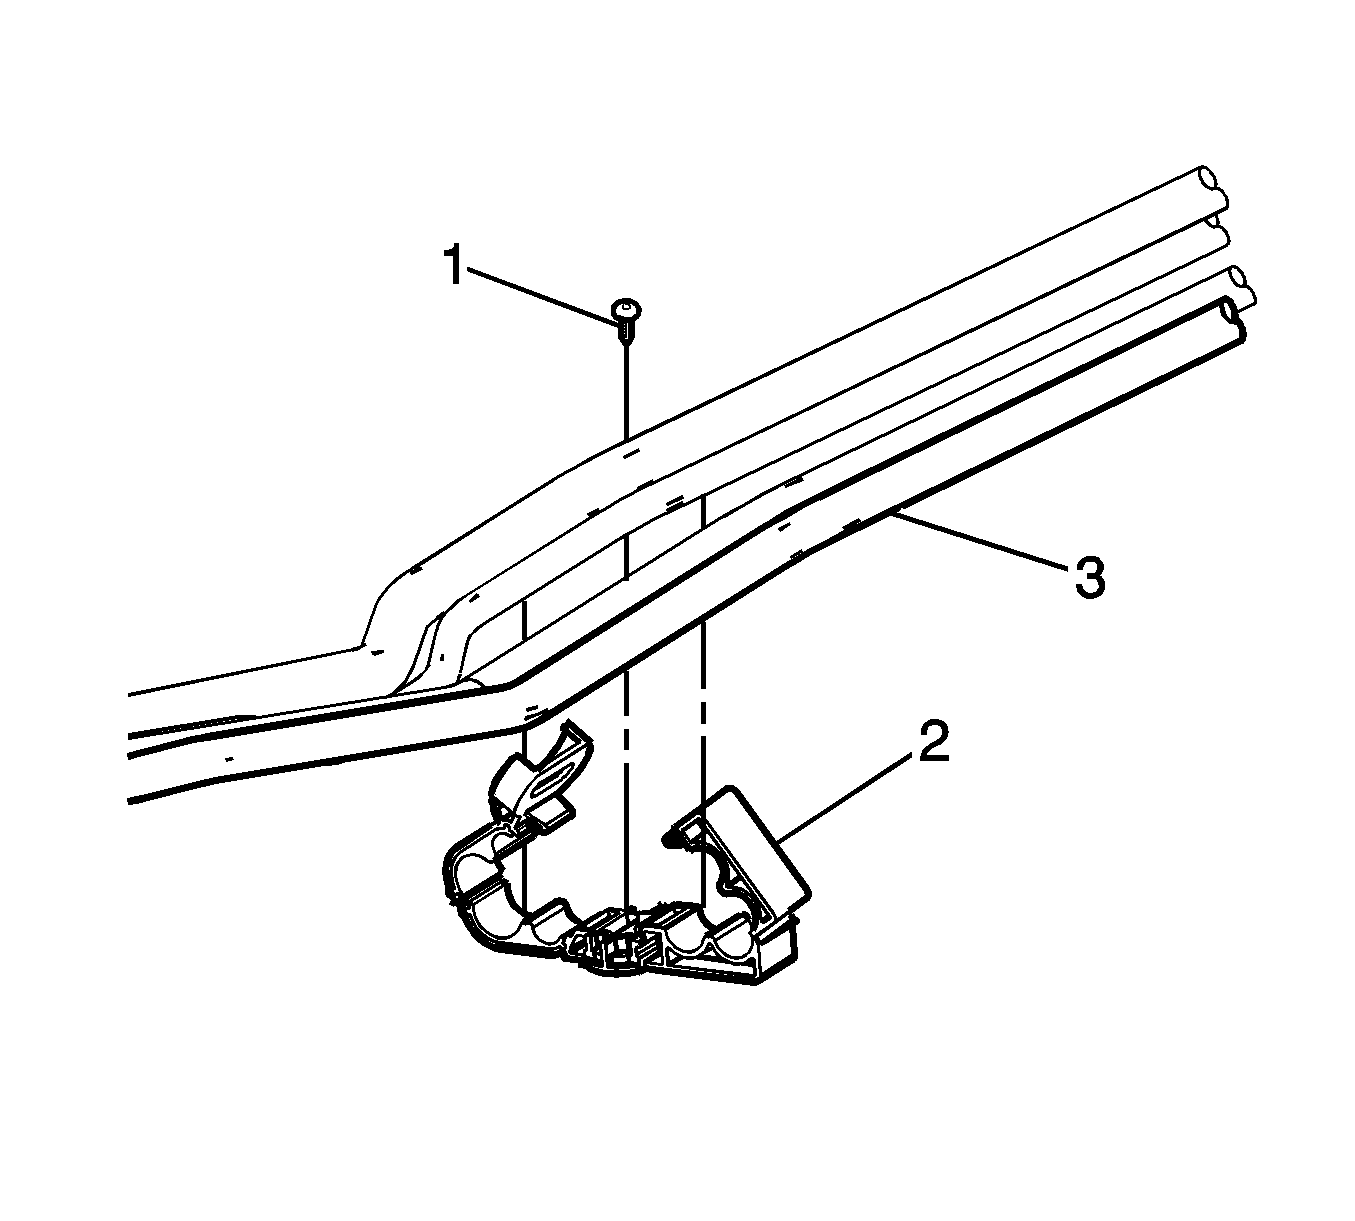
- Remove the heater - A/C tubes retaining push pins (1) at the frame locations.
- Remove the heater - A/C tubes retaining bolt (2) at the frame location.
- Remove the auxiliary A/C evaporator tubes (3) from the frame.
- Remove the auxiliary A/C evaporator tubes from the vehicle.
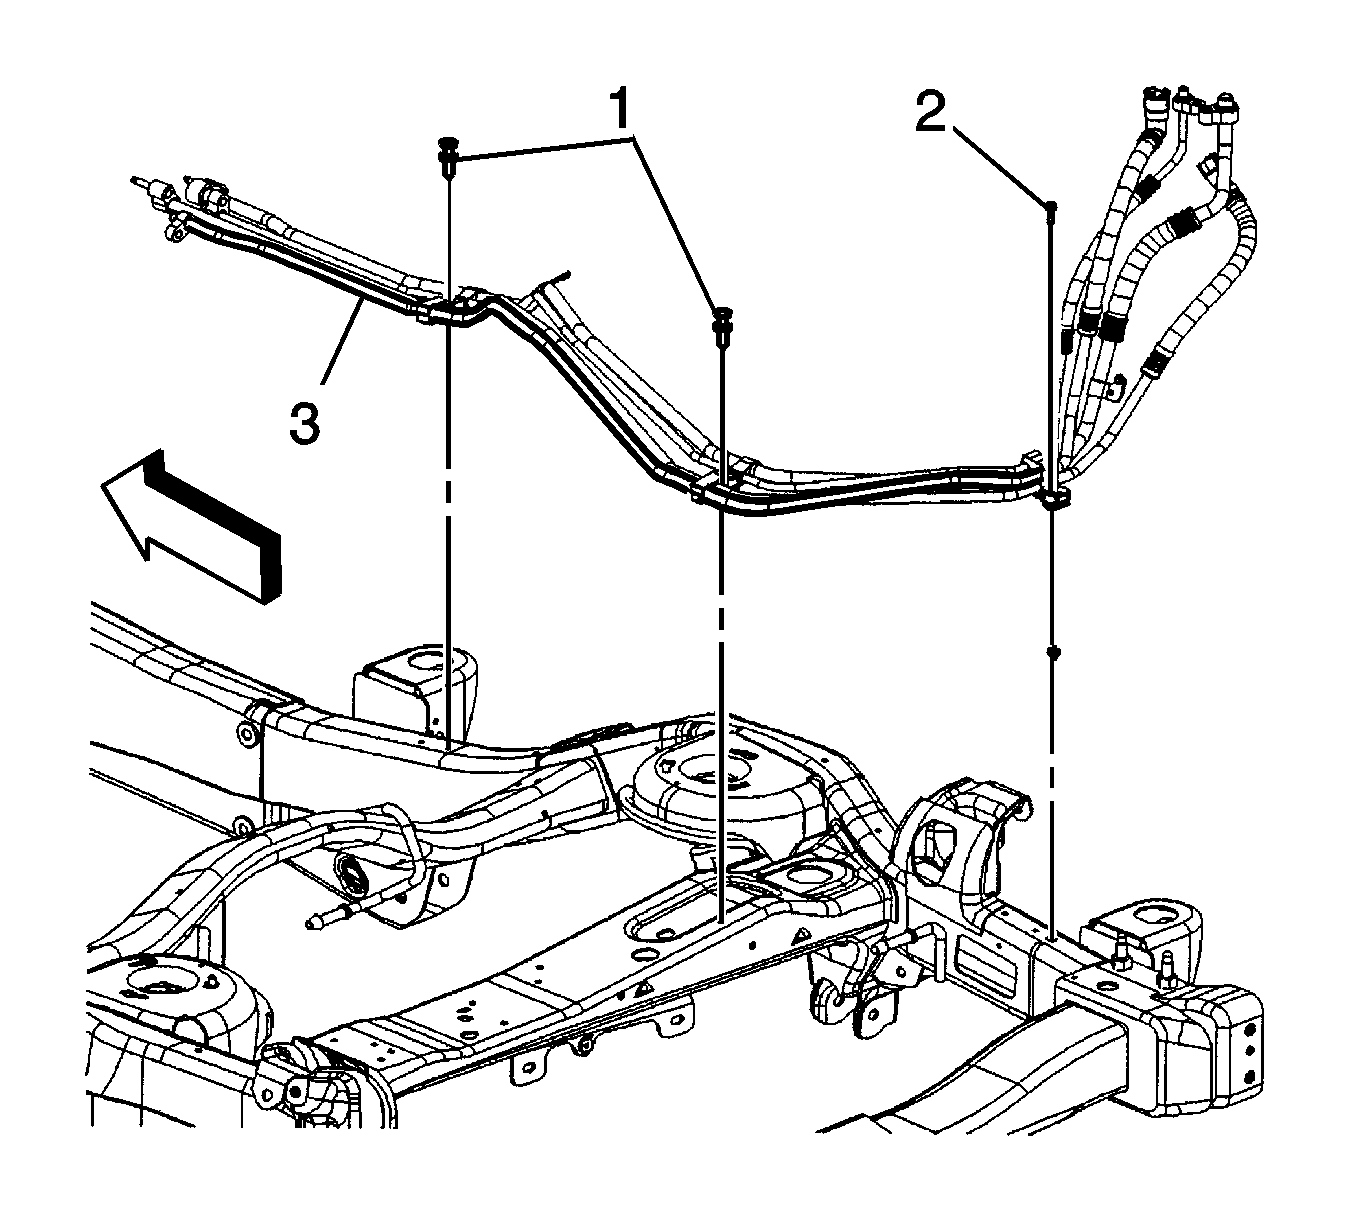
- Remove auxiliary heater - A/C tubes clip retaining push pin/bolt (1) if necessary.
- Use a flat-bladed release tool to open retaining clips (2).
- Remove auxiliary A/C tubes from vehicle.
Installation Procedure
Note: The replacement A/C and heater pipes are shipped in front and rear sections.
- Install the auxiliary A/C evaporator tubes (3) to the retaining clips (2).
- Install the auxiliary A/C evaporator tubes (3) to the vehicle.
- Install the auxiliary heater - A/C tube nut (2).
- Install the auxiliary heater - A/C tube push pins (1).
- Install the auxiliary heater - A/C tubes (3) and the retaining nuts (1) to the auxiliary HVAC module.
- Install new O-rings with replacement auxiliary A/C tubes. Refer to O-Ring Replacement.
- Install new O-rings with replacement auxiliary A/C tubes. Refer to O-Ring Replacement.
- Install the auxiliary heater - A/C tube connection nuts (1) to the intermediate connection point.
- Install the auxiliary heater tubes connector nuts (2) if necessary.
- Install the rear wheelhouse liner. Refer to Wheelhouse Panel Replacement.
- Install the right assist step if necessary. Refer to Assist Step Replacement.
- Lower the vehicle.
- Fill the engine coolant. Refer to Cooling System Draining and Filling.
- Recharge the refrigerant to the system. Refer to Refrigerant Recovery and Recharging.
- Leak test the fittings of the component using the J 39400-A .
Caution: Refer to Fastener Caution in the Preface section.
Tighten
Tighten the nut to 7 N·m (62 lb in).
Tighten
Tighten the nut to 16 N·m (12 lb ft).
Note: Use a adjustable wrench or equivalent holding tool at tube connections to prevent twisting.
Note: Mandatory torque sequence required for proper connections.
Tighten
Tighten the nuts to 16 N·m (12 lb ft).
Tighten
Tighten the nuts to 16 N·m (12 lb ft).
