Removal Procedure
Important: Before the motor/encoder is removed, ensure that the motor/encoder is in the neutral position.
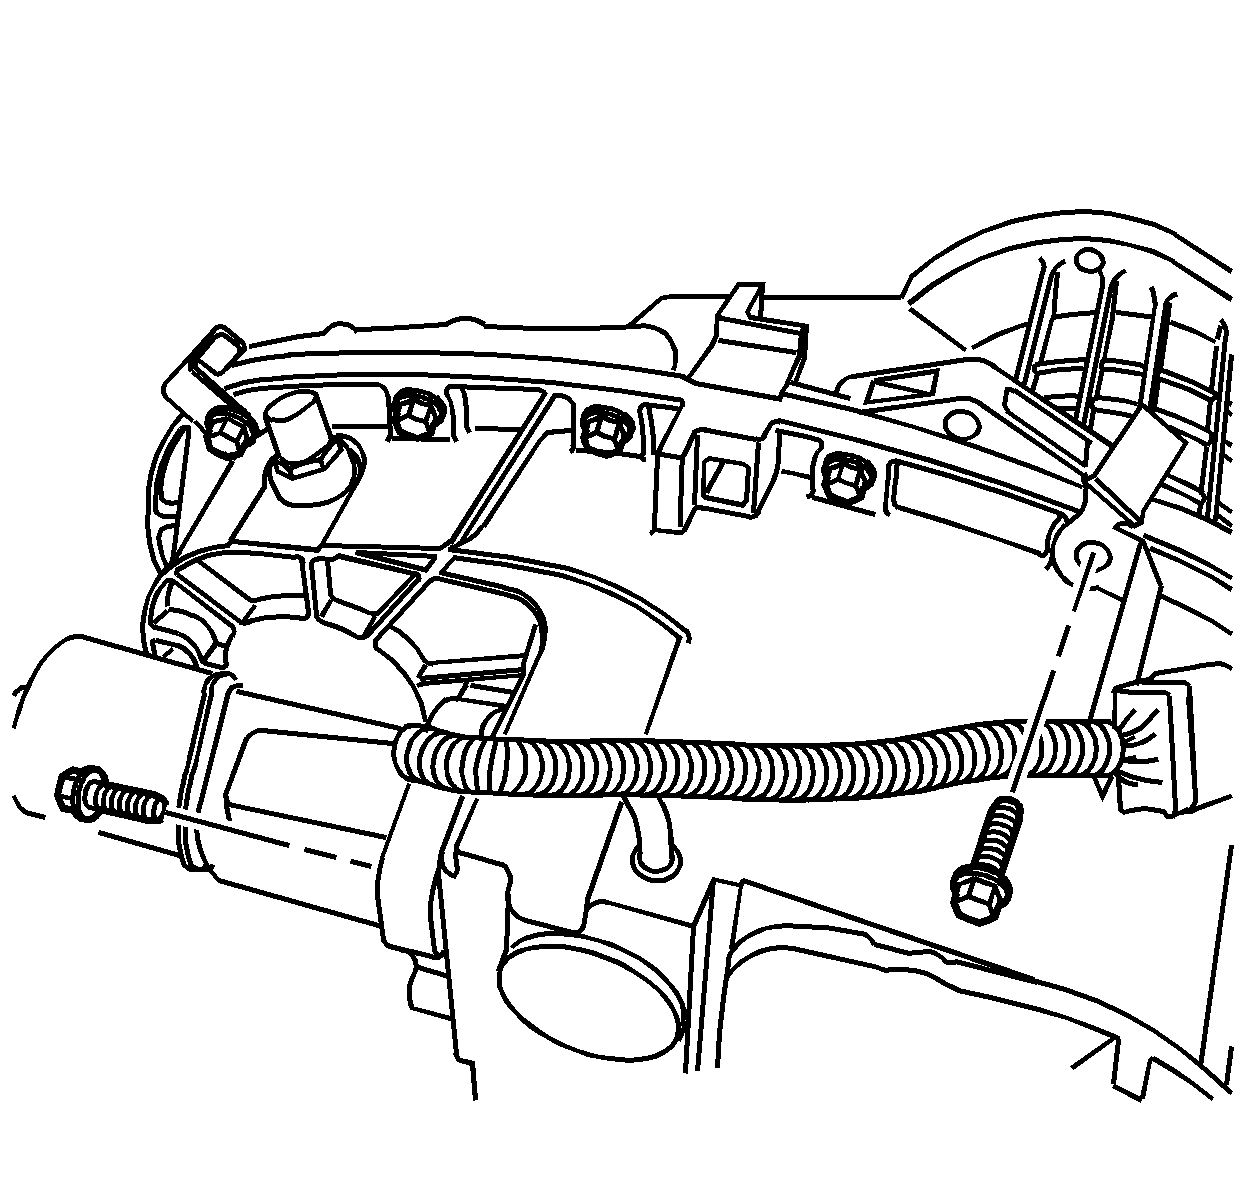
- Raise the vehicle. Refer to Lifting and Jacking the Vehicle in General Information.
- Remove the transfer case shield, if equipped. Refer to Transfer Case Shield Replacement in Frame and Underbody.
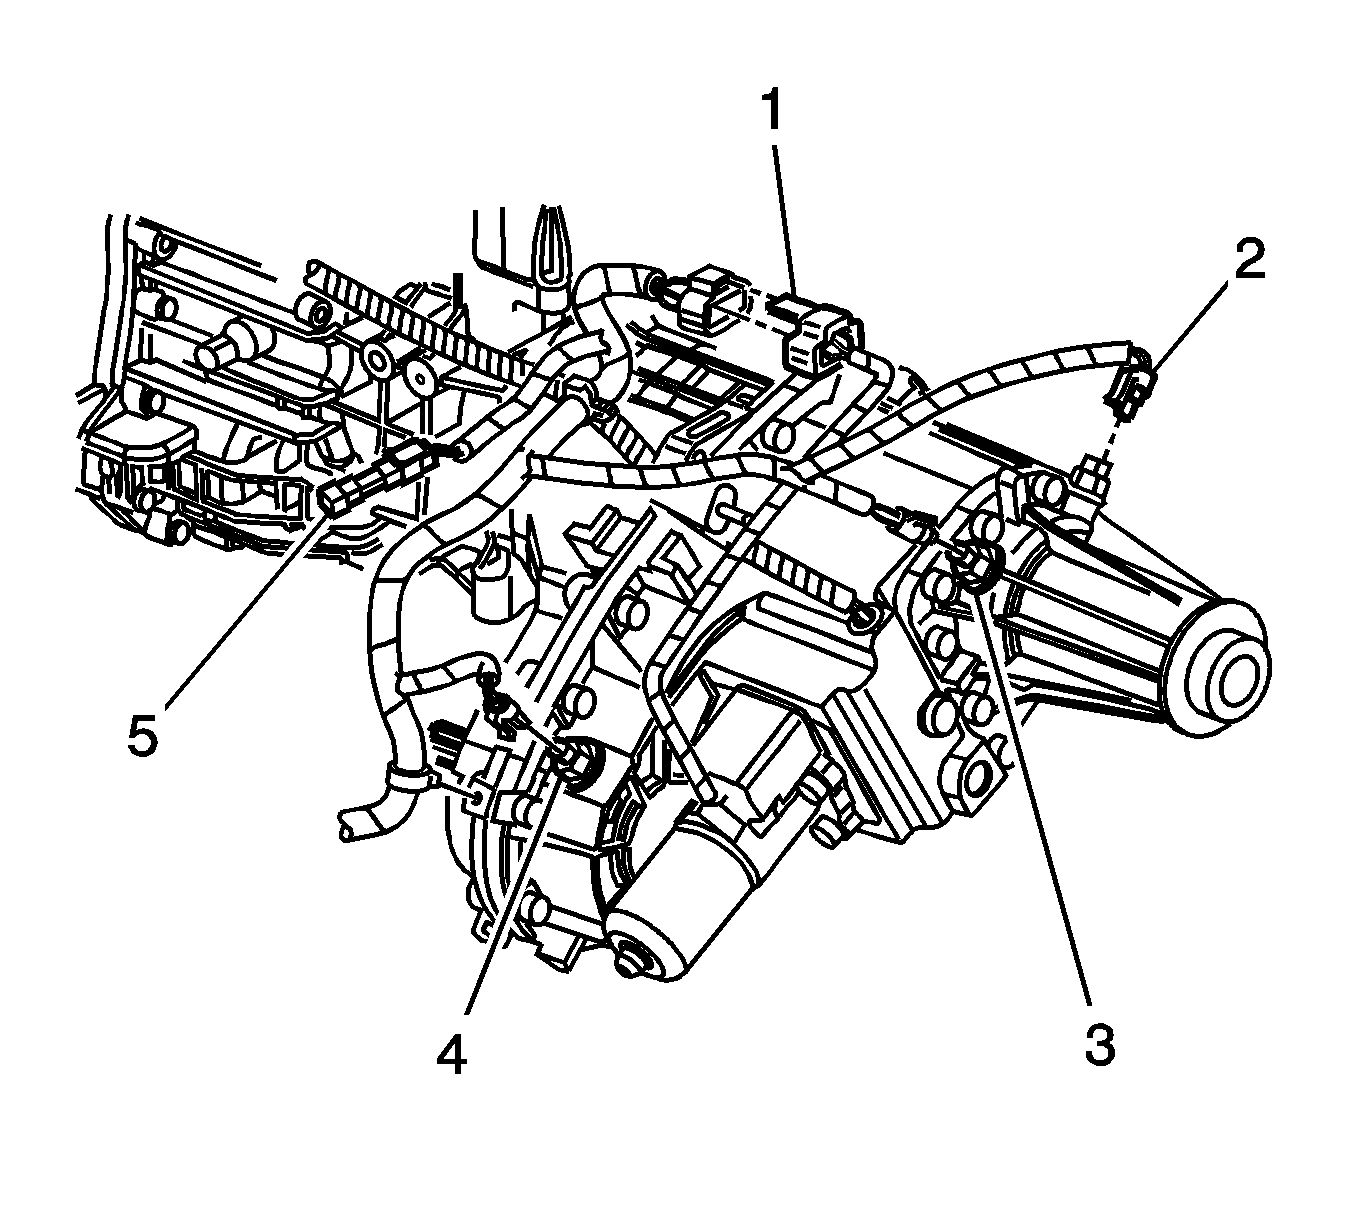
- Disconnect the motor/encoder electrical connector (1).
- Remove the motor/encoder mounting bolts.
- Remove the motor/encoder assembly.
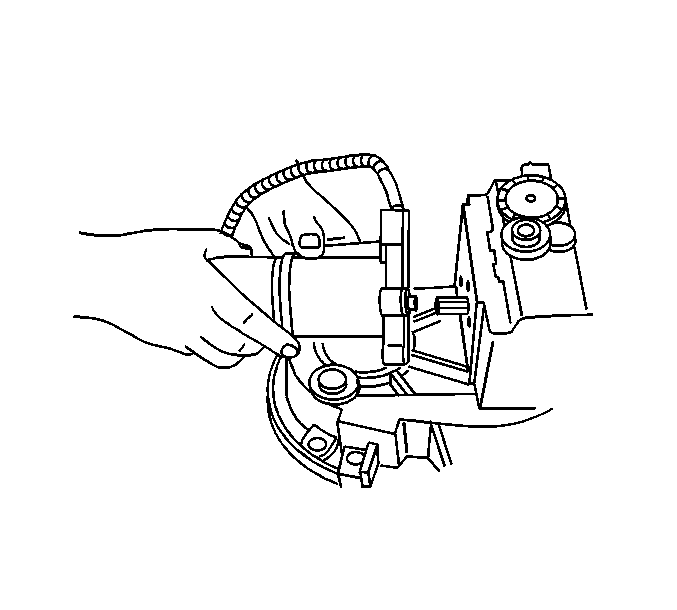
- Position the motor on a work bench.
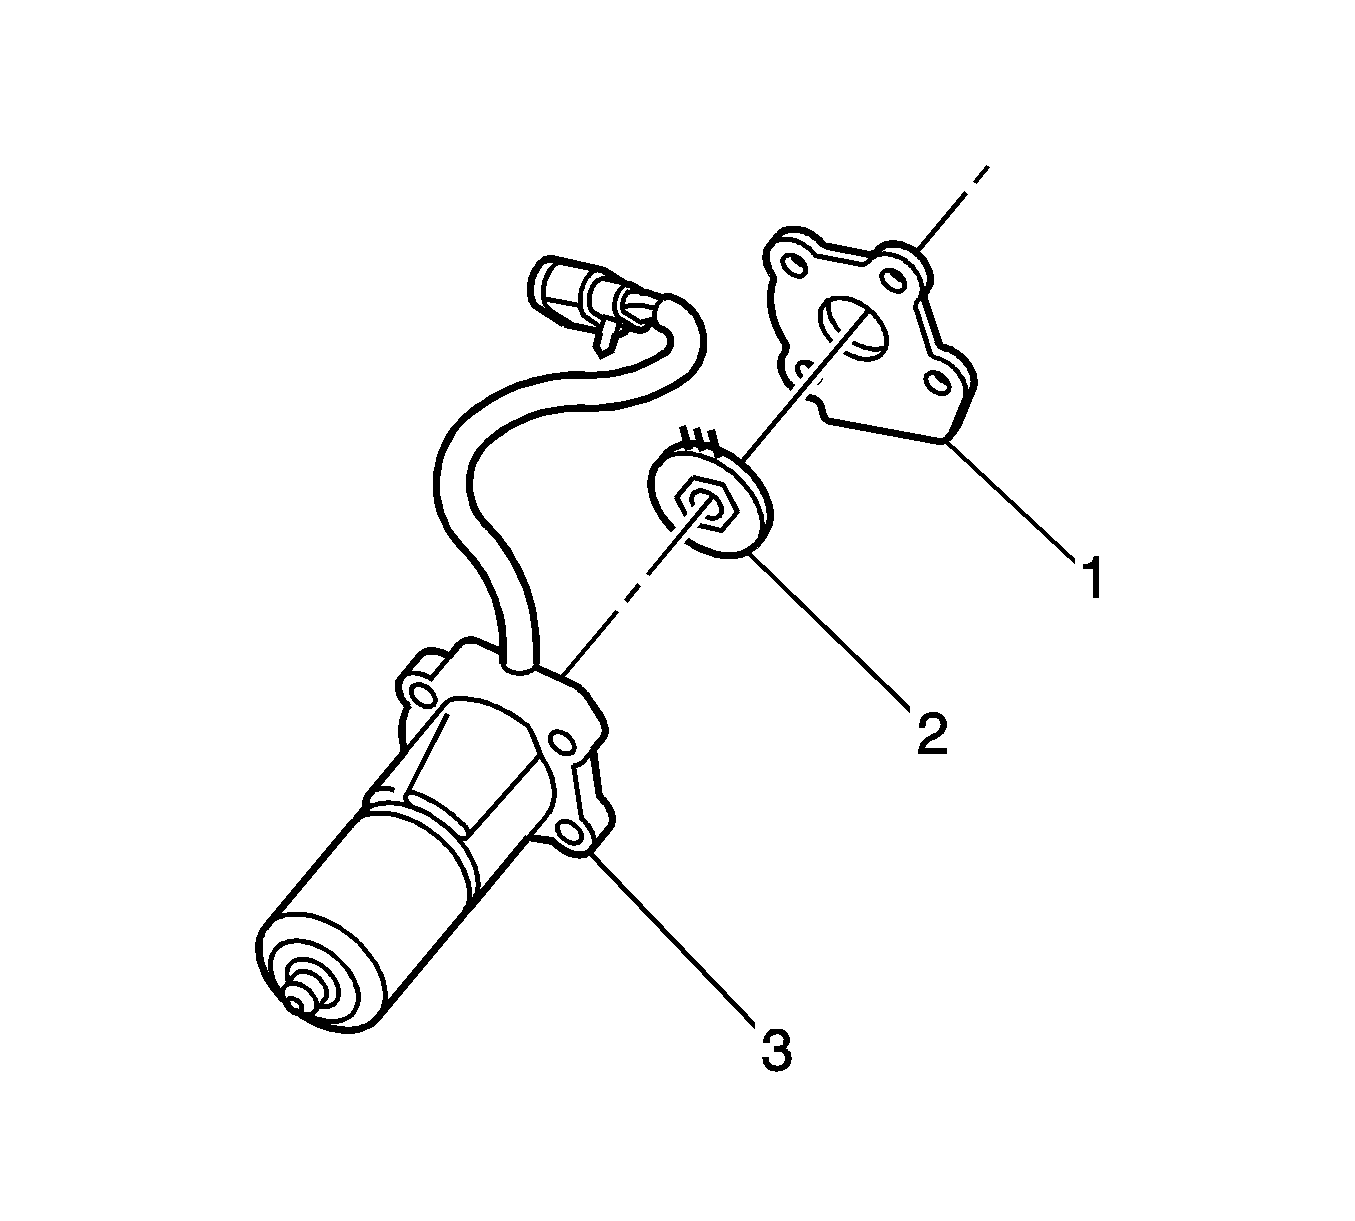
- Release the 4 tabs that retain the motor/encoder gasket and remove the gasket (1).
- Remove the snap ring and washer retaining the motor/encoder rotary position sensor.
- Lift the motor/encoder rotary position sensor (2) from the motor shaft.
- Disconnect the rotary position sensor (2) from the wiring harness.
Important: When replacing the encoder rotary position sensor follow these additional steps. The rotary position sensor is circular with 3 contacts on one side and is positioned behind the motor/encoder gasket.
Important: Gently lift the rotary position sensor and wiring to disconnect it. The internal wires go to a connector within the motor housing. This internal wire connector does not have a locking tab and is easily disturbed.
Important: Look at the motor/encoder housing (1) where the rotary position sensor was removed from. Take note of the "Hex" in the housing where the new sensor will seat when properly installed.
Installation Procedure
- Connect the wiring harness to the rotary position sensor.
- Gently insert a suitable tool along side the internal wires and press down on the internal wire connector to insure the connector is fully installed.
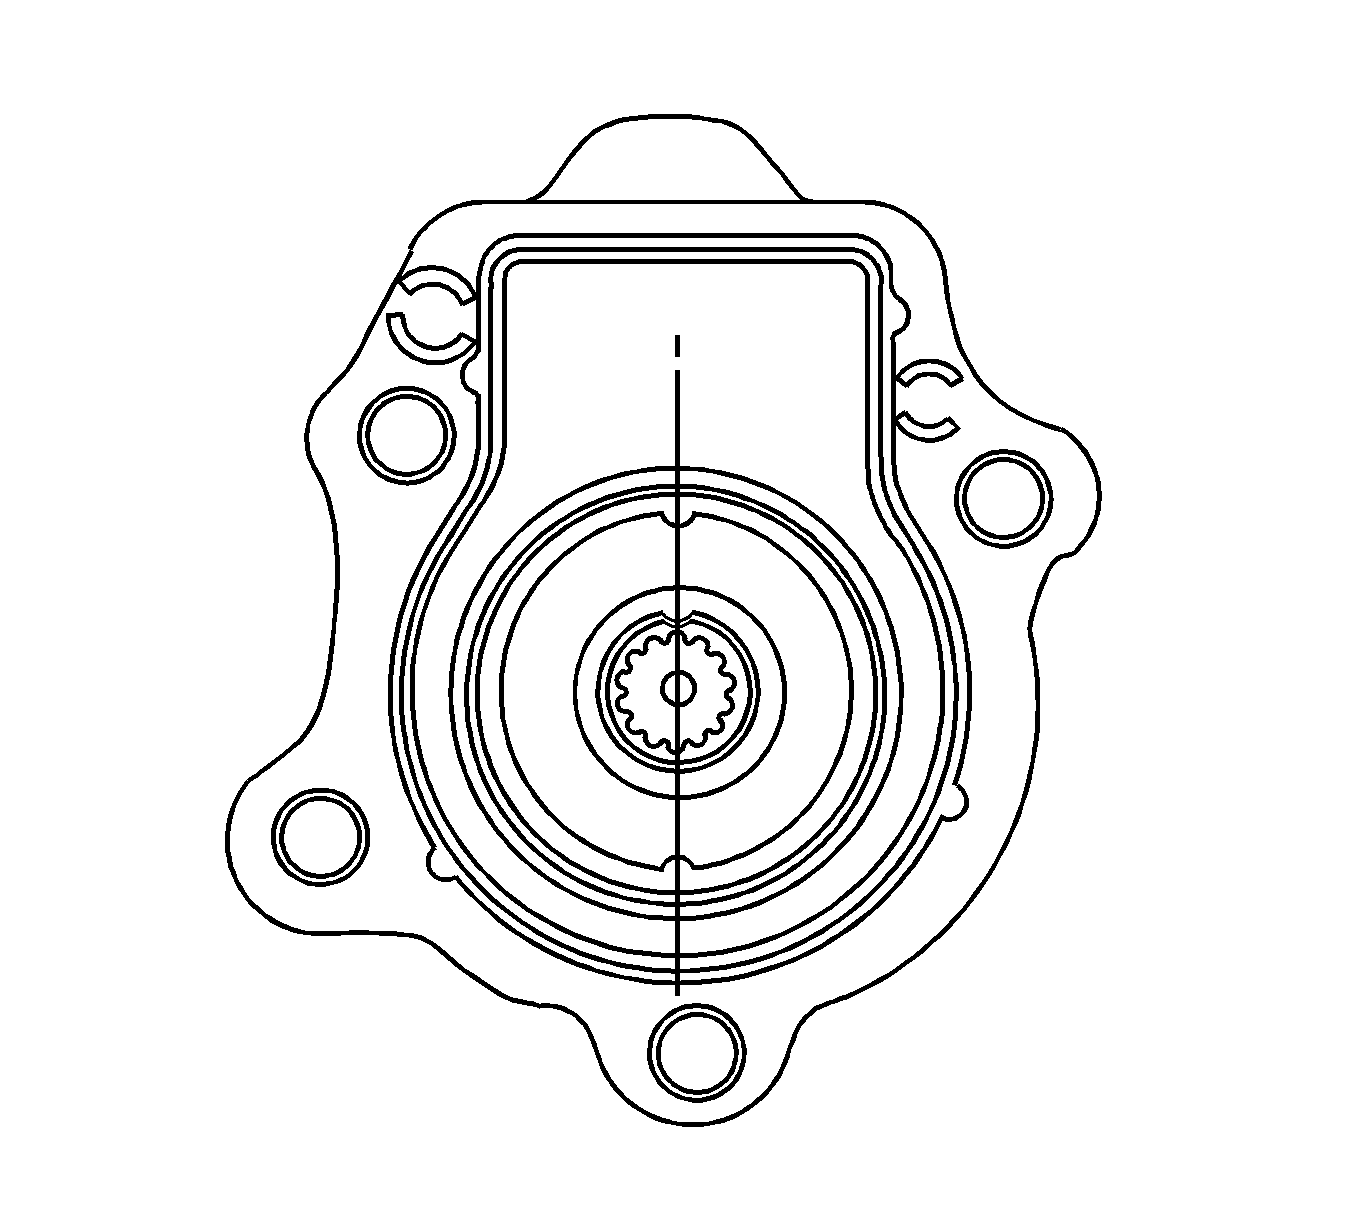
- Properly align the keyway of the rotary position sensor with the motor/encoder shaft as indicated by the center reference line shown in the graphic.
- Ensure that the hex on the rotary position sensor (2) fits in the hex of the motor/encoder housing (3).
- Install the washer and snap ring retaining the motor/encoder rotary position sensor.
- Install the washer and snap ring retaining the motor/encoder rotary position sensor.
- Install the motor/encoder gasket (1).
- Install the motor/encoder to the transfer case.
- Install motor/encoder mounting bolts to the transfer case.
- Connect the motor/encoder electrical connector (1).
- Install the transfer case shield, if equipped. Refer to Transfer Case Shield Replacement in Frame and Underbody.
- Lower the vehicle. Refer to Lifting and Jacking the Vehicle in General Information.
Important: Provided the rotary position sensor was removed, follow steps to install the sensor, otherwise proceed to installing the motor/encoder to the transfer case.
Important: When performing this service procedure, make sure that the motor/encoder unit is flat against the transfer case for proper installation.
Notice: Use the correct fastener in the correct location. Replacement fasteners must be the correct part number for that application. Fasteners requiring replacement or fasteners requiring the use of thread locking compound or sealant are identified in the service procedure. Do not use paints, lubricants, or corrosion inhibitors on fasteners or fastener joint surfaces unless specified. These coatings affect fastener torque and joint clamping force and may damage the fastener. Use the correct tightening sequence and specifications when installing fasteners in order to avoid damage to parts and systems.
Tighten
Tighten the bolts to 16 N·m (12 lb ft).
